MrSquid's long term grow-out tank

MrSquid

Active Member
View Badges
Joined
Jun 20, 2009
Messages
372
Reaction score
54
Location
Venice, CA (formerly Menasha, WI)
Rating - 0%
0   0   0
I have been planning on setting up a 6' or 7' tank sometime in the future, and we all know that even small tanks can be pricey to fill with coral, and anyone with a big tank knows that frags don't do much to fill them for a while. I know I'd be doing a QT, so I decided to set up a grow-out tank that'll eventually be my QT. Also my wife has never had a tank (I used to have a 125 mixed reef) so doing a small tank now is a strategic play to get her excited about doing a bigger tank that she may normally be cool with. Although I do realize that could backfire on me....

I had space constraints in that it would be going into a small & already cramped garage in this space...

Frag area.jpg

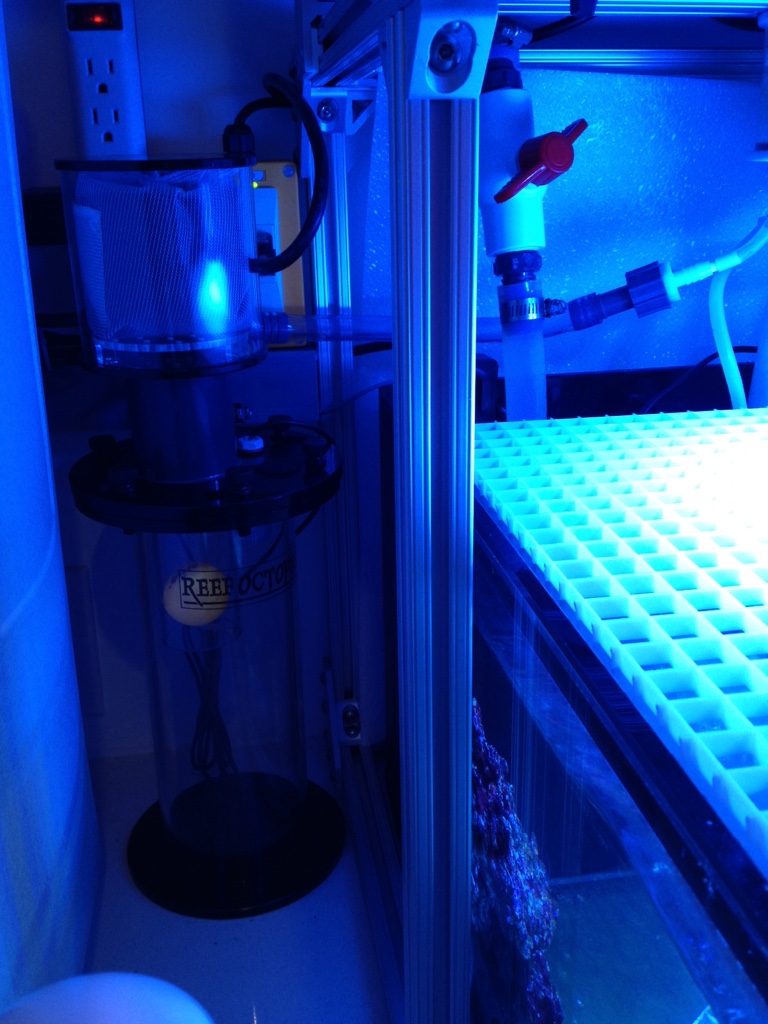
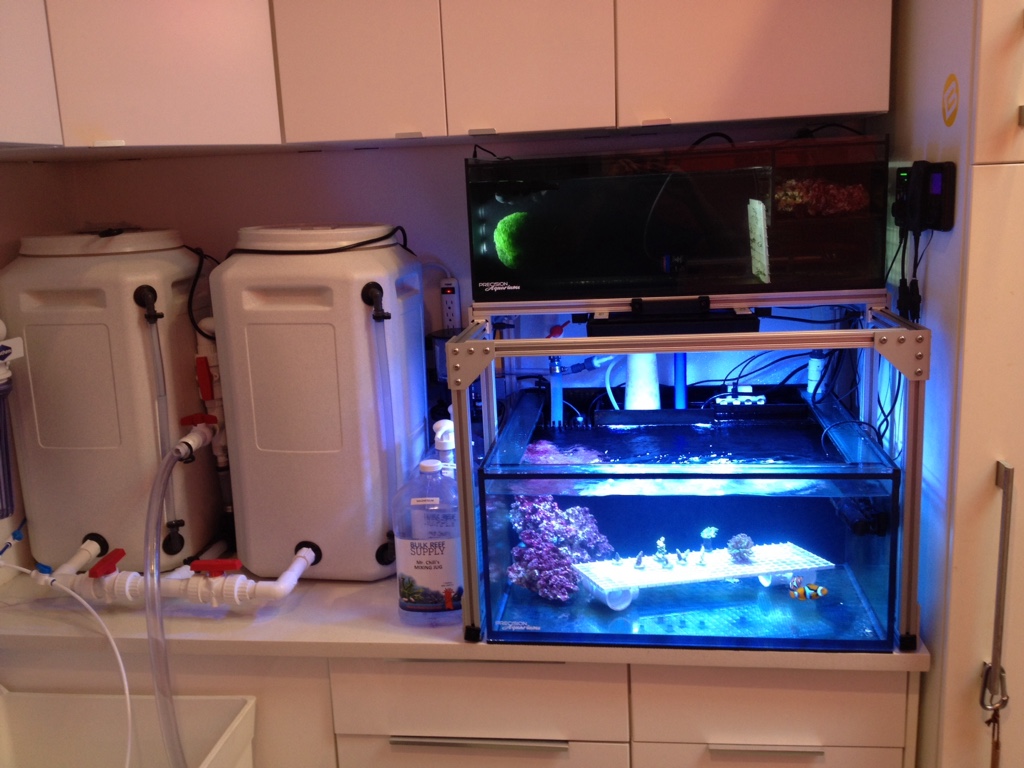
I knew that mix & RODI tanks would be on this counter as well and I wanted a sump for added water volume, a fuge & to hold some rock, so I needed to get creative. I was intrigued with the aluminum t-slot material that Vertex used in their booth at Denver's MACNA, so after designing a tank & sump and having them built by Precision Aquariums, I built the structure for the system. Each of the corner has a 1.5" gusset plus there's a corner plate wherever I could put them. It's really sturdy. And I need to point out that Precision did an AMAZING job on these tanks! These guys are top notch!

IMG_6487.JPG

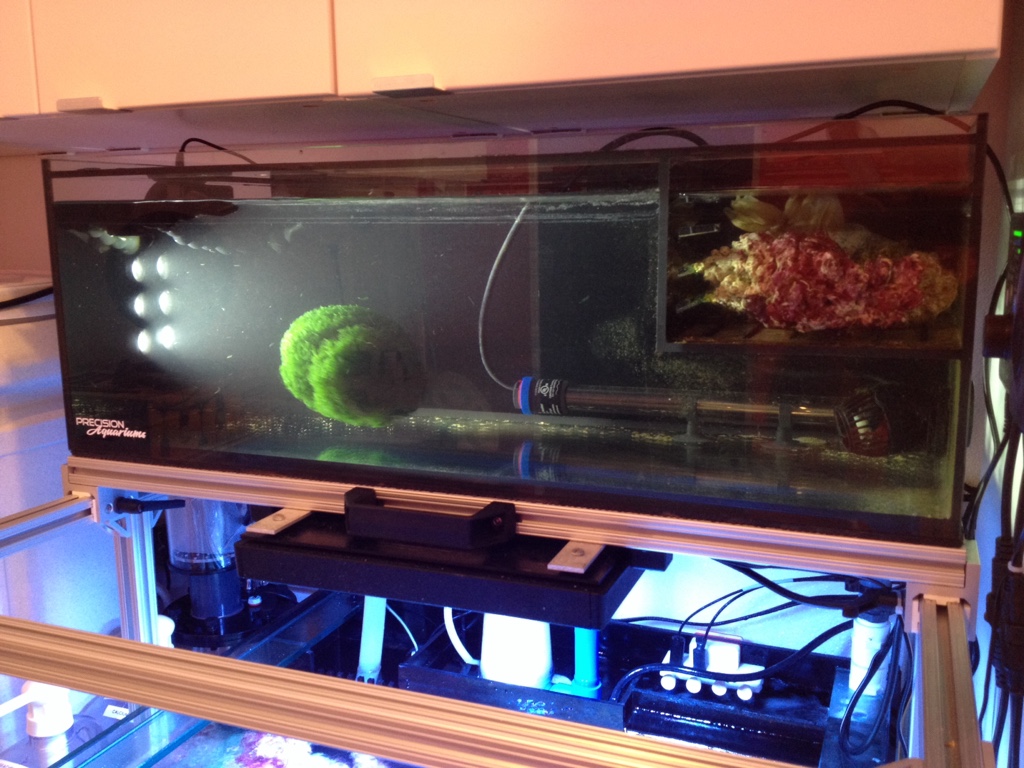
This is where things get different - the sump is on top, tucked away under the upper cabinet. It's on a frame that's on bearings so it will slide out if I need to access it. You'll have to trust me on this one - it slides out fairly easy - even with filled with ~15g of water.

I also added lots of support to the cabinet itself. The right end is two 3/4" panels, there's another two 3/4" panels where the drawers meet, plus additional support across the back and extra in the front on the left side, all going down to the bottom of the cabinets which are set on a 2x4 frame.
 
OP
OP
MrSquid

MrSquid

Active Member
View Badges
Joined
Jun 20, 2009
Messages
372
Reaction score
54
Location
Venice, CA (formerly Menasha, WI)
Rating - 0%
0   0   0
Here's the water station. These are two 28g Vittles Vaults from the local pet store. Food safe and ~$55 each - hard to beat! I have a small DC pump between them to keep the salt mixed.

IMG_6448.JPG

A long strange story made short, I've replaced the RODI in this pic with one of the new Icecap Smart RODI's. It filled the two tanks in ~4hrs. Our water has high silica levels, so I added a 2nd DI chamber and have Spectrapure's Silcabuster resin in both. Haven't got it installed into the final resting place yet, but soon.....

IMG_6579.JPG
 

143MPCo

ASSIST PROTECT DEFEND
View Badges
Joined
May 14, 2012
Messages
6,696
Reaction score
8,295
Rating - 0%
0   0   0
tagging along... this looks very cool!
 
OP
OP
MrSquid

MrSquid

Active Member
View Badges
Joined
Jun 20, 2009
Messages
372
Reaction score
54
Location
Venice, CA (formerly Menasha, WI)
Rating - 0%
0   0   0
Earlier this year picked up some 2nd gen Radions, so here's one mounted below the frag tank. I cut down some flat stock, mounted it to the bottom of the frame the sump is on, then bolted the Radion to it.


IMG_6490a.jpeg


Here it is lit up as the tank was being filled on Saturday.

IMG_6587.JPG


In the 1st pic in this thread you can see a tall cabinet on the right side - that is a tall laundry cabinet from Ikea that I have all my cased tools in. I put big casters on that cabinet so I can slide it out to have access to the back of the tank and be able to try to do some wire management, and I mounted my Apex to the inside of the back panel. I had some issues with getting my computer to see the Radion so I could do a firmware update on it so I can use the WXM on it, so now there's a Reeflink in here too. The other module is an LSM with 2 LED's that are siliconed to the frame, flanking each side of the Radion.

IMG_3571.jpeg
 
OP
OP
MrSquid

MrSquid

Active Member
View Badges
Joined
Jun 20, 2009
Messages
372
Reaction score
54
Location
Venice, CA (formerly Menasha, WI)
Rating - 0%
0   0   0
The T-slot is really cool stuff to work with. It cut like butter using an 80 tooth carbide blade and some heavy cutting oil on a chop saw. I ordered the sticks from Amazon, and all the fasteners, brackets & gussets are from tnutz.com. It was pretty fun to assemble, but you definitely need to be thinking a few steps ahead with everything you do. Honestly though, so far assembling this has been the most fun. :D

IMG_6415.JPG IMG_6481.JPG IMG_6482.JPG IMG_6483.JPG IMG_6484.JPG IMG_6485.JPG IMG_6486.JPG
 

cope413

Active Member
View Badges
Joined
Apr 6, 2014
Messages
442
Reaction score
88
Location
Orange County, CA
Rating - 0%
0   0   0
Check out OpenBeam. They only have 15mm profile extrusions currently, but their goal was $10/meter or less for the extrusions and $1/connector. It's also on amazon.
 
OP
OP
MrSquid

MrSquid

Active Member
View Badges
Joined
Jun 20, 2009
Messages
372
Reaction score
54
Location
Venice, CA (formerly Menasha, WI)
Rating - 0%
0   0   0
7fe27209ef41cbc5f91b3722f00c1c31.jpg


I finally got around to doing some work on the tank. including adding a Reef Octopus waste collector.

a874724cb1aee0e12437586db7231361.jpg


I've got a good roll going on the chaeto in the sump.

7b0d2dca2127123c78444edffcf39fec.jpg


And here's a full shot, including the water station.

For livestock I added a purple firefish and a couple of perculas. I also added a frag packs from Battlecorals & Unique.

Next up will be making some tops & frag racks so I can lose the egg rate and get those SPS up higher.
 

ikiwi

Community Member
View Badges
Joined
Feb 26, 2013
Messages
89
Reaction score
51
Location
New Jersey
Rating - 0%
0   0   0
Here's the water station. These are two 28g Vittles Vaults from the local pet store. Food safe and ~$55 each - hard to beat! I have a small DC pump between them to keep the salt mixed.

IMG_6448.JPG

A long strange story made short, I've replaced the RODI in this pic with one of the new Icecap Smart RODI's. It filled the two tanks in ~4hrs. Our water has high silica levels, so I added a 2nd DI chamber and have Spectrapure's Silcabuster resin in both. Haven't got it installed into the final resting place yet, but soon.....

IMG_6579.JPG
Hi. Can you provide a bit more detail about how to add the second Di chamber to the Ice Cap unit ? also.. a closer view of the pump and plumbing of the two vittle vaults would be extremely helpful.
 

Looking back to your reefing roots: Did you start with Instant Ocean salt?

  • I started with Instant Ocean salt.

    Votes: 86 76.1%
  • I did not start with Instant Ocean salt, but I have used it at some point.

    Votes: 10 8.8%
  • I did not start with Instant Ocean salt and have not used it.

    Votes: 15 13.3%
  • Other.

    Votes: 2 1.8%
Back
Top