My first 180 gallon BUILD THREAD (from 55 gallon)

MiniBukta

Community Member
View Badges
Joined
Jun 14, 2020
Messages
47
Reaction score
71
Rating - 0%
0   0   0
Figured I’d start a thread for my build, it’ll be a nice place to have it all catalogued. I’ll keep adding to this as I do more and more. (I’m hoping this is the right place for this? If not, lemme know and I’ll move it)

Started with a 20 that had one leather coral and a couple fish. Then moved to my 55 gallon I’ve had running with fish and LPS for about 4 years. Decided now is the time to move up to a 180 gallon tank. Probably run about the same, maybe try my hand at SPS which I never did well with before.

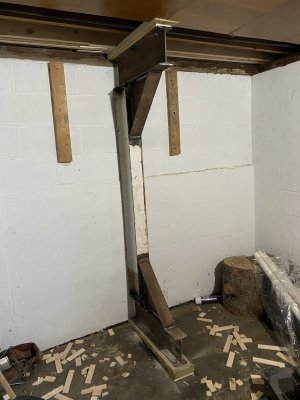
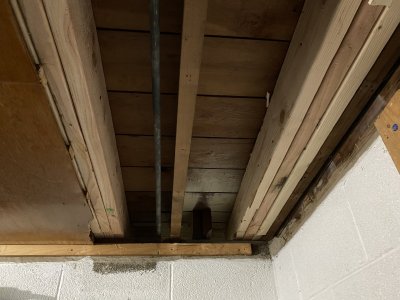
I wanted the tank to stay where it is, which is parallel to the rafters, so I sistered in 3 - 2x6s on each side, and put a beam in the middle I found and repurposed from a house demo.
Also removed the carpet the old tank sat on and put in vinyl plank flooring so I can change carpet out in the future without worrying about the tank.
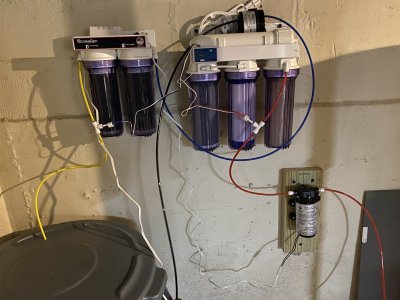
Set up RO filter to (finally) make my own water. Going to the LFS every couple weeks was nice, but it’s hell on the wallet. :p
All pics for posterity below.

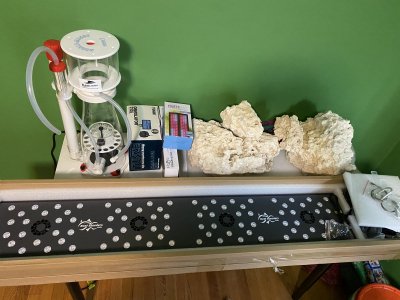
Light is a reefbreeder 50”, bit concerned it’s not wide enough for the tank, but I can always add a light on one end if needed.
Trying out an auto top off with this tank, I’ve always wanted one.
Skimmer is a curve 7, and sump is a trigger 36.

Still need to do some research on proper heater setup, right now I just run one heater
9F8FEBAC-E347-4F13-9340-F8B4E879B03D.jpeg DFC719FF-79CB-4FE4-BEE3-884C2D2EA38C.jpeg 22826308-1A62-434A-9021-30F76F19C06B.jpeg FEFB5E57-DEF2-4F57-AD48-7AB06A6A912C.jpeg
 

Peace River

Thrive Master
View Badges
Joined
Apr 29, 2014
Messages
21,549
Reaction score
164,763
Location
USA
Rating - 100%
1   0   0
Good start to the thread! You should add a build thread banner (which doubles as a link to your thread) so people can find your thread more easily.

Here are the step-by-step instructions to add your build thread banner:

1. Copy your build thread URL
2. Click here to edit the link in your profile: https://www.reef2reef.com/account/account-details
3. Scroll down the page until you see "R2R Tank Thread Link" and paste your build thread link in box next to it and then select "save"
4. Your build thread banner will show up below your name in all of your posts!
 
OP
OP
MiniBukta

MiniBukta

Community Member
View Badges
Joined
Jun 14, 2020
Messages
47
Reaction score
71
Rating - 0%
0   0   0
Figured I’d start a thread for my build, it’ll be a nice place to have it all catalogued. I’ll keep adding to this as I do more and more. (I’m hoping this is the right place for this? If not, lemme know and I’ll move it)

Started with a 20 that had one leather coral and a couple fish. Then moved to my 55 gallon I’ve had running with fish and LPS for about 4 years. Decided now is the time to move up to a 180 gallon tank. Probably run about the same, maybe try my hand at SPS which I never did well with before.

I wanted the tank to stay where it is, which is parallel to the rafters, so I sistered in 3 - 2x6s on each side, and put a beam in the middle I found and repurposed from a house demo.
Also removed the carpet the old tank sat on and put in vinyl plank flooring so I can change carpet out in the future without worrying about the tank.
Set up RO filter to (finally) make my own water. Going to the LFS every couple weeks was nice, but it’s hell on the wallet. :p
All pics for posterity below.

Light is a reefbreeder 50”, bit concerned it’s not wide enough for the tank, but I can always add a light on one end if needed.
Trying out an auto top off with this tank, I’ve always wanted one.
Skimmer is a curve 7, and sump is a trigger 36.

Still need to do some research on proper heater setup, right now I just run one heater
9F8FEBAC-E347-4F13-9340-F8B4E879B03D.jpeg DFC719FF-79CB-4FE4-BEE3-884C2D2EA38C.jpeg 22826308-1A62-434A-9021-30F76F19C06B.jpeg FEFB5E57-DEF2-4F57-AD48-7AB06A6A912C.jpeg
Figured I’d start a thread for my build, it’ll be a nice place to have it all catalogued. I’ll keep adding to this as I do more and more. (I’m hoping this is the right place for this? If not, lemme know and I’ll move it)

Started with a 20 that had one leather coral and a couple fish. Then moved to my 55 gallon I’ve had running with fish and LPS for about 4 years. Decided now is the time to move up to a 180 gallon tank. Probably run about the same, maybe try my hand at SPS which I never did well with before.

I wanted the tank to stay where it is, which is parallel to the rafters, so I sistered in 3 - 2x6s on each side, and put a beam in the middle I found and repurposed from a house demo.
Also removed the carpet the old tank sat on and put in vinyl plank flooring so I can change carpet out in the future without worrying about the tank.
Set up RO filter to (finally) make my own water. Going to the LFS every couple weeks was nice, but it’s hell on the wallet. :p
All pics for posterity below.

Light is a reefbreeder 50”, bit concerned it’s not wide enough for the tank, but I can always add a light on one end if needed.
Trying out an auto top off with this tank, I’ve always wanted one.
Skimmer is a curve 7, and sump is a trigger 36.

Still need to do some research on proper heater setup, right now I just run one heater
9F8FEBAC-E347-4F13-9340-F8B4E879B03D.jpeg DFC719FF-79CB-4FE4-BEE3-884C2D2EA38C.jpeg 22826308-1A62-434A-9021-30F76F19C06B.jpeg FEFB5E57-DEF2-4F57-AD48-7AB06A6A912C.jpeg
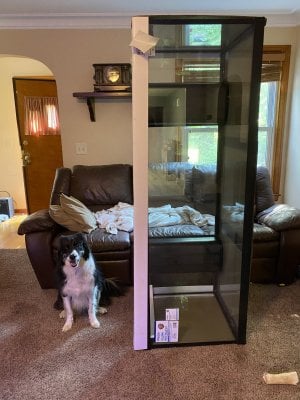
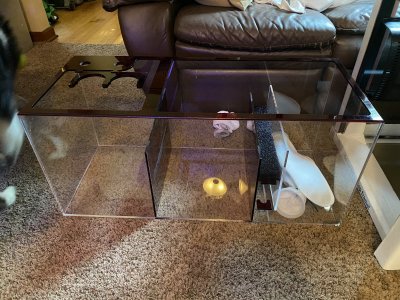
Next up! Finally got my tank today. The LFS ordered me a stand but apparently it keeps ending up on back ordering, and will be a while before I see one. So, I’ll be building my own over the next week. I think I’ve got enough popsicle sticks and hot glue rods to put something nice together.
180 gallon tank was a pain getting into my house, but we got it. Also got a Ruby 36 sump, and some other misc hardware.
*border collie for scale

87A021BB-5112-4352-AE6E-281261609AE0.jpeg 2099E21B-883F-4E6C-AC09-C063CC95150B.jpeg
 

PacoPetty

Well-Known Member
View Badges
Joined
Feb 22, 2018
Messages
631
Reaction score
720
Rating - 0%
0   0   0
I am looking forward to following your build. I have just started a 180 gallon build of my own and I started by building my stand first. I already have my sump, protein skimmer, and return pump. I am currently researching lights and trying to decide which ones to go with without having to upgrade in the future.
 
OP
OP
MiniBukta

MiniBukta

Community Member
View Badges
Joined
Jun 14, 2020
Messages
47
Reaction score
71
Rating - 0%
0   0   0
Next up! Finally got my tank today. The LFS ordered me a stand but apparently it keeps ending up on back ordering, and will be a while before I see one. So, I’ll be building my own over the next week. I think I’ve got enough popsicle sticks and hot glue rods to put something nice together.
180 gallon tank was a pain getting into my house, but we got it. Also got a Ruby 36 sump, and some other misc hardware.
*border collie for scale

87A021BB-5112-4352-AE6E-281261609AE0.jpeg 2099E21B-883F-4E6C-AC09-C063CC95150B.jpeg
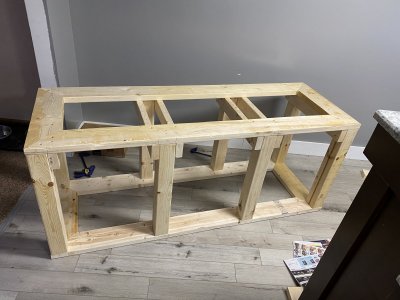
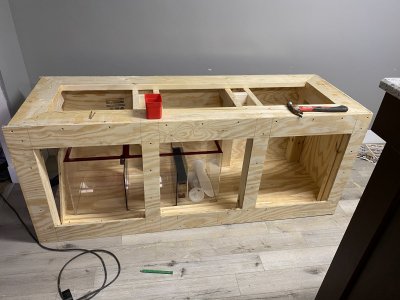
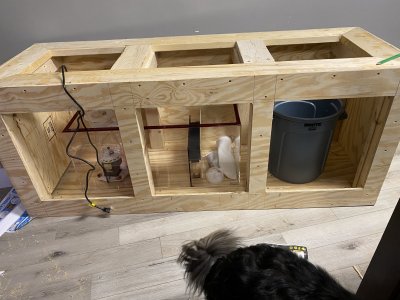
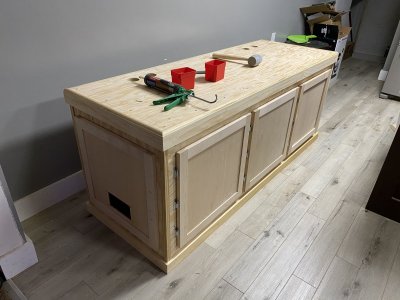
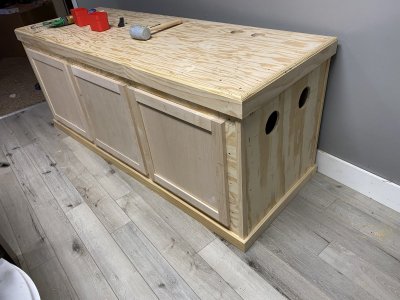
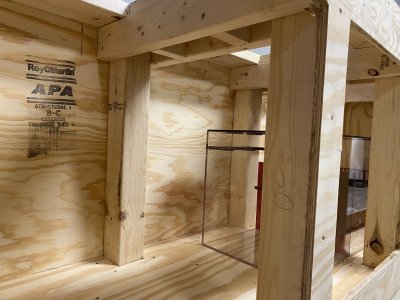
I’ve been cruising along on building my stand, all ready for sanding and painting!

Outside plywood shell was all glued and screwed on as part of the structure, with holes for a cabinet fan and vents on the other side for air flow. Had to stick my sump in while it was being built, so hope it works well! Lol

Side cabinet has a panel just inside the door, and all my controllers will be velcroed inside the door for easy access.
63D08617-A923-4672-923E-516E8545532B.jpeg 777C7B87-FD6B-4572-9C13-758D43CE33DF.jpeg 66824FFF-FB68-42A2-8CB5-8BEB1676CDD2.jpeg B1BF4017-0FBE-4889-9F6A-4AD9AA3EBC6C.jpeg EDC8E5CA-A915-4DBE-86F1-2B07708C28D0.jpeg C8532A6B-C032-4C82-A7AA-51354DF2202C.jpeg FA3FDFF5-7920-447E-817C-483ACEE6DB0A.jpeg
 
OP
OP
MiniBukta

MiniBukta

Community Member
View Badges
Joined
Jun 14, 2020
Messages
47
Reaction score
71
Rating - 0%
0   0   0
I’ve been cruising along on building my stand, all ready for sanding and painting!

Outside plywood shell was all glued and screwed on as part of the structure, with holes for a cabinet fan and vents on the other side for air flow. Had to stick my sump in while it was being built, so hope it works well! Lol

Side cabinet has a panel just inside the door, and all my controllers will be velcroed inside the door for easy access.
63D08617-A923-4672-923E-516E8545532B.jpeg 777C7B87-FD6B-4572-9C13-758D43CE33DF.jpeg 66824FFF-FB68-42A2-8CB5-8BEB1676CDD2.jpeg B1BF4017-0FBE-4889-9F6A-4AD9AA3EBC6C.jpeg EDC8E5CA-A915-4DBE-86F1-2B07708C28D0.jpeg C8532A6B-C032-4C82-A7AA-51354DF2202C.jpeg FA3FDFF5-7920-447E-817C-483ACEE6DB0A.jpeg
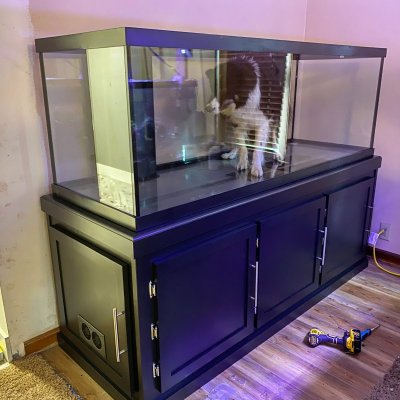
Stand is done! Now it’s time to figure out how all this stuff goes together. Testing the tank out with a very unenthused dogfish.

82E13836-04AA-4843-A9F0-555FBE248451.jpeg
 

RobB'z Reef

2500 Club Member
View Badges
Joined
Apr 23, 2020
Messages
2,783
Reaction score
5,773
Location
Eau Claire
Rating - 0%
0   0   0
Figured I’d start a thread for my build, it’ll be a nice place to have it all catalogued. I’ll keep adding to this as I do more and more. (I’m hoping this is the right place for this? If not, lemme know and I’ll move it)

Started with a 20 that had one leather coral and a couple fish. Then moved to my 55 gallon I’ve had running with fish and LPS for about 4 years. Decided now is the time to move up to a 180 gallon tank. Probably run about the same, maybe try my hand at SPS which I never did well with before.

I wanted the tank to stay where it is, which is parallel to the rafters, so I sistered in 3 - 2x6s on each side, and put a beam in the middle I found and repurposed from a house demo.
Also removed the carpet the old tank sat on and put in vinyl plank flooring so I can change carpet out in the future without worrying about the tank.
Set up RO filter to (finally) make my own water. Going to the LFS every couple weeks was nice, but it’s hell on the wallet. :p
All pics for posterity below.

Light is a reefbreeder 50”, bit concerned it’s not wide enough for the tank, but I can always add a light on one end if needed.
Trying out an auto top off with this tank, I’ve always wanted one.
Skimmer is a curve 7, and sump is a trigger 36.

Still need to do some research on proper heater setup, right now I just run one heater
9F8FEBAC-E347-4F13-9340-F8B4E879B03D.jpeg DFC719FF-79CB-4FE4-BEE3-884C2D2EA38C.jpeg 22826308-1A62-434A-9021-30F76F19C06B.jpeg FEFB5E57-DEF2-4F57-AD48-7AB06A6A912C.jpeg
180 yeah baby! Welcome to da club!
 

RobB'z Reef

2500 Club Member
View Badges
Joined
Apr 23, 2020
Messages
2,783
Reaction score
5,773
Location
Eau Claire
Rating - 0%
0   0   0
I’ve been cruising along on building my stand, all ready for sanding and painting!

Outside plywood shell was all glued and screwed on as part of the structure, with holes for a cabinet fan and vents on the other side for air flow. Had to stick my sump in while it was being built, so hope it works well! Lol

Side cabinet has a panel just inside the door, and all my controllers will be velcroed inside the door for easy access.
63D08617-A923-4672-923E-516E8545532B.jpeg 777C7B87-FD6B-4572-9C13-758D43CE33DF.jpeg 66824FFF-FB68-42A2-8CB5-8BEB1676CDD2.jpeg B1BF4017-0FBE-4889-9F6A-4AD9AA3EBC6C.jpeg EDC8E5CA-A915-4DBE-86F1-2B07708C28D0.jpeg C8532A6B-C032-4C82-A7AA-51354DF2202C.jpeg FA3FDFF5-7920-447E-817C-483ACEE6DB0A.jpeg
Nice, that's one very stout stand!
 
OP
OP
MiniBukta

MiniBukta

Community Member
View Badges
Joined
Jun 14, 2020
Messages
47
Reaction score
71
Rating - 0%
0   0   0
I’ve been cruising along on building my stand, all ready for sanding and painting!

Outside plywood shell was all glued and screwed on as part of the structure, with holes for a cabinet fan and vents on the other side for air flow. Had to stick my sump in while it was being built, so hope it works well! Lol

Side cabinet has a panel just inside the door, and all my controllers will be velcroed inside the door for easy access.
63D08617-A923-4672-923E-516E8545532B.jpeg 777C7B87-FD6B-4572-9C13-758D43CE33DF.jpeg 66824FFF-FB68-42A2-8CB5-8BEB1676CDD2.jpeg B1BF4017-0FBE-4889-9F6A-4AD9AA3EBC6C.jpeg EDC8E5CA-A915-4DBE-86F1-2B07708C28D0.jpeg C8532A6B-C032-4C82-A7AA-51354DF2202C.jpeg FA3FDFF5-7920-447E-817C-483ACEE6DB0A.jpeg
Stand is done! Now it’s time to figure out how all this stuff goes together.
What did you paint that with?
I used the Rustoleum Cabinet paint. I used it a couple years ago in my kitchen and have had great results with it. Looks great and is super durable.
 

Looking back to your reefing roots: Did you start with Instant Ocean salt?

  • I started with Instant Ocean salt.

    Votes: 183 72.6%
  • I did not start with Instant Ocean salt, but I have used it at some point.

    Votes: 17 6.7%
  • I did not start with Instant Ocean salt and have not used it.

    Votes: 46 18.3%
  • Other.

    Votes: 6 2.4%
Back
Top