

Hey from Australia. I'm going to do my best with the imperial conversions!
Thought I would throw up some photos of the build of my tank. It all started when we started building our house back in 2010. I have never had room for a fish tank and after seeing a good mate of mines 10ft long in wall tank, I knew it was something I had to have.
Being that it was a new build it was easy to incorporate the tank from day one. Floor waste for water changes, fresh water tap for RO, and a line from outside the house to inside for my salt water.
The tank uses natural sea water which is delivered to my place by a local. He collects it in bulk, filters it, runs it through a phosphate reactor, and then delivers it 1000lt (300 gallons?) at a time.
The dimensions of the tank is 1400mm wide, 980mm deep, and 750mm high. Almost 5ft wide, just over 3ft deep, and 2.5ft high. My sump is a 4ft x 2ft x 2ft tank which I lowered the front by 4 inches and then added the baffles in. The sump area is a work in progress so no photos as of yet!
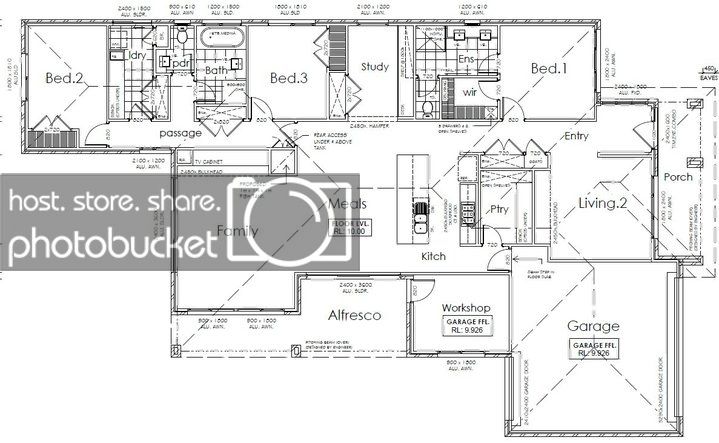
The house plans with the planned fish tank. The floor is a concrete slab (as most homes since the 90's are in Australia) and was engineered for the extra weight. The hallway directly behind the tank has a deep strip footing for the concrete, and the slab itself was increased by 1 inch in the area of the tank.
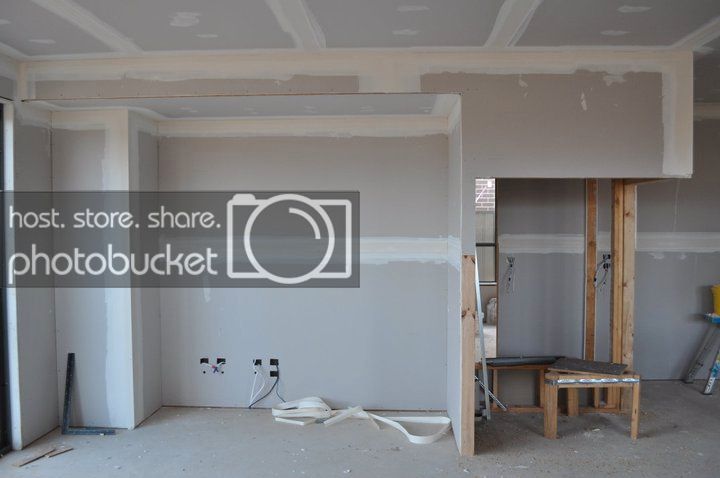
The cavity ready to accept the stand.
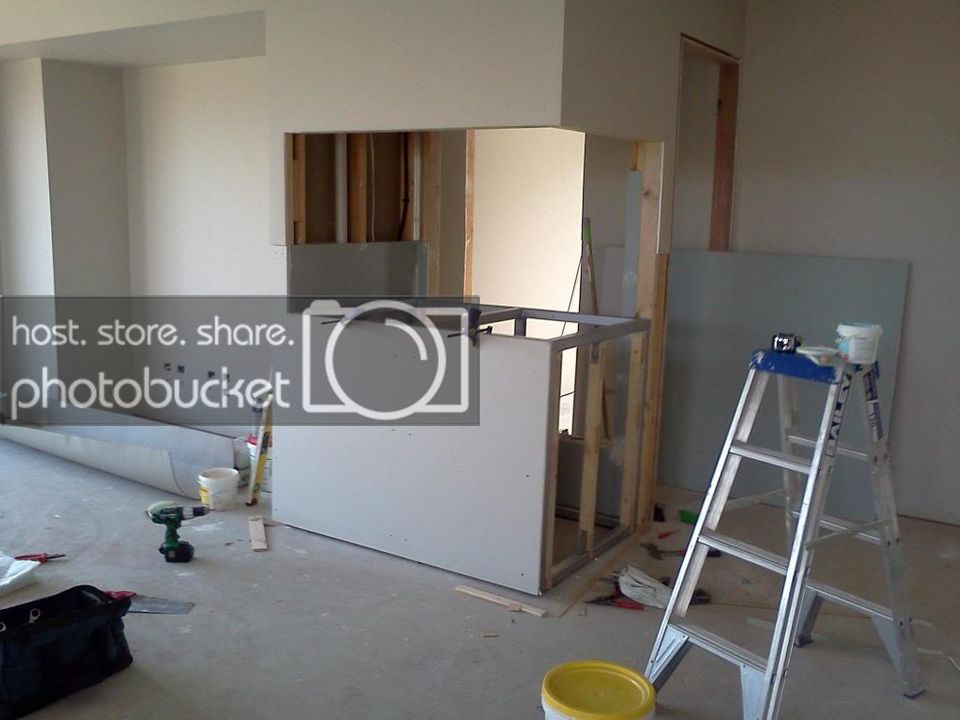
Stand in place and starting to get cladded.
And this was the original tank. Internal overflow which took up a fifth of the total tank length. The glass and silicone work was shocking and I pretty much hated everything about the tank.
The aquascaping I was proud of at the time, but really began to resent that also.
This is how it ran for about 2 years. Then kids came along and I'm sure you can guess the rest.
Water changes became non existent, I became an expert at growing bubble algae, and was losing fish to disease. The decision was made in May 2014 to pull the tank down. All the live stock that I had left was transferred to a 3ft temporary tank whilst I removed the internal overflow, cut out the back wall behind the tank to allow room for an external overflow, and that's where it sat. I shut the 3ft tank down and lost all interest.
About 2 years ago I decided I really needed to get the tank up and running again, and my wife was also threatening to get someone around to fill the hole in! I had two more projects to get out of the way which was relandscape our front yard, and finish building a new front fence, and then I could start again on the tank.
So September 2019 I ordered the new tank. Regular float glass, black silicone work, but this time polished all the way around. I didn't need it polished as it was all going to sit behind a wall, but it actually worked out well because we are looking at moving in the next two to three years so at least I can take the tank with me and worst case have it sitting on a stand.
I also had it optioned with an external overflow and a water jet cut back panel with black acrylic and integrated overflow teeth.
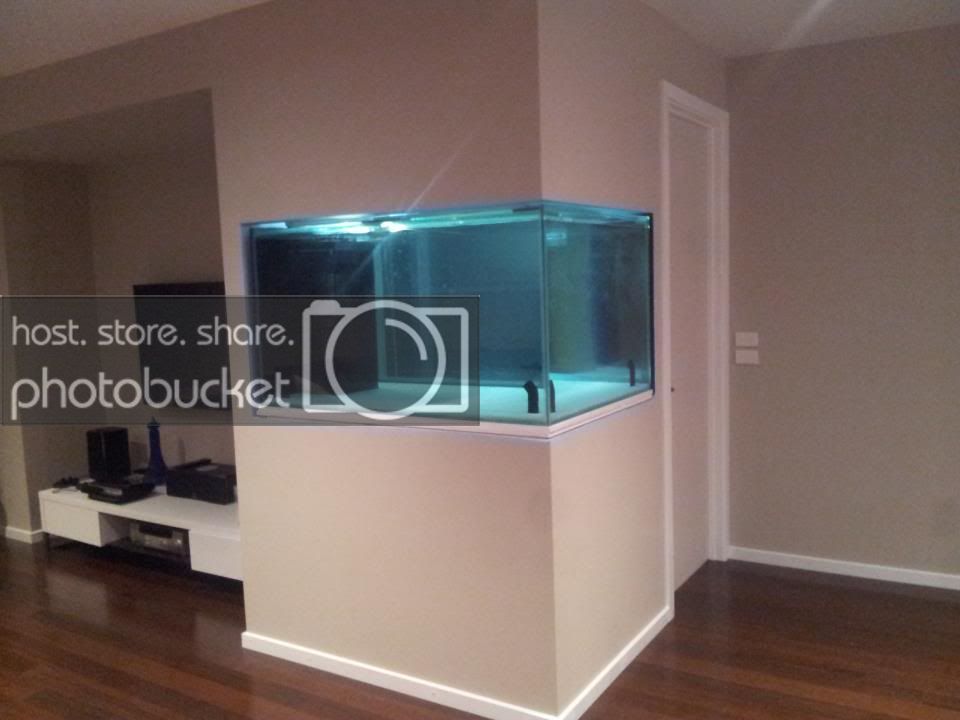
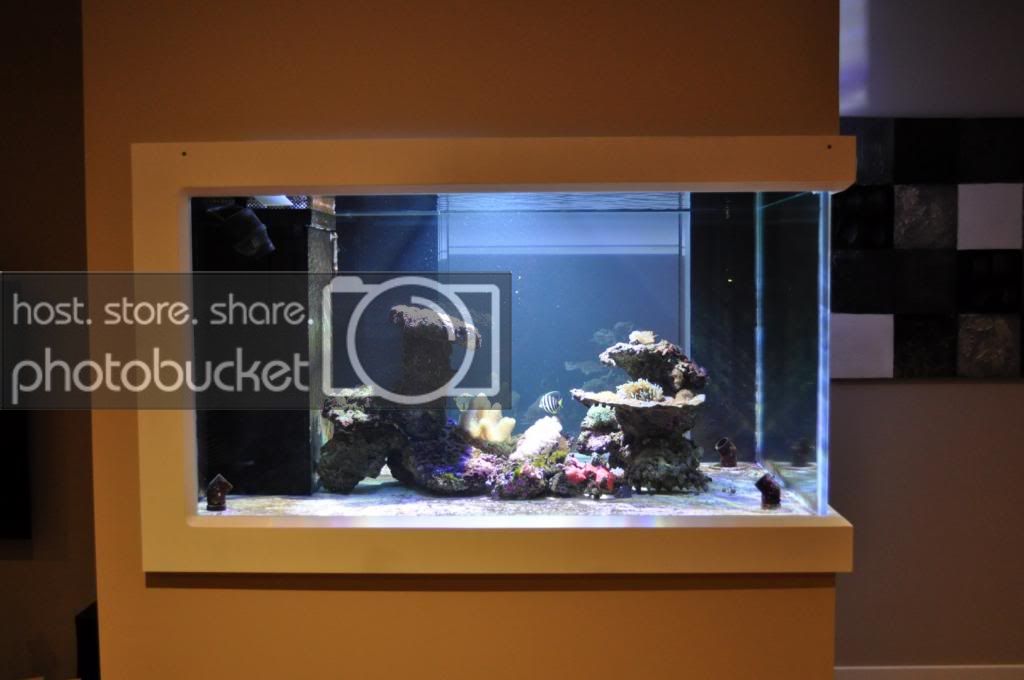
And this is where we are today


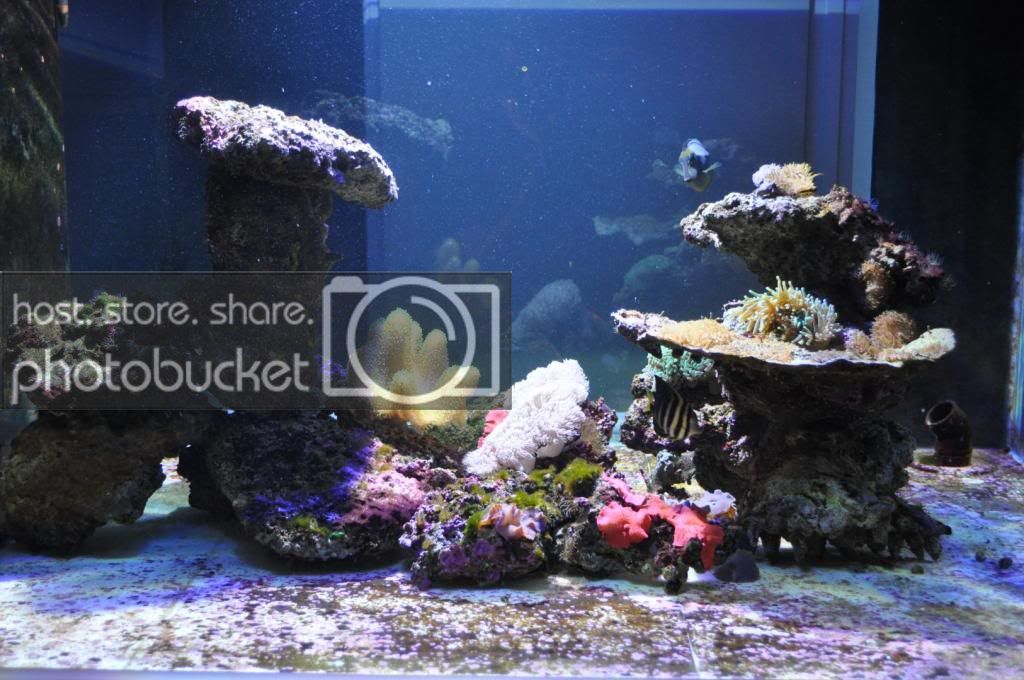
The tank builder had black bracing all the way along the inside of the bottom of the tank, so I got some black starboard cut up to fit in between it all. I was umming and aahring about putting sand in but at least this way I can still always add sand if I want to. As it stands now I love the black!!
You can see all 3 sides that I can view the tank from. This made aquascaping much more difficult compared to a tank you can only see from one direction.
The day I started filling water in the tank was 13th December last year. 5 and a half years after the planned "quick renovation" of the tank!! I was over the moon that day.
My sump is a very simple design - drain pipes in the very right, filter socks next to that (I am now going to make my own roller filter insert for that section, refugeum in the middle, and return section on the very left. There was no planned skimmer section as I was going to run an external skimmer. The problem though is my skimmer no longer fits as I had to raise up the sump!
I have purchased an internal skimmer which I will elevate in that section, and make an intake so it draws water from directly under the filter sock area. It will then dump the water as close to the overflow for the return section as possible.
That's it for now - the rest is to finish all the sump area! More photos to come...
Thought I would throw up some photos of the build of my tank. It all started when we started building our house back in 2010. I have never had room for a fish tank and after seeing a good mate of mines 10ft long in wall tank, I knew it was something I had to have.
Being that it was a new build it was easy to incorporate the tank from day one. Floor waste for water changes, fresh water tap for RO, and a line from outside the house to inside for my salt water.
The tank uses natural sea water which is delivered to my place by a local. He collects it in bulk, filters it, runs it through a phosphate reactor, and then delivers it 1000lt (300 gallons?) at a time.
The dimensions of the tank is 1400mm wide, 980mm deep, and 750mm high. Almost 5ft wide, just over 3ft deep, and 2.5ft high. My sump is a 4ft x 2ft x 2ft tank which I lowered the front by 4 inches and then added the baffles in. The sump area is a work in progress so no photos as of yet!

The house plans with the planned fish tank. The floor is a concrete slab (as most homes since the 90's are in Australia) and was engineered for the extra weight. The hallway directly behind the tank has a deep strip footing for the concrete, and the slab itself was increased by 1 inch in the area of the tank.

The cavity ready to accept the stand.

Stand in place and starting to get cladded.

And this was the original tank. Internal overflow which took up a fifth of the total tank length. The glass and silicone work was shocking and I pretty much hated everything about the tank.

The aquascaping I was proud of at the time, but really began to resent that also.

This is how it ran for about 2 years. Then kids came along and I'm sure you can guess the rest.
Water changes became non existent, I became an expert at growing bubble algae, and was losing fish to disease. The decision was made in May 2014 to pull the tank down. All the live stock that I had left was transferred to a 3ft temporary tank whilst I removed the internal overflow, cut out the back wall behind the tank to allow room for an external overflow, and that's where it sat. I shut the 3ft tank down and lost all interest.
About 2 years ago I decided I really needed to get the tank up and running again, and my wife was also threatening to get someone around to fill the hole in! I had two more projects to get out of the way which was relandscape our front yard, and finish building a new front fence, and then I could start again on the tank.
So September 2019 I ordered the new tank. Regular float glass, black silicone work, but this time polished all the way around. I didn't need it polished as it was all going to sit behind a wall, but it actually worked out well because we are looking at moving in the next two to three years so at least I can take the tank with me and worst case have it sitting on a stand.
I also had it optioned with an external overflow and a water jet cut back panel with black acrylic and integrated overflow teeth.
And this is where we are today
The tank builder had black bracing all the way along the inside of the bottom of the tank, so I got some black starboard cut up to fit in between it all. I was umming and aahring about putting sand in but at least this way I can still always add sand if I want to. As it stands now I love the black!!
You can see all 3 sides that I can view the tank from. This made aquascaping much more difficult compared to a tank you can only see from one direction.
The day I started filling water in the tank was 13th December last year. 5 and a half years after the planned "quick renovation" of the tank!! I was over the moon that day.
My sump is a very simple design - drain pipes in the very right, filter socks next to that (I am now going to make my own roller filter insert for that section, refugeum in the middle, and return section on the very left. There was no planned skimmer section as I was going to run an external skimmer. The problem though is my skimmer no longer fits as I had to raise up the sump!
I have purchased an internal skimmer which I will elevate in that section, and make an intake so it draws water from directly under the filter sock area. It will then dump the water as close to the overflow for the return section as possible.
That's it for now - the rest is to finish all the sump area! More photos to come...
Last edited:


")


