Trevor's Reef Lab (Fish Room Build Thread)

trevorhiller

Reefing Nurse
View Badges
Joined
Oct 22, 2021
Messages
1,057
Reaction score
758
Location
Williamsport
Rating - 100%
1   0   0
My Saltwater Story
I was introduced to the saltwater aquarium hobby by a fellow coworker back in 2016. I had a couple different nano tank for a few years. I believe my first was ~10 gallons that I used gallons of distilled water from Wal-Mart and a float arm hydrometer to make instant ocean saltwater. I had a couple corals and a few fish, but really had no clue what I was doing.

At the end of 2021, the saltwater bug reared its ugly head and I decided to setup a 15 gallon Waterbox to see if I really wanted to get back into the hobby and have a tank again. As soon as those Petco clownfish were swimming around I knew I was in trouble. That quickly progressed to a 60 gallon Cade Aquarium (my current tank).

Me and my partner discussed finishing our basement to make a bar/lounge area and this presented the perfect opportunity to get a big tank once and for all.

The Tank
The plan is a 60" x 30" x 20" Glass Cages tank that will be mounted through the wall with an adjacent fish room behind it located in the mechanical area of the house to hide all the "fish crap" as my partner says. It's going to become my "reef lab" complete with frag tanks, QT tanks and space to do all my crazy coral & fish stuff. The tank hasn't been ordered yet, we are currently working on the infrastructure for the reef room and are in the process of finishing the lounge area. This is all being done by us (mainly me) so it's slow progress, but I wanted to document the build since I think it's going to pretty great when it's all done. The sump will be a Rubbermaid stock tank.

The Reef Lab
The mechanical area of our house is about 17' x 12'. It houses the HVAC unit, water heater, electrical panel, etc. The remainder of the space is for me and my reefing madness. :cool:
 
Last edited:
OP
OP
trevorhiller

trevorhiller

Reefing Nurse
View Badges
Joined
Oct 22, 2021
Messages
1,057
Reaction score
758
Location
Williamsport
Rating - 100%
1   0   0
FRAMING THE ROOM

I'm fortunate that our basement is nice and dry and already had some electricity, easy access to water, the main house drain pipe and lots of space to work in.

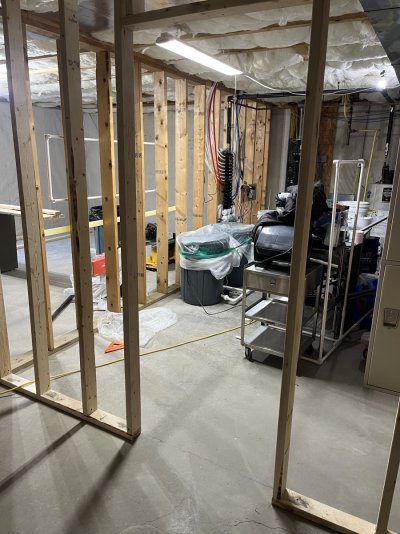
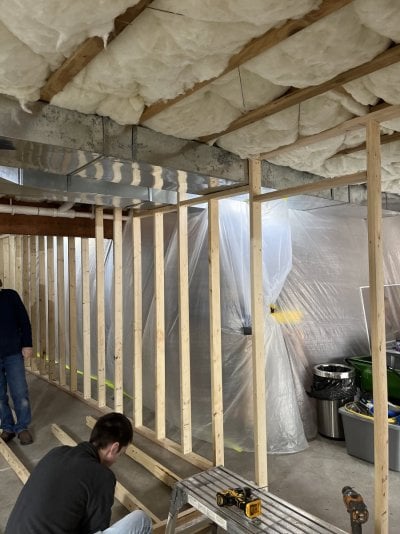
We started with the framing. In this picture you can see the Reef Lab to the right, the lounge/bar area straight ahead (that was already framed) and if you look closely the PVC mock-up of the tank footprint hanging in place on the wall where it is going to go.

We built the wall to close in the Reef Lab and installed a doorway. With any construction comes lot of dust, so we hung a temporary plastic wall to keep our belongings (mostly) free of the wood dust.

Reef Room Framing.jpg More Framing.jpg
 
Last edited:
OP
OP
trevorhiller

trevorhiller

Reefing Nurse
View Badges
Joined
Oct 22, 2021
Messages
1,057
Reaction score
758
Location
Williamsport
Rating - 100%
1   0   0
ELECTRICAL INFRASTRUCTURE

The basement had minimal outlets in it and only a few screw in light sockets. We all know aquariums use a lot of outlets! Especially when you are an equipment junkie like myself!

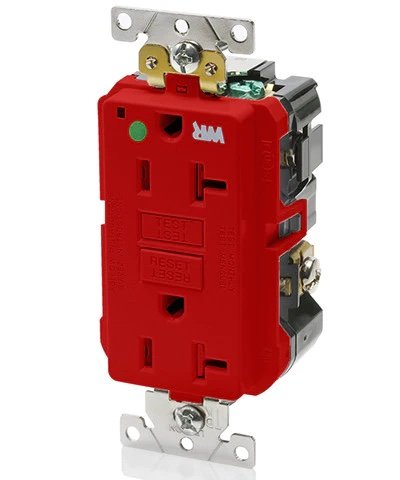
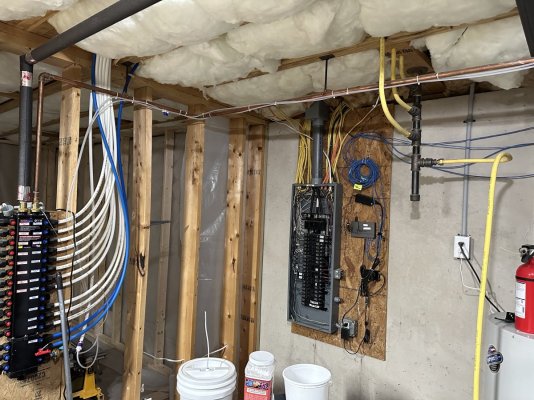
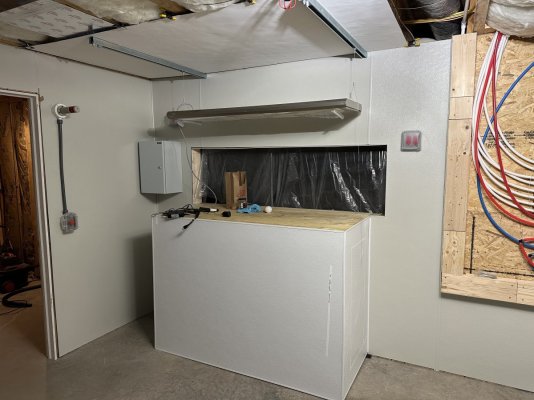
I installed four two gang 20 Amp GFCI circuits wired in parallel to provide independent GFCI protection. Each receptacle next to the tank stand (4 outlets each) has a dedicated 20 Amp line to its own breaker for the bulk of the aquarium equipment. The wall opposite the tank has two, two gang GFCI outlets on a third shared 20 AMP circuit, again wired in parallel to provide independent GFCI protection. This way if one device trips a GFCI outlet, the remainder of the devices still have power. The theory is this will prevent any catastrophic failures due to nuisance trips by having multiple circuits. It will also minimize the need for power strips.

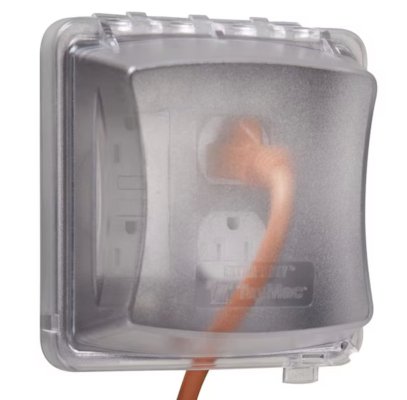
For the actual outlets I went with Leviton 20 AMP Hospital Grade Weather/Tamper Resistant receptacles. All outlets in the fish room have TayMac In-Use Weatherproof covers to keep salt spray off the 120 volt plugs. I'm still working on a solution for the EB832s, but some sort of plastic cabinet to house them is in order.

Leviton Hospital Grade WR TR 20 AMP GFCI.jpg TayMac In Use Weatherproof Outlet Covers.jpg Electrical Panel.jpg Dedicated GFCI Outlets.jpg
 
Last edited:
OP
OP
trevorhiller

trevorhiller

Reefing Nurse
View Badges
Joined
Oct 22, 2021
Messages
1,057
Reaction score
758
Location
Williamsport
Rating - 100%
1   0   0
PLUMBING INFRASTRUCTURE

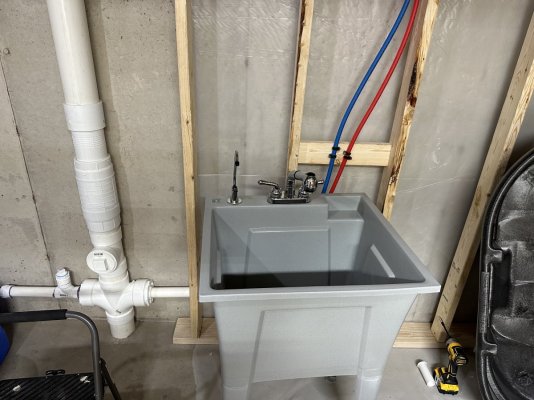
No fish room is complete without a utility sink!

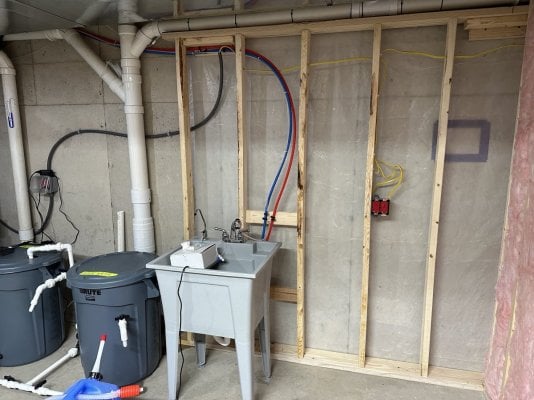
I picked up a cheap, all plastic sink from Lowe's and a cheap RO drinking water style faucet. The sink has a little utility drying rack with it and came with a non-metallic faucet. The RO faucet will provide on-demand filtered water and is connected straight to my RODI system.

My basement floor does have a drain for the HVAC unit, but it's not easily accessed as it's back in the corner of the room near the water heater and furnace. (Kind of annoying as having a centrally mounted floor drain/sloped floor would have been ideal, but it's better than nothing).

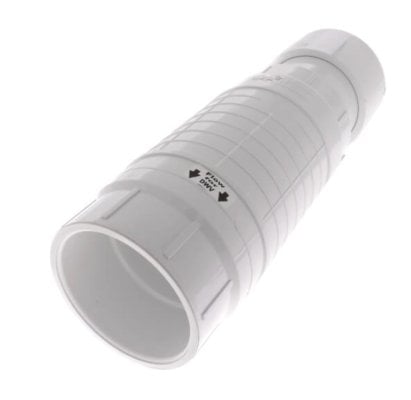
Therefore, I had to tap into the 4" main stack of the house to make the drain connection for the utility sink. This was a little interesting, but luckily I found a 4" telescoping repair coupling made by Spears on supplyhouse.com. It was a little pricey (~$120), but it was the only way to cut into the main stack and get it back together without MacGyvering it. This was difficult to find, but I highly recommend this part if you have a similar situation and need to add a T to your main drainage stack for adding a basement drain. It was literally a lifesaver.

While I was tapping into the drainage for the house, I figured I would install a T so I can connect the tank plumbing to it in the future for EASY water changes. :cool:

You can see the additional 2 gang weatherproof GFCIs and conduit I used for the wiring in this photograph.

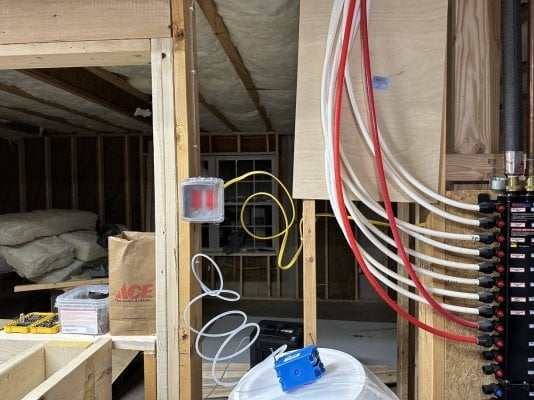
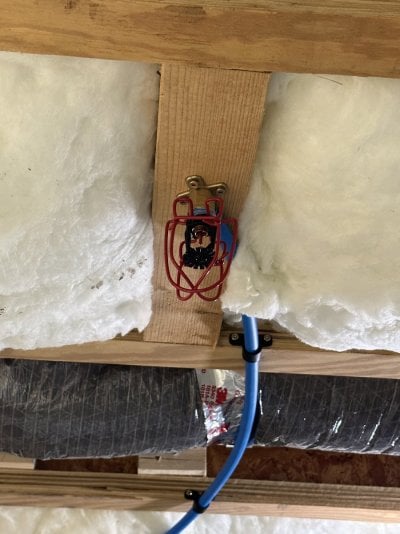
After hearing of several aquarium fires recently, I'm taking fire mitigation and response more serious than ever. The Reef Lab will have it's own wired smoke detector above the electrical equipment and I spent $40 and about 20 minutes on a fire sprinkler to connect to the home's PEX water manifold located in the same room.

Utility Sink.jpg
Drainage T Installed for Water Changes.jpg
4%22 Telescoping Repair Coupling.jpg Utility Sink w:RODI Water Faucet.jpg Reef Tank Sprinkler.jpg Reef Tank Sprinkler 2.jpg
 
Last edited:
OP
OP
trevorhiller

trevorhiller

Reefing Nurse
View Badges
Joined
Oct 22, 2021
Messages
1,057
Reaction score
758
Location
Williamsport
Rating - 100%
1   0   0
FRESH AIR INFRASTRUCTURE

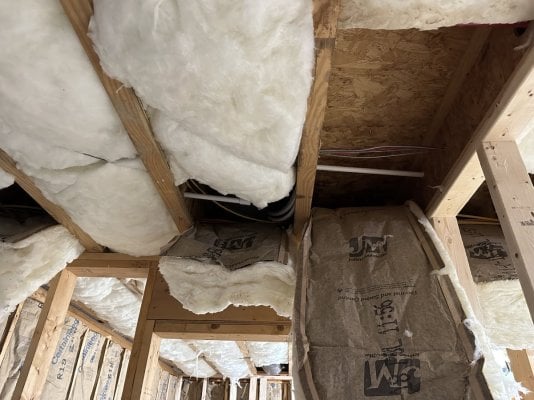
I've been experimenting with Sodium Hydroxide and Kalkwasser to raise my pH. My home is relatively new construction and is insulated quite well. I picked up a cheap Inkbird CO2 meter on Amazon and found out that my indoor CO2 levels were frequently >1000 ppm driving down my pH. While I had access to the newly framed walls, I ran a 1/2" Schedule 40 PVC pipe for a fresh air snorkel to connect the future protein skimmer to. I had the 1/2" PVC lying around with a bunch of connections from mocking up various tank sizes to see what size tank I wanted so I used that to prevent excessive waste. I'm hoping it's large enough diameter to provide adequate air flow for the skimmer. I probably would have went a little larger just because the run is a little long, but I had it on hand and it just cost me a little PVC cement.

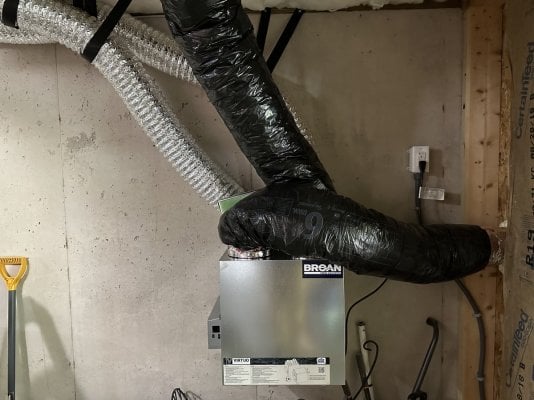
We also installed a whole home energy recovery ventilation system. For this I had to install 2 6" flexible ducts and vents through the wall along with a GFCI outlet. One thing always leads to another with construction. :face-with-rolling-eyes:

I selected a Broan 160 CFM 75% efficiency unit from supplyhouse.com. It autobalances when you set it up making installation quite easy. I simply tapped into the return and supply ducts of my home's HVAC system rather than running dedicated ducts. Despite the shortcut, my home's CO2 level is now down to 400-600 ppm everytime I check. The only downside to this installation method is you need to run the HVAC ventilation fan while the ERV is running to prevent any condensation (and subsequent mold) in the vents.

Fresh Air Supply Line.jpg Broan ERV Installed.jpg
 
Last edited:
OP
OP
trevorhiller

trevorhiller

Reefing Nurse
View Badges
Joined
Oct 22, 2021
Messages
1,057
Reaction score
758
Location
Williamsport
Rating - 100%
1   0   0
THE STAND

I really wanted to go with a 80/20 Aluminum T-Slot stand for the tank so I didn't have to worry about it ever. I never trust my own carpentry skills being a nervous nelly and all.

But, pricing them out I was looking at probably $1300-$1500 for the aluminum vs a few hundred for the wooden stand, hardware and trim. Therefore I opted for a DIY 2x6 wooden stand that will be skinned with 7/16" OSB and topped with 3/4" plywood. I used screws rated for marine spray areas and some galvanized structural brackets to reinforce the stand to be excessively overkill. I plan to put a nice finish around the stand for water/splash resistance. I'm likely going to use some FRP sheets and PVC trim to make it look as nice as possible. It's also going to be topped with foam before the tank goes on it.

For the stock tank (aka sump) I made a similar DIY stand with the scrap lumber and remaining hardware. It's not perfect up close (again, I'm no carpenter), but looks pretty good from a distance and will do the job. In the future I'm going to get some access panels to install on one of the sides of the stands to be able to utilize the space underneath for storage.

I wanted to make a door/removable panel for the same purpose but I think that exceeds to my carpentry skill set. Sometimes embracing your limitations will save you time, effort and frustration.


DIY Aquarium Stand In Progress 2.jpg
DIY Aquarium Stand In Progress.jpg
DIY Sump Stand.jpg
FRP Wall Covering & Stand Progress.jpg
 
Last edited:
OP
OP
trevorhiller

trevorhiller

Reefing Nurse
View Badges
Joined
Oct 22, 2021
Messages
1,057
Reaction score
758
Location
Williamsport
Rating - 100%
1   0   0
MANAGING SALT-SPRAY

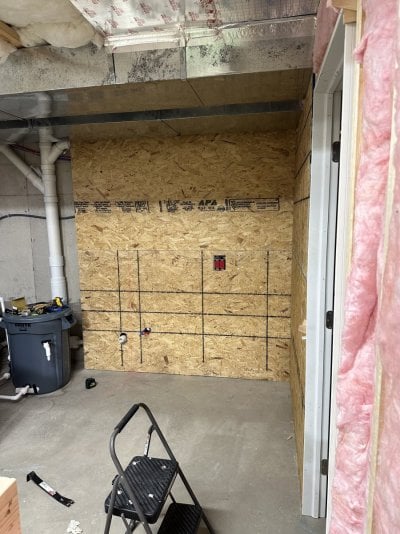
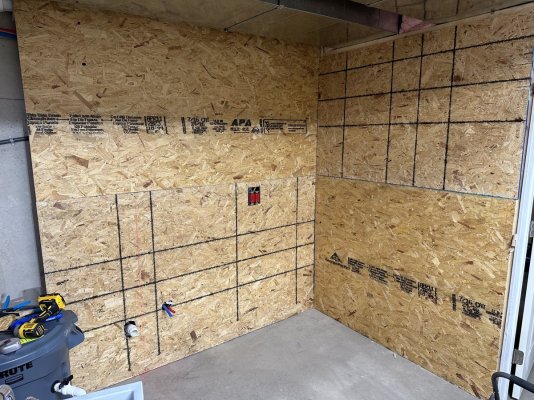
Once you've had a couple reef tanks, you realize that salt spray is a very real concern. I'm opting for fiberglass reinforced plastic panels in lieu of drywall in the Reef Lab. The opposite side of the dividing wall between the Reef Lab and the lounge/bar area will be water resistant drywall. FRP needs to be glued to the walls so I chose some 7/16" OSB panels and screwed them up to the walls.

Installing OSB Sheathing for FRP Wall Covering 1.jpg Installing OSB Sheathing for FRP Wall Panels 2.jpg
FRP Wall Covering Installed.jpg
 
Last edited:
OP
OP
trevorhiller

trevorhiller

Reefing Nurse
View Badges
Joined
Oct 22, 2021
Messages
1,057
Reaction score
758
Location
Williamsport
Rating - 100%
1   0   0
LIGHTING

I wanted to be able to support SPS with this build. I considered going with Radions + ReefBrites that I have over my current tank, but I would likely need 5 XR30s to get the coverage over the tank that I want. The price and energy consumption along with the need to route so many cords and power bricks put me off from that as viable option. Therefore, I decided to go old school with a 60" 8-Bulb T5 SunPower Fixture from ATI.

Right now I am planning on 6 Blue Plus, 1 Actinic & 1 Coral Plus bulb. But, I am sure I might do some tinkering with bulb combinations in the future once the tank is finally here. I may also decide to add some supplemental LED side bars of some sort down the line but for now I have no doubts the T5 fixture will be more than adequate.

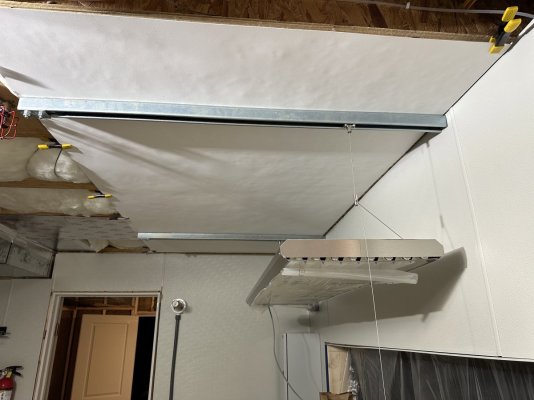
For mounting, I chose to make a DIY sliding rail system to allow the fixture to slide completely off of the tank. This was accomplished with 2x 4 foot sections of Unistrut (often used to mount pipes to walls in industrial applications) along with 2 UniStrut trolleys. These are basically weight-rated mounting surfaces on some bearings to allow the the entire T5 fixture to slide back and forth. Of course I retain the elevation adjustment of the OEM SunPower hanging cable kit as well.

Unistrut Trolley Light Mounts.jpg Unistrut Trolley Sliding Light Mounts.jpg
 
Last edited:
OP
OP
trevorhiller

trevorhiller

Reefing Nurse
View Badges
Joined
Oct 22, 2021
Messages
1,057
Reaction score
758
Location
Williamsport
Rating - 100%
1   0   0
THE FLOOR

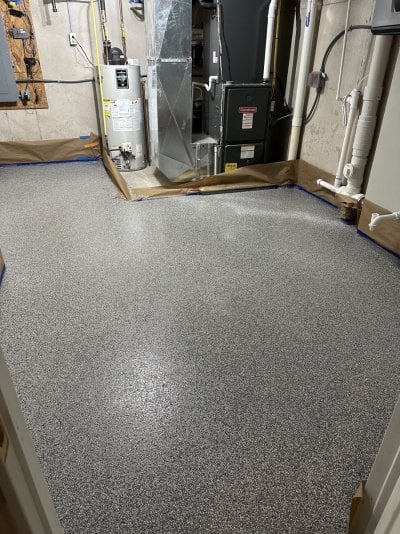
While my equipment room doesn't have a centrally mounted floor drain, there is a floor drain for HVAC drainage over in the corner. The price to tear up the concrete at this point was more than I wanted to spend (for now) so it will have to do. We did opt to epoxy coat the floor to keep saltwater spills from ruining the concrete.

Epoxy Floor Coating.jpg
 
Last edited:
OP
OP
trevorhiller

trevorhiller

Reefing Nurse
View Badges
Joined
Oct 22, 2021
Messages
1,057
Reaction score
758
Location
Williamsport
Rating - 100%
1   0   0
THE AUTOMATIC WATER CHANGE SYSTEM

After several tanks and a few years in the hobby, I've come to realize that water changes are probably one of the best kept "secrets" in reefing. We spend a lot of time and money trying to avoid changing water--oversized filtration equipment, reactors, dosing pumps, carbon dosing, phosphate media, bio-media, trace elements, ICP testing, etc. I've realized much of this can be replaced by more frequent and consistent water changes. I surely don't plan to eliminate all of the above and will still have a robust filtration plan, but I think embracing water changes and making them easier can only be a benefit to the tank's success.

With my current tank on the second floor of my home with my salt mixing station in the basement, carrying multiple 5-gallon buckets up two flights of stairs got old FAST. I knew this going in but it was the only space I had at the time. Therefore a convenient automatic/semi-automatic water change system was a must for my next tank. I contemplated the Neptune dos, Ecotech Versas and even plumbing the tank to the sewer for the semi-automatic water changes (I may still do this for fast and easy LARGE water changes-we'll see). But then I found what I'd consider the most bullet-proof pump for the job.
Automatic water changes will be accomplished by a dual-head commercial-esque peristaltic pump. I picked up a Stenner 170DMP4 pump and an Intermatic mechanical timer. The Stenner pumps ~120 gallons/day or about 5 gallons per hour making water change calculations easy. They offer a variety of fixed flow rates and even adjustable flow rate pumps, however, because the pumps are noisy, I opted for a faster flow rate model. This will allow me to get my water change done quicker when no one is home to be bothered by the pump noise in the basement. The adjustable flow rate model seemed overkill since I can tweak the volume via the timer.

I'm still deciding if I want to do smaller daily water changes (say 30 mins/day/2.5 gallons) or larger weekly water changes (3 hours/15 gallons). I'd be curious to know which you think will be more beneficial; I think there is an argument for both methods.

7/22/2023 Pictures coming soon once I figure out the mounting location.
 
Last edited:
OP
OP
trevorhiller

trevorhiller

Reefing Nurse
View Badges
Joined
Oct 22, 2021
Messages
1,057
Reaction score
758
Location
Williamsport
Rating - 100%
1   0   0
STORAGE

No reef equipment room would be complete without adequate storage. Afterall, we accumulate A LOT of stuff to keep our systems running. While I could always use more space, I chose some Rubbermaid shelving and cabinets to try to keep the madness neat and tidy. I also installed some access panels in the tank stand and sump stand to allow for storage of less frequently used items in the otherwise wasted space below. For example, under the tank stand will be 5 gallon DIY dosing container buckets.

Pictures coming soon...
 
Last edited:
OP
OP
trevorhiller

trevorhiller

Reefing Nurse
View Badges
Joined
Oct 22, 2021
Messages
1,057
Reaction score
758
Location
Williamsport
Rating - 100%
1   0   0
THE TANK

Dimensions: 60" x 30" x 20" (1524 mm x 762 mm x 508 mm)
Gallons: ~150 gallons / 567 Liters

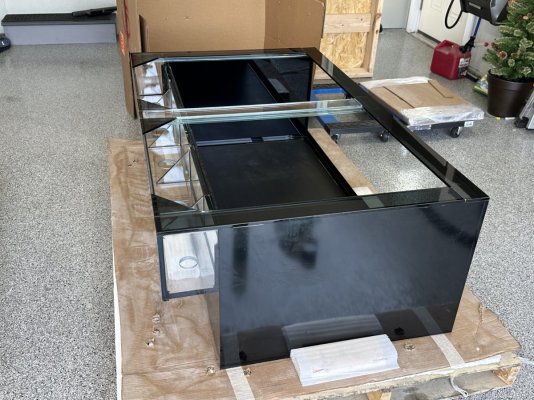
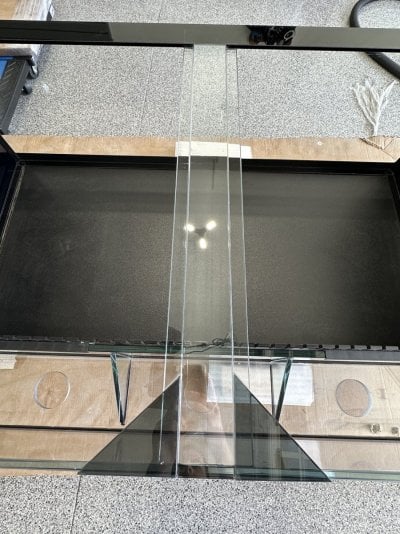
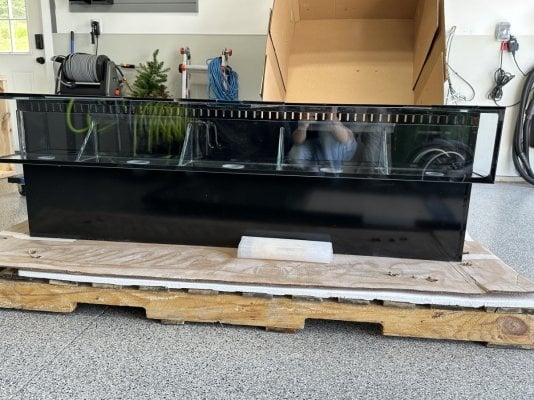
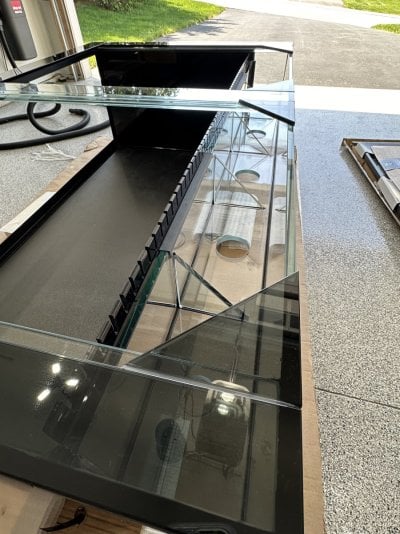
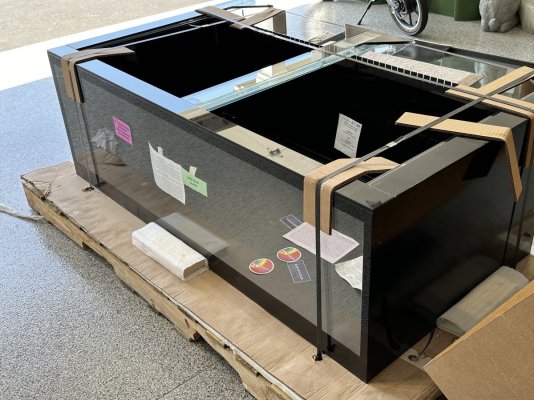
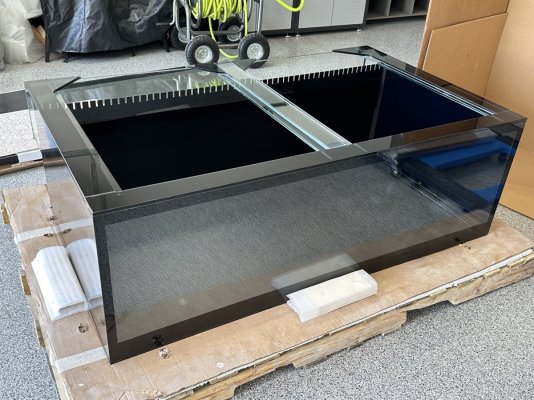
I ordered the tank at the beginning of January from Glass Cages. It's a euro-braced tank with a coast to coast overflow, 1" Bulkheads, Armored seams and HDPE bottom. It's also got the concealed water and sand line features added.

I had contemplated going with a perimeter eurobraced tank since after having a rimless Cade aquarium, Eurobracing to keep the water inside was a must for me. But, the cross bracing on a 5 foot tank is only one brace right in the middle. This still allows plenty of access but makes the tank more structurally sound, a nice compromise situation. Having a "bullet proof" tank was a must if I was going to be putting a box of 150 gallons of saltwater in my house. The cross brace also allows the option of hanging wavemakers down in the middle of the tank and gives an extra surface to sit things on while working on the tank.

The tank came back in March, but unfortunately the tank was damaged in transit by the shipping company. It appeared that someone ran a pallet into the back right corner of it and chipped the corner off the overflow box. So back it went to Glass Cages for repair.

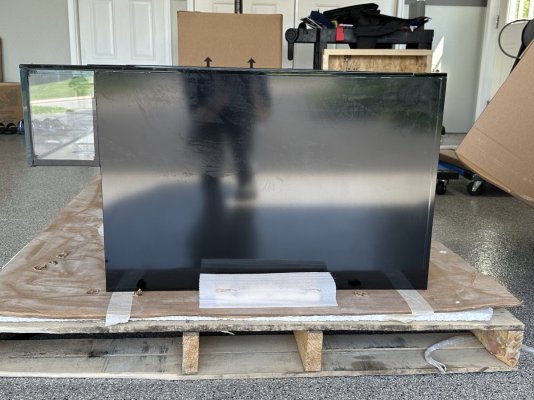
After a few weeks they had it ready and I got the notification Friday it was scheduled for delivery. Everything went smoothly this time & the tank looks really nice. It's very solidly built. Now to start working on plans to get it into the house and on the stand so that I can start working on a plan for the trim around the tank & stand.

Glass Cages 10.jpg Glass Cages 8.jpg Glass Cages 7.jpg Glass Cages 11.jpg Glass Cages 3.jpg Glass Cages 2.jpg Glass Cages 1.jpg Glass Cages 4.jpg Glass Cages 5.jpg
 
Last edited:
CasperOe

In it to win it!
View Badges
Joined
Feb 14, 2022
Messages
3,261
Reaction score
5,718
Location
Glasgow, United Kingdom
Rating - 0%
0   0   0
Cant wait to follow this Pal! All the best- and best of luck with the project! :D
 
OP
OP
trevorhiller

trevorhiller

Reefing Nurse
View Badges
Joined
Oct 22, 2021
Messages
1,057
Reaction score
758
Location
Williamsport
Rating - 100%
1   0   0
The tank has arrived! See post #16 for pictures.

I'm still working on the basement reef lab, but there have been lots of things accomplished. I just need to find the time to take some pictures and post some updates on here.
 

Going off the ledge: Would you be interested in a drop off aquarium?

  • I currently have a drop off style aquarium

    Votes: 3 1.5%
  • I don’t currently have a drop off style aquarium, but I have in the past.

    Votes: 4 2.0%
  • I haven’t had a drop off style aquarium, but I plan to in the future.

    Votes: 28 14.3%
  • I am interested in a drop off style aquarium, but have no plans to add one in the future.

    Votes: 94 48.0%
  • I am not interested in a drop off style aquarium.

    Votes: 62 31.6%
  • Other.

    Votes: 5 2.6%
Back
Top