haha right! but sometimes i need that pressure behind me so that i can it done...otherwise it'll probably take alot longer than my wife would want me to...i'll keep the pics coming and i appreciate your responses!
Navigation
Install the app
How to install the app on iOS
Follow along with the video below to see how to install our site as a web app on your home screen.
Note: This feature may not be available in some browsers.
More options
You are using an out of date browser. It may not display this or other websites correctly.
You should upgrade or use an alternative browser.
You should upgrade or use an alternative browser.
Upgrading to 66x36x25 260 gallon reef!
- Large Build
- Thread starter Canuck007
- Start date
- Tagged users None
Would appreciate your opinion..
So my sump has 6 sections. this was my plan but not sure if something better more efficient can be done...looking to keep alot of fish so heavy bioload...water flows in
1. Drain intake from display.
2 water flows over 2 4 inch socks.
3 large skimmer section 16x18
4 12x18 area...thinking of using it for rubble rock...sand for critters?
5. 12x18 area...thinking of using it for chaeto...
6. return section
Thoughts?
That looks really good IMO. I would think about an auto filter roll instead of socks myself, but I’d you are willing to do the work the socks work well. Just change them often if you are having trouble with high N and P.Would appreciate your opinion..
So my sump has 6 sections. this was my plan but not sure if something better more efficient can be done...looking to keep alot of fish so heavy bioload...water flows in
1. Drain intake from display.
2 water flows over 2 4 inch socks.
3 large skimmer section 16x18
4 12x18 area...thinking of using it for rubble rock...sand for critters?
5. 12x18 area...thinking of using it for chaeto...
6. return section
Thoughts?
I would divide the 12x18 rubble/sand into thirds with deep trays 6”x12”x5-10” high. Then put sand, rubble, whatever you want in them. Every 4 months take the “oldest” tray out and wash the detritus out. Pull rubble and rinse, put sand into strainer and rinse under a hose or faucet. Then return to the sump. This will help greatly with stability and N/P levels.
I’d put a small prop pump like a wavepuck in each chamber that settles detritus.
All of this is optional of course, just my thoughts. Seems like you have a good plan already!
Thanks for the suggestions! I've seen people do the trays and may give it a shot. It's setup pretty well for filter socks so I'll probably continue with that as I have like 8 pairs (16) so should be able to replace them often. Thanks!
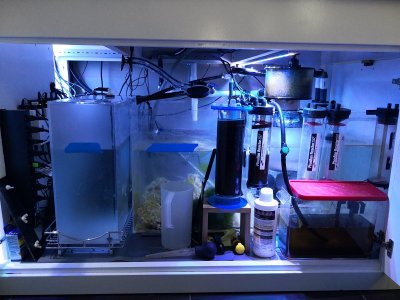
Did a few things today...black background using car vinyl wrap. I think it turned out pretty good. Just have to cut out for the 2 return line bulkhead holes.
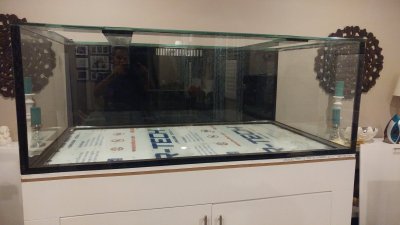
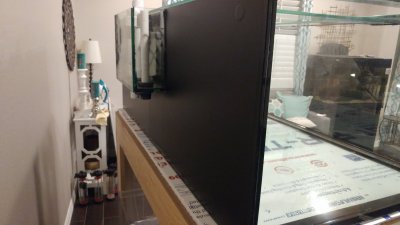
Also put my ATO on a cabinet slider so that when I refill it I can just pour from the 5 gallon jug into a funnel or something. I always used to pump water into the ATO from the 5 gallon jugs so I thought this would be easier.
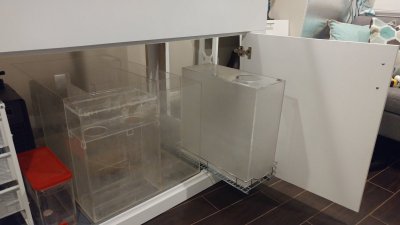


Also put my ATO on a cabinet slider so that when I refill it I can just pour from the 5 gallon jug into a funnel or something. I always used to pump water into the ATO from the 5 gallon jugs so I thought this would be easier.

revhtree
Owner Administrator
View Badges
Staff member
Super Moderator
Reef Squad
Partner Member 2024
Excellence Award
RGB
Photo of the Month
Article Contributor
R2R TV Featured
Hospitality Award
Article Administrator
Black Friday Sponsor
Partner Sponsor 2023
Industry Professional
My Aquarium Showcase
- Joined
- May 8, 2006
- Messages
- 47,997
- Reaction score
- 89,042
Looks like you attached an image in the first post for your new tank but somehow deleted it. Upload a new one here in a post and I will fix it for you! 
not sure why it's putting 2 imagesLooks like you attached an image in the first post for your new tank but somehow deleted it. Upload a new one here in a post and I will fix it for you!
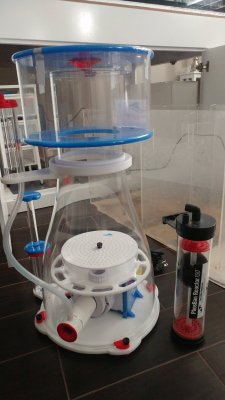
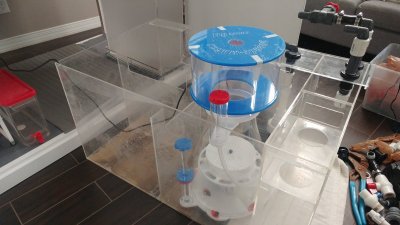
So I did some plumbing this weekend and realized that my configuration of the equipment and sump was not going to work. I couldn't get the skimmer top, which is 10" tall, in and out with the sump being 20" high. So moved the sump around and didn't have to redo the plumbing too much. Here's the skimmer and I'll post pics of the plumbing once it's all done. The skimmer is massive!!


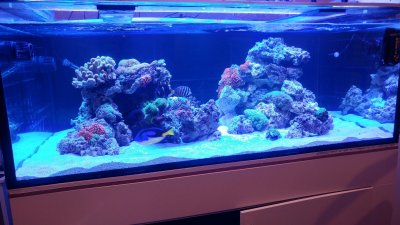
so here's a shot from tonight. not completely running yet. just added enough water to move all my corals and fish from my holding tank. wanted to get them in there as they seemed a bit stressed. will get more shots going once all the cords and everything is cleaned up. but tomorrow i'll fill with more water and get the sump/skimmer etc going. lights are on a temporary hood until I can build a proper one in the next few weeks.
Here are a few updates...thanks for asking! sorry water a bit cloudy as I just cleaned the glass and some of the sand. started adding a few more fish this past week. I added a few early on and lost them as I was probably still going thru the cycle and also had a nice outbreak of ich. Fortunately everybody doing well now. I know it's not gone from the tank but looking good for now.
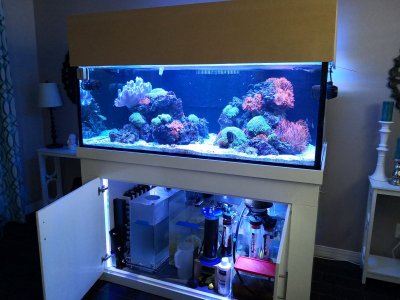
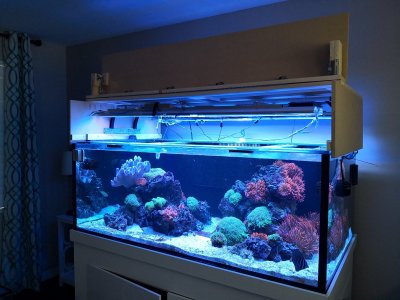
Finished the canopy last week and now need to paint and add trim. Hopefully in the next couple of weeks. I made it such that the front face flips open for feedings but also the front 1/3 flips open as shown in the pic for cleaning and other work.
Just wanted to get it up there to make sure it all fit well...also we had guests over....lol


I'm going to build a tank similar, so this is great inspiration for me. I'm actually going to build the tank, so if you don't mind me asking, how thick is your glass? My dimensions will be 60x34x26. I'm hoping I don't have to go with ¾ thickness and can get by with ⅝ or possibly ½. I'm hoping for it to be rimless as well.My new tank!

Here's my old tank (150g) I just sold a few weeks back as I get ready to upgrade to my 260 gallon starphire mixed reef.
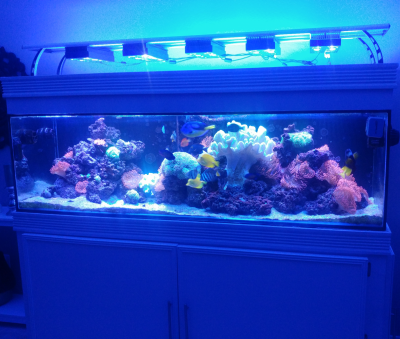
New tank: 66x36x25 starphire...take delivery in 6 weeks..using bean animal
Sump: DIY acrylic 60 gallon tank converted to sump
Skimmer: Bubble Magus B11...just got it for a smoking deal!
Lights: 4 AI Sol, also have a 60" with 2x250 metal halide and 4 80w T5s light fixture. Trying to figure out use all 3 or use AI sol with T5s?
Apex controller
2 MP40ws and 1 Jebao CP-150 (like a gyre)
DIY wood stand 40" tall
Media reactors for phosban and carbon
Dosing using Bubble magus BM-T11 doser, B-Ionic, NoPOX, Magnesium
Lots and lots of fish!! Mostly softies and LPS
Next week start on my stand!
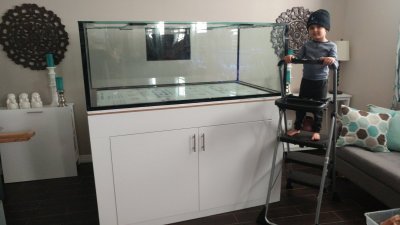
That looks sweet.It's finally here!! The front to back at 36" looks amazing!! Just have to add the trim around the tank to hide the styrofoam. It sits at 41.5" tall now! Wow!
Now to start working on the plumbing so I can move the tank against that wall behind it. Of course my little guy is excited. He wants the fish in there now!! Not tomorrow or in a couple of days...now!! hahaha
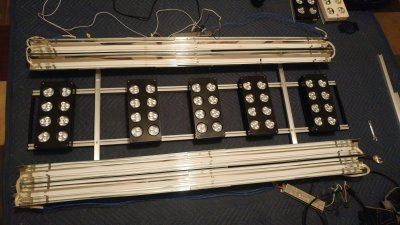
Also the light fixture running on AI classic rails. 5 AI sols with 4 80w T5s. It's at about 29" wide. Planning on putting the rails on 2 drawer sliders in the canopy so I can push it towards the back in case I need more space to work inside the tank.
Similar threads
- Replies
- 38
- Views
- 980
- Replies
- 4
- Views
- 227
- Replies
- 8
- Views
- 218
- Price: 80
- Shipping Available
- Replies
- 2
- Views
- 297


