CDNess's 125G Build Thread

cdness

2006 - Present
View Badges
Joined
Jul 15, 2009
Messages
3,988
Reaction score
165
Location
West Fargo, ND
Rating - 0%
0   0   0
Hi All,

I don't have a thread on here about my current 75G tank, but I'll be sure to post some pictures later to show what I am upgrading from.

Reason for the upgrade is my wife wants another fish. She fell in love with a small 2" Chevron Tang at the LFS Pets R Inn and said we have to get it. Since we have no more room in the 75G I told her we'd have to upgrade and she is totally supporting the ides just so she can have her fish (YAY!).

I have lots of equipment already as I have been buying for the upgrade for at least a year, just never had soupport for it. Here's the equipment plan:

Main Tank: 125G RR W/Corner Overflows
Sump: 75G sump (chambers as follows Skimmer, Fuge/prop, Return)
Lighting: 4' IC660 T-5 retro and a 20K ReefKoi LED for the last 2'
Skimmer: MSX 200 NW
Returns: 2x Marineland 4500
Flow: Closed Loop powered by a Reeflo Dart and OM 4 way (No powerheads)

Project timeline: I am hoping to have water in the tank and inhabitants moved over the weekend before or the weekend after Thanksgiving. I don't know if I am all that fond of transferring then leaving for 4 days so it will probably be after.

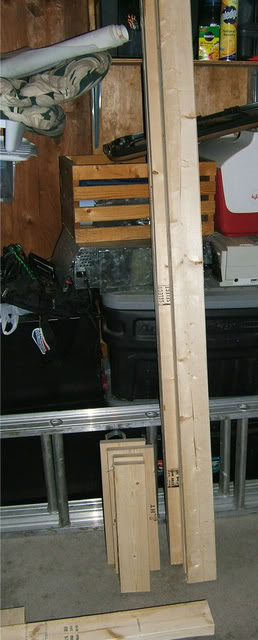
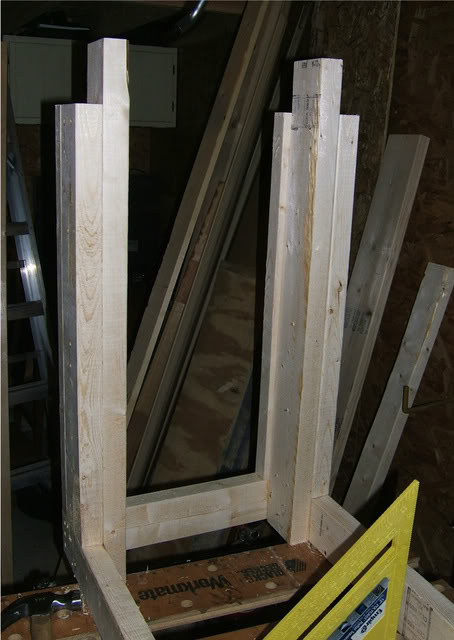
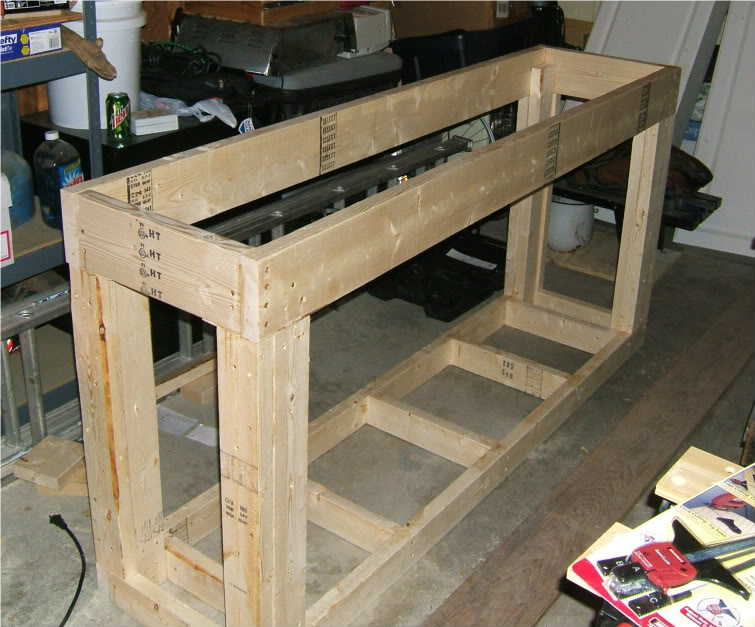
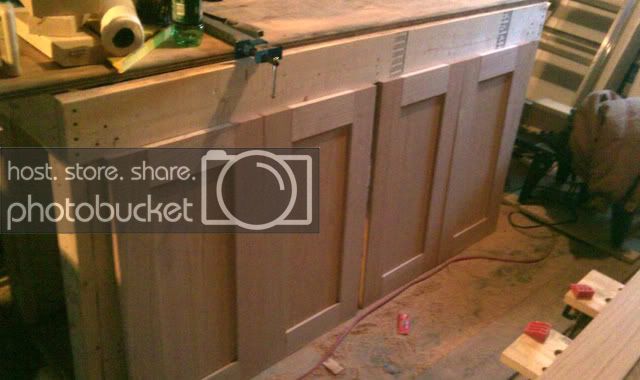
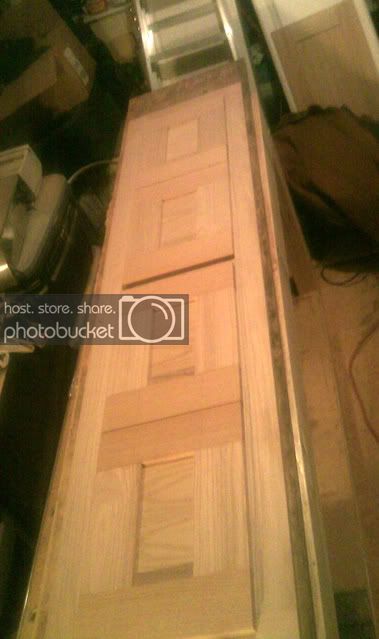
Many pics will be taken along the way as I still need to build the stand, canopy, and sump. I also need to re-seal the dart and do all the plumbing.

Stay Tuned!

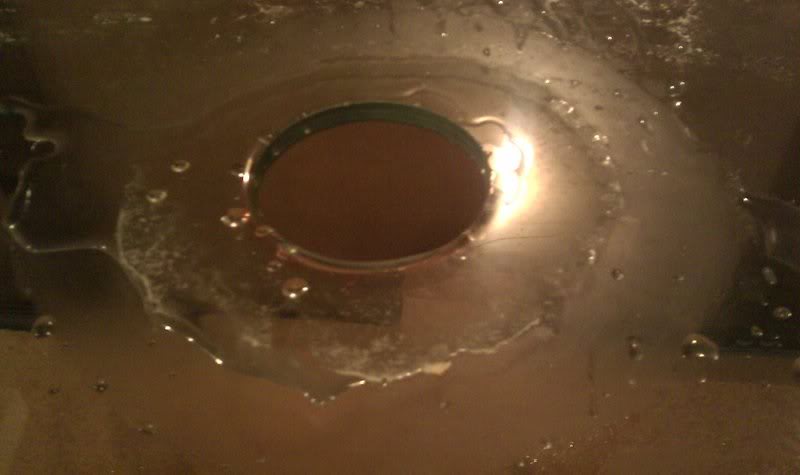
** Tonight I am drilling the tank, wish me luck. 2" bulkhead going into the back of the tank to feed the Dart.
 
OP
OP
cdness

cdness

2006 - Present
View Badges
Joined
Jul 15, 2009
Messages
3,988
Reaction score
165
Location
West Fargo, ND
Rating - 0%
0   0   0
Last night I drilled the tank. Since I will be running a closed loop with a Reeflo Dart I had to have a 2" supply line. I debated on doing two 1.5" bulkheads or one 2" and ended up going with the one 2". The 2" bulkhead required a 3" hole to leave room for the threads. Typically when drilling the tanks I have used a drill guide to help keep it level and in place. This works really well except for the fact that the guide doesn't support 3" hole saws. This is the first tank hole I have freehanded: (crappy cell phone pic below)

Drilled3inchhole.jpg


There are going to be six return lines for the closed loop. Two of them will always be flowing and the other four will be alternating two on/two off with a OM 4 way. They will all be 1" pipes reduced to 3/4" Loc Line with penductors/educators. The flow will be crazy in there.

Next is the debate between my wife and I with my design and her ideas. I want to hang the pipes on the back of the tank to allow me to move them if I wanted to or easily take them off for maintenance. This will also allow me to run a couple lines down the center braces and let some flow come from the front of the tank as well. She would like me to drill six more holes and use six more bulkheads to make the lines come through the back wall of the tank. I did this on my current tank, which is where she is getting the idea from. Any opinions?
 
OP
OP
cdness

cdness

2006 - Present
View Badges
Joined
Jul 15, 2009
Messages
3,988
Reaction score
165
Location
West Fargo, ND
Rating - 0%
0   0   0
I need some opinions... I am building my stand tonight. I bought 2x6s for the top of the stand. Should I have purchased 2x8 boards instead or will the 2x6 boards be OK?

I just noticed the RC stand calculator thread says 2x8s :(

Thanks!
 

swannyson7

Moderator/Acro Aficianado
View Badges
Joined
Jan 17, 2010
Messages
6,715
Reaction score
296
Location
Bantam, Connecticut
Rating - 0%
0   0   0
I think you'll be fine with the 2x6s without a center support. If you want the extra piece of mind, you could always sister them up with a couple 2x4s.
 
OP
OP
cdness

cdness

2006 - Present
View Badges
Joined
Jul 15, 2009
Messages
3,988
Reaction score
165
Location
West Fargo, ND
Rating - 0%
0   0   0
I am going with no center brace, but I may add a 6" piece of 3/4" plywood on the back of the top 2x6s to add stiffness. I think that will give me the peace of mind and I will stop worrying. It is too late to start building tonight so tomorrow it is.

It will be faced with Oak boards, not plywood.

If there are any other tips let me know before I get cutting please.
 
OP
OP
cdness

cdness

2006 - Present
View Badges
Joined
Jul 15, 2009
Messages
3,988
Reaction score
165
Location
West Fargo, ND
Rating - 0%
0   0   0
So here is the material List for the framing. I have yet to get the material list for the oak, but I'll have that all done once the framing is built for the stand and canopy...

Stand: 36" high and slightly overbuilt to let the face hide the trim
2 - 2 x 6 x 72 1/2"
2 - 2 x 6 x 15 1/2"
8 - 2 x 4 x 15 1/2" * will need to be slightly shorter depending on if the plywood is needed
2 - 2 x 4 x 72 1/2"
8 - 2 x 4 x 27"
4 - 2 x 4 x 34"

** If the plywood for stiffening is needed it will go on the inside of the fromt 2x6 and the outside of the rear 2x6. The center cross braces will need to be shortened slightly to accomodate the plywood.

Canopy: full length and 9" tall framing. Actual canopy will cover the framing of the tank and extend about 1" above the top of the frame to allow for light rails.
4 - 1 x 2 x 72 1/2"
4 - 1 x 2 x 15 1/2"
1 - 1 x 2 x 9"

Actual dimensions of the Oak facing along with build pictures coming. There will be a plywood bottom on the stand to set a 75G sump under the 125. All assembly of the framing will be with exterior contractor grade hardware and glues at all joints with titebond exterior glue.

So any tips before the boards go under the knife, i mean saw... ;)
 
OP
OP
cdness

cdness

2006 - Present
View Badges
Joined
Jul 15, 2009
Messages
3,988
Reaction score
165
Location
West Fargo, ND
Rating - 0%
0   0   0
Stand Frame 75 Percent Done

Well the stand frame is 75 percent done... I have pictures but none available to me at the moment. I'll post them when done. I ran out of screws at approximately 10:30 last night so I had to call it quits for the day. To Menards I go at lunch time to get more screws and the stand framing will be done tonight.

Thursday I am hoping to have the face done in Oak and get it ready to stain. I need to go buy a slot bit for a router to make the 1/4" slot in the oak wood for the oak panelboard inserts. I noticed Sears has an inexpensive kit that has everything I need. This may be my only router project and I borrowed the router so I don't need anything super expensive...

Just with what I have built right now I can tell it is going to be much stronger than what came with my tank for sure. The one I got was a homemade stand but it was not glued and it looks like it was built WAY too quickly. It rocks side to side and at the moment mine doesn't move at all. We'll see how it looks when I have the top ring on with the 2x6s, but I don't forsee it being an issue.

Slowly but surely this is moving along...
 
OP
OP
cdness

cdness

2006 - Present
View Badges
Joined
Jul 15, 2009
Messages
3,988
Reaction score
165
Location
West Fargo, ND
Rating - 0%
0   0   0
The framing of the stand is almost done. I got stuck as I didn't want to wake up the neighbors ripping down plywood at 11:30 pm... ;)

The stand started as this:

CutWood.jpg


I built the top and bottom frames. Then attached each corner and screw board to the bottom part of the frame. Each joint is glued (including the length of the boards that run along each other) and screwed with lots of construction screws. Some went through so I'll need to chop them off a bit with the dremel. I also used glue on the screws so they should be permanently stuck there ;)

VerticalSupports.jpg


When I finished last night the stand was basically done. I still need to cut the plywood for the bottom as well as the plywood to be used as a bracing board on the top 2x6 (inside of the front 2x6 and outside of the back 2x6) for added structural support. I will then install the top bracing and start working on the oak facing.

StandFrame.jpg


I also purchased a gallon of Kilz2 primer/sealer to paint the inside of the stand and canopy to seal the wood from all the moisture.

Just a few questions:

1. Do you think I need the additional bracing on the top 2x6s or will they be fine?

2. Do I need to paint over the Kilz 2 with an epoxy or other paint or is it fine with just the Kilz 2?

3. Is there a specific polyurethane coat I should use for the oak part of the stand or is any MinWax polyurethane ok to use?

Feel free to add any other suggestions if you see places to improve.
 
Last edited:

reeferdale

Community Member
View Badges
Joined
May 22, 2011
Messages
74
Reaction score
1
Location
SE michigan
Rating - 0%
0   0   0
Personally, I would put a plywood or chipboard top on it. It does not need to be there for weight as much as to firm up the stand and make it ridged. Also, if you are not going to have any center braces, it would not hurt to double the 2x6's. Just bolt 2 of then together to form a 4x6 and then you will not have anything to worry about. I have my 270 on a stand with no back center 'legs' and I have 3 2x6's that make a beam for the support. My tank does not actually sit on much more than 1/2" or so of the back beam. It sits right on top of the front and side 2x6's but in order to get access to the overflow standpipes from the bttom, it could not sit squarly on the back beam.
 

skinz78

10K Club member
View Badges
Joined
May 8, 2009
Messages
21,934
Reaction score
648
Location
lovely rainy NW Washington
Rating - 0%
0   0   0
I agree, I would double up those 2x6's on top, cheap insurance!
I'd do a thin layer of Killz2 and then paint over that. Any stain should work.
 
OP
OP
cdness

cdness

2006 - Present
View Badges
Joined
Jul 15, 2009
Messages
3,988
Reaction score
165
Location
West Fargo, ND
Rating - 0%
0   0   0
Well the stand frame is complete. I added some 3/4" plywood strips to the 2x6 top boards and added center bracing on the top as well.

I am in the process of constructing the red oak facing for the stand. It will be a mix of 1x4, 1x6, and 1/4" oak faced plywood. All of the boards are cut and are ready to be drilled. Here are some of the things I noted during the build to make things easier:

1. Go to a good lumber place, not a big box store, for the wood. It will be nicer, closer in color, and much straighter.

2. A Kreg Pocket Hole kit is a wonderful tool. It makes assembling the cabinet parts SO much easier and leaves a really nice looking cabinet.

3. When using a router to put the plywood channels in the wood, make sure to get good bits.
a. A slot cutter works wonders for the boards you need to slot from end to end, but does not work as well for the ones you need to plunge cut
b. A straight cut bit works good for the plunge style cuts, but make sure to do multiple passes getting deeper each pass as one deep cut is harder to do.
c. Make sure you have a good router table, not a dumpster dive table with a makeshift fence and clamps holding stuff together ;). Good fencing and featherboards will make your life so much easier...

Assembly of the cabinet will happen tonight. After that is done I'll prep for staining and painting.

Stay tuned for pictures of the assembled cabinetry and stand soon!

Then it's off to plumbing. I did some research and it looks like when comparing online places and local stores I can get almost everything I need locally and I'll actually save money (odd I know). I am still wrapping my head around the plumbing mess with dual drains, dual returns, 2" CL feed bulkhead, Dart, OM 4 way, and 6 closed loop returns...
 
Last edited:
OP
OP
cdness

cdness

2006 - Present
View Badges
Joined
Jul 15, 2009
Messages
3,988
Reaction score
165
Location
West Fargo, ND
Rating - 0%
0   0   0
Here is a small update...

I have the doors, sides, and framing done on the stand. I still need to sand, stain, poly, and paint but that should be done shortly after thanksgiving. Pictures of progress below (crappy cell pics, but pics anyway):

StandDoorsUnfinished.jpg


CanopyDoorsUnfinished.jpg


I do have to say that KREG jigs are awesome for building doors and working with oak. I couldn't have made this look as good as I did without it.
 
Last edited:
OP
OP
cdness

cdness

2006 - Present
View Badges
Joined
Jul 15, 2009
Messages
3,988
Reaction score
165
Location
West Fargo, ND
Rating - 0%
0   0   0
Sanded the oak last night. It is looking really nice. Staining tonight with Minwax Red Oak. I'll be letting it dry over the weekend and doing the poly on Sunday.

Still attempting the design of the 75G sump... Any ideas?

https://www.reef2reef.com/forums/do-yourself-diy/73765-75gallon-sump-ideas.html

I also need to build the plumbing but I have a bit of time for that and honestly that is the cheap part of the build ;)
 

LegoZ81

Well-Known Member
View Badges
Joined
Oct 15, 2009
Messages
775
Reaction score
6
Location
IL
Rating - 0%
0   0   0
nice cabinet work! you might need to do a full thread on those! you could save me alot of money lol!
 
OP
OP
cdness

cdness

2006 - Present
View Badges
Joined
Jul 15, 2009
Messages
3,988
Reaction score
165
Location
West Fargo, ND
Rating - 0%
0   0   0
nice cabinet work! you might need to do a full thread on those! you could save me alot of money lol!

It is coming... Keep your eyes peeled in the upcoming week or so. I wanted to get better pictures and show the finishing as well...
 

Heathd

Community Member
View Badges
Joined
Nov 20, 2011
Messages
97
Reaction score
95
Location
Texas
Rating - 0%
0   0   0
Looks great. I bought the pocket hole Kreg jig a few weeks ago, and it was the best money ever spent. Makes it real easy to get a strong and clean looking attachment.
 

Reefing threads: Do you wear gear from reef brands?

  • I wear reef gear everywhere.

    Votes: 17 14.3%
  • I wear reef gear primarily at fish events and my LFS.

    Votes: 7 5.9%
  • I wear reef gear primarily for water changes and tank maintenance.

    Votes: 1 0.8%
  • I wear reef gear primarily to relax where I live.

    Votes: 19 16.0%
  • I don’t wear gear from reef brands.

    Votes: 67 56.3%
  • Other.

    Votes: 8 6.7%
Back
Top