Just watched it, looks even better then i thought it would be. The mounting idea will be perfect for me atleast, ill run 2 long pieces of something in those slots and just rest it on 2 baffles of my sump.
Navigation
Install the app
How to install the app on iOS
Follow along with the video below to see how to install our site as a web app on your home screen.
Note: This feature may not be available in some browsers.
More options
You are using an out of date browser. It may not display this or other websites correctly.
You should upgrade or use an alternative browser.
You should upgrade or use an alternative browser.
Introducing the new Turbo Algae Scrubber! (Rev 4)
- Thread starter Turbo's Aquatics
- Start date
- Tagged users None
Users Who Are Viewing This Thread (Total: 1, Members: 0, Guests: 1)
OP
OP

Some more pictures
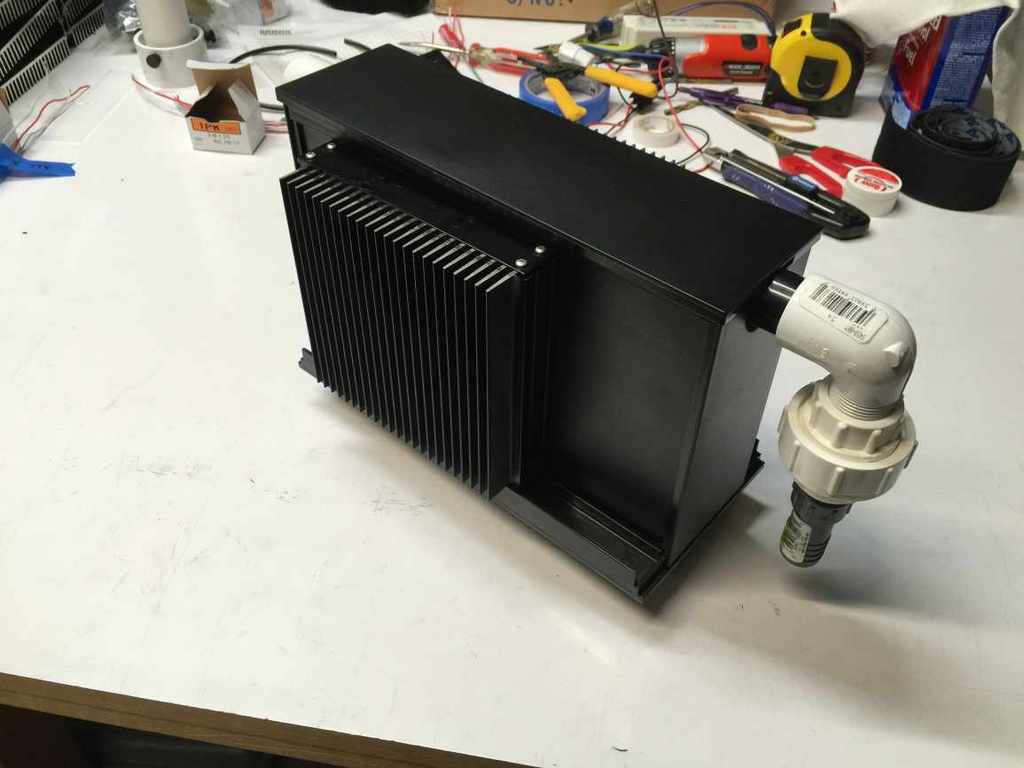
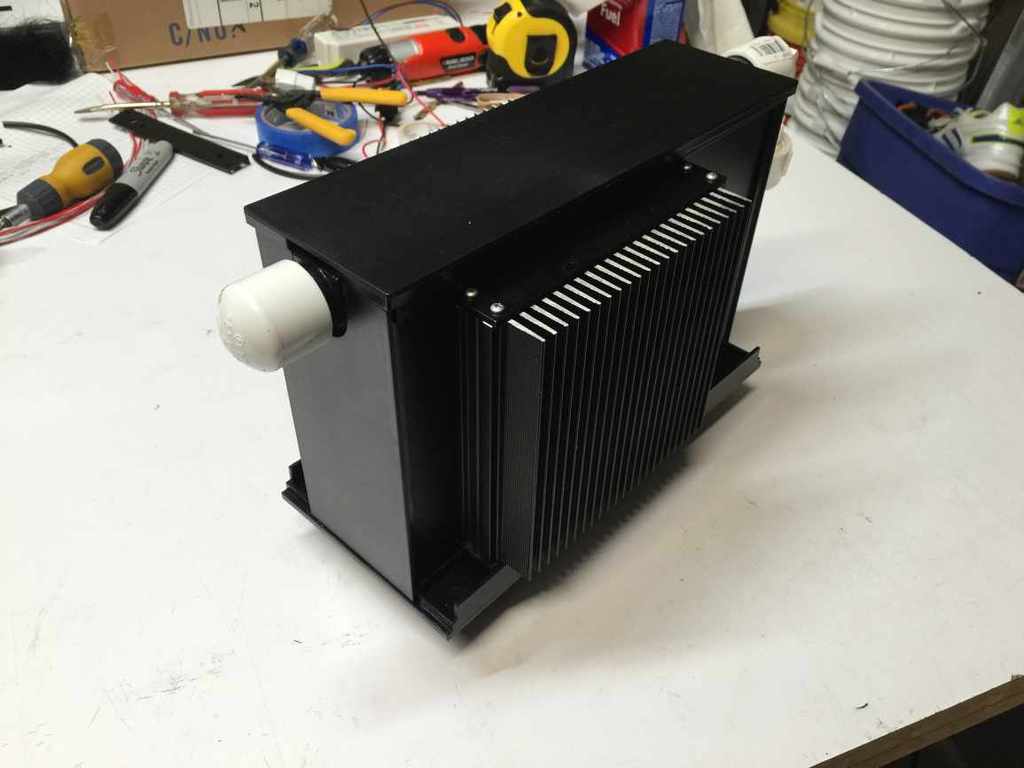
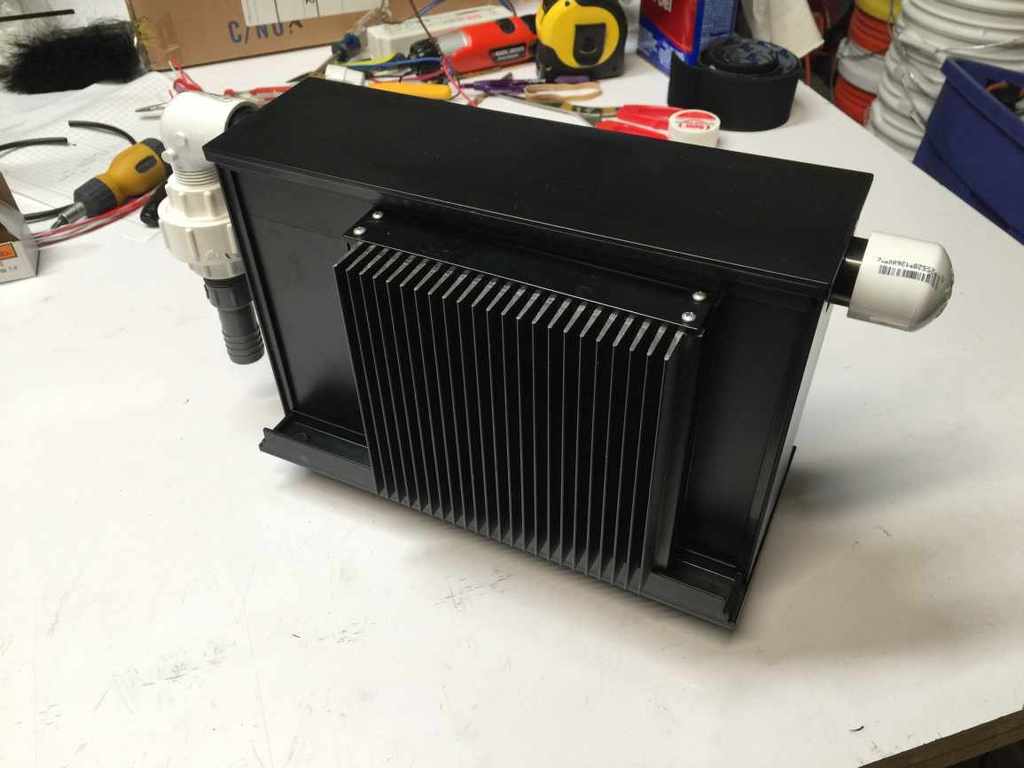
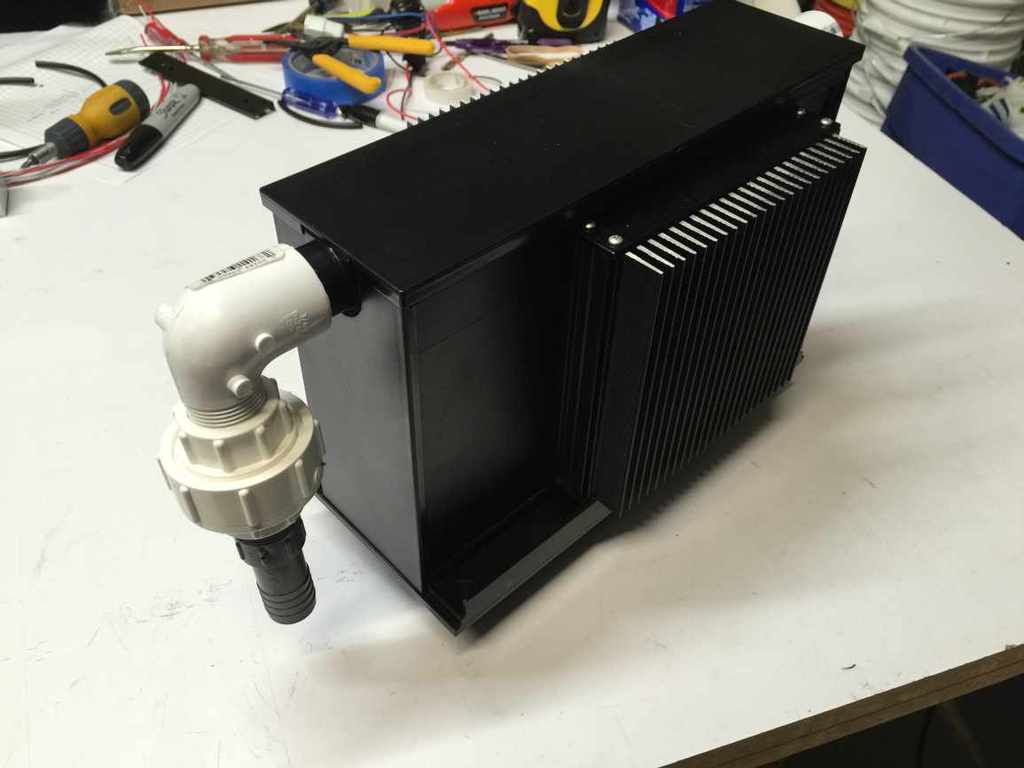
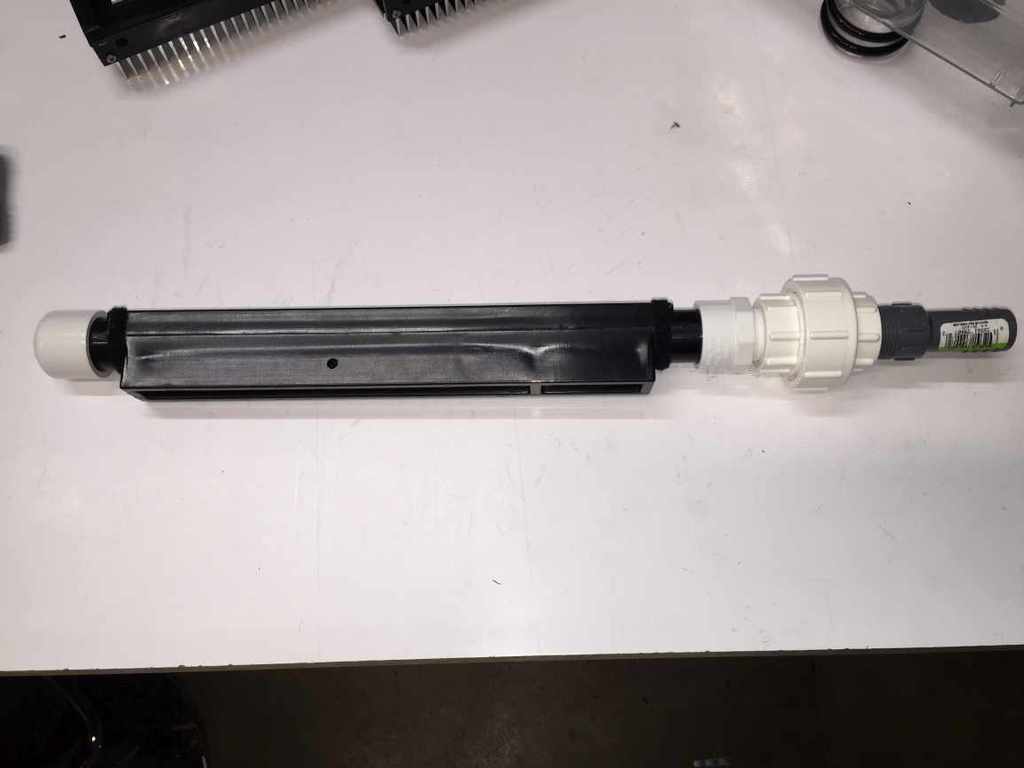
Slot pipe is formed to fit into cutout on Growth Chamber so it doesn't rotate. Velcro added for vibration isolation.
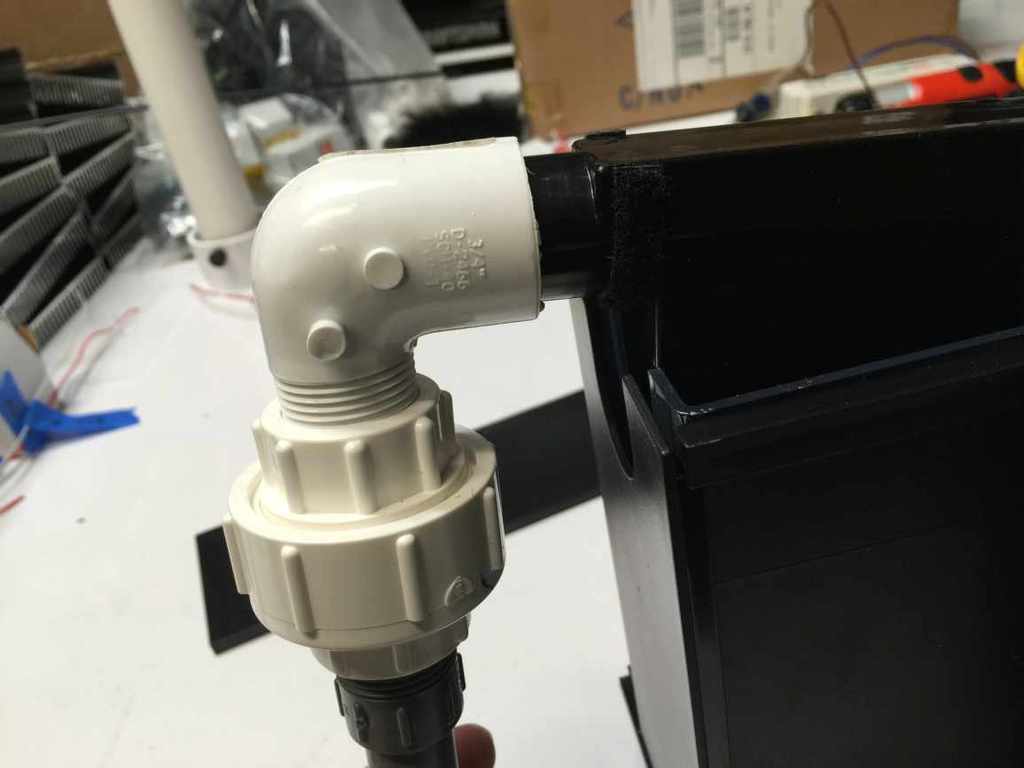
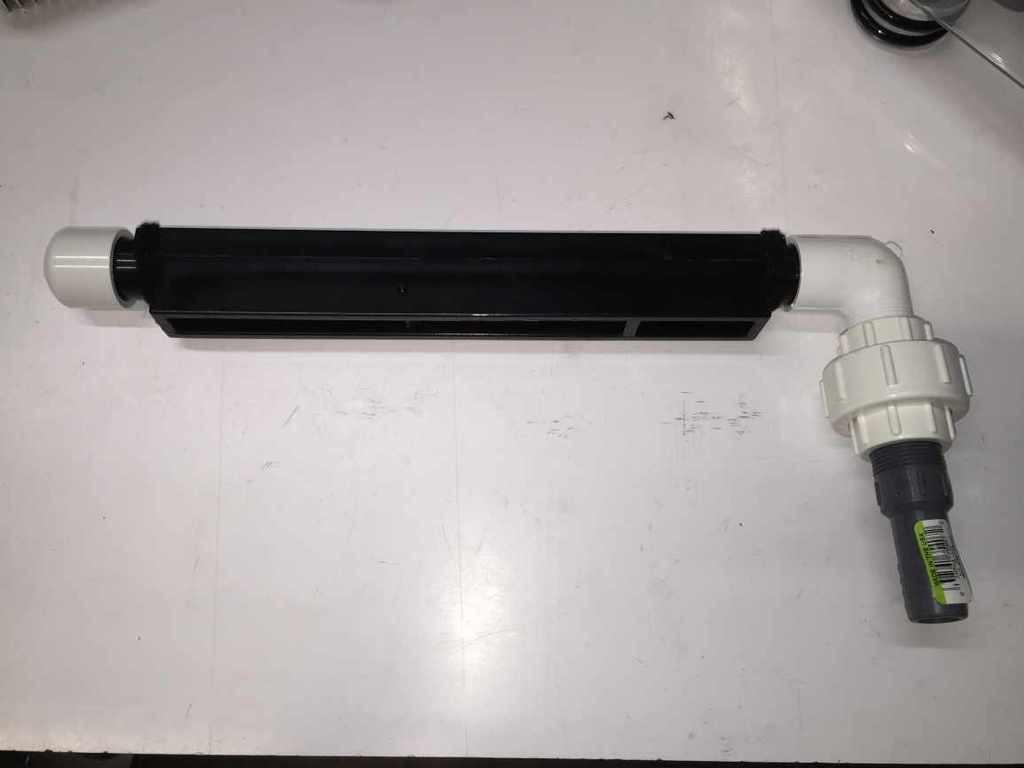
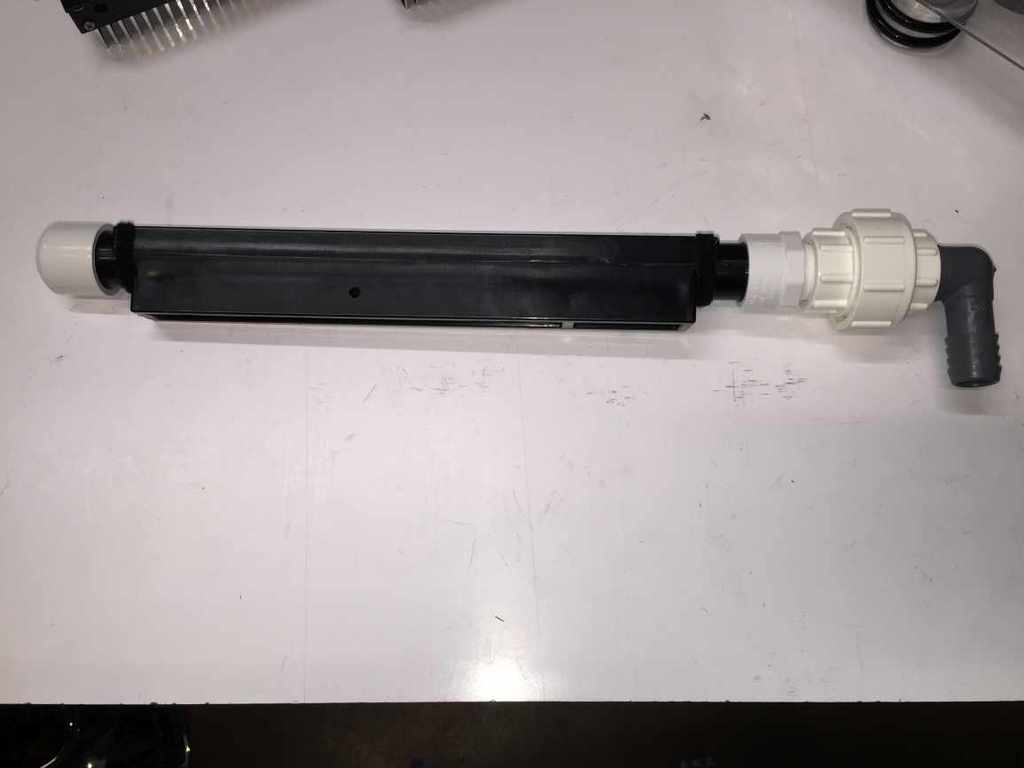
The slot pipe come without fittings bonded to it, so you may configure it for the direction of the water source and the connection fittings. A thread/thread union is included as well as a slip/thread straight adapter and elbow adapter, a thread/barb straight adapter and elbow adapter, and an end cap. A slip/slip union is not included. It is important to note that in order to bond fittings to the slot pipe, you must use transition cement (green type) and you must not apply primer to the ABS slot pipe.
Example configurations
Slot pipe is formed to fit into cutout on Growth Chamber so it doesn't rotate. Velcro added for vibration isolation.
The slot pipe come without fittings bonded to it, so you may configure it for the direction of the water source and the connection fittings. A thread/thread union is included as well as a slip/thread straight adapter and elbow adapter, a thread/barb straight adapter and elbow adapter, and an end cap. A slip/slip union is not included. It is important to note that in order to bond fittings to the slot pipe, you must use transition cement (green type) and you must not apply primer to the ABS slot pipe.
Example configurations
OP
OP
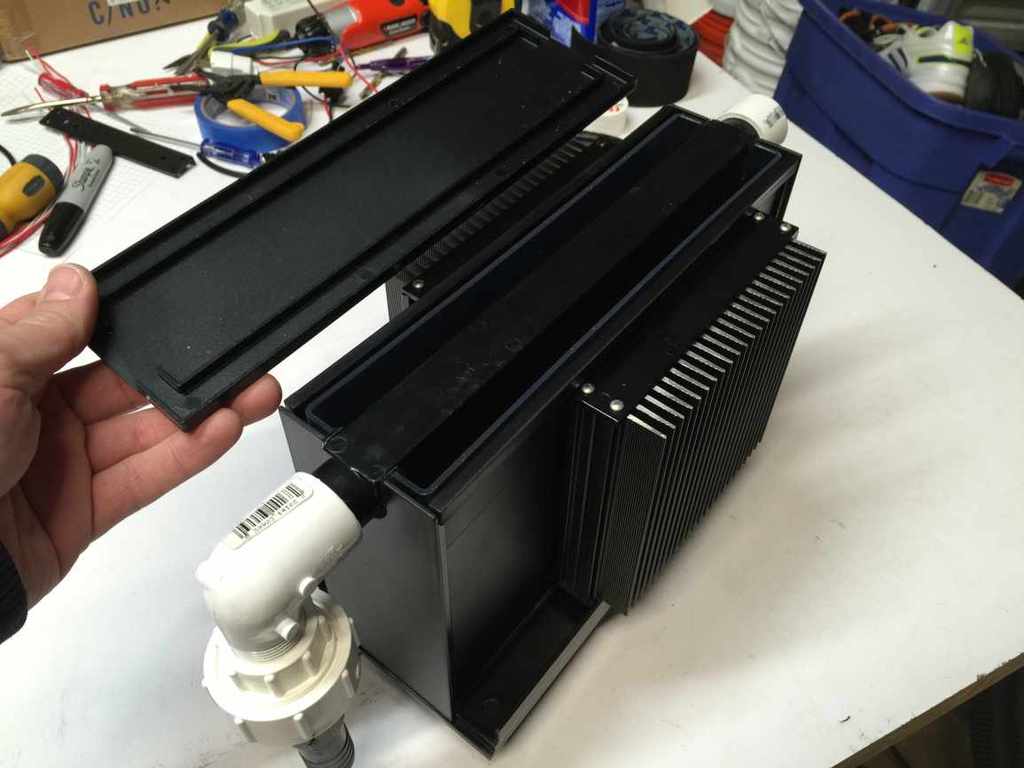
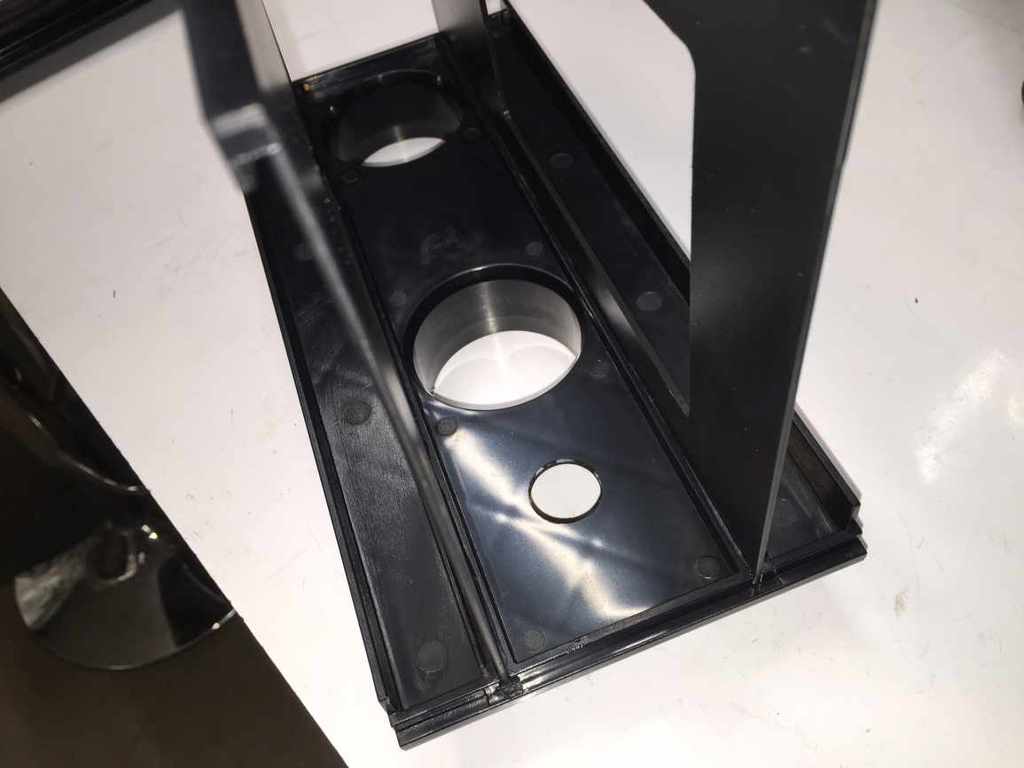
Plastic parts and light fixtures (not completed in this pic)
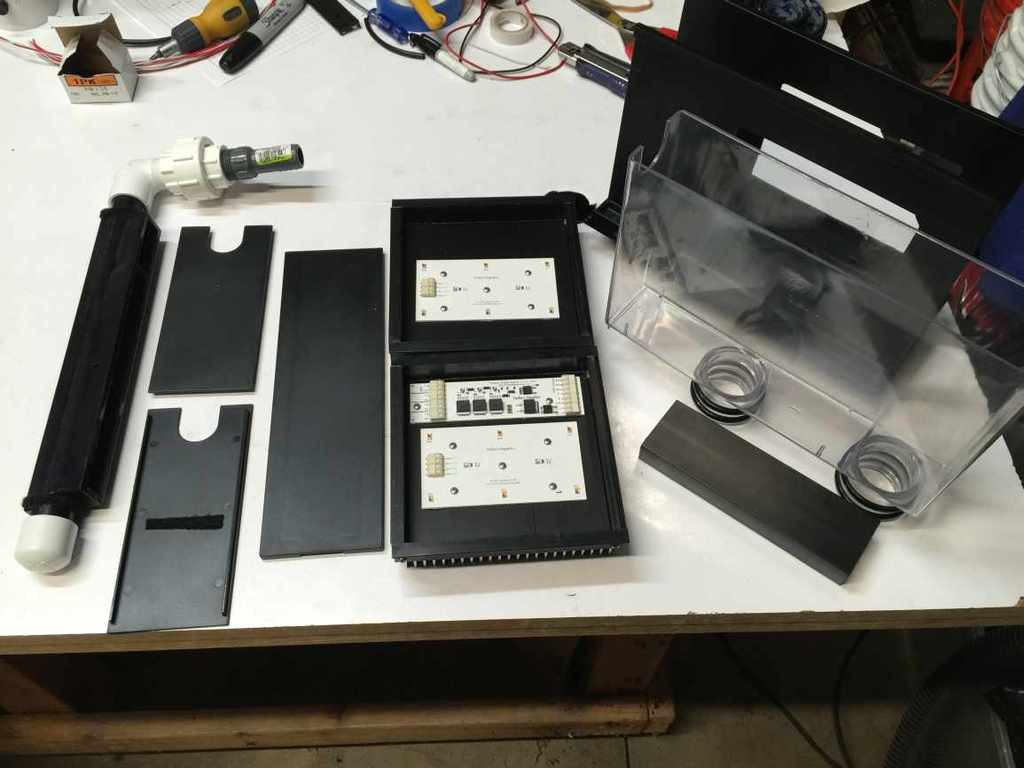
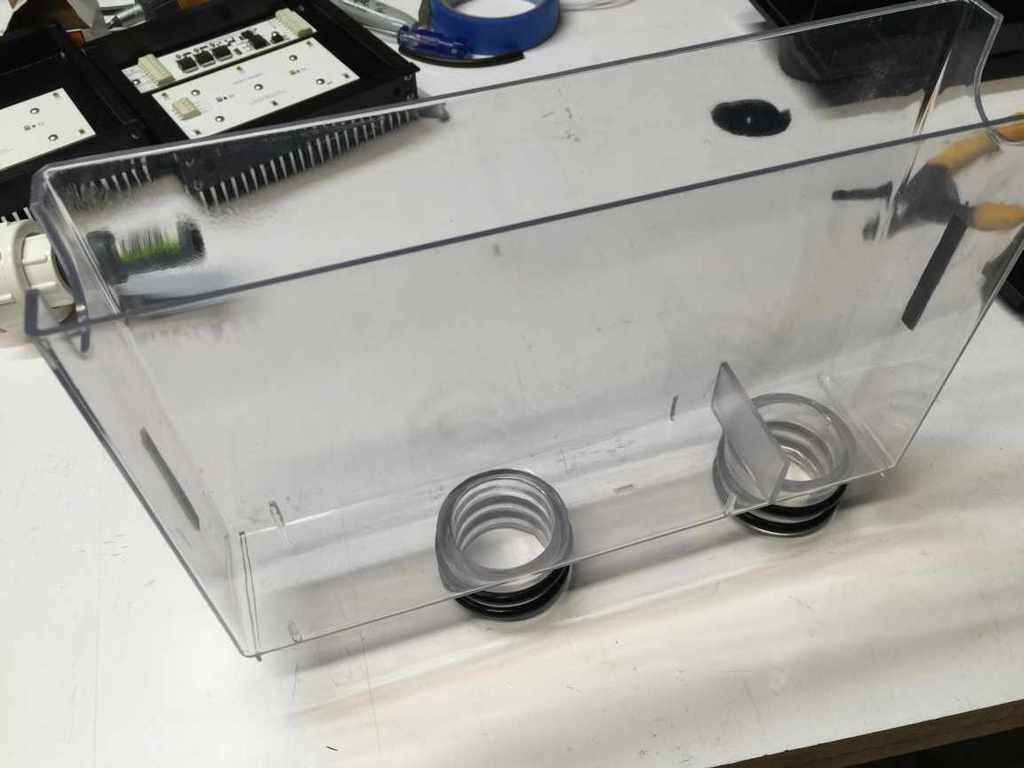
The growth chamber is made of clear polycarbonate and it almost completely indestructible. It has guides molded in for the false bottom (shown in pic above) as well as a barrier separating the main area of the Growth Chamber from the Emergency Drain section. I will also be producing snap-on extensions to this barrier for enhancing 3D growth. The seal extensions have glands (grooves) for holding a total of 4 heavy duty o-rings (3/16" diameter cross section) which provides a dual seal on each drain to ensure no leaking past the seal. The dual o-rings also serve to keep the growth chamber positioned straight up and down within the base for a perfect fit, every time. A small tube of silicone grease (reef safe) is included.
The bottom of the main section of the Growth Chamber has a draft to it, so that when you shut off the water flow in preparation for cleaning/harvest, the water will not pool on the bottom and then pour out as you maneuver the Growth Chamber out of your sump area. This means you don't have to worry quite so much about holding your hand under that drain extension.
In the above 2 pics you will notice there is a strip of velcro attached to the ends of the Growth Chamber as well as to the inside of the End Cover Plates. This is due to one of those "well, that' didn't turn out exactly as I had hoped" type of things: the End Cover Plates don't lock into the Heat Sink Groove in the base and at the top of the J-channel just quite right. To fix that, I am having this part redone with an offset tab to grab the edge of the J-Channel. Everyone will receive this replacement part when it is ready. Until then, the velcro works to hold the End Cover Plate in position and it is not difficult to remove and replace.
Here is the underside of the Base - it has ribbing added for structural support against flexing. The ABS may be drilled to secure it to support braces with, for instance, zip ties or nylon thumbscrews.
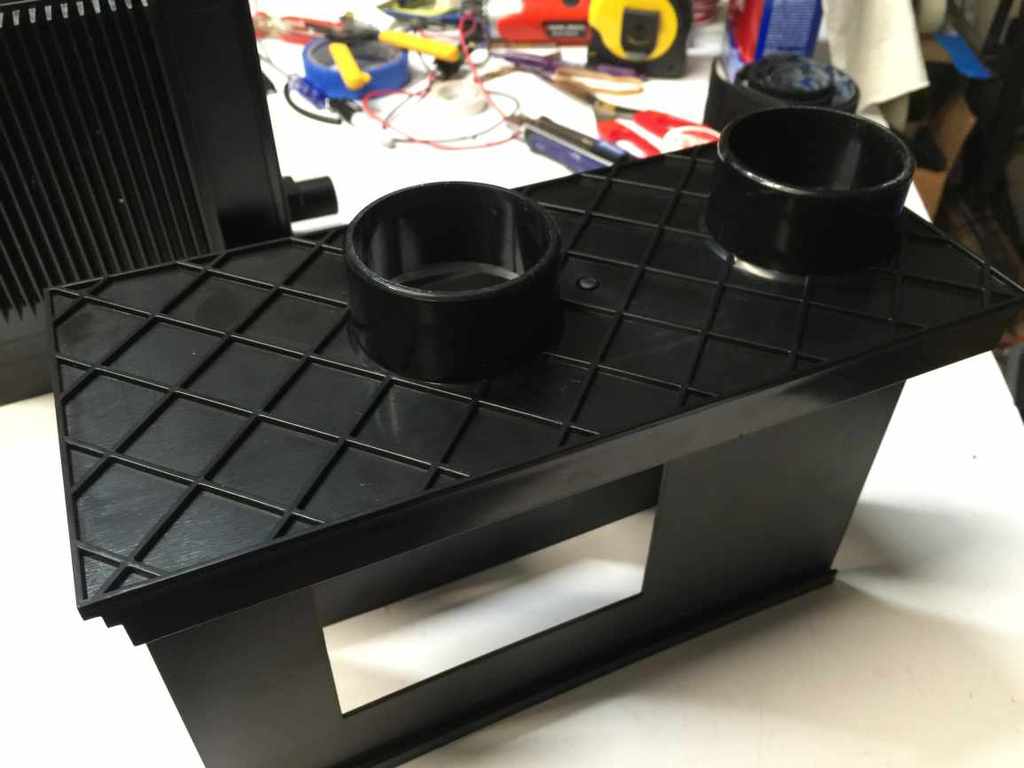
The base with J-channels bonded in place (comes assembled) showing the Growth Chamber removal access hole. Generally this is not needed, but if you forget to keep the o-rings lubricated or a suction develops between the o-ring seal sections, you might have a little trouble getting it to initially release. Placing your thumb on the edge of the base and pushing up on the growth chamber from below easily breaks the seal so the growth chamber can be lifted up and slid out the end
The pipe extensions match 2" PVC pipe dimensions. Included are (2) 2" x 1.5" slip/slip adapters which can be friction fit or solvent welded (again, using transition cement with no primer applied to ABS Base)
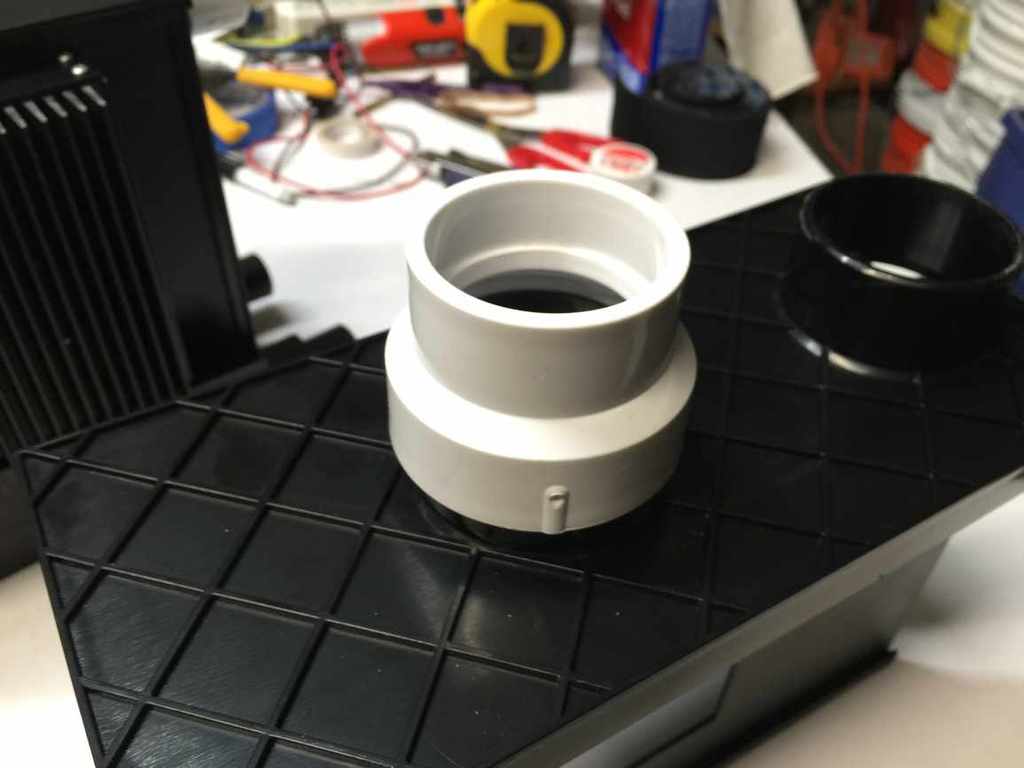
The emergency drain (on end) only need a section of 1.5" pipe extending down to the water level below the unit (just above or no more than 0.5-1" below the water surface). The primary (center) drain will have a valve (not shown) and a detachable bubble blocker. In the past, I used a filter sock hung from the drain handle but this doesn't work extremely well, so I came up with this simple method using a 2" coupler with tapped holes for thumbscrews and a drawstring filter sock (all included)
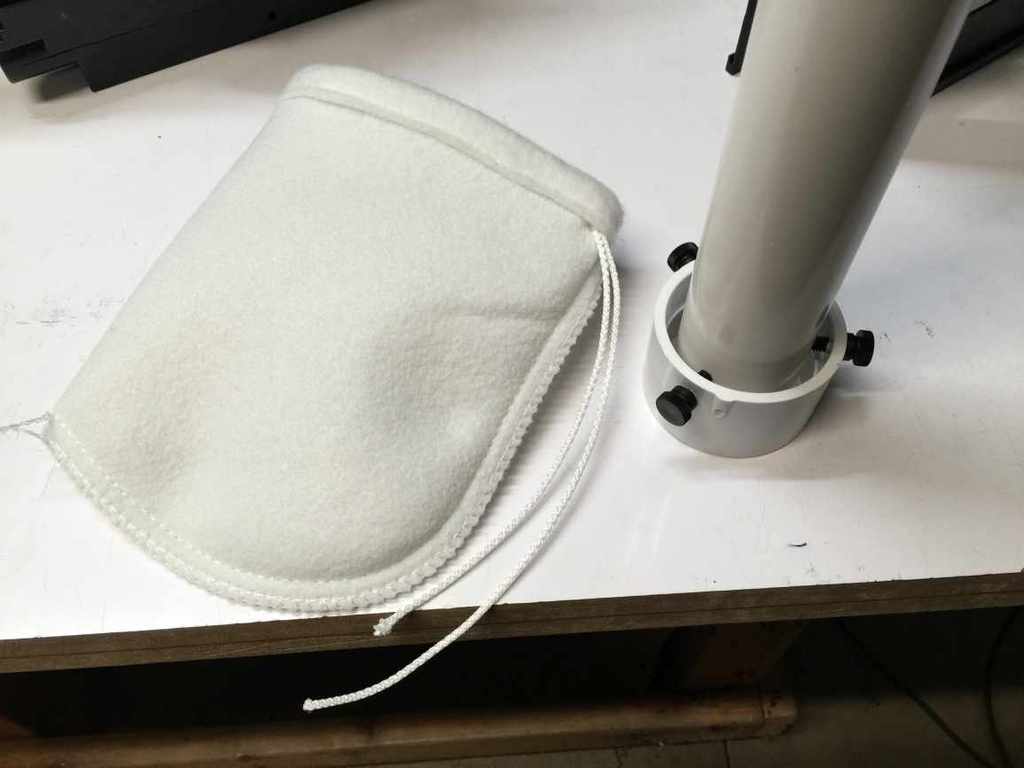
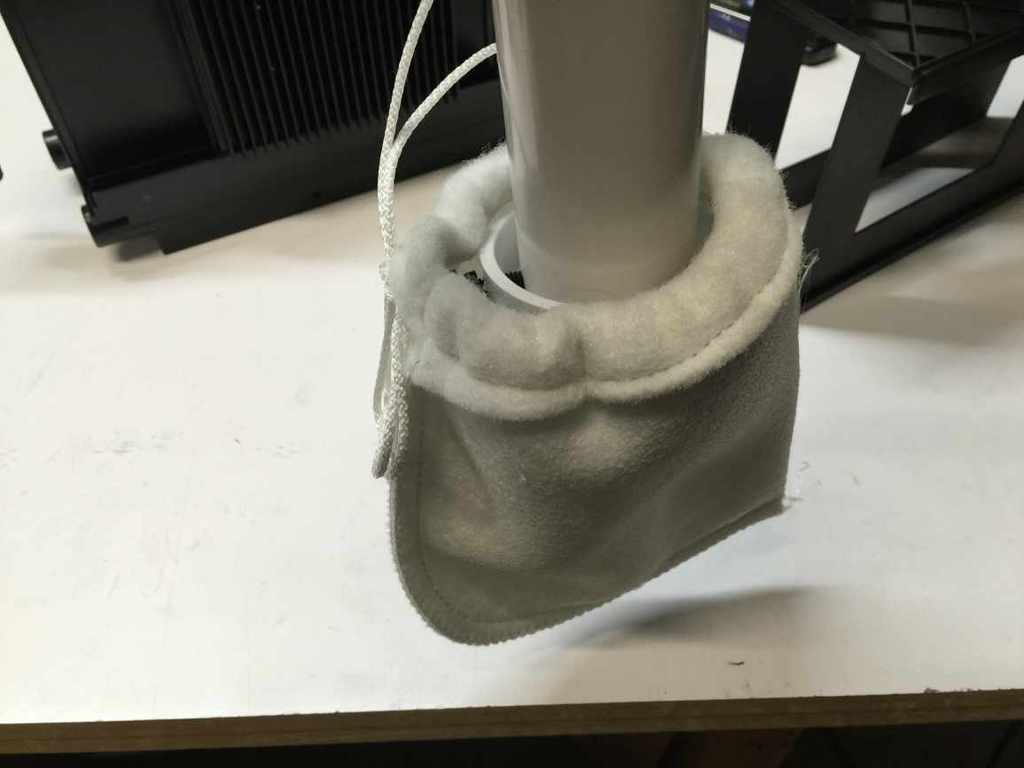
You cut the pipe to length such that the end of the 1.5" pipe is below the water surface (at least 0.5" but not more than 1" - so that it pulls a siphon) then you tune the drain to a full siphon (outflow matches inflow) in order to silence the unit and reduce bubbles (bubbles will be reduced significantly as the screen matures). Then you slide the bubble blocker over the drain and tighten the thumbscrews and cinch the filter bag over the adapter. You can pre-tie the bag so that it slips over the thumbscrews wit little effort, but it won't fall off on it's own.
There are tons of little details put into this design and I'm sure I'm forgetting many of them!
The growth chamber is made of clear polycarbonate and it almost completely indestructible. It has guides molded in for the false bottom (shown in pic above) as well as a barrier separating the main area of the Growth Chamber from the Emergency Drain section. I will also be producing snap-on extensions to this barrier for enhancing 3D growth. The seal extensions have glands (grooves) for holding a total of 4 heavy duty o-rings (3/16" diameter cross section) which provides a dual seal on each drain to ensure no leaking past the seal. The dual o-rings also serve to keep the growth chamber positioned straight up and down within the base for a perfect fit, every time. A small tube of silicone grease (reef safe) is included.
The bottom of the main section of the Growth Chamber has a draft to it, so that when you shut off the water flow in preparation for cleaning/harvest, the water will not pool on the bottom and then pour out as you maneuver the Growth Chamber out of your sump area. This means you don't have to worry quite so much about holding your hand under that drain extension.
In the above 2 pics you will notice there is a strip of velcro attached to the ends of the Growth Chamber as well as to the inside of the End Cover Plates. This is due to one of those "well, that' didn't turn out exactly as I had hoped" type of things: the End Cover Plates don't lock into the Heat Sink Groove in the base and at the top of the J-channel just quite right. To fix that, I am having this part redone with an offset tab to grab the edge of the J-Channel. Everyone will receive this replacement part when it is ready. Until then, the velcro works to hold the End Cover Plate in position and it is not difficult to remove and replace.
Here is the underside of the Base - it has ribbing added for structural support against flexing. The ABS may be drilled to secure it to support braces with, for instance, zip ties or nylon thumbscrews.
The base with J-channels bonded in place (comes assembled) showing the Growth Chamber removal access hole. Generally this is not needed, but if you forget to keep the o-rings lubricated or a suction develops between the o-ring seal sections, you might have a little trouble getting it to initially release. Placing your thumb on the edge of the base and pushing up on the growth chamber from below easily breaks the seal so the growth chamber can be lifted up and slid out the end
The pipe extensions match 2" PVC pipe dimensions. Included are (2) 2" x 1.5" slip/slip adapters which can be friction fit or solvent welded (again, using transition cement with no primer applied to ABS Base)
The emergency drain (on end) only need a section of 1.5" pipe extending down to the water level below the unit (just above or no more than 0.5-1" below the water surface). The primary (center) drain will have a valve (not shown) and a detachable bubble blocker. In the past, I used a filter sock hung from the drain handle but this doesn't work extremely well, so I came up with this simple method using a 2" coupler with tapped holes for thumbscrews and a drawstring filter sock (all included)
You cut the pipe to length such that the end of the 1.5" pipe is below the water surface (at least 0.5" but not more than 1" - so that it pulls a siphon) then you tune the drain to a full siphon (outflow matches inflow) in order to silence the unit and reduce bubbles (bubbles will be reduced significantly as the screen matures). Then you slide the bubble blocker over the drain and tighten the thumbscrews and cinch the filter bag over the adapter. You can pre-tie the bag so that it slips over the thumbscrews wit little effort, but it won't fall off on it's own.
There are tons of little details put into this design and I'm sure I'm forgetting many of them!
OP
OP
A little clarification about the bubble blocker:
The primary purpose of the filter sock is not to actually filter, it is just there to help control bubbles from flying around the sump (or tank). Filter socks will trap microscopic baby copepods that fall off the screen, you want these to stay in your tank...so I recommend installing the sock slightly below the water level. Alternatively, you can use it as a filter sock by cinching the bag higher up on the drain. The 2" coupler with thumbscrews creates a gap for water to freely flow out of the bubble blocker at or near the water surface, where the bubble will have more likelyhood of rising to the surface vs getting caught up in the flow towards the return pump.
At first, with a new screen, bubbles are just flat out hard to control because water falls freely across the screen and entrains air along the way - there is just no good way to prevent this without running all the flow through the filter sock (which is fine to do at first to prevent this - just cinch the sock up higher, around the pipe). But as algae grows and the screen matures, the bubbles will almost completely disappear by controlling the drain with a valve (tuned siphon). I run 3 scrubbers without any filter socks or bubble blockers, and one turns nearly 3000 GPH with a 6" sump water operating level.
OP
OP
No I just haven't shown it yet, bear with me please I am under a ton of pressure right now, everything is hitting me at once - work, family, you name it
OP
OP
Another uber high quality video (sarcasm)...You'll just have to take my word for it that I actually know how to make a halfway decent product video. Now just isn't the time for that!!
Thanks for the videos. Now I'm pumped for my L4!
OP
OP
I will have limited phone access from Friday 2/26 through Wednesday 3/2. The limit will be determined by my wife - who has total control over the hotel safe code and whether or not my phone is in there. So if I don't get back to you right away, that's why!
I couple friend of ours is getting married on Leap Day in Cozumel - the guy's idea, of course. Hope he never forgets an anniversary because then it's 4 years of living that down. Of course the timing of this sucks because that does delay the whole L2 rollout a bit - but this has been planned for over a year so there's nothing I can do about it that wouldn't involve me getting a black eye followed by divorce papers. It didn't help that work kicked into high gear Monday, followed by my wife getting a stomach bug Tuesday. Can anyone tell me why things happen like that?!?!? Pretty sure I hear a chorus of tiny finger sized violins right now though after saying where I'm going.
But anyways, I did get the first few units out the door before I left. I hope my wife gets better (alcohol seems to be helping already, even in the airport...yes, drinking my 2nd margarita before 11am - it's going to be one of those trips) and also hope this trip goes better than our Universal Orlando disaster (which was where one kids ended up in the hospital and her & wife missed pretty much the whole trip). I'm trying to talk my wife into doing some diving, but we watched Open Water a few years back, probably a mistake.
Right now the "confirmed" wait list for the L2 sits right at about 75, I've weeded the overall list from ~250 down to ~175. That means if I've contacted you directly and verified your interest in an L2, you will have yours within a month.
Thanks everyone for your patience, especially those of you in the first group who already paid and agreed to wait until next week for their unit to ship.
Have fun!!!
Waiting on my L2. Should ship this week, once Bud gets back from Cozumel. Looks pretty sweet!
OP
OP
I got back home late last night (walked in the front door around 11:30pm), catching up on many things. As soon as the next unit is ready to ship out the door, I'll take a full set of detailed pics and some "decent" video and post that. I just wasn't able to squeeze that in last week.
OP
OP
Absolutely. It also must be above the maximum possible water level in the sump. So if you planned things out such that your sump has enough volume to handle the draw-down upon a long power loss that happens after, say, you have an ATO pump stick "on" and dump all your top off water into your system, that would be the "oh @#$%" maximum and you would want to be above that - at least, the light fixtures would have to be above that. The heat sinks can sit in SW and get cleaned up if you really need to set it below the sump rim. But the LED boards must be above water, or they pop and fry on water contact, and it's not pretty.Does it have to be above the water line in a sump?
Similar threads
- Price: 500
- Shipping Available
- Replies
- 10
- Views
- 357
- Price: 650
- Shipping Available
- Replies
- 3
- Views
- 170
- Replies
- 6
- Views
- 184

- Replies
- 5
- Views
- 140


