- Joined
- Dec 15, 2018
- Messages
- 43
- Reaction score
- 15
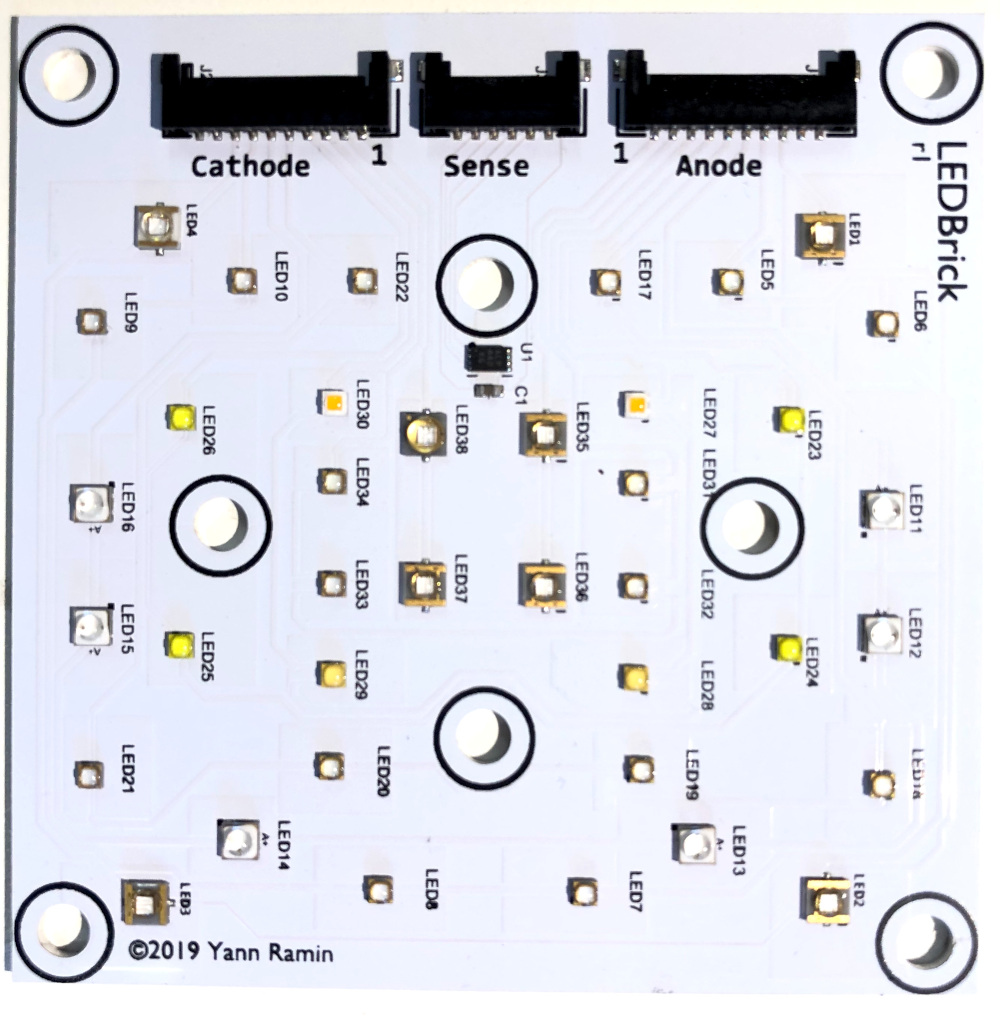
nice! N3535U-UNx1 semis?
looks like channels are split over the board nice.
hmm...
CH1 RBx5
Ch2 395, 2x410 2x420
ch3 1-2xCyan 2-3xBlue
Ch4 3xMint
would be fine for me
so i can pay around with separate color channels ^^ first & easy ReefPi project (my tiny little bit of linux knowledge has a lot of rust^^)
& add a view cree between the panels^^ maybe also 2700k or 4500k or just 4 experimenting (maybe also the cheap Rebel ES 16xRB from Kampo´s build)


")