

OP
OP
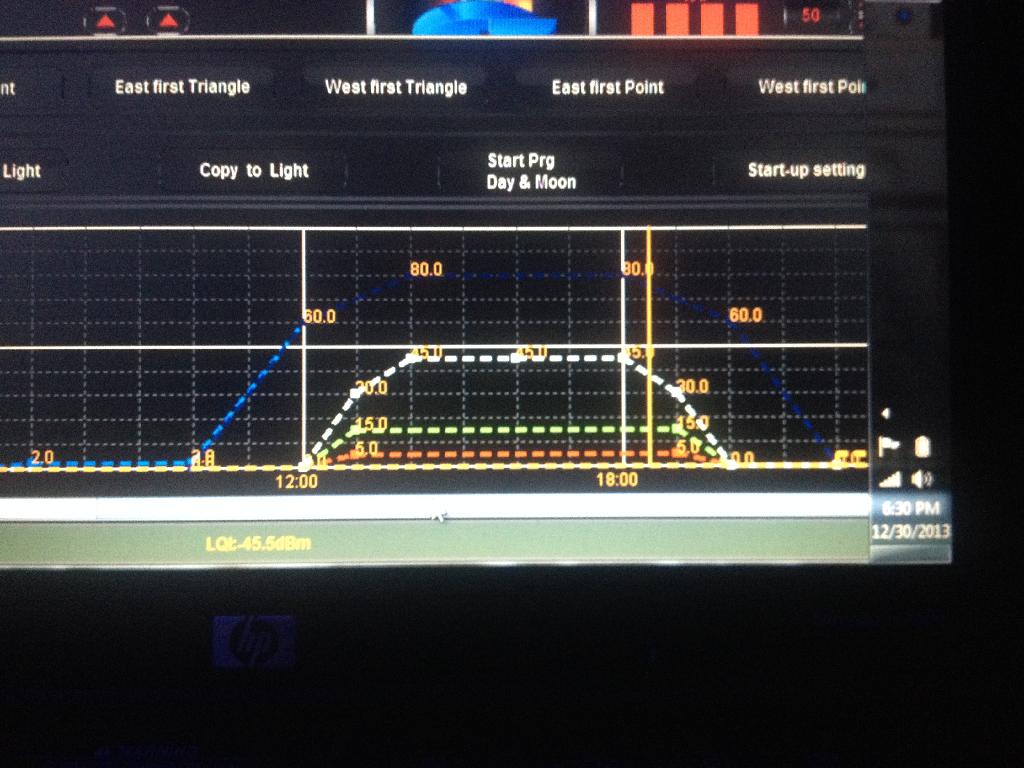
So I learned something new. Did not know that about the paste. Did you use the install kit? It makes it a little easer also. Here is a photo of my light %. The Blue, Royal Blue and UV's follow the same % line:

So.......yesterday, we installed our first extra pad in the light. Instructions that came with the pad were basic, and good, if you like game apps like Machinarium (meaning study the pictures carefully to make sure you understand what you are supposed to do). Here are the things we learned:
1. When they say install the pad as close as possible to the connecting pad, they mean right up tight against it. Our first try had a 1/8" gap, which was too much space for the wiring harness.
2. The tube of paste is heat sink paste and not conductivity paste. It is applied directly behind where the LED lights are, and is intended to help migrate heat away from the pad.
3. Have a pair of very small tip needle nose pliers to help seat the wiring harness. Using finger tips is about as easy as trying to perform surgery on a ladybug, and the pliers made it 1000% easier, but there are small parts and connections everywhere, so be careful. We used jewellers pliers, as they had a pointy tip that was only about 1mm wide at the end and was able to squeeze the connectors together well.
That's it! We installed the pad, cleaned the light, put it back up on the tank, turned it on, connected up the vlink, and it recognized and saw all the new colours right away! Yeah!
Now to figure out the levels for each. Considering there is only 1 green and 2 red, I assume that these should be turned up pretty high (eventually). Same with uv. Will keep them around 25% for now and raise them slowly.
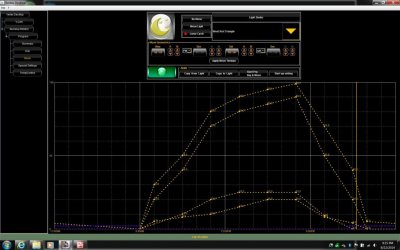
If anyone wants to post their day time light levels would love to see how everyone is running their vertex lights.
Last edited:


")


