


202 Gallon Peninsula Starphire Rimless Build

alxjrz

Active Member
View Badges
Joined
Mar 19, 2015
Messages
149
Reaction score
45
Location
Rio Grande Valley
Rating - 0%
0   0   0
I ordered my new tank this week and I wanted to start this thread to document my progress.
Dimensions are: 60"L x 30" W x 20"H
Starphire all 4 sides @ 3/4"
20" Synergy Reef Overflow
waiting on my leveling mounts to have my local shop build me another powder coated metal stand. I am still kicking the idea of having a canopy built as well, still thinking about it. lol
I will be going 1.5" @ .0781 (14 gauge)
picked up some goodies tonight at my favorite LFS ReefValley. I am going to try this product on this tank.
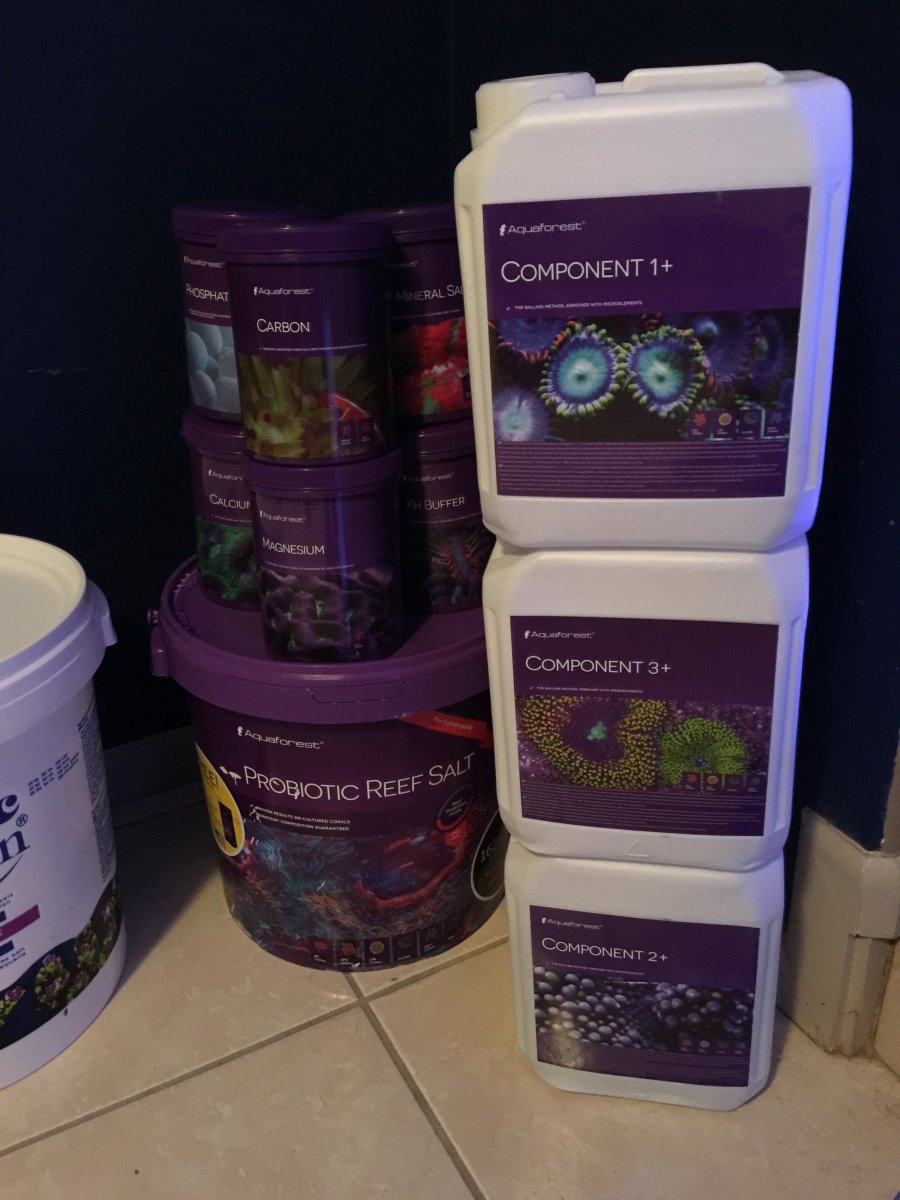
aquaforest.JPG
 
I ordered my new tank this week and I wanted to start this thread to document my progress.
Dimensions are: 60"L x 30" W x 20"H
Starphire all 4 sides @ 3/4"
20" Synergy Reef Overflow
waiting on my leveling mounts to have my local shop build me another powder coated metal stand. I am still kicking the idea of having a canopy built as well, still thinking about it. lol
I will be going 1.5" @ .0781 (14 gauge)
picked up some goodies tonight at my favorite LFS ReefValley. I am going to try this product on this tank.

aquaforest.JPG
Would love the see the progress with this salt following along brotha
 
at some point Aquaforest had issues with batches of salt or at least the salt being sold at my LFS. I picked up 4 buckets and really didn't have any of those issues.
 
Last edited:
December 9th 2015 stopped by the local shop to pick up some square tubing for the stand. I ended up going 1.25" x 1.25" x 1/8" @ 3 x 24' cut in half to fit in my truck.

IMG_3715.JPG
 
December 30 2015 I got a call that my stand was finished and ready for pick up. I was very happy with the results. Stainless Steel 5/8 threaded bolt and nuts with Stainless Steel 2" plates welded together were used so I could level the stand. The craftmanship really came out on this one. I ordered the fancy leveling mounts from Zoro Tools on eBay but they came in wrong and late so I improvised. The entire stand was powder coated including the leveling mounts. from the pictures you can see how generous they were with the powder.

IMG_3880.JPG


IMG_3882.JPG


IMG_3885.JPG


IMG_3904.JPG


IMG_3909.JPG
 
January 11 2016 I picked up a sheet of 3/4" Top Choice Maple Plywood from Lowes. I could have gone with less expensive plywood but most of the sheets were pretty warped.

IMG_3972.JPG


IMG_3971.JPG


IMG_3964.JPG
 
Last edited by a moderator:
Progress!!!
 
January 14 2016 I picked up a 3/4" STYROFOAM R5 Faced Polystyrene Foam Board from Lowes. I made a foam cutter to make this job a little easier on the cuts.

IMG_4015.JPG


IMG_4020.JPG
 
Last edited:
It's been a minute... January 24, 2016 was the last time I posted on this website. I stepped away from Social Media and decided to go Zero Dark Thirty on this Reefing Hobby.

Up until a few months ago I was invited to a meeting. The minute I walked into the Office, It was a cold and dark place but from a distance I see the outline of what seemed to me like a in-wall aquarium as I once had. Turned out the owner is a reefer! I listened to him speak about how he got into the hobby and how an old man got him into the setups that he has now.

So tonight I am updating this thread I started years ago. I will start posting soon and continue my progress.
 
Last edited:
Following along!
 
In Nov 24 2015 I had downloaded the template Synergy had on its website and I modified it. Threw out my history of owning tanks I knew what I wanted and did not want in my new build. I did not want a 2-3" from the top of my custom built tank but I needed to compensate for possible spillover so I increased the whole size and went with a 20" reef overflow. I wanted high turnover and as you will soon see what I did. I sent these plans to the tank builder to precut the hole placement.
 

Attachments

  • IMG_3575.JPG
    IMG_3575.JPG
    130.4 KB · Views: 47
  • IMG_3620.JPG
    IMG_3620.JPG
    111.5 KB · Views: 47
  • IMG_3621.JPG
    IMG_3621.JPG
    90 KB · Views: 47
  • IMG_3622.JPG
    IMG_3622.JPG
    108.6 KB · Views: 54
On January 22, 2016, I experienced some delays with my tank build. The builder accidentally drilled in the wrong location, causing a miscommunication issue. Fortunately, the owner of my local fish store, Jose, took full responsibility. He promptly ordered a new tank for me and had a stand built to sell off the incorrect one. Jose is truly a great guy! The mistaken tank didn't last long in the shop; it sold quickly. It was a rimless design with 3/4" Starphire glass on all four sides.

Luckily, the builder still had enough Starphire glass to create my replacement tank. Back then, there were no cheap knockoff versions of Starphire, so obtaining the genuine article was a bit of a challenge. During that time, Starphire wasn't very popular due to its high cost. I first encountered Starphire when I ordered my custom Oceanic 215, which was showcased at an event in Dallas in 2007. From the beginning of this build, I had factored in the steep costs for this premium material.

IMG_4078.JPG IMG_4241.JPG
 
Last edited:

TOP 10 Trending Threads

HOW DO YOU COVER THE TOP OF YOUR REEF TANK?

  • Full mesh screen

    Votes: 14 51.9%
  • Glass or acrylic lid

    Votes: 4 14.8%
  • Partial screen or cover

    Votes: 0 0.0%
  • Canopy or fitted hood

    Votes: 3 11.1%
  • Open top

    Votes: 5 18.5%
  • A combination of these

    Votes: 1 3.7%
  • Other (Post in the comments)

    Votes: 0 0.0%
Back
Top
Home
Post thread…
Market
What's new