40 Breeder stand- Now a Build Thread

Lingwendil

Well-Known Member
View Badges
Joined
Jul 23, 2012
Messages
529
Reaction score
445
Location
Antioch, California
Rating - 0%
0   0   0
Hey there dudes. I am getting ready to pick up a 40 Breeder as an upgrade from a 20 Long. Looking at stands I was really wanting something that I could use as a bookshelf as well (not doing a sump) and there is little available without building something to suit. I had a few people recommend simply buying a cheap stand, and adding shelves, which will probably end up costing the same as a purpose built stand would. I saw this stand is pretty popular, but it sounds like quality is pretty hit or miss-

https://www.petco.com/shop/en/petcostore/product/imagitarium-brooklyn-metal-tank-stand-40-gallons

The price is definitely right- and it looks like adding shelves would be very easy by simply drilling a couple small holes in each leg to add brackets.

Would this make more sense than building a 2x4 based wooden stand and simply adding shelves to the design? I know it will probably end up costing a similar amount, and I would honestly prefer to do wood anyway. I see a ton of simple wood builds, but I have very little access to woodworking tools at all, so would have to have the wood cut for me mostly, and then I would do the actual fitting and assembly myself. To be perfectly honest I think I would prefer the wooden DIY option.

Any leads on a ~$75 or less wooden stand? The stand the 20 long is on now is wood print over MDF from Petco, and I absolutely hate it- never buying one like that again.

Alternatively, if there is anybody in the East SF bay area that would be interested in helping, let me know! I want something that will last and don't plan on skinning it, or doing anything too fancy. Maybe some torch work to bring out the grain, and a coat of stain and oil is all I would really do.
 

reef lover

It's a reef thing....
View Badges
Joined
Jan 1, 2013
Messages
14,296
Reaction score
44,608
Location
new york
Rating - 0%
0   0   0
I think moding the black stand would look great! Especially without access to tools. :)
 
OP
OP
Lingwendil

Lingwendil

Well-Known Member
View Badges
Joined
Jul 23, 2012
Messages
529
Reaction score
445
Location
Antioch, California
Rating - 0%
0   0   0
Well, after thinking about the matter a bit more, I decided that I really didn't like the steel stand, and really wanted to go with wood. I suppose this will end up as a build thread now :)

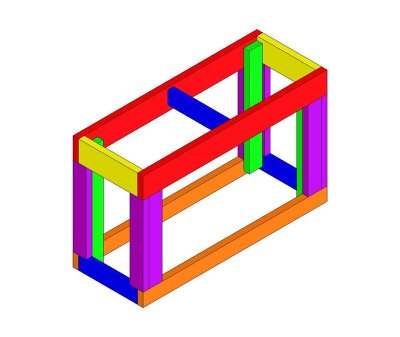
I ended up deciding to go with a Rocketengineer stand, based on these plans from the now legendary thread over on RC-

148629DIY_Stand_Template.jpg

My only real changes will be a center support between the bottom rails as the top has, a plywood top for added rigidity (and because I have a pile of nice plywood scrap to work with in the garage) and that I will be incorporating some sort of plywood shelving, three shelves total including the bottom of the stand. The plan is to do some basic woodburning to accentuate the grain, followed by a finish of Boiled Linseed Oil. Old School :)

Just paid for the lumber from a local place, and they are cutting it all for me. They claim they can do 1/16" tolerance, which should be good enough for me to then clamp them all up and finish them true if needed by hand with coarse sandpaper. ~$75 or so out the door for kiln-dried douglas fir. That's worth it for me for sure, and likely better tolerance than I can do, having not done any large woodworking projects in a few years.

Stand desired dimensions-
~36" tall, 38" long, 20" deep.

Cut list-
4x 38" (orange/red
8x 28" (purple)
4x 26" (green)
6x 17" (blue/yellow)

Planning on using stainless decking screws, 2 1/2", either #8 or #10. Star or square drive.
 

Billdogg

Valuable Member
View Badges
Joined
Jun 3, 2017
Messages
2,091
Reaction score
3,108
Location
Grove City, Ohio
Rating - 0%
0   0   0
So no sump? If not, then shelves are a fine idea that will add not only storage are but will add to the overall rigidity of the already overbuilt design.
 
OP
OP
Lingwendil

Lingwendil

Well-Known Member
View Badges
Joined
Jul 23, 2012
Messages
529
Reaction score
445
Location
Antioch, California
Rating - 0%
0   0   0
No sump, I have a little one that is too curious, as well as more books that I would like a space to display.

Besides, if I was doing a sump, I would go bigger, it's nearly the same amount of work, but a 40 is the most we can really manage size wise in our living situation.
 
OP
OP
Lingwendil

Lingwendil

Well-Known Member
View Badges
Joined
Jul 23, 2012
Messages
529
Reaction score
445
Location
Antioch, California
Rating - 0%
0   0   0
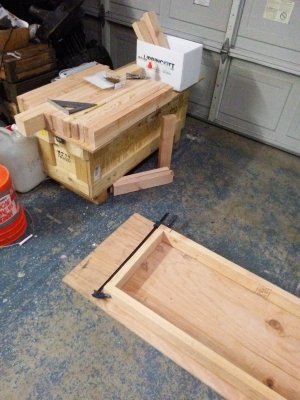
Brought the wood home, it looks like only minor trimming will be required on a couple of the boards to make them equal, not bad for 22 pieces total! Better accuracy than I could do with the tools I have on hand. Now I need to borrow a sander, and buy some clamps. I also picked up GRK R4 #9, 2-1/2" star-drive screws, rather than stainless.
 
OP
OP
Lingwendil

Lingwendil

Well-Known Member
View Badges
Joined
Jul 23, 2012
Messages
529
Reaction score
445
Location
Antioch, California
Rating - 0%
0   0   0
What, mine?

I don't mind at all, I'm going to post up all the details as I go, it helps me keep track and stay motivated better anyway. Since mine is going to have a removable bookshelf section I figure others would find it useful too.
 
OP
OP
Lingwendil

Lingwendil

Well-Known Member
View Badges
Joined
Jul 23, 2012
Messages
529
Reaction score
445
Location
Antioch, California
Rating - 0%
0   0   0
It'll be that same basic frame, with two added shelves, I'm planning to make them easily removable for upgrades later on. I'll also be attaching my light hanging arms to the back as well, with threaded inserts so they can easily be installed and removed without damage to the wood.
 

Eb1air

Community Member
View Badges
Joined
Jan 8, 2019
Messages
97
Reaction score
79
Rating - 0%
0   0   0
I do need to put in my 2 sense but I would really suggest that you do, do a sump it really helps with success just saying
HAPPY REEFING
 

Eb1air

Community Member
View Badges
Joined
Jan 8, 2019
Messages
97
Reaction score
79
Rating - 0%
0   0   0
Here's my setup sump.fuge first skimmer then return with powerless to doser keep it simple I do a lot of diy to save money but also consider a all in one tank bc once you catch the reef bug you will do the I wish I had this and that lol I've done it just trying to help. Good luck

20190216_163751.jpg


20190219_182815.jpg
 

geekengineer

Active Member
View Badges
Joined
Feb 10, 2019
Messages
427
Reaction score
538
Location
South Aurora
Rating - 0%
0   0   0
yeah I was going to put plywood on the bottom for my 20gal long sump. So yeah you would want to leave room in the center for a sump ideally.
 
OP
OP
Lingwendil

Lingwendil

Well-Known Member
View Badges
Joined
Jul 23, 2012
Messages
529
Reaction score
445
Location
Antioch, California
Rating - 0%
0   0   0
Design goal here is bookshelves, but I want to make that section somewhat easy to remove for eventual upgrades or equipment. Due to the limited space we have in our living situation I really want the space underneath for books at this time, and that's actually one of the main reasons for building rather than buying. I've run sumps in the past, and really don't want to go with one here for various reasons, but will run one on the next eventual larger build.

Believe me, I've had the reefing bug for fifteen years, and I actually don't mind simple, in fact for this setup it will be just fine. The current 20 long has been going for four years, and this will be the upgrade. I've had plenty of setups before and would go bigger if I could, and go with a sump and refugium, but not right now.

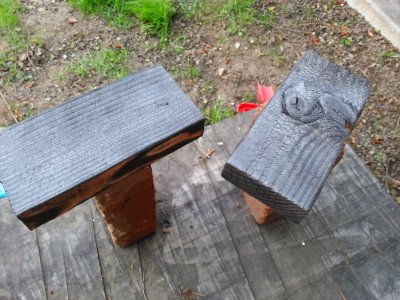
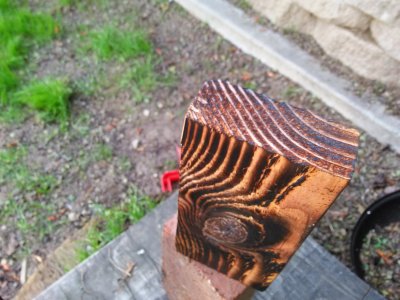
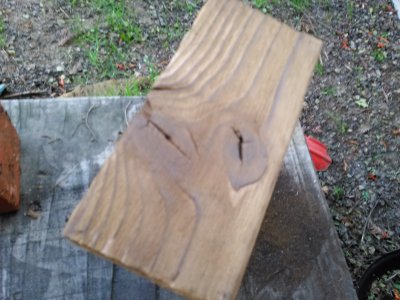
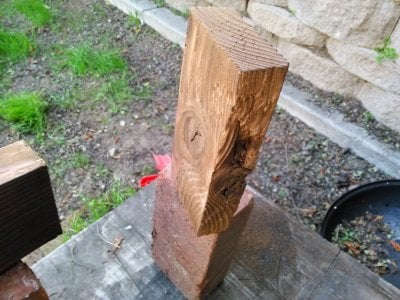
On a design note, I started on the tests for the wood finish techniques I want to try. After seeing a handful of really nice builds of various furniture and wooden things using the "shou sugi ban" technique, I really wanted to try something similar. Since 2x4 lumber is already several magnitudes overbuilt for this application, I figure there's some leeway to play with the technique here.

Take a torch, and run back and forth across the wood until you get a nice black color, with a hint of cracking- like reptile skin-

IMG_20190219_164912.jpg

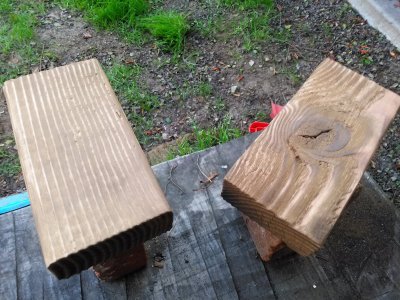
I tried a lighter touch on the opposite side to see how it turns out as well-

IMG_20190219_164921.jpg

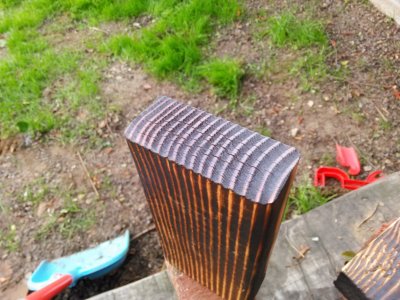
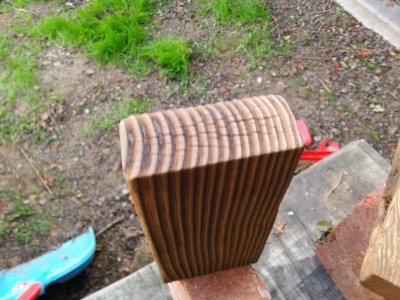
You can see the effect is less pronounced on the sides for sure. But the end grain looks lovely (please note, the cracks were already there)-

IMG_20190219_164929.jpg

IMG_20190219_164947.jpg

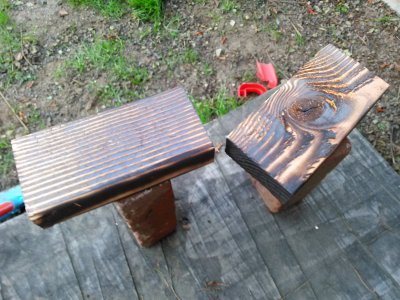
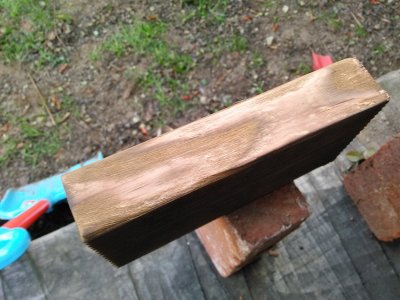
After brushing the heavy stuff down with a wire brush, and taking a scotchbrite to the lighter toasted one-

IMG_20190219_165541.jpg

IMG_20190219_165546.jpg

IMG_20190219_165554.jpg

IMG_20190219_165602.jpg

IMG_20190219_165608.jpg


It looks way, way better in person, but my initial thought is that I really, really like it. It looks best on straight grain for sure, but I'll make more decisions once I get some oil on it, and dig through the pieces on hand to see how many I have that look suitable.
 
Last edited:
OP
OP
Lingwendil

Lingwendil

Well-Known Member
View Badges
Joined
Jul 23, 2012
Messages
529
Reaction score
445
Location
Antioch, California
Rating - 0%
0   0   0
Yeah, I just grabbed a pair of clamps and started on the top frame tonight. I plan to have it mostly done tomorrow night, I need to clamp up all of the uprights together and do some minor adjustments to get them all perfect, a couple are a smidge long. I had a small hiccup where the corner of one of the boards split about two inches from the end, but I was able to glue and clamp it, so it shouldn't be an issue as it was pretty clean.

I'm loving these screws, no predrilling needed, and they go in like butta' without fuss. Highly recommended.

IMG_20190223_194421.jpg
 

Looking back to your reefing roots: Did you start with Instant Ocean salt?

  • I started with Instant Ocean salt.

    Votes: 161 74.2%
  • I did not start with Instant Ocean salt, but I have used it at some point.

    Votes: 17 7.8%
  • I did not start with Instant Ocean salt and have not used it.

    Votes: 35 16.1%
  • Other.

    Votes: 4 1.8%
Back
Top