75 Gallon Mixed Reef with 40 Breeder sump build

atx100r

Active Member
View Badges
Joined
Oct 9, 2017
Messages
201
Reaction score
117
Location
Illinois
Rating - 0%
0   0   0
Hello all. I'm new to the site and to marine fish in general. I have been in the fresh water planted hobby for many years but only recently decided to take the plunge into the marine side. I started very conservatively with a used 55 gallon tank with a HOB. I later transitioned that tank and added 20L sump with carbon reactor and DIY algae scrubber. I love the hobby so much I have now decided to set things up more traditionally and thanks to the dollar per gallon sale I am the new owner of a 75 gallon and 40 breeder. I thought I would take this opportunity to document my journey.

So after messing around with a 20L sump on my 55 gallon system and realizing how crowded it got in a very short time I decided on my next build to take a harder look at size, space and accessibility. This build at a minimum will include the following.

  • DIY Custom stand to accommodate the 40 Breeder sump
  • Drilling and Install of Internal overflow
  • Install Baffle kit for DIY 40 Breeder sump
  • Transition of equipment from 55G tank into the 75g
 
Last edited:
OP
OP
atx100r

atx100r

Active Member
View Badges
Joined
Oct 9, 2017
Messages
201
Reaction score
117
Location
Illinois
Rating - 0%
0   0   0
Hello all. I'm new to the site and to marine fish in general. I have been in the fresh water planted hobby for may years but only recently decided to take the plunge into the marine side. I started very conservatively with a used 55 gallon tank with a HOB. I later transitioned that tank and added 20L sump with carbon reactor and DIY algae scrubber. I love the hobby so much I have now decided to set things up more traditionaly and thanks to the dollar per gallon sale I am the new owner of a 75 gallon and 40 breeder. I thought I would take this opportunity to document my journey.

So after messing around with a 20L sump on my 55 gallon system and realizing how crowded it got in a very short time I decided on my next build to take a harder look at size, space and accessibility. This build at a minimum will include the following.

  • DIY Custom stand to accommodate the 40 Breeder sump
  • Drilling and Install of Internal overflow
  • Install Baffle kit for DIY 40 Breeder sump
  • Transition of equipment form 55G tank into the 75g
Here is a copy of my design and cutting schedule for the stand build
Plans.jpg


One important note: I pre-drilled everything prior to installing screw. It takes a little longer but I wanted to avoid splitting if at all possible.

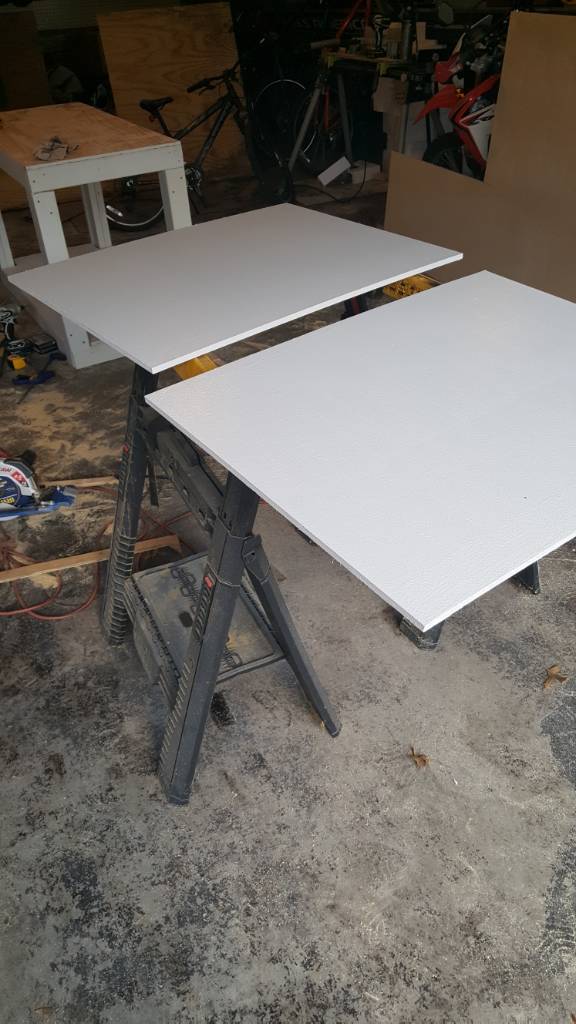
And the pieces cut and primed. I find it easier and quicker to do this prior to install. I am using some spare lumber I have left over from doing some household projects mainly 2x4 and 1/2" plywood.

2x4 cuts:
  1. 25.5" X 4
  2. 33" X 4
  3. 52.5" X 4
  4. 22.5" X 2
  5. 26" X 6
cut boards.jpg


I then set about making my bottom and top frame. If you currently have any of the Med or heavy duty Irwin clamps they now make a corner jig that attaches for around 6$. I also am a big fan of Kreg jigs and used pocket screw for the top and bottom frame.

Squaring the corners
corners.jpg

Completed frames
top and bottom.jpg


Next I started with the bottom frame and added the legs/nailers for the supports. (this design not mine by the way carries the main load on the boards not the screws.) I used a post level from another project and lots of clamps to help in getting everything true. It seems you can never have to many hands.
legs.jpg


Once I had the legs/nailers attached to the bottom frame I then debated how to get the top where I wanted it. I decided to add one piece of the 26" supports to each leg and use this to locate my top. I dry fitted this using claps to make sure everything aligned before I started drilling and screwing.

supports 2.jpg


Once that all checked out and prior to securing the top frame I added the remaining support to each leg.
adding supports.jpg

I then secured the top frame and added my cross support.
center support.jpg

Of course even though I have a 4 car garage the dog has to be right next to me when I'm working...

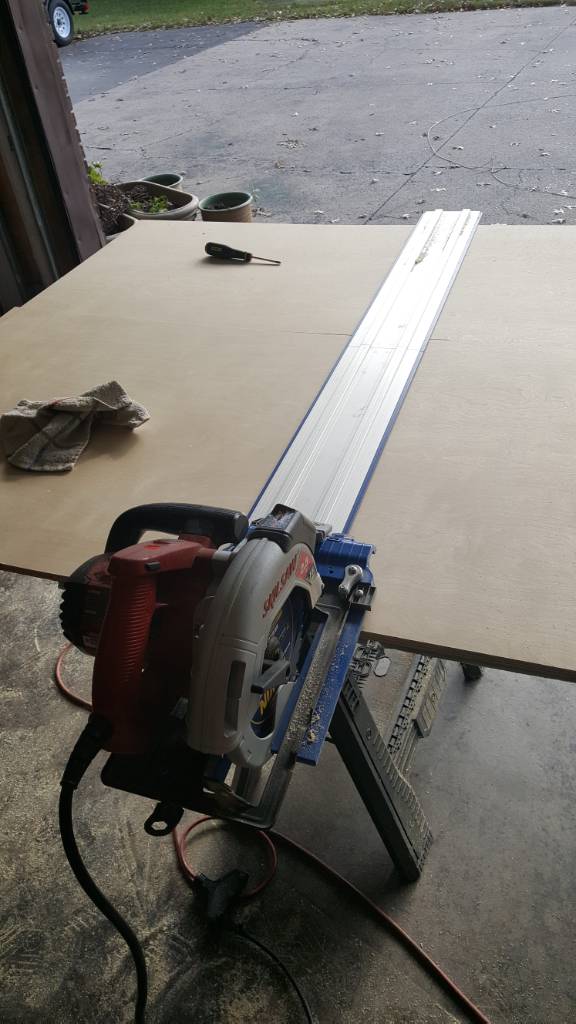
One of the bigger problems I have faced in past projects is ripping long cuts. I currently don't have a table saw so I usually come up with some kind of hand made jig put together with a board and a few clamps. I have had mixed results with this method so I decided to do a little investigating and see what others do. I said earlier I'm a big fan of Kreg and the tools they make. I stumbled across their Accu-Cut system and decided to give it a try. Below is a picture of the track. There is also another piece that attaches to your circular saw. The 2nd picture is of a cut I made with the jig. So far I am very impressed with it and will be using it going forward. One key thing when using it is aligning your saw cut to their aligning system. My saw happens to have a laser on the front so this was pretty easy but it would take some planning without the laser.

kreg accucut.jpg
ripped board.jpg


I then cut out and dry fitted the base-top. I made a slight error here so there is a small gap on the inside edge of each leg. It was late in the day and I probably should have stopped but if there wasnt a flaw it wouldn't be one of my projects...
dry fit base.jpg


I then primed my base and installed it. I then cut out my top and did dry install on that.
top center support.jpg


Next I installed my top.
mounted top.jpg


I decided to fill the rough surface of the plywood with some putty and let it dry before sanding it. I haven't decided what if anything I am going to put over this plywood. I may paint it flat black and leave it but more likely I will find some kind of surfacing to adhere to it but we will see.
top filler.jpg
 
Last edited:
OP
OP
atx100r

atx100r

Active Member
View Badges
Joined
Oct 9, 2017
Messages
201
Reaction score
117
Location
Illinois
Rating - 0%
0   0   0
Had a little time after work last night so I cut, Dry-fit and primed the back side of the side panels. I plan on staining the display side to match my living room furniture. When I did my cuts I cut them long (.5" each side) so they will be even with the face of the front and rear panels when all is installed. I used a scrap piece of the paneling on the front and rear to mark the extra length for the cuts.
a712f7b447e31b2d0a081af052bbc1bd.jpg
118a4ee5107054930bd02f82cc58dfac.jpg
 
OP
OP
atx100r

atx100r

Active Member
View Badges
Joined
Oct 9, 2017
Messages
201
Reaction score
117
Location
Illinois
Rating - 0%
0   0   0
Gt a bit of work done on the stand this weekend. I dry fitted the end pieces and used a piece of scrap to make sure the fornt overhang was correct and would be flush when front is installed.
20171013_162709.jpg


I then cut my front pieces (with matching grain flow) and secured everything with screws. I could have used trim nails but I did want to gain some structural benefit as this is 1/2" sheeting. I also wasnt worried about that raw edge as it will be covered with trim.
20171013_164935.jpg

I then filled all the cracks and countersinks with sand-able stain-able wood filler.
20171014_091345.jpg

Once I had the top, bottom and side pieces installed I started working on the trim. I started on the left side and allowed my first piece to extend out the back roughly 2 " knowing I would trim this once the trim was installed. I used shims and clamps to hold everything in place and adjust prior to nailing anything.
20171014_101027.jpg
20171014_101055.jpg

I decided I was going to use vinyls flooring tiles on the top so I can kind of match the look of my stone fireplace. I sued one of the tile pieces as a guide so I could raise my top trim to hide the side of the tile once installed.
20171014_102013.jpg

Once all looked good I secured everything with finishing nails seated with a set. I then repeated the entire process for the bottom trim.
20171014_140448.jpg

I added some ornamental trim to front sides to give some texture and covered up the wood joint. One note that the selection of stainable trim at my local Lowes was not very good. They had lots of preprimed trim that you could later paint but I wanted to stain the wood so had to make do with what they had. I also cut out a few pieces for the back form some spare sheeting I had laying around. I primed it and anticipate allowing a 3" gap for plumbing and wiring to pas thorough. I thought about just drilling some hole but once this is in place it would be difficult to modify that if the need arises so I errored on the side of more accessibility rather than less. I may regret that decision down the road.
20171015_092234.jpg

I then sanded everything and got it ready for its first coat of stain.
20171015_093358.jpg

I like to use a brush and foam roller when applying stain. The roller leaves some bubbles but it allows me to work faster and keep a wet edge. I let it start to dry 10-15 minutes then go back over it with the brush to knock down the bubbles and smooth out the appearance. I'm no expert by any means but it works for me.

20171015_093547.jpg

First coat is on but didn't get a chance to work on it at all on Sunday. I noticed I missed sanding 2 screw heads so I will go back and try to fix those before I put another coat on. Ill hit the first coat with 00-000 wire wool be starting on the 2nd coat.
20171015_102126.jpg

I was originally gong to put doors on the front but have decided against that. I think I am going to do one panel that is completely removable. This way it will be totally out of the way while I am in working on the sump and give me full access. I haven't work out the design completely yet but I am thinking I will have a ledge and possible pin on the bottom and 2 securing mechanisms on the top. I will frame it out with some trim and possible put a design in the middle to add some artistic flair.
 

joec

Well-Known Member
View Badges
Joined
Nov 29, 2016
Messages
782
Reaction score
490
Rating - 0%
0   0   0
Great job, will be done the same config soon so following along. Looking forward to you single removable panel idea. Magnets perhaps?
 
OP
OP
atx100r

atx100r

Active Member
View Badges
Joined
Oct 9, 2017
Messages
201
Reaction score
117
Location
Illinois
Rating - 0%
0   0   0
JO thanks for commenting...I picked up a few spring clips from lowes this weekend. I tried the magnet thing on an earlier build with mixed success. Admittedly I did have trouble finding strong magnets. I also didn't want to use thin wood (so this will be on the heavy side 1/2" ply) on this panel as keeping noise down is a goal because this sits in my living room. Hopefully I will have that all worked out this weekend.
 
OP
OP
atx100r

atx100r

Active Member
View Badges
Joined
Oct 9, 2017
Messages
201
Reaction score
117
Location
Illinois
Rating - 0%
0   0   0
OK so I got some time Saturday to work on the stand and drill the tank. It was bit of an ordeal regarding the tank. I purchased the 75 gallon tank at the Petco $1 per gallon sale. I ran across a thread purely by accident that another user recently posted indicating the 75 gallon tank had he recently purchased at Petco had tempered glass on all side. The Aqueon data sheet located at BRS and on here indicates only the bottom is tempered. So I took my laptop and some polarized glasses out to the garage to check my tank and sure enough all panels were tempered. I returned the aquarium Saturday morning and just for grins I took my laptop and glasses with me as I new they had 1 more on the floor. I checked it and this one checked as tempered only on the bottom panel so I did the swap and took it home. So now I'm back in business...I live in a rural area so getting a 75 gallon tank from another source would be difficult if not expensive.

First thing I did was cut out my main panel for the front door. I matched the grain and cut it about 1/16 of an inch smaller out of 1/2" finished plywood. I then started to cut my trim pieces and dry fit them as I went.
20171021_104218.jpg


I also dry fit (installed a single finish nail in each piece to hold it) them on the stand itself to make sure all my lines ran true.
20171021_110519.jpg


I've noticed no matter how hard I try I always end up with some primer on the side of the wood I plan on staining. It is a good idea to remove this prior to assembly as it is much easier to do.

20171021_112915.jpg


Everything was checking out but I must admit the last piece was tough to match up perfectly. Nothing a little wood filler wont cover up.

20171021_140531.jpg


I had a bit of a mishap with my stain but don't have any pictures. The rolling tub I have been using somehow developed a hole in the bottom. Of course I didn't figure this out until I had walked around my garage with the tub in had. I was wearing flip flops and once my toes started to get sticky I realized there was something wrong. Needles to say my feet and my garage floor are a bit of a mess. Looks like someone took a hatchet to my feet and they are bleeding... I did 2 coats of stain on the door and decide to start working on the tank while it dried.

I am using a Modular Marine Overflow and sump kit. I must say the I am very impressed with the packaging, workmanship and overall design of this product. On my current system I have and external overflow and it takes up so much room in my tank. The Modular Marine design is sleek and very well though out. Here area few pictures to show you how it comes and what comes with it.
20171021_141605.jpg

20171021_141859.jpg


As ordered the unit comes with the overflow, Uniselas (2 X 3/4" and 1x 1" This was done at no extra charge), removable covers on both the skimmer and external box, 2 bulkheads and gaskets, hole saw, drilling template made of PVC so your hole saw doesn't jump around. You can also see that the internal box is removable for cleaning if needed. It is pressure fit into the bulkheads on the tank side.
20171021_142426.jpg


I measured the center line of my tank and the template. I used some spring clip to hold this in place. You do have to be aware of where yo are putting this vertically because if you put it to high the tank lip will interfere with the external box preventing a seal and you might not be able to remove the lid on the internal skimmer. I checked this several times before I proceeded to drilling.
20171021_143351.jpg


Here is the step that accommodates the tank lip. Critical you don't mount this to high.
20171021_143405.jpg


Next I took the tank outside added some tape to the back side to catch the glass puck as it was cut. I had my son spraying water on the hole saw as I was cutting and as everyone says I did not push I just let the weight of the drill drive it through. I must say the noise it makes is awful. I had to stop and get some earplugs. I also used a power drill not a battery drill. It really didn't take that long and in hindsight with a fresh battery I probably could have used my battery drill.
20171021_144831.jpg

20171021_145805.jpg


One bit of advise I would give is that after drilling make sure you wash the top of the tank and more importantly to make sure you you get lots of water between the tank trim ring and the glass. I didn't do this and after paining noticed I have some very unsightly white residue trapped under there. I should be able to get this cleaned out fairly easily but it would be easier to do prior to me painting than after.

I then added 3-4 coats of flat black exterior paint to the tank. I know lots of folks use Krylon or rustolium but this stuff is cheap and I apply it with a roller so I don't get any over-spray. Just make sure your surface is clean and dry. Also don't try to put to much on with your first coat. I am planning on running bare bottom so I panted the back and bottom black. I avoided putting any paint close to where the gasket seals on the outside of the tank. This will be covered by the internal skimmer box and I wanted to minimize any opportunity for a gasket leak.

20171022_101436.jpg


Here you can see that white crud I referenced earlier. I will wash it out with a hose once the paint is all dry. You can also see the internal skimmer box and how sleek it really is.

20171022_101807.jpg


Here is a side shot showing the entire unit installed. Next steps are to work on the front door mechanism and start working on the sump.

20171022_101816.jpg
 

samnaz

Earthling
View Badges
Joined
Dec 30, 2016
Messages
3,564
Reaction score
6,879
Location
Humble.fish
Rating - 0%
0   0   0
Nice! You got more done in a day than I have in weeks. In fact I am preparing to drill and install my mm overflow right now, perfect timing on this very helpful update of yours. Will you be doing single or dual returns?
 

samnaz

Earthling
View Badges
Joined
Dec 30, 2016
Messages
3,564
Reaction score
6,879
Location
Humble.fish
Rating - 0%
0   0   0
Oh and that’s somewhat unsettling that Petco stocks both tempered and non and doesn’t specify which is which, what a pain. Also lucky you caught it before shattering one.
 
OP
OP
atx100r

atx100r

Active Member
View Badges
Joined
Oct 9, 2017
Messages
201
Reaction score
117
Location
Illinois
Rating - 0%
0   0   0
Nice! You got more done in a day than I have in weeks. In fact I am preparing to drill and install my mm overflow right now, perfect timing on this very helpful update of yours. Will you be doing single or dual returns?
I'm just doing a single return but have added a T with a valve on my plumbing as it exits the return pump so I can add something down the road if I need to...my return pump is currently only running on setting 2 so I could run a reactor or more likely I will add a uv sterilizer if I get one from santa....Good luck on your install...
 
OP
OP
atx100r

atx100r

Active Member
View Badges
Joined
Oct 9, 2017
Messages
201
Reaction score
117
Location
Illinois
Rating - 0%
0   0   0
Oh and that’s somewhat unsettling that Petco stocks both tempered and non and doesn’t specify which is which, what a pain. Also lucky you caught it before shattering one.
Yah that was complete luck I saw that post and checked...
 

BrewPug

Community Member
View Badges
Joined
Jul 12, 2017
Messages
53
Reaction score
34
Rating - 0%
0   0   0
I just drilled a 75 and had the same issue as you with the white ground up glass getting under the tank rim. I didn't see it until after painting though. Have to figure out how to get it out.
 

Creating a strong bulwark: Did you consider floor support for your reef tank?

  • I put a major focus on floor support.

    Votes: 40 41.7%
  • I put minimal focus on floor support.

    Votes: 21 21.9%
  • I put no focus on floor support.

    Votes: 33 34.4%
  • Other.

    Votes: 2 2.1%
Back
Top