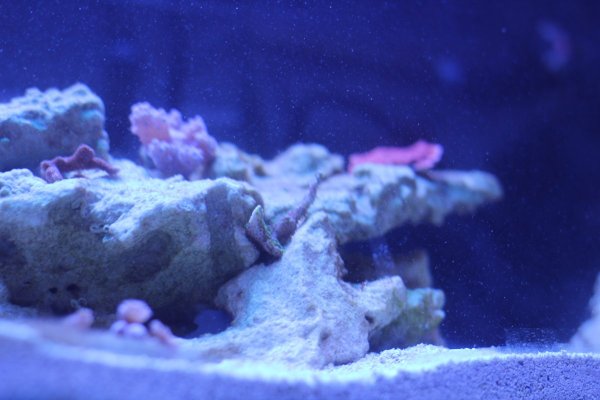
AIO Custom Build (Picture Heavy)

dannyd_

Active Member
View Badges
Joined
Mar 22, 2021
Messages
186
Reaction score
160
Location
Tampa Bay Area
Rating - 0%
0   0   0
Hello all! I have been working on this tank for the past 2 months, taking pictures all the while, and I decided to finally sit down and type it all out. My inspiration came from the Mr. Aqua 12 gallon long. I really like the look of a tank that was very long and didn't have too much depth, however I didn't want to have a sump underneath. I also really like the idea of an AIO, so I decided to make my own. I decided that I would make the tank 36 inches long, 15.75 inches wide, and 10.25 inches tall. I split the tank and had 36" by 10" by 10" of display area, and 36" by 5" by 10" for equipment.

Rendering Isometric.JPG

Rendering Back View.JPG


The far right and left chambers are dry, and the middle three are the parts of the filter. The far right area is where the ATO container goes, which I got from amazon. The far left is where the dosing container and doser goes. The red box is the return pump, the black box to the right is the protein skimmer, and the next box over is where the media basket goes.

Rendering Left View.JPG
Rendering Right View.JPG
Rendering Top View.JPG
Rendering Front View.JPG


Some of the things that changed from design to practice was the holes were larger as I didn't realize I was reading the hole size for the inside of the bulkheads, and not the outside. I also had the middle part changed to a single 1 inch hole where I put the overflow strainer instead.

Once I got all the products lined up, found their dimensions and made sure they would fit in their respective compartments, I went ahead and ordered the glass from a local store.

Glass Tape 2.jpg
Glass Tape.jpg


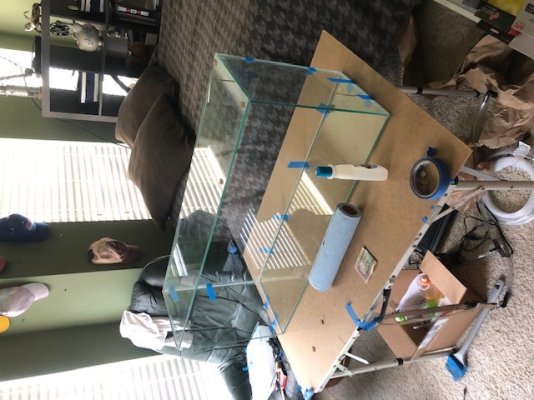
Once I got all the glass I cleaned it with acetone, taped it, and used silicone to put it all together.

Glueing .jpg
Glued.jpg


I was fairly nervous about doing this even after all of my research, however the research paid off and it went very smoothly (this was my first time making a tank). When gluing it I did three separate layers of silicone. The edges turned out very clean, and I had no issues with lining everything up. I let it dry for two days then water tested it outside.

Water Tested.jpg


I let it sit for two days and then felt satisfied, as even carrying it around it felt extremely solid. I am impressed that all it takes is that glue to hold it together, even though I know that is what it is made to do. After I was sure it was good to hold water, I drained it and started taping it off, prepping to glue in the dividers.

AIO Insert.jpg

AIO Insert 2.jpg


Another thing that I didn't think of was that the glue caused the edges to rise up, not allowing the glass divider to sit flush. I used a glass razor, which is shown on the right side of the picture above, to cut slots into the glue. The glass razor works very well for the silicone, as you don't even need to worry if you get glue in places you don't want because it will scrape off very easily.

Glue Line.jpg
Glue Cut.jpg


After getting everything glued and taped I once again let it sit for two days. The only issue I had was with the first compartment of the filter, as there was a small leak. I fixed it and let it sit for two more days then tested again. I am glad I filled up the filter area first to see, as I would have had to empty a lot more water out.

Filled Frontview.jpg
Filled Inside.jpg
Filled with ATO.jpg


These pictures kind of shows a jump ahead, as at this point I started putting some of the equipment in. Before I filled it I put the bulkheads in, the elbow joints, and the plumbing to the pump in the final compartment to have water circulating. The plumbing portion worked great, however the pump didn't have the movement I wanted. I want to try to avoid having extra wavemakers, and this pump puts out very little movement. I ordered the Mighty Jet 356 to replace it, and will see if this will be enough to use without extra wavemakers. The next area was the ATO.

ATO Container.jpg
ATO Cap.jpg
ATO Janky.jpg


I bought this container from amazon, and is used for backpacking (liquid storage). The ATO I bought was the JBJ Nano, and so far it looks very nice. The pump is extremely small, as I was able to fit it into the container through the cap, which was a 2 inch hole! The tricky part was pushing the tubing onto the pump nozzle while it was in the container. I had to buy a couple 1/4" inch elbows so it would be able to smoothly get into the tank with the limited room. The other picture also shows how I put on a 1/4 inch bulkhead onto the cap, and cut a slot for the wire. This whole ATO setup works out perfectly and I am happy with how it turned out.

The other "DIY" thing that I did was the dosing containers, as I didn't want to spend 25 dollars on the containers. For this build I haven't been going the cheaper route to make sure to get longevity, however I felt like using non-dosing specific container was not going to be a cheapskate. If there is any issues in the future I will just buy dosing containers. For these I bought three different colored water bottles, and then put 1/4 inch bulkheads into each of the caps. I will be able to connect the tubing once I get a doser.

Dosing Container.jpg
Organization.jpg


The power bar in this picture was returned and exchanged for two different ones. There was nothing wrong with that power bar, however I didn't correctly anticipate how many smart outlets I would need. You can see in the previous where the tank is filled the two white power bars on the left of the tank, which are really nice. They each have six controllable outlets, and four usb outlets each. You can control it from an app on your phone, and everything was great quality.

App SS.png
App SS 2.png


The most recent thing that I did was get a matt for underneath the tank. I wasn't planning on getting a leveling matt because I wasn't worried about it not being balanced, however I compromised and bought a cushiony yoga matt. It's three millimeters thick, and it was easy to cut.

Yoga Mat 2.jpg
Yoga Mat.jpg


The next steps is waiting to purchase the light that I am getting, which is a dual T5 with led fixture. After that I will get dry live rock and live sand and then fill it up, and start to cycle. I still am waiting for the protein skimmer that I want to go back into stock, and once that happens I will order the doser at the same time.
Here are some random photos.

Compartments 2.jpg
Dosing Containers Filled.jpg

Filled Compartments.jpg
Top View.jpg
Side View.jpg


The other things that I have in the back compartments is a media basket that I made out of black egg crate, which you can see in the first chamber, and the IM refugium light. It is mounted on the glass in-between the first stage of the filter area and ATO compartment. I also have a 100 watt Finnex titanium heater. I have been testing it out recently and I don't think it works honestly. I need to get a thermometer to see if it is actually changing the temperature. However there isn't a huge rush to get that because it already got refunded due to the quality of the box it came in, and livestock won't be in it for another three weeks at least. My main goal now is wiring control, as I'm trying to figure out a way to keep the two power bars in some sort of box mounted on the back of the tank.

I will keep updating this as things progress. I appreciate any constructive criticism or things you guys can point out. Fingers crossed everything keeps going smoothly. Glueing .jpg
 

GK3

Valuable Member
View Badges
Joined
Jan 16, 2017
Messages
1,852
Reaction score
1,339
Location
Cincinnati
Rating - 100%
2   0   0
Hello all! I have been working on this tank for the past 2 months, taking pictures all the while, and I decided to finally sit down and type it all out. My inspiration came from the Mr. Aqua 12 gallon long. I really like the look of a tank that was very long and didn't have too much depth, however I didn't want to have a sump underneath. I also really like the idea of an AIO, so I decided to make my own. I decided that I would make the tank 36 inches long, 15.75 inches wide, and 10.25 inches tall. I split the tank and had 36" by 10" by 10" of display area, and 36" by 5" by 10" for equipment.

Rendering Isometric.JPG

Rendering Back View.JPG


The far right and left chambers are dry, and the middle three are the parts of the filter. The far right area is where the ATO container goes, which I got from amazon. The far left is where the dosing container and doser goes. The red box is the return pump, the black box to the right is the protein skimmer, and the next box over is where the media basket goes.

Rendering Left View.JPG
Rendering Right View.JPG
Rendering Top View.JPG
Rendering Front View.JPG


Some of the things that changed from design to practice was the holes were larger as I didn't realize I was reading the hole size for the inside of the bulkheads, and not the outside. I also had the middle part changed to a single 1 inch hole where I put the overflow strainer instead.

Once I got all the products lined up, found their dimensions and made sure they would fit in their respective compartments, I went ahead and ordered the glass from a local store.

Glass Tape 2.jpg
Glass Tape.jpg


Once I got all the glass I cleaned it with acetone, taped it, and used silicone to put it all together.

Glueing .jpg
Glued.jpg


I was fairly nervous about doing this even after all of my research, however the research paid off and it went very smoothly (this was my first time making a tank). When gluing it I did three separate layers of silicone. The edges turned out very clean, and I had no issues with lining everything up. I let it dry for two days then water tested it outside.

Water Tested.jpg


I let it sit for two days and then felt satisfied, as even carrying it around it felt extremely solid. I am impressed that all it takes is that glue to hold it together, even though I know that is what it is made to do. After I was sure it was good to hold water, I drained it and started taping it off, prepping to glue in the dividers.

AIO Insert.jpg

AIO Insert 2.jpg


Another thing that I didn't think of was that the glue caused the edges to rise up, not allowing the glass divider to sit flush. I used a glass razor, which is shown on the right side of the picture above, to cut slots into the glue. The glass razor works very well for the silicone, as you don't even need to worry if you get glue in places you don't want because it will scrape off very easily.

Glue Line.jpg
Glue Cut.jpg


After getting everything glued and taped I once again let it sit for two days. The only issue I had was with the first compartment of the filter, as there was a small leak. I fixed it and let it sit for two more days then tested again. I am glad I filled up the filter area first to see, as I would have had to empty a lot more water out.

Filled Frontview.jpg
Filled Inside.jpg
Filled with ATO.jpg


These pictures kind of shows a jump ahead, as at this point I started putting some of the equipment in. Before I filled it I put the bulkheads in, the elbow joints, and the plumbing to the pump in the final compartment to have water circulating. The plumbing portion worked great, however the pump didn't have the movement I wanted. I want to try to avoid having extra wavemakers, and this pump puts out very little movement. I ordered the Mighty Jet 356 to replace it, and will see if this will be enough to use without extra wavemakers. The next area was the ATO.

ATO Container.jpg
ATO Cap.jpg
ATO Janky.jpg


I bought this container from amazon, and is used for backpacking (liquid storage). The ATO I bought was the JBJ Nano, and so far it looks very nice. The pump is extremely small, as I was able to fit it into the container through the cap, which was a 2 inch hole! The tricky part was pushing the tubing onto the pump nozzle while it was in the container. I had to buy a couple 1/4" inch elbows so it would be able to smoothly get into the tank with the limited room. The other picture also shows how I put on a 1/4 inch bulkhead onto the cap, and cut a slot for the wire. This whole ATO setup works out perfectly and I am happy with how it turned out.

The other "DIY" thing that I did was the dosing containers, as I didn't want to spend 25 dollars on the containers. For this build I haven't been going the cheaper route to make sure to get longevity, however I felt like using non-dosing specific container was not going to be a cheapskate. If there is any issues in the future I will just buy dosing containers. For these I bought three different colored water bottles, and then put 1/4 inch bulkheads into each of the caps. I will be able to connect the tubing once I get a doser.

Dosing Container.jpg
Organization.jpg


The power bar in this picture was returned and exchanged for two different ones. There was nothing wrong with that power bar, however I didn't correctly anticipate how many smart outlets I would need. You can see in the previous where the tank is filled the two white power bars on the left of the tank, which are really nice. They each have six controllable outlets, and four usb outlets each. You can control it from an app on your phone, and everything was great quality.

App SS.png
App SS 2.png


The most recent thing that I did was get a matt for underneath the tank. I wasn't planning on getting a leveling matt because I wasn't worried about it not being balanced, however I compromised and bought a cushiony yoga matt. It's three millimeters thick, and it was easy to cut.

Yoga Mat 2.jpg
Yoga Mat.jpg


The next steps is waiting to purchase the light that I am getting, which is a dual T5 with led fixture. After that I will get dry live rock and live sand and then fill it up, and start to cycle. I still am waiting for the protein skimmer that I want to go back into stock, and once that happens I will order the doser at the same time.
Here are some random photos.

Compartments 2.jpg
Dosing Containers Filled.jpg

Filled Compartments.jpg
Top View.jpg
Side View.jpg


The other things that I have in the back compartments is a media basket that I made out of black egg crate, which you can see in the first chamber, and the IM refugium light. It is mounted on the glass in-between the first stage of the filter area and ATO compartment. I also have a 100 watt Finnex titanium heater. I have been testing it out recently and I don't think it works honestly. I need to get a thermometer to see if it is actually changing the temperature. However there isn't a huge rush to get that because it already got refunded due to the quality of the box it came in, and livestock won't be in it for another three weeks at least. My main goal now is wiring control, as I'm trying to figure out a way to keep the two power bars in some sort of box mounted on the back of the tank.

I will keep updating this as things progress. I appreciate any constructive criticism or things you guys can point out. Fingers crossed everything keeps going smoothly. Glueing .jpg
This is awesome
 
OP
OP
D

dannyd_

Active Member
View Badges
Joined
Mar 22, 2021
Messages
186
Reaction score
160
Location
Tampa Bay Area
Rating - 0%
0   0   0
An update. I got the new Mighty Jet to replace my other one and so far it works very well, and I like that you can control the flow from a controller instead of knob on the pump. I also got in my light fixture. I went ahead and ordered extruded aluminum from 8020 to create the frame, and I modified and made a couple brackets to 3D print to hold it together. This is what I got so far.

Light Mount Rendering.JPG


The L Bracket is what I modified from what I found online, from Thingiverse. The 45 degree angle bracket and bracket between the bottom two post I made myself. Hopefully this stand won't be as rugged and obvious as it is in the rendering. I will use wire and eye hooks to hang the light from the top bar.

Light Setup.jpg


This is the fixture itself, balancing on boxes since it is the exact size of the tank.

LED and T5.jpg


This is the light fixture with the LED and T5 on.

LED.jpg


This is the light fixture with just the LEDs on, a little blurry.

T5.jpg


This is just the T5s on. While I wait for the aluminum to come in I'm gonna start printing the brackets and then figure out what to do for the power bar organization. No clue where to go on that, so to the drawing board I go.
 
OP
OP
D

dannyd_

Active Member
View Badges
Joined
Mar 22, 2021
Messages
186
Reaction score
160
Location
Tampa Bay Area
Rating - 0%
0   0   0
Update 5/17/21

I am still waiting on the metal to assemble the light frame. In the meantime I have had other things to work on. I got two bluetooth Kamoer X1 pumps. I had no issues with bluetooth connectivity and they both worked great. I like how they can share one power cord via their power cord connector.

Doser Install.jpg
Doser Container Installed Tubing.jpg
Doser Top View.jpg


For now I only have space for two bottles, which will be fine as I only plan to dose a two part solution. If that ever changes I will make a mount so the dosers can fit vertically, giving me the space to put in the third bottle.

Doser Tube Holder.jpg
Designing Brackets.jpg
Double Sided Tape.jpg
Wire Bracket.jpg
Practice Parts.jpg
Power Bar Brackets.jpg
Power Bar Mounts.jpg


I'm taking this time until the lights come in for cable management and other random design things I need worked out. I first made the bracket to hold the two power bars behind the tank, however I had to change it from an open loop to a closed because it started to sag with the weight of the cords. I then made the clip you see in on top of the sketch, nothing crazy as I modeled it off one I found on amazon. I am going to attach those with the double-sided sticky tape along the back edges to house all the wires. I lastly designed the three-hole dosing tube holder. It is also going to be using the sticky tape on the inside of the return pump chamber. It has three because if I ever get a third element in the future. I also began experimenting with threaded loc-line inserts and the joints, and I was very impressed with how accurate they turned out.

Also wanted to include some pretty cool pictures I took of a local seller's tank.

Torch.jpg
Hammer.jpg
Mushroom.jpg


These coral came from Gator Coral, where I help out so I can learn all I can. FYI they are close together in the picture as they were being gathered for a sale, not a permanent location. You can check him out on Facebook or online at his website.

I also wanted to include that I am selling a Bubble Magus Curve 7 that is in very good condition, as well as sump that fits it. If you are interested let me know.
 
OP
OP
D

dannyd_

Active Member
View Badges
Joined
Mar 22, 2021
Messages
186
Reaction score
160
Location
Tampa Bay Area
Rating - 0%
0   0   0
Another update. I have since got the framework for the light fixture, printed the brackets, installed it, and begun cycling the tank. Here are some photos for progress. I will be posting a landscape photo of the whole tank about every month to show the progress, with updates in between. Let me know what you think!

IMG_7110.JPG
IMG_7108.JPG

IMG_7111.JPG

IMG_7113.JPG

IMG_7114.JPG

IMG_7120.JPG

IMG_7121.JPG

IMG_7122.JPG

IMG_7124.JPG

IMG_7125.JPG

IMG_7126.JPG

IMG_7116.JPG
 
OP
OP
D

dannyd_

Active Member
View Badges
Joined
Mar 22, 2021
Messages
186
Reaction score
160
Location
Tampa Bay Area
Rating - 0%
0   0   0
Hello all, I'm back.
Had to take the tank down, but now I'm up at college and the it is back up and running again! The tank has been cycled once again, and a little different rock structure. I currently only have cleanup crew, and I have a reserve on a pair of fish that should be coming into the tank in a couple days.

Current stocking:
3 Bumblebee snails
8 Astrea Snails
9 Blue Leg Hermit Crabs

The glass has yet to be cleaned to let the snails go to town before I clean it when I get the fish. Any and all feedback is welcome!

Dorm Setup Distance.jpg
Dorm Setup 7.jpg
Dorm Setup 9.jpg
Dorm Setup 11.jpg
Dorm Setup 12.jpg
Dorm Setup 13.jpg
Dorm Setup 14.jpg
Dorm Setup 15.jpg
Dorm Setup 16.jpg
Dorm Setup 17.jpg
Dorm Setup 18.jpg
Dorm Setup 19.jpg
Dorm Setup 20.jpg
 
OP
OP
D

dannyd_

Active Member
View Badges
Joined
Mar 22, 2021
Messages
186
Reaction score
160
Location
Tampa Bay Area
Rating - 0%
0   0   0
Update 12/17/21; Lots of fish, lots of coral

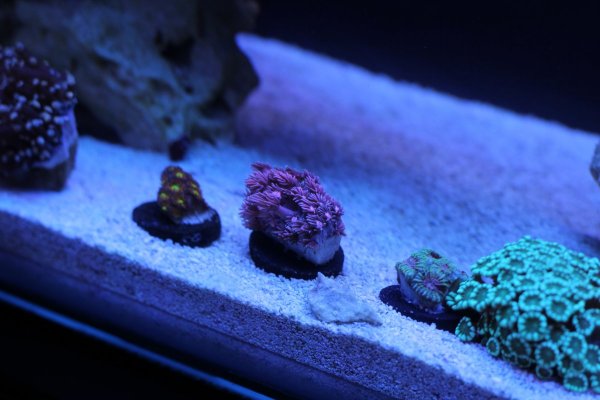
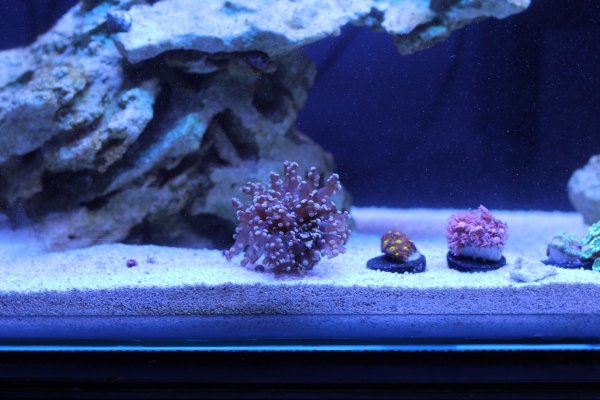
Lots of new things since I have last updated the tank, have been busy with classes. I am back home from school, and took the fish tank with me, and now I have a good break to do some updates. The corals I have all are lined up in the sand because I am not going to glue them to rocks until I take everything back up to college.

Fish:
- Pair of Mocha Clownfish
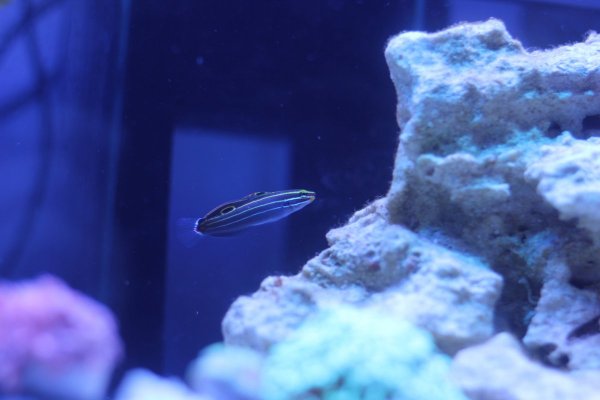
- Hector's Goby
- Yellow Watchman Goby

Inverts:
- Bumblebee snails
- Astrea snails
- Blue leg hermit crabs
- Lettuce sea slug
- Stomatella snail

Coral:
- Red zoanthid
- Pink zoanthid
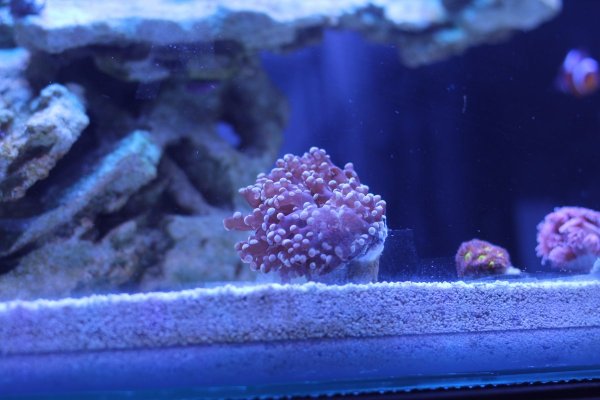
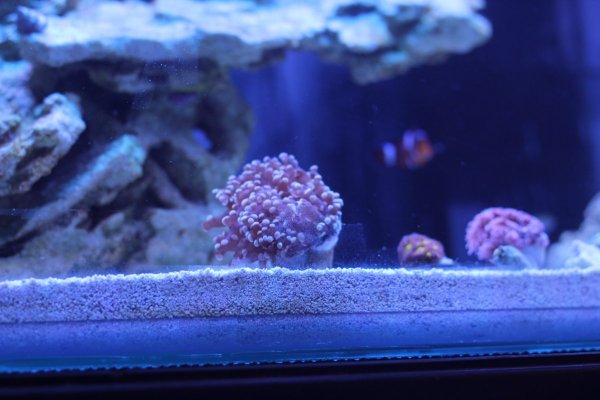
- Pink kenya tree
- Orange frogspawn
- Orange favia
- Green favia
- Green alvepora
- Pink gonipora
- Red plating montipora
- Green encrusting montipora
- Orange encrusting montipora
*I am still learning the specific names of each type, if you know them feel free to share

IMG_7270.JPG

IMG_7275.JPG


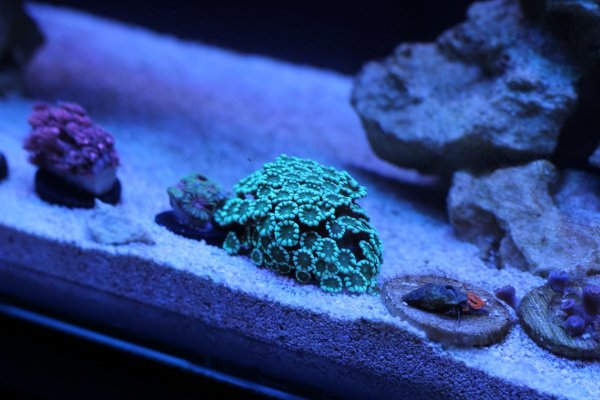
Green alvepora in the middle, to the left is green favia, left of that is pink gonipora.

IMG_7276.JPG
IMG_7277.JPG
IMG_7280.JPG
IMG_7304.JPG


Bottom middle is the green encrusting montipora, top right is red plating montipora, top left is red encrusting montipora, and top middle is pink kenya tree that was closed up because I bumped it.

IMG_7305.JPG
IMG_7306.JPG
IMG_7310.JPG
IMG_7318.JPG

IMG_7320.JPG


This is where I house what little equipment I have. In the first chamber is a three section basket; the top level of the basket is filter floss, second level is the bag of carbon, and the third is empty (eventually will have chaeto). The second chamber is where the heater is, but is large enough to house a nano skimmer which I might get eventually. The third chamber is the return pump.

IMG_7321.JPG


Current routine:
- Scraping glass when needed (majorly done right before water changes)
- Feed fish two times a day, a mix of pellets and frozen food
- Feed reef roids couple times a week
- 3 gallon water changes every two weeks/ week and a half (whichever is more convenient for my schedule comes first)
- Change filter floss every water change
- Change carbon every two water changes
- Clean all equipment every two water changes

Any and all feedback, criticism, or better identification of my corals is welcome! Will be updating again in January.
 

Attachments

  • IMG_7271.JPG
    IMG_7271.JPG
    118.4 KB · Views: 48
  • IMG_7272.JPG
    IMG_7272.JPG
    132.7 KB · Views: 40
  • IMG_7273.JPG
    IMG_7273.JPG
    128.5 KB · Views: 44
  • IMG_7284.JPG
    IMG_7284.JPG
    117.4 KB · Views: 47
  • IMG_7285.JPG
    IMG_7285.JPG
    137.1 KB · Views: 44
  • IMG_7294.JPG
    IMG_7294.JPG
    84.1 KB · Views: 47
  • IMG_7298.JPG
    IMG_7298.JPG
    122.1 KB · Views: 43
  • IMG_7299.JPG
    IMG_7299.JPG
    116.8 KB · Views: 49
  • IMG_7305.JPG
    IMG_7305.JPG
    128.4 KB · Views: 41
  • IMG_7312.JPG
    IMG_7312.JPG
    113.5 KB · Views: 52
  • IMG_7317.JPG
    IMG_7317.JPG
    133.2 KB · Views: 40
  • IMG_7319.JPG
    IMG_7319.JPG
    125.1 KB · Views: 41
  • IMG_7322.JPG
    IMG_7322.JPG
    125.3 KB · Views: 42
  • IMG_7332.JPG
    IMG_7332.JPG
    149.7 KB · Views: 37
  • IMG_7333.JPG
    IMG_7333.JPG
    151.1 KB · Views: 44
  • IMG_7334.JPG
    IMG_7334.JPG
    100 KB · Views: 44
  • IMG_7338.JPG
    IMG_7338.JPG
    114.7 KB · Views: 43
OP
OP
D

dannyd_

Active Member
View Badges
Joined
Mar 22, 2021
Messages
186
Reaction score
160
Location
Tampa Bay Area
Rating - 0%
0   0   0
Anemone already bonded to clownfish! As of three days ago I got a green bubble tip anemone, and within one day my pair of clownfish already have hosted it!

IMG_8272.jpg


IMG_8282.jpg


IMG_8280.jpg


Updated positions of some of the corals, all doing well.

IMG_8283.jpg
IMG_8286.jpg
IMG_8287.jpg


Newest addition is the green zoanthid (not sure the name)

IMG_8289.jpg


IMG_8290.jpg


Lots of growth on the pink goni

IMG_8291.jpg


Newer addition, same time as the anemone, is a cocoa worm. You can already see the new growth on the end of the stem, where the new red rings are.

IMG_8275.jpg


Updated tank shot 1/11/21. The next steps are to glue down some of the frags, now that I am able to see what is happy where. That and wait for everything to grow in. The last major bucket list item for me is a blue maxima clam. I'm also going to start dosing reef roids, and see how the tank responds. Working up to dosing in general but this is a good step (I think).
 
OP
OP
D

dannyd_

Active Member
View Badges
Joined
Mar 22, 2021
Messages
186
Reaction score
160
Location
Tampa Bay Area
Rating - 0%
0   0   0
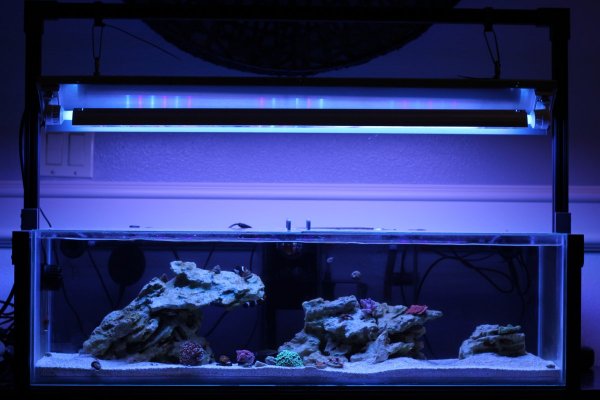
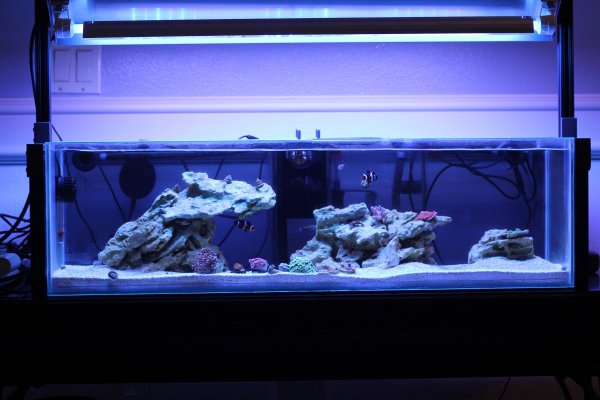
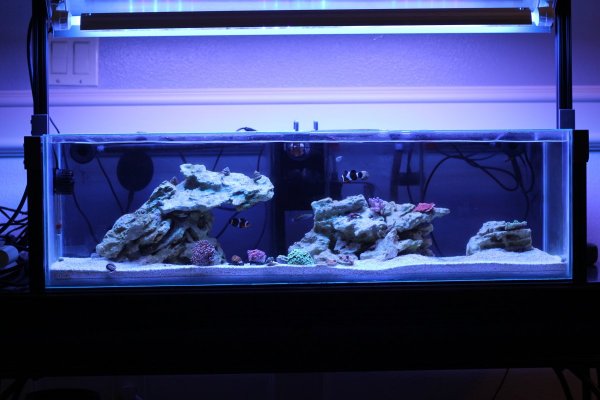
June 16 2022 Year Update

I haven't been active because of school, but I went and collected some scattered photos for how the tank has progressed, for better and worse. I will do some updates on the coral next month after my summer classes have ended.


June 2021; Tank was finished and tested with water

001 June 2021.jpg


End of June 2021; 1 of many different rock works to exist in this tank, and this was when cycling began. Sadly I think this was my favorite rock structure, but with moving the tank back and forth to and from college I never get the same rockwork twice.

002 June 2021 End.jpg


October 2021; I had to break the tank down and start the cycling again once in my dorm. (Rock work #2)

003 October 2021.jpg


November 2021; Cycling complete and the first fish, a pair of Mocha clownfish, and coral two zoanthids and a ricordea.

004 November 2021.jpg


Beginning of December 2021; Little change, just letting the tank continue to develop. One new coral added, a pink Kenya tree, and a new fish, a Hector's Goby.

005 December 2021.jpg


End of December 2021; This was back home for Christmas break, hence rock work #3. Many new corals that I got from working for a local seller, testing out what the tank could handle. Also much better photos because I got ahold of my dad's camera.

006 December 2021 End.JPG


January 2022; Back at school, and back to crappy photos from iPhone camera. New fish, yellow watchman goby, and lots of growth from the coral I got over Christmas break.

007 January 2022.jpg


February 2022; Lots of change here, I honestly think this photo is from later in the year. Moved corals to the rockwork, got an anemone, and a Feather Duster. New fish addition as well, which was a Firefish. I had got a pair, but one was able to fit through the grate and jump out the back. That is why there was the cardboard on the back, RIP firefish.

008 February 2022.jpg


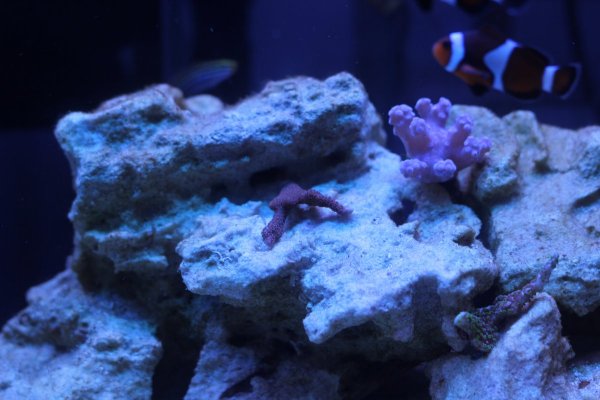
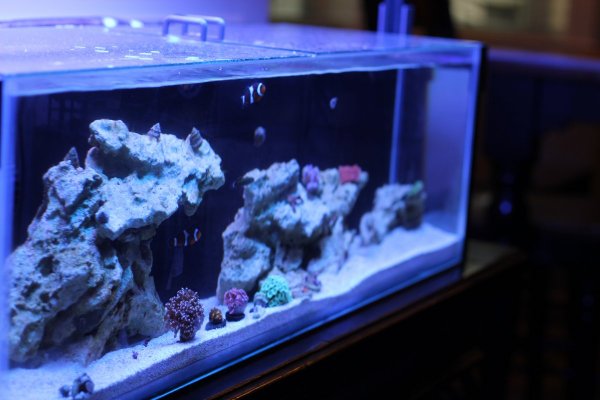
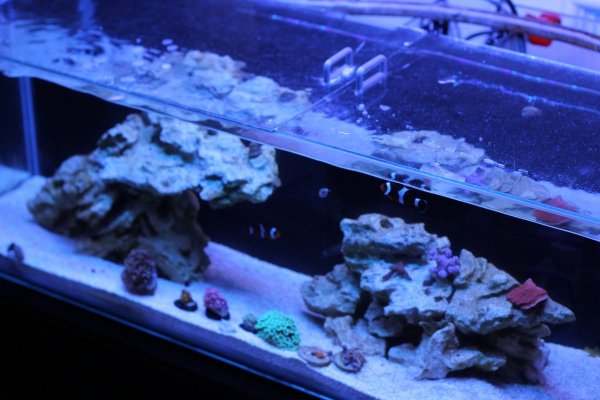
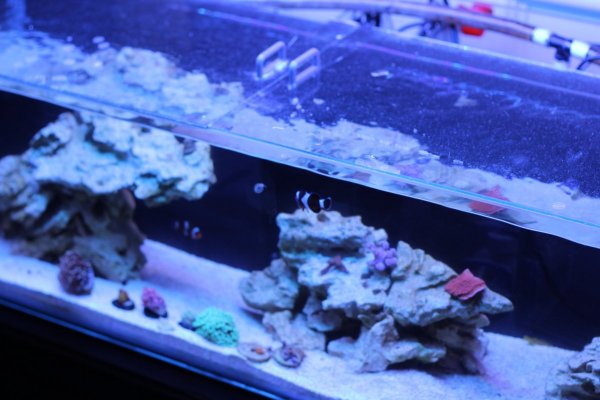
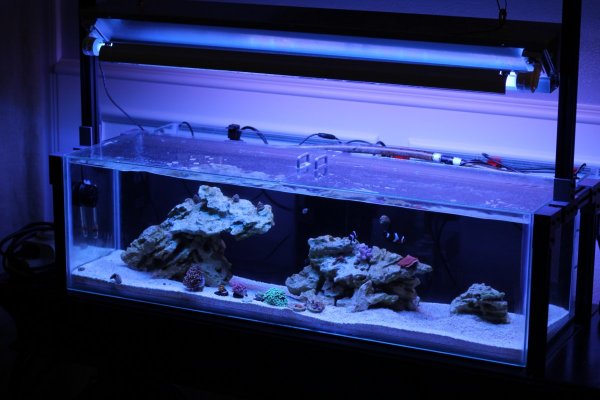
June 2022; Huge jump, and back to better camera. The other firefish somehow managed to jump out while in the care of my family. Lost one of the clownfish as well to what people think was aggression, still doesn't feel right to me. As you can probably notice, the alvepora has become the center of attention and is the size of a tennis ball when extended. More to come soon!
009 June 2022.JPG
 

Konrad_

New Member
View Badges
Joined
Nov 3, 2020
Messages
11
Reaction score
9
Location
Warsaw
Rating - 0%
0   0   0
Very nice build! I'm a huge fan of AiO tanks, having one myself.
What bulbs do you use?
 
Back
Top