Another Pico Jar / Quarantine Capsule

Dennis Cartier

Valuable Member
View Badges
Joined
Aug 25, 2016
Messages
1,950
Reaction score
2,388
Location
Brampton, Ontario
Rating - 0%
0   0   0
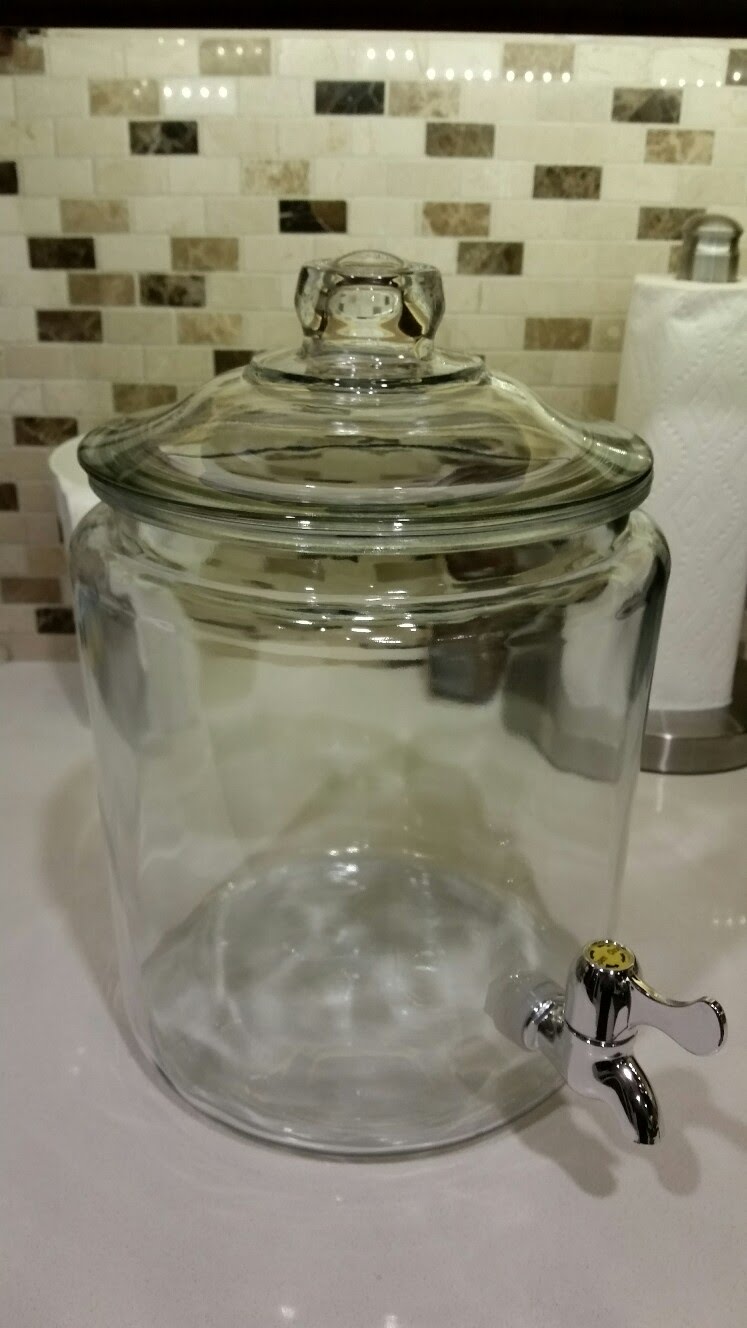
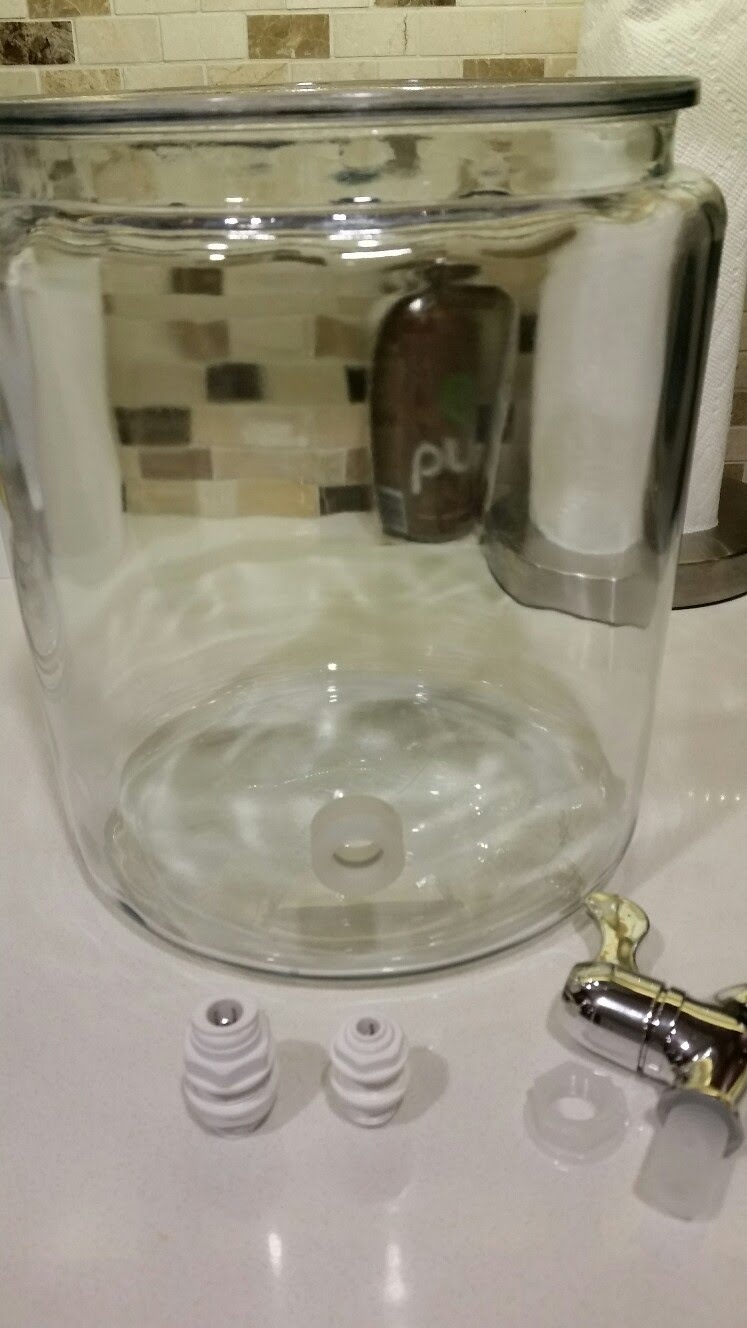
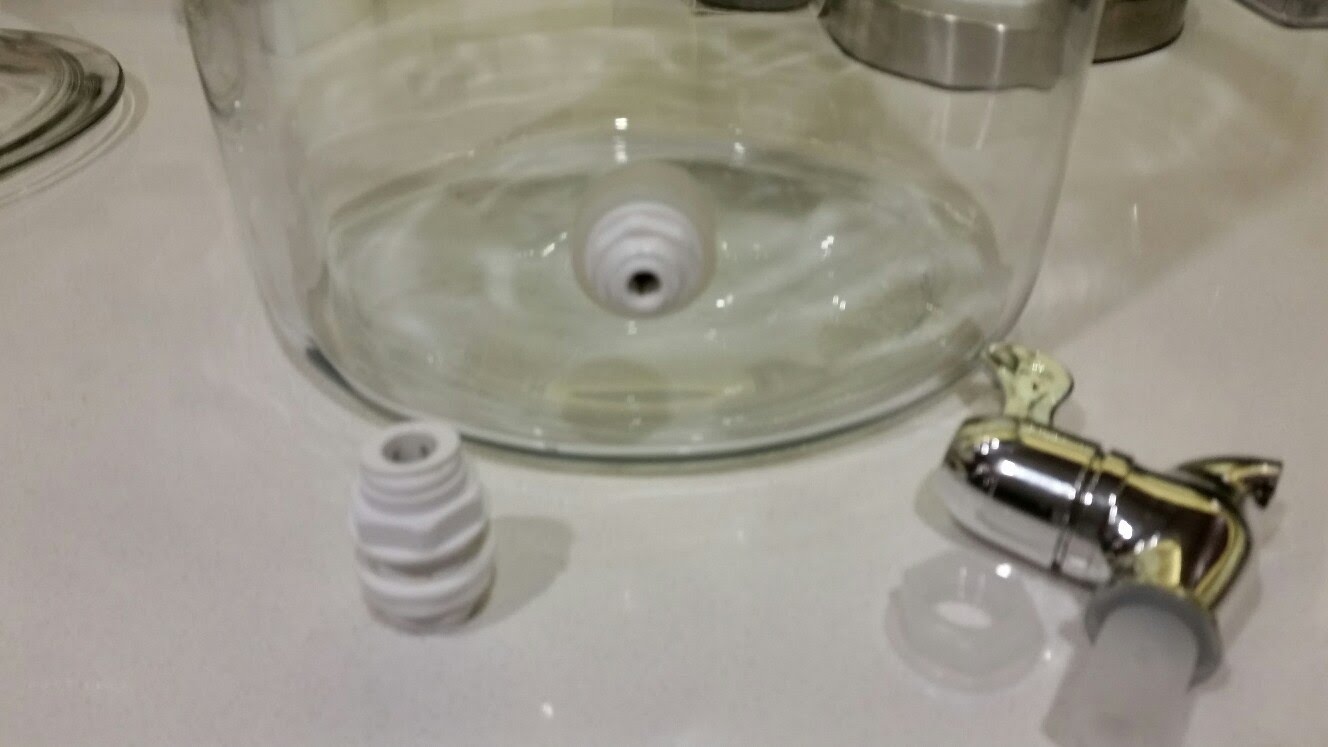
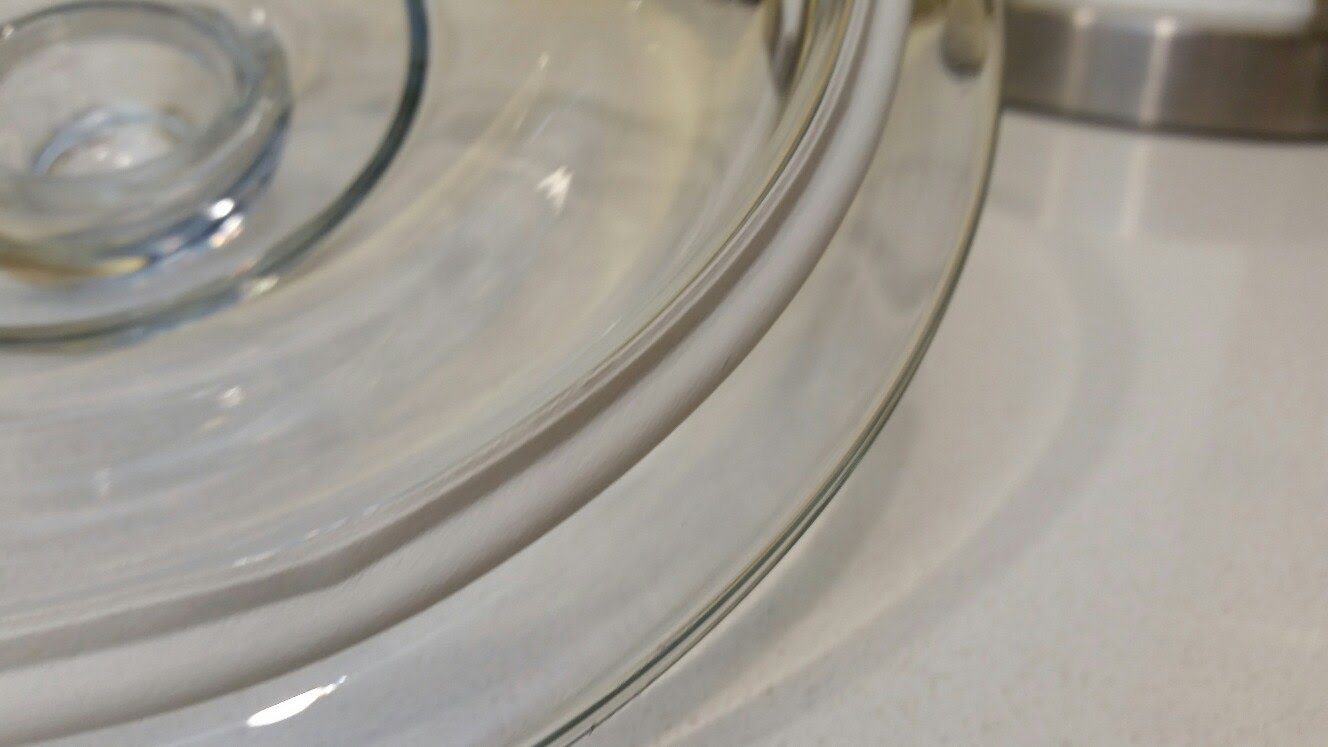
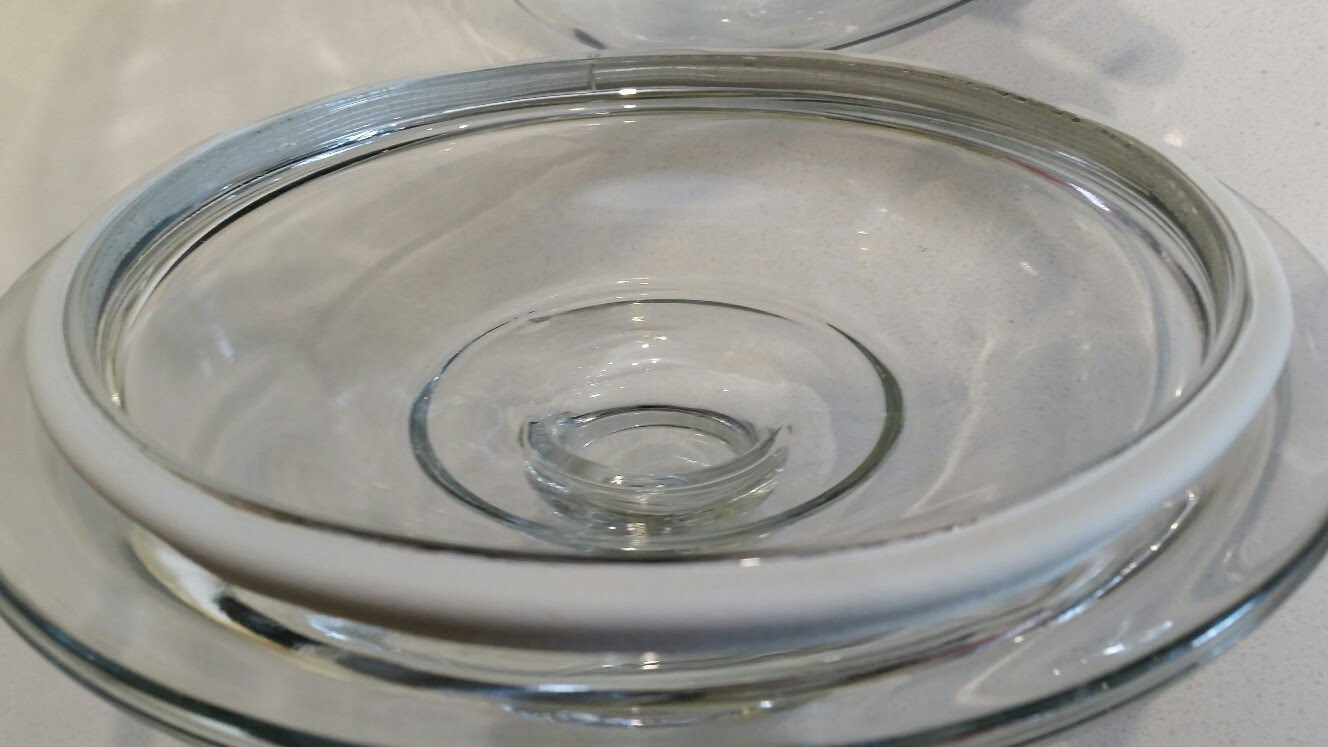
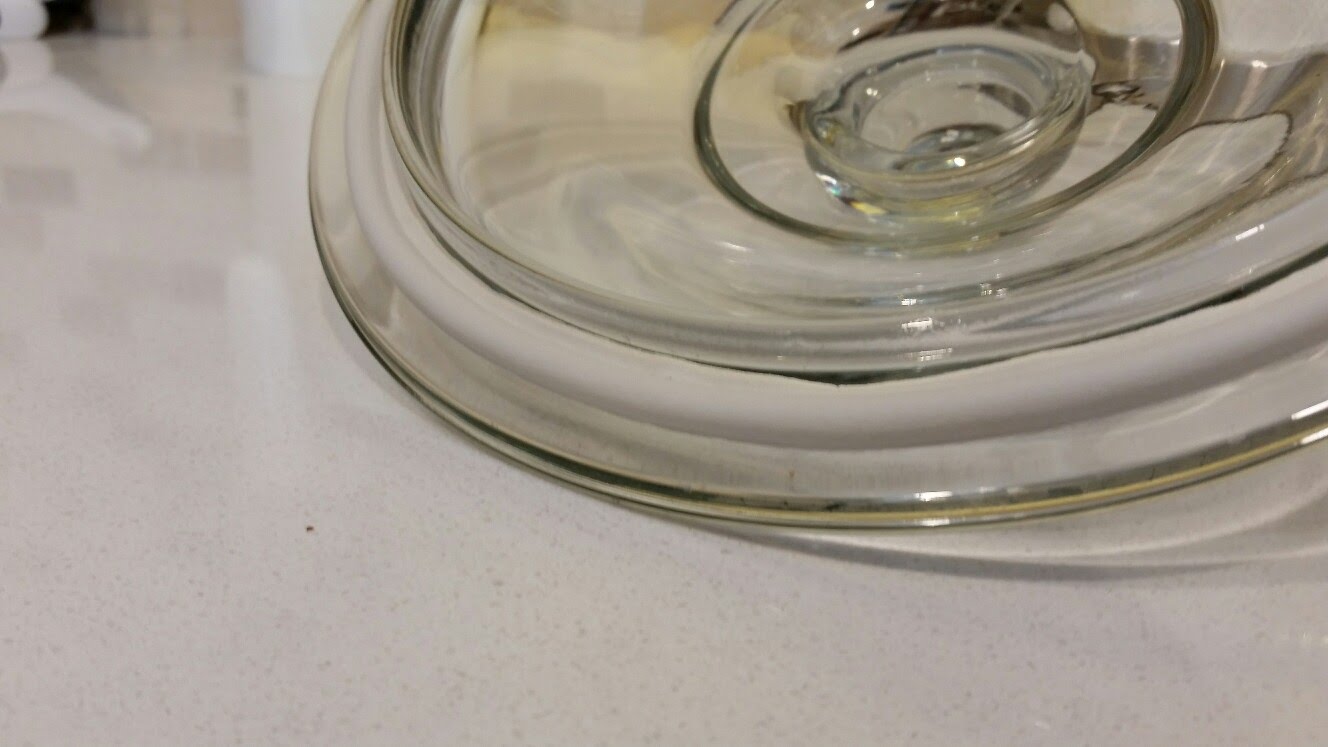
After reading a post from @brandon429 on the ULM thread, I got inspired and decided to do a jar pico. I remembered the jar that @hart24601 had used and thought I had seen one at a local Walmart. So I set off in search of the perfect jar. I did find one as expected, but it has a spigot in the side. At first I thought this would be a show stopper as the spigot was chrome, but on closer inspection, it is chrome coloured plastic, and has all plastic internals (in the spigot). Perfect. The spigot should make the water changes really, really easy. I may even be able to just drain the jar directly into my frag tank. That would make for some quick and simple water changes. My jar is 2G also just like @hart24601.

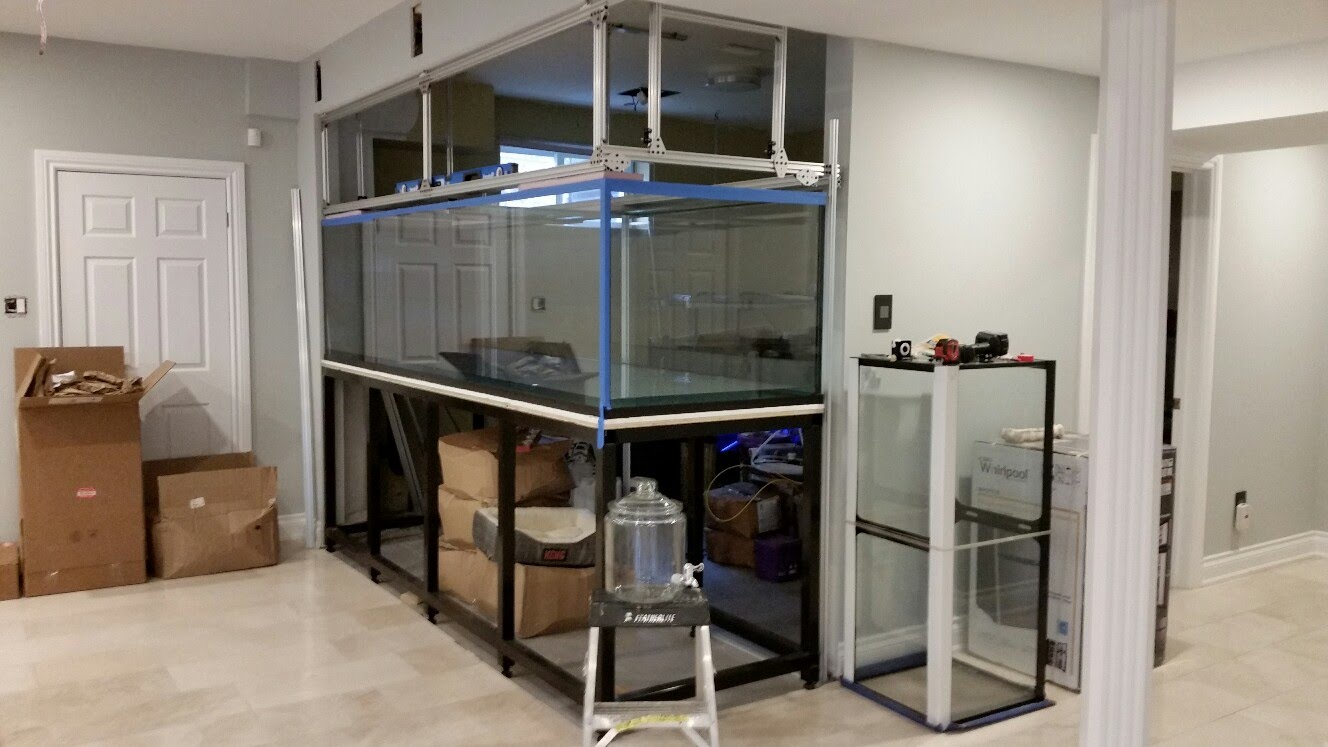
One of the reasons to setup the pico at the moment, is that I am fighting nudis in my frag tank. I would like a nice safe place to move some decontaminated frags to preserve them incase the battle goes awry. As well Brandon, mentioned the technique of mentoring struggling large tank owners using pico's. Since I have a largish build on the way, I thought why not hone my skills up a bit on a pico as my big build is taking moving along slowly. So I will be improving my reef keeping skills using a 2 G pico in preparation for my 785 G system. That seems applicable right!? Some of these frags are also intended for that system, so I would like to have a nice safe place for them, since my frag tank has been hard on some of them recently.

I tried to read through the other jar/pico threads to get ideas on what would go well with this system. With that in mind I ordered the following equipment.
  • Tunze Nanostream 6040
  • Kessil A80
  • Oceanbox Designs heater
  • Söchting Oxydator Mini
The oxydator is something I want to try to see if I can scale the output down to be compatible with a 2G pico. Have to see if that works out.

I will probably make a custom gasket and drill the top for the heater and Tunze. I expect I will wince a bit cutting the cord on a brand new Tunze pump.

To refill the jar after water changes, I have a spare Masterflex Digital on hand that I should be able to program to do a one shot pumping cycle of a preset amount when the Start button is pressed. That should make water changes so easy I should have no excuse for not keeping on top of them.

I have a 20 gallon container of live rock attached to my frag tank, so I should be able to sort through that and find some nice small pieces with lots of sponges. Come to think of it, sponges don't like air, water changes would expose them to air. Hmm, I will not go out of my way to select LR with sponges, but some will probably be present regardless.

I have some hitchhiker snails that have been breeding in my frag tank that look like nassarius snails, but only a 1/4" long. I will have to hunt some of those down and add them to the jar.

Now I just have to wait for everything to arrive.

Dennis
 
Last edited:

brandon429

why did you put a reef in that
View Badges
Joined
Dec 9, 2014
Messages
29,758
Reaction score
23,734
Location
tejas
Rating - 0%
0   0   0
Dennis i couldn’t be more happier to read that :) we just think evaporation controlled picos are the bees knees as they’re not much bigger than bees knees too

Nobody has ever put an oxydator in a pico that I’ve seen. Oxydators have never overdosed any system nor caused a single tank loss, wherever you can fit one will be fine. We dose raw peroxide to picos all the time, which is a calculated risk in consideration of whatever target we are up against, so the OD is safer right off the bat if you’ve got the space to experiment with one it will be just fine.

Glue corals all over it to obscure it ha!

Pls post pics and we are so happy to see this level of planning and execution it’s high level


I’m curious about that lid fit

Inner diameter fit vs rests on top of lip of the tank, how does it press? Not a huge deal either way but with ID fit it stops salt creep. I’m glad you mentioned that upscaling practice part, I really feel that’s a standout aspect of evaporation controlled picos. The upscale was that when pico keepers see you can rip into these things and force clean out any invader (not that you’ll need to with preemptive OD) and you are working with a system so tiny there is no room for error, or mini cycle, those actions are easily worked in larger systems who once feared deep cleaning due to mysterious recycle risks

Not that deep cleaning a 75 g is easy, but it can be done and picos pre model all the critical biology that big tankers used to hesitate over. In my opinion a pico Reef will remove all the ghost fears of cycling due to basic tank access cuz they’ll die immediately if we’ve made any bad calls about procedure. Here is one example below, the sand rinse thread.


leading in here by highlighting that sandbeds are neutral to coral growth, you can access them without loss so I’ll flip my system like a tapwater pancake and take my own medicine first and then the rest of the thread is all larger tanks with more forgiving dilution.
https://www.reef2reef.com/threads/the-official-sand-rinse-thread-aka-one-against-many.230281/

*Not every pico reefer chooses to bed rinse, Maritza does not. This just shows access, where wanted.


The smaller we reef, the more we learn what the -real- boundaries of tank care have always been in my opinion.
 
Last edited:
OP
OP
Dennis Cartier

Dennis Cartier

Valuable Member
View Badges
Joined
Aug 25, 2016
Messages
1,950
Reaction score
2,388
Location
Brampton, Ontario
Rating - 0%
0   0   0
When I thought of the oxydator, I researched the size of the mini one. The bottle is 1" x 3.5" and the base is 1.5". So pretty small and should fit with little trouble. I expect that I should be able to have 1 refill of H2O2 to last 1 week to coincide with the water change by tweaking the H2O2 concentration. The mini uses 4.9% peroxide, so I will try either 3%, or 2.45% along with 1 catalyst. I also have a larger model A and giant model W on the way for my frag/DT.

The jar has a lip on the lid that extends into the neck of the jar, so I am thinking either a flat gasket on top of the jar, or a bit of weather stripping. I am sure that a positive seal will be possible.

I have started to think about the best way to drain and fill the jar. There is a flat ring portion on the jar, just below the neck, and before the flare. I was thinking of using that as a place to drill for the cord pass throughs. That would leave the lid with no light blocking encumbrances, but then it occurred to me that removing the pump or heater cleaning/maintenance would be difficult if they are not removable with the lid. Hmm, being able to take the lid off without a pump / heater trailing behind sounds far nicer than having to deal with them everytime. Have to ponder that.

I think I am going to replace the spigot with a bulkhead. I was thinking either a 1/4" or 3/8" might just fit. I decided to test the options.

DFeRzWHA5_O8nWhfXa-NJ1oECMdh-XZS_-J2KXPIQawRV8H7hTRm-S36i3_53eDI8GlQBSgAER-pQZPFBJZFTYL2W0q2mEJ8zf4ujo5QxBp0Nbor2a2x5n5Yzr_2KU5P0r2AJeXq-hhGuGGP-QkJw9m22DS-JiyMYj82K3v2rtKy9J4MH1TOqqhHh3hoAhRKoRp_z-EG3BaV8c-VVUjPHLhujSvSQj-OyUv4d0x8YGE_KFC2dYTqn-OEM8MsRyRJe14AUH2oo17xhiddzvnJVOF96nJ1IhlTfIt-LPNXZEPmXa9naz4OYr1prGltMeUlfZXXxPS0hA8mL-BEHAqGx5z68tZL6pLZH7FYlSgxSvknWj_NPSR_LpVPN9XexmqUBmx6o69L6Ik5LIGWa6cOc_du8ErR5jPLTfX2EtPH6sbetK9Zar2ZC35d2nN9aZdtjim81a5MNWS00r3gBiW0wl9iFg4IADmPdlNqPcKjnfykVY-FohFqraIAMFH69fmeoZ4rbLUM6MATNGlMD6GzvTzYkjdLZuqja5ehYoyJGu2FC1ZdTEKuflJgtCCfuBDNeR-r3_-jQ5DJbcyCz03-3rV16v7LtxqOIV8qvX1PJZfD-mV81OzkNb-BSNknv2b5LcDyQ4EE01Ta7vm7UdenmOpUEmpV-hrwW5s=w747-h1328-no


4pd8vG9BJKI0VxA77MIPNyOh1OgEQU288m65yQ3-TkqY8bB_lRHtxcUNWdb3fwUJTVgw8UUxUi0oCK2SpsecVwQA3u9nqvFUkwWixUtNkovOfi2-6mwjpwYd52IfagGq59GSxpqcgME1XU5OuQEFqfa0sN-yq_ftUN3YQNcluLUKLxbO1tepwOA29nEcHEmEXnVGgn1HUhZCCLyuOXKETpn0P1mZ-YA5mftEoLe-DRz7JYANMxuPWCvR-FHjBYVPyB5XfzhQ6EqTx4J51s8wo20N1htrP2fc8jExV8tQN6zTytZgH91Oz7Ct0D_WbMAWKNCUM4KmCO-a9kHekyv5vousNaN95_0M1-_tQxrjaqjUKINLdem4CippawjDCMjRQ8kKPFrDX-EB2hdYcDzO5SKkfJcrdt4aDivHPkyKV7m7_KDbVhSEhaDjCjVyFeHsERgG42KClaHAnvCN5RZpfC1JopVJbtvYsI-l8CcS5BTXjzwSNqK-aQthyQBp0DLatrwwkwX1MUxUmItsi_LmfapeCnGddEztMylpCS5tCJXfa-nnVqCz2xypx1dVHLFn0h5BKuDRMbLd5tGqrkc5KrHHKsDaWjqpgI-ZAhLKtrXEsepun-vwze4rGwwQSMKhnrlCz-mU9qKZgEaW6heCdLt_WUp3mIJi56M=w747-h1328-no


Ok the 1/4" fits, but the 3/8" is too big even with the silicone grommet removed.

7Cn34sEliqv2FU3aKwmjDdxtR7_aeKBkZ58W7pN5SNAzj1OE2rhzWE6_IIxWsr2jZhy960SAu62Fxi3lI726OUcUlsKqW6ERbhFldzeZADZxgCI3BNrwTMMsolBSQPjt9yYu_LMaVrHT_0MgzOHd7nQ_LisyaPU5T4XA34FVbdRickzkvMVf_FlPLZAB4okP4HHUesOHctaTQed8NQXqxIYMXcOsWWWKrcXUnGTac2G7V48sO7tC5vUPBu-uOwQxu0WaC2xKK93B3OZKq4BTmyLk54JeqWJ_UXUALjQNB3QB3IqHi_1vvYAHitiWW3Edh9P4u5lse8h7B4Gn7Blby2cJaF52Fd2q5Pm-4wZX0z8_jwn3CkErDMv86edBSopNNJKXKmJuS18TOMTgmo9NvBtEpA80daTM8koY4ZZqFA99H9YmD6k7R5Pfl8jWKrSGjd5QisxaU01ZxOyEXct7PvbQyuIEzfLnuBi1MExD3m4yFYMbvsuu21PJNt6m7Ke5fKPi8p1_KspY57PSoAB0EacUgEht4W3re8HCHgFvef2gM8FUezArBHpV2Jeilwp4To9xH27aSzJjqMHimc7xKjJxnbtRI3tLYpKRpdV_wYDuDBPXPr-AZDnk0RYq3Qtk_4NQ_hhIFZ-shNC1g3tma3M4JP8J_8zmpI8=w1328-h747-no


Just for comparison, here is my soon to be pico tank in front of my larger display tank. The tank that is standing on its end is a 75G that will be the filter for the 560G display. The sump will be a 150G stock tank.

i5kNU-5bK9Dc5fNLe5AooXAVNBb7i81zKhEQbTUU2YeAlA__j45E8zSQG3mDYntKeuNad_MDulQ979yIFXj3gryv_qd9QakNqtVcoZ8hYttYCAkuiYBwjUJIF4dKINpYyplXa_Gyd1SVqzKnjIMrr2_cev9CUr1bVtvf4xNu9k1Dx6Su1D4CnYbv9lI51yD24WqLxDIkk9206sJqDnyoX1xsgUnLowNAlmDAmm0tqyyz0WAQBDAYzv9PMZxmBeyCOq3AbS8X_PhALw57lmSNailgIGWIMUmzaDZAJz2I_3q2kF8tpmEd91_Hc4pz3GGgUrrpGPBexIZ_JzooPR6iaZo0fQ162sqWMtQwhIU6Zm0EfHMhEM3jwd80QY12FJJzRk97JWHhuHEvHj3RcGnWJlyivhGXglAMP-R07g7K2JpjtSiEXMCzhDxfcNC-waMDqcfKEIdFncfERbx0Uv8ePesglfRIWn451JzpQmjYypXVJJDy3aZSrwGat6uUAchn7Rakx7PD5_TcWJkRdl8I4BxThWMI4L9k3I94ewlcqDoIHMDG2pqCELmBm9NsiE8Kf9VKLBSH2OGDJF9imCdWGdTXUjhwZyPan8tiqrce2DUgtNXxq-b-Vi2_-iWx93z1HKueDxsl0pgZgABfjg4pPkKTqudMtdeiSPY=w1328-h747-no


Dennis
 

brandon429

why did you put a reef in that
View Badges
Joined
Dec 9, 2014
Messages
29,758
Reaction score
23,734
Location
tejas
Rating - 0%
0   0   0
That's one of the sharpest builds I've seen. Dual clinch win on pico and large display TOTM coming up

The fact these systems can be tied together for functional support/biomodeling for things like quarantine or invader analysis to help one another is a great way to start my morning here at sbucks in ruidoso
 

brandon429

why did you put a reef in that
View Badges
Joined
Dec 9, 2014
Messages
29,758
Reaction score
23,734
Location
tejas
Rating - 0%
0   0   0
That pico will perform outstanding

Time to test the salinity control statements/love it. With a slightly dropped water line to allow for microclimate above the water no air input would be required and simply lifting the lid occasionally would refresh.


*If this is to be plumbed to any system to receive gas exchanged water then you have a zero topoff pico reef potential, that stands out in your design.

The water change internal/auto refresh rate can be set also to gas exchange requirements ( it will go days, not plumbed, with the simple air zone under the lid)


Yours can forego the whole topoff depending on how you want to plumb it, wow
 
Last edited:
OP
OP
Dennis Cartier

Dennis Cartier

Valuable Member
View Badges
Joined
Aug 25, 2016
Messages
1,950
Reaction score
2,388
Location
Brampton, Ontario
Rating - 0%
0   0   0
Ok, here is my spin on sealing the jar.

After a quick trip to Lowes, I selected a P shaped profile. I hoped that it would be about the right size to stick to the lip that extends down from the lid into the neck.

U629qhyFbNaXR_C9O8tXRGoAr-PFHyo2E-M_yi3Uv5BcmipgllC1P4lIZntzPTfTCCXxpnKleoURAE3kJMdUO2s4nvv0lUeaVOgjqU-696kBh5mpEqewxpPoM3pyEJe22whvky5faGa0f42ZQ-aCo9aS2JweysTCzXlZ3E6rIovjr7ttHTl3ZlwsH2Ntj--Mh6EyLQUMW5b551MKGSS0a1U-T0EhvLEFqvXsu6FTc5lEtkn5RjVRJrXXH2zIz58obx8ggi278IB2HZvwz6jnIXVEfoiKpx2Y0jdyBElj27zKEKP_xhofOCwL89lhWC9-ETFRPsjt9BZpt02HwyBL37PA6TCHtSHc2-Fu-E5Nm6bEdl5lUdYIq1lOBGfJORPuj2y6JfH1ZQLQ0Zk-Lz-kSeiHje6g2_blDDj7BwfJ8SDOzDQ1L5R5Pi-wZaP8BwmX9DVB1weU_Idwsln7s_ICjRYSknHzwY19SfFMGffamSDhNkO6TRF7wfZZ7euvX8SJikhjS_dCviPwx3BIaWAIQOyhgsx0H-7UrHAs6dVQeYDkzuX_QnZbKLEUcBUxdGViDn_XVnTbdGO9o0mpNAOmgreH0hZfclrXN61A2YJRaFqbRVrba-gj6D9Cdc7GhKazQfTkGPpxBCKQIgxhEzwh4ag0QRB76jPDIKs=w747-h1328-no


My first thought was to put the skinny part of the P facing downwards into the neck of the jar.

QBguuoG8iQGV19UnFzpIXRj42ixJ7-R0TB3u6fk_DUn1s3DD5mAx9u_LbfhHcA6VpB-hs8d48ZoPCZGdt0rVcRlRDWn3Y1CFB8_v-TMpEtcn9paQlUSe_XIhwT8rxXfSRCgVqPGcoks5Mgl8SnZRKgLvykFanwae0MOzug-jZkzlfscv8WeHXJkuo-hLQIH3VcmrVZnFL5CAovENP5dnRDAtxn0gQILGdkU8o-xVNM-6qPYUEf2ZxuP9i3jjLcdq_Bu4IsjgbSmPZMUzuruo0xd1jQEh1wo0_doXQnx7eoKaXbqPeJmU4TpVzSWUEpCTm8SrvhxfwTfobYdqmG-xi6bPzETOCBvQkydjjVvlf3qYDQOu7M4KhFX4tNyUGONDMIpjnd_0sKfoKYWNQd-mhmkSiwcxO1325zxpepJDaxUitth4E_WBwpxmTUsj8VgnpLlP6XAZlfGSfuLcbegkNfPlsgGvOs6WtEOqYa6aVV3OZr7FxRLLQZGxY90HLKtNIGs4-AyOl4T42ONVXzeS8l7lv5UO5PzxooheK3kYFmTldf2exYd97H3XDELVslwLPvSL7sDvx5t9KMp7Zk2O9mX0FXzri7B7kDMahG1mN8oLAIaVhC4w-8vIpiwh-H22ARttb7zMoc5WVPR4hsCO-FFksoefs38hUgw=w1328-h747-no


That really did not seal well. Perhaps reversing it would provide a better fit.

sy0PdCb7rISfYdw1d0Pg_Ps4WyII-ZhGX32KideDkhfurWDrH7NVlJ_YVinSW0lfuEKyaZd6dnhgucUvzqTe7PxHL_cjrwX91UYSLM5OAhuKrNHsFwtdREbfQ2IiyRYiBSGoC9llph-_2ybNwbGCfvUKnsoL_qQg_USlzW5WKINmCeAbmuzZqk1w_LdrSxKf8rD_6Q0WoQffudCf3C8T-kw_1WylRqVijcAOwZGMv8i0nca0dLXy2GK3whTz2wR0Yu3SySQH5eo6hmSgqWIoUwpBT1LY6yxOpoJWOhoN7qDkL8iHKqnhPBiQf5xjUINCwO4v--AF1ito95iHrQHEWtLtKBMCa2hHkymP-PSfZL6pbDk9qdZI0y6uJLy4PERv60sxdZEQl7EtoTZQJQfCv1r9EDB07vs77ISKjG3hOiro4DxpPTv7qToSUI5fWbQcuySQId-T4Qv4kw6_WTaCt2BN4kIbmMBcJY15-DVndyZciAcEGnl8fxGXLEqr0p8XXo8mvuasQgDScdgDQxZPZ7AHZQp5XWPNRzxLRx16BLRRkfjj5eDSAkDQ1eTZjg5YwNuhv-ydP3w7IRJiv-KjLqQKb-3gIL5NRan5LgzyjgRuSioNsst2Mz6OZfjLJIHNBx1Py9T6WfV0-oBrvF_9P2ICeFVBNkXiOYI=w1328-h747-no


Nope. Better, but still not what I would consider a good seal. Back to the drawing board.

DQ-IDnnKqLHk404tKkyGU_ekEcjbpOa8KmuXzrc4Tz06ou2M31q5QAl1gxtpCG2iK4EdaHmgytlQBu04mLvCI7pX2qKfmPOIrPgdMEPG5NK3yC5RztBg3sqEN7p980Hw2R3M02kz6N33pt9Tl733LLY-SZW_4Q5qgp5Qo53IUmlRQFP6seri8KnZh-RheA07X5F1BFNff8yHmfMVJJDZQvXl5HMthQ4Omwf6HMMCkqUuAuY7LA28Kh8NzTC9HGT5FrKcuhZmCdYOdtjf834-7sthixpAGori4aoVoFLHvuCIZVFG-zKpnABb95KmFsWX6ztsoh_hxeutA17oYfCpgSlFpT8P0_UJ1eDH7xevRzoEbe4DbBYPAHPPjGUITMVQq6Rdesi1zGPTuN3GyYC_mqGj_TtajO5x1q7XBhl0riw-Lz0RTsLXPY1rhM8PR0C0I7TxRLbUmR-8wm2q7hDkM3LY2m23ionQ5XFbib43u5LGbiLjPiyoOReuSRpzfeZbK7BxHPsPSmKTGw6Pda1MSZxwJmBQoemyqyJ25j0v29d_vkcDLUxMYDunVAICQfwNwK-G9V2zytz0_CkO5FtcdmUTiGnFA6dS-k63CB1W2yFjwpn8D7mtuOSBURrn0Ky_C9DVEPitc8Hxi84EIfjLbOCFXvMVdTtHOTA=w1328-h747-no


Ah, that is better. Now the lid sits on the weatherstrip and does not shift or shimmy when jostled. Since I am now using the flat part of the lid, there was a weather strip profile at Lowes that was a rectangle with ridges, but it was too wide for my initial plan of sticking it to the lip that sticks down. I have a feeling that it would work great stuck to the rim. I have plenty of extra of the P profile, so I just may pull it off and test using the wider profile that would cover the whole underside of the rim. This can be changed at any time, so waiting to see how it performs in use is also an option.

Dennis
 

brandon429

why did you put a reef in that
View Badges
Joined
Dec 9, 2014
Messages
29,758
Reaction score
23,734
Location
tejas
Rating - 0%
0   0   0
are you going to drill through the lid/glass for incoming lines, heater/powerhead or bubbler lead that's so sharp documentation
 
OP
OP
Dennis Cartier

Dennis Cartier

Valuable Member
View Badges
Joined
Aug 25, 2016
Messages
1,950
Reaction score
2,388
Location
Brampton, Ontario
Rating - 0%
0   0   0
are you going to drill through the lid/glass for incoming lines, heater/powerhead or bubbler lead that's so sharp documentation

My plan is to drill through the neck of the jar rather than the lid. That way I can remove the lid at will for maintenance/feeding. It will make maintaining the pump/heater a little less convenient, but I figure that having easy access to the lid without dangling hardware will make up for it. Any soaking of the equipment will just have to take place beside the jar, or I will need to move the jar to a different location when maintenance is required on the equipment. The photo below shows the flat neck area, below the rim and above the flare, where I intend to drill the grommet holes.

CAhOWv9BhBX_WHApIVnsoq_8oY2WNHS2qdDrt89Lpyhbwj6XHd9wUEFbT9fejOD6T4RYK8V0sC0tGz0FR8CbmOfkbrS3KEc-zZLR0esIINR9PNEs6jY6oRV8DgYuZe_0nYnQt2_l0oeoRWCvASrceFvnrgIohXqkqdkUthtmJ_7jPtOwaF6ZOZQ_szz3UorAkPbbA_NN0FOstCc-6TsSb_FbB1LczrriAPgdNgSK1Y6DzMZ5chsgaDa6Q0OvDO2T0fOuPNrm1KbagGKDme8aEiHN6O_SUHUOvzvAPaNbGT8zK7liBO96YcbAHekp3c6W1bQxXvudUiJOSQf1xXktQ3m_WERJIkzjg8mFMTdcpqp-NdyLQwq0anDigrB3md1azfVWWGha2TSQ0MJ8S_0V8g14u7F39x3htDEdncbLjidAEo7hEaEZ32OdgrsOMLAZlHY3aOtwQYEmj2vvO4yBt3CSU-eIZqoXX8Uv2mHYJ2uQPmTkjc06hh6mRiM31FngtTlLeCFV3APZEPMJNiSnKQKxdCgd_sdJ9y-nD-PXCheNtwKs6KTQhXEEMUZmuIF_MiNnJU-H-3t2uqeVx5pBwYrPVfIlT6nD2FlZc49NZ9kzMun66o_ct4XFi0VYLhfDuM-B33rnlCkvjd5VnxZ7JwLw7rfMC9-7CzI=w422-h749-no


I have been thinking about what you said yesterday about having one of these connected to a larger system. Though I plan to make this one separate due to the nudi issue, it would be handy in the future to have one of these hanging off a larger system with daily full water exchange. That would make it easy to test different light/temperature/flow parameters. Basically everything other than water parameters. So if the contents of the pico tank are doing well, then any issue the larger tank is having, must be related to something that can be adjusted (flow/light/etc).

I just need to find a more economical pump for future incarnations. The Tunze 6040 is a bit pricey for this. Then again, once I have this running and see how the 6040 performs, I might think it is worth it.

... I see that my local supplier is carrying the Jebao SW2. That is about 1/2 price of the 6040 and may be worth a look ...

Dennis
 
Last edited:

brandon429

why did you put a reef in that
View Badges
Joined
Dec 9, 2014
Messages
29,758
Reaction score
23,734
Location
tejas
Rating - 0%
0   0   0
Just checking in to see if gettin a little closer

It's gonna look science reefy.
 
OP
OP
Dennis Cartier

Dennis Cartier

Valuable Member
View Badges
Joined
Aug 25, 2016
Messages
1,950
Reaction score
2,388
Location
Brampton, Ontario
Rating - 0%
0   0   0
Just checking in to see if getting a little closer

It's gonna look science reefy.

Things are slowly arriving. The pump and light are here. The heater is sitting in Canada Customs at the post office sorting center. As is the Oxydator, sitting in customs, one province over. While I have been waiting, I have been working through the best way to set up the water change for the jar. This one will be separated from my current (frag) tank to keep it nudi free, but in the future I may use one or more of these jars to hang off the display, and those will need much more frequent water changes. With that in mind, I was trying to come up with a method of accurately measuring the water level in the jar, without being too intrusive. A high and low sensor to help limit the drain and refill would fit the bill nicely. A bit of searching led me to these https://www.ebay.ca/itm/352165998942. They are non-contact capacitive sensors that sense the liquid level through the vessel wall. Being non-contact, they can be stuck to the outside of the jar, on the backside, and not require more holes to be drilled, nor take up any internal space of the jar. I ordered the round versions, but if the curvature of the jar is too much for a good contact, I can switch to the rectangle versions intended for curved surfaces. My plan is to hook these up to an Arduino and make a simple jar controller. Using this type of system, the lid would become optional, as the high level sensor could also be used for top off (with RODI) between water change periods. This would also mean no drilling required as the cables could be routed over the lip of the jar, rather than through grommets. I was surprised to see that the cable of the Tunze 6040 is one continuous cable, without connectors between the pump and controller.

While searching around for an easy method of attaching a Masterflex head to a stepper motor, I stumbled across some Chinese versions of what look like Masterflex heads attached to stepper motors. The heads are Chinese versions, but as long as the attachments and drives shafts are the same, I have a whole bunch of authentic Masterflex heads on hand that I have been wanting to get attached to stepper. I am going to order in a couple to have a look and see if they can suffice rather than dedicating a full Masterflex digital drive to this one jar.

This jar is quickly turning into a project of it's own. No wonder my DT is always taking so long to progress ;)

Dennis
 

brandon429

why did you put a reef in that
View Badges
Joined
Dec 9, 2014
Messages
29,758
Reaction score
23,734
Location
tejas
Rating - 0%
0   0   0
Had no idea that was possible ~ that’s some worthy reading for sure. Those sensor controls give us more freedom in lid fit designs, topoff control and by that shapes of containers we can reef inside become much more diverse

Awesome
 
OP
OP
Dennis Cartier

Dennis Cartier

Valuable Member
View Badges
Joined
Aug 25, 2016
Messages
1,950
Reaction score
2,388
Location
Brampton, Ontario
Rating - 0%
0   0   0
Sadly no progress yet. The level sensors arrived this past week. The only development is that I have decided on cyphastrea as my main coral type. I have about 8 different morphs in my frag tank currently, so I have some stock to work with. Plus they are tough corals.

I have 3 weeks of holidays coming up shortly, so I will hold off on any actual work until after I am back.

Dennis
 

Myka

Valuable Member
View Badges
Joined
Jul 16, 2015
Messages
1,041
Reaction score
676
Location
SK, Canada
Rating - 0%
0   0   0
Instead of cutting the cords and drilling the jar, why don't you grind a "U" shape into the lid or the jar so the cords can fit out? Or maybe your "P" strip lifts the lid high enough that all you have to do is leave a gap in the "P" strip? Or leave the lid off and keep a jar of RODI nearby and top it up when you feed?

My pico doesn't have a lid, and I only have to top it up once a day - it doesn't go down much, I only add about 150 mL per day.
 
OP
OP
Dennis Cartier

Dennis Cartier

Valuable Member
View Badges
Joined
Aug 25, 2016
Messages
1,950
Reaction score
2,388
Location
Brampton, Ontario
Rating - 0%
0   0   0
Instead of cutting the cords and drilling the jar, why don't you grind a "U" shape into the lid or the jar so the cords can fit out? Or maybe your "P" strip lifts the lid high enough that all you have to do is leave a gap in the "P" strip? Or leave the lid off and keep a jar of RODI nearby and top it up when you feed?

My pico doesn't have a lid, and I only have to top it up once a day - it doesn't go down much, I only add about 150 mL per day.

I have pretty much decided against cutting the cord on any of the in jar equipment. I will probably just forego the lid all together and add an ATO using the high level sensor. The jar will be in the same room as my RODI so it should be pretty easy.

The part that I have been struggling with, is how to drain the water fast enough and refill, through the spigot hole. I can fit a 1/4" bulkhead into the existing silicon grommet, but that would limit me to using a 1/4" tube, which even at 2 gallons, will take some time to drain and refill. If I want to forego the quarantine aspects, I could simply put the jar inline with the AWC of my frag tank, with the waste from the frag tank being pumped to the jar, and a riser tube of the spigot hole acting as an overflow to waste. That may make for some interesting opportunities to test how altering flow/light would impact growth over altering the water chemistry.

Dennis
 

Myka

Valuable Member
View Badges
Joined
Jul 16, 2015
Messages
1,041
Reaction score
676
Location
SK, Canada
Rating - 0%
0   0   0
I like how you're being creative with your jar. I am doing the same with mine. I like the simplicity of some peoples' jars, but I think it's more fun to tinker. Hehehe. :D
 

reynaldoramon

Well-Known Member
View Badges
Joined
Dec 4, 2014
Messages
631
Reaction score
136
Rating - 0%
0   0   0
This is the pump I'm getting for my 2.5 gallon jar. Its 0 to 180 gph. To get a seal, I ordered 3 sheets of rubber with 1/8" thickness. I got a clear glass plate ($1 at walmart) for a top. I cut the rubber sheets into rings and glued them to the play to create a seal. Then I cut a notch out of the rubber "gasket" for wires to come out and let the top be level, and somewhat level.
dd55fc700780d71bf0944f2c9d71ebf5.jpg
 

Myka

Valuable Member
View Badges
Joined
Jul 16, 2015
Messages
1,041
Reaction score
676
Location
SK, Canada
Rating - 0%
0   0   0
Nice find on the pump! I searched all over Amazon, and never came across the Hydor Pico pumps! Why didn't you get the smallest version of the pump? My pico is 2.6 gallons, and 160 gph would blow the water right out of it. Haha!
 

reynaldoramon

Well-Known Member
View Badges
Joined
Dec 4, 2014
Messages
631
Reaction score
136
Rating - 0%
0   0   0
The flow is customisable from 0 to 180. I barely have it open and it's just right.
 

Creating a strong bulwark: Did you consider floor support for your reef tank?

  • I put a major focus on floor support.

    Votes: 54 40.3%
  • I put minimal focus on floor support.

    Votes: 28 20.9%
  • I put no focus on floor support.

    Votes: 48 35.8%
  • Other.

    Votes: 4 3.0%
Back
Top