CDA 125gal Reef tank build

Perfectly_Imperfekt1

Active Member
View Badges
Joined
Dec 27, 2014
Messages
210
Reaction score
127
Location
Murrieta, CA
Rating - 0%
0   0   0
Welcome to my CDA tank build!! I picked the tank up from another local reefer that was the original owner in Dec 2022. He had owned it for a little over I year I think. So it's new to me and plus he sold it for a killer deal. Originally I wasn't going to build a bigger tank than what I have now(RSR250 - see my signature for the build) because I'm going to buy a house in the near future. Well when house prices come down to a reasonable price. I've moved large tanks in the past and it's not something that I want to do again. Besides I'm not sure what location and fit my current tanks would be in a new home.

BUT... I went and bought another tank to build out. :face-with-tears-of-joy: It's only twice as big as my RSR250.

The plan is to have a mixed reef tank with SPS towards the top of the rock scape with LPS towards the bottom, and zoa's along the bottom with mushrooms and plate corals. RSR250 tank has been on the moonshine method for a year and half. It's been great. No water changes since the start and the tank looks great. So I'm going with the moonshine method on this build. Plan to dose all the dailies with a reefdose. I haven't decided on a Calcium reactor, but the manifold I'm building will have and extra gate valve that I can use for it.

Here's the tank when I went and picked it up

CDA 1.jpg

CDA 1.jpg

CDA 2.jpg

CDA 3.jpg


The tank came with brand new metal halides with 48" led bar lights for blue pop. I thought about keeping the MH lights, but ended up selling them to a local reefer.


Here's my list of equipment for the tank to start with:
  • Orphek Icon lights x 2
  • Orphek Oone with OR3-120 48" bars in blue sky x2(on the waiting list for the new release)
  • Trigger sump ruby red(modified)
  • Somatic 60 sump (for the reefmat 1200)
  • Reefmat 1200
  • Red sea skimmer RSK900
  • CW-200 Clear water ATS
  • Deluxe BRS reactors x2(GFO if needed/backup, Carbon)
  • Red sea Reefdose 4 head doser
  • Vectra L2 return pump(manifold with reactors)
  • Current USA 6010(1900 GPH) for the UV sterilizer manifold
  • 57 watt Aqua Ultraviolet UV sterilizer
  • Hard plumbed manifolds(2) with gate valves for reactors, ATS, spare gate valve for Cal reactor, cepex ball valves for return pumps
  • Full Apex with Trident
  • 1" Flow meter for UV sterilizer (plumbed)
  • Titanium heaters 600watt x2
  • AI Fuge light
  • Motorized light rack(electric desk) with T slot aluminum
  • Red sea Reefwave 25x2
  • Nero 5(not sure how many, I have a 4 laying around)

Currently finishing the hard plumbing and then I will start on the rock scape. I picked up a bunch of reef rock, and shelf rock to use for the build. My plan is to build some negative scape like I did in my RSR250 build. Using white PVC to mockup the manifold, and I will use RED pvc pipe with grey sch 80 fittings.

CDA MANIFOLD PREP 1.jpg

CDA MANIFOLD PREP 2.jpg
CDA MANIFOLD PREP 3.jpg
CDA MANIFOLD PREP 4.jpg
CDA MANIFOLD PREP 5.jpg
 
OP
OP
Perfectly_Imperfekt1

Perfectly_Imperfekt1

Active Member
View Badges
Joined
Dec 27, 2014
Messages
210
Reaction score
127
Location
Murrieta, CA
Rating - 0%
0   0   0
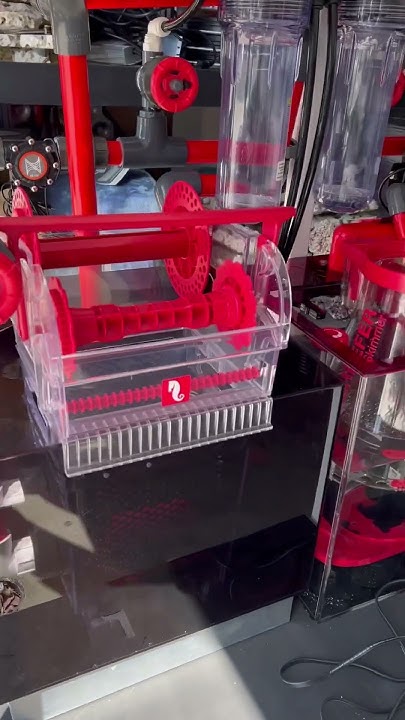
I built a platform for the ATS to sit on and so it's out of the way for me to get into the fuge chamber on the trigger sump. In the past I've had issues with the ATS on my RSR250 leak every once in awhile. So I wanted to make sure that if it did, there's no way for it to leak onto the ground.

I used red color plexiglass and cut it up and made it into this below

CDA ATS 1.jpg

CDA ATS 2.jpg

CDA ATS 3.jpg
 
OP
OP
Perfectly_Imperfekt1

Perfectly_Imperfekt1

Active Member
View Badges
Joined
Dec 27, 2014
Messages
210
Reaction score
127
Location
Murrieta, CA
Rating - 0%
0   0   0
What's up reefers!! I've been busy with work. I received a promotion and gained new territory. I'm now flying to AZ every other week for 3 days. It's a huge increase in commission for me. That's why it's taking me longer to get this build done. Here's the finished the hard plumbing.
1.jpg

3.jpg
2.jpg

5.jpg
6.jpg
4.jpg

8.jpg
7.jpg


I'm going to run a FUGE, and the ATS on alternating schedules. So FUGE for 12hrs and then ATS for 12hrs. I ended up mounting the AI FUGE light to the ATS. Turned out pretty clean.

9.jpg


10.jpg


12.jpg
11.jpg

13.jpg

14.jpg
 
Last edited:
OP
OP
Perfectly_Imperfekt1

Perfectly_Imperfekt1

Active Member
View Badges
Joined
Dec 27, 2014
Messages
210
Reaction score
127
Location
Murrieta, CA
Rating - 0%
0   0   0
Next project is to add the leveling feet to the steel stand. I made these leveling feet mounts with steel plates and welded a 1/2" grade 8 nut. These will be mounted with screws to the steel stand, there's a total of 6. I will drill a hole for each stud to go up into the steel tubing. Once I'm finished with this, I will move the tank into the house and do a leak test. Then I will start the aqua scape and hopefully it will be filled with water before Memorial day weekend.

feet.jpg

feet 2.jpg
 
OP
OP
Perfectly_Imperfekt1

Perfectly_Imperfekt1

Active Member
View Badges
Joined
Dec 27, 2014
Messages
210
Reaction score
127
Location
Murrieta, CA
Rating - 0%
0   0   0
Besides building the aqua scape I have a few more things to plan out and finish.

  • Control panel layout and figure out how I want to do it. Cabinet next to the tank? Mount all the electronics on the wall behind the tank and put it on a slides to put out from the back of the tank?
  • Reefdose(4 head - x2) setup with the Reef moonshiner method dailies(6 bottles) along with ALK, CAL. I'm been contemplating doing a calcium reactor. Haven't pulled the trigger or decided.
  • Install the water station on the exterior wall adjacent to the reef tank. Plan is to have RO water in the station to supply the ATO for the tank. I do have another setup for making saltwater if needed. But I don't do water changes now on my RSR250. My IM lagoon 25gal I do a month water change.
 
OP
OP
Perfectly_Imperfekt1

Perfectly_Imperfekt1

Active Member
View Badges
Joined
Dec 27, 2014
Messages
210
Reaction score
127
Location
Murrieta, CA
Rating - 0%
0   0   0
Fill the tank up for a leak test and trial run. Found that the Reefmat sump needs another bulkhead to drain into the trigger sump. There's currently a 1-1/2" bulkhead. The water level on the reefmat sump is too high for my liking. It's about 3" higher than the trigger sump water level. I do have a flow meter for both returns on the tank and I'm curious what these two return pumps will put out. I have them both at 50% power right now and the overflow is just about full.


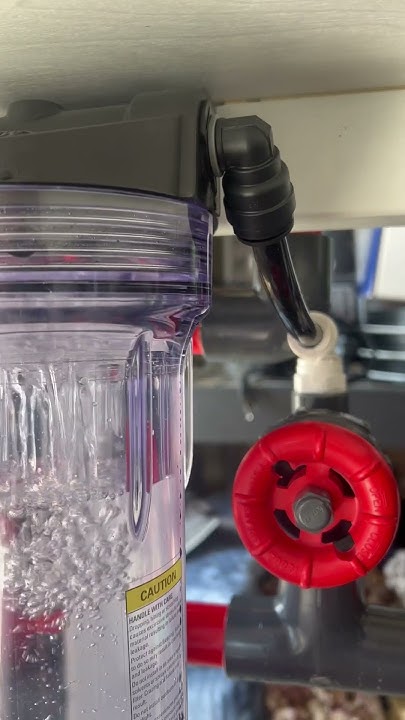
BRS reactor looked funny at first, and then it started to leak. Took it apart and found a pin hole in it. Going to send this info to BRS and hopefully they replace this reactor. It was purchases brand new in the last couple months or so. First time using it in the video.


BRS reactor leaking

BRS reactor pin hole 1.jpg

BRS reactor pin hole 2.jpg

BRS reactor pin hole 3.jpg
 
OP
OP
Perfectly_Imperfekt1

Perfectly_Imperfekt1

Active Member
View Badges
Joined
Dec 27, 2014
Messages
210
Reaction score
127
Location
Murrieta, CA
Rating - 0%
0   0   0
Update on the build:

It's been awhile since I've posted because I was busy with vacations, my kids, some little work in there somewhere.

The rock-scape took me some time to figure out what direction I wanted to go. The rock I used is Caribsea dry rock. Building the rock scape I wanted to keep in mind the max height that I wanted to go, flow between the scapes. Really wanted for the back of the scape to open so fish and water could flow. There's not overflow in the way so why not take advantage of it. This is my first tank with an external overflow. I have to say, that I wouldn't go back to an internal overflow. Then I thought to myself, why not keep some of the rocks-cape you built from the RSR250 build. Two years of reefing built into them. Sponges, coralline growth, etc. My weeping willow has spot in the new build. Really not sure I will keep it, but it's going into the tank.


The location of the tank went in the same spot my RSR250 tank was. First I had to move the RSR250 tank across room before I could move in the CDA tank. My plan was to cycle the CDA tank first then move the rock, fish, and coral I'm keeping into the CDA. Unfortunately 1 week before the tank move we had a power outage for 10hrs. I'm embarrassed to say that I didn't have a battery backup or generator on hand. I lost 14 fish out of the 16 total I had in the RSR250. That was really bad day.

The CDA cycle started with a medium size raw shrimp dropped in the tank for 2 days. The ammonia went over 5ppm. Then I pulled it. I'm a huge fan in diversity of bacteria in the tank. The bacteria I used is Dr. Tim's one and only, Biodigest, MB7, Polylab, Fritz turbo start. Then I added some vodka to take it up a notch. Once there was nitrite I added the PNS Substrate sauce(1 bottle during the cycle). The tank took about 2 weeks to cycle to where I measured 0ppm of ammonia and Nitrite with 5ppm of nitrate. Plan is to continue dosing Substrate sauce till the nitrate reduces.

IMG_5686.jpeg


IMG_5510.jpeg


OP
OP
Perfectly_Imperfekt1

Perfectly_Imperfekt1

Active Member
View Badges
Joined
Dec 27, 2014
Messages
210
Reaction score
127
Location
Murrieta, CA
Rating - 0%
0   0   0
The control cabinet was going to be in the sump area at first. But then I always wanted to have a side cabinet with all the electronics in one area and away from the water. Found a shaker cabinet that is 24” wide by 36” tall. Almost matches the height of my tank. Mounted the cabinet just above the base boards. The wires will run out the bottom of the cabinet. The style of the doors on the cabinet match my stand doors. Worked out perfect!!

IMG_5448.jpeg


OP
OP
Perfectly_Imperfekt1

Perfectly_Imperfekt1

Active Member
View Badges
Joined
Dec 27, 2014
Messages
210
Reaction score
127
Location
Murrieta, CA
Rating - 0%
0   0   0
Update:

Mounted the led bar lights(48" bars) that I purchased from Herifi.com. Basically Orphek knock-offs. The cost was the biggest factor why I decided on this brand. They are also 100% dimmable with one driver for all 4 bar lights. Considering it's supplemental lighting and so I have that color pop. I did two blue sky and 2 blue plus. Each channel is dimmable and I can set a lighting schedule on the app the lights come with. The app is not user friendly and require direct wifi connection to the dimmer every time you want to control the lights. Once you set the schedule you really don't need access the lights again. The lens I went with are 120-degree angle and works great for my application. The cost for these lights was just over $450 delivered to my door. You can't beat that. [email protected] , she was very helpful. I highly recommend contacting her if you're interested in these bar lights. Tell her I sent you.

The hardware I used was from Tnutz.com. They are the most cost effective aluminum T-slot website. Their service is great. It came out very clean, and I really like it. The bar lights came with swivel mounts that I mounted to the alum angle that is attached to the motorized light rack.

I will get some closeup photos of the mounting hardware, and how I mounted the ballasts for the Orphek lights and the bar lights.


IMG_5423.JPEG

IMG_5424.JPEG
IMG_5425.JPEG


Here's the mounting brackets that came with the bar lights. They are stainless steel.

IMG_5426.JPEG
IMG_5428.JPEG
IMG_5430.JPEG
IMG_5431.JPEG


Some photo's of the lights mounted. The lights are at their MAXIMUM height up.

IMG_5824.JPEG


IMG_5822.JPEG
IMG_5825.JPEG
IMG_5827.JPEG
IMG_5828.JPEG
 
OP
OP
Perfectly_Imperfekt1

Perfectly_Imperfekt1

Active Member
View Badges
Joined
Dec 27, 2014
Messages
210
Reaction score
127
Location
Murrieta, CA
Rating - 0%
0   0   0
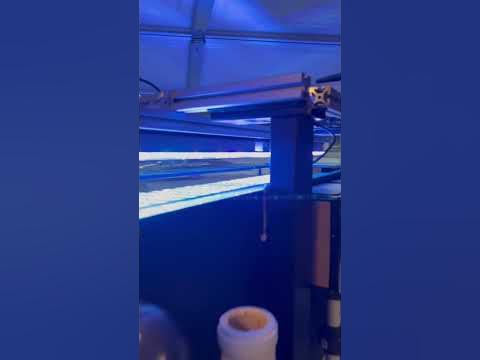
Here's a short video of the top of the light rack with all the ballast for the lights. Connected to a power strip. With one cord down the back of the motorized lift. That keeps all the wires from running down the light rack, looking all messy. Still need to shoot a small video of the bar lights mounted. I did this video after I mounted the ballasts for the led bar lights and power strip.

 
OP
OP
Perfectly_Imperfekt1

Perfectly_Imperfekt1

Active Member
View Badges
Joined
Dec 27, 2014
Messages
210
Reaction score
127
Location
Murrieta, CA
Rating - 0%
0   0   0
After 4 weeks of cycling the tank I turned the lights on at 15% max and lifted as far as they can go up. Added some fish after 6 weeks. The ugly stages is in full effect. I've added a lot of PODS and a small group of snails and hermit crabs to help with the algae. Running my lights currently from 9am to 9:30pm. The led bar lights come on at 4pm and off at 9:30. They gradually ramp up to 15% and then slowly ramp down and off at 9:30pm.

The Red Sea tank is still running with my 3 fish and coral. The next couple weeks I will be moving fish and coral into the CDA. Selling off the corals that won't make the cut.


Reefing threads: Do you wear gear from reef brands?

  • I wear reef gear everywhere.

    Votes: 20 13.7%
  • I wear reef gear primarily at fish events and my LFS.

    Votes: 10 6.8%
  • I wear reef gear primarily for water changes and tank maintenance.

    Votes: 1 0.7%
  • I wear reef gear primarily to relax where I live.

    Votes: 22 15.1%
  • I don’t wear gear from reef brands.

    Votes: 83 56.8%
  • Other.

    Votes: 10 6.8%
Back
Top