Completely DIY 315 build

bruno3047

Valuable Member
View Badges
Joined
Feb 16, 2021
Messages
1,088
Reaction score
828
Location
Central Florida
Rating - 0%
0   0   0
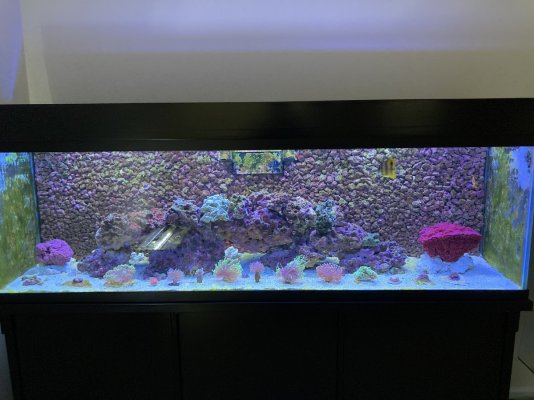
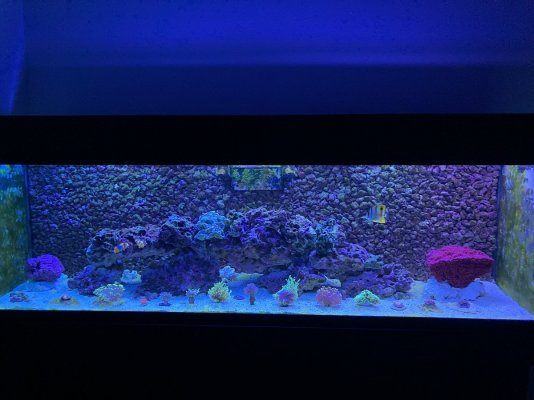
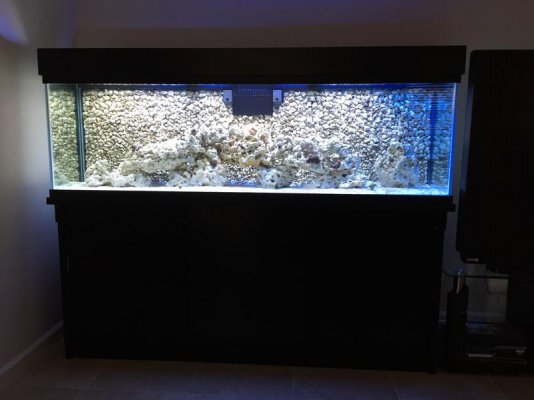
Just wanted to start my build thread, even though I still have a ways to go before it’s complete. I’ll start with a FTS of my current tank. A recently converted FOWLR 125. This was a Petsmart Black Friday Special that I bought for $349, no tax, at the local Petsmart. This is what I bought:


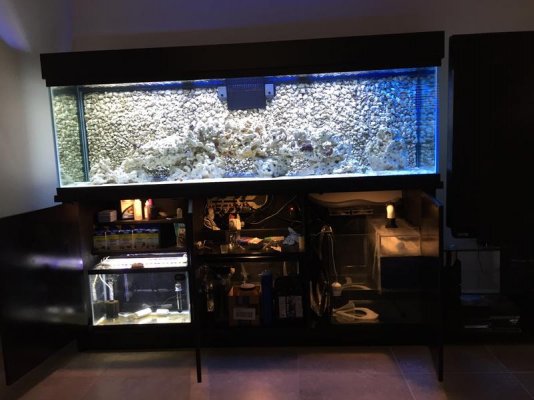
I then made some modifications, starting with the stand. I raised the tank platform up 3 1/2 inches by inserting sections of 1x4 oak on top of the existing supporting particleboard. I built new doors out of particleboard that I had cut to size at the local Home Depot. On the tank, I drilled the back and added a medium size Eclipse external overflow. Eventually I ended up with this. This is the review that I posted to the Petsmart website.
Amazing potential​

Bought on Black Friday 2017. Spent a few months modifying the tank. Added a removable dry rock rubble back wall and an Eclipse medium-sized overflow. Also modified the stand to make room for a 10-Gallon quarantine tank, custom-made wet/dry filter and 10-Gallon auto top-off system. Very happy with this product. Excellent quality.

DCBB80D4-F2C8-4D28-A09B-80EBBF6540CB.jpeg 3C35AEF1-19C0-4D5F-80E3-DF1F574F1015.jpeg This is what it looks like now DDE0EE5D-60C1-4835-8990-6F908984476E.jpeg 492C0891-9772-4E68-93C8-9DA5383AC2AF.jpeg I also built a matching open-style canopy to hold the light fixture and block the glare. The canopy allows access to the glass canopy doors which allows access to the tank itself for feeding and minor cleaning and aquascaping.
 
Last edited:
OP
OP
bruno3047

bruno3047

Valuable Member
View Badges
Joined
Feb 16, 2021
Messages
1,088
Reaction score
828
Location
Central Florida
Rating - 0%
0   0   0
Just wanted to start my build thread, even though I still have a ways to go before it’s complete. I’ll start with a FTS of my current tank. A recently converted FOWLR 125. This was a Petsmart Black Friday Special that I bought for $349, no tax, at the local Petsmart. This is what I bought:


I then made some modifications, starting with the stand. I raised the tank platform up 3 1/2 inches by inserting sections of 1x4 oak on top of the existing supporting particleboard. I built new doors out of particleboard that I had cut to size at the local Home Depot. On the tank, I drilled the back and added a medium size Eclipse external overflow. Eventually I ended up with this. This is the review that I posted to the Petsmart website.

Amazing potential​

Bought on Black Friday 2017. Spent a few months modifying the tank. Added a removable dry rock rubble back wall and an Eclipse medium-sized overflow. Also modified the stand to make room for a 10-Gallon quarantine tank, custom-made wet/dry filter and 10-Gallon auto top-off system. Very happy with this product. Excellent quality.

DCBB80D4-F2C8-4D28-A09B-80EBBF6540CB.jpeg 3C35AEF1-19C0-4D5F-80E3-DF1F574F1015.jpeg This is what it looks like now DDE0EE5D-60C1-4835-8990-6F908984476E.jpeg 492C0891-9772-4E68-93C8-9DA5383AC2AF.jpeg I also built a matching open-style canopy to hold the light fixture and block the glare. The canopy allows access to the glass canopy doors which allows access to the tank itself for feeding and minor cleaning and aquascaping.
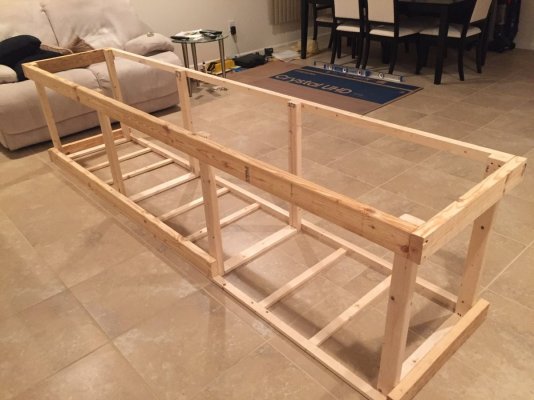
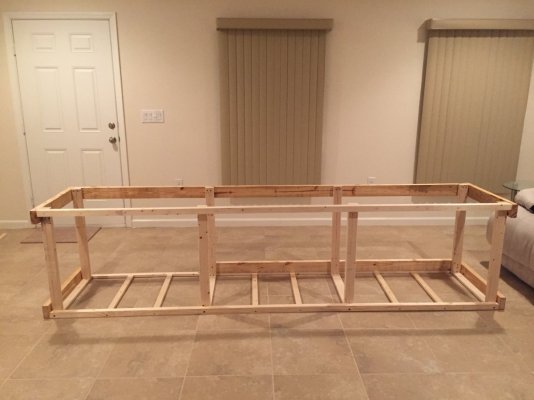
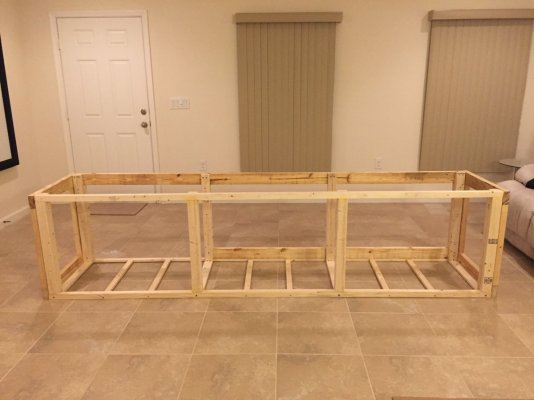
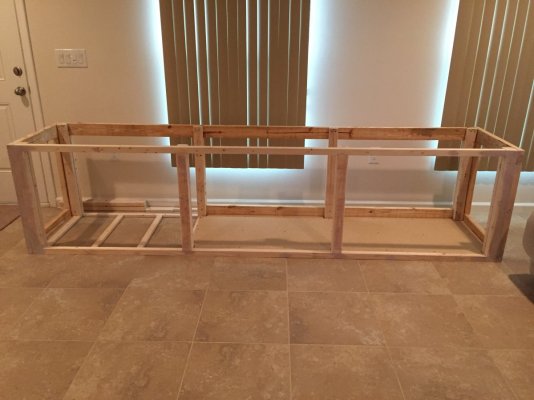
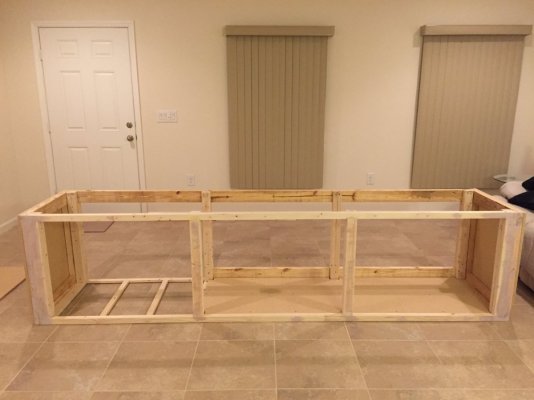
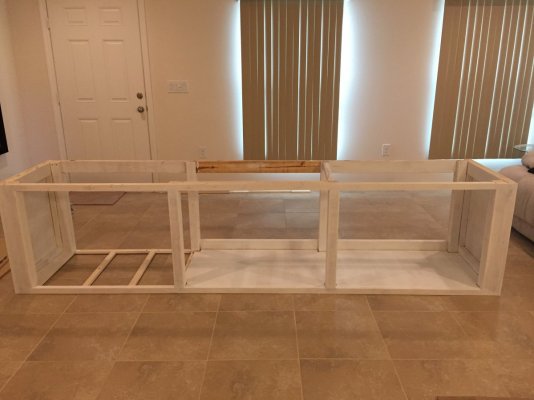
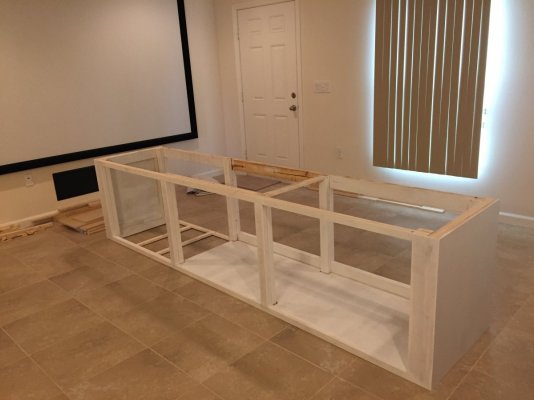
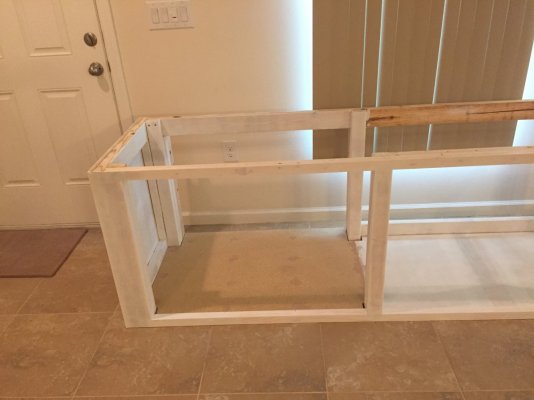
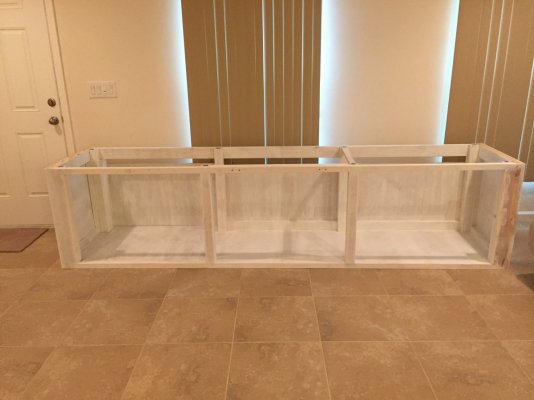
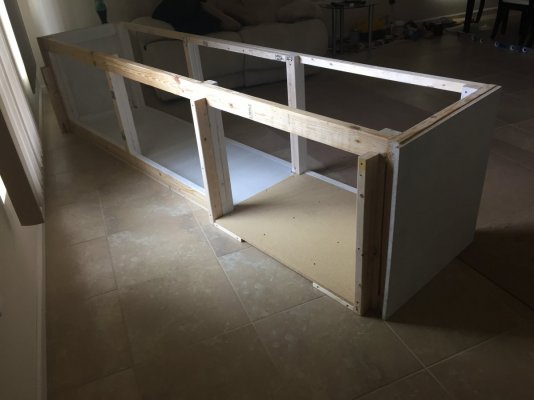
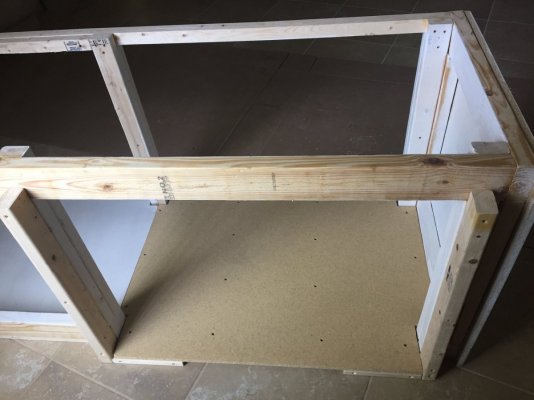
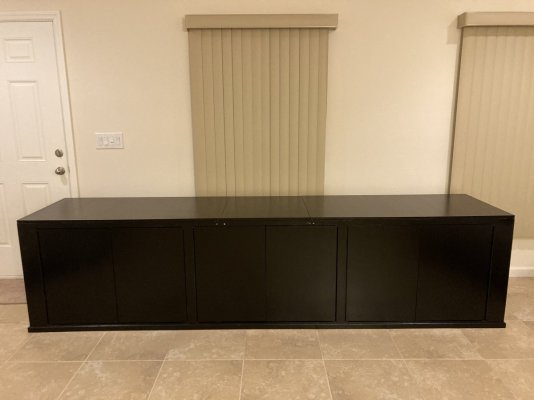
A few pictures of the stand, as it’s being built. First pictures show the base frame. I used the method shown by the King of DIY. It’s an accepted tried and true method for building sturdy wood aquarium stands.

AD864C35-9487-4FA9-B20A-974D82D6B94D.jpeg B6955872-F1FE-4C25-8F7F-437A75E150CD.jpeg Step two of this method is to insert cripples (wood pieces) between the top perimeter frame and the base perimeter frame 84AECA68-5151-4915-9351-DA44AC0EA6E1.jpeg I was after the same smooth black finish that I presently have on the current tank. So my next step was to fill the joints between the different framing members with body filler used in body shops. I used Bondo, which can be bought at Home Depot for less than nine bucks a quart. I also installed 2/3 of the floor. This was the result after application of Bondo and the initial sanding. B9F0F829-1634-4BA2-B520-5CEE3B798A37.jpeg 6F4C67A3-D1A2-487F-9F6C-A7FEE291167A.jpeg The left side of the stand has an extended back so as to be able to fit 2-29 gallon aquariums back to back. The front one to serve as a quarantine tank and the back one to serve as the ATO Reservoir. The Bondo will also be used to fill-in and smooth out any imperfections on the exposed surfaces of the framing members which I intend to use as the finished material. By this time I had also installed the end panels. All the 2 x 4 material is Southern Yellow Pine, which Is significantly heavier and also significantly stronger than Whitewood lumber. All the other framing material is standard Whitewood lumber. All joints and panels are screwed and glued with waterproof wood glue. All wood panels are 5/8 inch particleboard, primed with BIN123, painted with Rustoleum, and sealed with Minwax Polycrylic water-based crystal-clear protective finish.
 
Last edited:
OP
OP
bruno3047

bruno3047

Valuable Member
View Badges
Joined
Feb 16, 2021
Messages
1,088
Reaction score
828
Location
Central Florida
Rating - 0%
0   0   0
A few pictures of the stand, as it’s being built. First pictures show the base frame. I used the method shown by the King of DIY. It’s an accepted tried and true method for building sturdy wood aquarium stands.

AD864C35-9487-4FA9-B20A-974D82D6B94D.jpeg B6955872-F1FE-4C25-8F7F-437A75E150CD.jpeg Step two of this method is to insert cripples between the top perimeter frame and the base perimeter frame 84AECA68-5151-4915-9351-DA44AC0EA6E1.jpeg I was after the same smooth black finish that I presently have on the current tank. So my next step was to fill the joints between the different framing members with body filler used in body shops. I used Bondo, which can be bought at Home Depot for less than nine bucks a quart. I also installed 2/3 of the floor. This was the result after application of Bondo and the initial sanding. B9F0F829-1634-4BA2-B520-5CEE3B798A37.jpeg 6F4C67A3-D1A2-487F-9F6C-A7FEE291167A.jpeg The left side of the stand has an extended back so as to be able to fit 2-29 gallon aquariums back to back. The front one to serve as a quarantine tank and the back one to serve as the ATO Reservoir. The Bondo will also be used to fill-in and smooth out any imperfections in the framing members which I intend to use as the finished material. By this time I had also installed the end panels also made from 5/8” particleboard. All the 2 x 4 material was Southern Yellow Pine, which Is significantly heavier and also significantly stronger than Whitewood lumber. All the other framing material is standard Whitewood lumber.
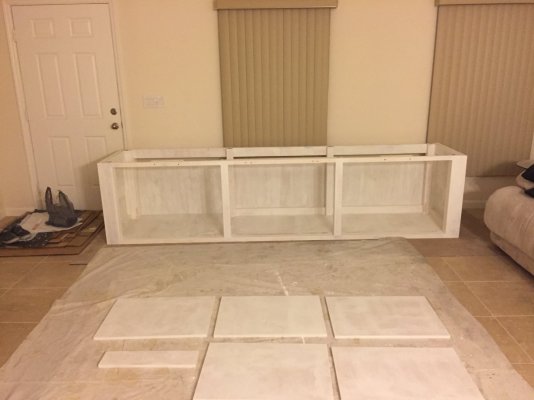
Another application of Bondo to hide the exposed front edges of the end panels. Also, the initial application of the BIN123 primer. This is a fast-drying shellac-based waterproof primer/sealer/stain killer.

B0091130-CAB0-4850-B0A6-311AB19D4B1B.jpeg
 
Last edited:
OP
OP
bruno3047

bruno3047

Valuable Member
View Badges
Joined
Feb 16, 2021
Messages
1,088
Reaction score
828
Location
Central Florida
Rating - 0%
0   0   0
Another application of Bondo to hide the exposed front edges of the end panels. Also, the initial application of the BIN123 primer. This is a fast-drying shellac-based waterproof primer/sealer/stain killer.


Another application of Bondo to hide the exposed front edges of the end panels. Also, the initial application of the BIN123 primer. This is a fast-drying shellac-based waterproof primer/sealer/stain killer.

B0091130-CAB0-4850-B0A6-311AB19D4B1B.jpeg
Completed the floor. The joint was
Another application of Bondo to hide the exposed front edges of the end panels. Also, the initial application of the BIN123 primer. This is a fast-drying shellac-based waterproof primer/sealer/stain killer.

B0091130-CAB0-4850-B0A6-311AB19D4B1B.jpeg
Angle view of the front corner showing all the various wood pieces made to look monolithic (one piece) using the Bondo.

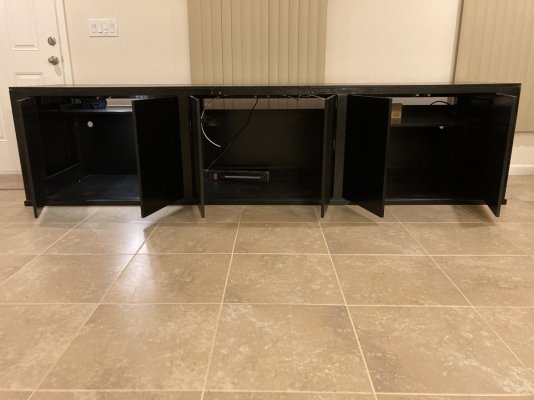
406FFA90-79F9-4CAF-B84A-7A261567C4D2.jpeg Installation of the final section of the floor. The joint was filled with Bondo and sanded smooth to again give the appearance of a single piece of material. CE528DB1-56ED-427C-A772-A74B2E8B998D.jpeg Stand is now primed and almost ready for base coat of paint. Additional work required on the right post with Bondo. B291E066-A255-414F-B289-DD4217B53623.jpeg Photos showing the rear left side where the floor was extended B68A2A62-5CD4-4F7C-9BCB-E28E41E15D1A.jpeg 8760DDBC-E8C6-470C-9252-AE794F4B32C4.jpeg
 
Last edited:
OP
OP
bruno3047

bruno3047

Valuable Member
View Badges
Joined
Feb 16, 2021
Messages
1,088
Reaction score
828
Location
Central Florida
Rating - 0%
0   0   0
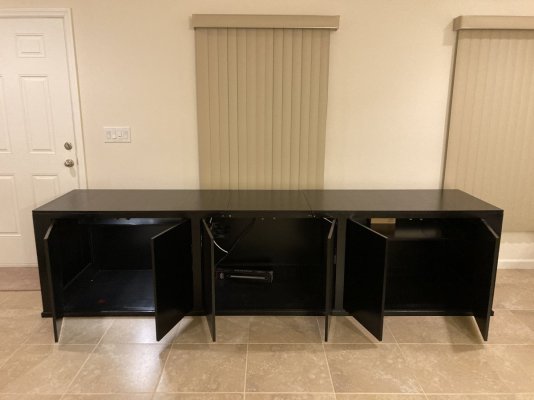
A few notes. Particleboard panels were put on the back of the stand leaving a 3 inch gap at the top to allow for ventilation and humidity mitigation. Temporary cross brace made out of one by two to maintain the stand’s integrity front to back. Ultimately, there will be 2-2x4s put into place when the stand top is installed. This is so I can use those as a variable to have a flat, straight, level platform for the tank to sit on. The stand top will be installed permanently when the stand is put into its final position. I want to eliminate the chance of my tile floor not being perfectly level in every location. The stand top only needs to be perfectly level where the stand will be permanently located.
 
OP
OP
bruno3047

bruno3047

Valuable Member
View Badges
Joined
Feb 16, 2021
Messages
1,088
Reaction score
828
Location
Central Florida
Rating - 0%
0   0   0
Doors primed

AE79FCAA-913B-4AA4-B58E-13D27AA0003F.jpeg
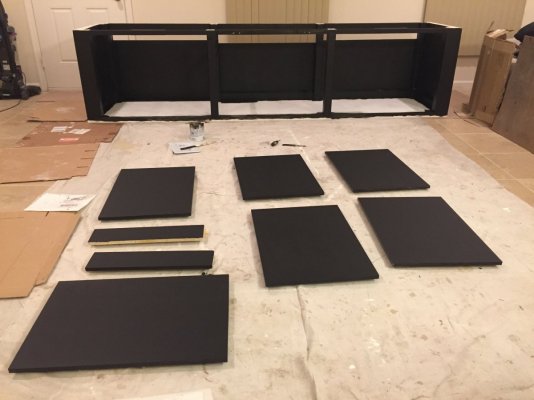
Basecoat applied using Rustoleum flat black protective coating. Flat black for the base coat so there’s no sanding required for the topcoat. Paint was applied using a 4 inch foam roller and 2 inch brush.

The finish on the particleboard comes as a rough finish. In order to get a smooth finish I applied a skim coat of thick viscosity drywall compound. Did a light sanding then applied the BIN123 primer. This made for a solid smooth surface. The floor will be painted with black liquid Flexseal.

5B55AE05-1615-481A-8F92-BC2A2F4F3C5D.jpeg
 
Last edited:

Projects with Sam

5000 Club Member
View Badges
Joined
Dec 2, 2021
Messages
6,931
Reaction score
27,778
Location
Western Springs, IL
Rating - 100%
3   0   0
looks awesome! following!
A note for QT. Its generally recommended QT be in a different room or at least 10 feet away because the pathogens/protozoans can travel in aerosolized QT tank water. Also you're more likely to cross-contaminate if local to your DT.
 
OP
OP
bruno3047

bruno3047

Valuable Member
View Badges
Joined
Feb 16, 2021
Messages
1,088
Reaction score
828
Location
Central Florida
Rating - 0%
0   0   0
looks awesome! following!
A note for QT. Its generally recommended QT be in a different room or at least 10 feet away because the pathogens/protozoans can travel in aerosolized QT tank water. Also you're more likely to cross-contaminate if local to your DT.
I thought about that, and being an old guy, mixing up nets and other utensils is a distinct possibility. But I’m pressed for space. In my present tank, I had a 10 gallon QT and all my inhabitants went through there, without any complications. I had a 4-5 inch regal angel in there with a bad case of pop-eye. I cured him by giving him 4 freshwater baths, every other day using tapwater. The chlorine in the tapwater killed the bacterial infection in his eye.
 
OP
OP
bruno3047

bruno3047

Valuable Member
View Badges
Joined
Feb 16, 2021
Messages
1,088
Reaction score
828
Location
Central Florida
Rating - 0%
0   0   0
looks awesome! following!
A note for QT. Its generally recommended QT be in a different room or at least 10 feet away because the pathogens/protozoans can travel in aerosolized QT tank water. Also you're more likely to cross-contaminate if local to your DT.
Thanks for the compliment.
 
OP
OP
bruno3047

bruno3047

Valuable Member
View Badges
Joined
Feb 16, 2021
Messages
1,088
Reaction score
828
Location
Central Florida
Rating - 0%
0   0   0
Basecoat applied using Rustoleum flat black protective coating. Flat black for the base coat so there’s no sanding required for the topcoat. Paint was applied using a 4 inch foam roller and 2 inch brush.

The finish on the particleboard is a rough finish. In order to get a smooth finish I applied a skim coat of thick viscosity drywall compound. Did a light sanding then applied the BIN123 primer. This made for a solid smooth surface. The floor will be painted with black liquid Flexseal.

5B55AE05-1615-481A-8F92-BC2A2F4F3C5D.jpeg
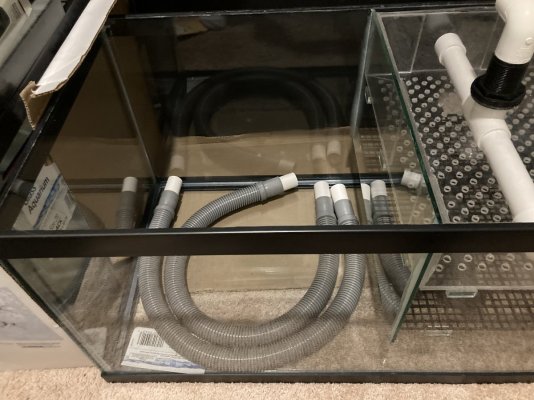
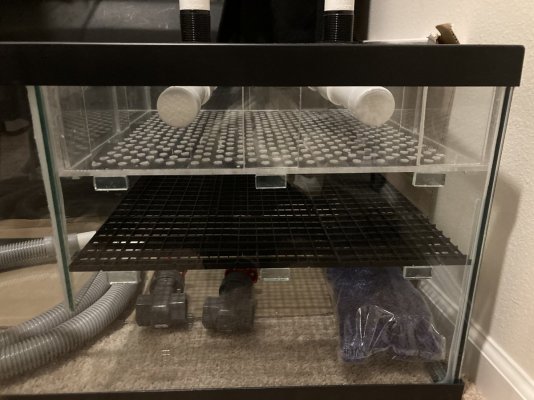
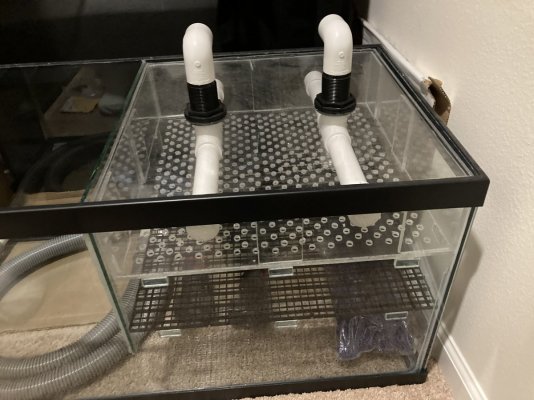
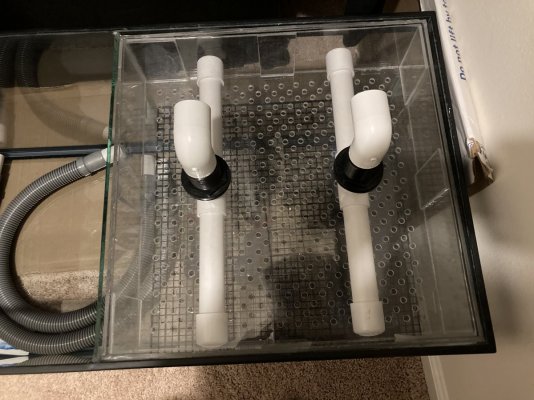
A few pics of my DIY 40 breeder trickle filter. Extra large drip tray to hold bags of phosguard and Purigen and/or any other filter media I deem necessary. The drip tray and egg crate are supported by small clear glass mosaic tiles attached to the glass walls of the tank with silicone. The drip tray is made out of quarter inch thick clear acrylic plastic that I bought at Lowes. The PVC is 1” thin wall and the end caps are removable for cleaning of the spray bar.

966D956D-7EE0-4EF9-BADD-609C382FCC57.jpeg 848B276A-86E9-4D9E-AB75-2935514BE780.jpeg 980F83C7-AC2F-43EA-B602-A57B72C38560.jpeg 3470502F-8A13-4053-8687-4B0EBA494922.jpeg Ok
 
Last edited:
OP
OP
bruno3047

bruno3047

Valuable Member
View Badges
Joined
Feb 16, 2021
Messages
1,088
Reaction score
828
Location
Central Florida
Rating - 0%
0   0   0
Basecoat applied using Rustoleum flat black protective coating. Flat black for the base coat so there’s no sanding required for the topcoat. Paint was applied using a 4 inch foam roller and 2 inch brush.

The finish on the particleboard comes as a rough finish. In order to get a smooth finish I applied a skim coat of thick viscosity drywall compound. Did a light sanding then applied the BIN123 primer. This made for a solid smooth surface. The floor will be painted with black liquid Flexseal.

5B55AE05-1615-481A-8F92-BC2A2F4F3C5D.jpeg
Topcoat applied using Rustoleum protective coating, satin finish. Light sanding. Second topcoat applied using the same paint. As per instructions, three coats of Minwax Polycrylic crystal clear protective finish applied. Doors mounted and platform panels laid on temporarily. Couple of photos:

A220D88C-4317-47AB-A390-2AE2B970155D.jpeg 83ECB3D4-EDEE-44E5-9B8A-E094F19B7BE6.jpeg
 
OP
OP
bruno3047

bruno3047

Valuable Member
View Badges
Joined
Feb 16, 2021
Messages
1,088
Reaction score
828
Location
Central Florida
Rating - 0%
0   0   0
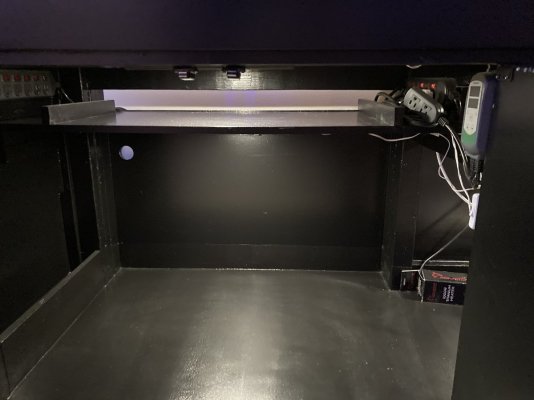
The floor of the stand was covered with two coats of Flexseal black liquid. The heater shows where the sump will be located and wires were tacked into place. Undercabinet LED lights were installed for cabinet lighting and quarter inch RO tubing was installed in anticipation of being connected to the main house RO filtration system. A final stage DI canister will be installed in-line immediately before the ATO reservoir.

B9F776A0-8699-4A72-A409-9425ED233828.jpeg
 
OP
OP
bruno3047

bruno3047

Valuable Member
View Badges
Joined
Feb 16, 2021
Messages
1,088
Reaction score
828
Location
Central Florida
Rating - 0%
0   0   0
The floor of the stand was covered with two coats of Flexseal black liquid. The heater shows where the sump will be located and wires were tacked into place. Undercabinet LED lights were installed for cabinet lighting and quarter inch RO tubing was installed in anticipation of being connected to the main house RO filtration system. A final stage DI canister will be installed in-line immediately before the ATO reservoir.

B9F776A0-8699-4A72-A409-9425ED233828.jpeg
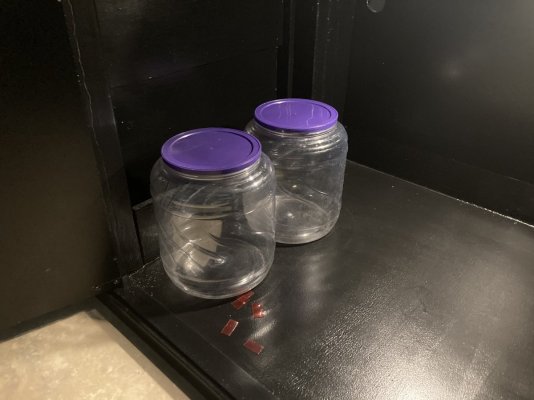
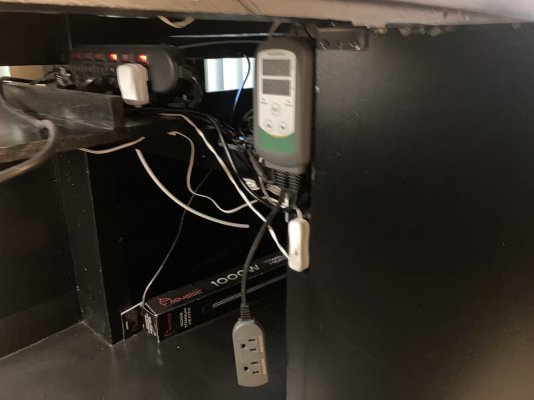
A look inside. First, left side compartment (facing tank). At the top you’ll see a 6-outlet individually switched power strip on each side protected by built-in GFCI. A removable shelf and the mounted Ink Bird temperature controller, beneath which you can see the light switch controlling the compartment LED lights, one lighting the shelf and one lighting the floor. This compartment will hold the two 29 gallon tanks, one in front of the other. The front one will be a quarantine tank the rear one will be the ATO Reservoir. The compartment will also hold the dosing pump and extra large containers to hold the CA and ALK.

7FD8C4B9-0E2F-40EC-A255-3D0E3AF33A08.jpeg BD1FD01B-8DAF-42B3-A821-00A1938BB51C.jpeg 9133E495-4420-4F49-A27D-E8A23A84449D.jpeg
 
Last edited:
flagg37

Custom stair builder - TreeofLifeStairs.com
View Badges
Joined
May 28, 2016
Messages
950
Reaction score
1,119
Location
Denver area
Rating - 0%
0   0   0
How did the flexseal go on? Did you roll it, brush it…? Did you carry it up the sides at all?
 

Reefing threads: Do you wear gear from reef brands?

  • I wear reef gear everywhere.

    Votes: 15 19.0%
  • I wear reef gear primarily at fish events and my LFS.

    Votes: 3 3.8%
  • I wear reef gear primarily for water changes and tank maintenance.

    Votes: 0 0.0%
  • I wear reef gear primarily to relax where I live.

    Votes: 13 16.5%
  • I don’t wear gear from reef brands.

    Votes: 40 50.6%
  • Other.

    Votes: 8 10.1%
Back
Top