First DIY 50g Acrylic Aquarium and Wood Stand Build

Guns286

Community Member
View Badges
Joined
May 21, 2022
Messages
97
Reaction score
91
Location
Westchester County NY
Rating - 0%
0   0   0
I’ve only ever had glass, freshwater aquariums. But, for my first SW tank I wanted something different. Acrylic aquariums always looked sleek and cool to me, but they can be expensive. Building one was always a dream of mine but, again, once you get over 1/4” thick the prices shoot up.
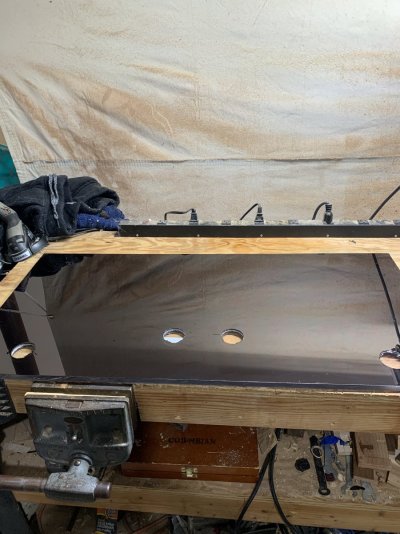
Due to an oversite at work 2, 1/2” thick, 36”x48” pieces of acrylic were accidentally ordered. My boss said I could have them, and I knew exactly what I was going to do with them!
I thought I’d document my progress and inevitably mistakes here. Maybe the info will help someone.
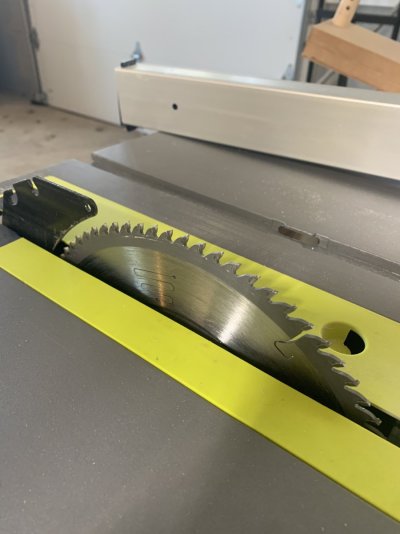
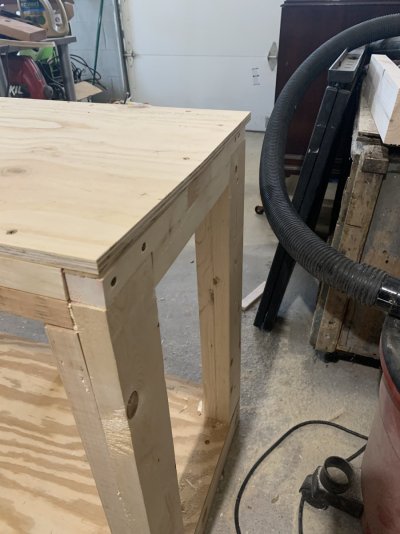
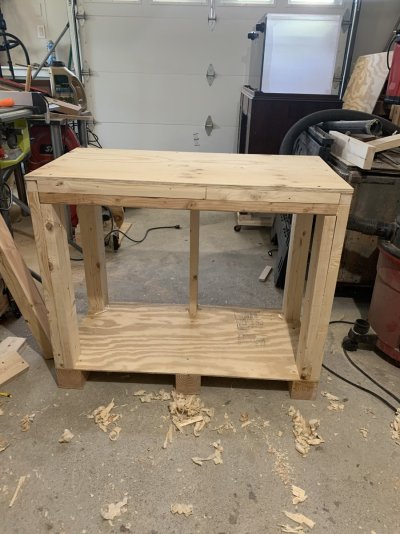
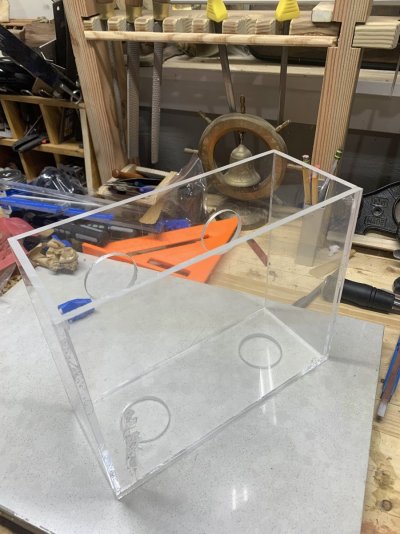
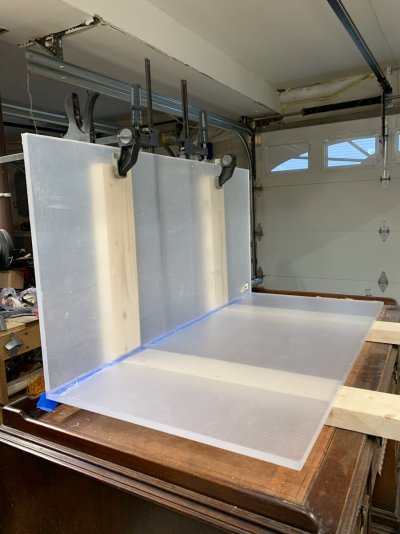
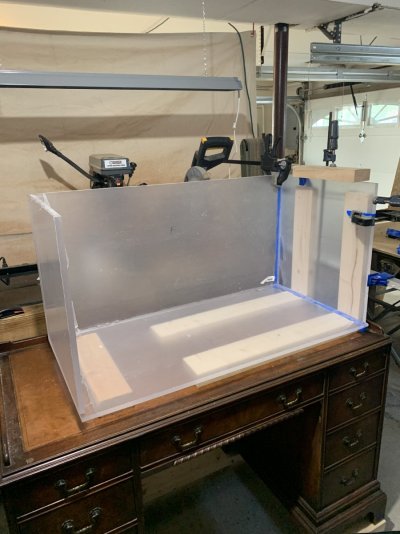
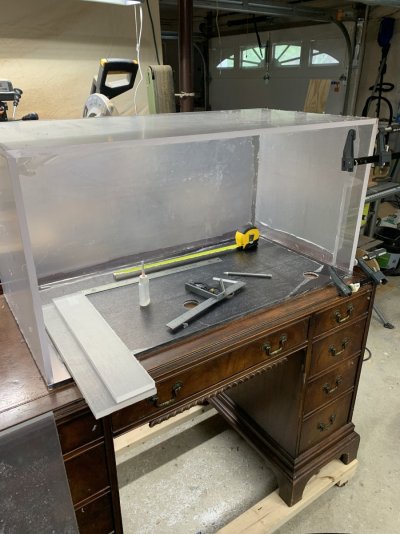
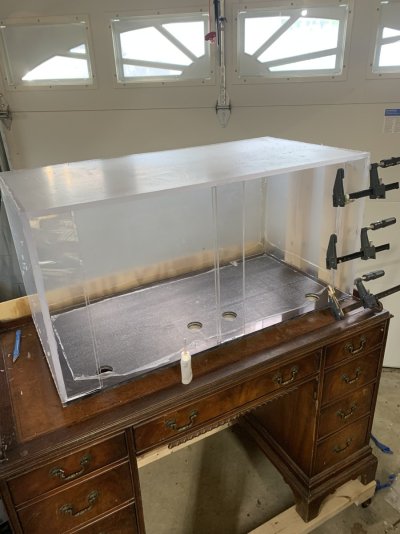
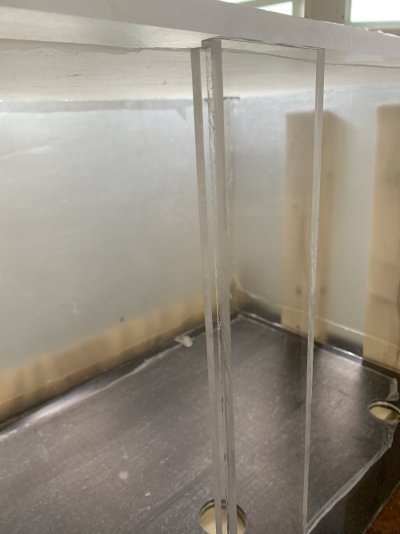
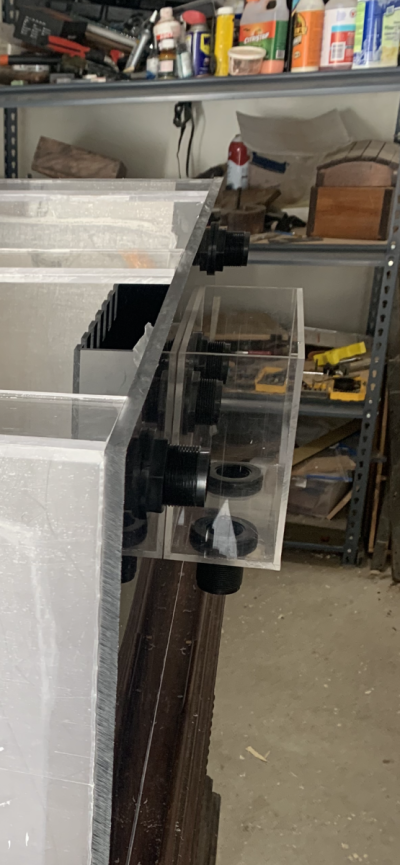
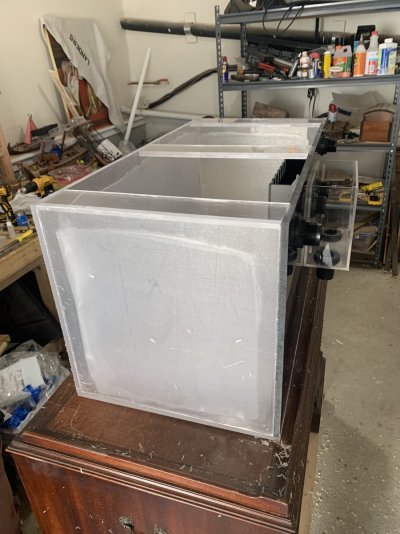
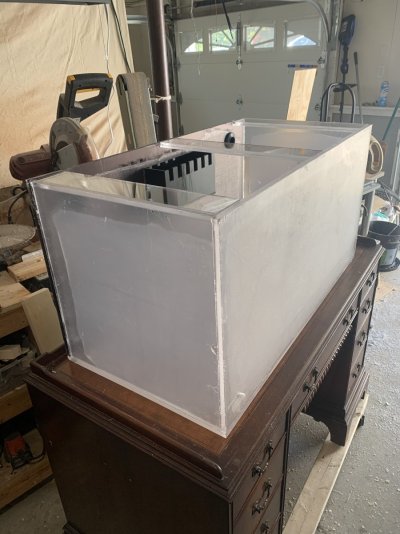
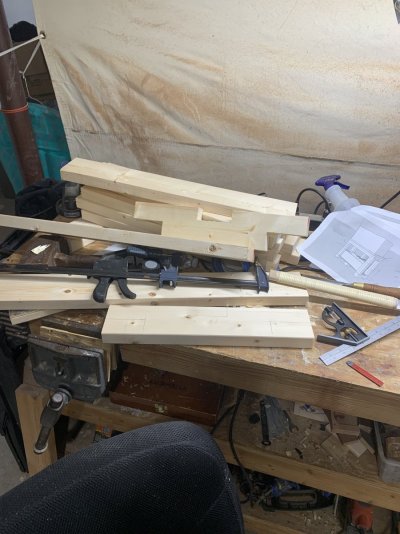
‘I started off doing TONS of research. On SW aquariums, acrylic tanks, acrylic in general, cutting, welding, plumbing, sumps, and everything else in between. I settled on making a 36"x18"x18" tank with a 20g long, glass sump. I also designed a wood stand that would accommodate the 20g sump underneath.
So, the journey begins. I’ll update this as I progress.

0925E0DA-C4D9-4133-9AB9-11DA99119F9D.jpeg 1B691D6B-E8AF-47CD-8F6F-F9DCEA79E8E3.jpeg
 
OP
OP
Guns286

Guns286

Community Member
View Badges
Joined
May 21, 2022
Messages
97
Reaction score
91
Location
Westchester County NY
Rating - 0%
0   0   0
So far I’ve only made the overflow boxes. I got the hang of using Weld-On 4 pretty quickly. I used painters tape, a dead flat surface and a square to make sure the pieces were all set and then used the hypo-applicator to add the Weld-On. The first one I did was the clear, outside box, which you can see that I squirted a little too much Weld-On and got some staining. For the interior box I ordered 1/4” black acrylic, cut the pieces to size, cut the "teeth" and welded it together. I did a much better job on this one.
I also used 2.5% window tint to black out the back wall.
 

Attachments

  • 64E70F99-1039-4BF3-8625-298010925B02.jpeg
    64E70F99-1039-4BF3-8625-298010925B02.jpeg
    154.3 KB · Views: 99
  • 39987494-1928-44C4-BC64-295656ECFC23.jpeg
    39987494-1928-44C4-BC64-295656ECFC23.jpeg
    201.5 KB · Views: 91
  • B6B9C00C-952C-4528-B7BC-AC63BD0908BC.jpeg
    B6B9C00C-952C-4528-B7BC-AC63BD0908BC.jpeg
    210.4 KB · Views: 96
  • 4857AE9A-06F7-4C5B-9EDD-FEBA28C4763B.jpeg
    4857AE9A-06F7-4C5B-9EDD-FEBA28C4763B.jpeg
    148.5 KB · Views: 97
OP
OP
Guns286

Guns286

Community Member
View Badges
Joined
May 21, 2022
Messages
97
Reaction score
91
Location
Westchester County NY
Rating - 0%
0   0   0
First part welded to the bottom!
I made 2 L brackets out of planed 2x4. After some screws and shims they are dead on 90 degrees. I put just enough force on the clamps to hold the piece against the wood, so I was still able to clamp it down to the bottom piece after applying the Weld-On.
I used the "pin" method, by spacing out 5 sewing needles along the bottom of the vertical piece, between it an the bottom piece (sorry, didn’t take a pic). This left a tiny gap, to ensure that the Weld-On could spread better and completely coat the area. I also ran a piece of painters tape along the edge of the bottom piece to protect it from drips and spillover.
‘Once I throughly applied the Weld-On I removed the needles, ensured that everything was lined up properly and used clamps to hold the vertical piece firmly to the bottom piece.
 

Attachments

  • 547B5C56-FC37-4DD9-A27F-397F4A3FC484.jpeg
    547B5C56-FC37-4DD9-A27F-397F4A3FC484.jpeg
    143.8 KB · Views: 99
OP
OP
Guns286

Guns286

Community Member
View Badges
Joined
May 21, 2022
Messages
97
Reaction score
91
Location
Westchester County NY
Rating - 0%
0   0   0
Back piece and the first brace are in and curing. I’m putting 3, 3” braces across the top. One on each side and one in the middle. Then I’ll make and put on 2 hatches/doors.
 

Attachments

  • 57782B04-E1EE-456A-9908-C5D07576688D.jpeg
    57782B04-E1EE-456A-9908-C5D07576688D.jpeg
    194.7 KB · Views: 93
OP
OP
Guns286

Guns286

Community Member
View Badges
Joined
May 21, 2022
Messages
97
Reaction score
91
Location
Westchester County NY
Rating - 0%
0   0   0
All 3 braces are now attached. I ran a 1/4”x1/4” piece of acrylic along the bottom edge of each brace. Those will be the railings that the doors sit on when closed. I ordered heavy duty, clear acrylic hinges that will attach to the back of the tank and the doors.
 

Attachments

  • 6452919E-24E8-4266-ADCC-92DEE8756BBB.jpeg
    6452919E-24E8-4266-ADCC-92DEE8756BBB.jpeg
    156.8 KB · Views: 79
  • A7B37023-53A3-4C47-ADA7-951AF409B565.jpeg
    A7B37023-53A3-4C47-ADA7-951AF409B565.jpeg
    86 KB · Views: 82
  • F5D8A485-C3E8-4F47-8656-EB5DDE2719AB.jpeg
    F5D8A485-C3E8-4F47-8656-EB5DDE2719AB.jpeg
    58.9 KB · Views: 83
OP
OP
Guns286

Guns286

Community Member
View Badges
Joined
May 21, 2022
Messages
97
Reaction score
91
Location
Westchester County NY
Rating - 0%
0   0   0
Dry run. I put the tank and overflow together. Everything lines up and seems good. I didn’t do a water integrity test yet cause I ordered some Weld-On 16 so I can go over the seems with a thin layer (I don’t trust myself so want some backup).
Now I’ll start working on the stand. I already cut the wood, so I should be able to start putting it together.
 

Attachments

  • 47188EB4-8625-4BF3-B11E-5FAB7F067431.png
    47188EB4-8625-4BF3-B11E-5FAB7F067431.png
    881.3 KB · Views: 75
  • 8E7B232A-4439-4F3E-9755-277C82E935D2.jpeg
    8E7B232A-4439-4F3E-9755-277C82E935D2.jpeg
    189.7 KB · Views: 81
  • 6BADE0B1-BE20-4424-A9D6-6DCB37A4336D.jpeg
    6BADE0B1-BE20-4424-A9D6-6DCB37A4336D.jpeg
    173.1 KB · Views: 81
  • DC0357B1-1ADB-4DEF-931F-6BF170D0EB9D.jpeg
    DC0357B1-1ADB-4DEF-931F-6BF170D0EB9D.jpeg
    196.1 KB · Views: 75
OP
OP
Guns286

Guns286

Community Member
View Badges
Joined
May 21, 2022
Messages
97
Reaction score
91
Location
Westchester County NY
Rating - 0%
0   0   0
So, despite the fancy design program and all my calculating, some of the wood was cut to the wrong sizes! I guess it goes back to the old military steps for planning: Step 1 - Carefully design a plan, Step 2 - Execute the plan, Step 3 - Watch the plan completely fall apart, Step 4 - Wing it!
Back to the hardware store for more wood…..
 

Mhamilton0911

BitterSalty
View Badges
Joined
Jul 8, 2021
Messages
4,388
Reaction score
20,915
Location
Idaho
Rating - 0%
0   0   0
Did you use a fine tooth blade or the standard? I've pondering making my own overflow box and and curious on the blade you're using.

Looking nice, fingers crossed for the water test!
 

DeniseAndy

7500 Club Member
View Badges
Joined
Sep 12, 2011
Messages
7,802
Reaction score
10,678
Location
Milford, Ohio
Rating - 0%
0   0   0
Looks great so far.
I thought the motto was measure twice or four times and cut once. Never works for me. I can measure 20 times and still mess up a cut. :)
This looks like a nice set up!
 
OP
OP
Guns286

Guns286

Community Member
View Badges
Joined
May 21, 2022
Messages
97
Reaction score
91
Location
Westchester County NY
Rating - 0%
0   0   0
Did you use a fine tooth blade or the standard? I've pondering making my own overflow box and and curious on the blade you're using.

Looking nice, fingers crossed for the water test!
Yes, I used an 80 tooth, fine table saw blade. I put a little soy candle wax on the blade before each cut, but that might have been overkill. It cut straight through, no problems.
 
OP
OP
Guns286

Guns286

Community Member
View Badges
Joined
May 21, 2022
Messages
97
Reaction score
91
Location
Westchester County NY
Rating - 0%
0   0   0
Looks great so far.
I thought the motto was measure twice or four times and cut once. Never works for me. I can measure 20 times and still mess up a cut. :)
This looks like a nice set up!
I always forget to take into account the fact that a 2x4 isn’t really 2” by 4”. And then after planing the wood it makes it even smaller. Ah well, I think I’m better when I wing it anyway !
 

Mhamilton0911

BitterSalty
View Badges
Joined
Jul 8, 2021
Messages
4,388
Reaction score
20,915
Location
Idaho
Rating - 0%
0   0   0
Yes, I used an 80 tooth, fine table saw blade. I put a little soy candle wax on the blade before each cut, but that might have been overkill. It cut straight through, no problems.
Nice. I bought a table saw but I've only used it once. My husband uses it all the time so he can show me anything I need to know. I'm usually the wood repairer and he's the metal guy, but I haven't really tackled any new projects since I bought the saw. I'm thinking of switching my 75g freshwater to salt but I need to rehome the freshwater fishies to a 55g in the garage and I'll be building the stand for that. I have a few ideas for acrylic for small tanks I have lying around but I have been too scared to try to cut it.
 
OP
OP
Guns286

Guns286

Community Member
View Badges
Joined
May 21, 2022
Messages
97
Reaction score
91
Location
Westchester County NY
Rating - 0%
0   0   0
Nice. I bought a table saw but I've only used it once. My husband uses it all the time so he can show me anything I need to know. I'm usually the wood repairer and he's the metal guy, but I haven't really tackled any new projects since I bought the saw. I'm thinking of switching my 75g freshwater to salt but I need to rehome the freshwater fishies to a 55g in the garage and I'll be building the stand for that. I have a few ideas for acrylic for small tanks I have lying around but I have been too scared to try to cut it.
I was nervous too. I’ve been working with wood for awhile, but never thought I’d be working with acrylic. Honestly, I found that it’s not much different. I also used a regular wood trim bit in a router to trim a little hang over off of the tank and it worked perfectly. Acrylic isn’t cheap, so when this batch fell into my lap I figured that I have to finally try to make a tank. I’m glad that I did.
 
OP
OP
Guns286

Guns286

Community Member
View Badges
Joined
May 21, 2022
Messages
97
Reaction score
91
Location
Westchester County NY
Rating - 0%
0   0   0
Following along..how big are your teeth and how spread apart are they? Looking.good so far.
Fingers crossed for.leak test for u!
D
I haven’t been to the dentist lately. I don’t think they’re abnormally big……OH, you mean the saw blade! Just a cheapo Harbor Freight blade.
 

Attachments

  • 5D63827F-61BA-4BEA-A828-56874D91BD09.jpeg
    5D63827F-61BA-4BEA-A828-56874D91BD09.jpeg
    103 KB · Views: 66
  • EF98242F-DE67-409C-BA46-C388179ACF98.jpeg
    EF98242F-DE67-409C-BA46-C388179ACF98.jpeg
    225.5 KB · Views: 71
OP
OP
Guns286

Guns286

Community Member
View Badges
Joined
May 21, 2022
Messages
97
Reaction score
91
Location
Westchester County NY
Rating - 0%
0   0   0
The stand is now basically completed. I still need to sand it, put 1/4” plywood walls on the sides, and come up with a front door. But everything is level and solid. I test fit the 20L underneath too and it fits perfectly (sorry, no pic).
 

Attachments

  • 66606A12-530E-438E-8A70-B6B66D1D77B6.jpeg
    66606A12-530E-438E-8A70-B6B66D1D77B6.jpeg
    147.3 KB · Views: 85
  • D6E4D2C6-63F4-4D3C-B416-030CBE474BE6.jpeg
    D6E4D2C6-63F4-4D3C-B416-030CBE474BE6.jpeg
    205.2 KB · Views: 85

Reefing threads: Do you wear gear from reef brands?

  • I wear reef gear everywhere.

    Votes: 15 21.4%
  • I wear reef gear primarily at fish events and my LFS.

    Votes: 2 2.9%
  • I wear reef gear primarily for water changes and tank maintenance.

    Votes: 0 0.0%
  • I wear reef gear primarily to relax where I live.

    Votes: 10 14.3%
  • I don’t wear gear from reef brands.

    Votes: 37 52.9%
  • Other.

    Votes: 6 8.6%
Back
Top