
- Joined
- Dec 12, 2018
- Messages
- 192
- Reaction score
- 201
What's up everyone! I'm in the beginning stages of setting up my first tank, and I figure I'd start one of these things up.
This is my first aquarium I have ever owned, so I'm kind of jumping into the deep end, but I'm fairly diligent with my research and I try to do things ethically and to the best of my ability. My goals with this tank are to have something with a lot of biodiversity, lowish maintenance and fairly clean looking.
I'm trying not to get too far ahead of myself, so my plan is to take it slow and just learn to care for a reef tank using the TBS live rock and its hitch hikers. Once the tank is stabilized and I'm feeling settled in my routine, I'll add a small fish or two and some coral.
You'll notice the lack of QT tank, and I'm undecided what I want to do here. I'm super tight on space and I pretty much went way over budget with this system, and I'm lucky enough to have a really great LFS who dips and quarantines most of his livestock. Going to stick with the TBS goodies until I decide on which way I want to go here.
I decided to go with the AutoAqua AWC as it was only $50 more than the ATO, so I'll be doing daily 2% water changes when I'm confident that it's working right. It'll be fed by a 4 gallon Aqua-tainer, with another 4 gallon Aqua-tainer next to it for waste, and a 1 gallon Tupperware container for the ATO. I estimate that the tank will hold about 10 gallons when the rock is in there, so that should give me about 2 weeks of water changes per reservoir fill.
I'll be making my own water using a Spectrapure unit,and I plan on having two 7 gallon aquatainers full at all times in case of emergency.
Let's start with my equipment, some of which I have and some is on order:
Tank gear:
Fluval Evo 13.5
Nanobox Tide Plus
Sicce .5 return pump
Neo-therm 75w heater
AutoAqua AWC/ATO
AutoAqua Smart Level Sensor
DIY media basket (w/ filter floss and carbon)
Inkbird temp controller
Custom stand (I'll be posting pics of this build as well):
Imagitarium 40 gallon
Custom bamboo plywood top, with magnetic bamboo panels for easy access
Various electronics:
Tripp lite Isobar 6 Ultra surge protector
WR GFCI outlet w/ weather resistant cover for the outlet next to the tank (for backup)
AFCI/GFCI dual function outlet further away that will power the tank
Chemicals/Test stuff:
Refractometer
Aqua Experts refractometer calibration fluid
Seachem Prime
Seachem Matrix Carbon
Ammonia badge
Salifert Nitrate test
Water:
Spectrapure MaxPure 90GPD Chloramine kit
Red Sea blue bucket
Misc gear:
2 x 4g Aqua-tainers for the AWC reservoir/waste
1g Sterilite tupperware ATO reservoir
Long tongs
Long Tweezers
Husbandry:
TBS live rock/sand
Undecided beyond that
I'd like to make a note what I did to ensure my tank setup is safe. I'm extremely worried about electrical shock, so I did a few things to reduce the chances of that happening:
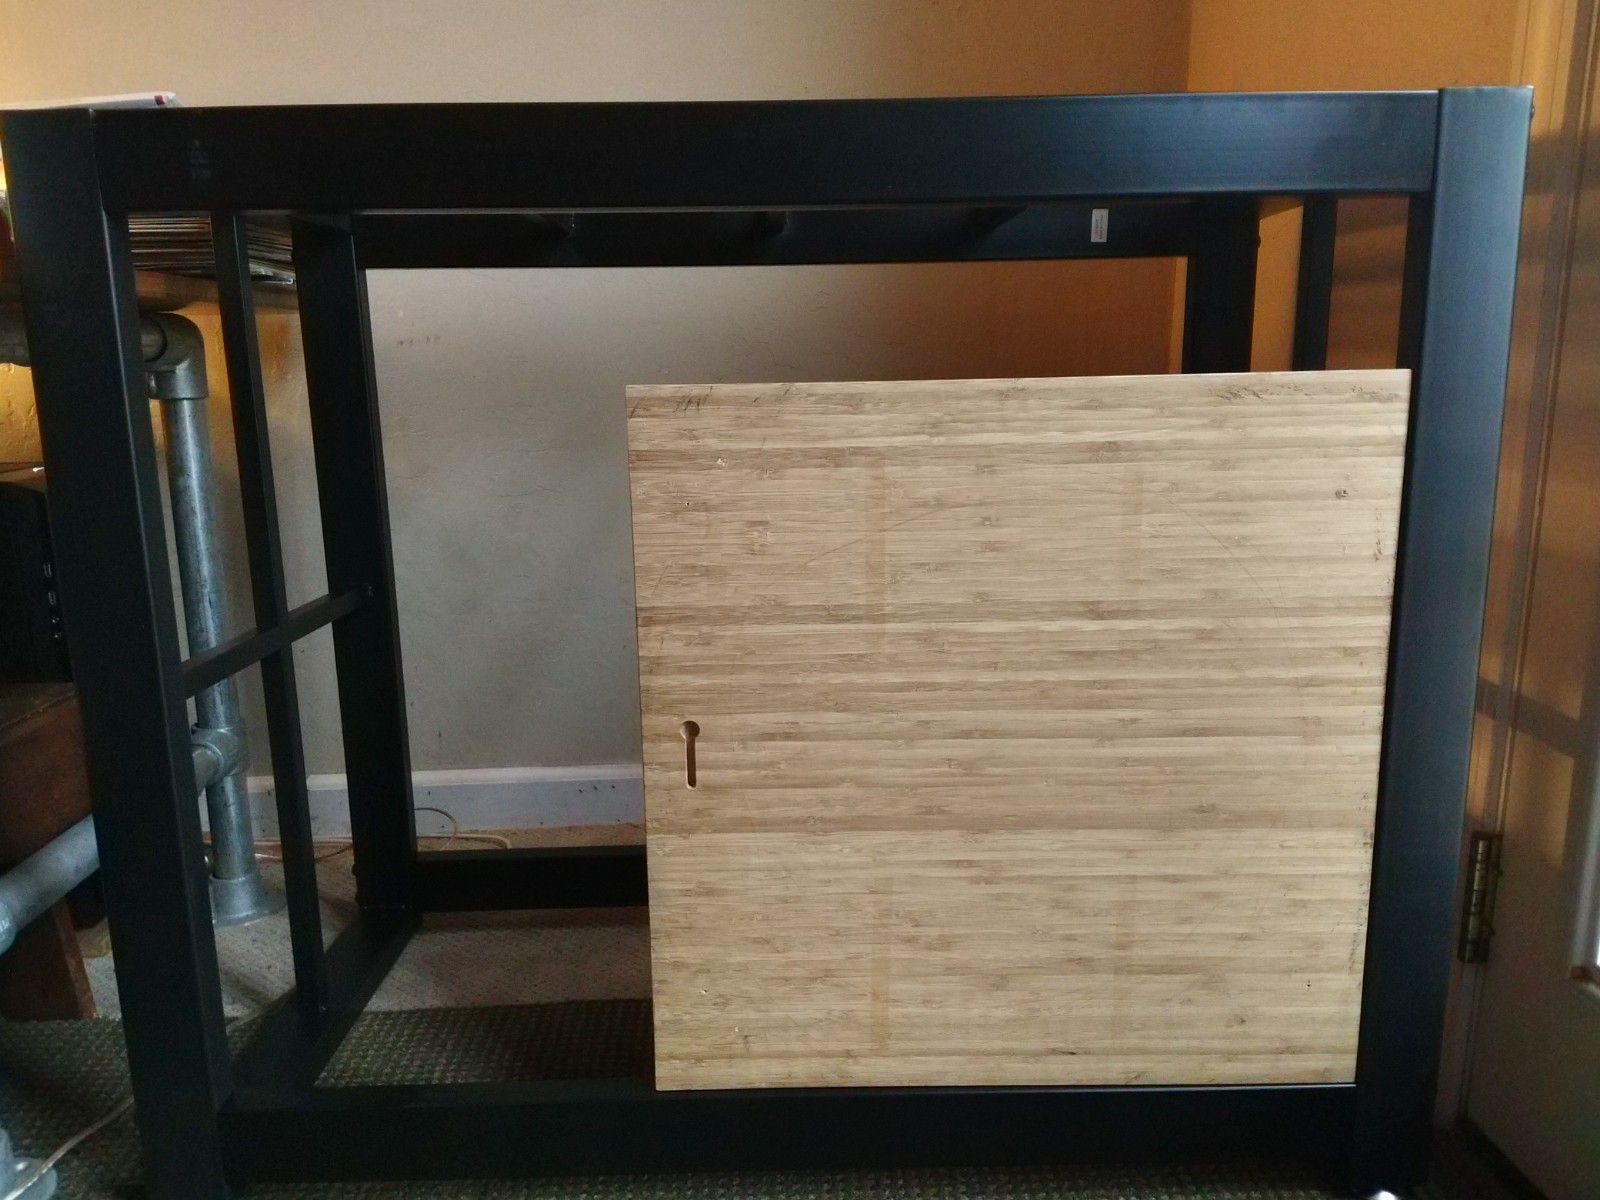
I opted for the metal Imagatarium 40 gallon tank stand. Cheap, sturdy and easy to modify. While I prefer the aesthetics of a stand the same dimensions as the tank, I don't feel comfortable with that as I live in earthquake land. The top will consist of 3/4" natural bamboo plywood, side panels will be 1/4" natural bamboo plywood as well, with rare earth magnets to make them removable. All the bamboo will be finished in some oil based poly to protect from moisture. Still waiting on the quote as I'm having the panels CNC'd, so I'm doing what I can in the meantime. Bonus is that it'll match my desk right next to it!
Picture time!
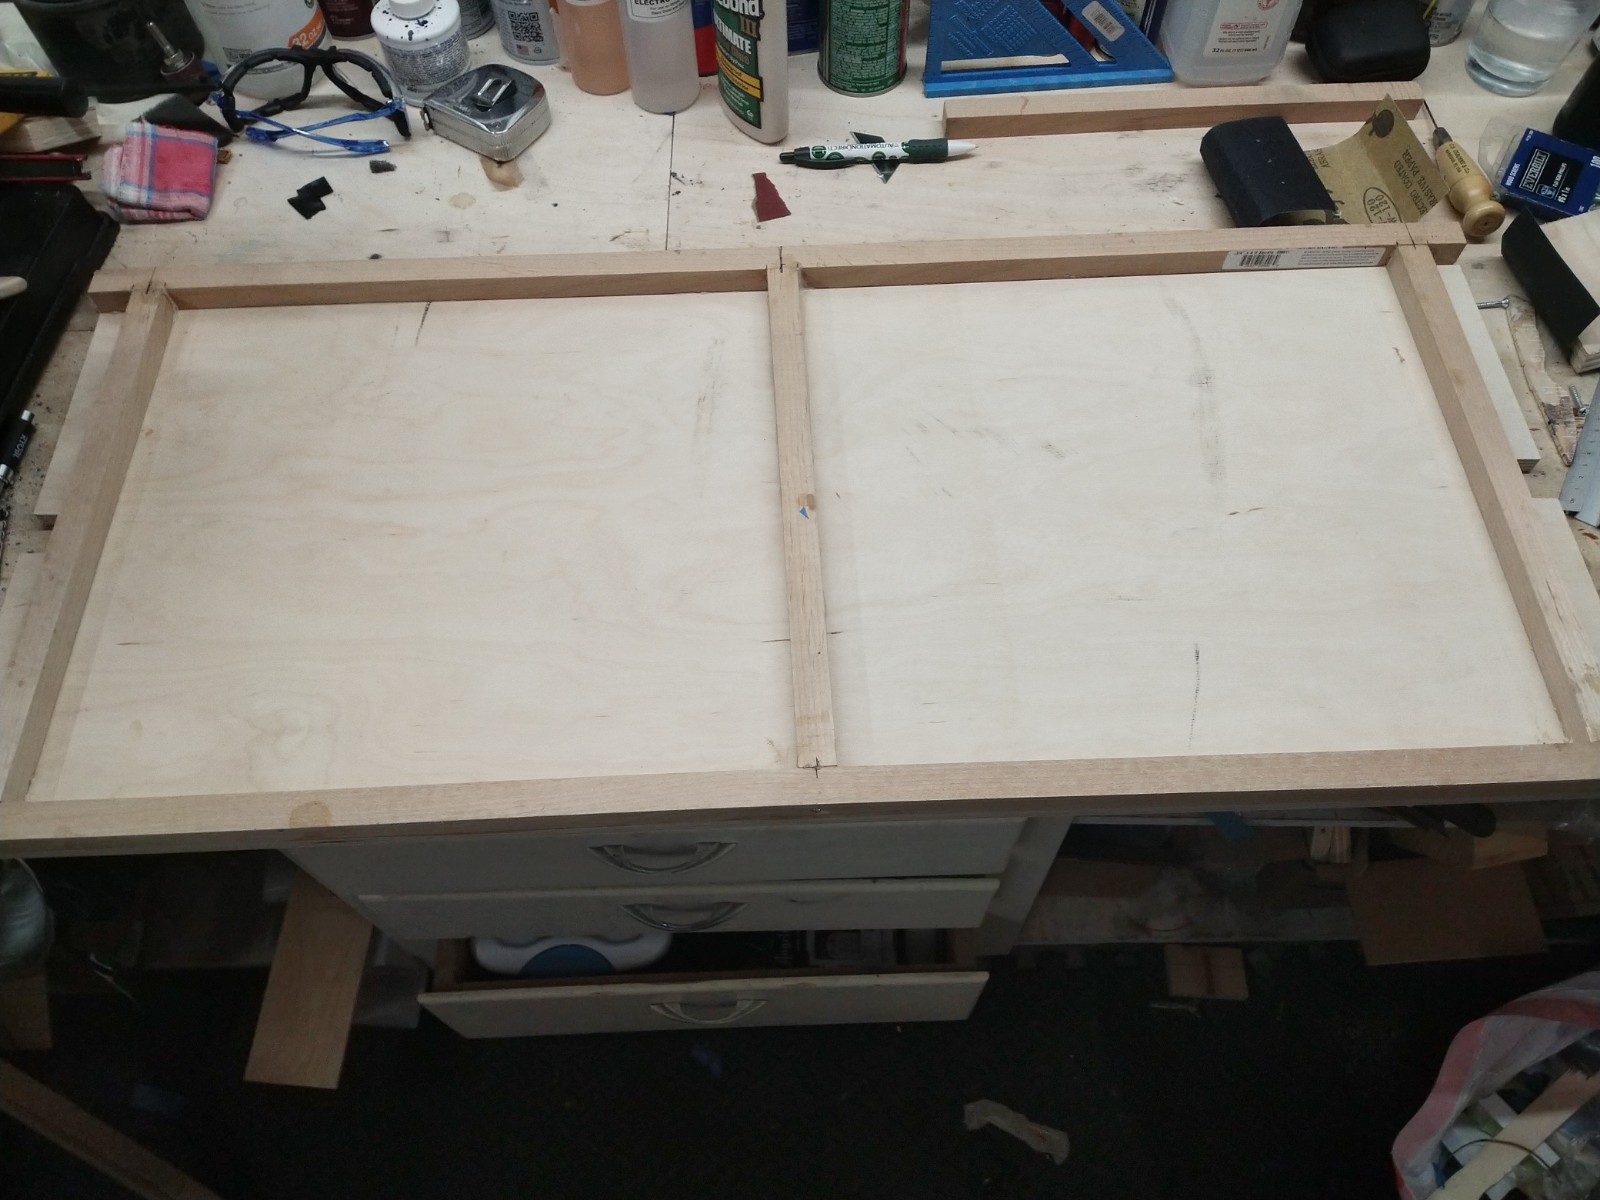
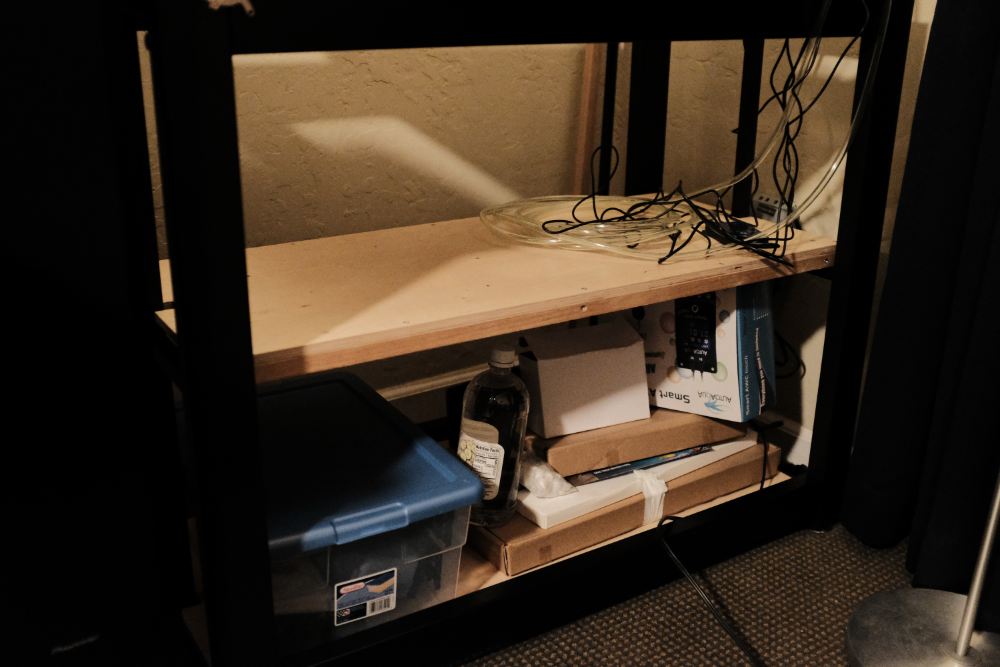
Bracing the custom shelf I built out of some scrap 1/2" ply:
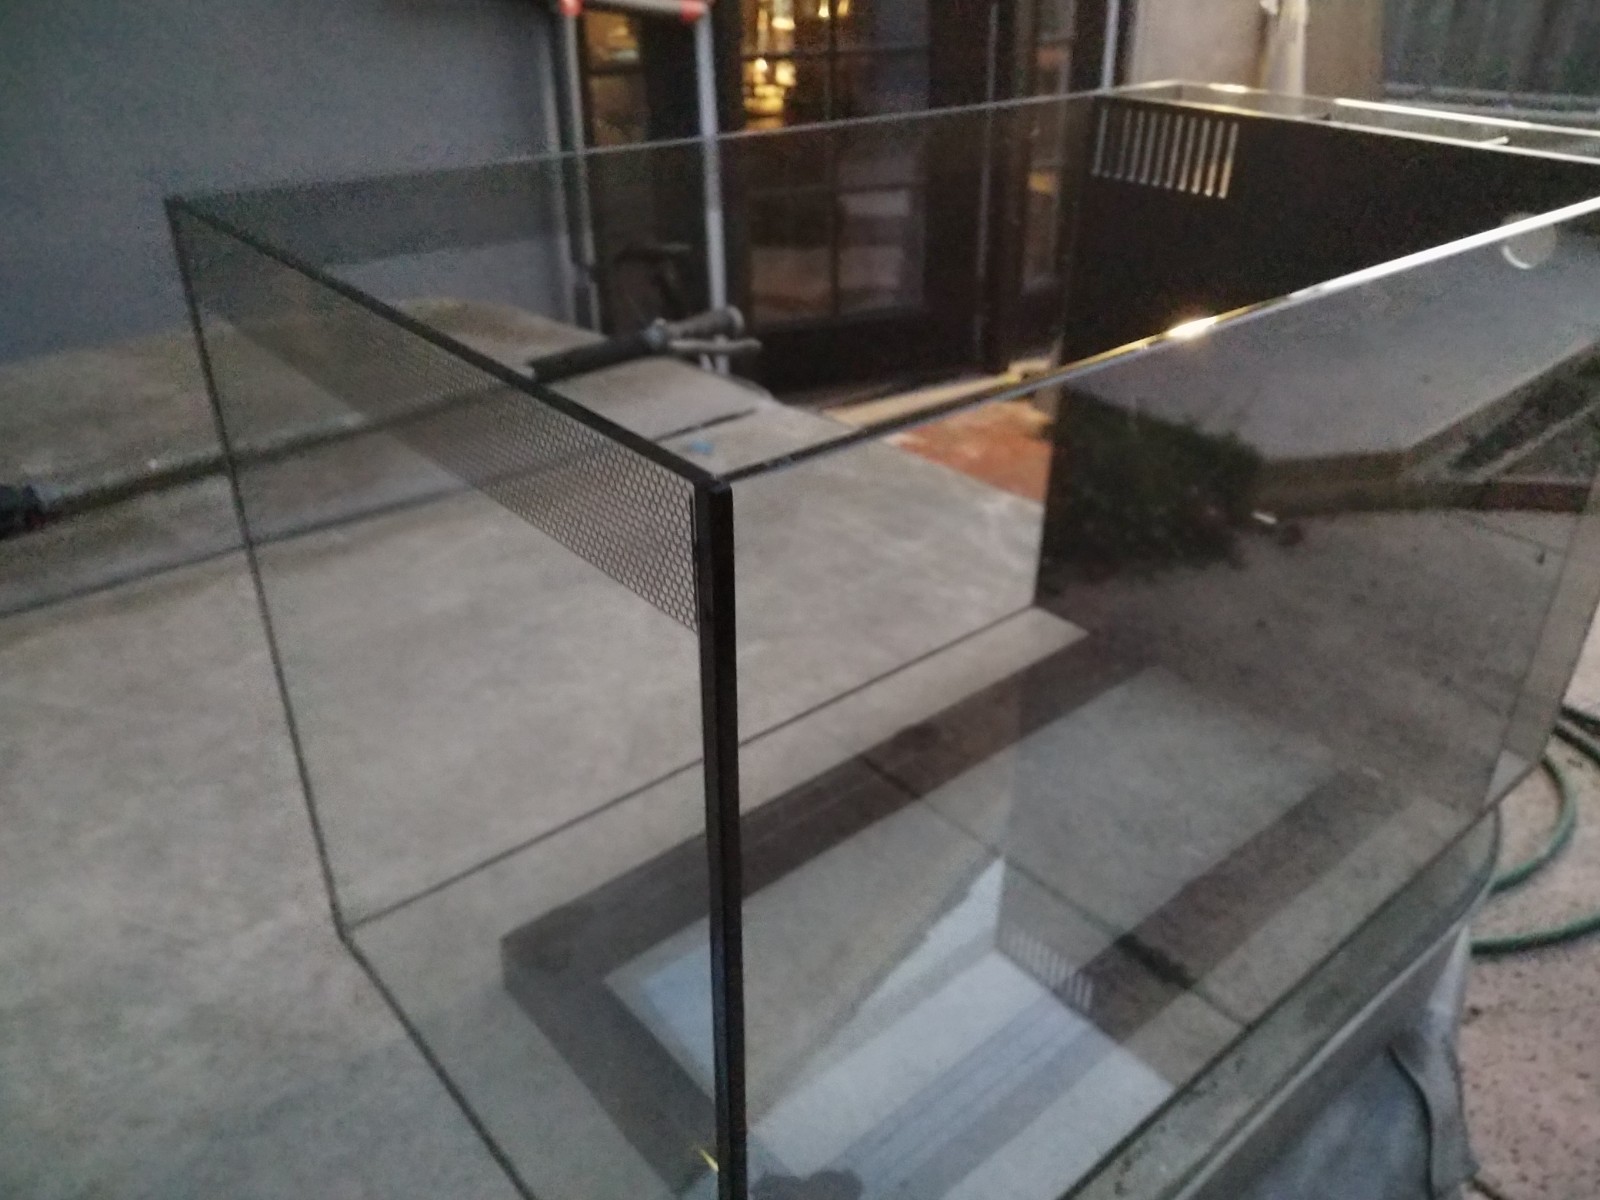
Scraping the honeycomb off the rim:
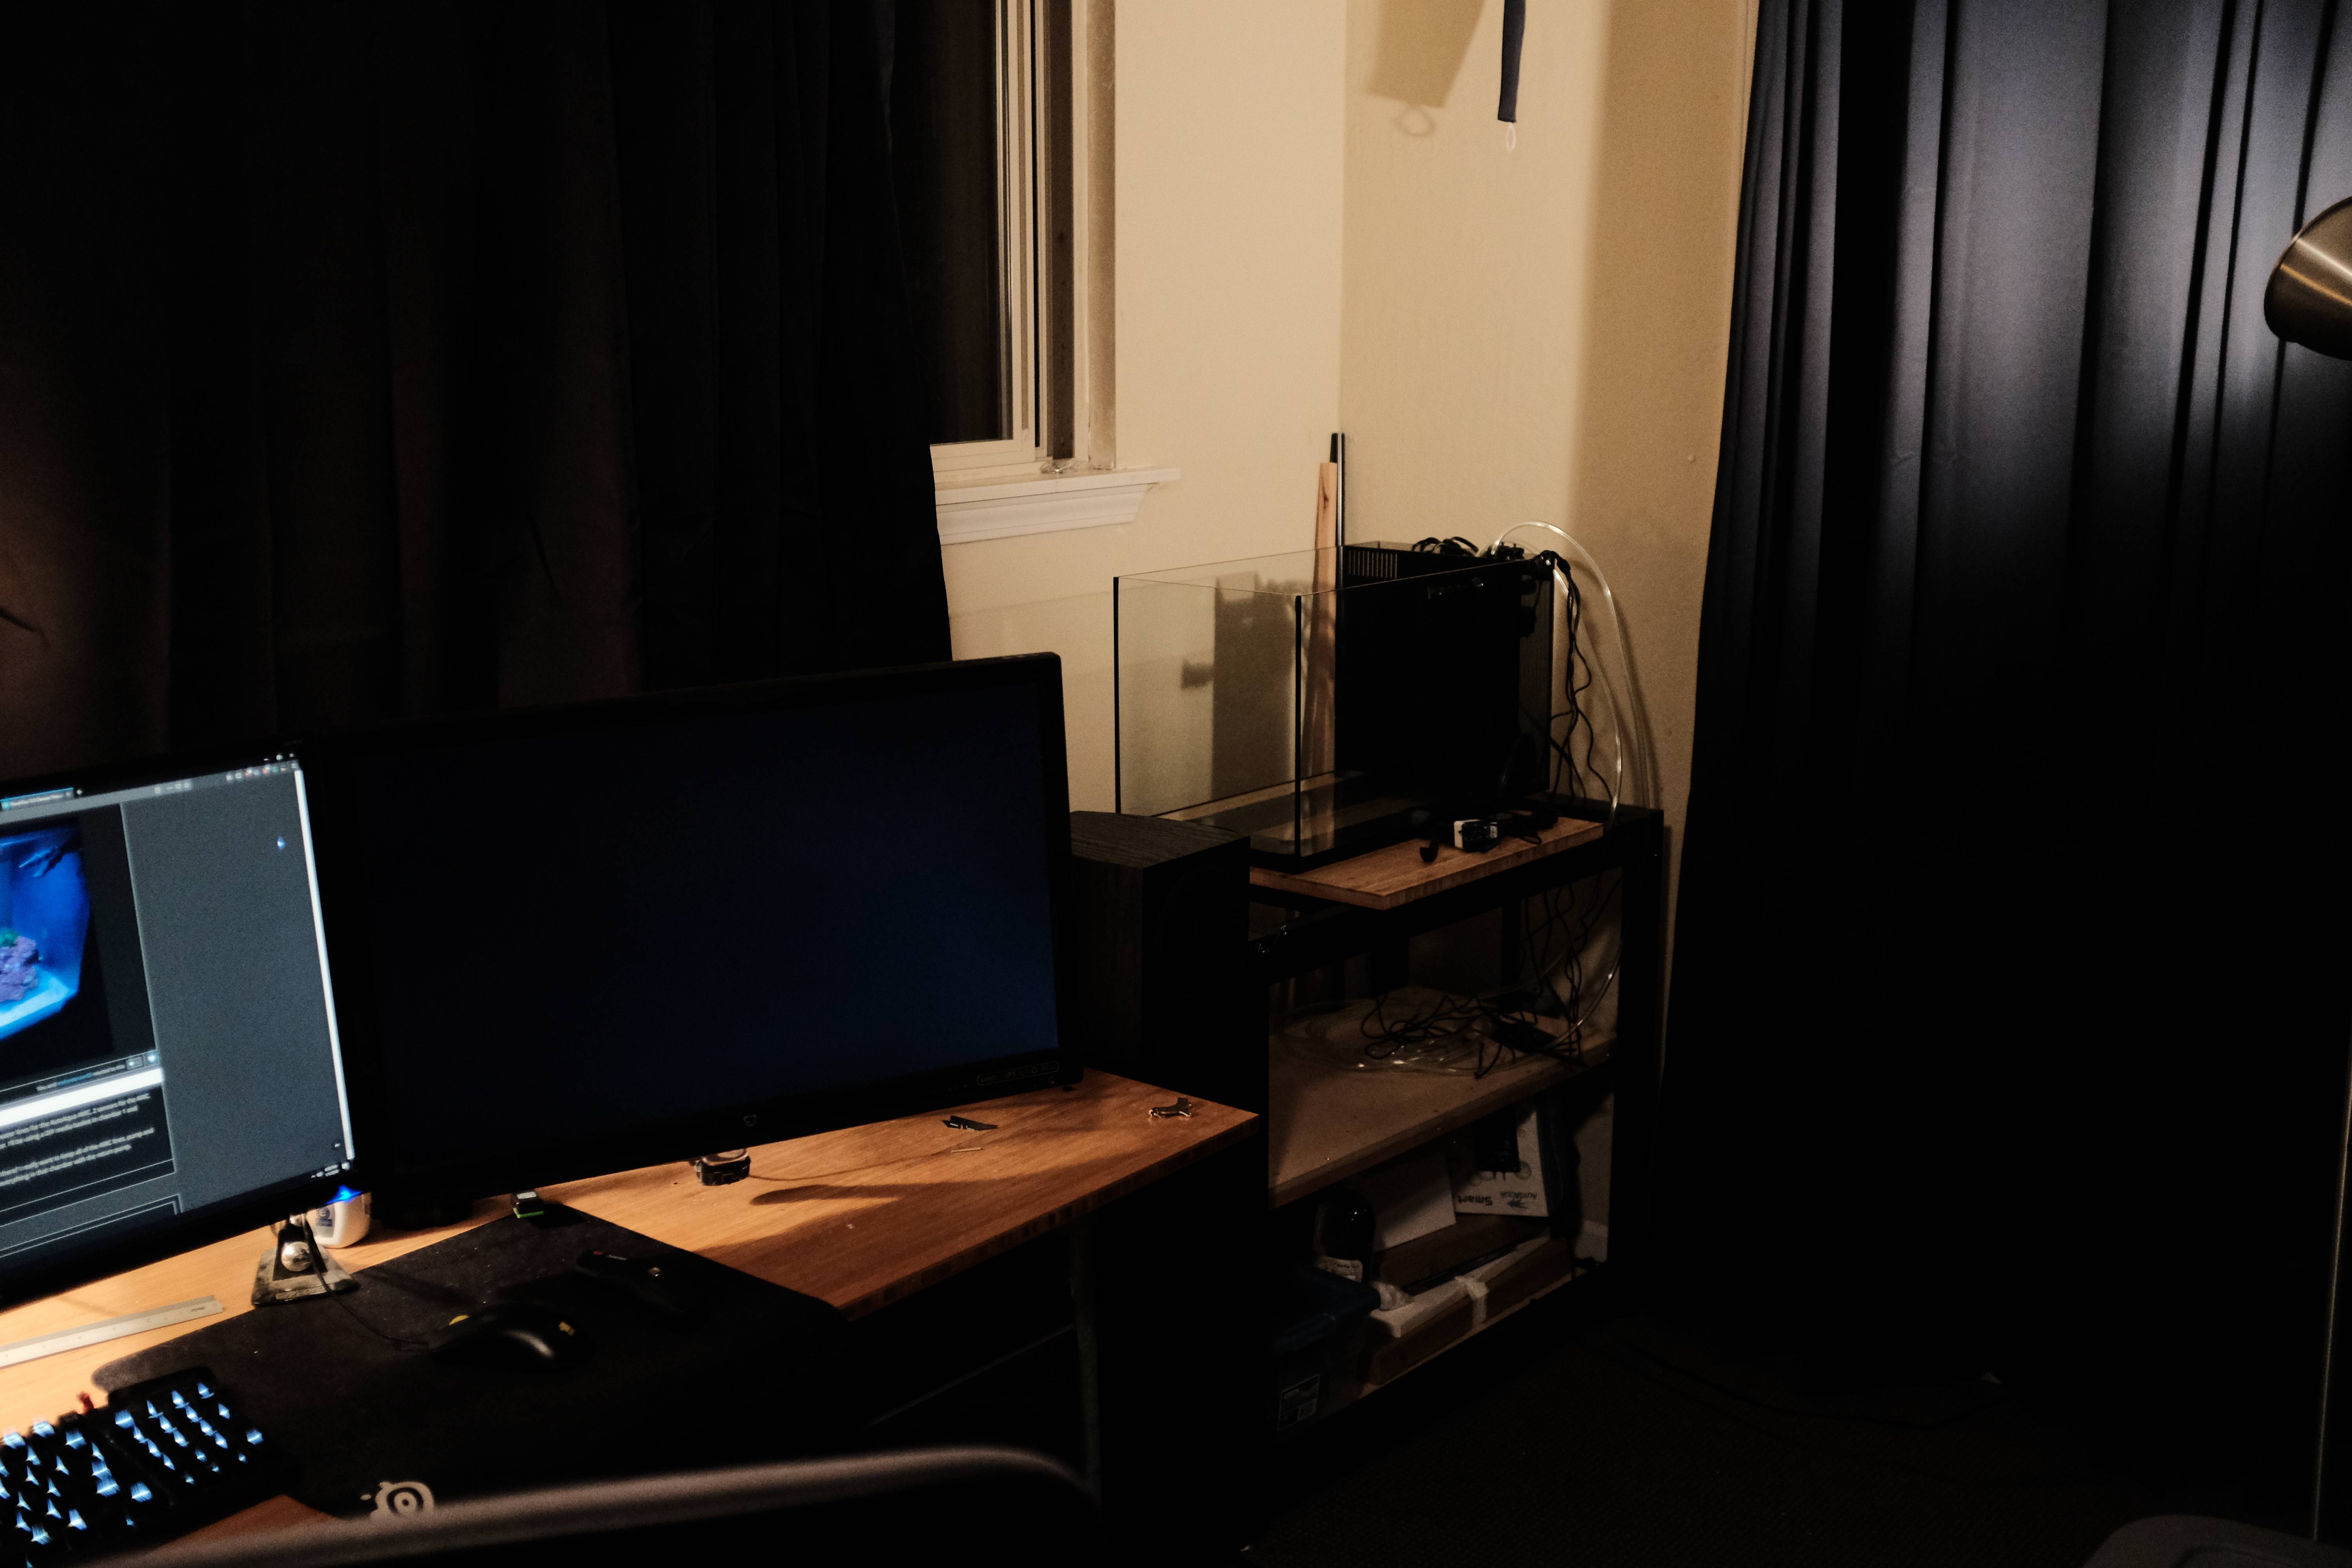
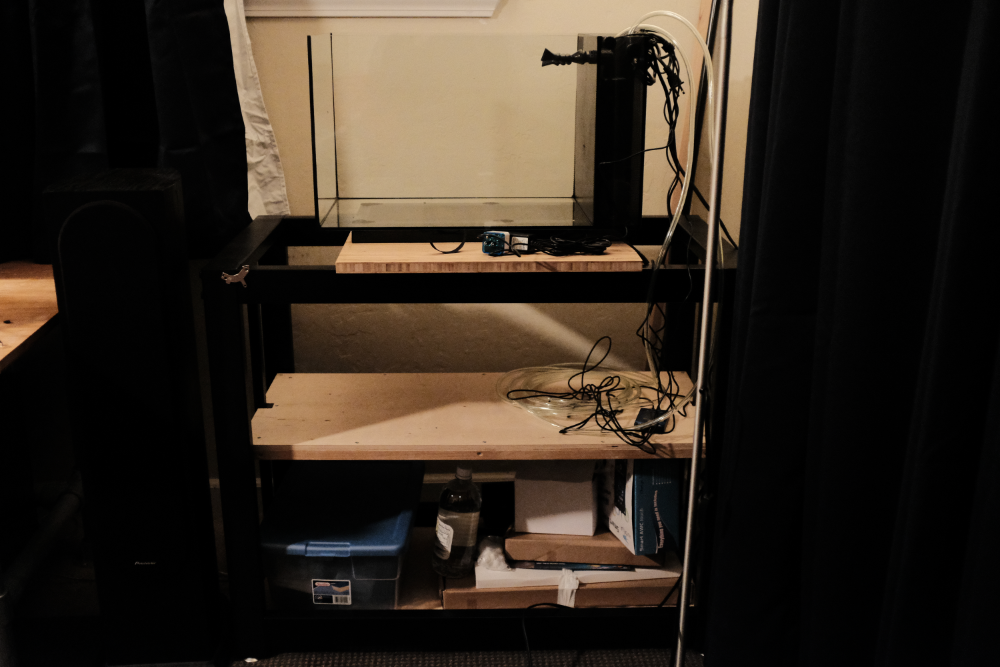
Tank placement in the bedroom:
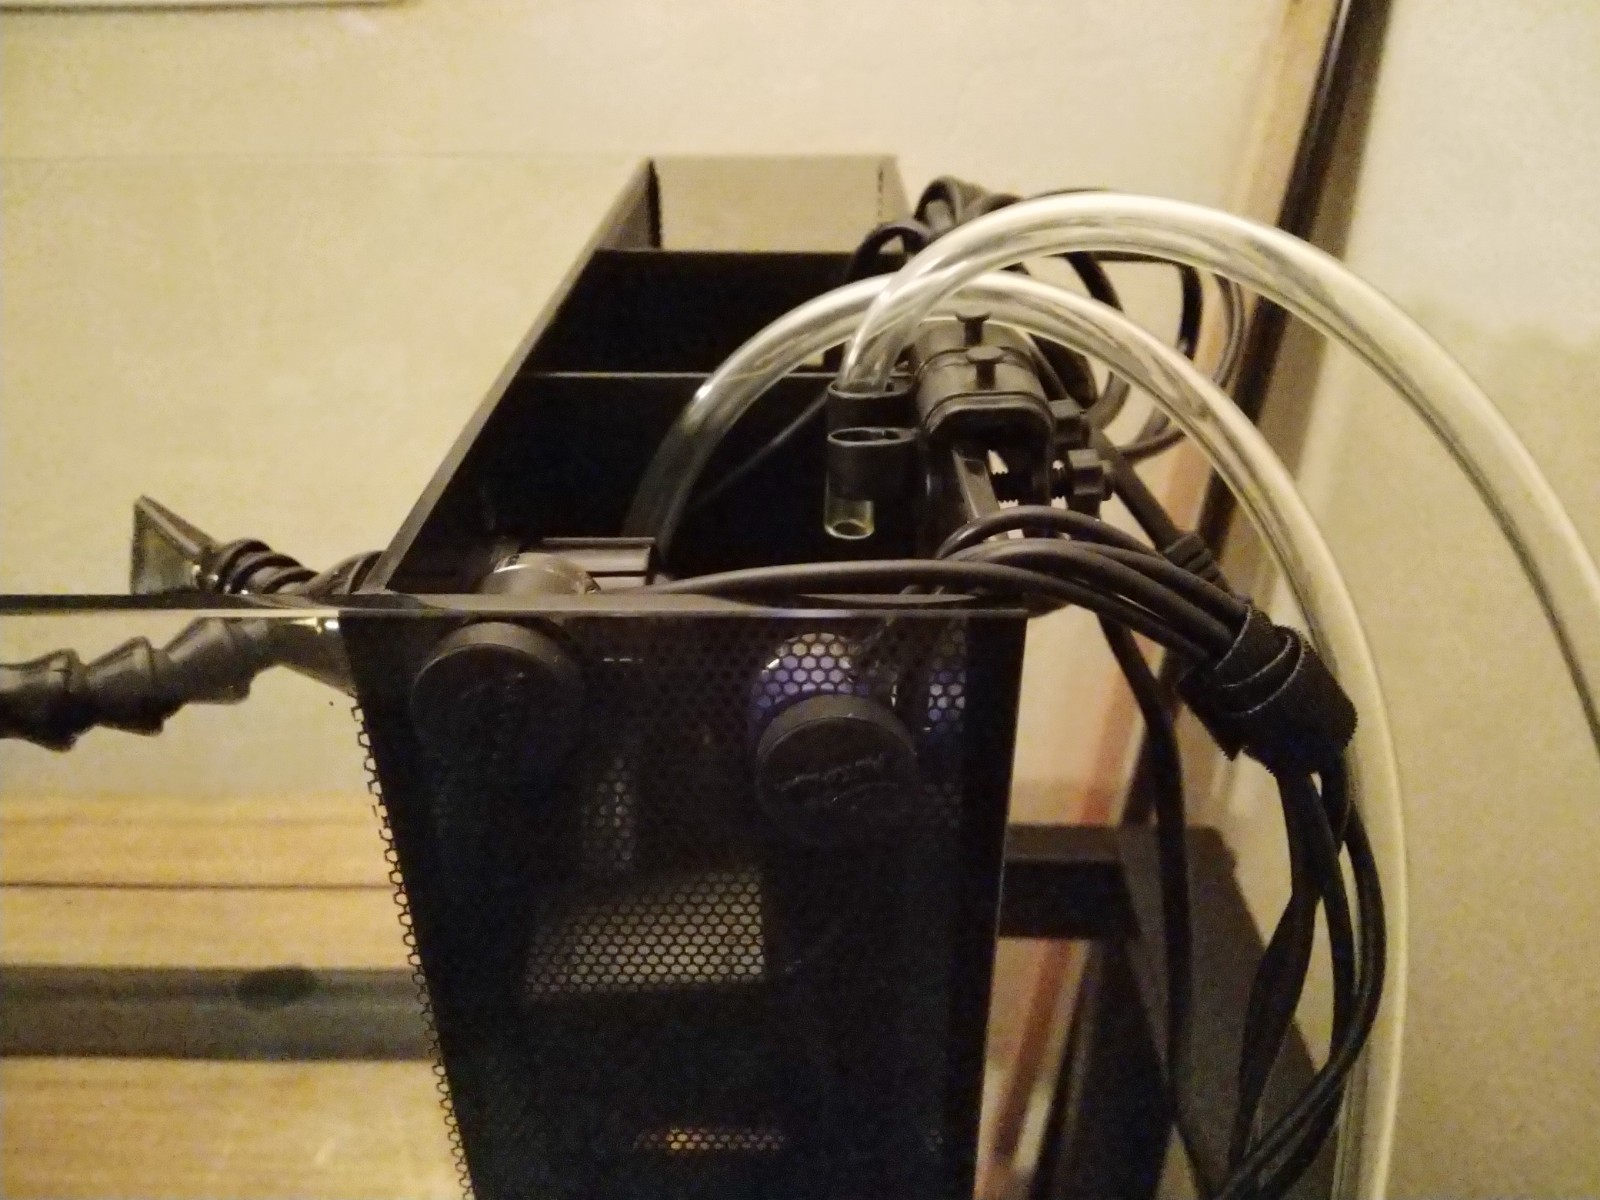
Dry fitting the AWC/SML sensors, pump and water lines:
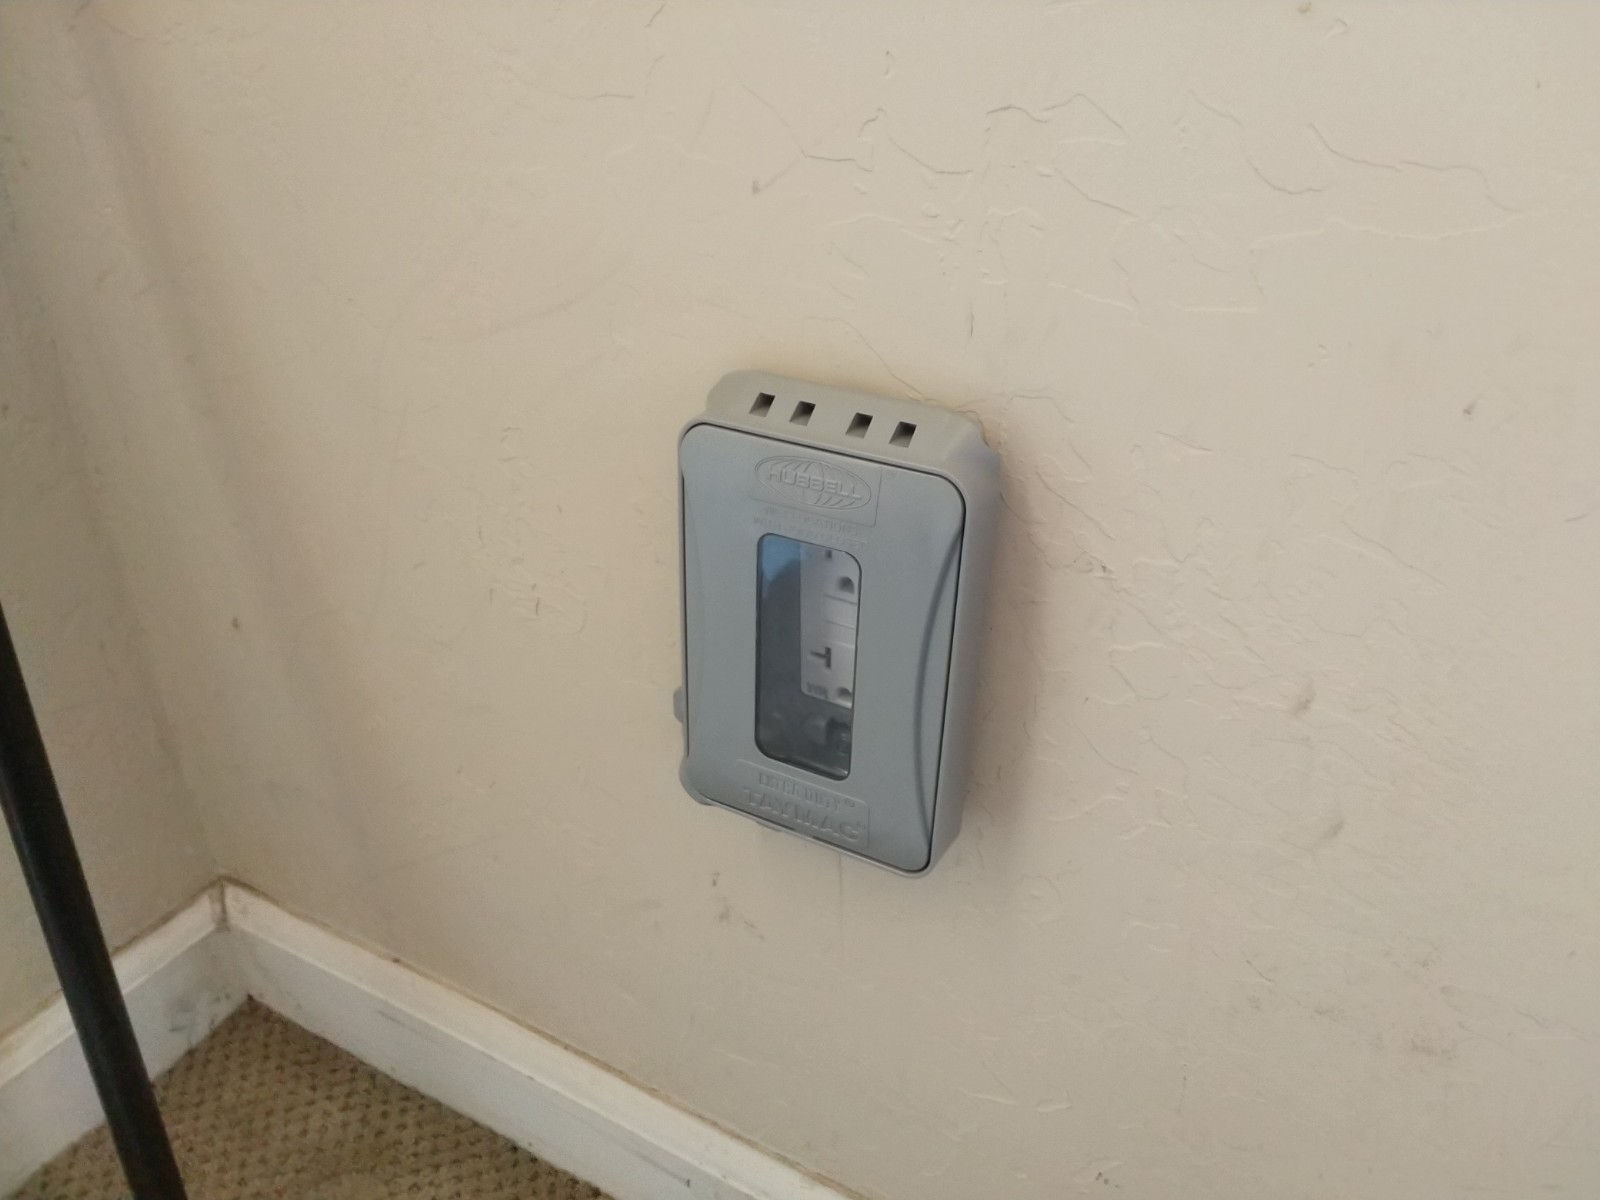
GFCI outlet and cover:
This is my first aquarium I have ever owned, so I'm kind of jumping into the deep end, but I'm fairly diligent with my research and I try to do things ethically and to the best of my ability. My goals with this tank are to have something with a lot of biodiversity, lowish maintenance and fairly clean looking.
I'm trying not to get too far ahead of myself, so my plan is to take it slow and just learn to care for a reef tank using the TBS live rock and its hitch hikers. Once the tank is stabilized and I'm feeling settled in my routine, I'll add a small fish or two and some coral.
You'll notice the lack of QT tank, and I'm undecided what I want to do here. I'm super tight on space and I pretty much went way over budget with this system, and I'm lucky enough to have a really great LFS who dips and quarantines most of his livestock. Going to stick with the TBS goodies until I decide on which way I want to go here.
I decided to go with the AutoAqua AWC as it was only $50 more than the ATO, so I'll be doing daily 2% water changes when I'm confident that it's working right. It'll be fed by a 4 gallon Aqua-tainer, with another 4 gallon Aqua-tainer next to it for waste, and a 1 gallon Tupperware container for the ATO. I estimate that the tank will hold about 10 gallons when the rock is in there, so that should give me about 2 weeks of water changes per reservoir fill.
I'll be making my own water using a Spectrapure unit,and I plan on having two 7 gallon aquatainers full at all times in case of emergency.
Let's start with my equipment, some of which I have and some is on order:
Tank gear:
Fluval Evo 13.5
Nanobox Tide Plus
Sicce .5 return pump
Neo-therm 75w heater
AutoAqua AWC/ATO
AutoAqua Smart Level Sensor
DIY media basket (w/ filter floss and carbon)
Inkbird temp controller
Custom stand (I'll be posting pics of this build as well):
Imagitarium 40 gallon
Custom bamboo plywood top, with magnetic bamboo panels for easy access
Various electronics:
Tripp lite Isobar 6 Ultra surge protector
WR GFCI outlet w/ weather resistant cover for the outlet next to the tank (for backup)
AFCI/GFCI dual function outlet further away that will power the tank
Chemicals/Test stuff:
Refractometer
Aqua Experts refractometer calibration fluid
Seachem Prime
Seachem Matrix Carbon
Ammonia badge
Salifert Nitrate test
Water:
Spectrapure MaxPure 90GPD Chloramine kit
Red Sea blue bucket
Misc gear:
2 x 4g Aqua-tainers for the AWC reservoir/waste
1g Sterilite tupperware ATO reservoir
Long tongs
Long Tweezers
Husbandry:
TBS live rock/sand
Undecided beyond that
I'd like to make a note what I did to ensure my tank setup is safe. I'm extremely worried about electrical shock, so I did a few things to reduce the chances of that happening:
- No electrical connections will be made inside of the stand
- No electrical connections will be made below the water line within a foot of the tank
- Installed a weather resistant GFCI outlet with weather resistant cover on the outlet let to the tank, this one will not be used, except if I need it for a backup.
- The outlet that will power the tank is located behind the desk and is an AFCI/GFCI dual function outlet.
- I will be using a high quality Tripplite Isobar 6 surge protector.
- All submerged equipment and lights will be turned off before I put my hands in the tank.
- Drip loops
I opted for the metal Imagatarium 40 gallon tank stand. Cheap, sturdy and easy to modify. While I prefer the aesthetics of a stand the same dimensions as the tank, I don't feel comfortable with that as I live in earthquake land. The top will consist of 3/4" natural bamboo plywood, side panels will be 1/4" natural bamboo plywood as well, with rare earth magnets to make them removable. All the bamboo will be finished in some oil based poly to protect from moisture. Still waiting on the quote as I'm having the panels CNC'd, so I'm doing what I can in the meantime. Bonus is that it'll match my desk right next to it!
Picture time!
Bracing the custom shelf I built out of some scrap 1/2" ply:
Scraping the honeycomb off the rim:
Tank placement in the bedroom:
Dry fitting the AWC/SML sensors, pump and water lines:
GFCI outlet and cover:


