I absolutely suck at aquascaping

cvrle1

Well-Known Member
View Badges
Joined
Sep 13, 2018
Messages
902
Reaction score
988
Rating - 0%
0   0   0
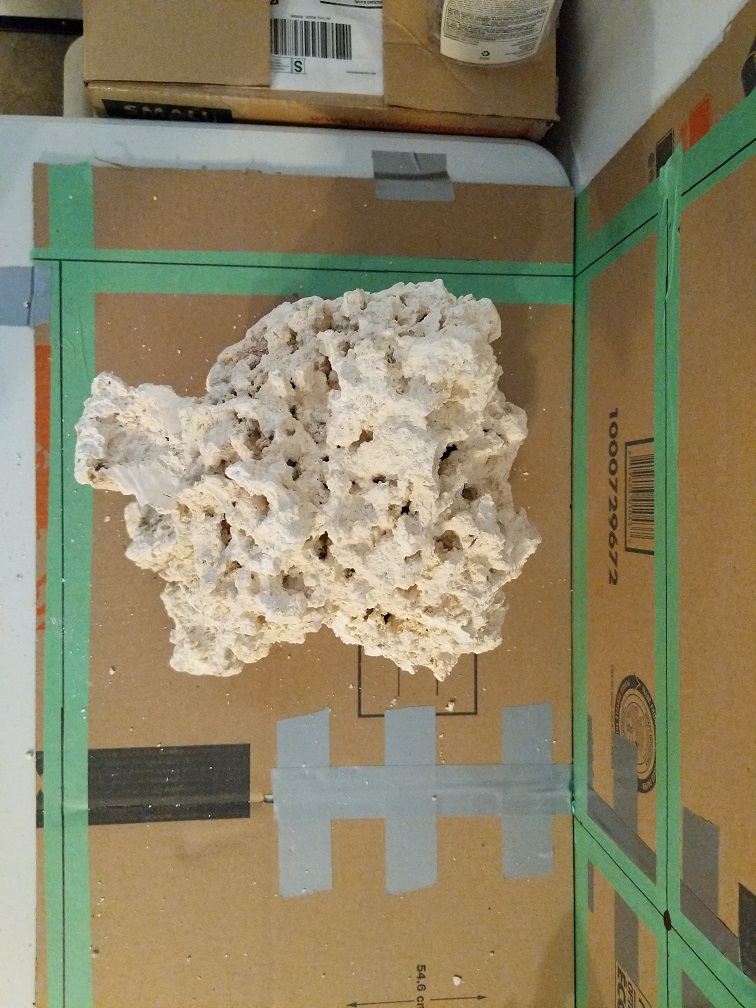
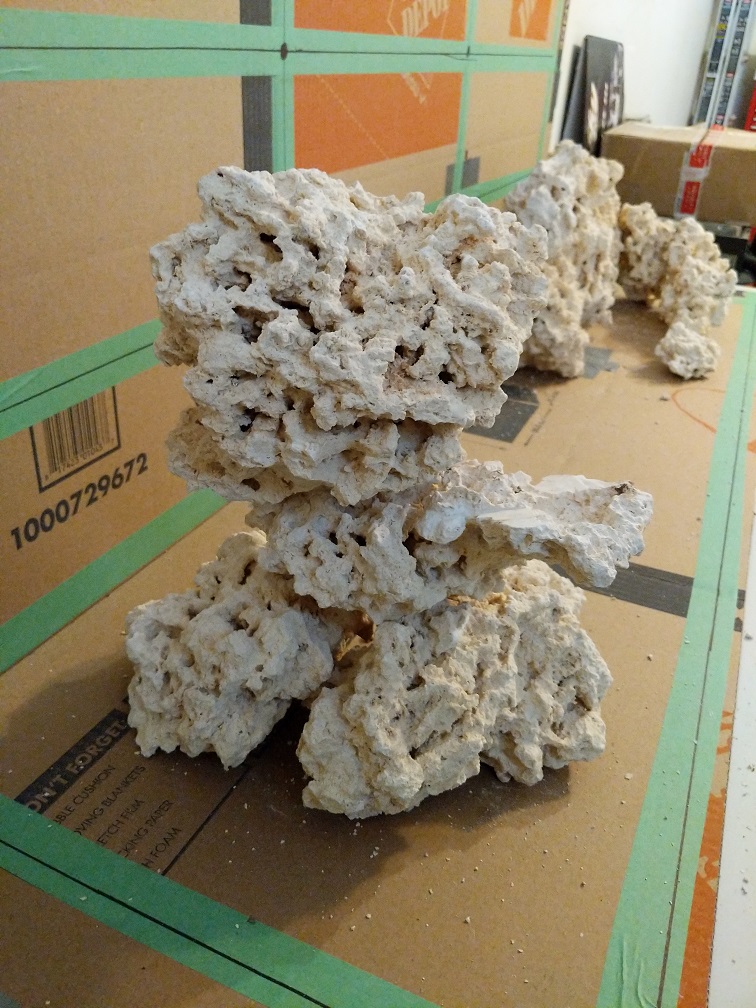
I was never artistic person, best I could draw was a stick man. Up until this point in my life it wasnt really too much of an issue, but I think it has finally caught up with me. I absolutely suck at aquascaping. Issue that I have is that I cant visualize what I can do with rocks that I have. I have a bunch of rocks, some small, some bigger boulders, all different shapes, but when I look at them I have absolutely no idea where to start and how to start creating aquascape with them. I kinda have an idea in my head on how I would like scape to look like, but have no idea how to take rocks that I have and mold them into what I want. I am afraid to just start randomly breaking, chiseling and cutting rocks as then I may break something I actually needed to be one piece later on.

Any help or pointers would be much appreciated.

Tank is 110G 5' x 18" wide x 2' high.

Thanks

 

Reeffraff

Active Member
View Badges
Joined
Feb 23, 2019
Messages
400
Reaction score
1,747
Rating - 0%
0   0   0
One thing that I find helpful is to mark out the inner dimensions on the floor with some tape and play around with the rock until you get something you like. Then you can simply transfer that structure to the tank.
 
OP
OP
cvrle1

cvrle1

Well-Known Member
View Badges
Joined
Sep 13, 2018
Messages
902
Reaction score
988
Rating - 0%
0   0   0
One thing that I find helpful is to mark out the inner dimensions on the floor with some tape and play around with the rock until you get something you like. Then you can simply transfer that structure to the tank.

I already did that. I created copy of the tank on the table, so thats not an issue. My problem is that I cant see how each piece could go with another to create something. If i take this part off, and I turn this around then I can fit it in here and I get this look, that sort of a thing is what I have issue visualizing.
 

Buckster

2500 Club Member
View Badges
Joined
Mar 23, 2020
Messages
3,745
Reaction score
24,166
Location
Pawleys Island, SC
Rating - 0%
0   0   0
Look at photos of other tanks. Make sure you include hiding places for fish. Form some pillars with elevated flatter rock which is unusual. Don't be too much of a perfectionist! Good luck!
 

JoshO

Valuable Member
View Badges
Joined
Feb 7, 2020
Messages
1,751
Reaction score
8,649
Location
North East England
Rating - 0%
0   0   0
I agree with the previous advice at marking the tank out, however I'd do it in the corner of a room and use the walls to mark height and depth also, gives you more perspective to work with. If that's not available try making it out of cardboard!
Once you've got it marked out, throw something together and then post it up on here and people will chime in with changes! We need pictures to be able to help better!
 

Phycodurus

Well-Known Member
View Badges
Joined
May 18, 2018
Messages
905
Reaction score
1,690
Location
Los Angeles
Rating - 0%
0   0   0
there is a design concept called the rule of thirds. it may help you better visualize the layout:

• take masking tape and tape 2 lines across the front glass, from the left side all the way across to the right side; the first at 8” from the top and the second at 16”.
• then take two more strips and paste them top to bottom 20” in from each side.
• you’ll end up with a stretched out tic-tac-toe board.
• notice the 4 intersections where the strips meet ... these are considered focal points

do you plan to keep LPS/softies? SPS? (If SPS, you want lower rock work to allow for growth). what about rock bridges and rock caves? rock islands? keep flow in mind too.

there’s a major thread here in aquascaping. have fun with it and expect revisions. post here for feedback. :)
 

William Mumford

Valuable Member
View Badges
Joined
Apr 9, 2019
Messages
1,050
Reaction score
884
Rating - 0%
0   0   0
I looked at other people's that I liked and took some of what they did and some of others to make my own. But I could only do it by using a picture next to me for reference
 

Mikeltee

Valuable Member
View Badges
Joined
Mar 15, 2020
Messages
1,563
Reaction score
1,209
Location
Fishers, IN
Rating - 50%
1   1   0
I was never artistic person, best I could draw was a stick man. Up until this point in my life it wasnt really too much of an issue, but I think it has finally caught up with me. I absolutely suck at aquascaping. Issue that I have is that I cant visualize what I can do with rocks that I have. I have a bunch of rocks, some small, some bigger boulders, all different shapes, but when I look at them I have absolutely no idea where to start and how to start creating aquascape with them. I kinda have an idea in my head on how I would like scape to look like, but have no idea how to take rocks that I have and mold them into what I want. I am afraid to just start randomly breaking, chiseling and cutting rocks as then I may break something I actually needed to be one piece later on.

Any help or pointers would be much appreciated.

Tank is 110G 5' x 18" wide x 2' high.

Thanks
Aquascaping is very subjective. Do what suits you. Dont worry about what others think. Heres some pointers followed by what I like:

Rock is the backbone of your tank. It allows parameters to shift as it takes the blunt of the hit. Therefore I like to shoot for at least a third filled tank with half filled being better.

Rock is for your animals more than it is for your eyes. Develope nice nooks and crannies for the fish to hide in and get away if they are getting punked on. This will avoid many common problems that people have that they think were caused during shipping. You want a stress free tank.

Keep it far enough away from the glass to get a MagFloat scraper through it. Dont EVER use your glass as support.

Get some reef welder to put some rocks together to build a sturdy structure.

Place your widest rocks on the bottom that way you can develope levels to have corals on and all will get light.

Personally I like a U shaped more like a /--------\ shape.

Stop beating yourself up over it. Build something and let it marinate for a week before you decide you dont like it. I'd assume you are getting ready to cycle your first tank and if you do it the proper way (with time not chemicals) you can make several changes before you add anything.
 
OP
OP
cvrle1

cvrle1

Well-Known Member
View Badges
Joined
Sep 13, 2018
Messages
902
Reaction score
988
Rating - 0%
0   0   0
Thanks for all the pointers so far. I had a small 33G tank years ago, so its same as if I didnt have one before haha. I plan on cycling rocks outside the tank, mainly because I will need to move tank on and off the stand while I work on skinning it, setting up overflow, sump, drain and return and so on. This way rock can cycle while I do everything else. I'll post up what I have as I go along for critique and feedback.
 
OP
OP
cvrle1

cvrle1

Well-Known Member
View Badges
Joined
Sep 13, 2018
Messages
902
Reaction score
988
Rating - 0%
0   0   0
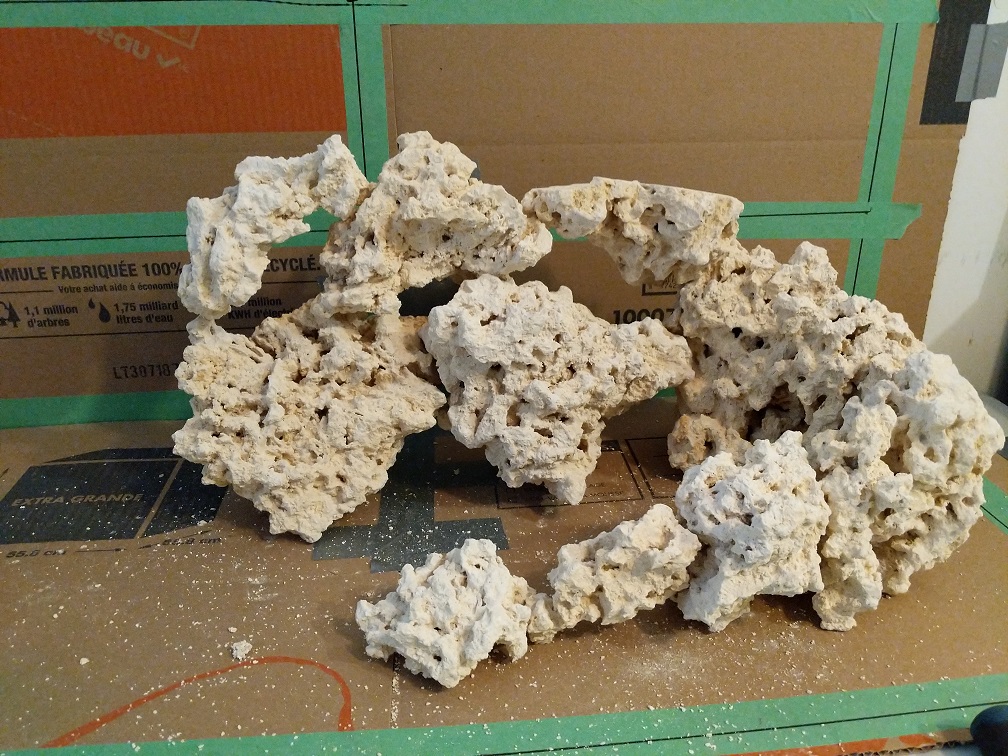
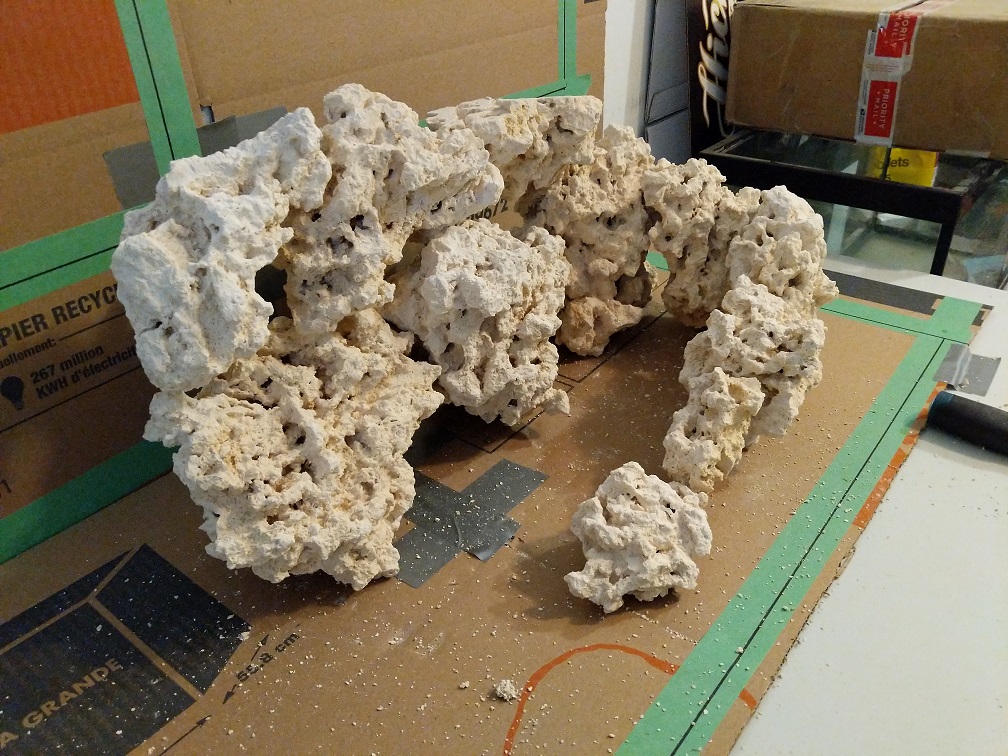
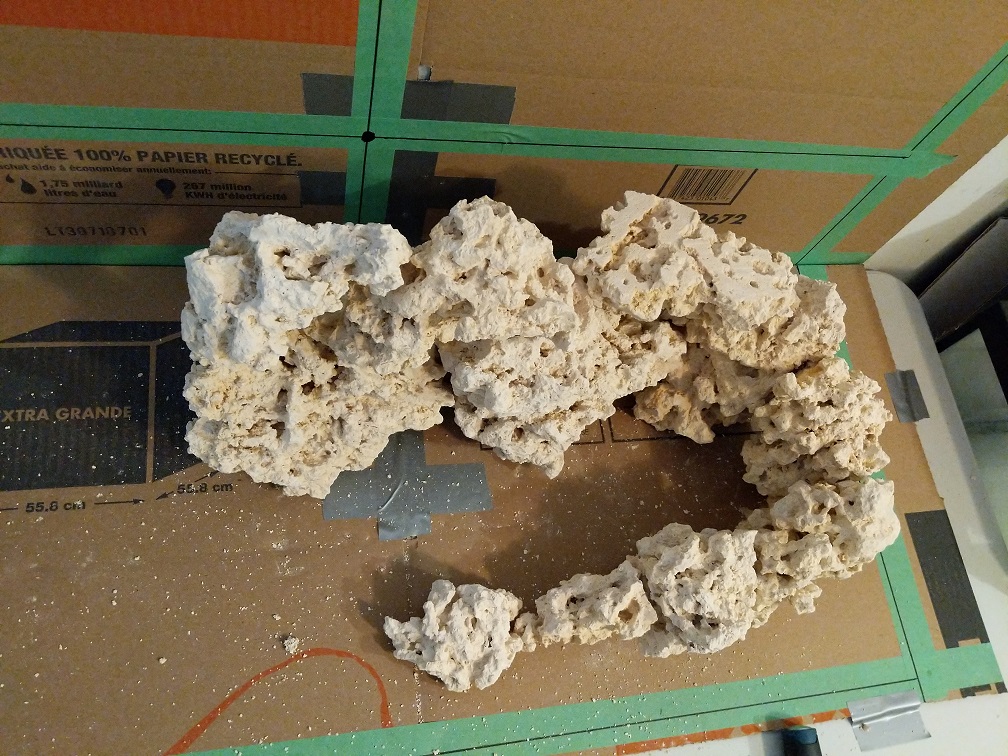
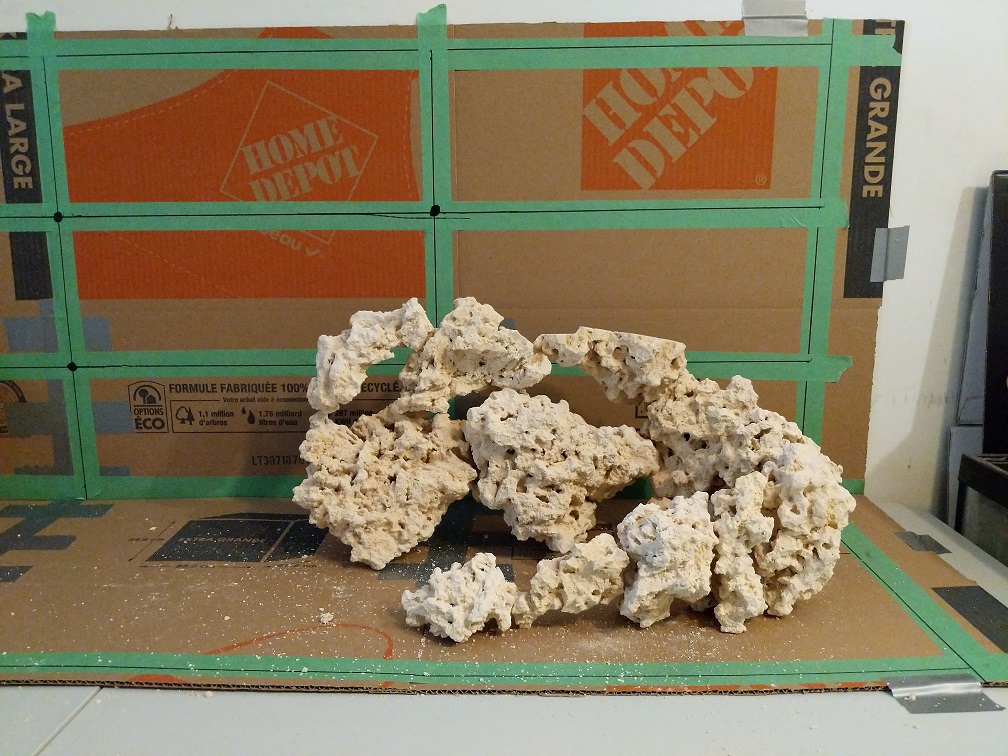
I kinda came up with one structure yesterday. It was complete fluke, but so far I like it (location and angle are not final). It did raise some questions thought that i wanted to inquire about
IMG_20200411_184450.jpg
IMG_20200411_184459.jpg


Few of the top pieces are barely touching one another, especially flat piece top right. How would you go about making this more secure? Even if I use glue and/or cement of some sort, there are very few points of contact between the 2 rocks. Should I try to build up shelf piece with smaller rocks using glue/cement and then connect to the bottom one, chisel away until it fits more securely, something else?

Since rock is heavy, and I have limited opening on the aquarium top due to acrylic brace, I will need to do this in 3 pieces. Once it is in the tank, should I connect all 3 pieces or leave them as separate? If I leave as separate, worried about one part falling over. If I connect, I wont be able to take out or remove if need be.

Thanks again for the help and tips so far.
 
OP
OP
cvrle1

cvrle1

Well-Known Member
View Badges
Joined
Sep 13, 2018
Messages
902
Reaction score
988
Rating - 0%
0   0   0
Played around some more with the 1st structure. Got idea of seeing if I can build some sort of asymmetrical cove out of it. Here is what I came up with so far

7OPstzO.jpg

LYsI8Rs.jpg

Ia5fLeY.jpg

Qx2ZPeO.jpg

NgPXIBB.jpg


There are 2" on all sides between structure and panel, so that there would be water movement, and so that acrylic cleaner can be used. Structure is almost 1/2 the tank height wise. One thing I am not sure is about water movement inside the cove. I will be using 2 gyre XF230s, so it should give me enough movement to move detritus as so on.

I also started playing with idea of doing "bonsai tree" structure on the left

S0uLpo8.jpg

55IYsXo.jpg

KHv50ah.jpg

6m9no4t.jpg

SNUGtza.jpg


Idea is to add 2 more longer "branches" so one would reach rule of 3rds point top left. Not sure how this will all work out, as i just started.

Any feedback critique, info is more than welcome.
 
OP
OP
cvrle1

cvrle1

Well-Known Member
View Badges
Joined
Sep 13, 2018
Messages
902
Reaction score
988
Rating - 0%
0   0   0
Any feedback on what I have so far? Issues that you can see? Too much rock? Would be great to hear something one way or the other. Thanks again.
 

Cstar_BC

Well-Known Member
View Badges
Joined
Nov 18, 2019
Messages
724
Reaction score
1,241
Location
Vancouver BC
Rating - 0%
0   0   0
Any feedback on what I have so far? Issues that you can see? Too much rock? Would be great to hear something one way or the other. Thanks again.
Hey !
Just wanted to say I think you have a great base to start out with .

I do worry that the tight “U” will create a spot for detritus to build up in as well as once something grows at the base of the U it will completely overshadow that spot

Also , maybe double check that you have left yourself enough room around the rock work . Nothing worse than trying to get your hand in there to pick up something and it’s too tight .

do you have any larger pieces to use as a base ?
 
OP
OP
cvrle1

cvrle1

Well-Known Member
View Badges
Joined
Sep 13, 2018
Messages
902
Reaction score
988
Rating - 0%
0   0   0
Hey !
Just wanted to say I think you have a great base to start out with .

I do worry that the tight “U” will create a spot for detritus to build up in as well as once something grows at the base of the U it will completely overshadow that spot

Also , maybe double check that you have left yourself enough room around the rock work . Nothing worse than trying to get your hand in there to pick up something and it’s too tight .

do you have any larger pieces to use as a base ?

Thanks for the info fellow Vancouver-ite (I am in South Surrey) :)

Main worry was lack of flow and detritus building up inside the U. In terms of larger pieces, largest ones are used for bonsai base that i have no idea what to do with quite yet. I have few that are 8" x 5" or so, but not really bigger than ones I used so far. What were you thinking?
 

Cstar_BC

Well-Known Member
View Badges
Joined
Nov 18, 2019
Messages
724
Reaction score
1,241
Location
Vancouver BC
Rating - 0%
0   0   0
If you are set on the bonsai I would try using this piece
34F37994-4169-418A-9268-2850F051D34C.jpeg

rotated 90 degrees left - it already has that tapered look you want with the bonsai style .

and then using
D8CFAA46-9A5B-4E4D-96C8-967807E62BE7.jpeg

these smaller pieces you can create some nice ledges/extensions
 
OP
OP
cvrle1

cvrle1

Well-Known Member
View Badges
Joined
Sep 13, 2018
Messages
902
Reaction score
988
Rating - 0%
0   0   0
After looking at this cove more, I decided I hate it and its not doing anything at all for me. Back to square 1. At least now I know what I dont like and what doesnt work, so it's something.
 
OP
OP
cvrle1

cvrle1

Well-Known Member
View Badges
Joined
Sep 13, 2018
Messages
902
Reaction score
988
Rating - 0%
0   0   0
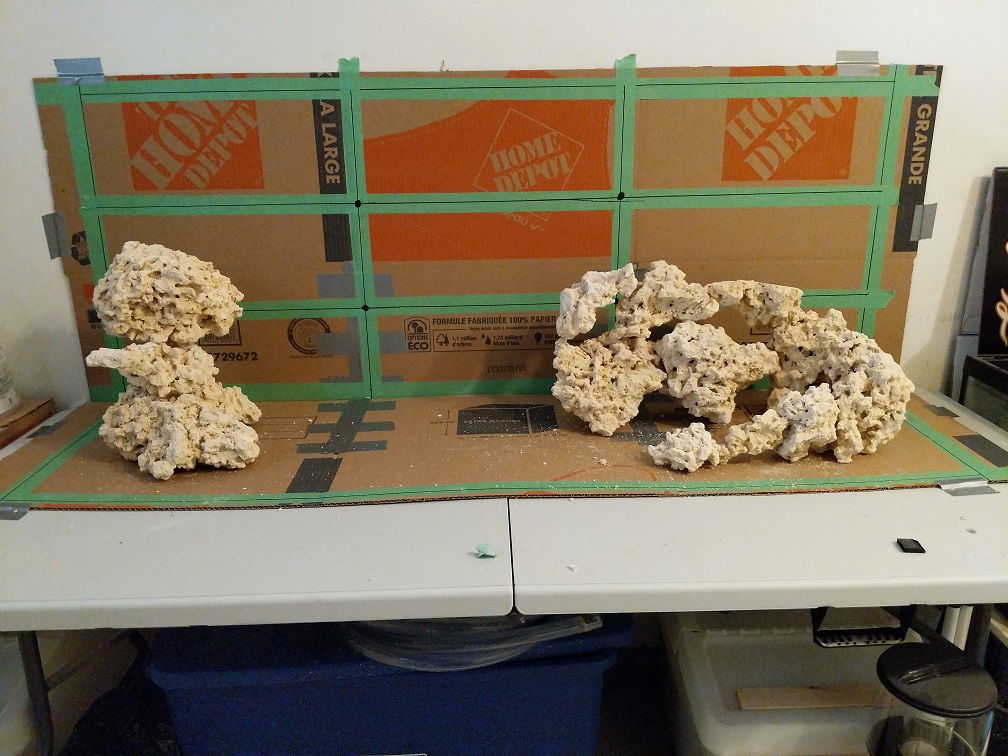
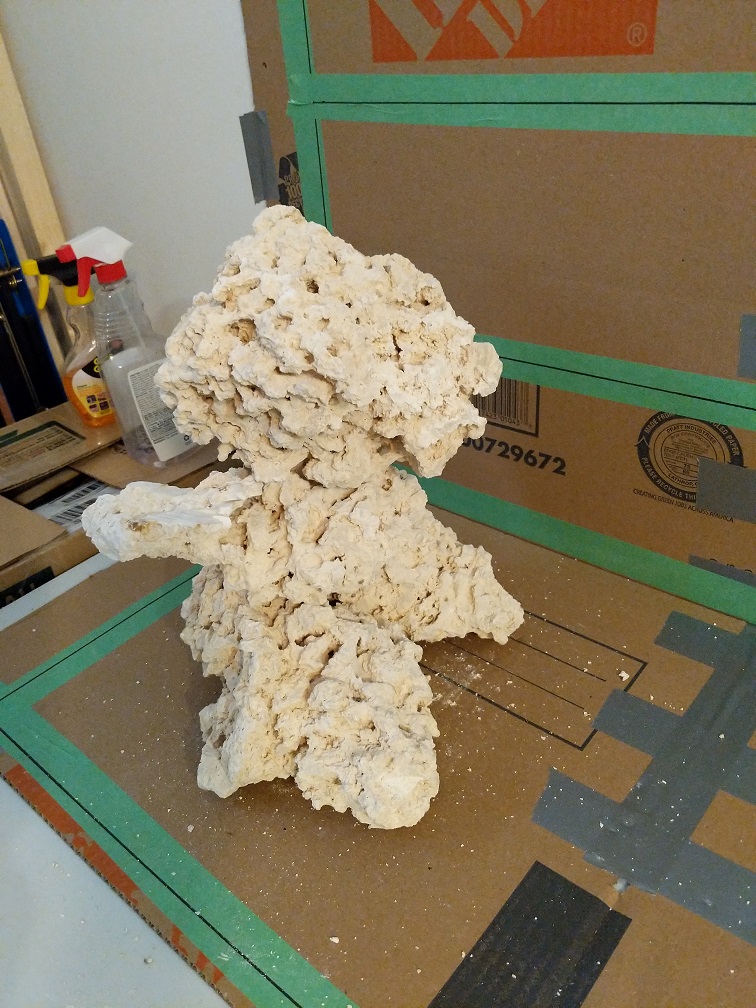
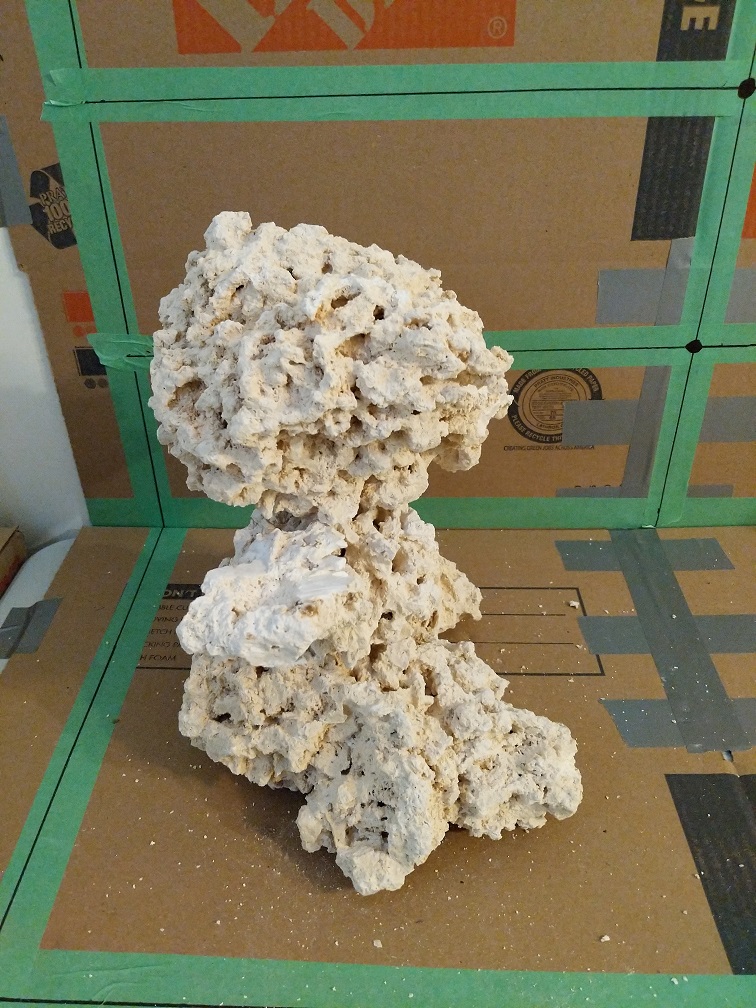
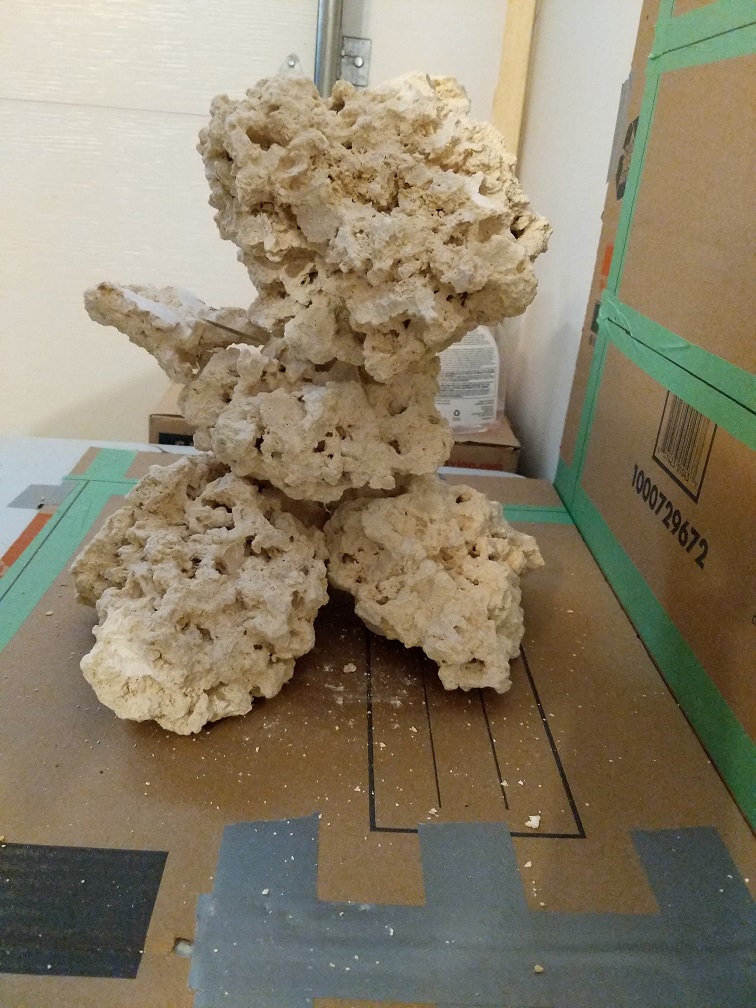
After taking some time and looking at bunch of pics, came up with few new things. Got annoyed last night, as I was wasting time just standing around and looking at rocks, so took masonry bit, drill, fiberglass rods and went at it. Came up with 2 structures

Right side:

IMG_20200423_181249.jpg

IMG_20200423_181242.jpg

IMG_20200423_181257.jpg

IMG_20200423_181324.jpg


Left side:

IMG_20200423_181303.jpg

IMG_20200423_181308.jpg

IMG_20200423_181315.jpg

IMG_20200423_181320.jpg


IMG_20200423_181337.jpg


Right side max height is 12", so 1/2 the tank height. Left side is around 14-15" at the highest point. I started adding random small pieces (being held by rubber bands) as they are too small to drill, and want to see what it would look like. Hope that by adding these to the left side, it looks more like rocks, and not just boulders stacked on top of one another. Feedback, critique, and so on always welcomed and appreciated. Thanks
 

Shaun_in_Cali

Active Member
View Badges
Joined
Apr 17, 2019
Messages
150
Reaction score
118
Rating - 0%
0   0   0
It may also depend on what you want to do with it.

If you are endeavouring to grow corals, think about where you want to place the corals. Considerations light, flow, ability to place multiple corals. Also think about how close to the waterline you are going to want it to be. And then last the only thing to consider is that within 2 years you probably can't see the original scape anyway for all the corals...

In my tank, I feel the aquascape is a little to linear, which means that apart from the top it is hard to find a place to put the corals. I'd do it differently a second time (this is my first tank.... )
 

TOP 10 Trending Threads

DO YOU THINK TECHNOLOGICAL ADVANCEMENTS ARE MORE HELPFUL OR HURTFUL TO REEFING?

  • More helpful.

    Votes: 49 40.8%
  • More hurtful.

    Votes: 5 4.2%
  • I think it depends mostly on the technology.

    Votes: 48 40.0%
  • I think it dependsmostly on the reefer behind the technology.

    Votes: 36 30.0%
Back
Top
Home
Post thread…
Market
What's new