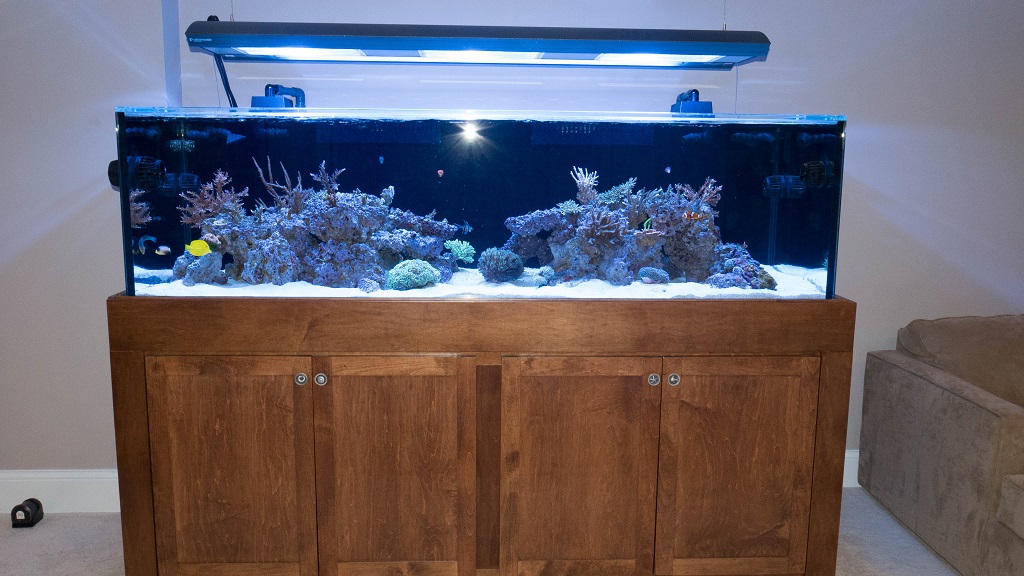
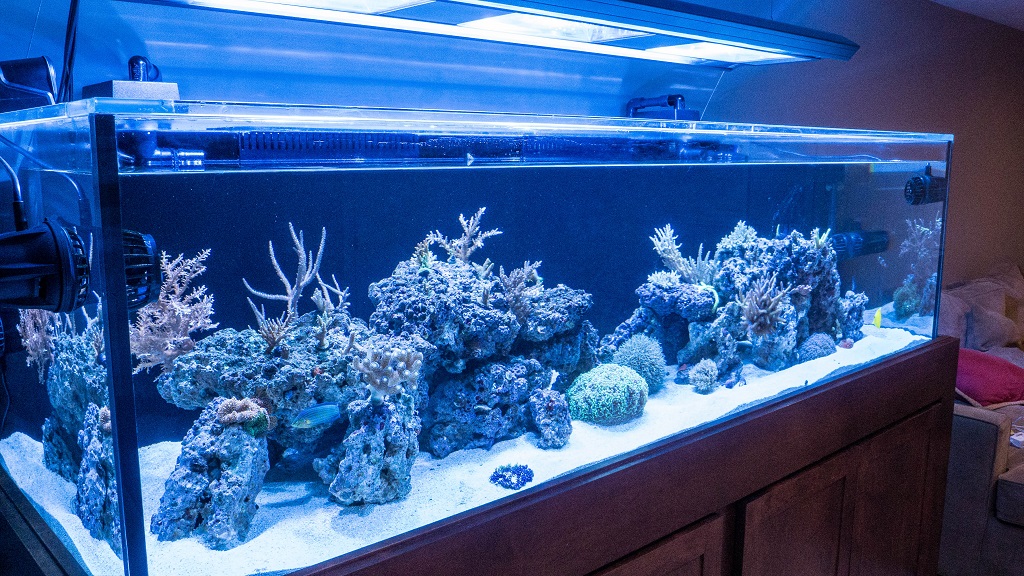
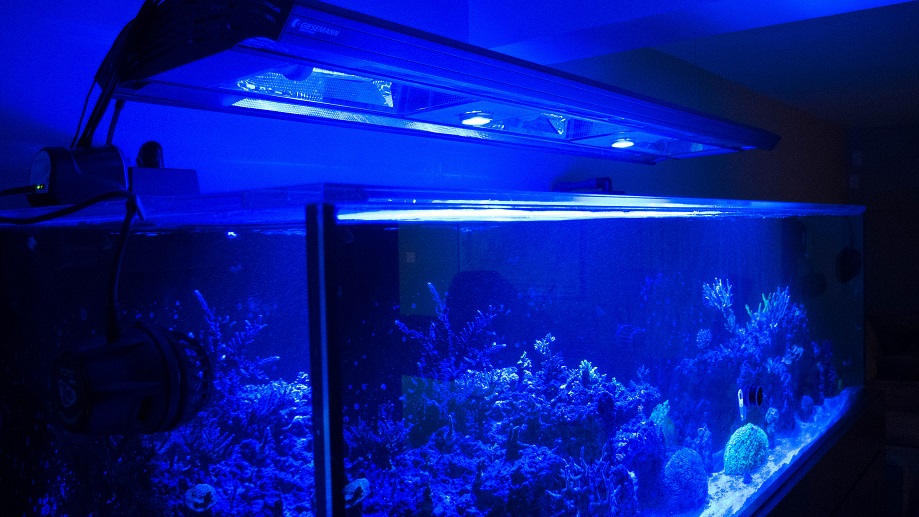
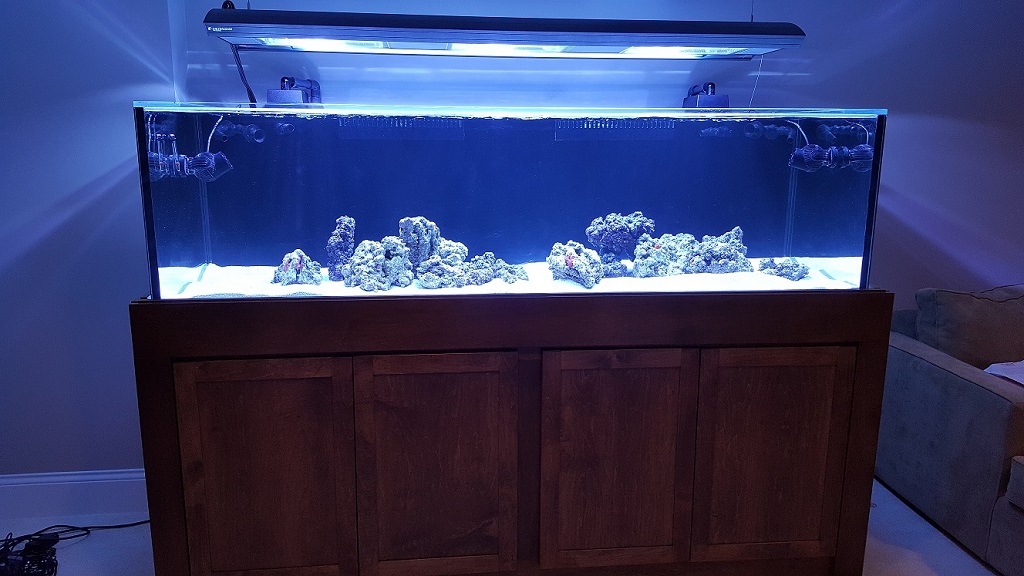
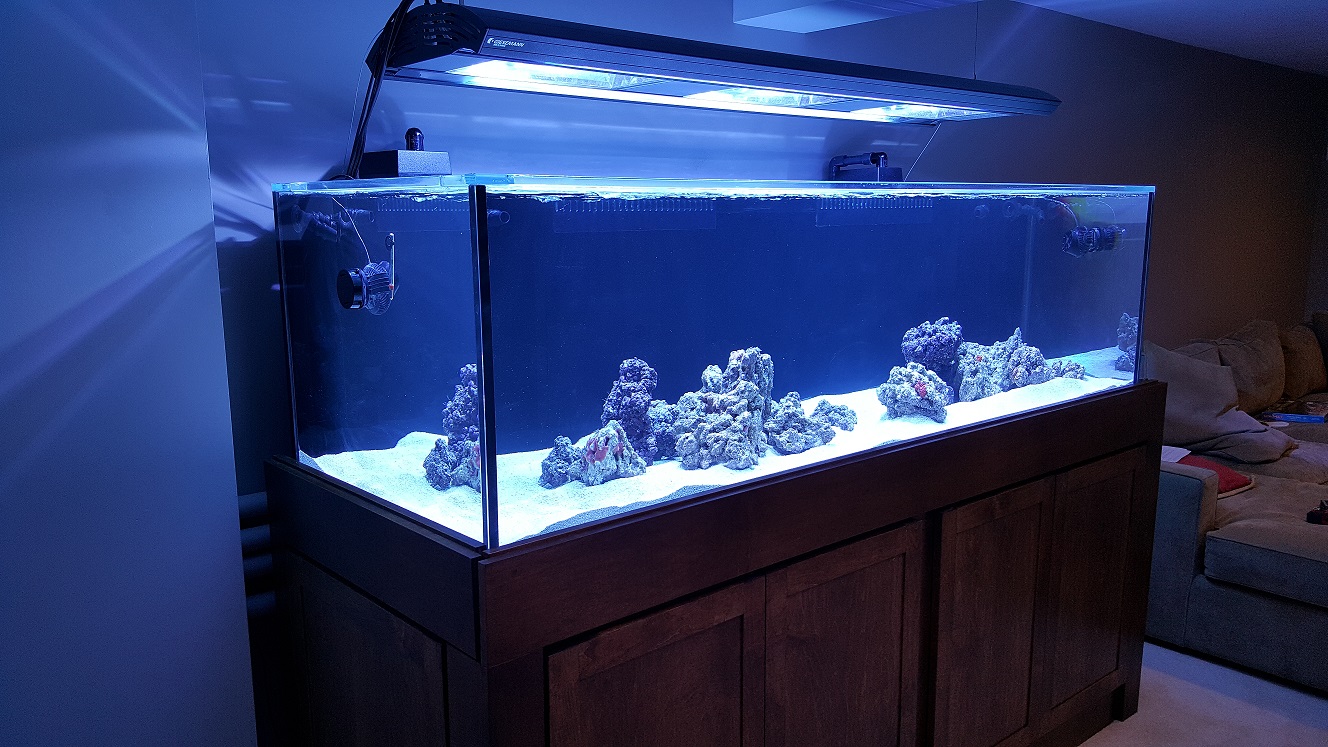
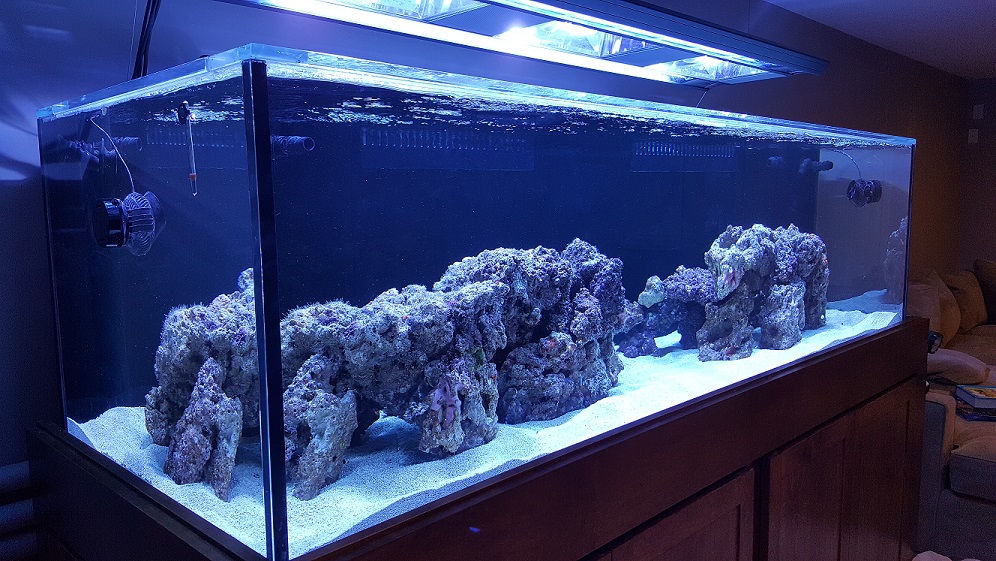
120g just wasn't enough for the fish I love watching. The new 260g, built by Derek at Miracles, is 84"L x 24"D x 30"W with 3/4" starphire on front and sides and eurobraced top and bottom. 48" rear external overflow with three 1.5" bulkheads for a beananimal drain. Only two return holes in the back corners of the DT. I decided against closed loop after talking with Sanjay. He convinced me it was too much risk of leaking for what could be done with poweheads. I did have 2 holes drilled into the back top eurobracing for a pair of Seaswirls. Miracles also built the steel framed stand with maple skirting, stained in walnut. The 260 was initially planned for my office, but after bringing in a structural engineer and having a rational discussion with my wife, we decided to put it in the basement. Our basement is finished with an existing theater room, bathroom, kids play area and most importantly space for a fish room. My concern was that the aquarium would get much less viewing being in the basement, which it does, but the pros outweighed the cons.
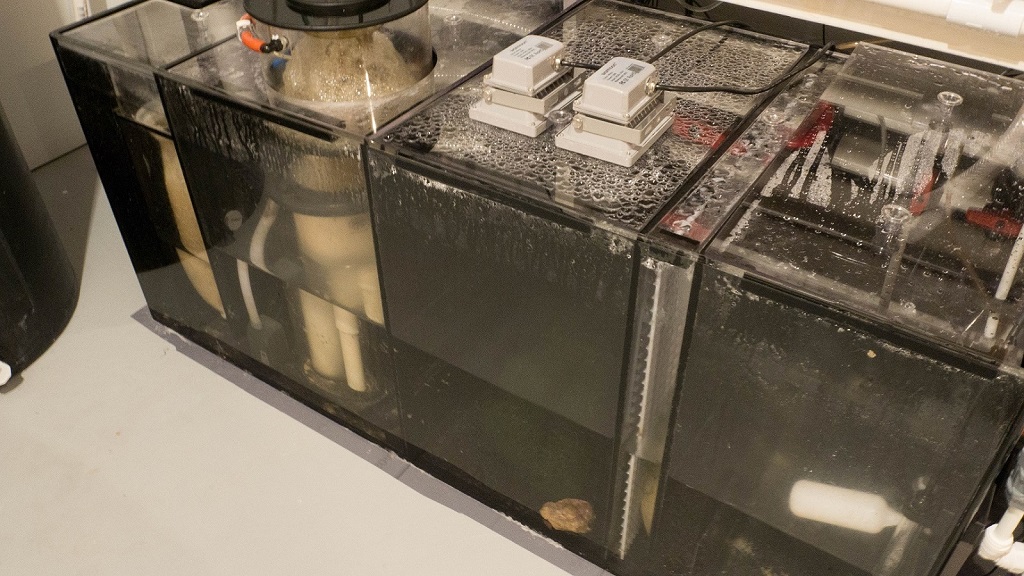
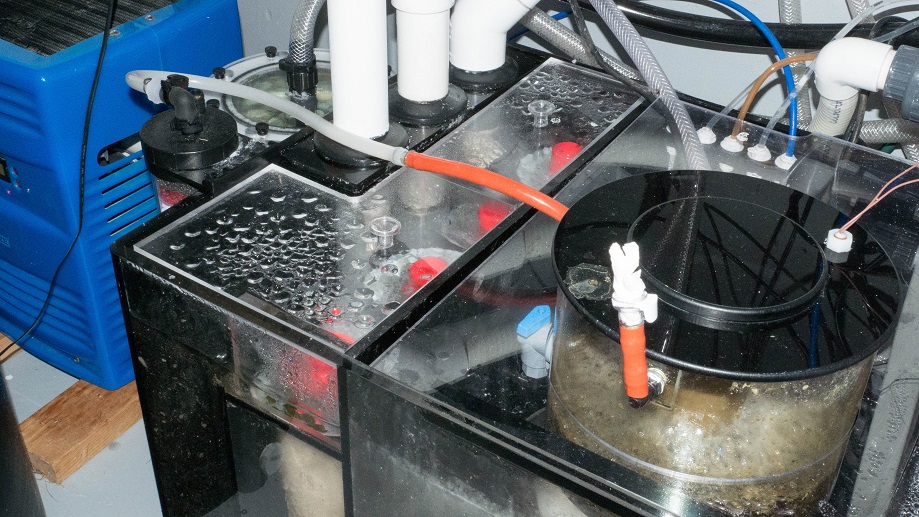
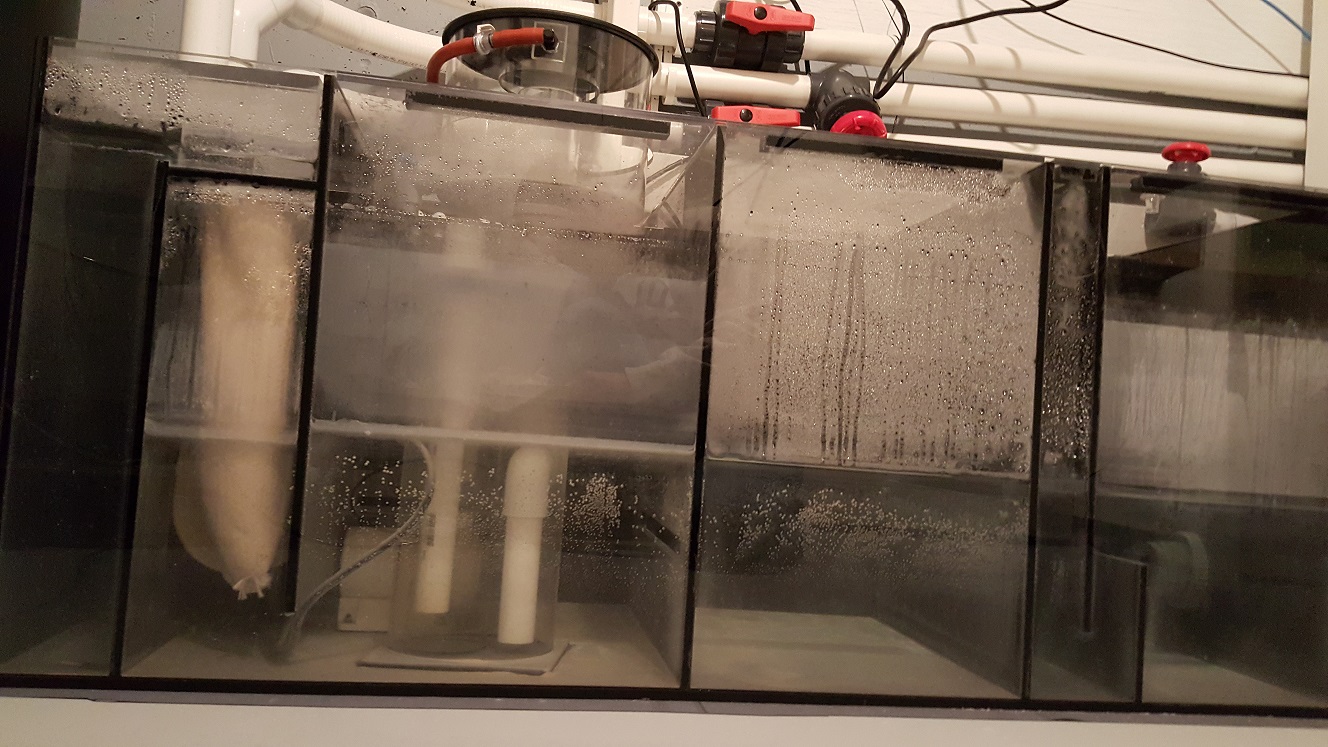
The sump was custom built to my design by John at Advanced Acrylics. It holds about 80g and is 48"L x20"D x20"W, 1/2" rimless with 3/8" black baffles back and bottom. I sized it to go in the stand under the DT if necessary. Flush Lids on all 4 sections. Notches on the return and the skimmer section for cords, Four 4" filtersock holders, skimmer section is 12.75"x 20", Center fuge section is 12"x 20", Return section is 8"x 20". There's a 5 hole dosing line , 3 hole probe holder, and three 1.5" bulkhead holes for the drain. I drilled the return bulkhead hole in order to line it up properly with a 230w Red Dragon 3 return pump.
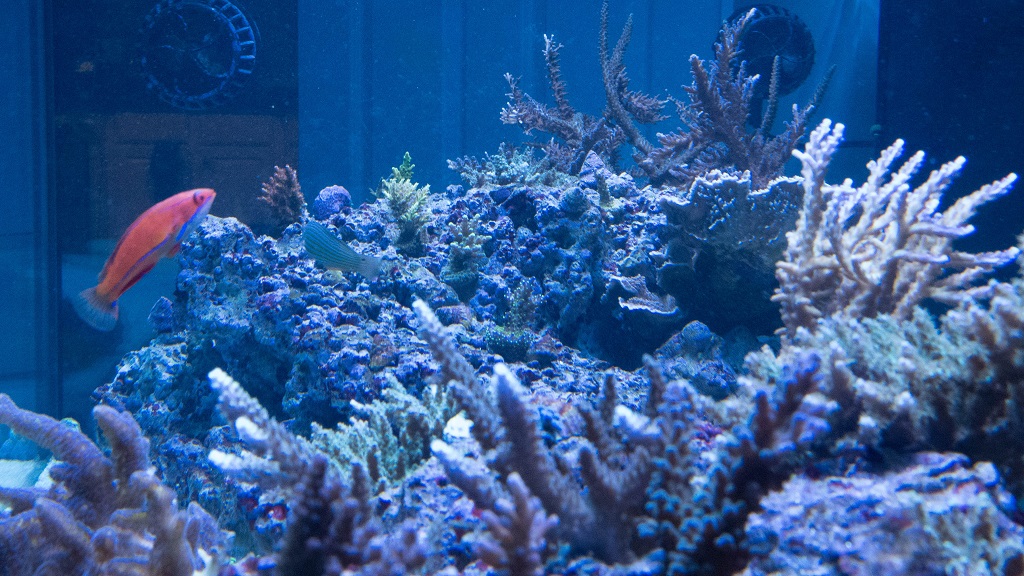
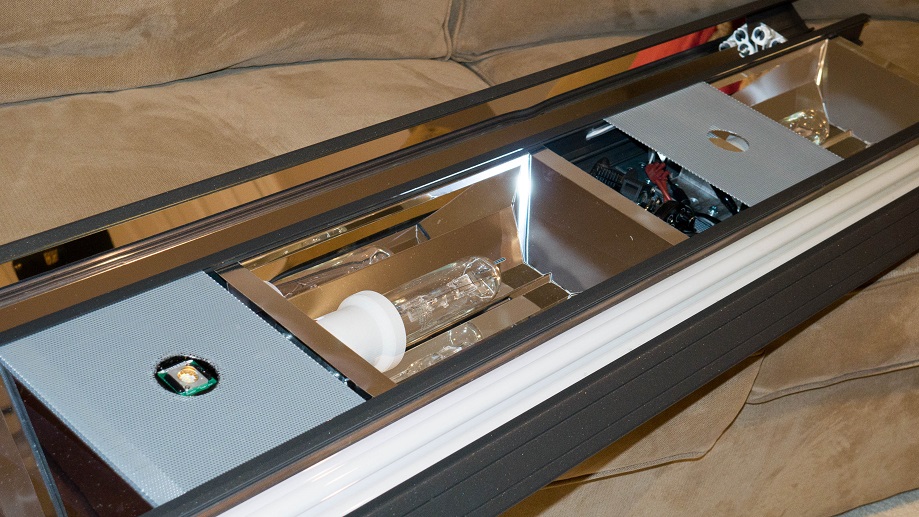
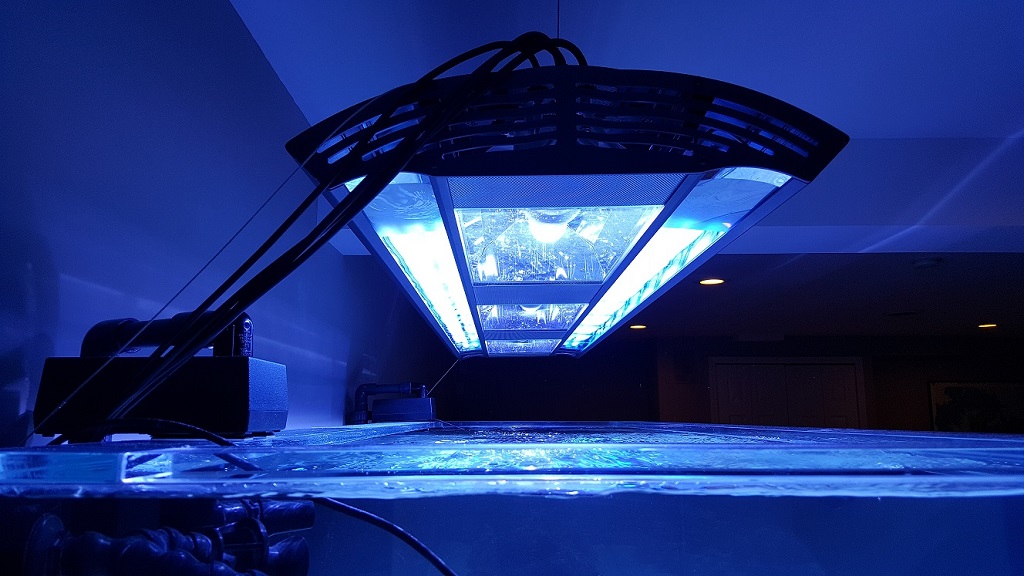
Lighting is Geismann Spectra 72" MH/T5 combo. Possible future plans to build in Kessil LED pucks between each MH reflector.
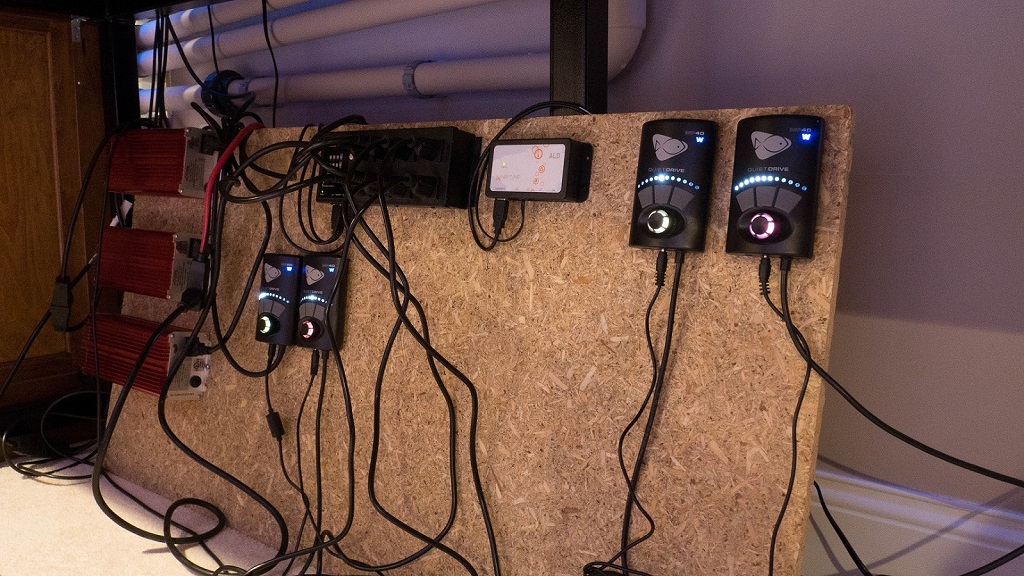
Powerheads are a pair of MP60s at front sides, a pair of MP40s at back sides and a single MP40 at middle back.
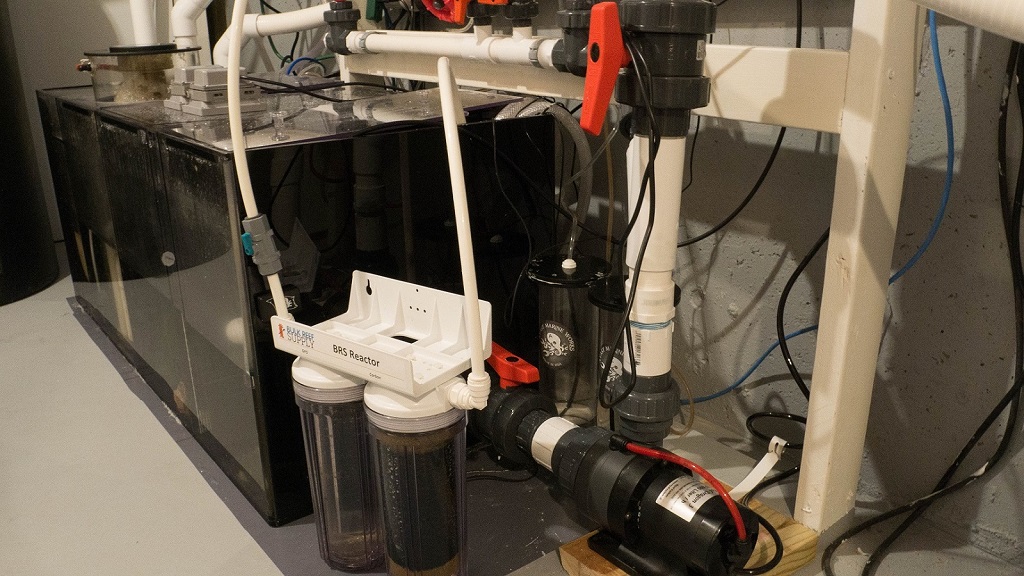
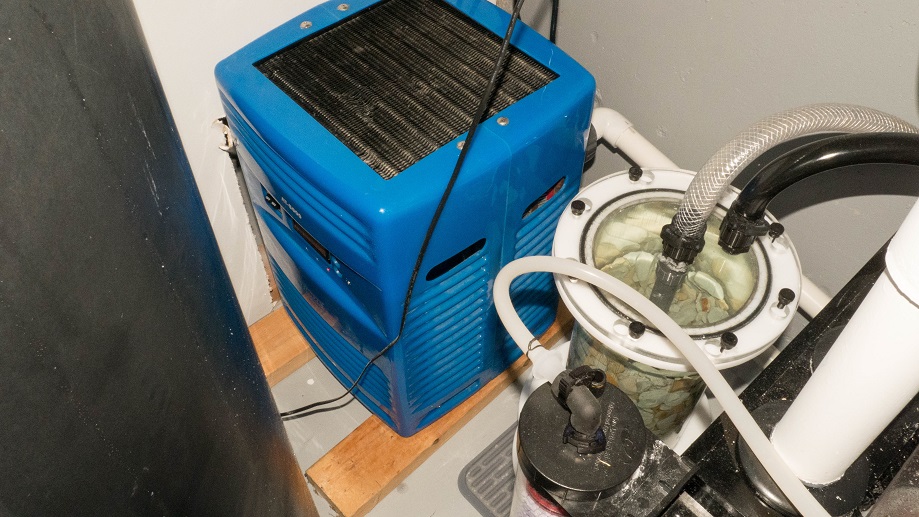
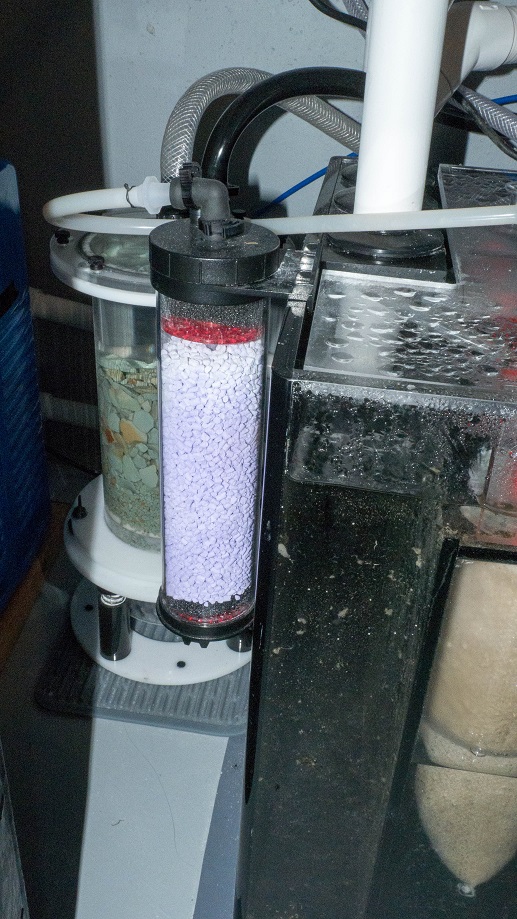
Skimmer for the moment is a LifeReef 24 with extra large collection cup and Vectra M1. I will either extend the skimmer height or replace it entirely based on how it performs, but so far so good. According to Jeff's site, the 24 in. is slightly undersized for the 260g but the nice thing about his skimmers is they are essentially the same except for the height. I originally bought this with the flange for my 120g to expand if necessary.
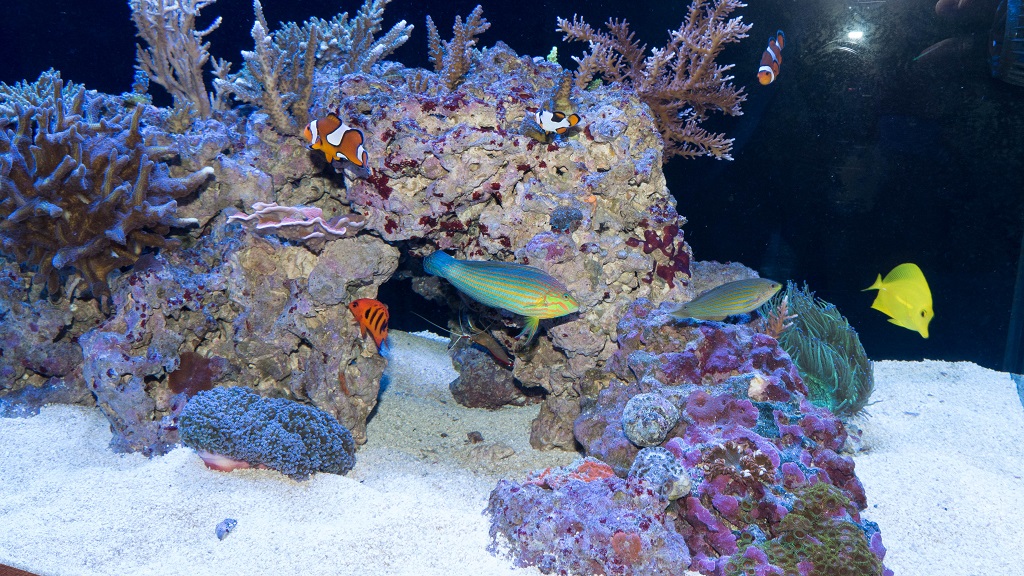
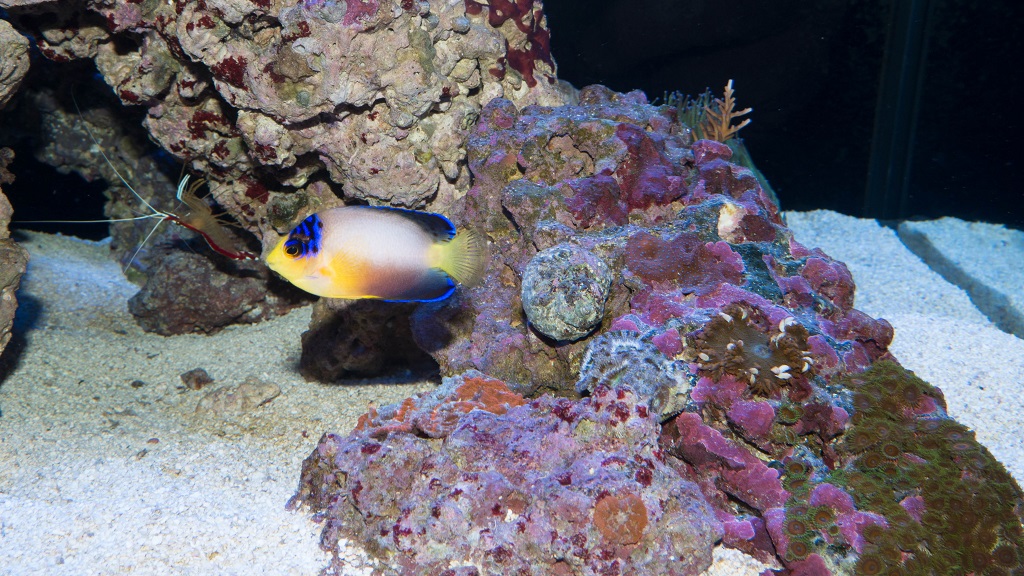
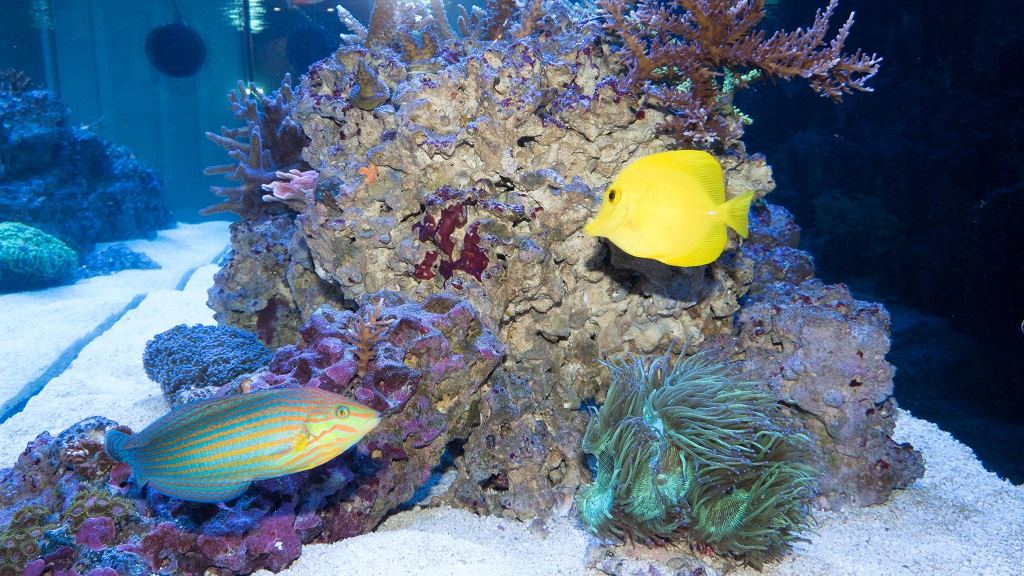
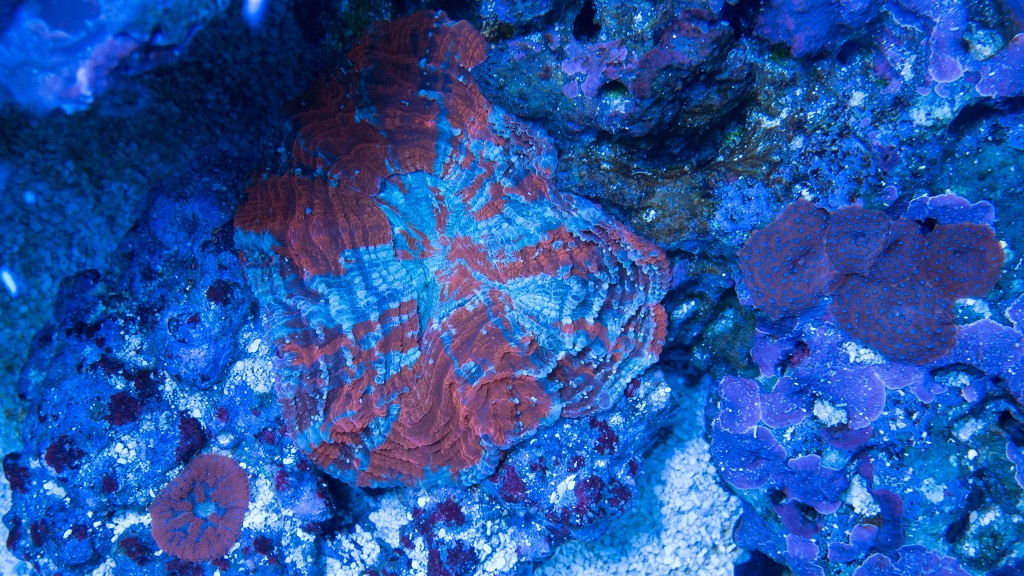
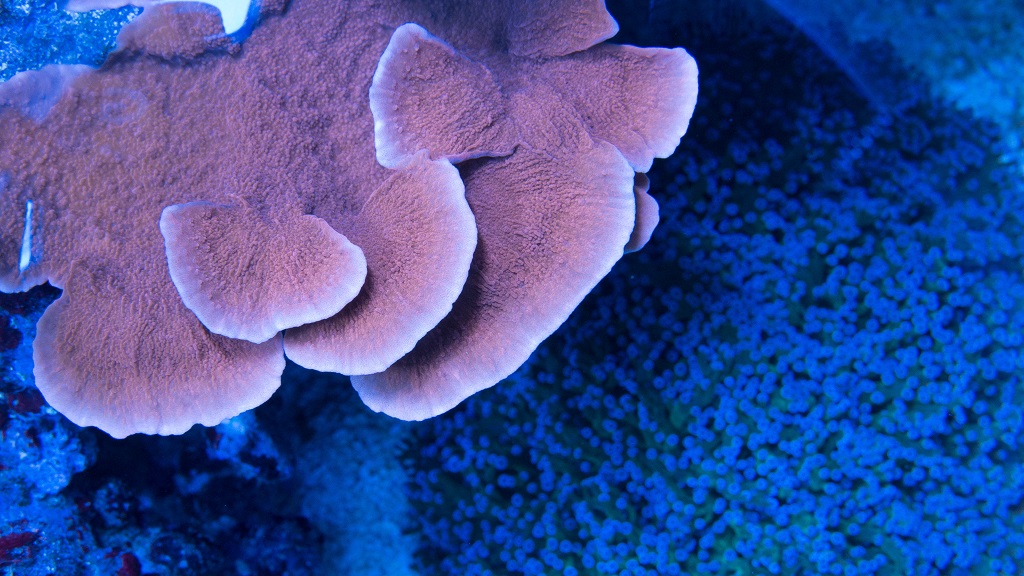
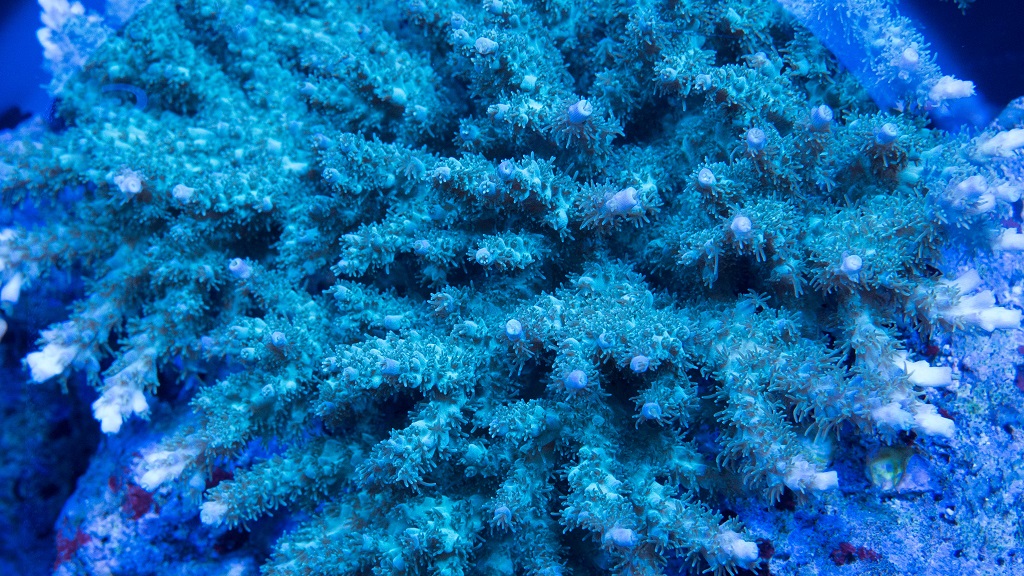
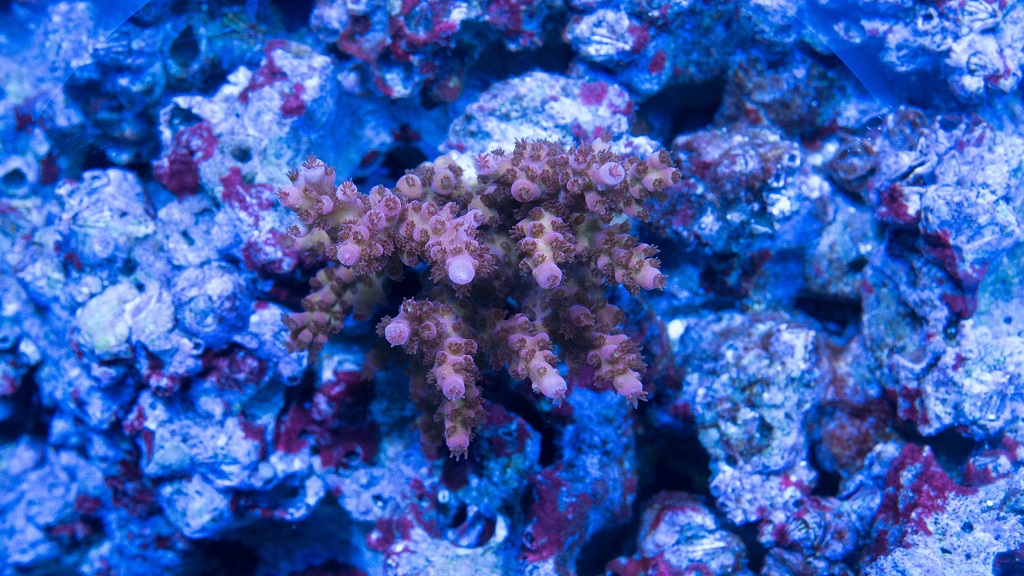
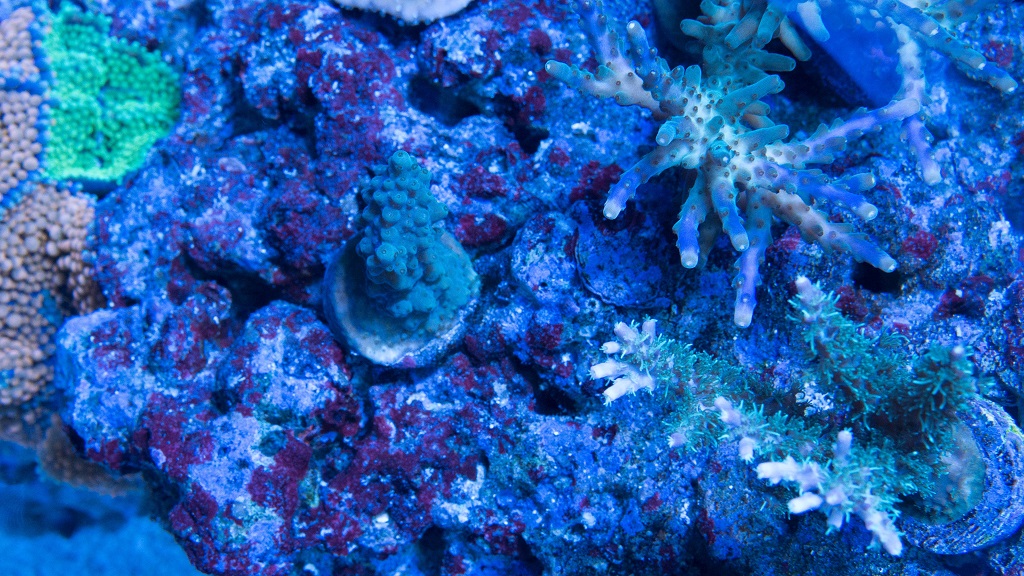
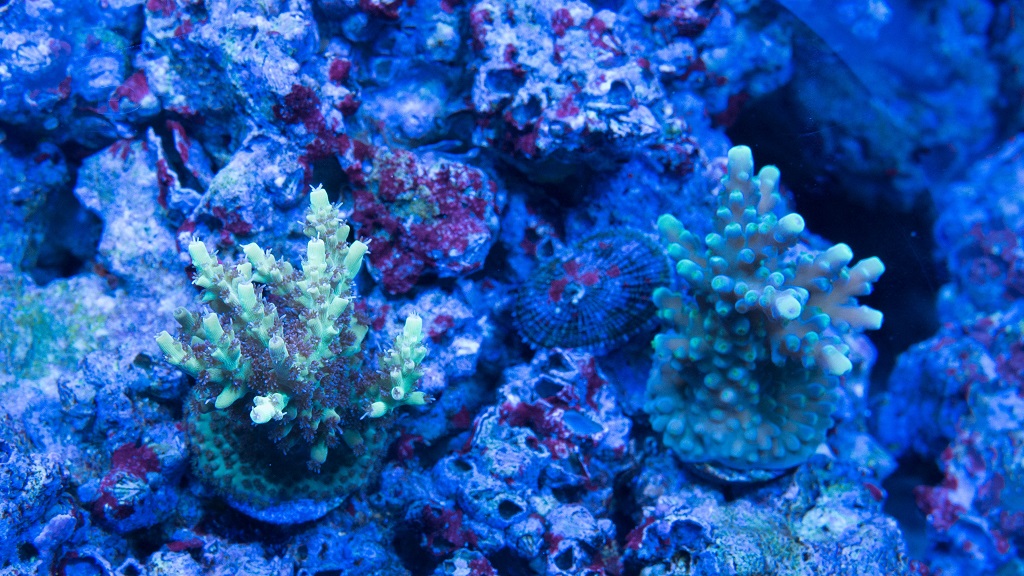
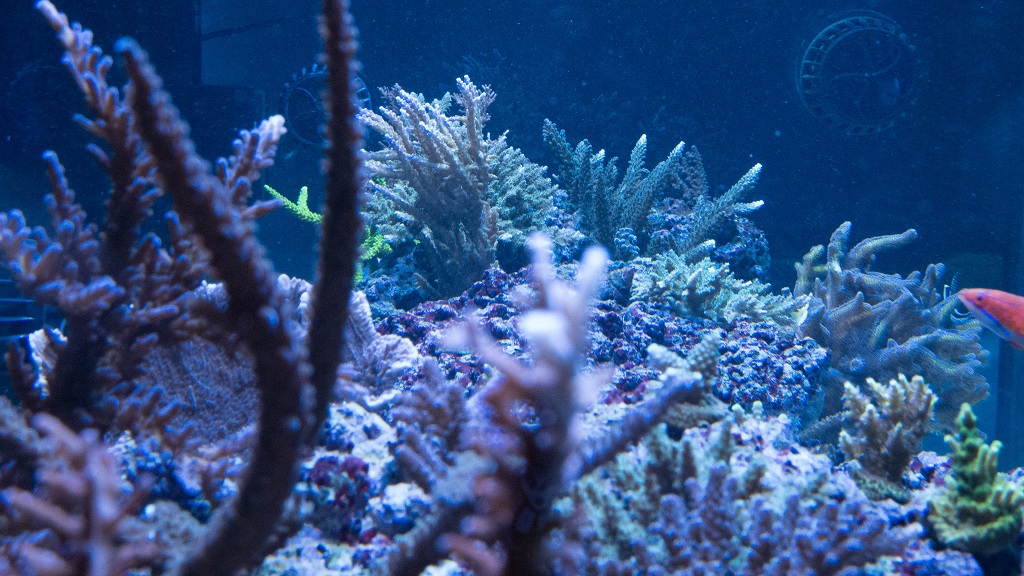
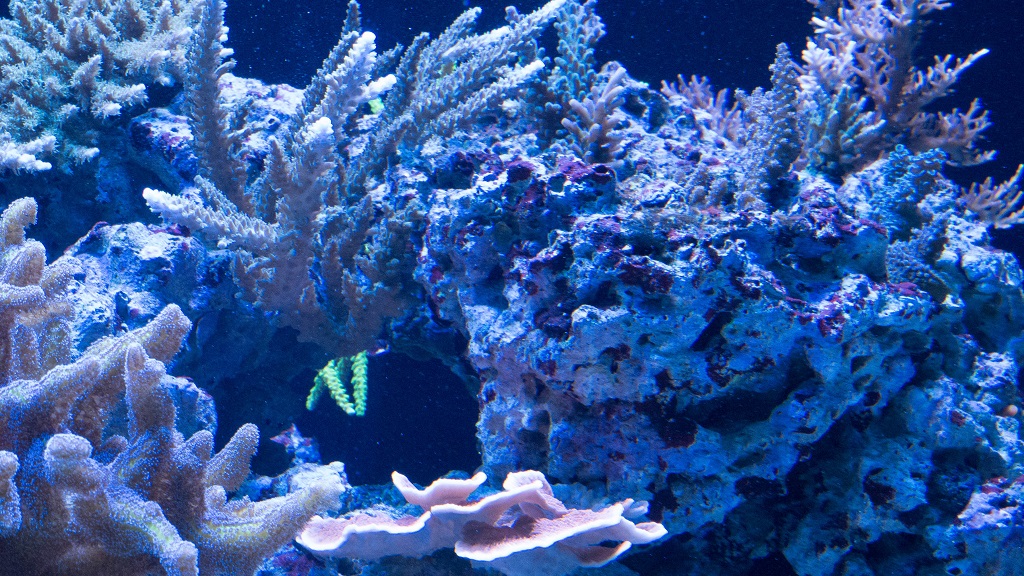
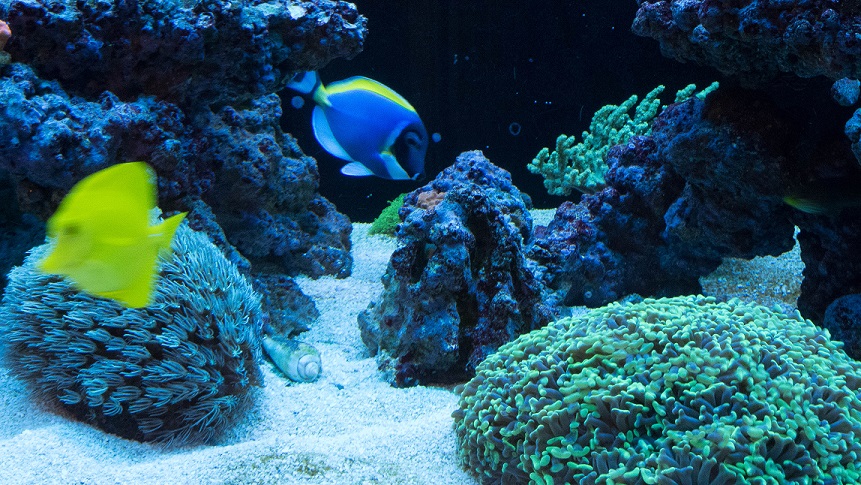
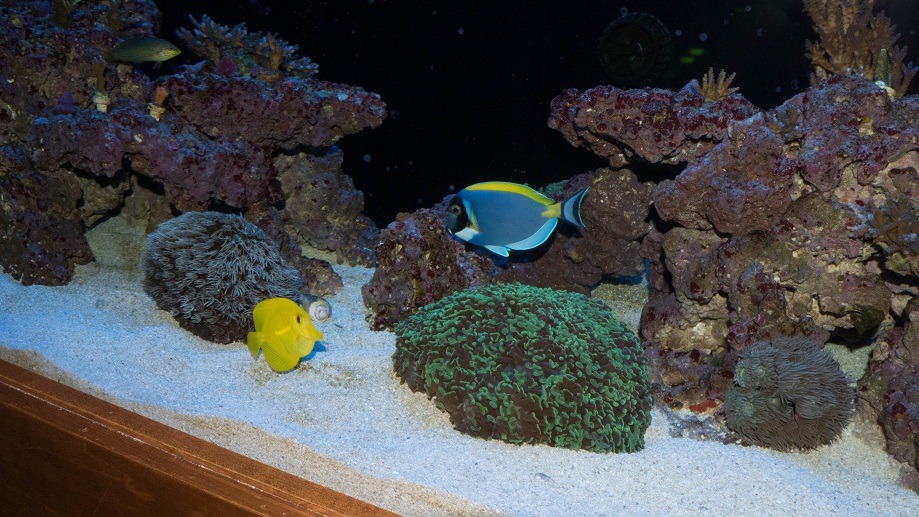
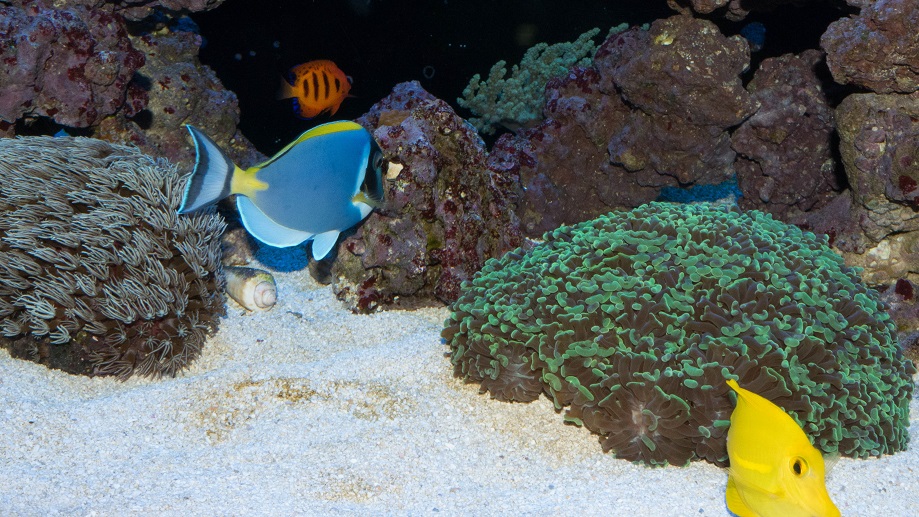
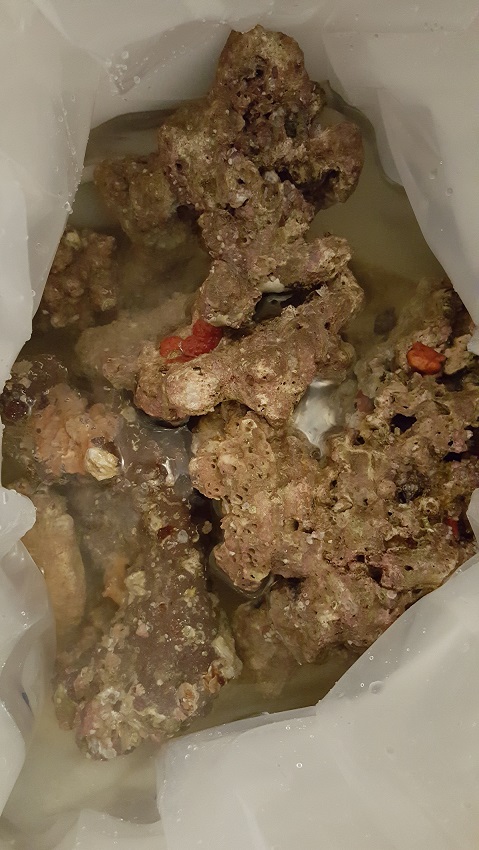
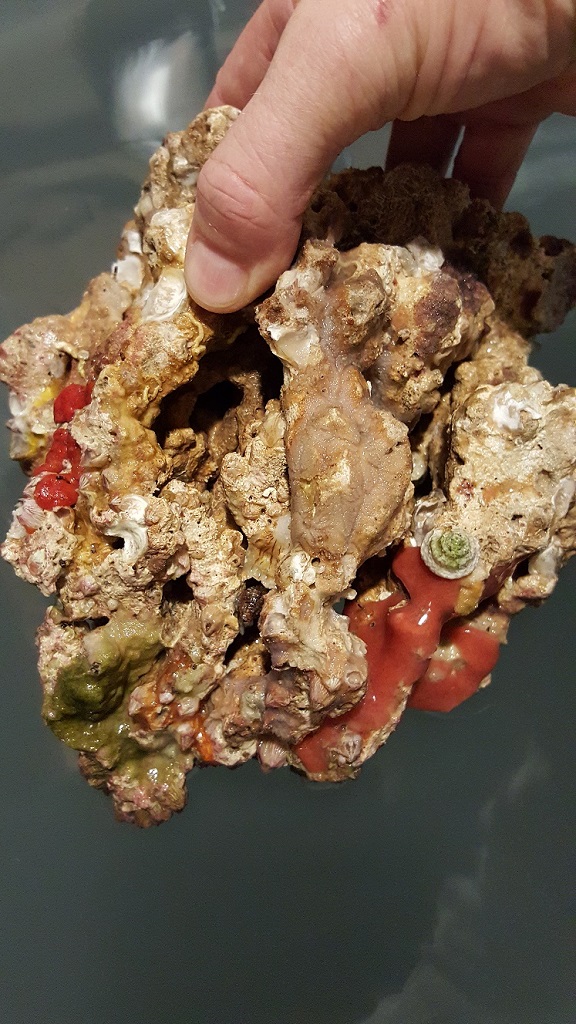
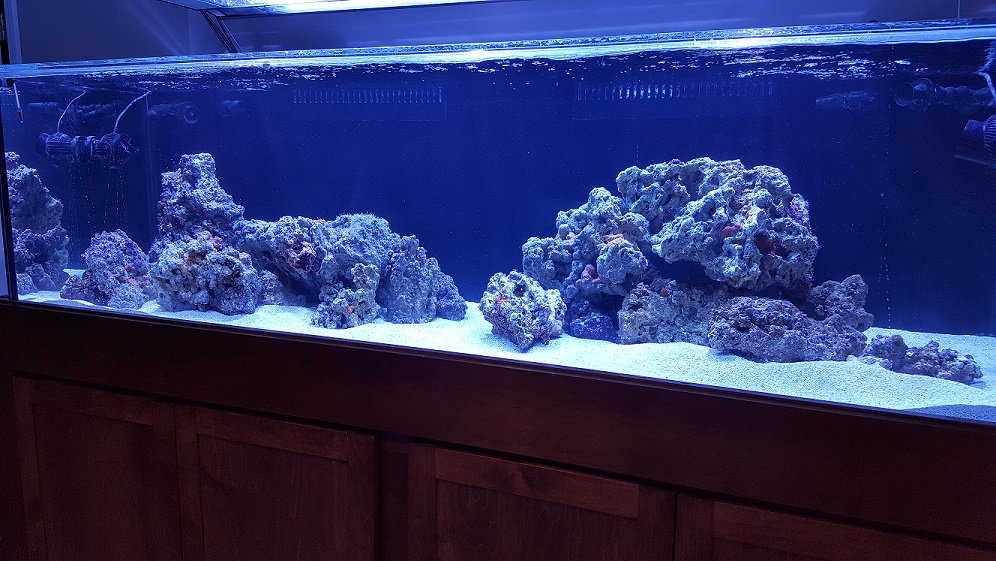
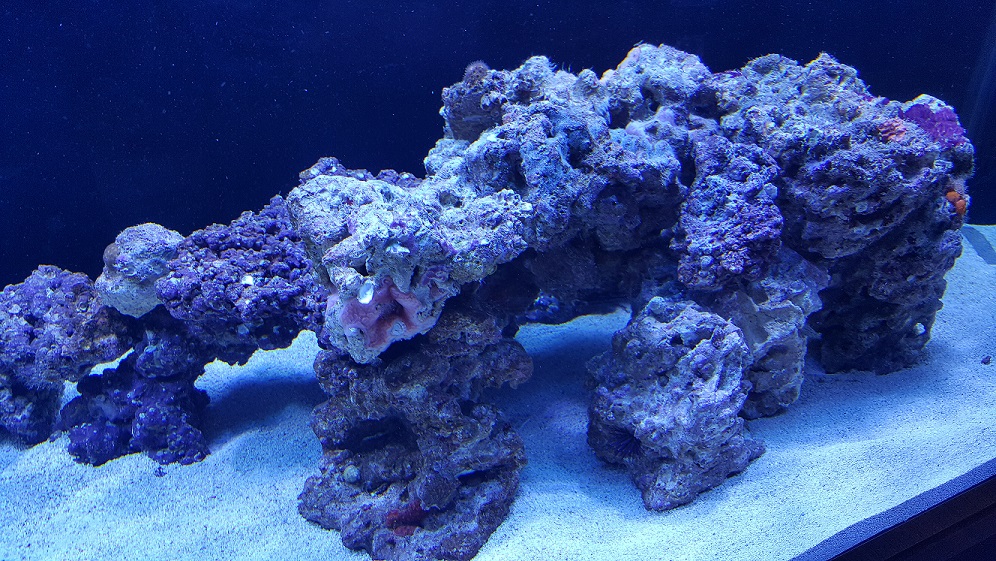
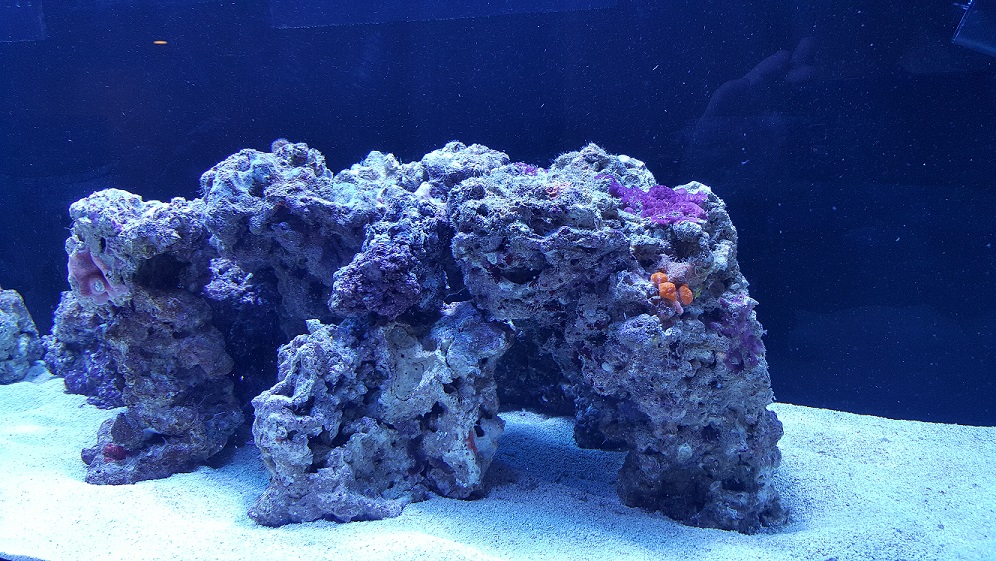
Dry sand is CaribSea special grade. Live rock from TBS. Both Pukani and Walt Smith, majority being the Pukani.
I added a 20 amp quad outlet to my fishroom for extra power. That turned out to be a real pita as the basement ceiling is drywalled. Conduit was tight to the breaker box, but the electrician got it through.
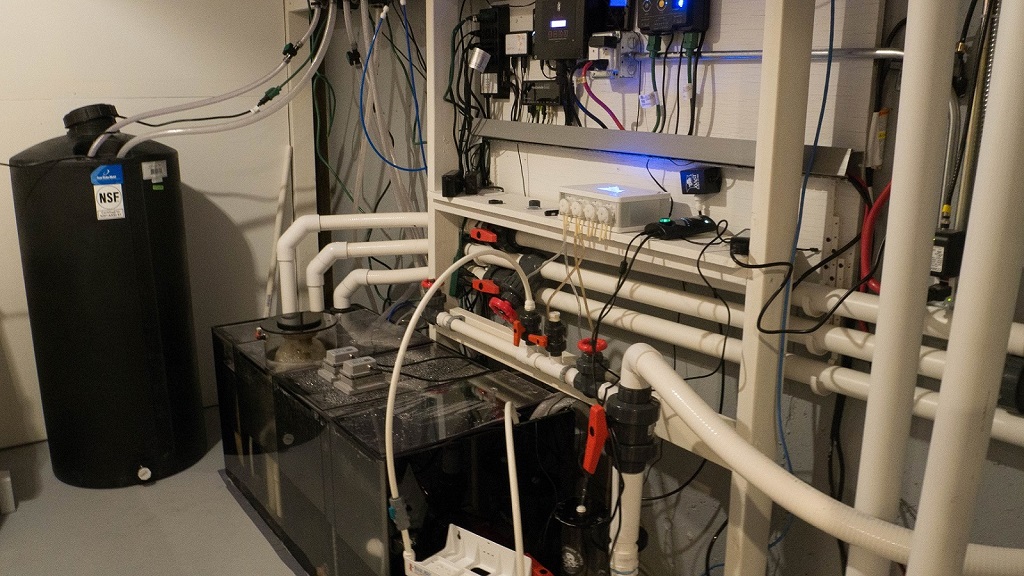
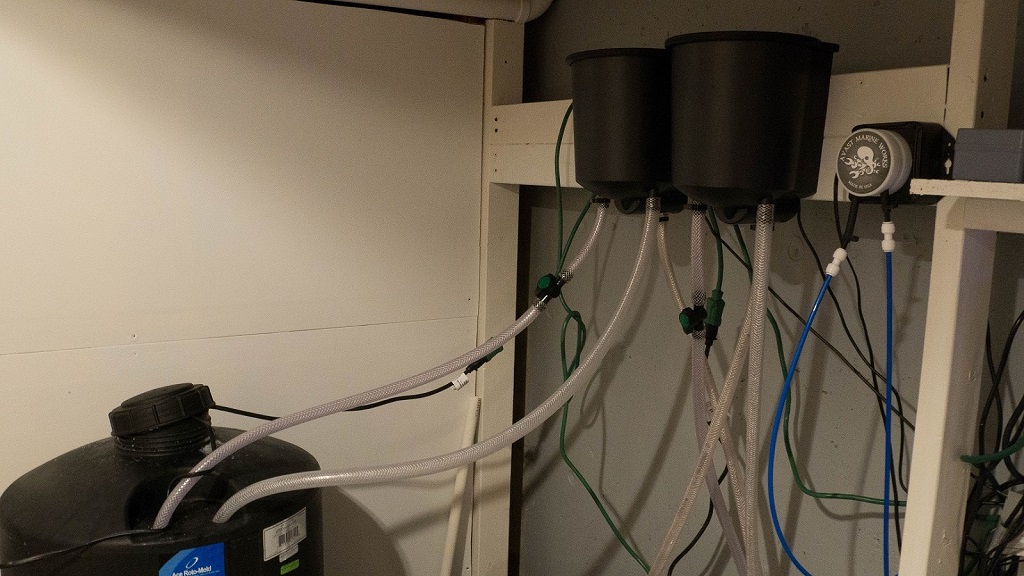
I picked up a new 55g black Roto-mold for salt water storage along with a Genesis Renew for AWC. I have a couple clear/frosted Roto-mold containers and while the FW tank with kalk doesn't have any growth, the SW tank gets a little which I need to periodically clean with vinegar.
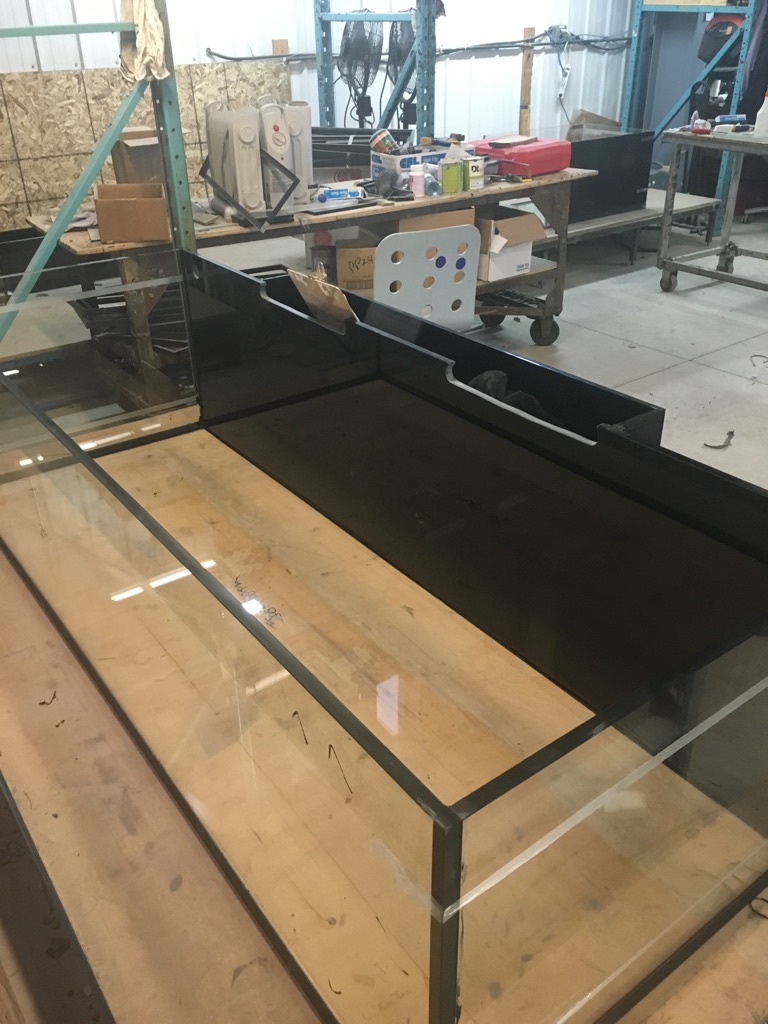
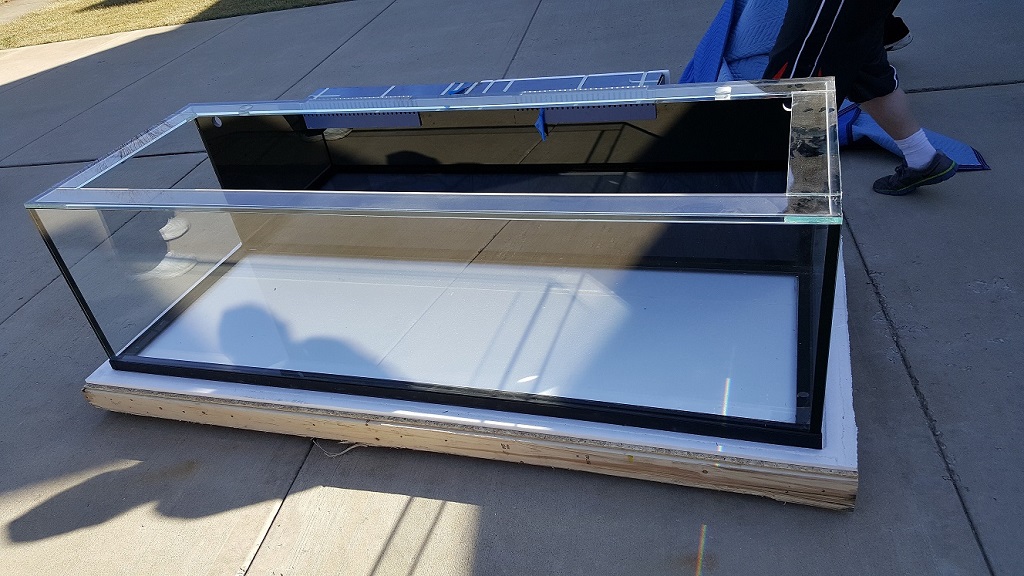
Here's the 260g Miracles tank before the eurobracing was installed.
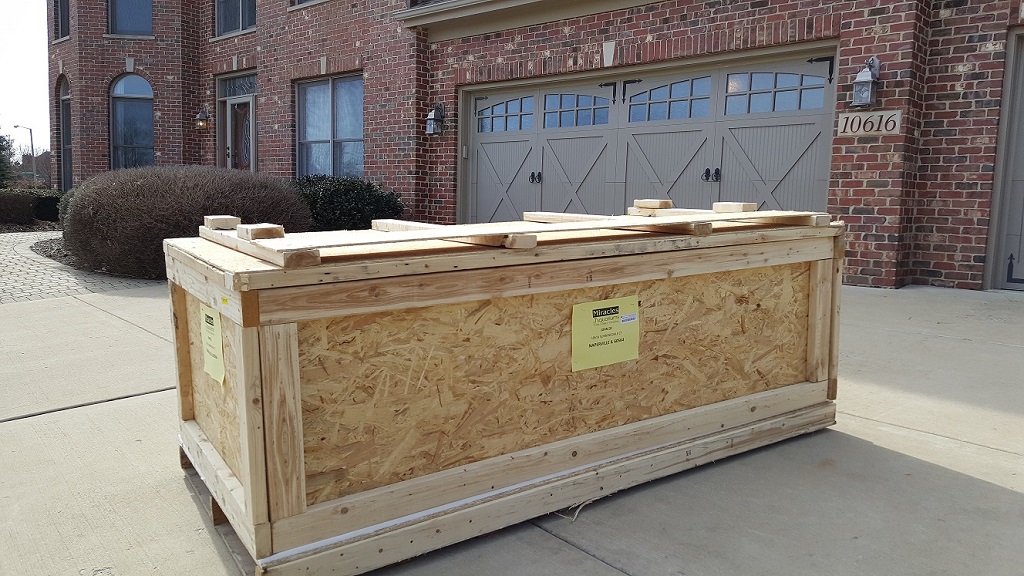
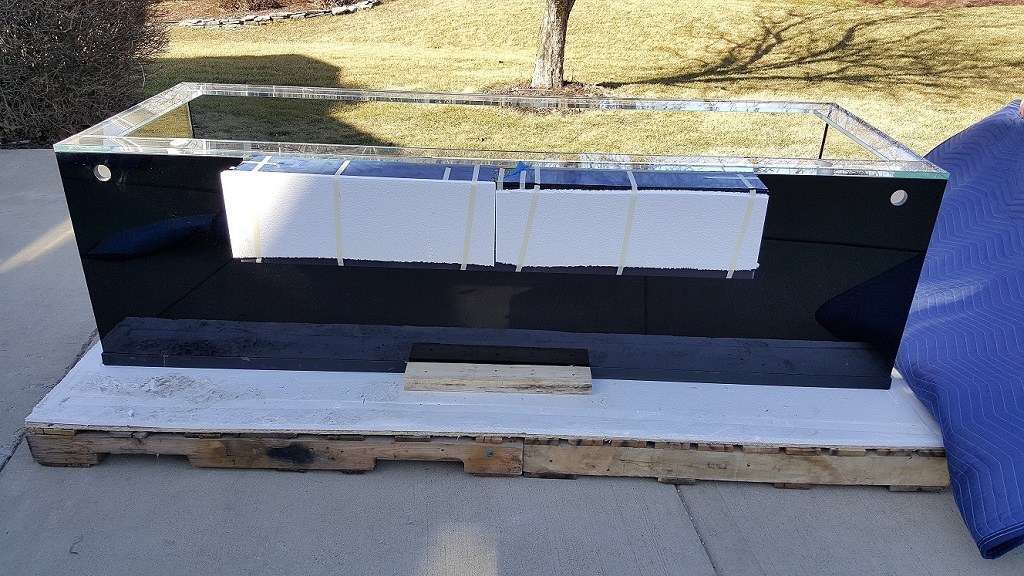
And here it is when it arrived back in February. The aquarium and stand arrived safely. Coordination of the freight company with Miracles and the movers was challenging. In the end the tank arrived on time. The freight company, ABF, was great. We removed the stand from the crate first and they helped me get that into the house. Then we put the tank on the driveway.
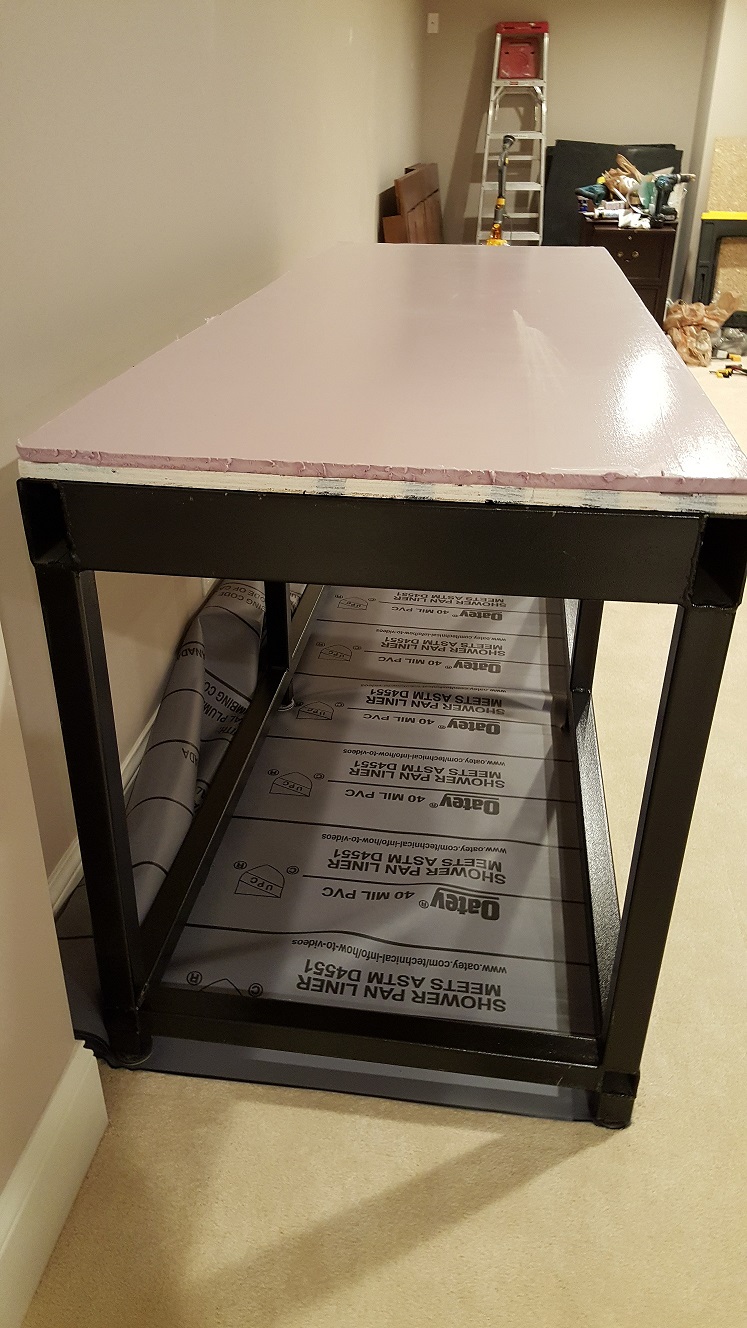
I prepped the stand the night before for the tank. I used 3/4" plywood and foam on top of the steel frame. I originally put a PVC liner under and behind to protect the carpet, but later pulled it out. The PVC liner would prohibit the carpet from "breathing". With condensation build up from the basement floor the moisture needs to be able to pass through the carpet.
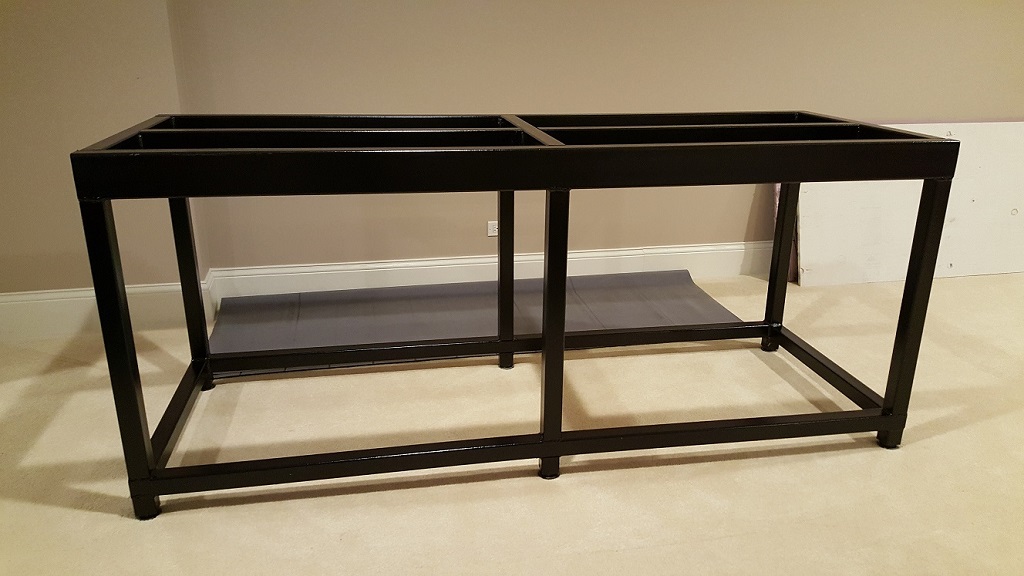
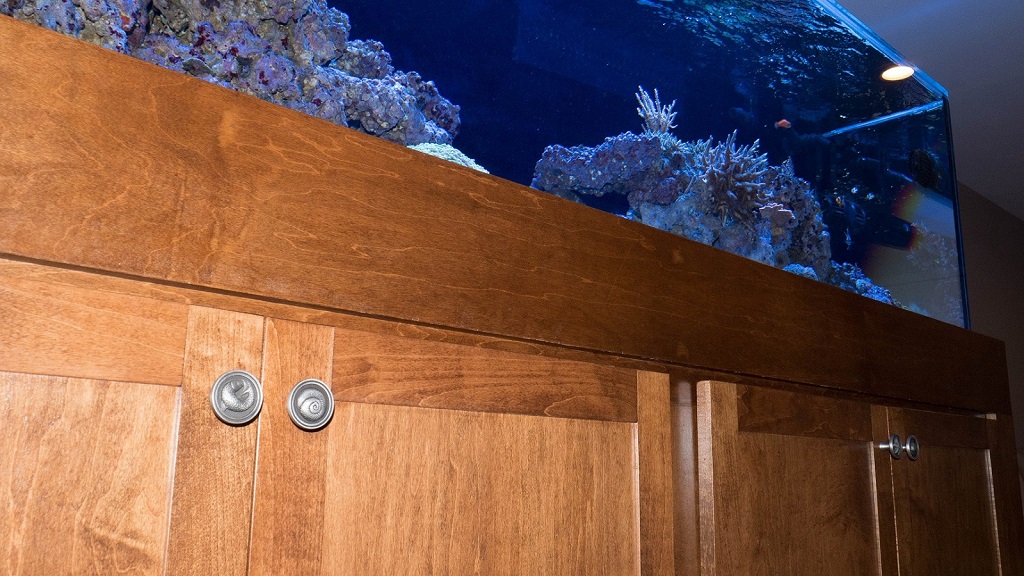
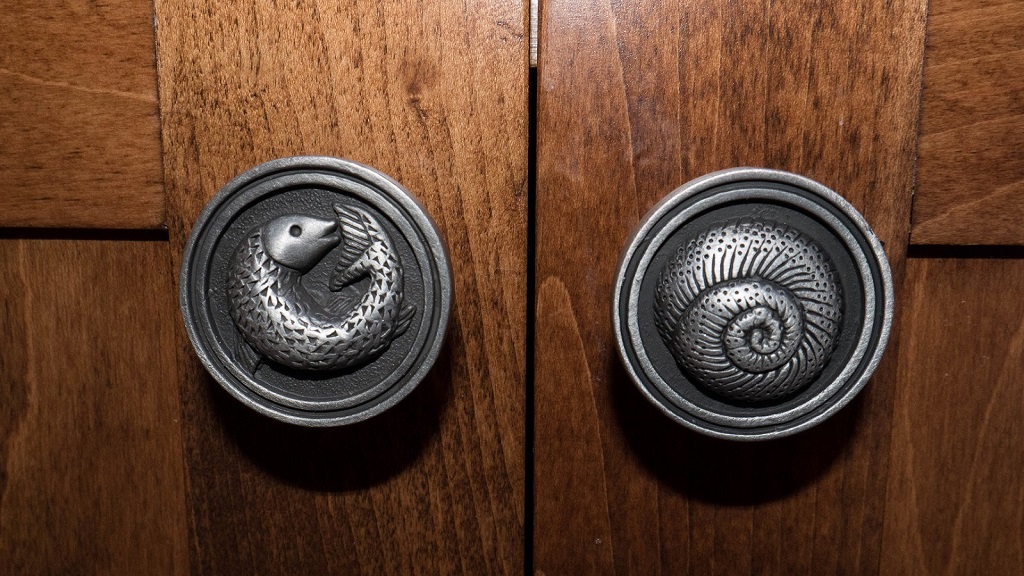
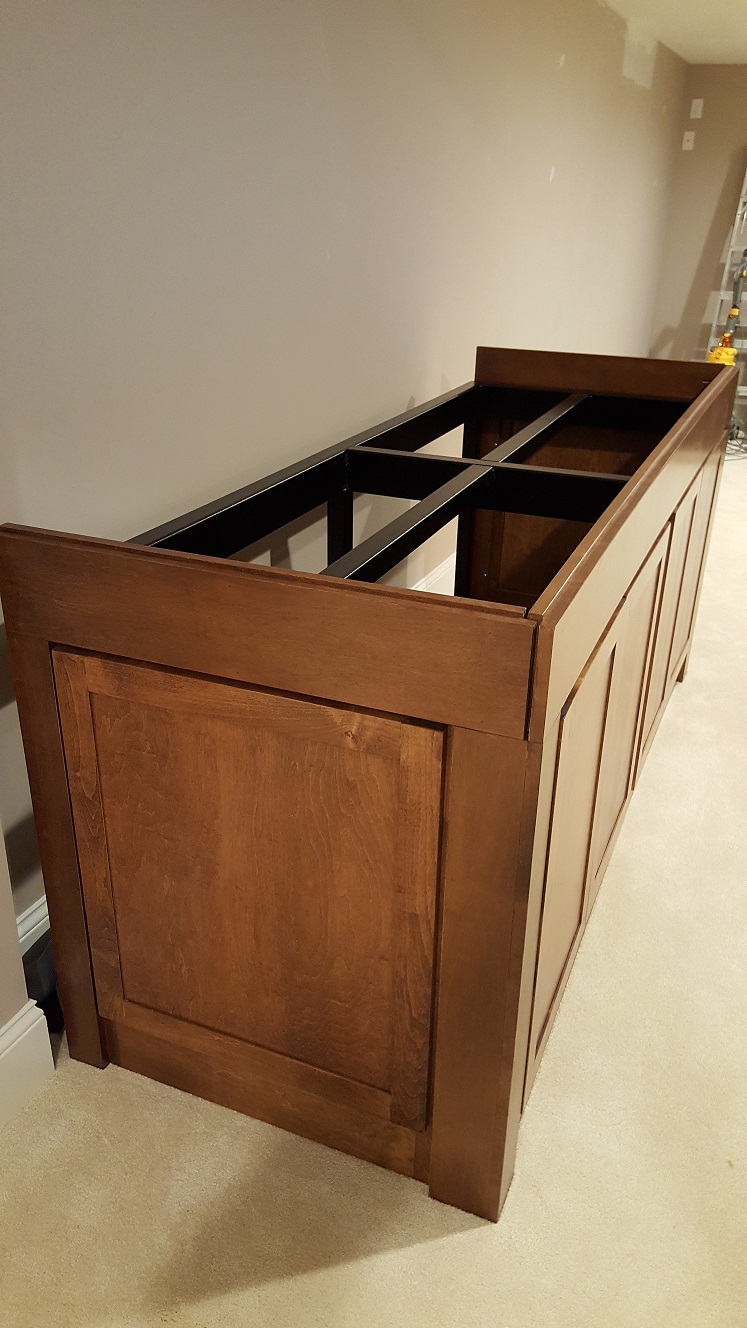
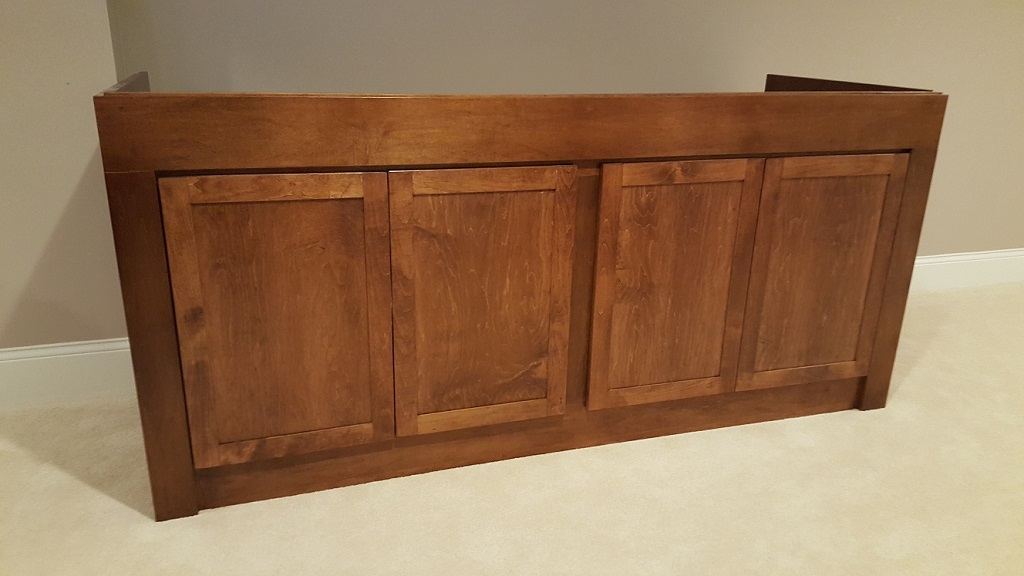
There is a maple skin that covers the steel frame. Two removable panels on the sides and four hinged doors on the front. I designed the stand to be able to house the sump if necessary. This required 2x4 steel beams in order to open up the front and use only one center column.
Three guys used an appliance dolly. I was surprised at only three as some movers quoted me four to six guys. Three was all it took. There were challenges moving it on the stair landing as it makes a turn but these guys were pros and made it look easy.
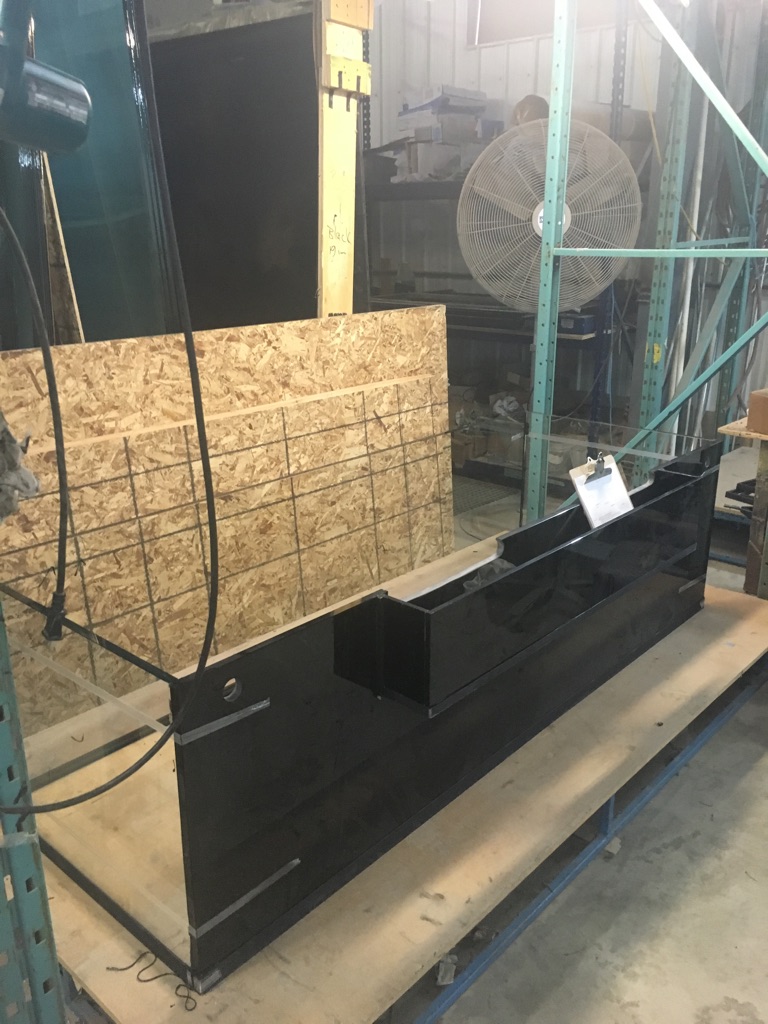
The maple skirt was loose against the stand in this picture. Derek at Miracles did not, or forgot, to provide the method to attach the skirt to the steel frame. He later explained I would need to use L brackets and tap the steel. One other minor gripe is that he built the skirt 4" higher than the frame. He explained this was to allow for the plywood, foam, bottom of tank and sand, but even with all that considered it's too high. Considering what I paid for the stand, I'm not happy about this. I ended up tapping the steel frame and installed L brackets to attach the skirt, and I trimmed a little over an inch from the bottom of the skirt. Now I'm very happy with the outcome.
Regarding the tank itself. I had asked for, in writing and in conversation, that the silicone be clear. When I saw the first pictures of the tank before eurobracing was installed I saw it was black. I also noticed the return holes were 3/4". My option was to have the tank disassembled, re-drilled and re-siliconed. This would have added at least two weeks. Instead I asked that clear silicone be used for the eurobrace. Luckily you can't tell where the black silicone was used at the corners and the clear silicone on the eurobrace looks great. I'm stuck with 3/4" return holes but I can work with that since I would have been stepping down to that measurement for loc-line anyway. I would have preferred larger and should have been more clear about that. I thought I had asked for all holes to be for 1 1/2" bulkheads like they are in my overflow. Apparently I wasn't clear enough.
I am going to leave my opinions of dealing with custom manufacturers to this, whether it's for your tank, stand, sump or anything else. Make sure you tell them exactly what you want. Do not trust them to make the right decisions for you. If you think that because they do this professionally that they will make the right decisions, you're wrong. They are likely understaffed, overworked and do not want to hear from you other than to make the sale. They want to get the work done in their time-frame with minimal interference. This makes things very challenging, so think every little detail through yourselves, communicate this to them up front, and get it in writing. Even then it may not be enough. I don't mean to sound harsh, this is just the reality of the situation.
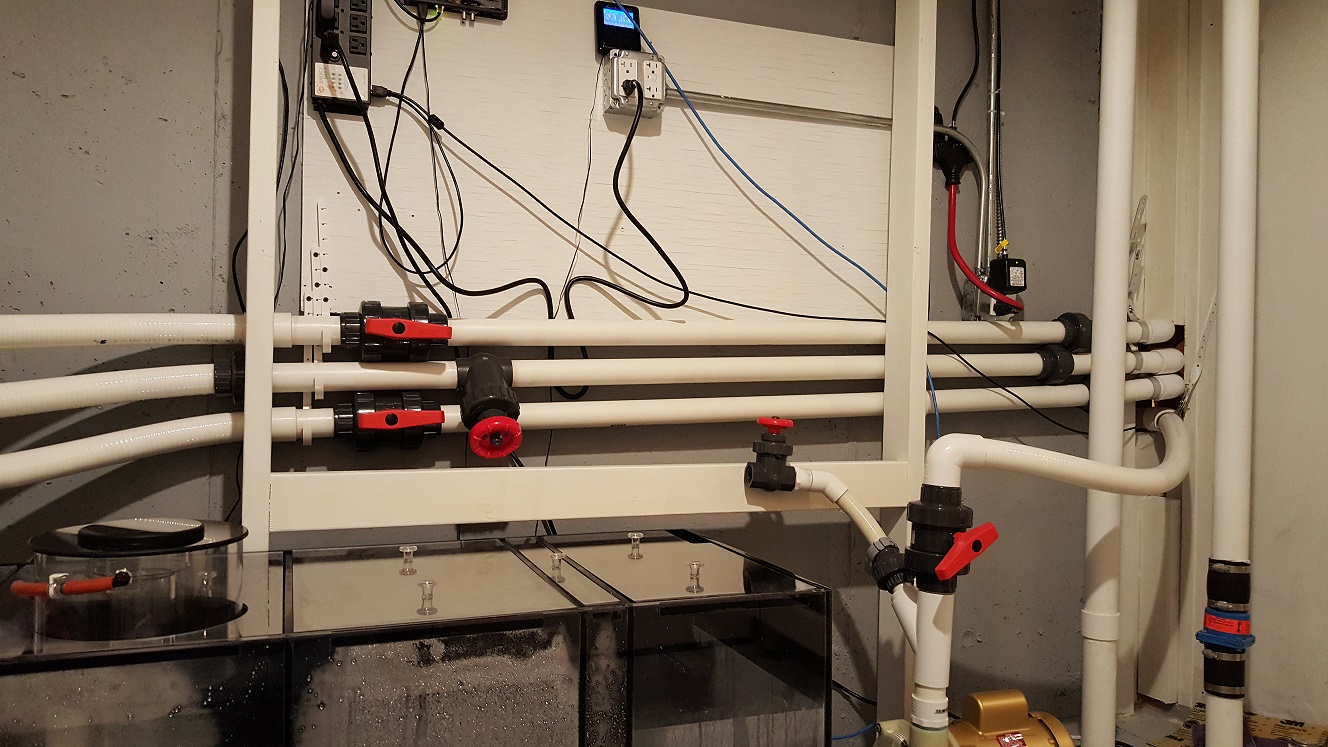
The plumbing was the hardest part. I had to figure out what pieces were required to fit in the space, allow for easy assembly and disconnect while reducing head. The sump is 20" high and I wanted the PVC runs to come through the wall below 36" which is the top of the steel stand. That left me 16" of play. I also only have about 6" between the back of the tank and the wall so my return plumbing needs to be snug.
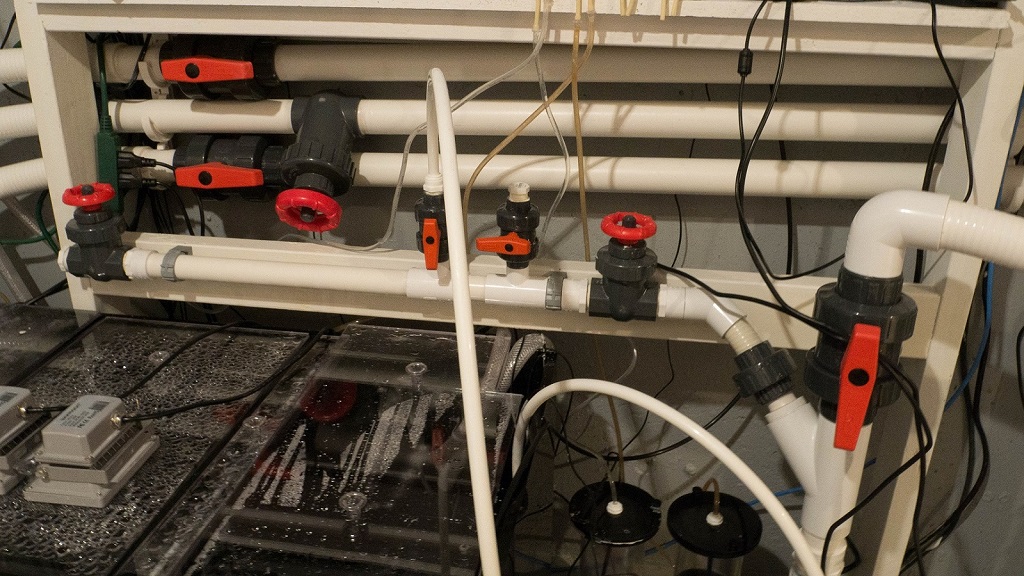
I wanted as much hard plumbed as possible. I do have some spaflex but kept that to a minimum, only when angles needed to be other than 45 or 90. I made sure the return plumbing was equal distant. Stepping down from 1.5" return pipe to a 3/4" bulkhead was challenging. It would have been nice if there was a premade 1.5" female slip to 3/4" thread male adapter, but there isn't. I used a 3/4" sch80 pipe with thread on the end, cementing it into a female 3/4" slip to 1.5" slip adapter. That went to sweeping 90s down to a 120 wye in the middle, then to another sweeping 90 into the fish/sump room. I only have one actual 90 in the return run. Each drain also only has one 90 with the rest of the angles being 45s.
I wanted the drain lines to be at a continuous downward slope, even if that slope was slight. That proved challenging and hopefully there isn't too much pressure at the overflow bulkheads because of that angle. Keeping a downward slope for that length with that little vertical allowed for a very slight slope along the three drain runs.
These shots were from back in April. Not much on the board at that time, and I was still using the Reeflo HH. That's now my backup as it was significantly louder than the dead quiet RD3.
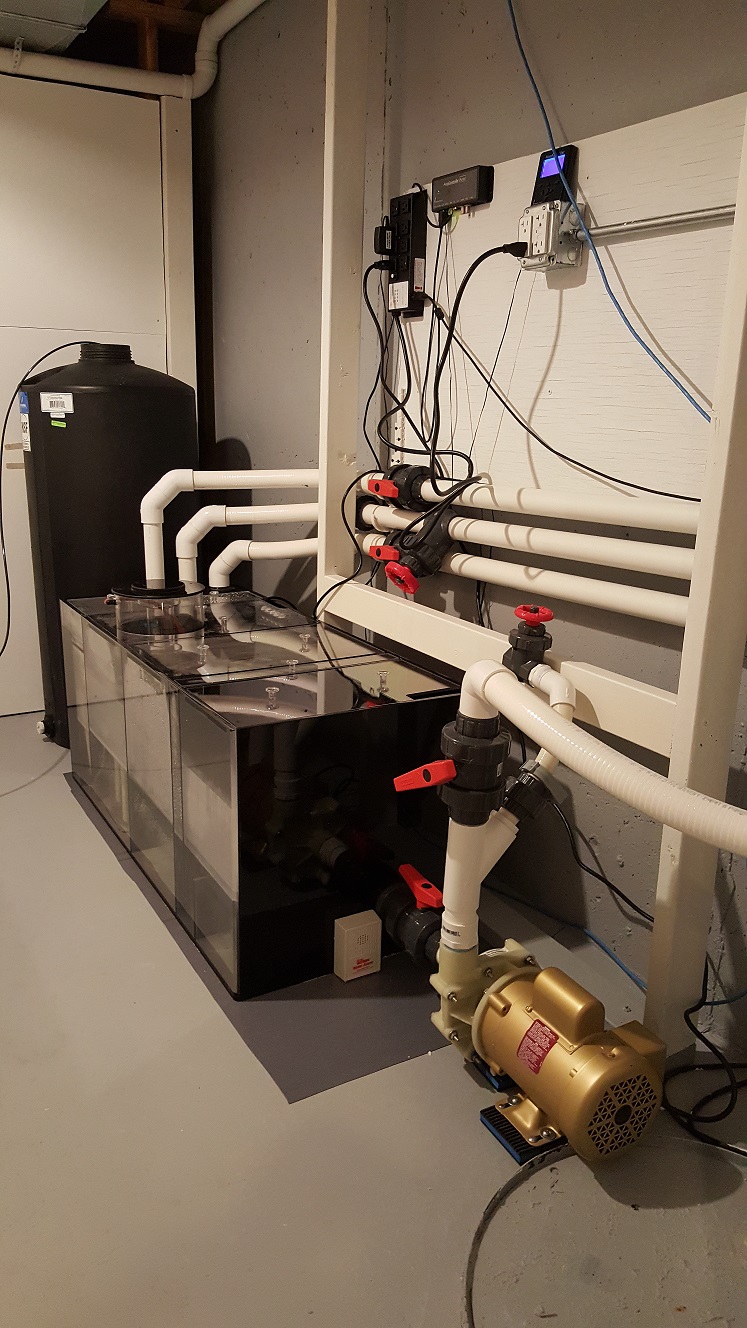

You can see the sediment buildup from the sand accumulating in the sump. I was running the sump water level low as no rocks were added yet. I had the LifeReef skimmer with Vectra M1 in place. It wasn't skimming yet.
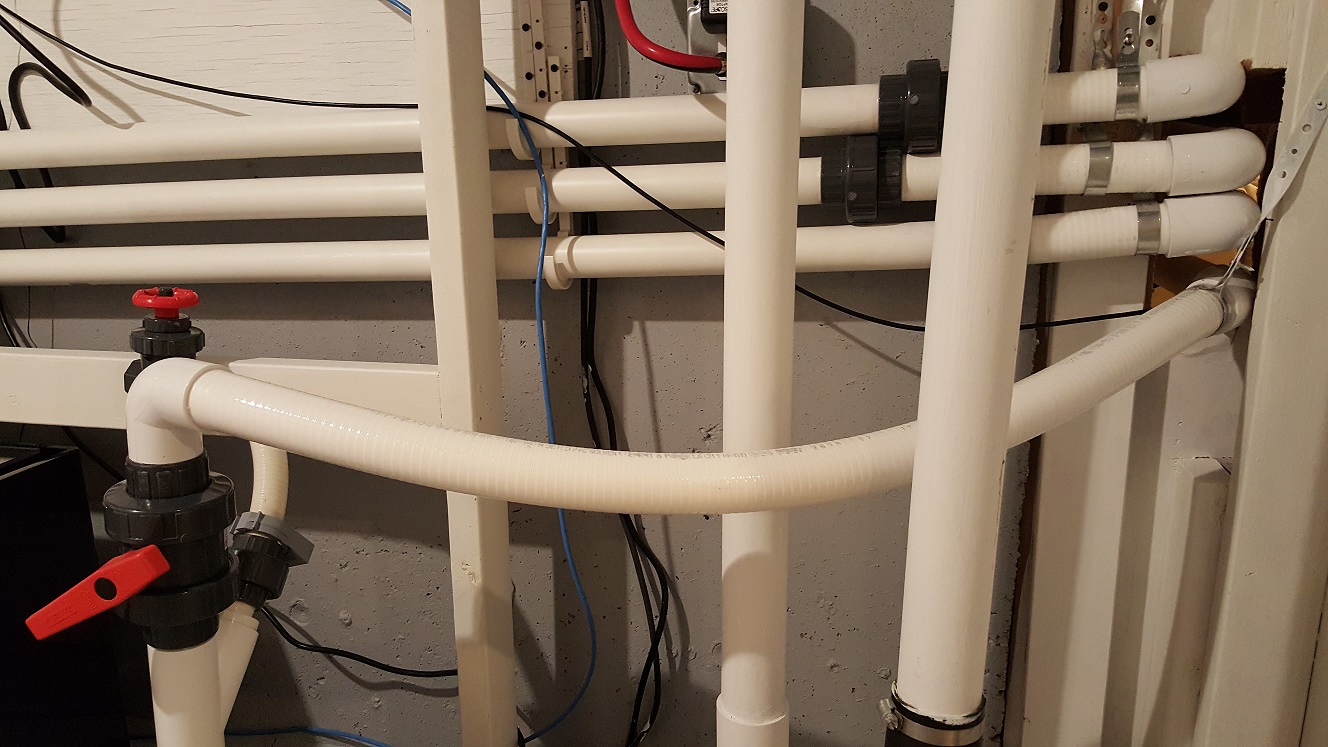
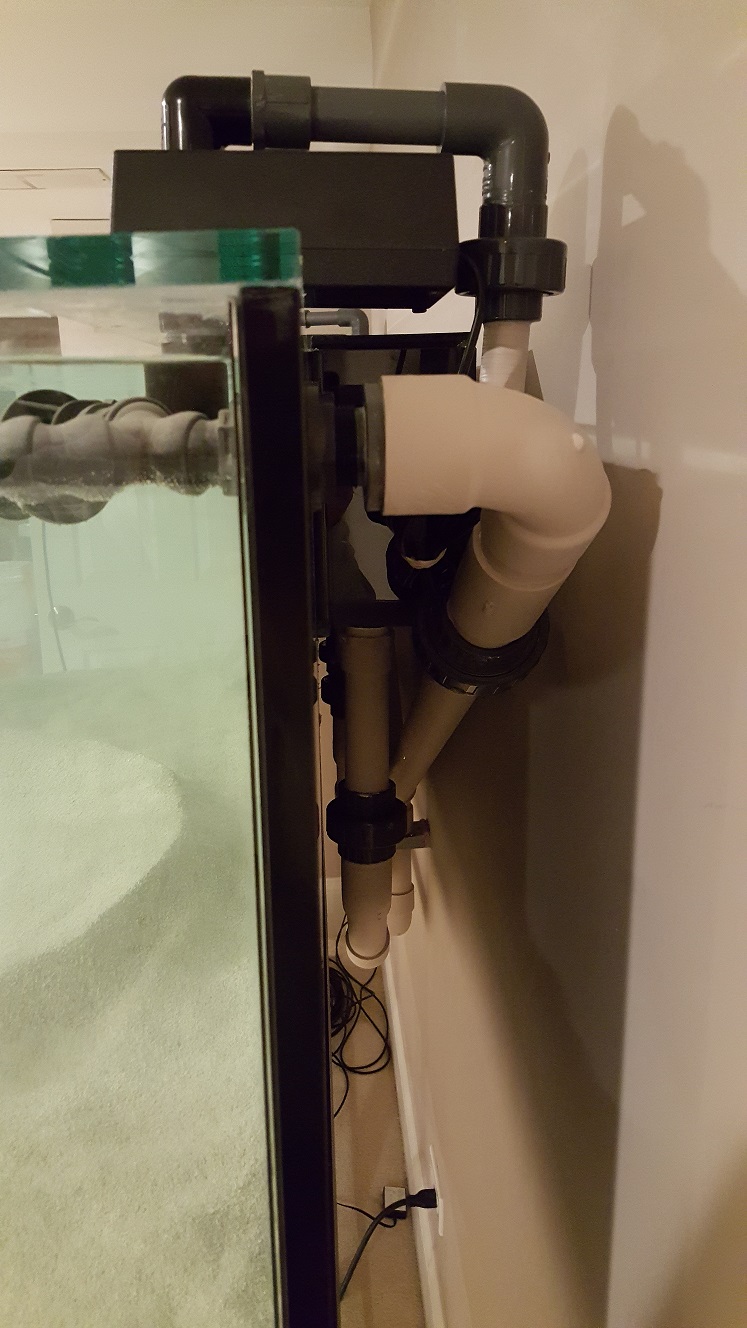
The two vertical pipes on the right are house plumbing.
This shot is of the plumbing coming in from the living area into the sump room. You can see I staggered the unions to keep the drain lines as close together as possible. I didn't have much vertical space to work with while maintaining a downward angle. You can see there's a little sag with the return spaflex. Not sure how to support that yet. Again, the two vertical pipes are house plumbing.
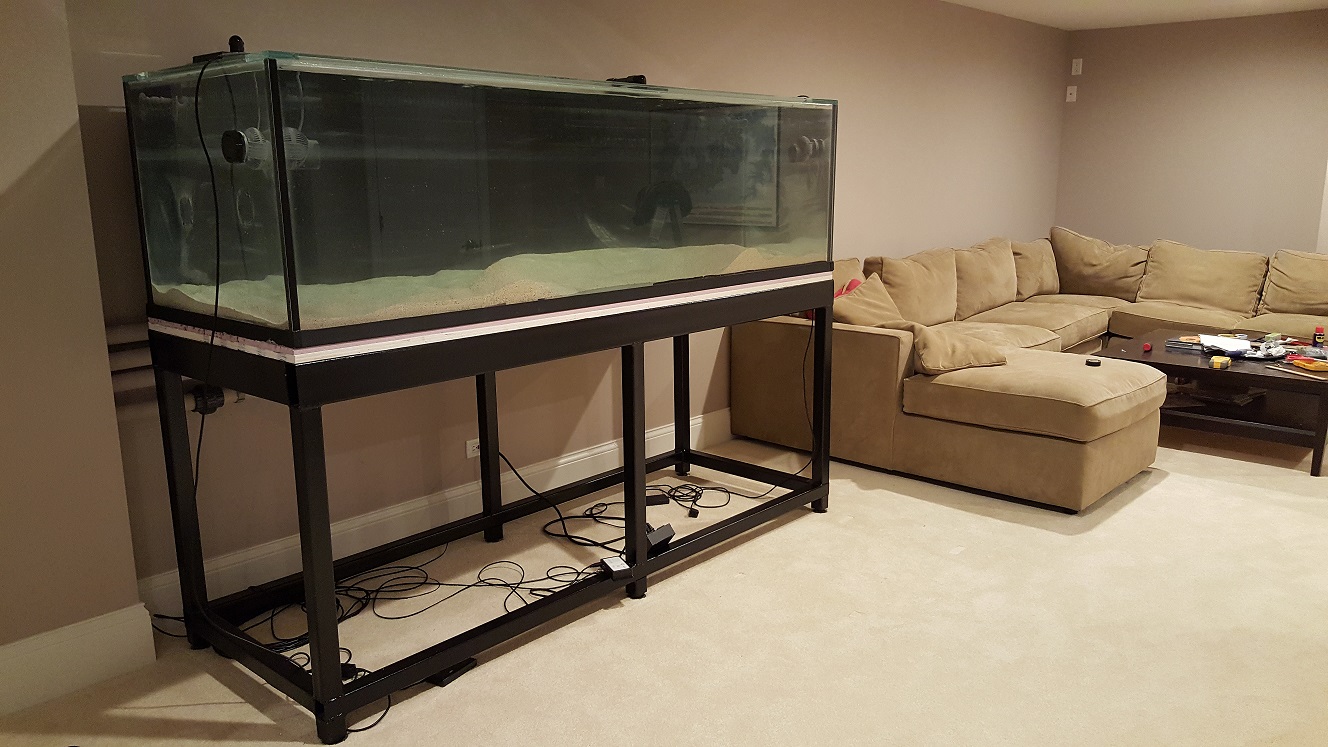
Here's the DT back in April. I primed and painted all the white plumbing behind the tank to match the wall. The stand skirt isn't on now, but when it is you'll still be able to see some of the pipes to the left of the tank going into the wall, and when sitting on the couch you can see behind the tank. I didn't want the plumbing to stand out when looking at the tank.
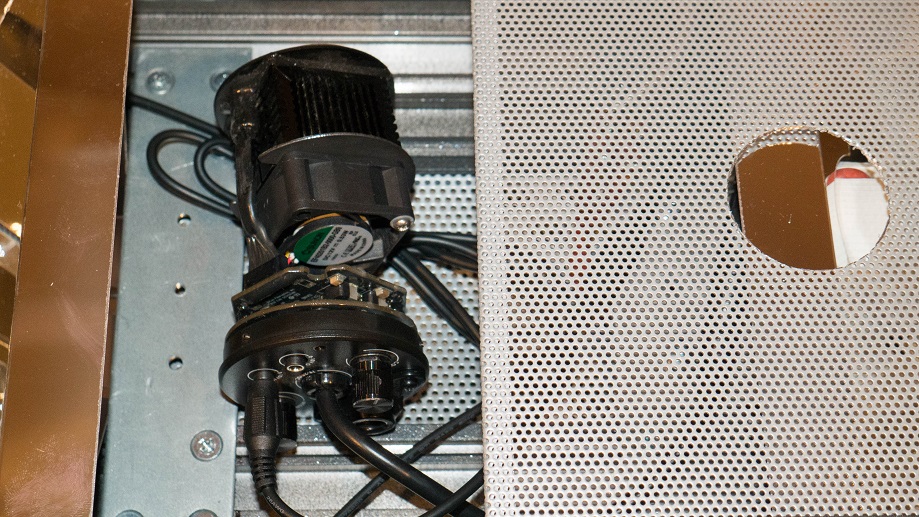
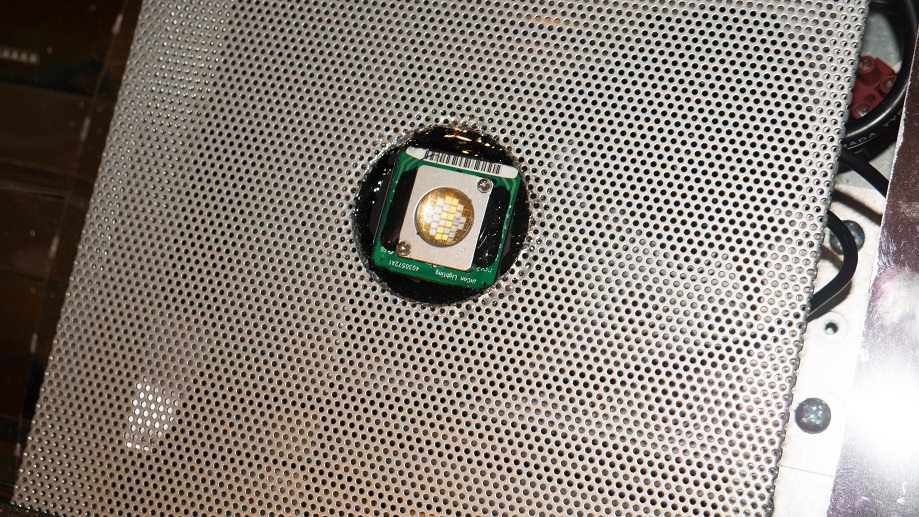
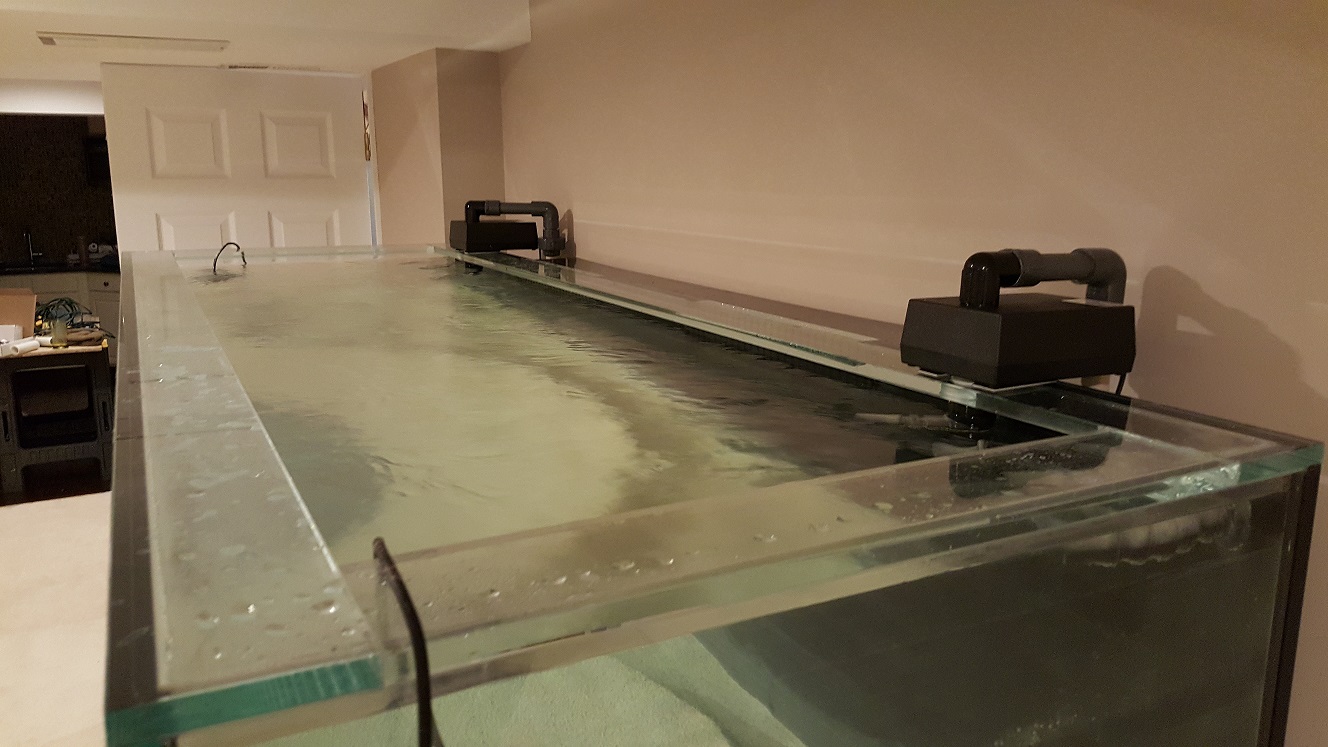
Top shot of the Sea Swirls. The Tunzes went away. I didn't want cables hanging over the eurobraced top.
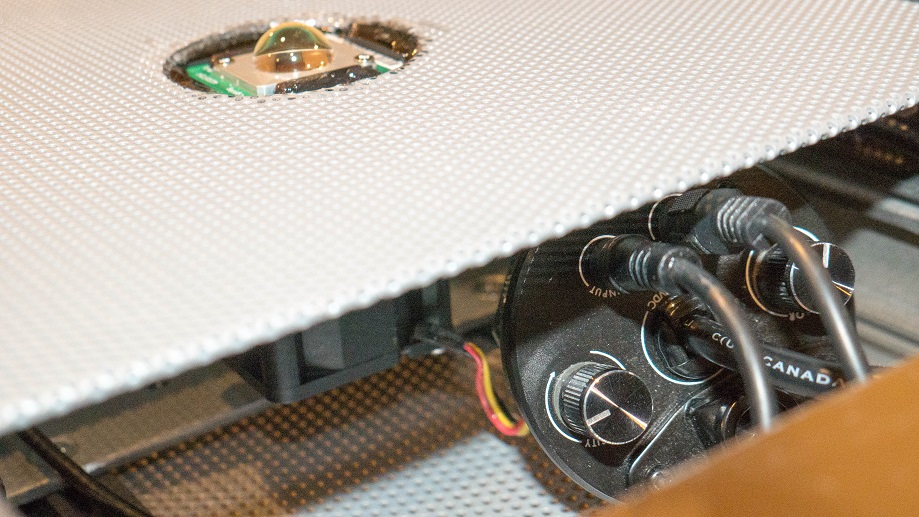
A shot of the return plumbing. I have 3/4" returns at both the bulkhead and Sea Swirls. I split the return loc-line with a Y and put an eductor on one output. I didn't like how that worked out as it takes more pressure for the water to get out the eductor. The result was more water coming out the other exit. I now have a Y with two slim loc-line exits. I used spaflex from the T to the Sea Swirl.
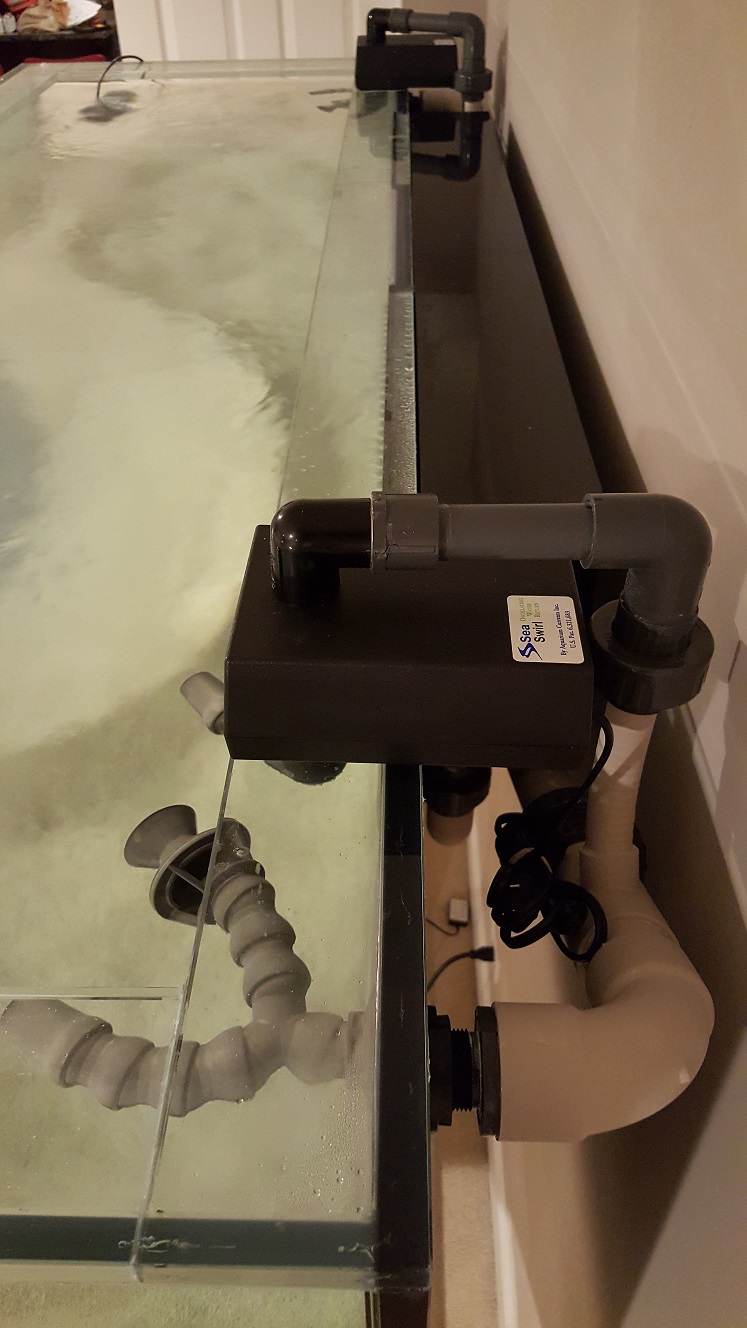
This is a shot from below the DT looking up at the return plumbing and external overflow.
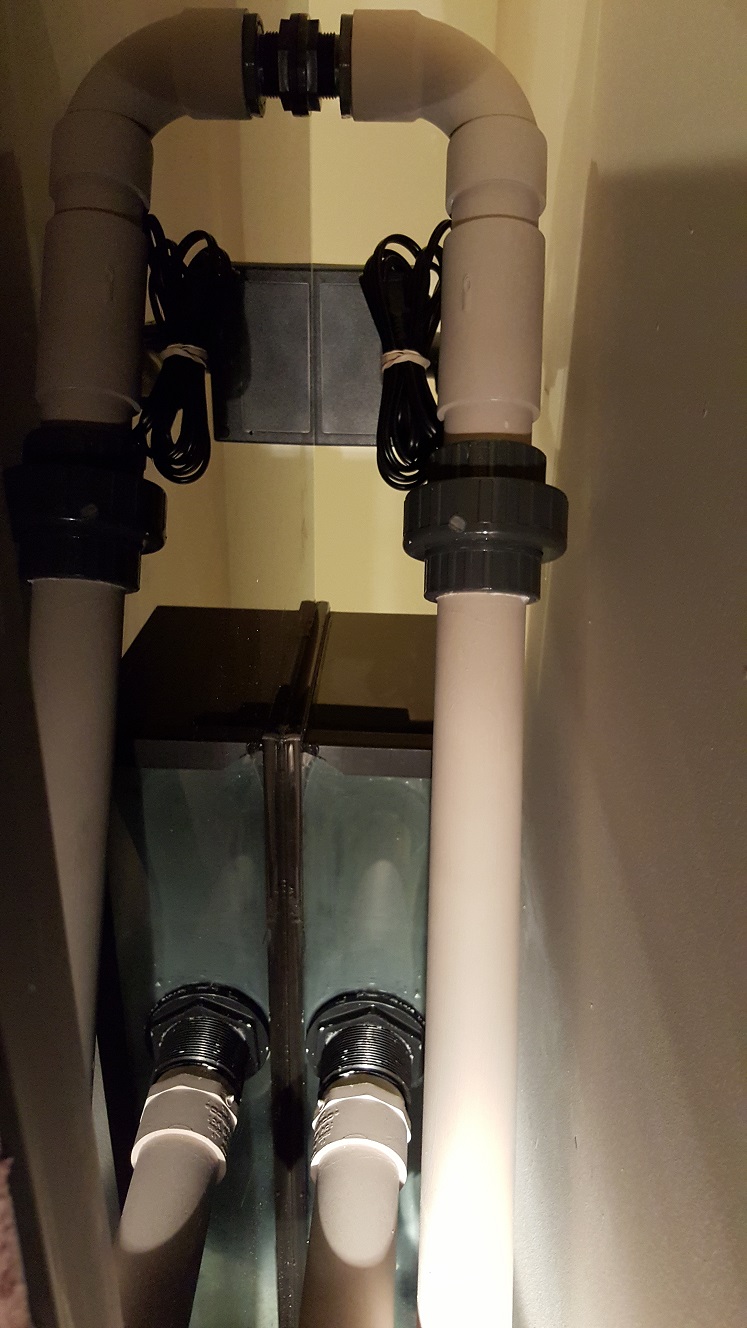
Plumbing lines along the wall. You can see the drain lines have a downward angle while the return line is nearly horizontal.
Here are some shots of the TBS rock when it came in and the Geisemann Spectra
The sump was custom built to my design by John at Advanced Acrylics. It holds about 80g and is 48"L x20"D x20"W, 1/2" rimless with 3/8" black baffles back and bottom. I sized it to go in the stand under the DT if necessary. Flush Lids on all 4 sections. Notches on the return and the skimmer section for cords, Four 4" filtersock holders, skimmer section is 12.75"x 20", Center fuge section is 12"x 20", Return section is 8"x 20". There's a 5 hole dosing line , 3 hole probe holder, and three 1.5" bulkhead holes for the drain. I drilled the return bulkhead hole in order to line it up properly with a 230w Red Dragon 3 return pump.
Lighting is Geismann Spectra 72" MH/T5 combo. Possible future plans to build in Kessil LED pucks between each MH reflector.
Powerheads are a pair of MP60s at front sides, a pair of MP40s at back sides and a single MP40 at middle back.
Skimmer for the moment is a LifeReef 24 with extra large collection cup and Vectra M1. I will either extend the skimmer height or replace it entirely based on how it performs, but so far so good. According to Jeff's site, the 24 in. is slightly undersized for the 260g but the nice thing about his skimmers is they are essentially the same except for the height. I originally bought this with the flange for my 120g to expand if necessary.
Dry sand is CaribSea special grade. Live rock from TBS. Both Pukani and Walt Smith, majority being the Pukani.
I added a 20 amp quad outlet to my fishroom for extra power. That turned out to be a real pita as the basement ceiling is drywalled. Conduit was tight to the breaker box, but the electrician got it through.
I picked up a new 55g black Roto-mold for salt water storage along with a Genesis Renew for AWC. I have a couple clear/frosted Roto-mold containers and while the FW tank with kalk doesn't have any growth, the SW tank gets a little which I need to periodically clean with vinegar.
Here's the 260g Miracles tank before the eurobracing was installed.
And here it is when it arrived back in February. The aquarium and stand arrived safely. Coordination of the freight company with Miracles and the movers was challenging. In the end the tank arrived on time. The freight company, ABF, was great. We removed the stand from the crate first and they helped me get that into the house. Then we put the tank on the driveway.
I prepped the stand the night before for the tank. I used 3/4" plywood and foam on top of the steel frame. I originally put a PVC liner under and behind to protect the carpet, but later pulled it out. The PVC liner would prohibit the carpet from "breathing". With condensation build up from the basement floor the moisture needs to be able to pass through the carpet.
There is a maple skin that covers the steel frame. Two removable panels on the sides and four hinged doors on the front. I designed the stand to be able to house the sump if necessary. This required 2x4 steel beams in order to open up the front and use only one center column.
Three guys used an appliance dolly. I was surprised at only three as some movers quoted me four to six guys. Three was all it took. There were challenges moving it on the stair landing as it makes a turn but these guys were pros and made it look easy.
The maple skirt was loose against the stand in this picture. Derek at Miracles did not, or forgot, to provide the method to attach the skirt to the steel frame. He later explained I would need to use L brackets and tap the steel. One other minor gripe is that he built the skirt 4" higher than the frame. He explained this was to allow for the plywood, foam, bottom of tank and sand, but even with all that considered it's too high. Considering what I paid for the stand, I'm not happy about this. I ended up tapping the steel frame and installed L brackets to attach the skirt, and I trimmed a little over an inch from the bottom of the skirt. Now I'm very happy with the outcome.
Regarding the tank itself. I had asked for, in writing and in conversation, that the silicone be clear. When I saw the first pictures of the tank before eurobracing was installed I saw it was black. I also noticed the return holes were 3/4". My option was to have the tank disassembled, re-drilled and re-siliconed. This would have added at least two weeks. Instead I asked that clear silicone be used for the eurobrace. Luckily you can't tell where the black silicone was used at the corners and the clear silicone on the eurobrace looks great. I'm stuck with 3/4" return holes but I can work with that since I would have been stepping down to that measurement for loc-line anyway. I would have preferred larger and should have been more clear about that. I thought I had asked for all holes to be for 1 1/2" bulkheads like they are in my overflow. Apparently I wasn't clear enough.
I am going to leave my opinions of dealing with custom manufacturers to this, whether it's for your tank, stand, sump or anything else. Make sure you tell them exactly what you want. Do not trust them to make the right decisions for you. If you think that because they do this professionally that they will make the right decisions, you're wrong. They are likely understaffed, overworked and do not want to hear from you other than to make the sale. They want to get the work done in their time-frame with minimal interference. This makes things very challenging, so think every little detail through yourselves, communicate this to them up front, and get it in writing. Even then it may not be enough. I don't mean to sound harsh, this is just the reality of the situation.
The plumbing was the hardest part. I had to figure out what pieces were required to fit in the space, allow for easy assembly and disconnect while reducing head. The sump is 20" high and I wanted the PVC runs to come through the wall below 36" which is the top of the steel stand. That left me 16" of play. I also only have about 6" between the back of the tank and the wall so my return plumbing needs to be snug.
I wanted as much hard plumbed as possible. I do have some spaflex but kept that to a minimum, only when angles needed to be other than 45 or 90. I made sure the return plumbing was equal distant. Stepping down from 1.5" return pipe to a 3/4" bulkhead was challenging. It would have been nice if there was a premade 1.5" female slip to 3/4" thread male adapter, but there isn't. I used a 3/4" sch80 pipe with thread on the end, cementing it into a female 3/4" slip to 1.5" slip adapter. That went to sweeping 90s down to a 120 wye in the middle, then to another sweeping 90 into the fish/sump room. I only have one actual 90 in the return run. Each drain also only has one 90 with the rest of the angles being 45s.
I wanted the drain lines to be at a continuous downward slope, even if that slope was slight. That proved challenging and hopefully there isn't too much pressure at the overflow bulkheads because of that angle. Keeping a downward slope for that length with that little vertical allowed for a very slight slope along the three drain runs.
These shots were from back in April. Not much on the board at that time, and I was still using the Reeflo HH. That's now my backup as it was significantly louder than the dead quiet RD3.
You can see the sediment buildup from the sand accumulating in the sump. I was running the sump water level low as no rocks were added yet. I had the LifeReef skimmer with Vectra M1 in place. It wasn't skimming yet.
The two vertical pipes on the right are house plumbing.
This shot is of the plumbing coming in from the living area into the sump room. You can see I staggered the unions to keep the drain lines as close together as possible. I didn't have much vertical space to work with while maintaining a downward angle. You can see there's a little sag with the return spaflex. Not sure how to support that yet. Again, the two vertical pipes are house plumbing.
Here's the DT back in April. I primed and painted all the white plumbing behind the tank to match the wall. The stand skirt isn't on now, but when it is you'll still be able to see some of the pipes to the left of the tank going into the wall, and when sitting on the couch you can see behind the tank. I didn't want the plumbing to stand out when looking at the tank.
Top shot of the Sea Swirls. The Tunzes went away. I didn't want cables hanging over the eurobraced top.
A shot of the return plumbing. I have 3/4" returns at both the bulkhead and Sea Swirls. I split the return loc-line with a Y and put an eductor on one output. I didn't like how that worked out as it takes more pressure for the water to get out the eductor. The result was more water coming out the other exit. I now have a Y with two slim loc-line exits. I used spaflex from the T to the Sea Swirl.
This is a shot from below the DT looking up at the return plumbing and external overflow.
Plumbing lines along the wall. You can see the drain lines have a downward angle while the return line is nearly horizontal.
Here are some shots of the TBS rock when it came in and the Geisemann Spectra