
Navigation
Install the app
How to install the app on iOS
Follow along with the video below to see how to install our site as a web app on your home screen.
Note: This feature may not be available in some browsers.
More options
You are using an out of date browser. It may not display this or other websites correctly.
You should upgrade or use an alternative browser.
You should upgrade or use an alternative browser.
Just Finished My 40 Gallon Breeder Sump
- Thread starter Fin
- Start date
- Tagged users None


OP
OP
I didn't even do a sketch before I built it. ")
I knew how I wanted to lay it out and I cut my own glass to make the baffles as I went along. I didn't have a cut list that I brought to the glass shop, or anything like that. Really, the only part that is any different from most sumps, is the way I set up the drain and the filter sock compartment. Here is a pic of that section (before the sump was completed)...
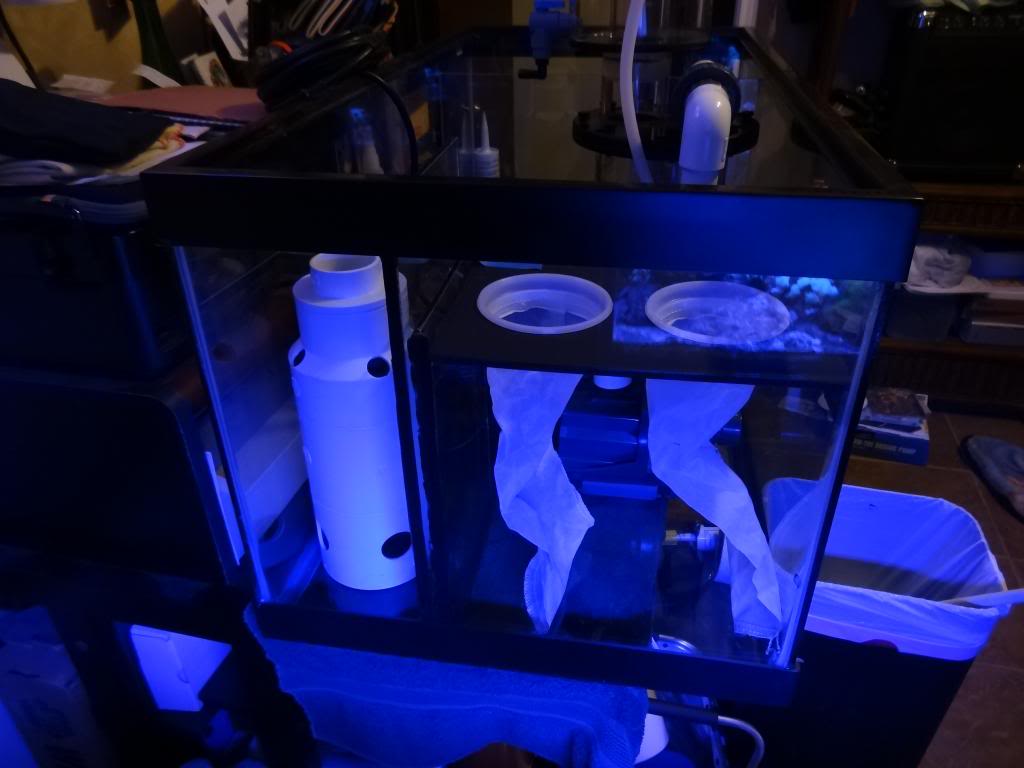
The water comes into the sump through that bubble killer tower and goes underneath a baffle, running over the plate that holds the filter socks. Then you have the skimmer section, bubble trap, return pump section and then on the end, the frag tank.
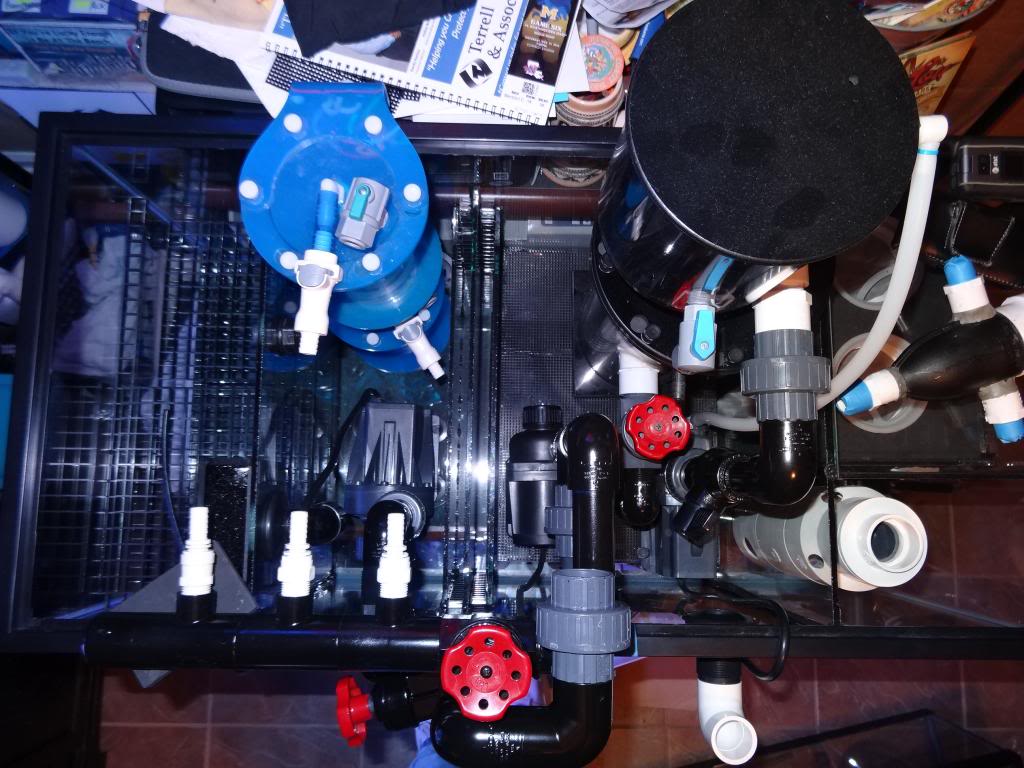
Here is a top down shot of the basic layout. Keep in mind that the skimmer ended up being upgraded and the reactors ended up different too. Don't mind that modded SCWD laying in the filter sock section. That was never part of this build.
I wish I had taken more pictures of it when I was building it, but I only have a few.
I knew how I wanted to lay it out and I cut my own glass to make the baffles as I went along. I didn't have a cut list that I brought to the glass shop, or anything like that. Really, the only part that is any different from most sumps, is the way I set up the drain and the filter sock compartment. Here is a pic of that section (before the sump was completed)...
The water comes into the sump through that bubble killer tower and goes underneath a baffle, running over the plate that holds the filter socks. Then you have the skimmer section, bubble trap, return pump section and then on the end, the frag tank.
Here is a top down shot of the basic layout. Keep in mind that the skimmer ended up being upgraded and the reactors ended up different too. Don't mind that modded SCWD laying in the filter sock section. That was never part of this build.
I wish I had taken more pictures of it when I was building it, but I only have a few.
Holy cow mine will look nothing like this lol
OP
OP
Not to worry. Sumps definitely do not have to be like this one. I am sure yours will work just fine. This is just the way I wanted mine set up and I just thought I would share what I have done. That's all.Holy cow mine will look nothing like this lol
Its gorgeously planned man i just couldnt have the brains to set that up im building mine now and my god it looks rediculous compaired to this lol
OP
OP
LOL! You will get there. I have been in the hobby for about 30 years. Believe me, I have screwed up plenty of stuff over that period of time. I still learn lots of stuff every day though It is always a learning process. Few people, if any, do everything right in this hobby. I know I don't.

OP
OP
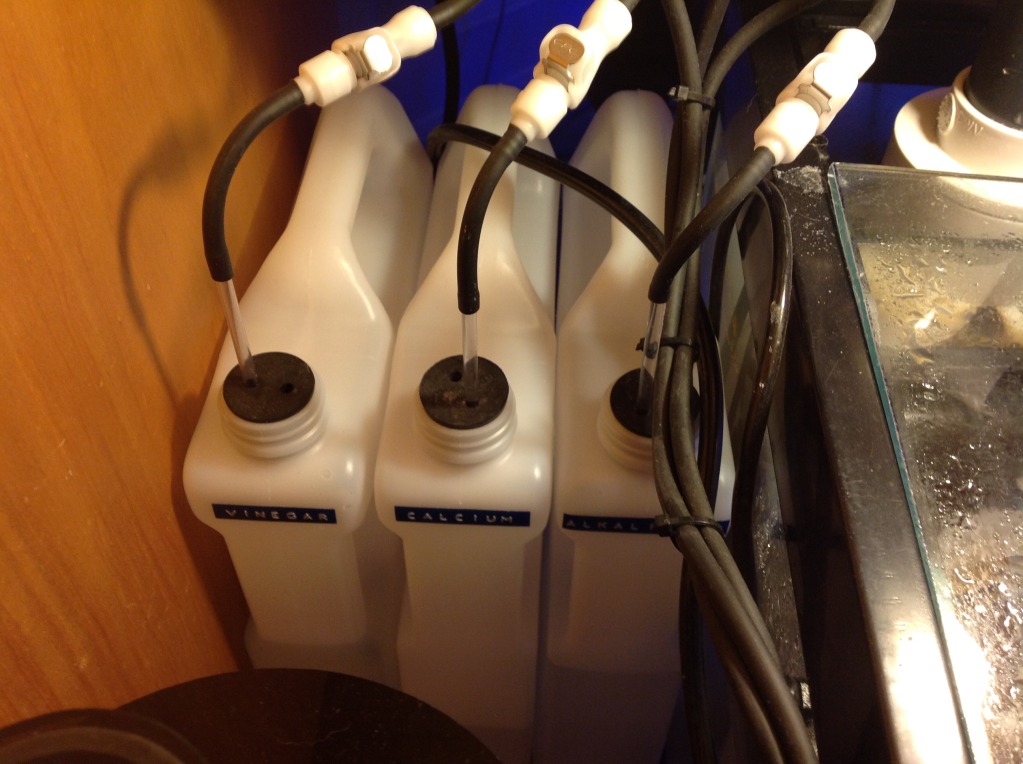
Since someone asked where I got my dosing containers, I thought I would mention that I have changed the type that I am using. The ones I had continued to drip from the large fill opening when the containers were standing in the vertical position (they were designed to sit horizontally). So, I found some others on-line at US Plastics. I have seen these on R2R before and in a BRS video. I couldn't find them on BRS, but they may have them also. These are similar to what I was using, except they only have the one small opening. They also have a brace in the center that keeps them from bulging out on the sides when full. I believe these will work better. These are 4L, but they are also available in a 5L size.
4 Liter Space Saver with Cap | U.S. Plastic Corp.
4 Liter Space Saver with Cap | U.S. Plastic Corp.
Last edited:
OP
OP
I was worried about that in the beginning, but I cut the holes for the plate just large enough for the ring to sit on the outer edge of the opening. It seals well enough that I had to drill two ½" holes for uni-seals to accommodate drain pipes (just above the normal water level). When the socks stopped up, the water level would rise too high in that chamber. Hardly anything leaked around the sock ring. I don't worry about a seal around the sock anymore.great looking sump! I am wanting to build the same style filter sock tray. How were you able to get a good sill around the sock so the the water doesn't just run out the hole?
I took a picture of it and the image kind of makes it look like the water is going underneath the rim of the sock, but the water level is actually slightly above the rim and the water is flowing over the edge in both socks.

Last edited:

OP
OP
Thanks. Good luck on your build. I hope it doesn't take as long as mine did.So cool - been watching this one as I make mine
No problem. Good luck with your build.Thanks for the info. Time to start building

I agree with the others. Your sumps are quite impressive, especially for being made from stock tanks. Would love to see a basic diagram of the layout and equipment list, so I can drool more. I'm buying a pre-built sump because I don't get along well with Silicone on the DIY level and could never be happy if it didn't look as clean as your builds.
OP
OP
Thank you for the comments. I don't have a diagram from the build. Just the pictures I have posted. If I knew SketchUp, it would be nice to be able to put together a diagram, but I don't. It would take me longer to learn the program than it would for me to build the sump.I agree with the others. Your sumps are quite impressive, especially for being made from stock tanks. Would love to see a basic diagram of the layout and equipment list, so I can drool more. I'm buying a pre-built sump because I don't get along well with Silicone on the DIY level and could never be happy if it didn't look as clean as your builds.
I have a really busy couple of weeks coming up, but maybe after that I can throw something together as a diagram. I think the pictures show more detail though.

OP
OP
Space savers? Not sure what you mean.Nice fund on the space savers! Bookmarked

Similar threads
- Replies
- 6
- Views
- 193
- Replies
- 5
- Views
- 109
- Replies
- 14
- Views
- 148


