samnaz’s Long and Shallow Rimless [upgrade in progress]

Phantom6966

Community Member
View Badges
Joined
Nov 8, 2017
Messages
80
Reaction score
41
Rating - 0%
0   0   0
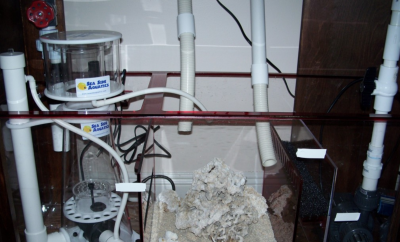
Couple more questions for you. Are the return outlet nozzles random flow generators? And do you know the height of your overflow standpipes by any chance? I noticed your tanks water level looks dangerously high in the photo you posted, but maybe it's just the angle of the photo.
They are the RFG nozzles. As far as I can tell they do seem to work quite well. The only negative thing I can say about them so far is that they are a bit longer than what I expected, and so stick out into the tank a little more than I'd like. But despite this, I still use them for the randomness of flow and they're kinda growing on me. I don't know the length of the standpipes. I sorta just lined each of them up to about where I wanted and cut as I went. As long as you don't cut them too short, you can always cut more off if they're too long. I have realized the water level is a bit higher than it probably should be. I may have mounted the overflow a bit higher up than I should have. I actually really like the way it looks though, and so far at least I haven't had issues with splash-over. Apart from the occasional snail who decides they're ready for an out of water experience.
 
OP
OP
samnaz

samnaz

Earthling
View Badges
Joined
Dec 30, 2016
Messages
3,564
Reaction score
6,879
Location
Humble.fish
Rating - 0%
0   0   0
Measure, hand saw, file/chamfer edges, sand. Repeat X 100. This is going to take a while...
IMG_3815.jpg


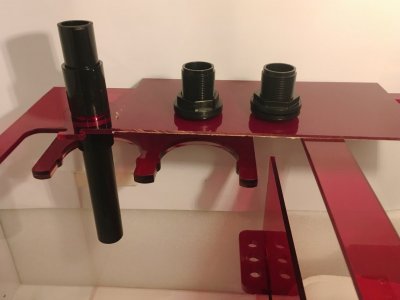
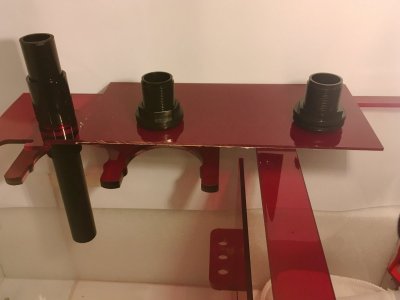
I did not account for the stand center brace when I planned the plumbing. It is directly below the overflow. This means I will need to use 6x 90 degree elbows on each drain, which seems excessive. This hard plumbing stuff is not easy. At this point I'm considering going with soft braided tubing instead, I could have this thing plumbed and running tomorrow. But I already have all the rigid PVC pipe and most of the fittings, looks like I'll have to figure it out.
IMG_3822.JPG


IMG_3826.JPG


IMG_3823.JPG


IMG_3828.JPG
 

anomeda

Active Member
View Badges
Joined
Apr 26, 2017
Messages
115
Reaction score
87
Rating - 0%
0   0   0
Can't you just drill a hole in the center brace? You could then place an extra brace in plywood for extra stability. Glue and screw it attached on top of the black centerbrace. That's what i would have done i think .

Something like this. But i'm sure someone else will come up a better solution and chim in.

12.jpg


Edit: Never mind. I see now that you have two drains infront of the center brace.
 
Last edited:
OP
OP
samnaz

samnaz

Earthling
View Badges
Joined
Dec 30, 2016
Messages
3,564
Reaction score
6,879
Location
Humble.fish
Rating - 0%
0   0   0
Can't you just drill a hole in the center brace? You could then place an extra brace in plywood for extra stability. Glue and screw it attached on top of the black centerbrace. That's what i would have done i think .

Something like this. But i'm sure someone else will come up a better solution and chim in.

12.jpg


Edit: Never mind. I see now that you have two drains infront of the center brace.
Actually, all three of the drains are directly in front of the center brace.

Here's a less off center pic.
IMG_3832.JPG
 

anomeda

Active Member
View Badges
Joined
Apr 26, 2017
Messages
115
Reaction score
87
Rating - 0%
0   0   0
Okey so this is what i would have done instead. Remove the centerbrace and attach a plywood sheet to cover most or all of the back., that way you can cut holes where you have the overflow and still keep the stand stability. I would use thick plywood for more surface to glue and screw, and probably even add two beams for even further suport as you removed something that is suposed to not be removed from that stand. One beam on each side of the overflow box as close as you can place it

Might be a bad plan i don't know.

13.jpg

14.jpg


Or for a cleaner look.
15.jpg
 
Last edited:

Janci

Staghorns will prevail
View Badges
Joined
Mar 14, 2016
Messages
2,978
Reaction score
9,295
Location
Belgium
Rating - 0%
0   0   0
I like @anomeda second solution.
At the looks of his drawing skills, maybe he can get you a complete layout with pipes, pumps, skimmer, fish, chaeto,.... hehehe
Nicely done rigid pvc pipe look way to good to let this middle brace ruin your plans.
 

anomeda

Active Member
View Badges
Joined
Apr 26, 2017
Messages
115
Reaction score
87
Rating - 0%
0   0   0
Hehe. Simple pipes i can draw but nothing else, and if i want to add pvc parts or equipment i cheat and download from google store.
 

SashimiTurtle

Turtle
View Badges
Joined
Feb 24, 2017
Messages
9,241
Reaction score
35,050
Location
South Carolina
Rating - 0%
0   0   0
Very nice looking tank and well thought out process. Just don't rush it and cut any corners you'll regret later. You have the making of a very beautiful nano here. I'll be the one who is full of suspense sitting on the edge of my chair, biting my fingernails waiting on livestock. ;)
 
OP
OP
samnaz

samnaz

Earthling
View Badges
Joined
Dec 30, 2016
Messages
3,564
Reaction score
6,879
Location
Humble.fish
Rating - 0%
0   0   0
Okey so this is what i would have done instead. Remove the centerbrace and attach a plywood sheet to cover most or all of the back., that way you can cut holes where you have the overflow and still keep the stand stability. I would use thick plywood for more surface to glue and screw, and probably even add two beams for even further suport as you removed something that is suposed to not be removed from that stand. One beam on each side of the overflow box as close as you can place it

Might be a bad plan i don't know.

13.jpg

14.jpg


Or for a cleaner look.
15.jpg

Great idea and sketches @anomeda but I'm afraid you are overestimating my woodworking capabilities. Can this be done with a hand saw and mitre box? Cause that's all I've got. If not, what kind of saw is needed? My brother builds guitars so he has all kinds of saws, maybe he could help.

For the support beams, what kind of wood and what size? For the plywood sheet, what size thickness? Where do the screws go / where do I apply the glue?
 

anomeda

Active Member
View Badges
Joined
Apr 26, 2017
Messages
115
Reaction score
87
Rating - 0%
0   0   0
Great idea and sketches @anomeda but I'm afraid you are overestimating my woodworking capabilities. Can this be done with a hand saw and mitre box? Cause that's all I've got. If not, what kind of saw is needed? My brother builds guitars so he has all kinds of saws, maybe he could help.

For the support beams, what kind of wood and what size? For the plywood sheet, what size thickness? Where do the screws go / where do I apply the glue?

I am no wood worker by any means, just do alot of DIY.

How is the center brace attached?
If you mean saw for the plywood back i would just have someone cut it for me to the exact size so you don't get a bowed stand topp. Messure the lenght of the centerbrace and cut the plywood/beams the exact lenght.
Thicknes 3/4" personally but 1/2" would probably work as well.
We have beams in sweden that messures around 1.1x2.8 inch that i would have used. That together with the tickness of the plywood should be more than enought i think.

16.jpg

Btw. Instead for just those 2 beams you could build a beam frame around the plywood, that way you have much more surface for screws and glue( if glue is even neccessary)
The green is screws that goes through the stand bottom/topp and into the beams. Just make sure you drill small holes first so you don't "crack" the bottom of the stand, they can be half the diameter of the screws.

17.jpg

Also don't go to deep deep into the stand. Try to keep the screw heads flat like in the scetch. One of the screws are to deep just to show you what i mean.

Might be better solutions, but I would personally trust this.
 
Last edited:

Pntbll687

Valuable Member
View Badges
Joined
Oct 4, 2017
Messages
2,094
Reaction score
2,609
Rating - 0%
0   0   0
If you end up not altering the stand, I would suggest using 45 elbows to make the turns needed.

If you use 90's there is a chance air bubbles can form and you'll get a gurgle sound from the pipes.
 
OP
OP
samnaz

samnaz

Earthling
View Badges
Joined
Dec 30, 2016
Messages
3,564
Reaction score
6,879
Location
Humble.fish
Rating - 0%
0   0   0
Alternative Reef makes those ceramic magnet rocks to hide MP10s, you could do something similar. Once mine got covered in coralline it got more distracting to my eye, but I could have soaked it in vinegar.

I'm considering ordering a longer version of your tank, so I'm really interested in following your build!
Oh I'd love to see that, as I am also considering a longer version of my tank. My stand is for a 75-90 gallon tank, it's hard to look at it and not wish it was a foot longer. If you do end up ordering one, keep me posted.


I am no wood worker by any means, just do alot of DIY.

How is the center brace attached?
If you mean saw for the plywood back i would just have someone cut it for me to the exact size so you don't get a bowed stand topp. Messure the lenght of the centerbrace and cut the plywood/beams the exact lenght.
Thicknes 3/4" personally but 1/2" would probably work as well.
We have beams in sweden that messures around 1.1x2.8 inch that i would have used. That together with the tickness of the plywood should be more than enought i think.

16.jpg

Btw. Instead for just those 2 beams you could build a beam frame around the plywood, that way you have much more surface for screws and glue( if glue is even neccessary)
The green is screws that goes through the stand bottom/topp and into the beams. Just make sure you drill small holes first so you don't "crack" the bottom of the stand, they can be half the diameter of the screws.

17.jpg

Also don't go to deep deep into the stand. Try to keep the screw heads flat like in the scetch. One of the screws are to deep just to show you what i mean.

Might be better solutions, but I would personally trust this.

If you end up not altering the stand, I would suggest using 45 elbows to make the turns needed.

If you use 90's there is a chance air bubbles can form and you'll get a gurgle sound from the pipes.

Thing is, it's a store bought stand made entirely of MDF. The only thing keeping it all together is a few peg screws (...or whatever they're called). The center brace is screwed into 2 pegs on the bottom piece of the stand, and 2 pegs on the top piece. It's flimsy but once the tank is full, the weight and pressure will make it much more stable.

Before I alter/remove large parts of this stand, I ought to try out a few other less permanent solutions for plumbing around the brace.

Such as incorporating Flexible PVC pipe, and using some 45 degree elbows instead of 90's.
 
Last edited:

SashimiTurtle

Turtle
View Badges
Joined
Feb 24, 2017
Messages
9,241
Reaction score
35,050
Location
South Carolina
Rating - 0%
0   0   0
I would try adapting the plumbing instead of modifying the stand. The stand is already assembled and made the way it was for a reason. Plumbing can be adapted, and short horizontal runs are not the end of the world. Keep taking your time and thinking things out.
 

anomeda

Active Member
View Badges
Joined
Apr 26, 2017
Messages
115
Reaction score
87
Rating - 0%
0   0   0
Like i said there are better solutions and changing the plumbing is of course much easier. I only keept explaining because you asked for more info, but listen to the exsperienced people instead. Good luck!
 

Phantom6966

Community Member
View Badges
Joined
Nov 8, 2017
Messages
80
Reaction score
41
Rating - 0%
0   0   0
I'm certainly no expert, but I'd also avoid trying to modify MDF in any way. Hard plumbing certainly looks better, but in your case I think nylon braided tubing is your best bet. Easier to change later if you upgrade to a larger tank, and less head-loss than having a bunch of 90° angles.
 
OP
OP
samnaz

samnaz

Earthling
View Badges
Joined
Dec 30, 2016
Messages
3,564
Reaction score
6,879
Location
Humble.fish
Rating - 0%
0   0   0
I picked up some flexible PVC pipe and 45 degree elbows. Below is a very ROUGH idea of the final plumbing setup. One concern/problem I see with this rough setup in general is that the pipe isn't mounted or supported to the stand anywhere. I need to figure out where/how to support the pipe.

IMG_3899.JPG


IMG_3900.JPG


IMG_3898.JPG


IMG_3901.JPG


Thoughts??
 

Janci

Staghorns will prevail
View Badges
Joined
Mar 14, 2016
Messages
2,978
Reaction score
9,295
Location
Belgium
Rating - 0%
0   0   0
Looks like a good solution to your problem.

To support the pipes, I would suggest to put a wood plate between the back of the tank and the pipes which sits on the stand.
You can then use half clamps to fix the pipes to the wood plate.
It is not a great solution, but that is how I did it.
Not a great picture but maybe of any help.


20170428_172028.jpg


20170429_115104.jpg
 
OP
OP
samnaz

samnaz

Earthling
View Badges
Joined
Dec 30, 2016
Messages
3,564
Reaction score
6,879
Location
Humble.fish
Rating - 0%
0   0   0
Calling all sump pro's.... In need of serious help figuring out drain placement in the sump/filter socks/etc.

Here's the sump.
1ruby.JPG

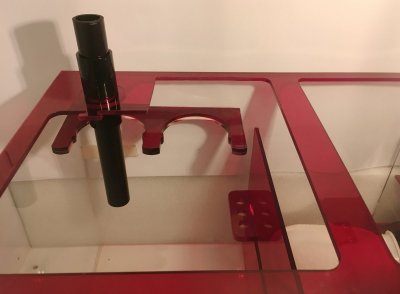
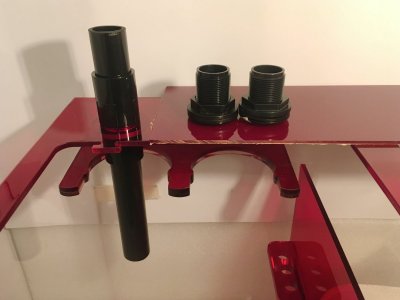
As you can see I have one drain hole the leads to one of the filter socks. There was another hole for a second drain/bulkhead above the other filter sock but the previous owner of the sump hacked that part off - they said it made sock changing easier and the drain quieter.

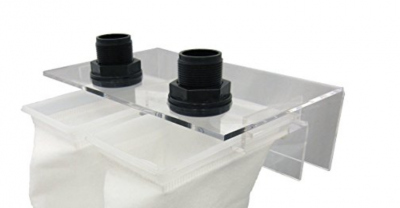
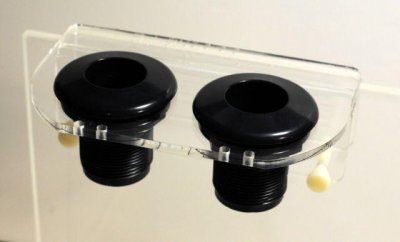
I have a red piece of acrylic I'm thinking about gluing onto the sump and drilling a couple holes for the other two drains.
Sort of like these (minus this sock holder part):
!drain-bulkheads.png !drain-bulkheads-5_02239fd9-604d-4276-b753-27c512135aac_1024x1024.jpg


Or am I better off leaving the sump as is - not adding the piece of acrylic and leaving the drains unsupported? Would that really make sock changing easier/the drain quieter?

I've never used filter socks before and don't quite understand how they work in relation to drain pipe placement. I've seen sumps with drain pipes terminating inside the filter sock, and some with separate filter sock and drain compartments. I assume it's easier to change the socks without having a pipe in the way or one that needs to be removed every time the sock is changed. If changing the socks requires too much effort, I'm more likely to go longer between changes...


Next, I have to figure out where the second and third drains should go on the sump.

One drain will go through the hole to the sock on the left side. I'm guessing that will be either the main or secondary drain.
For the other two drains, options are:

-Both empty into the filter sock?
2ruby.JPG

-One into filter sock, and one right beside the sock?
3ruby.JPG

-One into filter sock, and one to the fuge?
4ruby.JPG

-Both into the refugium (second chamber)?
(I didn't take a pic of this plan, so an example from google...)
!ruby-drains-sump.png


A couple other things to take into account...
Internal overflow box bean animal plumbing isn't setup yet. So the main full siphon, secondary trickle, and emergency drains can be put in any order. Wanted to figure out sump possibilities before deciding for sure on the internal box plumbing.
The main and secondary drain will terminate 1" below the water line, the emergency about 1" above the water line.

Can anyone tell me what to do here?
 
Last edited:

Reefing threads: Do you wear gear from reef brands?

  • I wear reef gear everywhere.

    Votes: 15 23.1%
  • I wear reef gear primarily at fish events and my LFS.

    Votes: 2 3.1%
  • I wear reef gear primarily for water changes and tank maintenance.

    Votes: 0 0.0%
  • I wear reef gear primarily to relax where I live.

    Votes: 8 12.3%
  • I don’t wear gear from reef brands.

    Votes: 35 53.8%
  • Other.

    Votes: 5 7.7%
Back
Top