Motorized Light Lift

Behnken

Active Member
View Badges
Joined
Apr 10, 2017
Messages
190
Reaction score
331
Location
Ohio
Rating - 0%
0   0   0
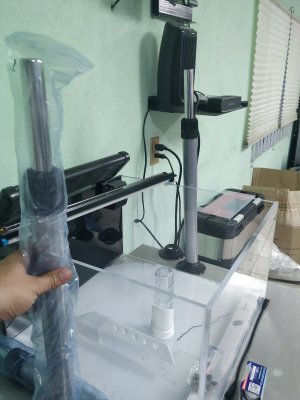
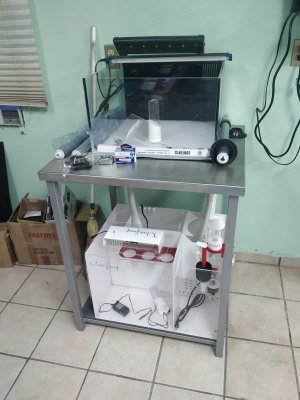
There was a bunch of interest on my build thread for my motorized light lift, so I decided to post a separate thread to show more of how it was built. I will do my best to go through the entire process but feel free to ask questions.

Before we get to the nuts and bolts here are some pictures to get everyones interest.

0816029A-248F-4924-B9C7-8DBAB51AE508.jpeg

D9A1EFE0-D17D-45CE-9DB1-723C4F7E0271.jpeg

F2F4DB1E-53F5-48D2-8877-AC178A0B55B5.jpeg
 
Last edited:
OP
OP
Behnken

Behnken

Active Member
View Badges
Joined
Apr 10, 2017
Messages
190
Reaction score
331
Location
Ohio
Rating - 0%
0   0   0
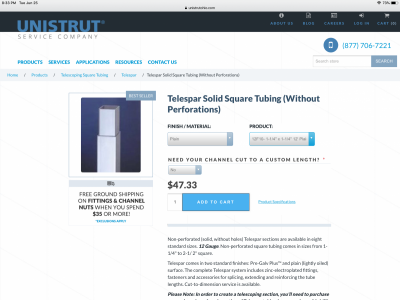
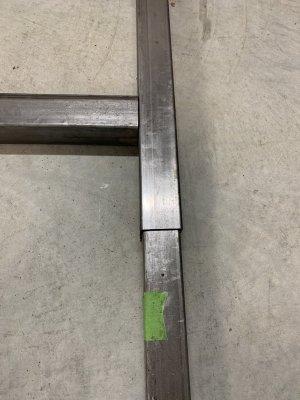
The idea was to have the moving parts slide over the base. I used Uni-Strut Telspar for this part. I ordered (2) 12’ pieces of 2”x2” and (2) 12’ pieces of 1 3/4” x 1 3/4”.
ED6EDF9E-036D-45E1-862B-F0F08C296093.png

The arms are made of 1” x 2” heavy wall, cold rolled steel and the frame the lights are mounted to aren made of 1” x 2” thin wall , cold rolled steel. I had originally ordered full length pieces and cut them down to size. I ended up needed an additional piece and found a local place called Metal Superstore which would have actually cut each piece to length for me. I wish I knew that at first because I would have had them cut everything.
 
OP
OP
Behnken

Behnken

Active Member
View Badges
Joined
Apr 10, 2017
Messages
190
Reaction score
331
Location
Ohio
Rating - 0%
0   0   0
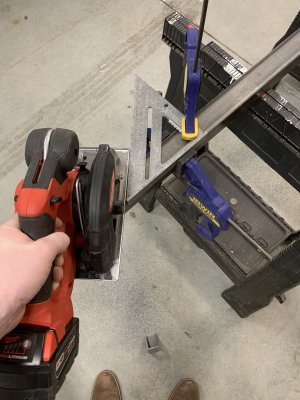
I borrowed a Milwaukee metal circular saw from work to make most of the cuts. I had my doubts but this thing was amazing. It cut through everything like butter.

3D2F8B8C-E24E-468D-9E6F-368284369CE1.jpeg

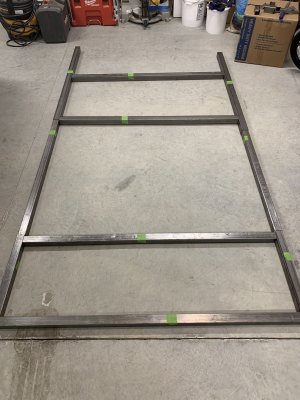
Here’s some pictures of it cut and lined up before the welding. The fist picture here was before I changed the design a bit. I ended up doing away with the horizontal cross braces so I could get the tank closer to the wall without interfering with the plumbing.
FF3CA084-288B-42DA-8E70-35F1D9BFDEFA.jpeg D2AF639C-B06A-45FC-88B2-E267DAD4E442.jpeg
 
OP
OP
Behnken

Behnken

Active Member
View Badges
Joined
Apr 10, 2017
Messages
190
Reaction score
331
Location
Ohio
Rating - 0%
0   0   0
Here are some pictures after it was welded. I don’t have any welding skills so I hired someone that we know to do the welding for me. Here it is mocked up after I got it back.

F802E91C-A0BC-4CFC-A762-6851A2F03C93.jpeg
AEA13538-8D4F-4AA7-9012-872FC10C47C9.jpeg
CDFDBE87-CC20-4597-A5D6-D0466C7EE018.jpeg
 
OP
OP
Behnken

Behnken

Active Member
View Badges
Joined
Apr 10, 2017
Messages
190
Reaction score
331
Location
Ohio
Rating - 0%
0   0   0
I had a basic idea of how I wanted to attach the light bracket to the arms but it took quite a bit of googling to find this part.
A28C2FB2-2C26-4C2F-B44C-880BB0E5C675.jpeg
9A2C56E8-EDA6-4BE6-8AF4-2708711D0D57.png
 
OP
OP
Behnken

Behnken

Active Member
View Badges
Joined
Apr 10, 2017
Messages
190
Reaction score
331
Location
Ohio
Rating - 0%
0   0   0
I wanted to conceal the wiring to the lights by running them through the frame. I cut a notch in the 2” x 2” vertical pieces so when the supporting arms were welded on I could run the cable into it. I didn’t take a picture of the notch but here it’s shown on the drawing.
D6EBA6FE-B715-4692-89BF-0960BABDB70C.jpeg

I also cut out a small section in the supporting arms.
5D45333B-96A6-4767-9444-69272E8D8642.jpeg
CA3903D8-EE7B-4017-B712-3174F9657422.jpeg


And finally drilled a hole in the sides so the wires can exit the tube behind the aquarium.
449FF29F-4700-4167-9A73-1D0F2E7F4A77.jpeg
 
OP
OP
Behnken

Behnken

Active Member
View Badges
Joined
Apr 10, 2017
Messages
190
Reaction score
331
Location
Ohio
Rating - 0%
0   0   0
I got side tracked and need to get back to finishing up this build thread. I used two 18” PA-14 linear actuators from Progressive Automations rated at 150lbs each. I will try to get back to finishing the build thread up this weekend and will detail the information better.
 

akaimal

Active Member
View Badges
Joined
Sep 29, 2010
Messages
294
Reaction score
340
Location
Oak Brook
Rating - 0%
0   0   0
I got side tracked and need to get back to finishing up this build thread. I used two 18” PA-14 linear actuators from Progressive Automations rated at 150lbs each. I will try to get back to finishing the build thread up this weekend and will detail the information better.
Thanks. No hurry. Just wondering what power supply you used for the actuators? Did you use one 24V power supply or two separate 12V power supply for the actuators?
 
OP
OP
Behnken

Behnken

Active Member
View Badges
Joined
Apr 10, 2017
Messages
190
Reaction score
331
Location
Ohio
Rating - 0%
0   0   0
Thanks. No hurry. Just wondering what power supply you used for the actuators? Did you use one 24V power supply or two separate 12V power supply for the actuators?
I used one 240w power supply that I bought from Amazon. Here is the link to it.

LEDwholesalers 12V 20A 240W AC/DC Power Adapter with 5.5x2.5mm DC Plug and 2.1mm Adapter, Black, 3262-12V
by LEDwholesalers ®
Learn more:
 

When to mix up fish meal: When was the last time you tried a different brand of food for your reef?

  • I regularly change the food that I feed to the tank.

    Votes: 29 27.4%
  • I occasionally change the food that I feed to the tank.

    Votes: 35 33.0%
  • I rarely change the food that I feed to the tank.

    Votes: 33 31.1%
  • I never change the food that I feed to the tank.

    Votes: 7 6.6%
  • Other.

    Votes: 2 1.9%
Back
Top