Mr. Green's 34 gallon Shallow Build

mr.Green

Community Member
View Badges
Joined
Jul 3, 2014
Messages
47
Reaction score
38
Location
Gothenburg, Sweden
Rating - 0%
0   0   0
Presentation1.png


Hi all!

I thought it would be a great idea to start up a thread on my current build to document my progress. I've been a lurker here for years, but haven't really got a thread going for any of my two previous tanks. This is the third setup, and it's evolving slowly into something I like. The tank is currently 15 months old, but it was started with moving existing livestock from a previous build. I'll post some pictures of the start-up phase in the upcoming couple of days before I'll give you a proper FTS. At the moment, I'm struggling with some cyano and hair algae due to laziness on my part, and lack of grazers on the tanks part. Now the reefing season (winter) is coming and with it more time with the tank. The end goal is to have a fabulous build thread with a bunch of nice pictures by Christmas, and preferably some success well after that. In the start, most images will be a bit meh since they're mostly from my old phone, but after a while I'll post you some classy DSLR imagery. Anyway, I'm more than happy to answer questions and comments and I'll do my best to keep this thread fresh.
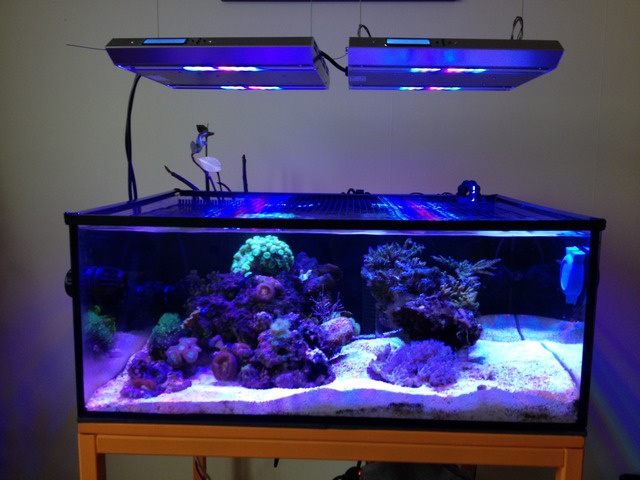
Aquarium Tech Specs
Strike up Date: July 2016
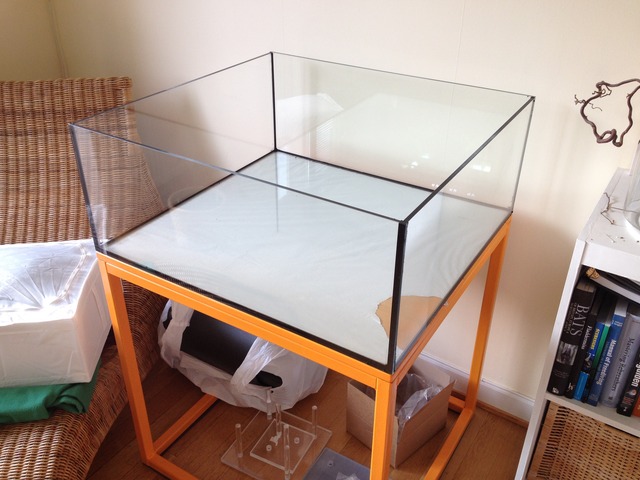
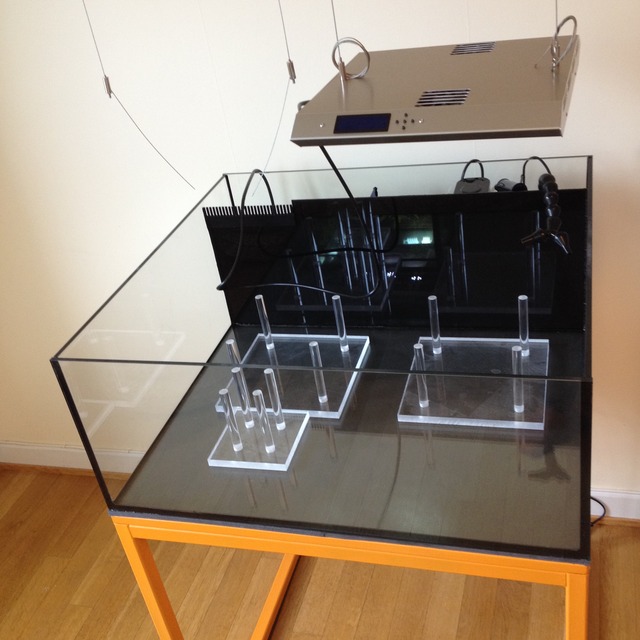
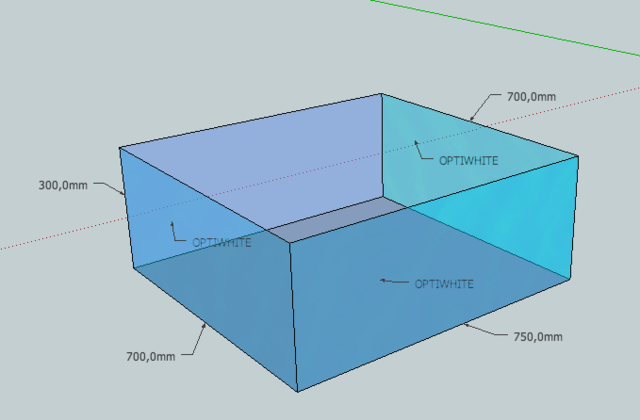
Tank: 750 mm x 700 mm x 300 mm (30” x 28” x 12”) and the volume is roughly 130 L (34 g) custom build starphire glass
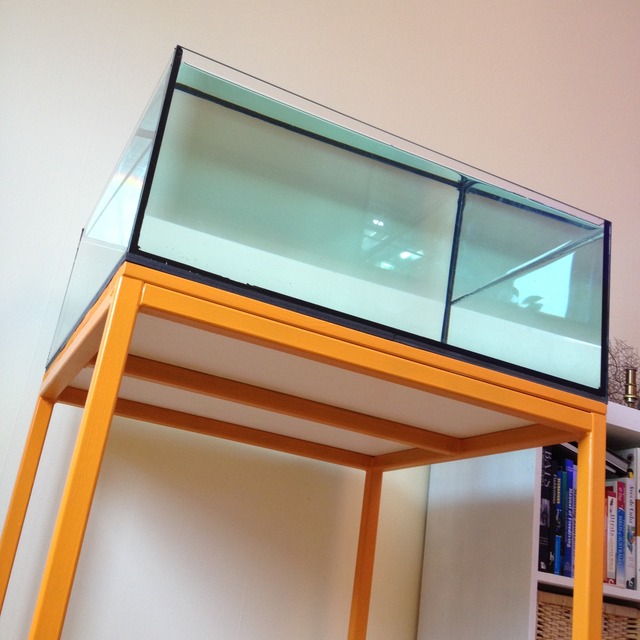
Display Part: 750 mm x 550 mm x 300 mm (30” x 22” x 12”)
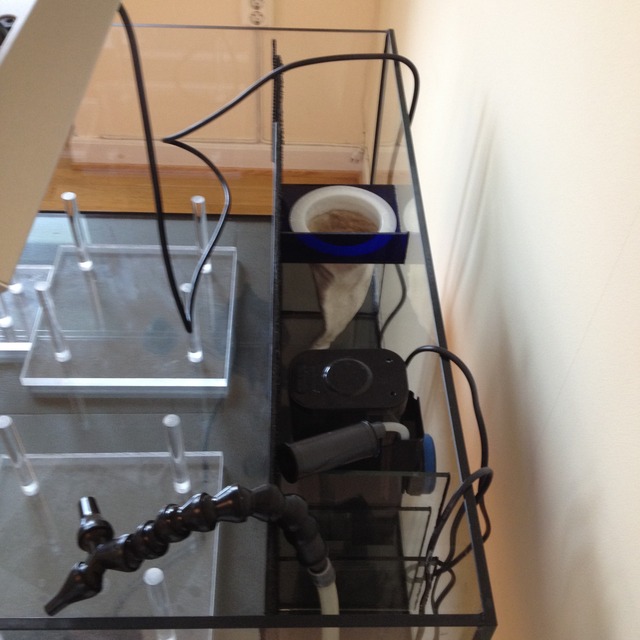
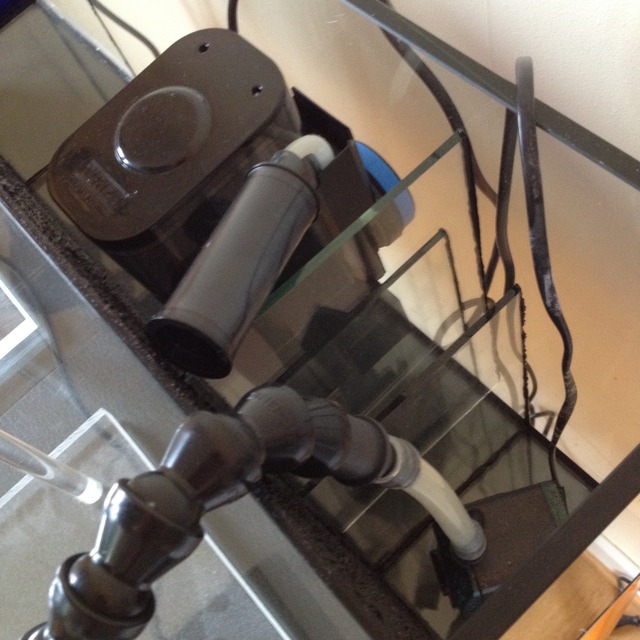
Sump: DYI back compartment in three parts: chaetomorpha and mangrove refugium then a filter compartment for skimmer and heater, and at last a return compartment.
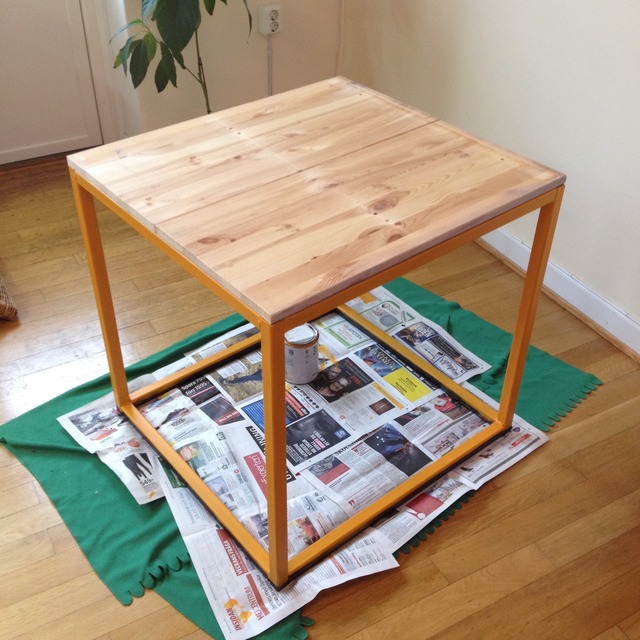
Stand: 750 mm x 700 mm x 400 mm (30” x 28” x 28”)
Hood: Hoodless, but a plastic net in frame is covering the tank to prevent fish from jumping.
Lighting: 2 ATI Sirius LED x2 on wires
Display Water circulation: 1 Ecotech Vortech MP10W and 2 Tunze Nanostream 6015
Return Pump: Aquarium Systems New Jet 1200
Skimmer: Tunze DOC9001
Evaporation Top Up: Tunze Osmolator 3155
Heater: Aquael 75W

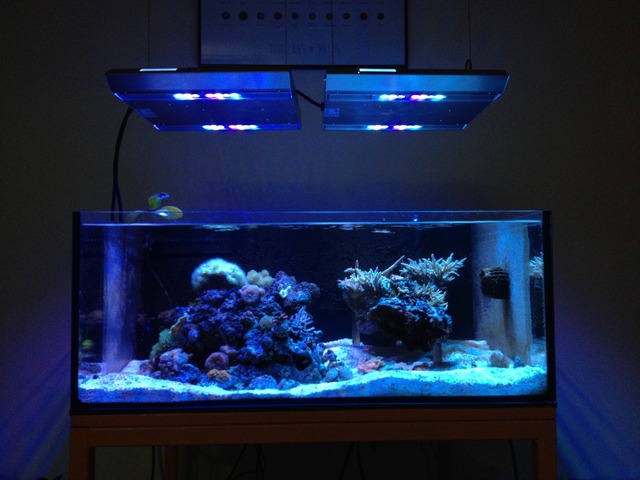
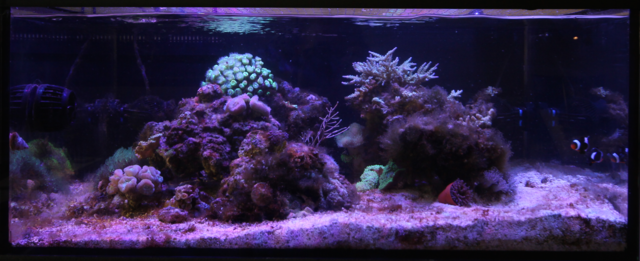
Most recent full tank shot - 13th of October 2017

FTS1.png


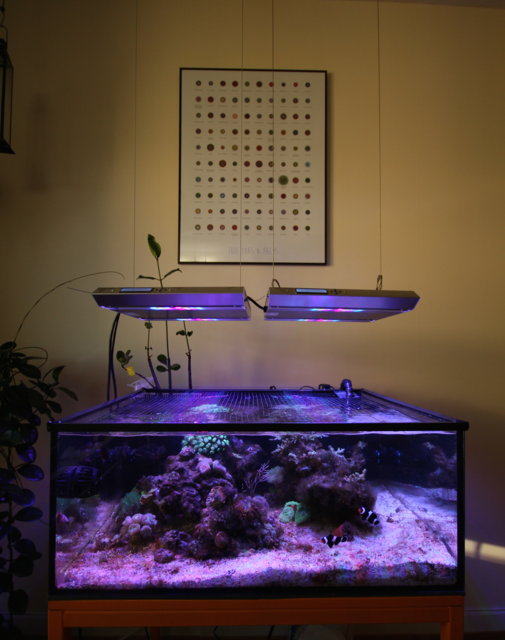
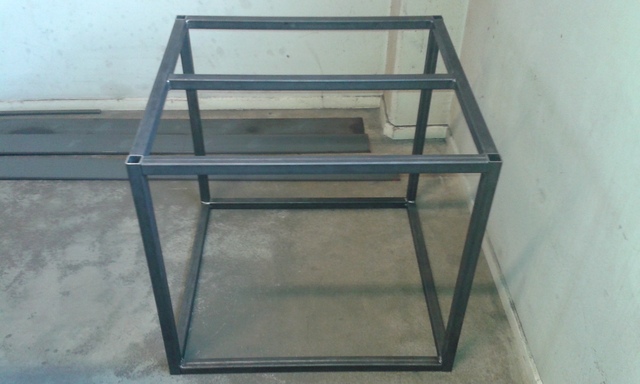
Here's the first pics of the project:

Stand welded by an acquaintance:
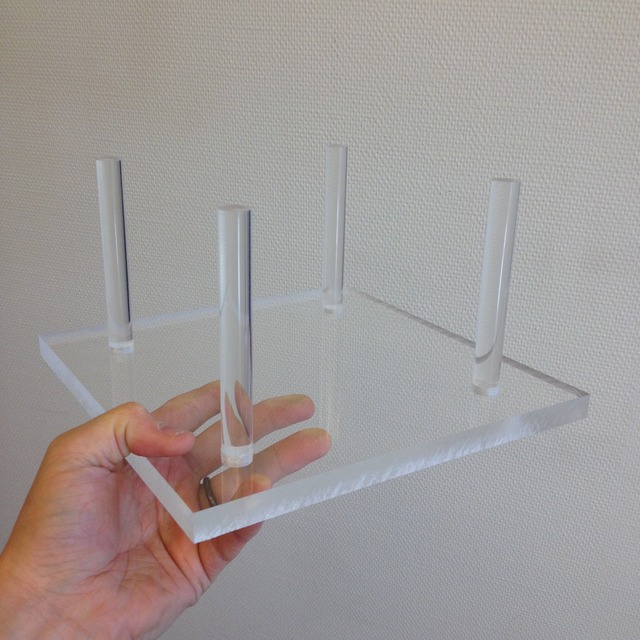
20160309_105950.jpg


Sump design:

sump%20design.png


Aquarium design:

aquarium-sketch.png


Happy reefing,
Mr. Green
 
Last edited:
OP
OP
mr.Green

mr.Green

Community Member
View Badges
Joined
Jul 3, 2014
Messages
47
Reaction score
38
Location
Gothenburg, Sweden
Rating - 0%
0   0   0
Hello again. Finally time for some pictures.

There's a whole bunch of different goals involved in this tank. The first was to downsize. I've previously owned a 100L nano cube, and now I had a 300L tank fully stocked in my living room. It was inaccessible, placed in a somewhat cumbersome spot to work on, and frankly not that well made (a standard glass tank I drilled myself and reworked into a reef tank). I liked it, but it was very tall, therefore difficult to work with, and as such, a bit neglected from time to time. This and the fear of freaky pipeworks (my wife once came home to the main tank almost overflowing (and a drained sump)) in a rental apartment told me that a smaller, more shallow tank would be nice. Something where I could access everything without lids and without having to stand on a chair. So some guidelines were set up:

Still some volume - I wanted the tank to run by itself for extended periods.
In tank sump - no more fear of leaks from pipework or water moving up and down drains.
Hanging lights, and lots of it! - in order for easy access and potential for upgrading the tank in the future.
Silence - the previous build had a seriously noisy skimmer.
Sleek design - my previous build was somewhat monstrous, a wooden stand and a tall tank that dominated the living room, and maybe not in a good way.

The stand was painted orange using acrylic spray:

IMG_4780.jpg


The tank finally arrived (unfortunately like 3 months after it was ordered... something of an issue with custom builds. But still worth it!

IMG_5116.jpg


It passed the water test. I really hate doing these on site, but our bathroom have a floor that could've cracked the glass, and the stand didn't fit through the door :p

IMG_5175.jpg


Next up are some pictures of the sump build, and an idea I have of keeping the rock off of the bottom!
 
OP
OP
mr.Green

mr.Green

Community Member
View Badges
Joined
Jul 3, 2014
Messages
47
Reaction score
38
Location
Gothenburg, Sweden
Rating - 0%
0   0   0
So... I built the sump using regular glass and some tinted acrylic plastic to get a nice finish. I'm quite happy with the result. It's quiet, easy to access and very simple. Just like planned. I even left some space for a small media reactor if I ever wanted to run something.

Here's some pics:

IMG_5178.jpg


A closer look at the filter sock placement:

IMG_5179.jpg


And another one of the skimmer and and return compartments, running lockline on the return. Another day I'd like to build a tank with those freaky orange and blue lockline parts, but here's a black in the meantime:

IMG_5180.jpg


Now I here you all screaming "BUT WHAT IS THE ACRYLIC STANDS IN THE BACKGROUND FOR!?!"

I'll tell you! I want to suspend all my liverock of off the sand. So I made a few stands for the rock to sit nicely over the sand bed. The idea is to run a DSB, and I wanted the entire surface to get contact with circulating water for it to function a little better. I've also had my fight with hydrogen sulphide build up under rocks before and I didn't want that to be an issue here.

So the idea is basically to tie some of my live rock from my old tank together and then have it rest nicely on these pillars. At this point I'm envisioning two arches running from the back to the front with a gorge in the middle (Spoiler alert! - It turned out really beautiful!).

Here's the stuff I'll use:

IMG_4710.jpg


I'll trim down the pillars to suitable lengths when I scape the tank.

Here's the full build so far:

IMG_5177.jpg


Oh, and there's a preview of the light. This system is going to run 2 Sirius ATI Ledx2 suspended over the tank. At this point, the second one isn't installed yet. I think they're going to give me plenty of light. I choose them due to the longer arrangement of the LED clusters. I run a Maxspect Razor on the big tank, and I think the clusters are way to "spotty", giving a lot of light to a small area. I want this tank to be very evenly lit, so these four elongated clusters should work well I think. The black background is done by a lot of silicone on the back of the sump divider. I put it on using a roller and there's about four layers there. Got the tip from my LFS, I think it should work nicely.
 
OP
OP
mr.Green

mr.Green

Community Member
View Badges
Joined
Jul 3, 2014
Messages
47
Reaction score
38
Location
Gothenburg, Sweden
Rating - 0%
0   0   0
Nice build! Is the sump going in the back of the DT or below?

Thanks AlgaeCleaner! The sump is going in the back for once. Some friends of mine run a nano that way, and though I think it might be risky on a taller or larger tank, but this shallow build with a lot of access should suit it well. (See the above post for some pics).
 
OP
OP
mr.Green

mr.Green

Community Member
View Badges
Joined
Jul 3, 2014
Messages
47
Reaction score
38
Location
Gothenburg, Sweden
Rating - 0%
0   0   0
So, with the tank in place and pretty much all of it functioning, it was filled up and running with water for a few days to make sure the system worked, then it was time to get the livestock over. At this point, I had no fish, as I had sold them all off for the transition into a smaller tank. The move was fairly easy and the rock placement quite simple to do, a cable tie holds two pieces together, but apart from this it is all just resting against each other.

Oh, pictures! State of affairs around October 2016:


IMG_5525.jpg


December 2016:

IMG_5964_1.jpg


Unfortunately it's been going downward from there, mostly due to lack of maintenance on my part. I did make a mistake, adding a dragonet which ate all of the pods (my only real grazers at the time), as a consequence, algae quickly took over while I was on vacation and the fish had to go. Next, I had an incident with a failing magnet, which started to rust inside the tank, this killed of a lot of the echinoderms, which made the clean up crew somewhat lacking. A **** load of water changes later, I feel like I'm back in the game.

I currently have an issue with algae and cyano which I try to get rid of by balancing the livestock a little better, adding nutrients by feeding more and removing by hand. I've also just bought some new grazers, two urchins.

On top of that, the fish have officially moved in, current stock is:

2 Black Amphiprion percula (which are getting to know my bubble tip, they live in a suspended breeders box, and are finally rubbing up against each other.)
1 Ecsenius bicolor (to help out with grazing)
1 Cryptocentrus cinctus (to look cool and hang out in the sand)

My hope is to give you guys the full tank specs and a new FTS during the weekend.

Short term plans for the tank is to:

* get all the coral of the sand (I've bought a few pieces which I've put directly on the sand, but the idea was to have it all suspended).
* add more sand (I've been sucking out a lot when getting rid of the cyano).
 
OP
OP
mr.Green

mr.Green

Community Member
View Badges
Joined
Jul 3, 2014
Messages
47
Reaction score
38
Location
Gothenburg, Sweden
Rating - 0%
0   0   0
Dear all,

finally time for a new FTS. I did a water change this morning. Still battling the cyano and removing a lot of it by hand is dreary. Fish and corals in general are doing fine though, I've lost some zoas to the cyano, but apart from that nothing major is going on. I've pulled down on the percentage of red ligth in my light cycle. I'm probably imagining it, but according to my notes the cyano started after I changed to a lot more red in the evening. It's probably not causation, merely correlation, but it won't hurt to try it. My plan is simply to let nutrient balance settle in with the fish feeding. Pick up on the manual removal and continue water changes. We'll see how it goes. Anyway, here's some up-to-date pick from this morning.

13th October 2017

FTS2.png


FTS1.png
 

jmp21677

Well-Known Member
View Badges
Joined
Aug 1, 2009
Messages
672
Reaction score
283
Rating - 0%
0   0   0
Great tank! Could the Cyano be a flow issue? I battled it for months until I added a second mp10 on my red sea tank. It didn't help that my nutrients were a little out of line as well. I added a DIY chaeto reactor and it's been gone since!
 
OP
OP
mr.Green

mr.Green

Community Member
View Badges
Joined
Jul 3, 2014
Messages
47
Reaction score
38
Location
Gothenburg, Sweden
Rating - 0%
0   0   0
Great tank! Could the Cyano be a flow issue? I battled it for months until I added a second mp10 on my red sea tank. It didn't help that my nutrients were a little out of line as well. I added a DIY chaeto reactor and it's been gone since!

Thanks! I've been thinking of the flow as well, but there is pretty good flow in the tank at them moment (I know I can always add more!). I can post tank specs when I get some time over during the weekend perhaps. I'm running chaeto in the sump, but at the moment without a separate light source, it was working fine for quite some time, but there's probably more I can tinker with there. Some acquaintances of mine have had success using chemical treatment. I'm not much of an advocate of that (who knows if it lingers or affect other organisms etc) but it might be a last resort.
 

Algae invading algae: Have you had unwanted algae in your good macroalgae?

  • I regularly have unwanted algae in my macroalgae.

    Votes: 8 33.3%
  • I occasionally have unwanted algae in my macroalgae.

    Votes: 4 16.7%
  • I rarely have unwanted algae in my macroalgae.

    Votes: 3 12.5%
  • I never have unwanted algae in my macroalgae.

    Votes: 4 16.7%
  • I don’t have macroalgae.

    Votes: 5 20.8%
  • Other.

    Votes: 0 0.0%
Back
Top