My 3 gallon Pico build

Starganderfish

Active Member
View Badges
Joined
Aug 8, 2019
Messages
179
Reaction score
133
Rating - 0%
0   0   0
I’ve been an on-again/off-again fish keeper with freshwater and reef tanks over the years. Had to tear down and give away my previous 75 gal reef about 7 years ago when we moved house (3-4 months of open-house, auction, settlement, house hunting, purchase and settlement on a new house, made moving that large a setup impossible) Our new house isn’t great for large tanks (plus the wife barely tolerates my hobbies and another big tank would probably be a bone of contention.)

But the kids are a bit older, we’re nicely settled into the house so I’ve been contemplating something a little smaller.

While recently cleaning out the garage and sorting through the random aquarium kibble I’ve collected over the years, I came across a little acrylic tank I picked up a few years ago as part of a Kickstarter. It’s called an EcoQube C Plus, and it's basically meant to be a small 3-gallon freshwater planted tank. It has a little… box on top, that’s kind of like a HOB filter. It sits on top of the tank and the return pump pushes the water up into this instead of into the display tank. The idea is you plant some small terrestrial plants like basil or something, and they grow hydroponically, pulling the nutrients out of the water and “cleaning it”. It has a little underpowered adjustable LED on a plastic stand and everything. For whatever, reason, I never really bothered to use it. The light was cheap and kind of fell apart and the whole “grow a plant” felt a bit gimmicky.

Obviously, it's designed for freshwater, but it’s a solid little acrylic tank with a built-in filter chamber in the back and with a little modification, I decided it might be fun to try and turn it into a PICO tank.

Equipment

Tank
: EcoQube C plus – 3 gallon w/fuge (modified)
Pump: Sicce Syncra Nano
WaveMaker: AI Nero 3
Light: AI Prime HD
ATO: AutoAqua Smart AWC Touch (modified)
Heater: AquaOne 25w Preset Nano
EcoQube c+.jpg


I ditched the light (no way that would work for a reef) cleaned it all out, leak tested and started looking it over.

The first problem – it has a frosted acrylic rim around the top of the tank, quite large (about 2-3 cm). It was an aesthetic choice of the designers I guess, but it’s a pain for light transmission. So I taped up the rest of the tank, got out some varying grades of sandpaper and plastic polish and polished it up. It came out looking pretty clear.

IMG_2743.JPG


Problem two - thanks to the hydroponic design, the return pump doesn’t feed back into the main tank - it points straight up and connects to the bottom of the plant box. I contemplated several options, from ditching the box, replacing the pump and drilling a new return into the tank, to drilling a return and keeping the box with two pumps in the rear chamber. In the end, the hassle of getting a drill into the narrow confines of the tank made me decide to keep the plant box and see what I could do with it.
 
OP
OP
Starganderfish

Starganderfish

Active Member
View Badges
Joined
Aug 8, 2019
Messages
179
Reaction score
133
Rating - 0%
0   0   0
Measuring the AIO filter chamber, it’s not a bad size for the tank - 55mm deep and with three chambers. The first chamber with the overflow clocks in at 40mm wide, the middle is 35 and the final chamber is 65mm. The included pump is tiny and grossly underpowered. I tried an AquaOne Maxi 102 but it was too large so I kept looking and came across the Sicce Synchro Nano. Even smaller than the AquaOne, it fits perfectly and pushes enough water into the box. More on that later. The one weird thing I noticed (and I’ve seen this in a few other freshwater tanks) is that the overflow/intake to the AIO chamber isn’t actually an overflow, it’s several cm’s down from the top of the box. This means no surface skimming. Without a protein skimmer, I wanted to at least skim the surface a bit, so I drilled and cut some new, higher teeth for an overflow weir (very roughly, my Dremel skills leave a lot to be desired) and glued some acrylic over the old intakes. It's not a perfect seal, I don’t need it to be, but it does mean the majority of flow into the rear chamber goes through the teeth of the weir.

The central chamber (35 x 55) was almost the right size for a Dymax Micro skimmer and I ordered one off Aliexprfess, but it’s still in transit and I think I’m going to go skimmer-less. The intake chamber was easy. I’ll build a little media rack using plastic embroidery mesh from the craft store. At the top is some filter floss (polyester batting from the same craft store) middle is just the right size for a Chemi-Pure Nano pouch and the bottom houses a small mesh bag full of Seachem Matrix. That takes care of physical, chemical and biological filtration, the middle chamber houses a small AquaOne 25w preset heater and then on to chamber three.

This is where things got a little creative. I decided to covert the small aquaponics box into a mini fuge. Replacing the pump but keeping the plumbing, which terminates in a small right-angle outlet in the box, I get fairly decent water flow. The box needed some modding.
IMG_2810.JPG


I used a Dremel to cut out the four square “plant” holes into one large opening.

IMG_2808.JPG


The water flows out of a rectangular hole in the side of the box, down a ramp and into the display tank, but the hole was quite low in the box, leaving a lot of wasted space. I used the Dremel to cut a new hole higher up the side, and glued a small piece of acrylic over the old hole, added some taller “guides” on the side of the ramp, and the box now fills almost to the rim before the water passes through the small overflow, down the ramp and into the display tank.

IMG_2832.JPG


The bottom of this fuge box now has a layer of Seachem matrix, and once my cycle is complete, I’ll add some chaeto. That of course needs light.
 
Last edited:
OP
OP
Starganderfish

Starganderfish

Active Member
View Badges
Joined
Aug 8, 2019
Messages
179
Reaction score
133
Rating - 0%
0   0   0
I decided to play around a bit with the fuge lighting, rather than try and find something off the shelf. I ordered a strip of led “grow lights” a mix of red and blue LED’s. Picked up 6 40x40mm aluminium heatsinks, and a pair of 40mm side blowing exhaust fans.
IMG_2814.JPG


I modelled up a casing for it in Tinkercad and printed it on my 3D printer (it came out a little rough due to a support failure, but it works fine). Painted the outside with a gloss black lacquer and the inside of the fuge box with a light grey gloss lacquer (not to increase PAR or anything, just to make it easier to see the contents!)

The 3D printed case holds a fan, the six heatsinks and the other fan, and I soldered together two strips of the LED and attached them to the base of the heatsinks. Superglued a sheet of clear acetate (overhead projector sheet!) over the lights to prevent water from getting into the electronics, and wired it all together to a 12v power brick. When powered on, the lights come on and the two fans blow air through the fins of the heatsinks and vent it out the top of the case. Should prevent things overheating when the lights are run for 10-12 hours. The case slots neatly on top of the mini fuge box, and will hopefully provide plenty of light for the macro-algae.
unnamed (3).jpg

unnamed (4).jpg

unnamed (5).jpg


The water now travels through the new weir/teeth, into the rear AIO chamber, passes through filter floss, Chemi-pure, and Seachem Matrix, past the heater in chamber two, and into chamber three. The Sicce nano pushes it up a 10mm pipe into the bottom of the fuge box. It passes over the thin layer of matric and will agitate the chaeto growing here, before flowing out the overflow hole, down the ramp and falling into the tank, nicely agitating the surface and aerating the water.

unnamed (1).jpg


This does leave one problem of course.
 
Last edited:
OP
OP
Starganderfish

Starganderfish

Active Member
View Badges
Joined
Aug 8, 2019
Messages
179
Reaction score
133
Rating - 0%
0   0   0
Without an intake filter return, there’s ZERO flow in the tank. Luckily, the AIO filter chamber doesn’t stretch across the entire back wall, so there are two little alcoves on either side, perfect for additional equipment, and nicely out of the way. Equally lucky, the width of this alcove is the exact diameter of the AI Nero 3 wavemaker.

IMG_2833.JPG


I was afraid it would be grossly overpowered for what's basically a sub-3 gallon pico, but the controls let me dial it down quite a bit. I currently have it randomly cycling between 10 and 50% and it’s not creating a cyclone or anything. Once I get some fish and corals in the tank and can see how wild the flow is, I can dial it down a lot more, but it seems to be working really well. On the back wall, in the alcove, the flow points towards the bottom and then into the front wall, which should then set up some fairly chaotic flow around the rest of the tank. I’m going bare bottom with this build. I’ve always wanted to try it because I hate siphoning the sand bed and with the small tank, rock-scape and the weird lip on the tank, getting a siphon in there to clean it up will be a nightmare.

I picked up an AutoAqua Smart ATO light and I also have an Auto Aqua AWC Smart Duo I picked up for a future Nano build, and have been experimenting a bit with these. I like the functions of both units, and am really keen to get regular small water changes happening to turn over the water in the tank without having to manually do weekly large water changes. I really want to use as much automation and support as possible to make this a fairly hands-off tank, at least to see if that works. The sensors fit nicely in the alcove on the right side out of the way. The biggest issue with both units is the pumps. They’re tiny of course, but in a Pico tank this small they’re still pretty hefty, and they push a fair amount of water. It’s a little too much flow for top-ups for such a small tank, and I found that even with the siphon break, the amount of water in the hose alone meant the ATO would fill to the sensor, the pump would stop, a siphon would kick in for a second and the water would drain below the sensor, then the pump would kick on again. It just kept draining and filling about 100 ml, over and over again. I plan to replace the three pumps on the Auto Aqua unit with small diaphragm pumps, wire them up to 5mm jacks and plug them into the control unit. I found an article from someone who did this a few years ago with an AutoAqua ATO, and I see no reason that shouldn’t work. Smaller tubing, slower pumps, and being able to house the pumps outside of the tank, is much more desirable for a Pico. I saw that Auto Aqua has announced a Nano ATO unit, which will use a diaphragm pump in a similar fashion but theirs clips onto the rim of the tank (which doesn’t work with the funky lip on this tank). That and it's only an ATO unit that doesn’t do AWC. But it suggests that my idea should work. Just waiting on the new pumps from Aliexpress.
IMG_2831.JPG


Finally ... lighting.
 
Last edited:
OP
OP
Starganderfish

Starganderfish

Active Member
View Badges
Joined
Aug 8, 2019
Messages
179
Reaction score
133
Rating - 0%
0   0   0
The included lighting was rubbish, barely enough for the planted freshwater tank it was designed for, but it was easy to remove. I’ve installed an AI Prime HD which works great. I 3D printed a hood for it, to stop some of the light spread, and have the power dialled down pretty low, but it lights up the tank amazingly well, even with the extra acrylic rim and the glass lid.

unnamed (7).jpg


The AI's gooseneck is supposed to clip on the back of the tank but the weight of the light and the design of the clip has me concerned it will crack or break the acrylic of the tank. Instead, I picked up a cheap swing arm desk lamp off eBay and have cobbled together a screw mount for it to attach to the AI Prime. I can easily swing the light away from the tank when doing maintenance. I’ll do a reverse cycle with the fuge lighting and see how things go.

IMG_2872.JPG


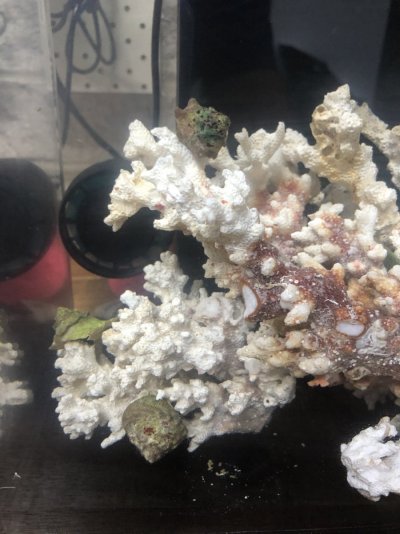
I picked up some dry rock from the LFS – due to the tiny size I needed small pieces and the shape of these coral skeletons suits the space. I think I need to re-arrange the scape a little more though. I’ve run the whole tank a few days with fresh water to clean everything out, check for leaks and test pumps, wavemakers and AWC, and it worked perfectly. So yesterday I mixed up some Saltwater (I have a 6 stage RO/DI filter in the kitchen for filtered drinking water, filtered and chilled carbonated water and an RO-DI outlet for aquarium use), and tonight I filled the tank and added the suggested amount of API Quick Cycle. No idea how well this will work, I’ve always cycled with live rock before, but I wanted to avoid the chance of bringing in any nasties with such a small tank. I’ve added a few drops of household ammonia to get the bacteria going and we’ll see what happens.

I haven’t received my testing kit or even my refractometer yet, my old test kids are long expired and I have no idea where my old refractometer went, so I have no idea what my initial parameters are, but there’s still plenty of time for that during the cycle. New test equip is on its way and should be here in a few days.

Once the cycle finishes (and from what I’ve read that can take weeks) I’ll add a clean-up crew of snails (being careful to avoid sand sifters, this being a bare bottom tank) a couple of hermits, and maybe a coral banded shrimp. I’m planning for a single small fish, hopefully, a green clown Goby or similar, but it’s a crapshoot what the fish stores in my area have in stock, and most of the local online Aquarium sites in Australia have really low stock of everything at the moment. I can wait for a while till I can find the right fish but it’s hard to plan for something specific given how limited local stock can be.

Otherwise, I’m planning a bunch of corals, mainly softies and LPS. I really like flowing, moving corals like duncans, torches and hammers etc, but with the small volume in the tank, I’m not sure I'll be able to fit many in and I expect some smaller zoa’s and similar will probably be needed to fill gaps. I should easily be able to manage the light and flow requirements for SPS corals, but I’m not sure how the actual flow will work out in the various parts of the tank, so I’ll have to see if I can get high enough flow for SPS and still manage some sheltered spots for the softer waving corals. But for now, I'm waiting for the cycle.
 
Last edited:

ylreefer

Active Member
View Badges
Joined
Sep 7, 2018
Messages
448
Reaction score
821
Location
Hong Kong
Rating - 0%
0   0   0
Just had to reply to this
When i read the first post I was like "what". That's tiny. Especially coming from someone who is clearly a seasoned hobbiest. So I read on out of curiosity lol. Got to the 4th post and was like OMG bro lol. This is so much work. .
Coming from a bit of a diy background in reefing this is just truly an example of "nothing is to small a project".

Will this work out as a reef? I have no idea, but it looks good so I hope this brings you as much joy as your 75 did. .

Sometimes it's not all about the size. Ill be interested to see the progress of this one .

Nice work on all the DIY by the way.
 
OP
OP
Starganderfish

Starganderfish

Active Member
View Badges
Joined
Aug 8, 2019
Messages
179
Reaction score
133
Rating - 0%
0   0   0
Just had to reply to this
When i read the first post I was like "what". That's tiny. Especially coming from someone who is clearly a seasoned hobbiest. So I read on out of curiosity lol. Got to the 4th post and was like OMG bro lol. This is so much work. .
Coming from a bit of a diy background in reefing this is just truly an example of "nothing is to small a project".

Will this work out as a reef? I have no idea, but it looks good so I hope this brings you as much joy as your 75 did. .

Sometimes it's not all about the size. Ill be interested to see the progress of this one .

Nice work on all the DIY by the way.
Thanks mate.
Yeah it’s gonna be small, and yep it might be a disaster but it’s been fun so far. I love pottering around and just trying stuff.
I am very carefully NOT going to do the maths to work out how much more this cost over a more traditional Pico or small Nano - it was more of a try it and see. I’m sure I could have bought a better (and glass!) tank for less but that wouldn’t have been as fun.
 

ylreefer

Active Member
View Badges
Joined
Sep 7, 2018
Messages
448
Reaction score
821
Location
Hong Kong
Rating - 0%
0   0   0
Absolutely agree. Nothing like seeing the end result of hard work. . Keep us posted.
 
OP
OP
Starganderfish

Starganderfish

Active Member
View Badges
Joined
Aug 8, 2019
Messages
179
Reaction score
133
Rating - 0%
0   0   0
Cycle is taking FOREVER!!!!

3 weeks and no hint of Nitrite or Nitrates and Ammonia wasn't budging.
The API QuickCycle was complete rubbish. I must have poured in half the bottle by this point (it said 10-20 ml's and that did nothing) and nothing happened.
We've then gone away on holidays after Christmas for a few weeks so I've just left the tank running on its own. We'll be back next week so at that point, I'll see if anything has happened. If not, I'll pick up a few small bits of live rock from the LFS and use that to kickstart it. My last tanks I always used fresh live rock and they cycled in under a week. This artificial cycle is a whole different ball-game.
On the bright side, the delay did give me a chance to test out the mods to the AutoAqua AWC. The diaphragm pump from Aliexpress arrived and I wired it into the setup with zero issues (I just cut the two-wire plug off the stock pump and wired it onto the diaphragm pump). It works perfectly and is so much more useful for such a small tank. There's no back siphon and the small pumping amount makes auto top-off great. I have it hooked up to a small 2 litre plastic container of RO/DI water and that should hopefully cover any evap while I'm away. I have a lid on the tank (thanks to the overflow water-fall I'm not worried about gas-exchange) so evaporation has been pretty manageable. Unfortunately, I was a bone-head and only ordered one pump from Aliexpress while the AWC unit requires three. I ordered a bunch more (I'll be doing the same mod on another AWC unit for my next 20 gallon nano) and will finish wiring them up soon.
This will allow Auto Top Off and Auto Water Changes on this small tank and do the same for my next 20 Gallon. I'll be wiring the waste pump directly into a nearby drain and using one large 10 gallon RDO/DI reservoir for combined ATO and another 20 gall SW reservoir for water changes for both tanks. I'll 3D print some boxes to hold the diaphragm pumps and keep everything neat and tidy.

Hopefully when I return home, the tank will be cycled and I can add some CUC and start looking for a fish. Hoping for a Green Coral Goby but its' pretty hit and miss getting specific livestock in Sydney. I'm hoping the LFS will take an order and be able to add one to their next shipment from their supplier? That kind of thing is standard in other industries but no idea if fish stores can do something like that...

I'm already planning a Waterbix 20 cube for my second nano tank to live next to this and thinking long term to hopefully negotiate with the missus to put a Cade 60 Galllon w/ sump in the house in a year or two (the Nanos live in my hobby-room/workshop/garage). I won't be going super huge again (as much as I loved the larger tank it takes up a lot of space and is more likely to cause domestic unrest - a nice 60 gallon cube, self-contained with sump in cabinet etc, should be more harmonious to domestic bliss. I'm also keen to implement more automation with the future larger tank - really keen to add some GHL Profilux equip for testing and dosing. Between AWC, ATO, auto testing and dosing, scheduled lighting and flow, a solid CUC including sand sifters, I'm hoping to keep maintenance down to periodically filling up water reservoirs, feeding and scraping down the glass, with very rare need for an intensive maintenance day.
Regular AWC's with the smaller nano's should take care of nutrients and elements because they won;t be super heavy bioloads, so they will hopefully also be low maint - maybe just the occasional manual dosing. That's the dream anyways.

Keen to see how the Pico has fared in my absence - its a good test for the ATO, pumps etc without endangering any livestock.
 

Blitz7737

Community Member
View Badges
Joined
Jul 8, 2020
Messages
82
Reaction score
106
Location
Albuquerque
Rating - 0%
0   0   0
Cycle is taking FOREVER!!!!

3 weeks and no hint of Nitrite or Nitrates and Ammonia wasn't budging.
The API QuickCycle was complete rubbish. I must have poured in half the bottle by this point (it said 10-20 ml's and that did nothing) and nothing happened.
I started with a chunk of shrimp to kick the ickies off. Also used Seachem Stability in tandem and had the same issue, nothing really happened. Give Biospira a shot, had great luck with that and use it as a bolster during WC and major cleaning events. Heard good things about Tims One and Only as well, but never tried it. Best of luck! Excited to see the rig in action!
 
OP
OP
Starganderfish

Starganderfish

Active Member
View Badges
Joined
Aug 8, 2019
Messages
179
Reaction score
133
Rating - 0%
0   0   0
Making progress, both good and bad.
Returned from holidays and the cycle is finished. Waters looking decent and the ATO maintained both the water level and the salinity pretty perfectly.
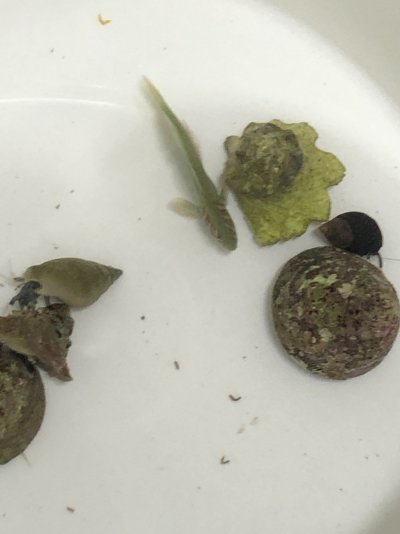
I popped across town to a fish shop I’d never heard of yesterday because they had the Waterbox 20 in stock, which I want for my next tank. Picked up the new tank, light and misc accoutrements and was scanning over their fish while wandering the aisles. Casually asked the staff if they had any Coral Gobies and turns out they had one Green hidden away in a stock tank. Guy didn’t really want to try and find and catch a tiny fish in a big tank but I insisted. Also grabbed two little Hermit’s and four snails (two Turbo’s and two Trochus), some frozen brine shrimp to feed ‘em with and called it a successful trip. Spent almost exactly a grand there so it was a pretty good day for them as well. Brought them home, drip acclimated and transferred to the Pico. No corals yet and the Chaeto arrives this week so easy to leave the light off for a few days to let everything settle in.
Was ready to call it a night and head to bed but poppped out for one last check on the tank around midnight.
Disaster! The water level had dropped precipitously, the ATO alarm was going off, the ATO reservoir (a plastic snap-lock container) was not only dry but the sides had caved in from the pressure (those little diaphragm pumps are STRONG!) There was water all over the counter and a steady drip out of the back of the tank.
Turns out the return line had come loose and while water was being pushed through the fuge, a lot was just madly splashing around in the rear filter chamber and had spilled out the back of the tank and run down the heater and pump cords (which I fortunately had looped so the water didn’t reach the outlets.) ATO had dumped a litre & a half of RDO into the tank to try and compensate. Luckily that wasn’t enough to completely kill salinity but it dropped it down a few points.
Spent the next few hours doing a water change to bring salinity back up, cleaning up the mess and trying to cobble the return line back into some kind of working order. Finally gave up around 2am, dropped a little JeBao wavemaker in the tank, pointed up for surface agitation and aeration, and went to bed.
Woke up this morning to find everything miraculously still alive. Used some super glue to fix the return line, and reactivate the fuge waterfall, did another round of water tests and another large water change. Parameters are looking decent, Salinity is almost back where I need it and I’ve re-arranged things to hopefully avoid a similar leak issue in future.
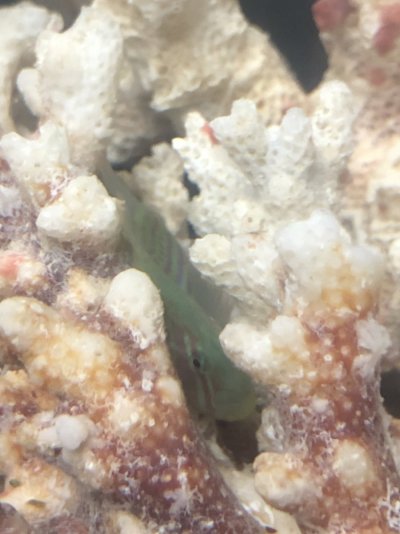
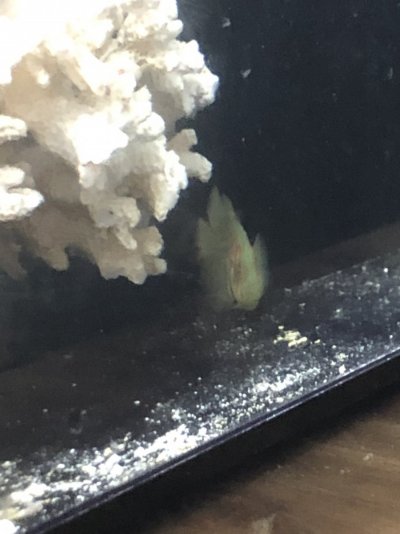
Fed the Coral Goby and hermits some brine shrimp and they all ate. The Goby is slowly emerging from hiding to explore a little bit. He seems to have a permanent list to the right, which was there before the disaster (no idea what’s going on there) but he’s colouring up and looking good.
I think the Trochus snails are a little too big for such a small, crowded tank, so I may move them to the 20 when it’s set up.
And I’m regretting the bare bottom, as I always do whenever I try it. Looking messy with grit and dust from the rock and general waste already building up. Not sure I can get the Nero3 pumping fast enough to clear all that without blowing the Goby into a spin. I may think about adding a very thin sand bed, half a cm or so, just to cover the bottom.
But for now, fingers crossed I’ve avoided a disaster. I definitely need to get the 20 Gal cycled and running so I have a backup tank if another disaster occurs. The Pico is so small that it doesn’t take much to knock it out of whack, fortunately it’s also pretty easy to bring it back in line. Chaeto should be arriving this Thursday and I’m going to order a mix of pods, rotifers, phyto from a local supplier. Hopefully that can stock up the fuge a bit and give the Goby some live prey to chase as well as help maintain parameters. I’ll pick up some corals in a week or so if things continue to stabilise and get the light cranking.
Still 50/50 on whether or not this experiment has been a good idea, but it’s challenging if nothing else.
 

Attachments

  • F273E88D-90A3-4193-883B-4FAD313AF077.jpeg
    F273E88D-90A3-4193-883B-4FAD313AF077.jpeg
    88.4 KB · Views: 65
  • B1797888-D254-4254-B83E-495B5175507D.jpeg
    B1797888-D254-4254-B83E-495B5175507D.jpeg
    137.5 KB · Views: 62
  • F7BA0563-75B4-4CD9-BDC6-80444CD45808.jpeg
    F7BA0563-75B4-4CD9-BDC6-80444CD45808.jpeg
    166.4 KB · Views: 65
  • 8B625AB1-ECA2-48DA-B11C-9889495BA5D7.jpeg
    8B625AB1-ECA2-48DA-B11C-9889495BA5D7.jpeg
    123.5 KB · Views: 66
OP
OP
Starganderfish

Starganderfish

Active Member
View Badges
Joined
Aug 8, 2019
Messages
179
Reaction score
133
Rating - 0%
0   0   0
More progress.
The Chaeto arrived and I gave it a good RO/DI rinse and placed it in the fuge (was very clean, I'm impressed!) I'll slowly begin ramping up the light schedule on the fuge to find a good balance.
Took the kids down to the LFS to pick up some dry rock and salt for my 20 Gallon, and ended up returning with three small coral frags. Gave them a dip in Seachem ReefDip and was frankly astonished at what came out of them. I have no idea between good and bad micro-fauna but lots of little swimming insect-like bugs (about 1-2mm) a bunch of tiny wriggling worm thingies (red at both ends, dark brown or black in the middle) and who knows what else. The tanks at the shop looked reasonably clean though there was scattered Aptasia in one of the other Frag displays. Gave it all a long dip in a strong solution and left it there till all the creepy crawlies had stopped moving, blasted the corals repeatedly with a turkey baster of dip and then did a two-stage clean saltwater rinse. I hope I got rid of anything bad along with anything good I ignorantly decimated..
They're in the tank now:
a rather dull brownish Torch coral ( no idea if it will colour up with some love and light but it was small and cheap so ...meh), and a pair of nice green Goniopora - one tiny and one a little bigger.
The Torch emerged overnight but the two Gonio's are taking their sweet time.
IMG_3086.JPG

The bloody big Trochus snail also proceeded to knock both the Torch and the smaller Gonio off their perches at least twice each, so a quick trip to the hardware store for some superglue and they're now fixed in place.
I also added about 3-5mm of sand to the bottom of the tank. Not really enough for a proper sandbed for burrowing snails or anything but it made a huge difference to the look. I've tried over and over again to do the bare-bottom tank thing but I realise now it's just not for me. It's less about the fish waste (which the wavemaker can usually stir up) it's more about grit and specs of rock and sand coming off all the rock and coral. You don't notice it ordinarily, but it stands out like a sore thumb on the bare tank. I cleaned this dry rock/coral really well beforehand, scrubbed it, disinfected it, baked in the sun for a day, washed and scrubbed, and rinsed again, but it still sheds grit. I'm just going to go sandy bottom from now on. I've tried multiple times but it's not for me.
I do notice that the Nero 3 is incredibly sensitive to getting sand in its spindle and seizing up. Have to be really careful if I'm stirring up the sand bed, and I made the mistake of playing with the speed settings in the app and it blasted out at high speed and kicked up a heap of sand and instantly locked up. Easy enough to clean (if I can get my hand in there) but a little pain.
I think I can step back now and let this tank run for a bit now. The Goby (Greenie) is eating well and beginning to emerge more and hang around in sight, the snails and crabs are wandering around and cleaning up, the filter seems to be handling most of the gunk and the Chaeto should hopefully help with any nutrient build-up. Only thing I'm waiting on is the final two replacement diaphragm pumps for the AWC unit and I can hopefully keep my hands out of the tank for a while and let it settle. Automatic Top-off and water changes, scheduled lighting on the Prime and the Fuge, easy spot feeding of the single fish and two hermits twice a day... Hoping this will be a nice and low maintenance tank for a little while.

But...
 
OP
OP
Starganderfish

Starganderfish

Active Member
View Badges
Joined
Aug 8, 2019
Messages
179
Reaction score
133
Rating - 0%
0   0   0
It's been a fun build and I'm glad I've been able to make it work (at least so far) but I'm already seeing the limitations and pain points of this particular tank. It's less about the size (which I'm fine with) but more about the design of the original tank itself.
The waterfall from the top-mounted fuge does a great job aerating the water, maybe too great as the whole tank looks cloudy with microbubbles. Not sure how to fix that without anything unsightly - maybe if I used some clear acrylic to extend the waterfall ramp down into the water so it's not falling straight onto the surface and more... sliding the water into the tank?
The stupid lip all around the tank is a nightmare and makes access to the tank almost impossible. I really can't get my hand or even a tool in there without constantly bumping the rock and knocking everything over.
There's zero visibility to what's happening in the back AIO chamber. Because the return pump feeds into the top fuge chamber, I can't run the pump without that fuge in place, so have no idea what the water level or movement is back there. And anytime I want to access the chamber to change floss or other media, the whole fuge and light have to drain and then come off.
The solid lid is great for limiting evaporation on such a small tank but it drips every time I remove it and it clouds up quickly with salt creep and because the lid sits on top of that lip, I get water condensing on the underside of the lip, on the underside of the lid, and seeping into the gap between lip and lid, so it always looks messy.
It's fine for now, and I'll try and run it for a while as a proof of concept that it can work, but I've already ordered a Waterbox cube 4 online which will eventually replace it. (AFAIK Waterbox stopped making the 4 a while ago but an online shop in Queensland had a single one left in stock, so I bought it while it was available - just to put aside as a "down-the-line upgrade").
I'll let this tank stabilise and see how it goes, but I already expect that I will eventually migrate everything over to the 4. Fortunately, everything except the fuge light should be transferable, and I have enough spare parts and components that I can probably cobble something together to run a mini fuge in the 4 as well.
After that I may tear down this Pico completely and make some more mods - removing that lip all around the top of the tank should go a LONG way towards easing some of the pain, and I can maybe then put a small mesh lid on it or something. Not sure how to improve visibility into the AIO chamber short of resizing the FUGE, but I'll give it some thought.
I don't really need ANOTHER tank but I really enjoy the process of fiddling and modding and trying stuff. Worse case this gets modded into a little invert tank or something.
But that's some way down the line, and for now I'm keen to see how well this thing holds up for a bit.
 

KellyCorals

Active Member
View Badges
Joined
Jul 19, 2020
Messages
342
Reaction score
458
Location
Cocoa Florida
Rating - 0%
0   0   0
I’m a big fan of DIY tanks like this! It’s really cool you have a 3D printer that you were able to use to accomplish some of your custom parts! The freshwater to salt is also something I found to be a really cool process and I’ve had fun doing that on my build as well. Can’t wait to see how it turns out on yours, do you have the fuge set up and running already?
 
OP
OP
Starganderfish

Starganderfish

Active Member
View Badges
Joined
Aug 8, 2019
Messages
179
Reaction score
133
Rating - 0%
0   0   0
I’m a big fan of DIY tanks like this! It’s really cool you have a 3D printer that you were able to use to accomplish some of your custom parts! The freshwater to salt is also something I found to be a really cool process and I’ve had fun doing that on my build as well. Can’t wait to see how it turns out on yours, do you have the fuge set up and running already?
Tanks been going steady for a couple weeks now. The Fuge’s running at night for about 6 hours currently and the Chaeto seems healthy.
The micro bubbles in the water have cleared up, the ATO is keeping water level and salinity stable and the Fuge waterfall keeps the water nicely aerated.
I have a green coral goby who seems happy and is eating and settled in, the snails are doing a decent job roaming the tank though they are a little too big for such a small area - I keep worrying that one’s going to wedge itself in a corner and get stuck!!
My torch coral is fairly happy, the largest gonio occasionally puts out maybe 5-7mm of polyps while the smaller gonio rarely extends more than 1mm or so.
I’ve dialled the flow way down on the Nero 3 - random flow between 1 and 2% - it really is too powerful for a tank this small.
The concept was ok but the tank itself is impractical though. The lip on the tank continues to frustrate, the narrow confines are a pain and having to drain and lift the entire fuge (including return pump) every few days to replace the filter floss is annoying. That’s the issue with this kind of DIY effort - it can be done and can be cool but sometimes the day-to-day maintenance and practicalities of running the tank are pain points.
I have a Waterbox 4 going through a mini cycle while I wait for a few parts to arrive and then the sand, rock, corals, inverts, chaeto and fish will all be migrated over to that. I’ll be making a new Fuge light for it and have a few other 3D printed parts under construction but it’s a much more traditional tank.
I’ll be keeping this thing as a micro Quarantine for the 4 and my WB 20 but I won’t be continuing with it for more than a few more weeks in its current form. Maybe as an invert only tank with some further mods.
The extra space in the WB 4 should make it easier to arrange the rocks and Nero to mange the flow better and rear chamber maintenance should be a lot easier. Pump, AWC, ATO, lights, flow… almost all the equip will move across. The Fuge light will be redesigned for the new space and I’m excited to see how it works.
 
OP
OP
Starganderfish

Starganderfish

Active Member
View Badges
Joined
Aug 8, 2019
Messages
179
Reaction score
133
Rating - 0%
0   0   0
SO this small tank has officially been retired and the contents migrated to a Waterbox 4 tank. After performing the migration and getting a better idea of volumes, I'm pretty sure the old tank was barely 2-2.5 gal.
A purpose-built tank is so much easier and cleaner, it's like night and day.
The EcoQube Pico was a fun experiment but the ongoing maintenance was already becoming a pain and I can see I would eventually have gotten sick of it.
The new Cube is going great, 90% of the equipment migrated straight across and everything was already cycled so it was just a matter of dropping it all in. I still need to do another funky Fuge light for the new tank because my current DIY solution won't work, but that's already underway. I'll keep the EcoQube to the side and maybe use it as a Quarantine tank if I need one.
 
Last edited:

melfish

Community Member
View Badges
Joined
Feb 21, 2019
Messages
73
Reaction score
108
Location
Brisbane, QLD, Australia
Rating - 0%
0   0   0
I so enjoyed this thread. What a fun little tank, it’s a shame it didn’t last but I can absolutely understand with the annoying complications. I only wish there were a few more photos of it up & running! But thanks for sharing, I loved it all
 

Form or function: Do you consider your rock work to be art or the platform for your coral?

  • Primarily art focused.

    Votes: 20 7.8%
  • Primarily a platform for coral.

    Votes: 44 17.2%
  • A bit of each - both art and a platform.

    Votes: 174 68.0%
  • Neither.

    Votes: 12 4.7%
  • Other.

    Votes: 6 2.3%
Back
Top