NineAndAhalf's 75g build

NineAndAhalf

Community Member
View Badges
Joined
May 14, 2017
Messages
95
Reaction score
24
Rating - 0%
0   0   0
I'd like to start off by saying hello, as I'm new to the forum. I haven't been into SW tanks for very long, maybe a year at most. My current setup is a rimless 20 long with a 20 long sump. I have quickly outgrown that tank so a couple months ago I started sourcing everything for my upgrade. Between research and planning I have a pretty solid plan so I decided to kick this build off.


So lets begin...


Here is my current setup that I've had running for about 8-9 months now:


z3PBC


It's fairly basic but it was really my first jump into a reef. I had a 27 gallon cube as my first saltwater tank but I didn't really like it as my reef.

I got the itch for something bigger so I started searching local CL ads and found a 75 gallon tank. Guy wanted very little for it so I jumped on it. It holds water and is in really good shape so I bought it. I decided to build my own stand for it since i'm pretty inclined with my hands and I have any tool I might need either at my finger tips or a phone call away.


Here's the tank sitting on the stand when I first completed the frame itself:

uKeeZ


It's your basic run-of-the-mill 2x4 stand. I opted out of using 2x6 for the top frame as i'm fairly certain 2x4 is plenty enough to support this tank especially with the amount of plywood support it will also have.


This weekend I spent a few hours skinning the stand and getting it exactly how I want it. Here's how it sits as of now:

aB3S2


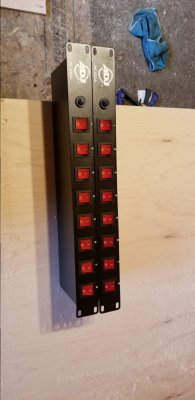
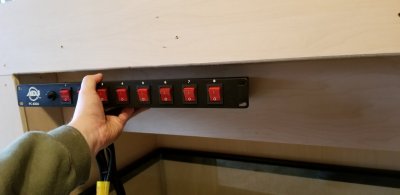
The stand still needs to be filled, sanded and painted. There's also some stand accessories (i.e. surface mount power strips, led strip, etc.) on the way that I plan to install one night this week. Also I will be making the doors hopefully this week and securing the shelves I have for the side cabinets of the stand. I plan to keep my food, test kits, glass scraper, fish net, etc. in the side cabinets. The stand will be painted black on the exterior and white for all interior panels. More than likely will use marine grade boat sump paint and silicone everything in case of a leak.


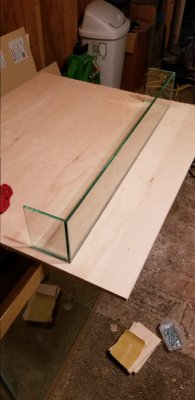
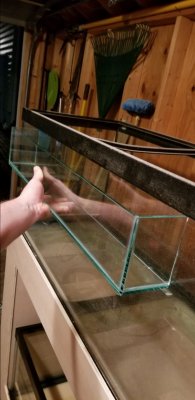
The sump is a 40 breeder I just picked up last week as well. I will be ordering glass baffles for it tomorrow and will hopefully have those cut and ready to pick up by Wednesday. Here is a sketch-up drawing of what My sump plans are:

2R6OZ


Layout goes as follows: From left - drain/overflow, filter socks, bubble trap/piece to keep socks in place, skimmer/reactor, return, the fuge is last. I know it's not common to see the fuge setup this way but that's how I have my current fuge setup and I absolutely love it. The lower flow and control-ability of it is really nice.
 
Last edited:
OP
OP
N

NineAndAhalf

Community Member
View Badges
Joined
May 14, 2017
Messages
95
Reaction score
24
Rating - 0%
0   0   0
Cool! Looking forward to seeing this one fill up! :)
Thanks I'm quite excited too.


Little update:
Glass ordered for sump and I also ordered 3/8 glass to remove the tank trim and euro brace the display.
New fuge light, gate valves and power strips arrived today. Bulkheads should be here by the end of the week so I can start drilling.

Going to order black acrylic for a "false back" with intigrated overflow by the end of the week as well. Hard to explain exactly how that's going to work until I can get pictures.
 

Mal11224

Valuable Member
View Badges
Joined
Mar 8, 2017
Messages
1,747
Reaction score
3,249
Location
Long Island, NY
Rating - 0%
0   0   0
Welcome to R2R. Looks like an interesting build. Must be exciting building from scratch. Looking forward to your progress.
 
OP
OP
N

NineAndAhalf

Community Member
View Badges
Joined
May 14, 2017
Messages
95
Reaction score
24
Rating - 0%
0   0   0
Thank you, glad to be here! It's very exciting to be able to build something to fit exactly what I want.
 

Greybeard

2500 Club Member
View Badges
Joined
Feb 10, 2017
Messages
3,233
Reaction score
8,669
Location
Buffalo, MO
Rating - 0%
0   0   0
Thank you, glad to be here! It's very exciting to be able to build something to fit exactly what I want.
You may not realize this, but by deciding that 'exactly what you want' is a standard 75g glass tank and a nice, clean looking, fairly basic DIY stand... well, you're going to save yourself a tremendous amount of money :p
 
OP
OP
N

NineAndAhalf

Community Member
View Badges
Joined
May 14, 2017
Messages
95
Reaction score
24
Rating - 0%
0   0   0
You may not realize this, but by deciding that 'exactly what you want' is a standard 75g glass tank and a nice, clean looking, fairly basic DIY stand... well, you're going to save yourself a tremendous amount of money :p
Oh absolutely. Obviously it's not my dream tank but how many people, honestly, get to build their actual dream tank? Lol
 
OP
OP
N

NineAndAhalf

Community Member
View Badges
Joined
May 14, 2017
Messages
95
Reaction score
24
Rating - 0%
0   0   0
Just a little update:

My power strips came in the mail today so I can get those cut out and mounted. Here's some photos of a rough idea how they are going to go. I counted 12 sockets are going to be used for all equiptment (with some being split to the same plug). I ordered 2 bars so I would have 16 sockets total for future use (possibly a plumbed in frag tank next to the display).

610517-9e76625377df82feb48d64d47695ca62.jpg


610518-587de41bcdd5dccbcdc6241ac16eb214.jpg


Also I took my external overflow outside to the shed after curing for about a week inside. It is 30"x3.5"x5". Originally I was going to use it as an internal overflow and let the coralline take over to cover it. The more I thought about it the more I did not want to wait 9-12 months before my plumbing was hidden and not and ugly intrusive mess. My solution was to order 1/4" black acrylic and make a "false wall" with a built in overflow. What this means is, the acrylic will be cut to the back wall dimensions and I will build an internal overflow that is cemented to it. Then there will be 3-4 bulkheads going from the acrylic internal overflow to the glass external overflow. Everything will be hidden and seamless. This also allows for a much smaller footprint inside the tank (probably 30x1.5x5ish). Extra gaskets will be used between the acrylic and glass just like you would use on a store bought overflow to prevent leaks. Anyway, here's the (now) external overflow:

610519-a725c267a457a7787052afd47a1c7382.jpg


610522-260928d38f85afa3f057a4c67257cf5b.jpg


I also contacted the local glass company today and placed an order of glass. I order all of the baffles for my sump as well as a small piece for the drain section to house bulkheads to keep the drain lines in place. They also special ordered 3/8" glass for me since they don't keep that in stock, so that I can remove the ugly black tank trim and euro brace it. I feel like euro bracing looks so much cleaner and It's honestly the only way my internal overflow/back wall plan is going to work. There's no way I can get the back wall in place unless the center support is not there.


I hope this update is enough to please everyone, cheers!

20180129_162058.jpg


20180129_162117.jpg


20180129_190208.jpg


20180129_190225.jpg
 
Last edited:

Greybeard

2500 Club Member
View Badges
Joined
Feb 10, 2017
Messages
3,233
Reaction score
8,669
Location
Buffalo, MO
Rating - 0%
0   0   0
I used the same power strips on my old 60g cube. After I sold that tank off last summer, I gave the power strips to a friend, who is still using them. They held up very well.

Enjoy :)
 
OP
OP
N

NineAndAhalf

Community Member
View Badges
Joined
May 14, 2017
Messages
95
Reaction score
24
Rating - 0%
0   0   0
I used the same power strips on my old 60g cube. After I sold that tank off last summer, I gave the power strips to a friend, who is still using them. They held up very well.

Enjoy :)

That's very good to hear. I was kind of taking a shot in the dark with them because I've never seen them being used before for this application.
 
OP
OP
N

NineAndAhalf

Community Member
View Badges
Joined
May 14, 2017
Messages
95
Reaction score
24
Rating - 0%
0   0   0
Quick update:

I picked up the glass sump baffles today so tomorrow I will hopefully get the sump complete so it can start curing. Also my order from BRS came in that includes bulkheads, loc-line return nozzles and an ro/di replacement filter kit so it's here when mine is depleted. Tomorrow I will update with photos of the sump complete as well as the beginning of the doors being glued together. Going to be a busy day.

Everyone loves photos so here you go.


(for anyone interested in what Kom Kitchen means, I order under a business account to get a slight discount and rushed work. Probably not politically correct to do that but why not I guess.)


20180202_201406.jpg


20180202_201434.jpg
 
OP
OP
N

NineAndAhalf

Community Member
View Badges
Joined
May 14, 2017
Messages
95
Reaction score
24
Rating - 0%
0   0   0
Quick question for anyone watching this thread.. I have 3/8" glass on order but having it cut to 2.5" is going to prove to be very difficult. The potential of wasting the piece of glass trying to get just 2 pieces is pretty high. There are places that have told me no question they can cut to size but they also want $55-$75 per piece. My place I order from wants $30 for a piece of glass that is big enough to 'try' to cut 6 pieces out of. This leaves them with extra material in case it breaks.

My question is, if they can't cut the glass and the whole piece gets broken, should I order from a place that will absolutely provide me with pieces to euro brace or just cut my loses and leave the black trim? Either way won't hurt my feelings, i'm just trying to see what everyones thoughts are.
 
OP
OP
N

NineAndAhalf

Community Member
View Badges
Joined
May 14, 2017
Messages
95
Reaction score
24
Rating - 0%
0   0   0
Another little bit of an update.. I spent the day in the shed making all of the doors for the stand. It's 4 doors total since I have the 2 side storage cabinets. I'm not a carpenter so I had my dad come lend his $.02 here and there. Everything went smooth and he will be taking them to work with him (he works as a salesman at a wood shop) and have one of their cabinet builders drill them for euro hinges. I'll also probably have them route the outside rim of the door to a 1/4" radius to knock the sharp edge off. Once they're back i'll be filling everything with putty and sanding. Hopefully the stand will be ready for paint by next weekend. After that's done I can bring the tank and stand inside and set it where it's going so I can begin plumbing.

Tomorrow the sump will be brought inside to warm up a bit before I begin siliconing in the baffles. I was using it as a work bench for building the doors earlier or I would be working on it right now lol.


613944-3094785137f3979df71b4c0b8642f156.jpg


Here's all of the pieces to make the frames of the doors. I used 1x4 poplar (3/4x3 1/2 finished size). I used a dado blade on the table saw to cut grooves for the center panel to fit into as well as have the frame kind of lock together.

613943-399067fdf90a99cf851aeb03ca1534b9.jpg


Glued and clamped. Glue bottle said 20-30 minutes with clamps but I let them sit for 45-60 minutes before taking clamps off. It was about 25 degrees F here today so I wanted to make sure the glue grabbed good.

613947-ebf9fee9c91e80c7c0498e591737acc6.jpg


Here's a rough idea of how the doors are going to look. The euro hinges I will be using require 1 3/8" overlay, that's why the doors look so wide. I will also be overlapping the front doors so that light doesn't shine through at night from the fuge light.

613948-85338e78e6a60f9b89c0795898db7458.jpg


Little bonus shot. I'll be taking the 3/4" x 1/2" trim angle and adding it to the top to kind of hide the tank trim completely. Only problem is if the tank ever needs to come off the stand it will need to be slid out the back.


That's all I have for today. Tomorrow I will be tackling the sump so i'll update then.
 

Reefing threads: Do you wear gear from reef brands?

  • I wear reef gear everywhere.

    Votes: 7 17.5%
  • I wear reef gear primarily at fish events and my LFS.

    Votes: 2 5.0%
  • I wear reef gear primarily for water changes and tank maintenance.

    Votes: 0 0.0%
  • I wear reef gear primarily to relax where I live.

    Votes: 5 12.5%
  • I don’t wear gear from reef brands.

    Votes: 24 60.0%
  • Other.

    Votes: 2 5.0%
Back
Top