Oceanic 160 Restoration

SnowyFox

Community Member
View Badges
Joined
Dec 9, 2023
Messages
36
Reaction score
93
Location
Boulder
Rating - 0%
0   0   0
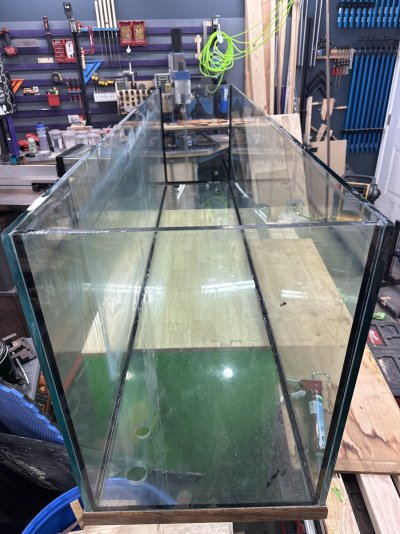
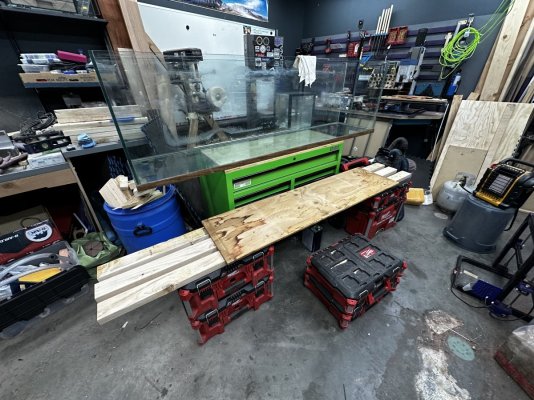
I picked up a used Oceanic 160 gallon tank my LFS wasn't using anymore for pretty cheap ($200). Its 84" x 18" x 24" with 1/2" thick glass on the sides, and 3/4" thick on the bottom. It came with a pair of corner overflows and a black acrylic panel that was attached to the glass between the overflows.

IMG_4087.jpeg


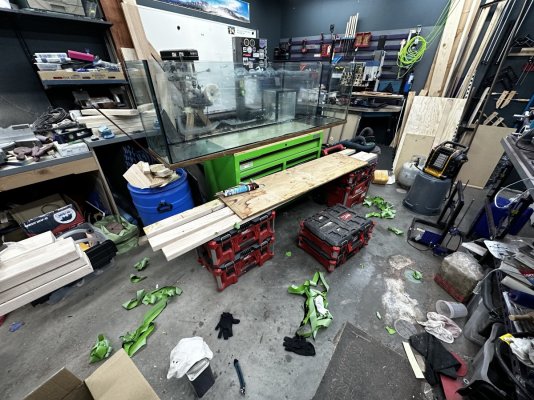
The tank has turned into quite the restoration project. The silicone between the glass panels looked like it was it really good shape, but the bead inside the tank was looked pretty worn and thin in spots. Water had found its way behind the black acrylic panel, and left a lot of salt and green gunk behind. Didn't realize how bad that was until after I had agreed to buy it, and we were in the middle of moving it.

IMG_4093.jpeg


After a lot of work, I was able to remove the black panel from the tank, and clean out all of the gunk that had built up behind it. Not sure if it came from the factory with that panel installed or not, but it appears to have been siliconed in place at the same time as the corner overflows were installed, as there was no seam left on the edge of the overflows after I got the panel out. One of the corner overflows also had some broken teeth on it, so I ended up just removing both of them. Still trying to decide what to replace them with.

The back glass panel is in pretty rough shape right now. It has some noticeable etching in it, especially right next to where the silicone was that held the acrylic panel in place. I've tried vinegar and bar keepers friend to try to clean the glass as best I can, but it still looks like it has a lot of whitish / grey build up on it. I was originally planning on painting the back of the glass black, but I'm concerned about how noticeable the etching / buildup will be. I'm considering getting a new acrylic panel cut to put in like it was originally, to hide the glass itself.

IMG_4152.jpeg


The tank is drilled with holes for a 1" and 3/4" line in each corner. I keep going back and forth on just plugging those holes, and drilling the back of the tank for an external overflow, or to just reuse those holes for an internal overflow. This might be a crazy / stupid idea, but if I am already going to put a big acrylic panel back in to cover the back wall of the tank, I could build new corner overflows that are connected together with that back panel, to create an internal coast to coast style overflow. It would be similar to how the overflows work on the Innovative Marine INT tanks, but with the pipes in the corners instead of the middle. Does this seem like a good or bad idea?

Over the weekend, I just finished removing all of the remaining silicone inside the tank to reseal it. The seams themselves still look like they are in really great shape. I also took the time to carefully remove the top trim from the tank to reseal it.

After I got the trim off, I was able to see the seams on the massive center brace in the tank for the first time. They did not look very good. The brace is 23" wide x 1/2" thick, and takes up a lot of space. I can see lots of air gaps in the silicone across the entire length of the brace on one side, and the other side has a 5" section that also has some air gaps in it. I'm definitely concerned that the brace is on its way towards coming loose. I could cut the seams on it, clean it really well, and then reinstall it with some fresh silicone. Also wondering if it might be nicer to replace the single brace with a pair of braces instead.

IMG_4169.jpeg


The trim also appears to be made from 4 separate pieces that were glued together (Looks like fake wood on the outside). Don't really see how this trim is providing much of any support at all. Given that all of the glass walls are 1/2" thick to begin with, would it be a crazy idea to just leave the trim off to convert it to be a rimless tank instead? Or maybe euro-braced?

IMG_4168.jpeg


I'd really appreciate any advice / feedback on this project.
 
Last edited:
OP
OP
SnowyFox

SnowyFox

Community Member
View Badges
Joined
Dec 9, 2023
Messages
36
Reaction score
93
Location
Boulder
Rating - 0%
0   0   0
This is the design of the integrated coast to coast corner overflows and back panel idea I was thinking about. If I went this route, I'm not sure how much space I should leave between the back glass and the panel. The trade off between maximizing usable space inside the aquarium, and room to access inside that overflow space for cleaning / maintenance down the road. I was thinking of leaving the overflow toothless. The length of the weir would be a smidge over 7', so I think the water height going over it would be around 1/4" at 2000GPH. I'd likely make some type of lids or screens to sit about a 1/2" above it to try to keep creatures from jumping into it. I'd use the (2) 1" bulkheads for the primary / secondary drains, and the (2) 3/4" bulkheads as an emergencies for a bean animal setup. The returns would just run up and over the back of the tank.

Screen Shot 2023-12-11 at 13.42.40.png
Screen Shot 2023-12-11 at 13.42.54.png
Screen Shot 2023-12-11 at 13.43.05.png
 
Last edited:

Reign1

Active Member
View Badges
Joined
Dec 12, 2022
Messages
421
Reaction score
486
Location
US
Rating - 0%
0   0   0
Nice work. This thread is a testament of the quality of tank Oceanic used to build. I remember selling those older nature view tanks and they were WAY heavier than other brands due to thickness of glass used.
 
OP
OP
SnowyFox

SnowyFox

Community Member
View Badges
Joined
Dec 9, 2023
Messages
36
Reaction score
93
Location
Boulder
Rating - 0%
0   0   0
Nice work. This thread is a testament of the quality of tank Oceanic used to build. I remember selling those older nature view tanks and they were WAY heavier than other brands due to thickness of glass used.
You aren’t kidding about the weight! I was shocked by how heavy it was. I couldn’t even lift up one end of it without using some of those suction cup handles my LFS let me use.

Also found a date stamped on the inside of the top trim when I removed it. Oct 16, 1991
 

Ironwill723

Well-Known Member
View Badges
Joined
Apr 25, 2009
Messages
508
Reaction score
249
Rating - 100%
1   0   0
I like your idea for the single piece of acrylic along the back side but I would just silicone it onto the back glass as the other piece was. No point in losing real estate in the tank for a narrow gap along the back side. The top trim was probably cosmetic if it was glued on in multiple pieces. You could beef up the top with strips of 1/2" glass to make a eurobrace or simply repair the bracing that came with the tank.
 

jsker

Reefing is all about the adventure
View Badges
Joined
Apr 11, 2015
Messages
24,974
Reaction score
79,738
Location
Saint Louis
Rating - 0%
0   0   0
Nothing like an old Oceanic tank. Oceanic was all that I would use in the past.

I would suggest to use this sealant for your system. Link
 
OP
OP
SnowyFox

SnowyFox

Community Member
View Badges
Joined
Dec 9, 2023
Messages
36
Reaction score
93
Location
Boulder
Rating - 0%
0   0   0
I would suggest to use this sealant for your system. Link

That is the exact silicone I purchased already, and am about to grab a second tube to make sure I have enough to seal everything. I think 1 tube would be enough, but running out and needing to remove everything to start over sounds really painful
 

TX_REEF

Kessil Fanboy
View Badges
Joined
Mar 12, 2023
Messages
2,058
Reaction score
2,502
Location
Texas
Rating - 0%
0   0   0
Based on all the video reviews and written reviews of various tanks I've consumed over the past year, and if you're putting in the restoration effort anyway, eurobrace would be an awesome way to go. You get the added support without the "ugly" trim, you can use the ledge to place items while doing maintenance, helps stop jumpers from jumping. Good luck with the process, following along!
 

jsker

Reefing is all about the adventure
View Badges
Joined
Apr 11, 2015
Messages
24,974
Reaction score
79,738
Location
Saint Louis
Rating - 0%
0   0   0
That is the exact silicone I purchased already, and am about to grab a second tube to make sure I have enough to seal everything. I think 1 tube would be enough, but running out and needing to remove everything to start over sounds really painful
I would also suggest blue taping the seams for a clean seam.

Tape and remove the tape as soon as you finish smoothing in the silicone. When the silicone dries the tape will leave pieces under the seam. This will be frustrating to cut out the blue tape.:)
 
OP
OP
SnowyFox

SnowyFox

Community Member
View Badges
Joined
Dec 9, 2023
Messages
36
Reaction score
93
Location
Boulder
Rating - 0%
0   0   0
I would also suggest blue taping the seams for a clean seam.

Tape and remove the tape as soon as you finish smoothing in the silicone. When the silicone dries the tape will leave pieces under the seam. This will be frustrating to cut out the blue tape.:)

I think we are on the same page with that. I still need to wipe everything down well with acetone, to finish removing any traces of silicone left on the glass. Was also thinking of using some 400 or 600 grit sandpaper to rough up the glass where the silicone will be applied to give it some extra tooth to stick to. I am still a bit unsure on when the best time to attach the acrylic for the overflows / black panel will be. Options are same time I do the reseal, or separately after the reseal has fully or partially cured first.
 

jsker

Reefing is all about the adventure
View Badges
Joined
Apr 11, 2015
Messages
24,974
Reaction score
79,738
Location
Saint Louis
Rating - 0%
0   0   0
Was also thinking of using some 400 or 600 grit sandpaper
I would suggest wet sanding with 1000 grit with the glass taped. Good idea.
Options are same time I do the reseal, or separately after the reseal has fully or partially cured first.
If you are not in a rush, time is your friend. seal up the tank first, let the tank cure for a week, then come back and add the overflow.
 
OP
OP
SnowyFox

SnowyFox

Community Member
View Badges
Joined
Dec 9, 2023
Messages
36
Reaction score
93
Location
Boulder
Rating - 0%
0   0   0
If you are not in a rush, time is your friend. seal up the tank first, let the tank cure for a week, then come back and add the overflow.

That is the direction I’m leaning towards. Seems like if I ever need to remove the overflows or back panel later on, I may not have to also reseal the whole tank again after removing those things.

I am planning to get the resealing done this weekend so it can sit for over a week to fully cure
 
Last edited by a moderator:
OP
OP
SnowyFox

SnowyFox

Community Member
View Badges
Joined
Dec 9, 2023
Messages
36
Reaction score
93
Location
Boulder
Rating - 0%
0   0   0
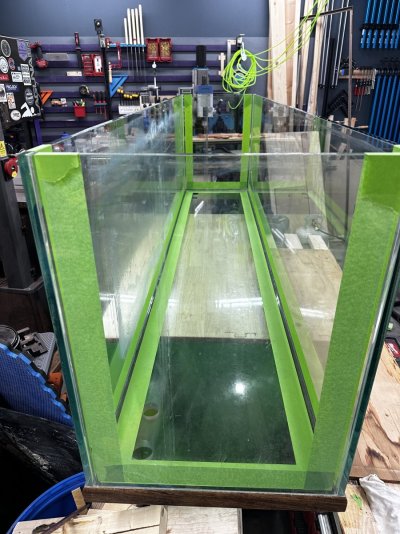
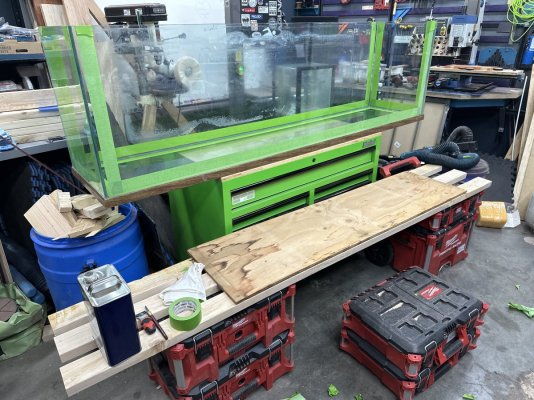
Well I’m exhausted now and have silicone covered tape carnage everywhere in my workshop, but the tank is now resealed… ‍

Now while that cures over the next 7-10 days… I can work on my brand new aquarium that I picked up last week.

All I can say is you all have been a very bad influence on me. This place, along with my local fish store, have completely seduced me over to the salty side of the aquarium hobby.
 

Attachments

  • IMG_4596.jpeg
    IMG_4596.jpeg
    229.6 KB · Views: 26
  • IMG_4595.jpeg
    IMG_4595.jpeg
    300.1 KB · Views: 28
  • IMG_4593.jpeg
    IMG_4593.jpeg
    238.8 KB · Views: 23
  • IMG_4594.jpeg
    IMG_4594.jpeg
    283.1 KB · Views: 21
  • IMG_4592.jpeg
    IMG_4592.jpeg
    271.1 KB · Views: 21
OP
OP
SnowyFox

SnowyFox

Community Member
View Badges
Joined
Dec 9, 2023
Messages
36
Reaction score
93
Location
Boulder
Rating - 0%
0   0   0
Not sure if I should start a new build thread or just keep everything here for the new tank I just got.

I was bitten by the reef keeping bug after I kept visiting my LFS. I was going to try to use a 40 breeder to start up a reef tank after I get the big tank finished, but the 40 breeder I’ve been keeping all of my cichlids in since my 125 split its seams, was scaring me a bit. The amount of bowing present in that tank just makes me really uncomfortable, despite Aqueon saying it’s completely normal and expected.

While browsing a different fish store a week ago that is a bit farther away from where I live at, I came across a UNS 90U aquarium (68 gallons, 36x22x22) that they had for sale. Fell in love with the dimensions, and decided to take it home with me to use for starting up my first ever salt water aquarium.

IMG_4512.jpeg


I drilled it this morning, first time ever drilling an aquarium . Other than not being able to drill holes in glass straight, it went really well. I am going to use the 2000GPH Fiji Cube overflow I had on it, and I am planning on setting it up as a peninsula aquarium.

IMG_4574.jpeg

IMG_4576.jpeg


Really happy with this overflow. I need to drill a couple holes in the bottom of the external overflow box to allow me to install a couple 3/4” bulkheads for the sump return. Also planning on painting that pane of glass black too sometime soon. Was going to do it tonight but ran out of time.

IMG_4577.jpeg

IMG_4578.jpeg


Haven’t figured out what size of sump I’m going to pair with it yet. I am going to put a ReefMat 500 in the sump, along with a refugium. I’ve also got a ReefLed 90 light to mount on the display tank as well
 
OP
OP
SnowyFox

SnowyFox

Community Member
View Badges
Joined
Dec 9, 2023
Messages
36
Reaction score
93
Location
Boulder
Rating - 0%
0   0   0
While I work on getting the new tank ready, I went ahead and put a couple bags of Arag-alive reef sand in an empty 20 gallon tank I had laying around to start the cycling process. I picked up a couple of flat dry rocks and a live rock from my LFS today, which will hopefully help to seed the biome. The live rock has some coralline algae on it. Only extra light I had laying around was one of the 6 footers I had on the 125, so now it is being used to light a 2 foot long tank lol

image.jpg
image.jpg


Really excited to get this cycled so I can start adding some fish and eventually some corals as well
 
OP
OP
SnowyFox

SnowyFox

Community Member
View Badges
Joined
Dec 9, 2023
Messages
36
Reaction score
93
Location
Boulder
Rating - 0%
0   0   0
IMG_4606.jpeg


Water finally cleared up on the small 20 gallon tank I’ve got all of the sand rocks in. I added 1ml of 10% ammonium hydroxide to it to start a fishless cycle while I work on getting the new tank setup.

I painted the side of the new tank that I drilled black last night. Going to let it cure for another day or two before attaching the overflow to it.

IMG_4604.jpeg


Would definitely not recommend painting a tank indoors when it’s -5° F outside making it hard to open any windows for ventilation :grinning-face-with-sweat:
 
OP
OP
SnowyFox

SnowyFox

Community Member
View Badges
Joined
Dec 9, 2023
Messages
36
Reaction score
93
Location
Boulder
Rating - 0%
0   0   0
I've been working on designing a stand for the UNS 90U. Its more or less a standard 2x4 stand, with some extra trim added. Haven't figured out what to do for doors, but was thinking maybe just cutting some 1/4" paneling to size, and have it attached magnetically, so I can pop off the panels anytime I need access it to.

Had a hard time figuring out what to do for a sump on this build. A standard 20 long tank is what I'm currently leaning towards using, and is what I've got roughed out in the design.

Screen Shot 2024-01-18 at 21.43.05.png
 
OP
OP
SnowyFox

SnowyFox

Community Member
View Badges
Joined
Dec 9, 2023
Messages
36
Reaction score
93
Location
Boulder
Rating - 0%
0   0   0
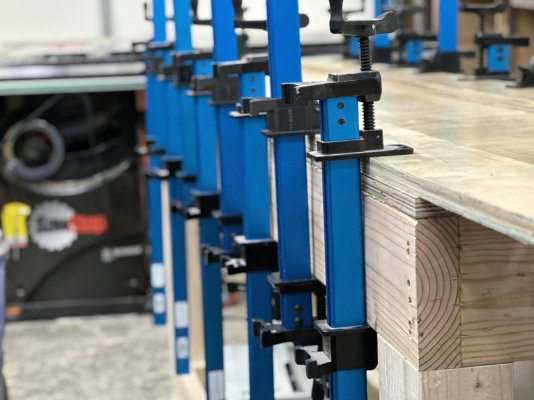
So many set backs on this project. Seems like every step forward comes with 2 steps back. The frame I built for the 160 using 2x6s and 2x4s had a critical flaw in it. One of the long 2x6s was taller than the other, and it was throwing the stand out of alignment. Had to take part of it apart, mill all the 2x6s down slightly so they were all the same height, and then reassemble. I got a plywood top deck cut out for the aquarium to sit on, glued it down, and then watched the panel completely come off after the glue had dried. Turns out the plywood I got had a UV coating on it, which prevented the glue from bonding to it. Just finished sanding that coating and the old glue off, and got it all glued up again.

IMG_4826.jpeg


You can NEVER have too many clamps… used every single one I had to glue the panel down
 

Attachments

  • IMG_4826.jpeg
    IMG_4826.jpeg
    143 KB · Views: 16

Gregg @ ADP

Valuable Member
View Badges
Joined
Sep 20, 2018
Messages
1,208
Reaction score
2,997
Location
Chicago
Rating - 0%
0   0   0
Nice work. This thread is a testament of the quality of tank Oceanic used to build. I remember selling those older nature view tanks and they were WAY heavier than other brands due to thickness of glass used.
I once ended up with an Oceanic 150-ish that was really scratched up and I didn’t have much use for.

I put it in the dumpster at our shop, but it was taking up so much space that I decided I needed to smash it up.

Armed with a 16oz hammer and safety goggles, I went out to make quick work of the tank. I hurled the hammer as hard as I could directly at the center of the front panel, and it just bounced off and landed at my feet :face-with-tears-of-joy:

It did scratch the glass a little, though.
 

Reefing threads: Do you wear gear from reef brands?

  • I wear reef gear everywhere.

    Votes: 32 16.2%
  • I wear reef gear primarily at fish events and my LFS.

    Votes: 11 5.6%
  • I wear reef gear primarily for water changes and tank maintenance.

    Votes: 1 0.5%
  • I wear reef gear primarily to relax where I live.

    Votes: 25 12.6%
  • I don’t wear gear from reef brands.

    Votes: 116 58.6%
  • Other.

    Votes: 13 6.6%
Back
Top