Pico Reef (I had to agree to more cats)

minorhero

Active Member
View Badges
Joined
Dec 12, 2021
Messages
191
Reaction score
297
Location
Maryland
Rating - 0%
0   0   0
Hello folks!

Those of us with spouses that don't share our hobby know the struggle of getting more tanks. I am certainly no exception. I have 4 freshwater display tanks and each one was it's own unique negotiation with The Wife. I keep them all at a pretty high level which is the only reason she agrees to so many.

I previously tried Saltwater and it failed fantastically. Admittedly, I was doing a lot of weird stuff.

I have been wanting to try again recently and this time try corals as well. So the negotiations with The Wife were an absolutely necessary first step. After weeks of causally mentioning the topic, we got down to really discussing it and in the end, it was agreed that in exchange for a saltwater tank up to 10 gallons, she would at some future point, after our existing cats pass away, get to have two Siberian kittens. I had previously been dead set against more long haired cats. The things we do for love and aquariums :p

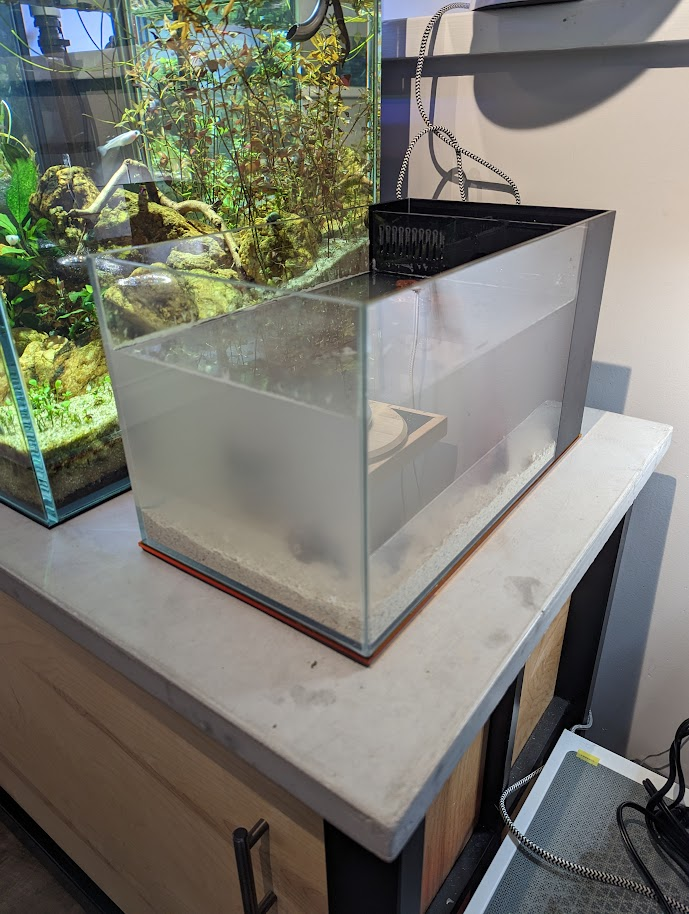
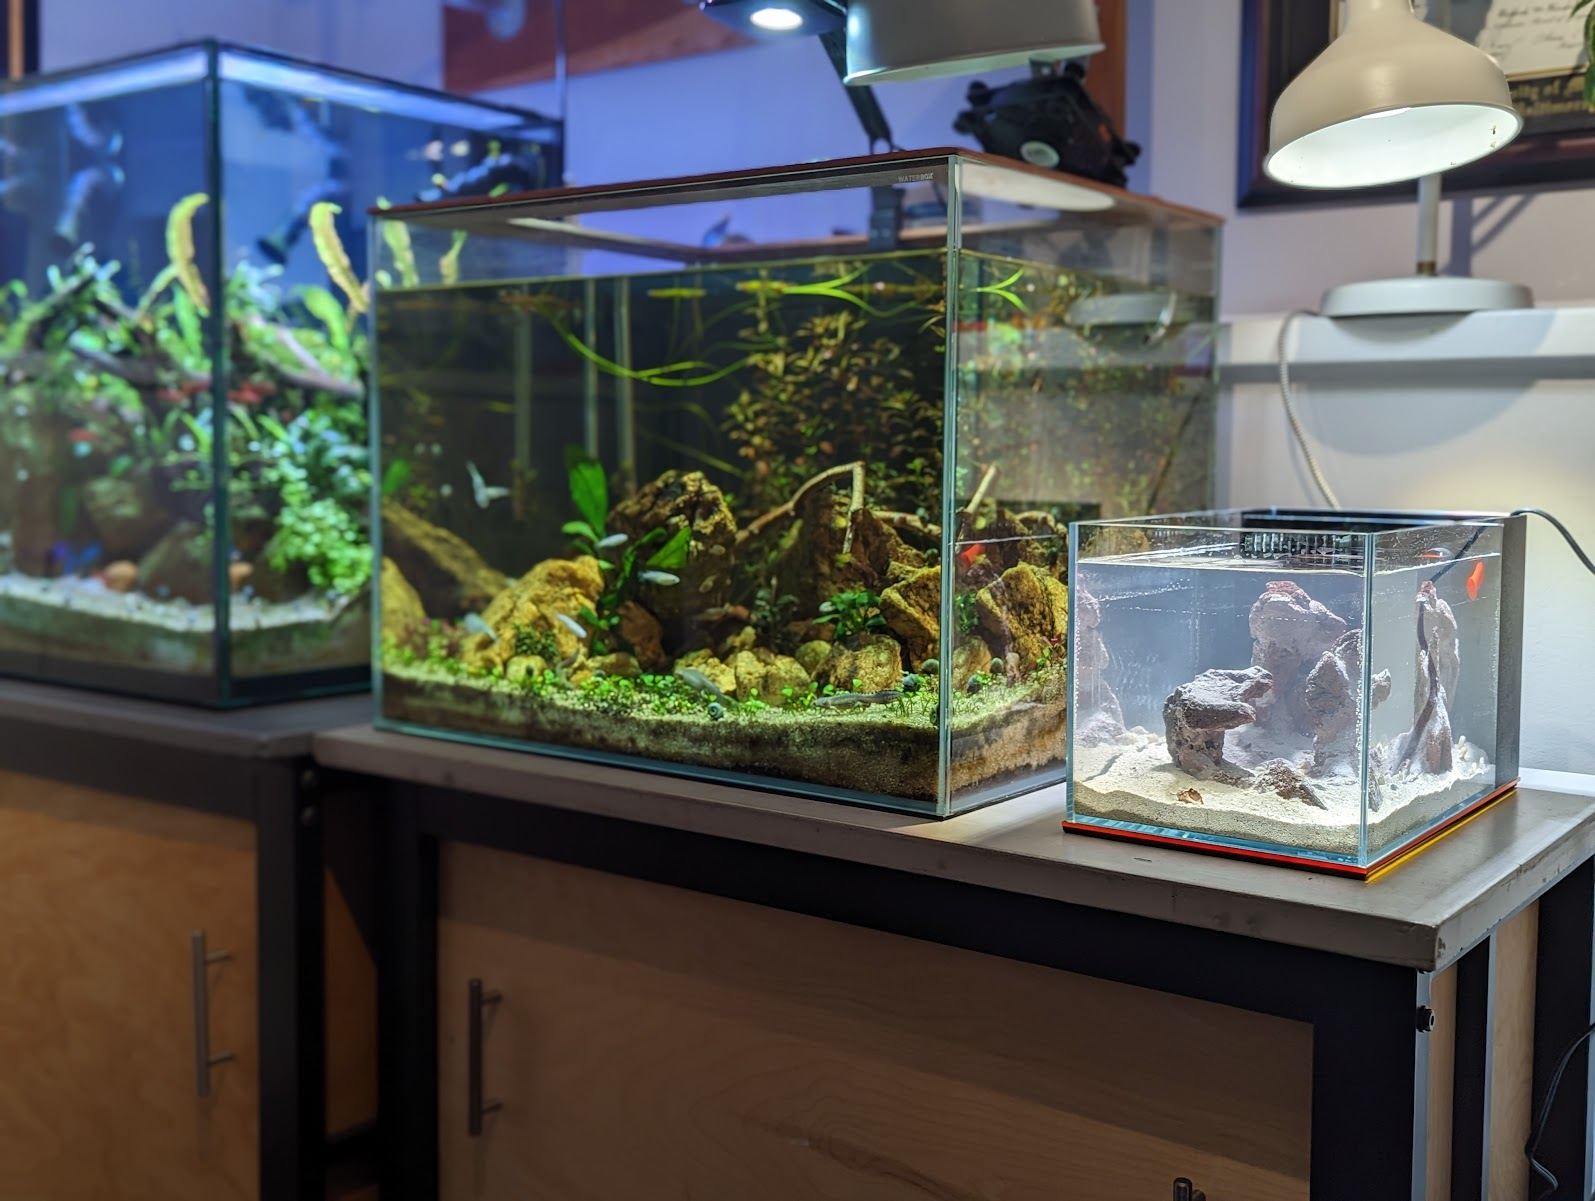
That brings me to the start of this new journey. While I have authorization for a 10 gallon tank, I am going to start a lot smaller. The reason being, that I really like doing big water changes for my tanks and I find that a lot more appealing when the tank can be refilled by a single jug. Plus, if this tank fails as spectacularly as the last one, the cost of things are a lot easier to deal with.

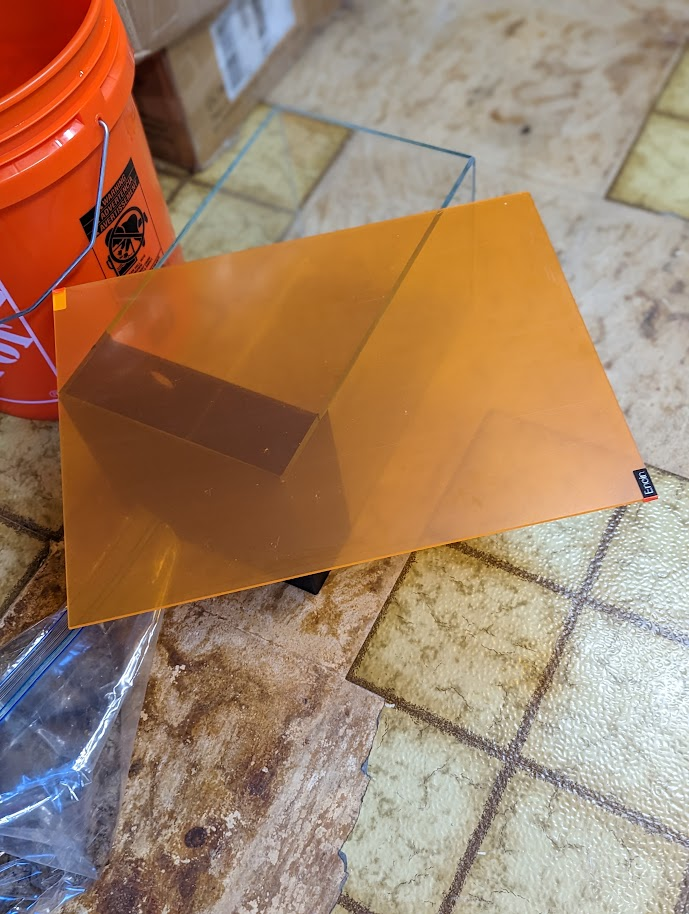
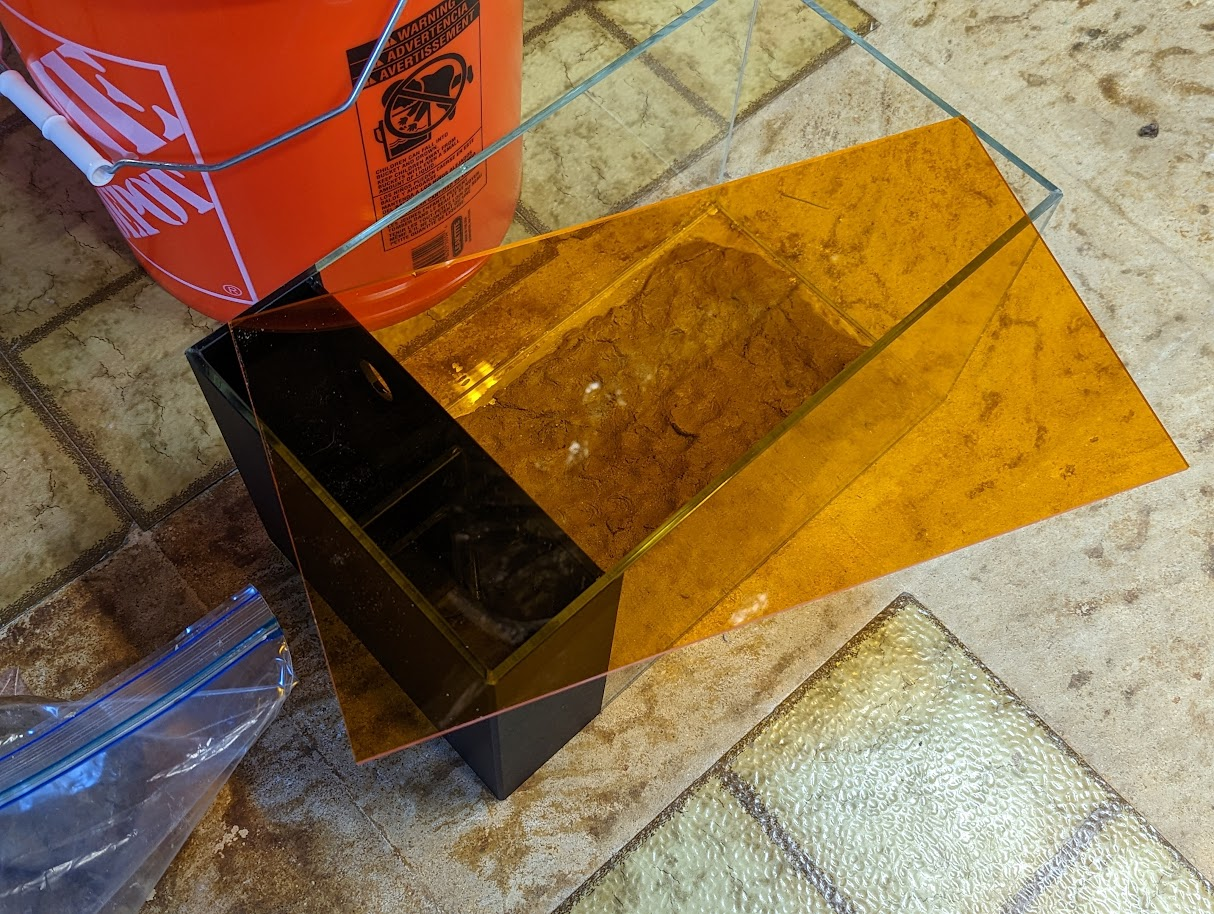
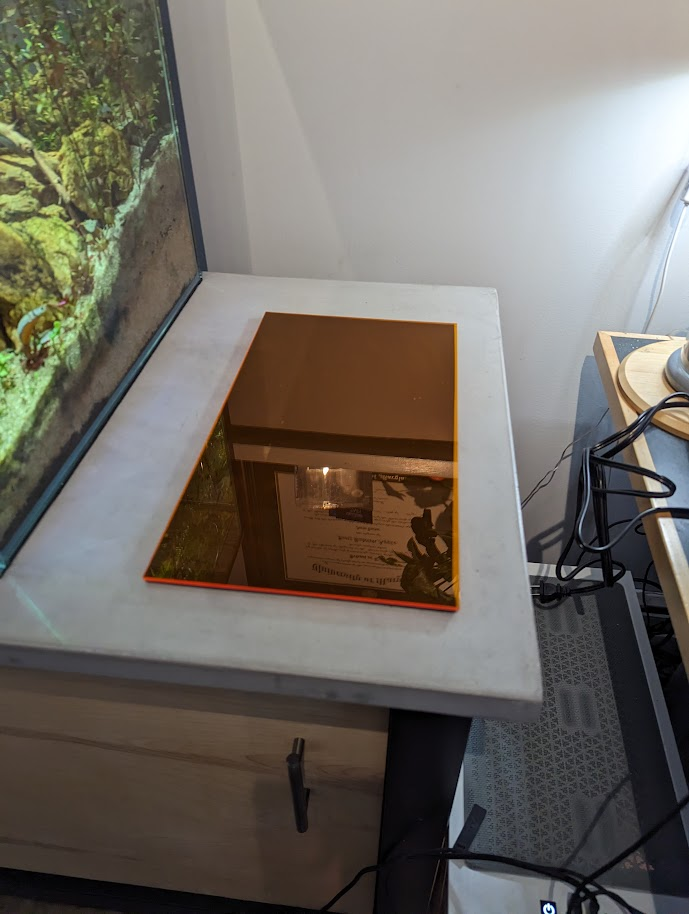
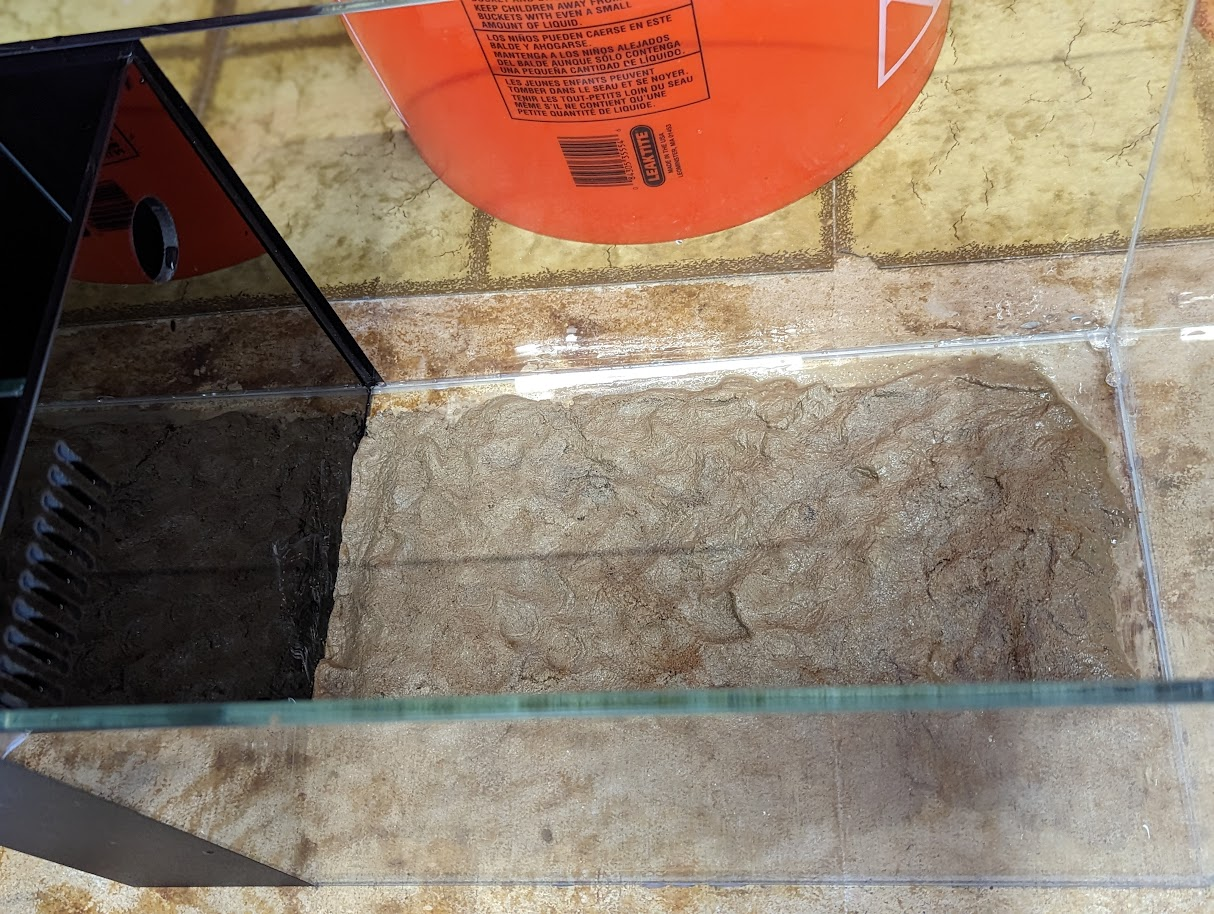
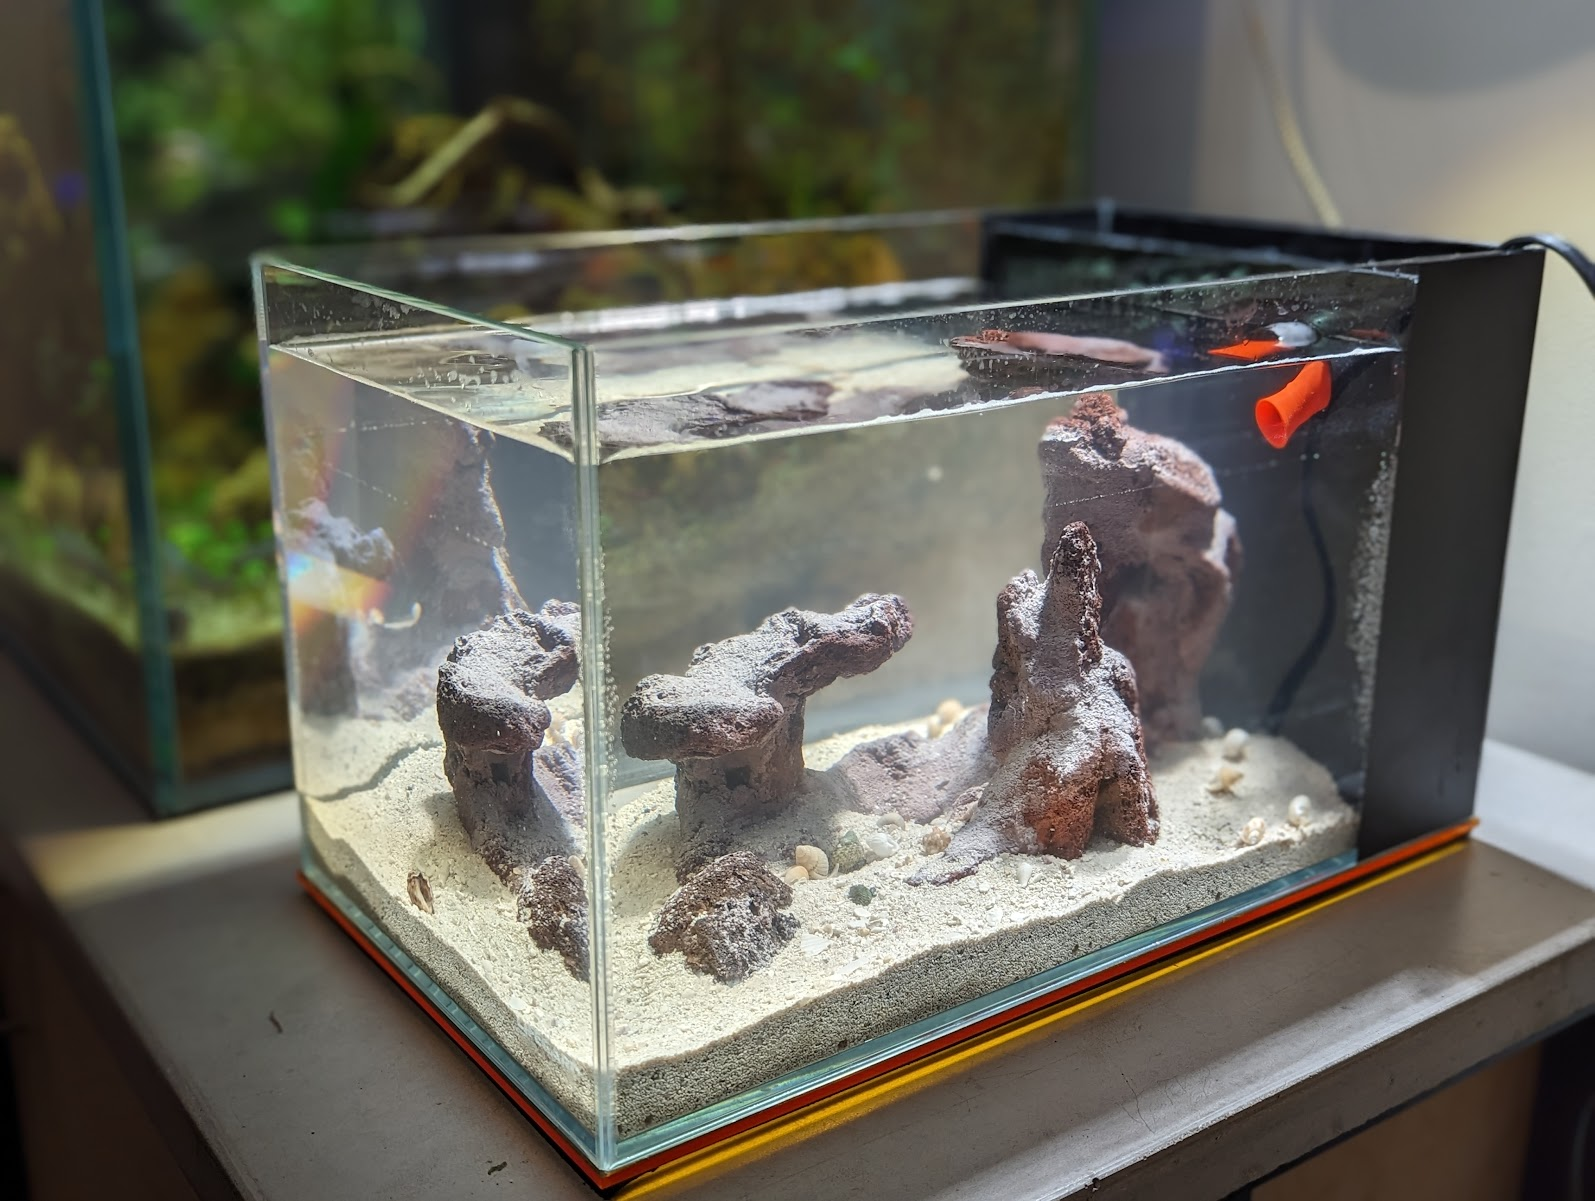
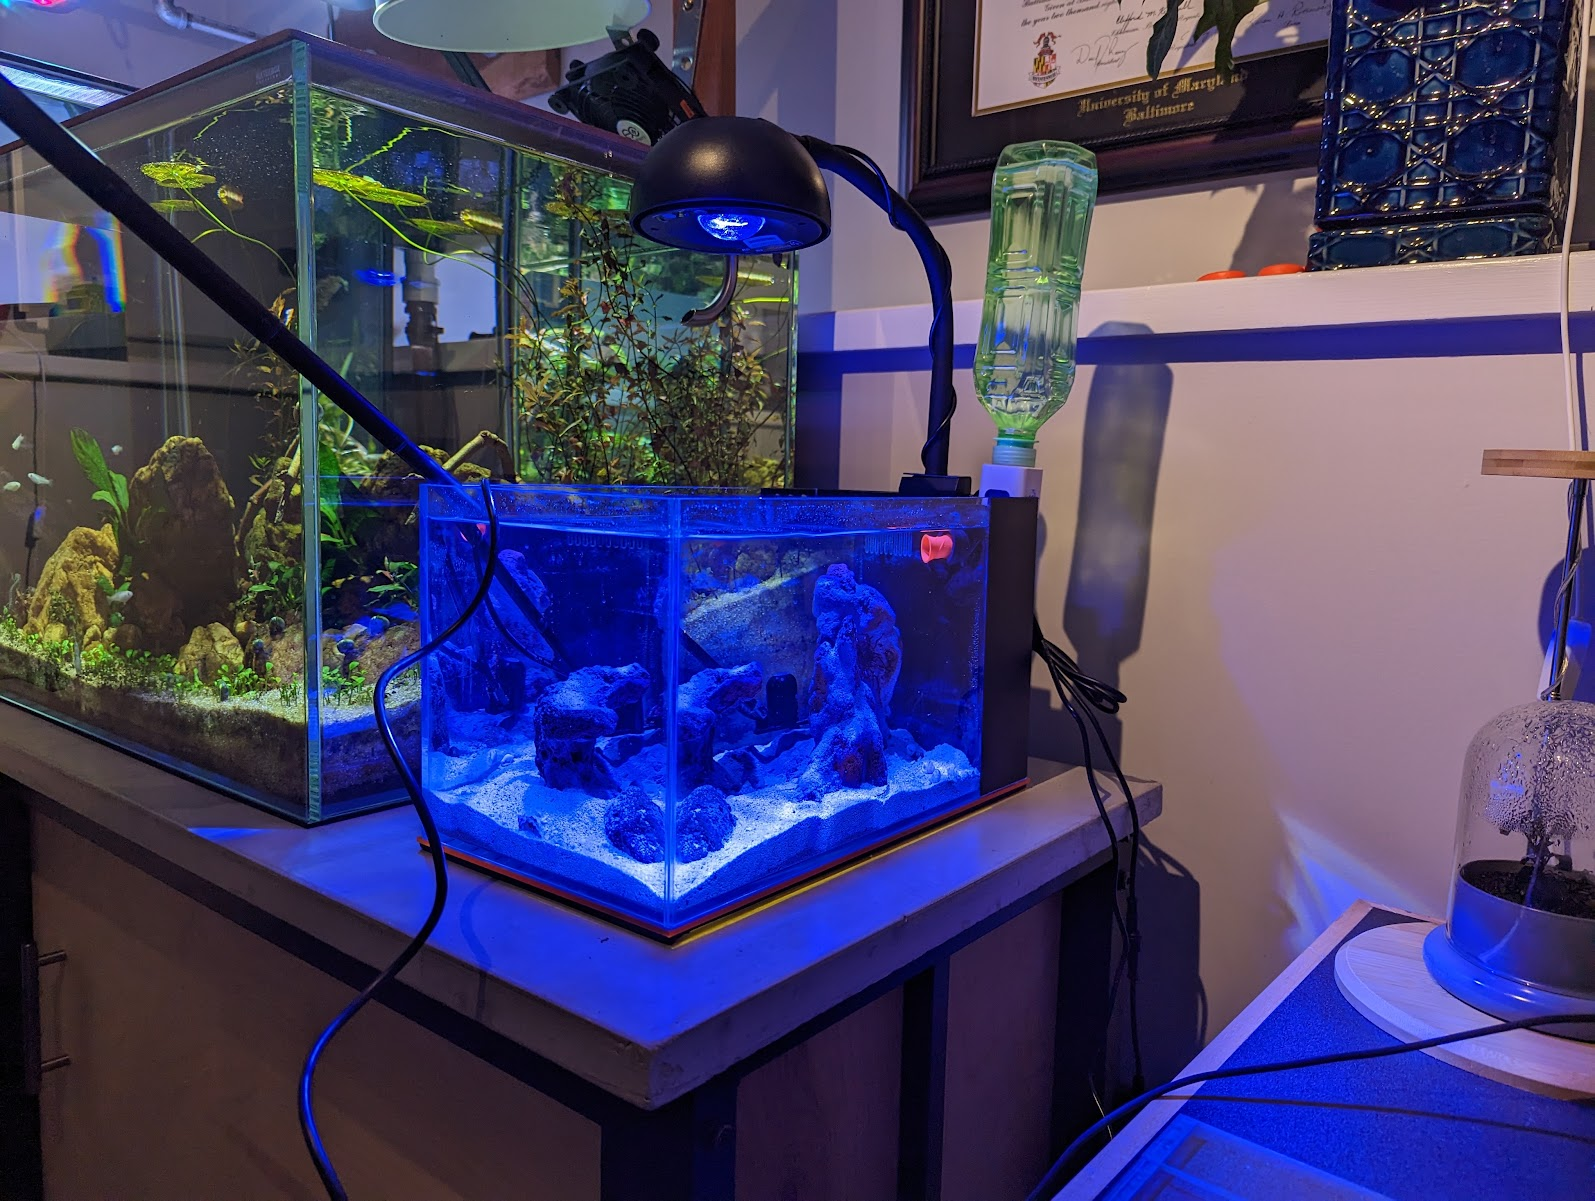
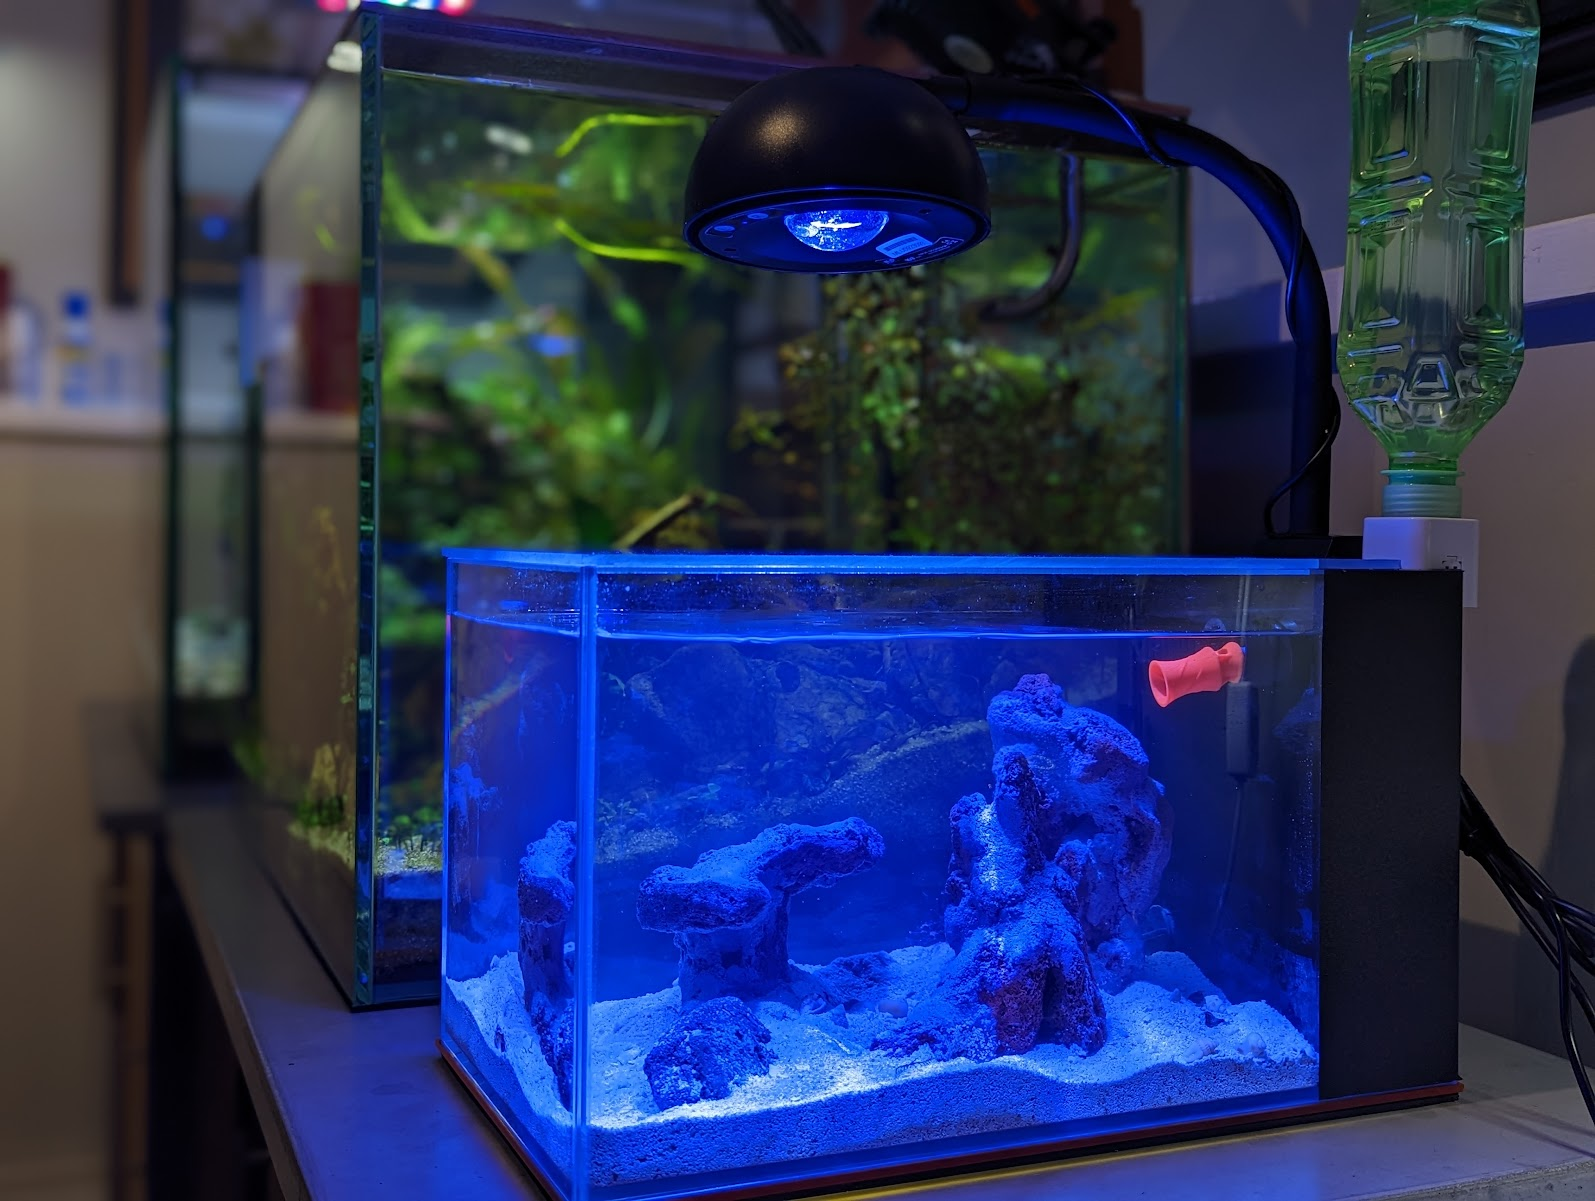
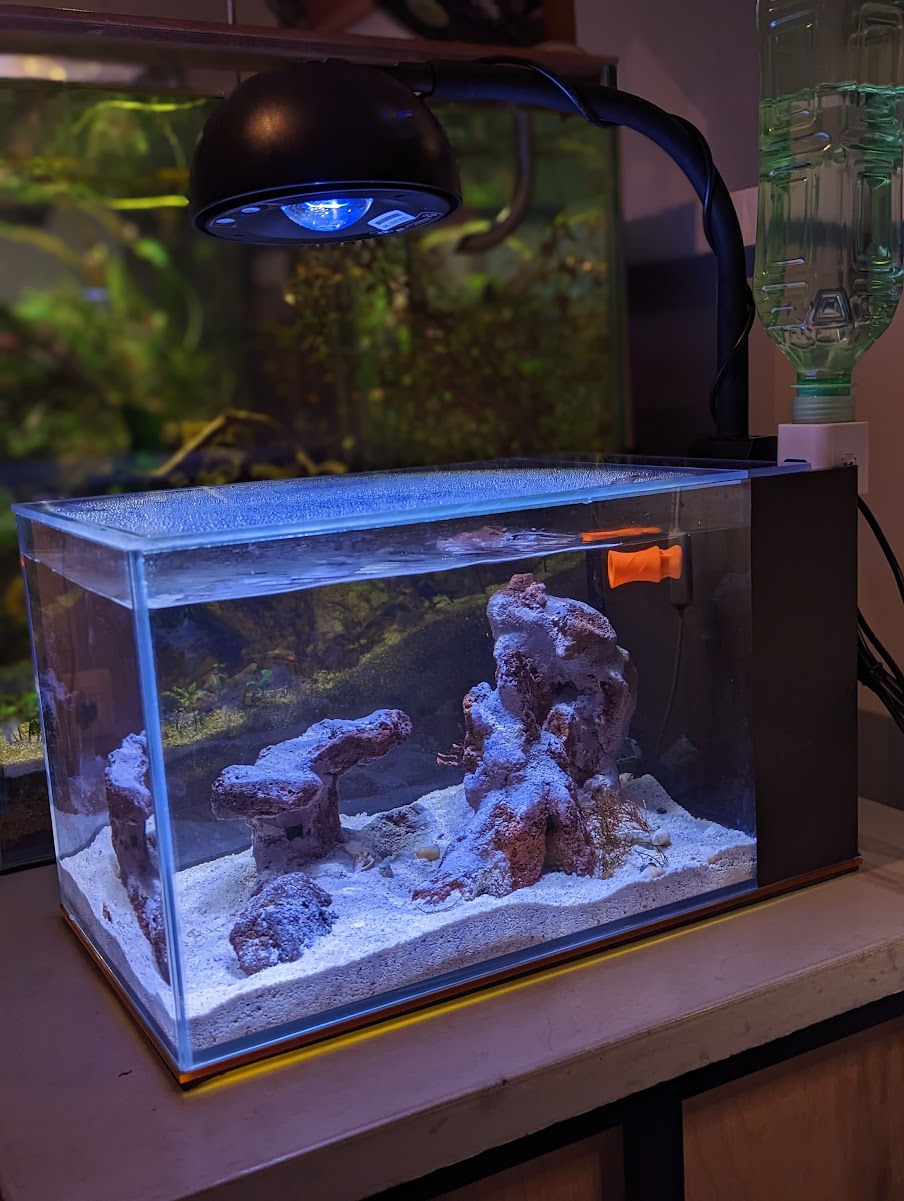
After much consideration, I decided on a Lifeguard Aquatics 3.8 gallon tank.

My plan for this tank is an invert only system with easy to keep corals that get along in close quarters. I am wary of corals that will take over the whole tank, and I don't have much room to isolate things.

That brings me to some features of my setup. My saltwater experience is extremely minimal, and my coral experience is even less. So if people see bad choices being made with things, please point them out. That said, some things are definitely going to be weird/diy because pushing boundaries a bit is part of my enjoyment of the hobby.

This is a giant wall of text so it's time for some pictures!

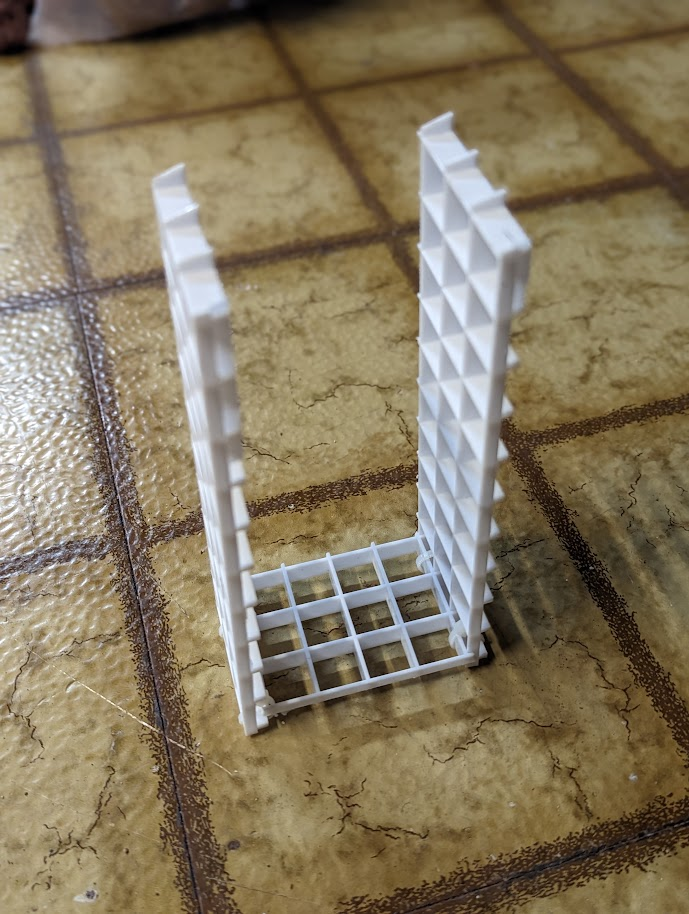
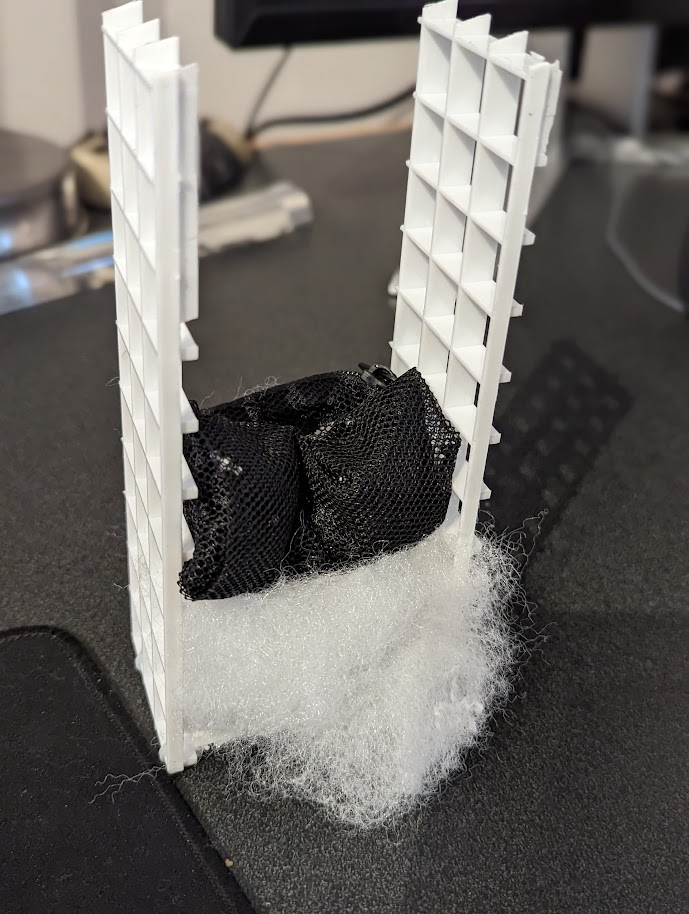
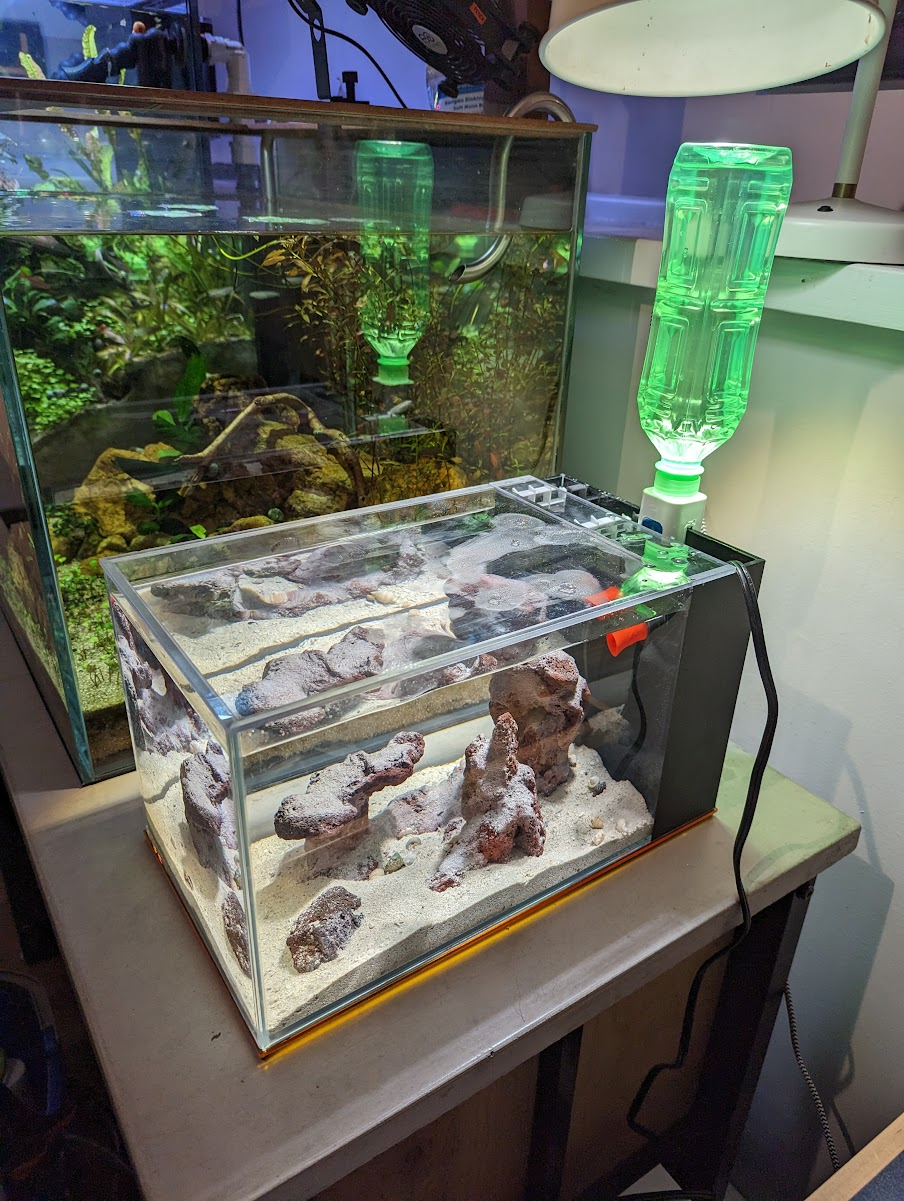
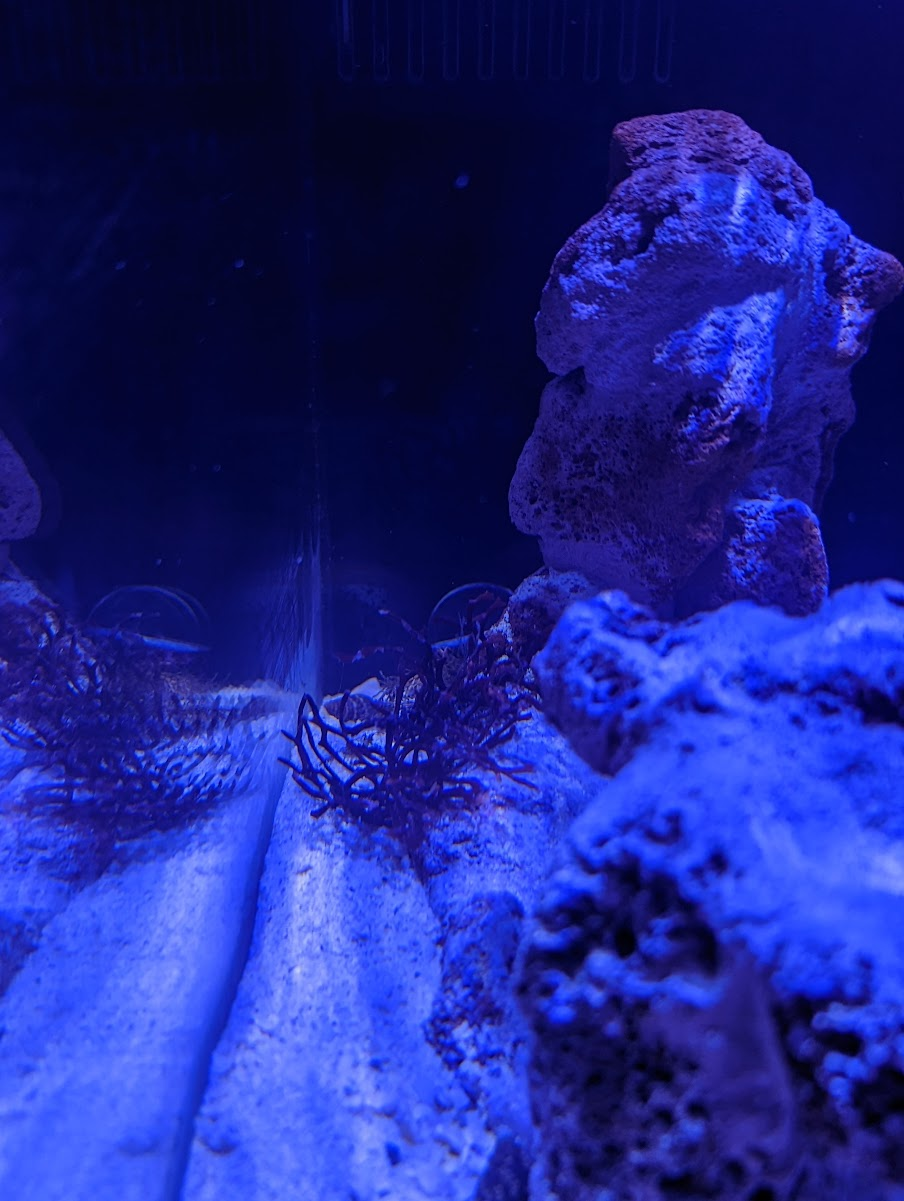
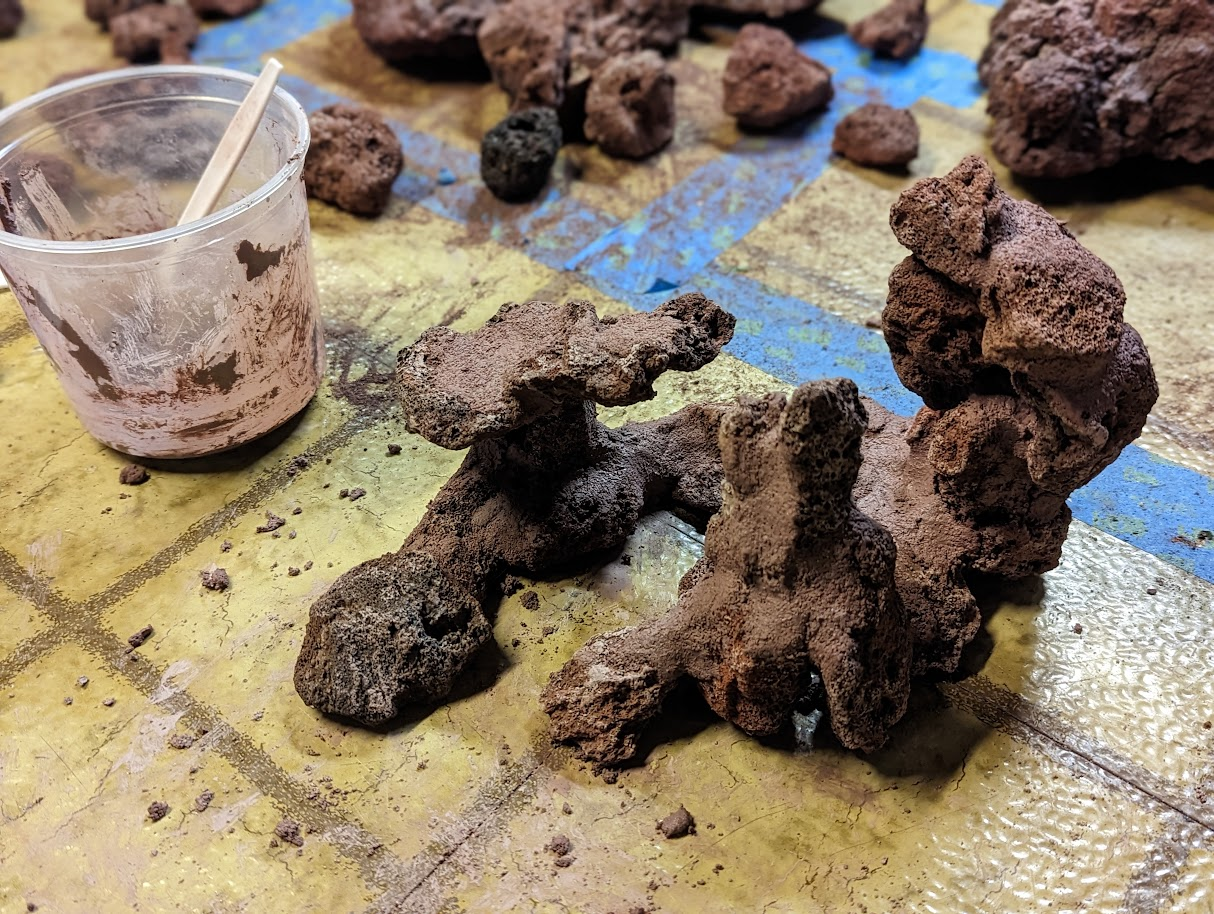
Here is a picture of my rockwork in the tank. The rocks are composed of ultra cheap hardware store lava rock.

3ePaCBV.png


5fnIq2Z.png


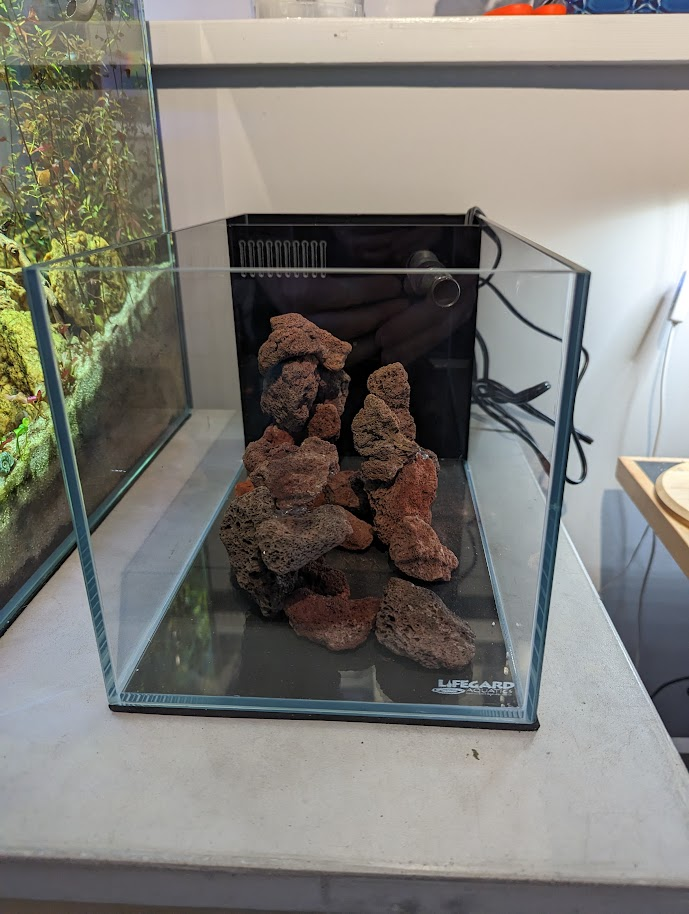
The goal was to make a structure that would be interesting to look at from different angles. I saw some pictures of other people with 'spires' in their reef tanks and instantly wanted to emulate it on a smaller scale. Hopefully this will be big enough to put different corals on the rockwork.

And of course I am doing something odd here.

Regarding lava rock.. if you google if its reef safe some of the first things that come up are random websites saying it leaches harmful metals. If you dig a bit you will find people who are actively using it in their tanks with no issues. Personally, I have been using this brand for years in freshwater with no problems and I haven't found anyone with first hand experience with lava rock causing any issues sooooo here we go :p

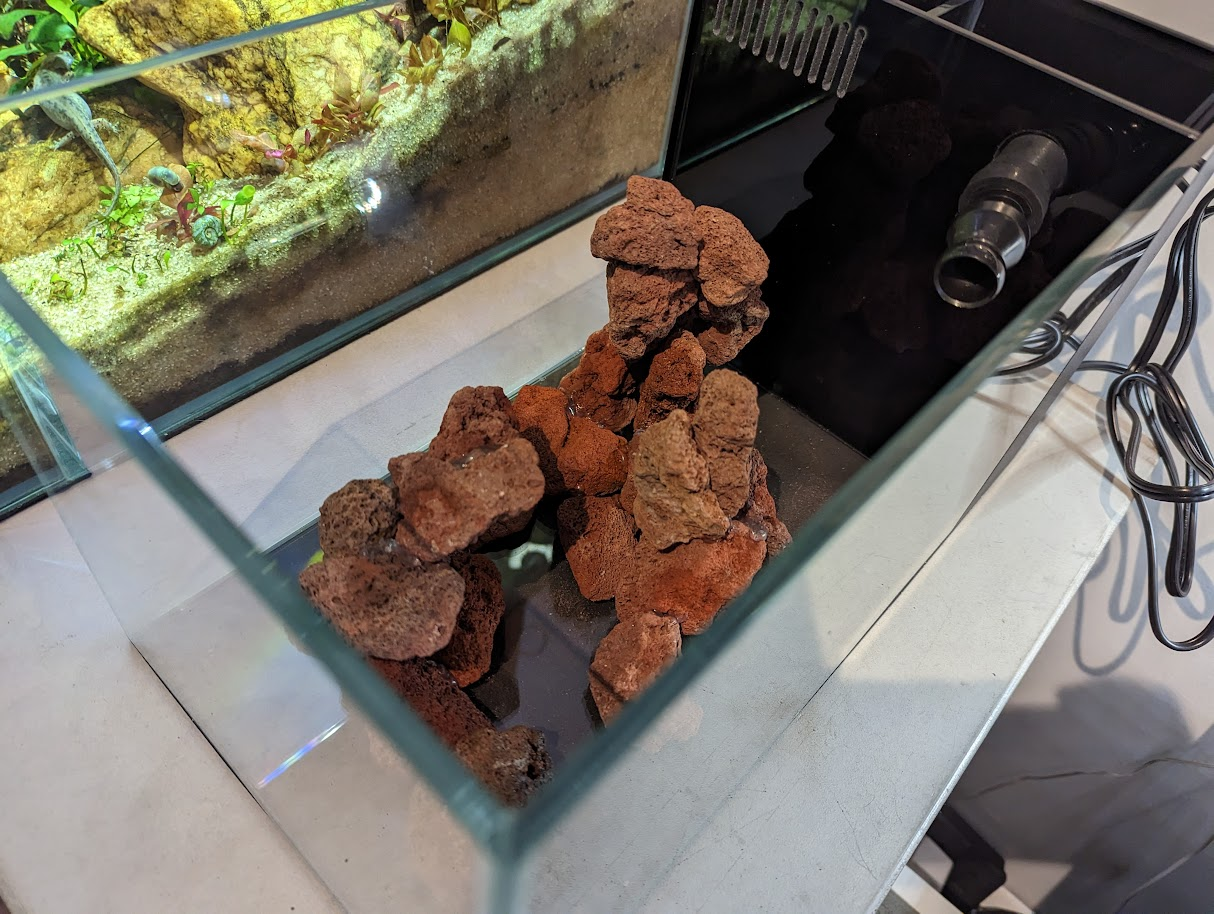
The lava rock was first glued together with extra thick super glue and accelerant. This made it just barely stiff enough to pickup if I was careful.

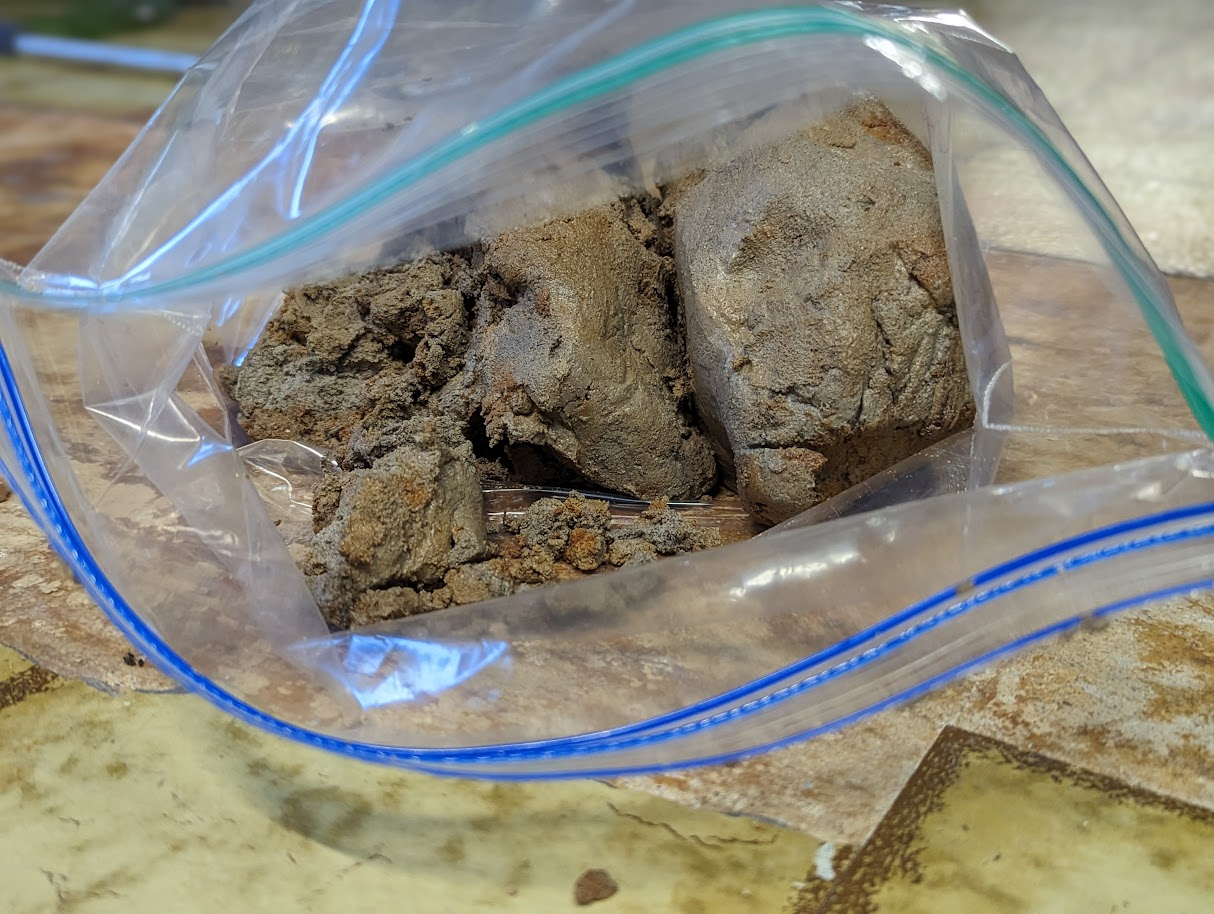
When watching a BRS video, I noticed that the e-marco 400 pink mortar was almost the same color as the lava rock (which is what inspired me to use lava rock in the first place).

So here is the rockwork after I coated all the joints with e-marco mortar:

G8x3H1i.png


This has been a lot of text, so I will stop there for the first post. More to come!
 
OP
OP
minorhero

minorhero

Active Member
View Badges
Joined
Dec 12, 2021
Messages
191
Reaction score
297
Location
Maryland
Rating - 0%
0   0   0
I've got a few coral stuck to lava rock. I didn't bother researching it beforehand though.

I haven't found anyone who has actually had problems with it, and quite a few that like yourself, are growing coral on them with no trouble. Honestly at 6 dollars for a .5 cubic foot bag, they are incredibly cheap, and most of them would be a really good size for a natural frag rock solution.
 
OP
OP
minorhero

minorhero

Active Member
View Badges
Joined
Dec 12, 2021
Messages
191
Reaction score
297
Location
Maryland
Rating - 0%
0   0   0
10 gallon tank for 2 cats?? Wife must be really good at negotiating

Sadly we have 3 cats currently. Once they pass on (likely in a decade or more), I agreed to 2 more cats of her choosing. At present she wants a specific breed called a Siberian. Of the 3 cats we currently have, 1 is a Siberian. So basically she wants more like that one. I on the other hand a) don't like living with indoor cats. Outdoor cats are fine, but indoor cats is terrible. b) Did not want another long haired cat as the current Siberian sheds more then the other 2 cats combined and then doubled again.

So that was the concession on my part, allowing her to have more Siberians. I reserved the right to continue to complain about the cats however.

That said, she likes her animals, which I can relate to since I have 4 (now 5) display tanks ranging in size from this pico up to 75 gallons and they are spread throughout the house. Additionally I have a gecko tank, and 2 dart frog tanks. Plus some supporting non-display tanks in the unfinished section of the basement. Soooooooooooooo I can't complaint too much when she wants to keep a specific critter :p
 

Mschmidt

Average Maybe
View Badges
Joined
Feb 9, 2022
Messages
14,078
Reaction score
31,186
Location
Baltimore
Rating - 0%
0   0   0
I haven't found anyone who has actually had problems with it, and quite a few that like yourself, are growing coral on them with no trouble. Honestly at 6 dollars for a .5 cubic foot bag, they are incredibly cheap, and most of them would be a really good size for a natural frag rock solution.
think any issues are more a user error than anything.
 
OP
OP
minorhero

minorhero

Active Member
View Badges
Joined
Dec 12, 2021
Messages
191
Reaction score
297
Location
Maryland
Rating - 0%
0   0   0
Next up is adding some bling. Because, yes, there will be bling.

The 5 gallon deskmate tank looks really slick, and I seriously considered it when choosing my tank, in part, because of that spiffy orange trim. I didn't because it's acrylic and I am wary of scratches. I decided however, I could replicate the orange trim just fine.

I started off with an oversized piece of orange fluorescent acrylic:

pz6XmlJ.png


A trip to my table saw using a plywood blade, and I cut it down to be just slightly bigger then the footprint of the aquarium:

1I0aDQx.png


I put this in place on the leveling mat. It should reflect just a little light from the overhead light used for this tank.

guuPYaz.png


Speaking of the overhead light, I purchased a NooPsyche K7 Mini. It seemed like a decent option for the price point not only for this tank, but for any future small nano tank I might get down the road. I just ordered that the other day, and it ships from China, so I am really not sure how long that will take to get to me. Likely a few weeks? In the meantime I have a desk lamp with a grow bulb I can use if needed. More on that in the next update.
 
OP
OP
minorhero

minorhero

Active Member
View Badges
Joined
Dec 12, 2021
Messages
191
Reaction score
297
Location
Maryland
Rating - 0%
0   0   0
With my base bling (is there a better name?) figured out and my rockwork ready, it was time to deal with substrate.

My background is very firmly in freshwater tanks, and I am familiar with what in freshwater we call dirt tanks. Basically when someone puts dirt under their substrate to feed plants in the tank. I frankly do not like them much in freshwater because there are so many perfectly calibrated fertilizers to use instead.

I was shocked when I found out that saltwater folks also have dirt tanks. Only saltwater folks don't call them dirt tanks. They refer to it as mud.

Justification for why folks put mud in their tanks seem to vary, with folks saying it does everything from help anaerobic bacteria to helping with dosing. One well documented benefit is that it helps when growing macro algae. This last will be of importance for me.

In freshwater, folks tend to seek out specific brands of dirt for their freshwater tanks which I always find somewhat hilarious/tragic. There is no magic to a specific brand of dirt and in fact, the best stuff is going to be dirt they can could dig out of their yard, or better yet...... a nice clay based riverbank.

And..... when I learned that reef mud is mostly just natural clay.... well that's exactly what I decided to do as well.

A trip to a nearby stream gave me this scene:

sc7G273.png


A nice clay riverbank, my garden trowel, and a ziplock bag was all I needed.

Ever want to see a bunch of natural clay in a plastic bag?

I aim to please!

8jnuAso.png


I took handfuls of this stuff and mashed it together to find any hard bits which was mostly pockets of sand or rocks, then put them in a thin layer about 1/8 to 1/4 inch thick on the bottom of the tank, staying away from the edges for aesthetic reasons.

XLRk0LK.png


After that I was ready for sand. I used Arag-Alive Fuji Pink sand and added my rockwork. Then added some more sand. I also added a handful of crushed coral for texture, and some small seashells for the eventual blue legged hermits (whom I have been convinced to add to the tank's eventual inhabitants). I mixed up 2 gallons of saltwater and added that as well. And TA-DA, a cloudy tank that is 'mostly' filled.

HTIoUqg.png


I added the water at this point because I wanted to keep the clay moist. But I want to mess more with the filtration before I go further.

That's all for this update, stay tuned for more.
 
OP
OP
minorhero

minorhero

Active Member
View Badges
Joined
Dec 12, 2021
Messages
191
Reaction score
297
Location
Maryland
Rating - 0%
0   0   0
Filtration! I needs it.

InTank makes a media basket specifically for this tank and its absolutely beautiful!

WcO2PsI.png


I mean, look at how cool that thing is. And.. I'm not buying it. Instead I am making a much more inferior version of the same thing out of eggcrate and zip ties:

mdexe2F.png


I need to add another shelf so I can add a bag of ceramic into there but for now this is good enough. Media is a handful of filter floss and a small mesh bag with some carbon and a tiny pinch of seachem phosguard.

CgVII7b.png


Regarding the pump and nozzle, this tank comes with a single link of 1/2 inch loc-line that attaches to their weird rubbery through the wall baffle. I saw in another build thread that a fellow with this same tank switched out the 1/2" loc-line for 1/4 and added a random flow generator nozzle and all of that seemed like a good idea. It was not entirely clear how they attached it, but a little tinkering with the parts revealed that the 1/4 loc-line had almost the same outer diameter as the 1/2" barbed elbow. That inspired me to use a small piece of 1/2" tubing to attach them. The layout was this:

6Xj4KyU.png


I used some hot water to soften the tubing until I could get it onto both pieces, at that point it looked like this:

8Q2jE5V.png


Once the last 2 pieces were in place, it looked like this:

WDW4WGu.png


This is a much more compact solution then using the original 1/2" loc-line. Plus, orange bling :p

I topped up the water in the tank, added the media basket and my new nozzle configuration and tada:

TSnWVyn.png


And here is how the tank looks next to 2 of my freshwater tanks in my office.

Ku0NfoQ.png


Clearly the tank is lit in this picture. I have a desk lamp above this tank with a white glow bulb in it. This is currently only for photography as obviously nothing alive is in the tank.

BUT, I have ordered some macro algae for this tank and it will probably arrive before the NooPsyche light, so the desk lamp may get deployed for reals in the not too distant future.

Regarding the pump.... I read reviews that it was terrible. I can confirm that it is indeed garbage. I mean this pump is noisier then the other 3 pumps I have running in this room. The cooling fans for the lights, the cooling fan for my newt tank, and all the fans in two desktop computers, combined! Why lifeguard decided to use this pump vs any other of the myriad available is beyond me. Either way, it is soon to be gone. I have ordered the critter below, and it should be arriving this weekend.

h9sdk0k.png


And that brings me to current. Future updates will be in 'real time' as it were.
 
Last edited:
OP
OP
minorhero

minorhero

Active Member
View Badges
Joined
Dec 12, 2021
Messages
191
Reaction score
297
Location
Maryland
Rating - 0%
0   0   0
A lid, a lid, my kingdom for a lid!

Well... maybe not my kingdom, but at least 20 dollars.

My research thus far has told me that one of the easiest ways to murder everything in a pico tank is to have salinity swings. To that end, I decided a lid to help control evaporation would be a very good idea.

Kraken of course sells a lid for this tank, and you can get the 'evaporation cover' add-on for it. Total cost comes out at around 100 dollars with the add-on. BUT, I wanted something with a bit more orange bling.

So I decided to make one myself.

The plan was to buy a piece of polycarbonate, use my routing table to cut a rabbit on 3 sides. Then use my tablesaw to cut off the edges that I just routed. Take those edges and dye them orange. Then glue the edges back to the main piece of polycarbonate. If it worked, the effect would have been a clear lid that had translucent orange edges.

It did not work.

I ran into 2 problems immediately. The first is that using Weld-On to glue polycarbonate together is a skill. I mean the learning curve was not as steep as say, using silicone. But I was darn glad I had some practice pieces before I tried it for reals.

The second issue, and this one I was never able to overcome, was that my polycarbonate was for all intents, and purposes, impervious to my dye.

I looked up in advance how to dye polycarbonate. I found numerous articles and videos saying that you need to use either hot water, or acetone, or hot water and acetone, and the dye itself, which is RIT dye purchased from amazon.

I tried every combination I could think of and none of it worked. My polycarbonate would not take the dye. I even tried painting things onto the polycarbonate like superglue, gorilla glue, cvpc cement, and pvc cement and then dying it with the hopes that the glue would take the dye. There was some success there, but it was both limited and disappointing.

In the end I dumped the idea and took my remaining chunk of polycarbonate, cut it to size, and routed a rabbit around 3 sides. The result was not quite as long as I wanted, so I ended up gluing another scrap piece on to make it stretch the desired length.

MK56wom.png


This will not be the permanent lid solution. I am unhappy with it on frankly, multiple fronts. But it will do for now.

Speaking of stopgap measures :p

I also setup a gravity fed water bottle ATO. I purchased this critter from amazon and went searching for a bottle that would actually fit. The bottle search was sadly more involved then I wanted it to be, but eventually I found something. I may replace even that bottle if I can find something less ugly..... :D

Kyoa0R1.png


As of now, I am planning to make my own ATO in the style of the Flipper ATO, but sized for this tank. That might end up being way more then I bargained for given how terrible today's lid build went. But hopefully I can make it come together a bit better.

That's all for now.
 
OP
OP
minorhero

minorhero

Active Member
View Badges
Joined
Dec 12, 2021
Messages
191
Reaction score
297
Location
Maryland
Rating - 0%
0   0   0
Equipment!!

My pump came in (thank goodness!) and I installed it immediately. The pump is sooooooooo much better then the stock pump. It's quiet for one, adjustable, and just way cooler. It is however slightly taller then the stock pump so I sadly needed to ditch the in-line flow control that came with the stock pump. Instead I attached the 1/4 barb that came with the pump and otherwise kept my plumbing the same. At its lowest setting, I think it will do ok for me regarding flow. I am really unclear on how much flow I need for coral growth, but if I need more, its a button push away.

One annoying thing about the setup of this tank is the placement of the nozzle vs the overflow. The top of the nozzle is almost at the top of the overflow. This matters because I am using a random flow generator that has intakes on the side of the nozzle. The strength of the flow of this pump is such that it was creating whirlpools to suck in air:

mrXaNBW.png


The solution I settled on was to plug one of the side intakes with extra thick superglue and accelerant.

NHvKseC.png


Then I just made sure that intake was the one facing up. This worked extremely well, now I can have the nozzle pointed anywhere without the whirlpool effect.

Meanwhile, I also got in my light! The light I chose for this tank is a NooPsyche K7 Mini. I chose this light because if I upgrade the tank later and want to keep something like sps, I should have the power to make it happen.

Regarding the light itself, I love the spectrum, and the ability to control it. I also love the price point.

I hate the fan.

It's clear that a light this powerful needs a fan, but how it's implemented is horrid. The fan has 2 settings. Off and Wind-Turbine of Doom. The fan comes on and off as it needs to. This means that I traded a noisy pump for a fan that when on, is even noisier then the old pump. It's literally the noisiest thing in the room when it's running. I would much prefer a fan that was constantly on, but running at a lower rate so as not to be as noisy.

When I got the light, I struggled a bit getting the app to work (seems par for the course) but once that was done, I was easily able to tune it how I wanted. Due to my desire to grow macro algae as well as coral, I set the whites at 40%, the blue at 20% and third slider (represented by a Magenta dot, UV?) at 30%. That gave me a pleasing spectrum (to my eye) and PPFD between 115 and 150 depending on where I put my par meter (oh yeah, I own a par meter, which I am constantly happy about when setting up new tanks).

fkjiUgn.png


In other news I also got in 2 piece of macro algae. My plan for this tank is to grow macro algae for nutrient control in between water changes. That said, it's a small tank, so there isn't exactly a lot of room for macro :p

The two macros I got are Purple Gracilaria/Gracilaria Sp. (it seems even the seller was not sure), and Coral Weed Algae Corallina officinalis. The former came in looking great, the latter does not look nearly as good, hopefully it perks up because that's the one I am most excited about.

Terrible picture of the algae in the back corner:

iobNYoT.png


Speaking of terrible pictures, here are some more!

226qJAL.png


gl13lNg.png


I desperately need some filters for my phone and for my real camera to bring my pictures up to snuff. I ordered a set for my phone which should come in soon. Once I try them out, I will have a better idea of what I need for my real camera.

And that's all for now!
 
OP
OP
minorhero

minorhero

Active Member
View Badges
Joined
Dec 12, 2021
Messages
191
Reaction score
297
Location
Maryland
Rating - 0%
0   0   0
In another thread I asked for recommendations on camera filters so I could take some non-terrible pictures. I was recommended to get these fellows for my phone and they came today. Now I can take non-horrible pictures with a phone!

bzp2suk.png


Now I just need a decent one for my real camera. I figure my macro lens is the most likely to get action, which means I need a 62mm filter. The set I bought has a pale yellow filter and a semi-pale orange filter (my terminology, not theirs). The orange is definitely the better for my purposes. I am wondering if I should buy another orange filter or if I would be better served with a deeper yellow.
 
OP
OP
minorhero

minorhero

Active Member
View Badges
Joined
Dec 12, 2021
Messages
191
Reaction score
297
Location
Maryland
Rating - 0%
0   0   0
So much to like here. Unorthodox, entertaining, egg crate.

Beautiful planted set ups btw.

Thank you!

Egg crate is how we know the hardware store industry loves us. :D

I was gonna say the same thing! I got curious and looked at siberian kitten prices and for 2 cats he should be setting up a minimum of a 120 gallon tank!

Ugh, it's terrible but a deal is a deal. The good news is that if history is any guide in my house, aquariums have a tendency to swell the longer they sit filled with water and looking good.
 

Creating a strong bulwark: Did you consider floor support for your reef tank?

  • I put a major focus on floor support.

    Votes: 53 40.8%
  • I put minimal focus on floor support.

    Votes: 26 20.0%
  • I put no focus on floor support.

    Votes: 47 36.2%
  • Other.

    Votes: 4 3.1%
Back
Top