Project Patriot’s Serenity - Where The Lake Meets The Ocean (365 Gallon Reef Tank)

OP
OP
K

Karliefish

Well-Known Member
View Badges
Joined
Apr 12, 2020
Messages
740
Reaction score
516
Location
Western North Carolina
Rating - 0%
0   0   0
Tank Room Layout

Now that all the tank plumbing is installed and tested, I can turn my attention to the installation of all the equipment. Like many others that have done a new tank build, one of the biggest challenges we all face is how to maximize the available working space to fit all the equipment, controllers, water mixing station, quarantine/frag tanks etc. At the bottom of this post, I've included a very simple drawing that shows the reef tank placement and how I'm going to try and maximize the space for all my equipment. My overall main room available floor space is: 10'L x13'W (this includes the space used by the tank: 96"L x 34"W x 26"H) . Additionally, there is a smaller room for the controller equipment.

Here is a list of all the equipment that needs to be installed:
- 1 BRS 7 Stage RO Sytsem
- 1 Aquatec RO Booster Pump

- 1 57 Watt Aqua Ultraviolet UV Sterilizer
- 1 BRS Carbon Reactor - Deluxe
- 1 BRS GFO Reactor - Deluxe
- 1 BRS Air Filter (ozone generator)
- 1 Apex Controller Head Unit
- 2 Apex 832 Energy Bars
- 1 Apex Automatic Feeding System
- 1 Apex Display Module
- 3 Apex Dosing Fluid Metering Systems
- 2 Apex Dual Reservoir Systems
- 1 Apex Trident Water Analyzer
- 2 Abyzz A200 Controllers
- 1 Bubble King Supermarin 250 Protein Skimmer Controller
- 2 Aqua Logic Digital Temperature Controllers
- 2 Ecotech Vortech MP60 Controllers and leave room for possibly two more controllers (future expansion, depending on long term water flow requirements)
- 1 Red Octopus Various-8 Controller (used for reactors and UV light and potential future chiller)
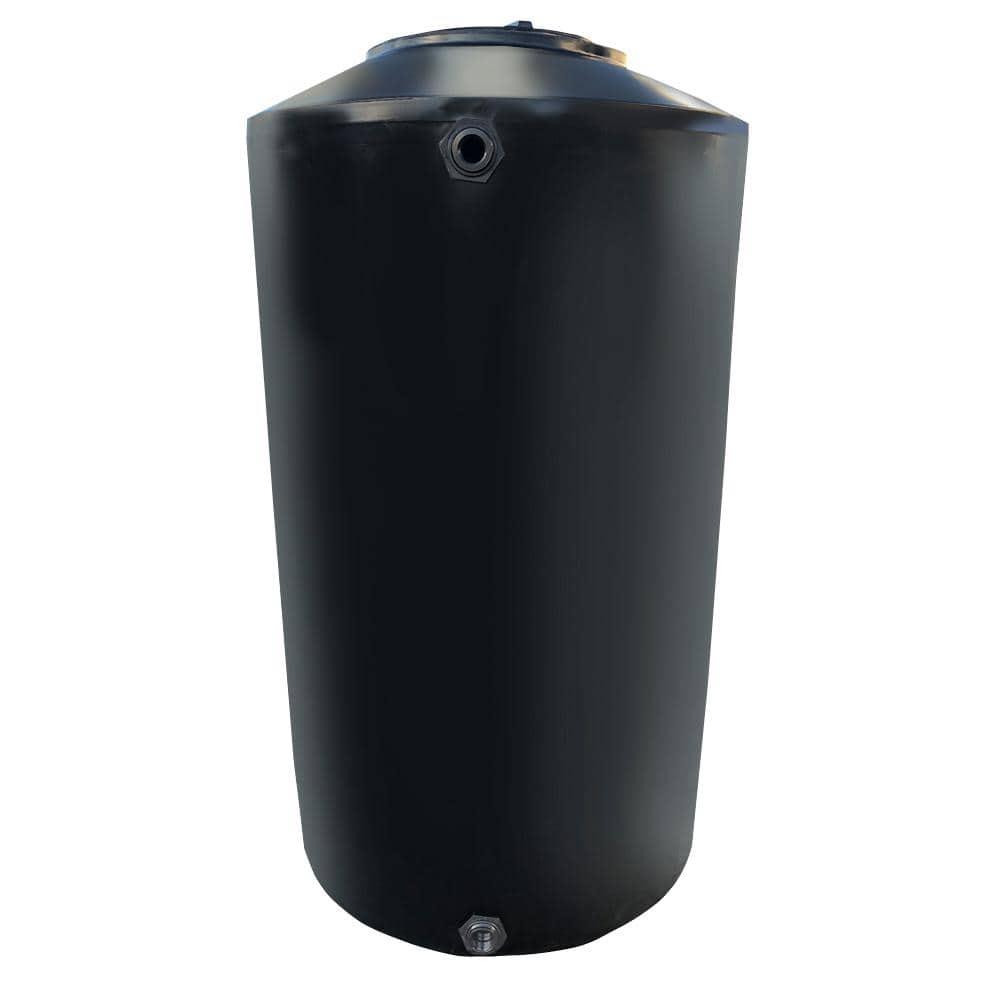
- 2 65 Gallon Water Storage Tanks along with one Sicce Syncra 7.0 Controller Pump for mixing saltwater and pumping saltwater to MT
- Wall space for one large display computer tablet (probably going to get a 20" tablet) to use with Apex System
- 1 40G Quarantine Tank (24"L x 20"W)
- 1 Workbench (60"L x 24"W). Don't know what I'd do without a workbench area. This bench has been a work-horse throughout the build project

In my next post I'll show you pics on how my installation is coming along for all of this equipment. Here is the drawing that shows the layout of the overall room space.

Room Layout.png
 
OP
OP
K

Karliefish

Well-Known Member
View Badges
Joined
Apr 12, 2020
Messages
740
Reaction score
516
Location
Western North Carolina
Rating - 0%
0   0   0
I gotta say those Stratton’s look absolutely excellent over your tank.
Thanks. Of all the things I agonized over the most it has got to be the lighting. I must of changed my mind at least a half-dozen times on my lighting selection and configuration. The Straton's look really awesome - to bad they'll be hidden behind a wall :) :) Of, course the real test will be to see how they perform once I've got the tank up-and-running with lots of SPS corals.
 

Alexreefer

Coral, Coral, Coral!!!
View Badges
Joined
Feb 19, 2018
Messages
1,121
Reaction score
1,267
Location
West suburbs of Chicago
Rating - 0%
0   0   0
Wow just read the entire thread in 20 minutes, got me hooked. This tank is a dream and I couldn't be more jealous. Cant wait to see the tank wet!
 
OP
OP
K

Karliefish

Well-Known Member
View Badges
Joined
Apr 12, 2020
Messages
740
Reaction score
516
Location
Western North Carolina
Rating - 0%
0   0   0
Wow just read the entire thread in 20 minutes, got me hooked. This tank is a dream and I couldn't be more jealous. Cant wait to see the tank wet!
Thanks for taking the time to read our thread. We've tried our best to bring our project to life for everyone. We are also getting very anxious to get this tank wet! thanks for following along.
 
OP
OP
K

Karliefish

Well-Known Member
View Badges
Joined
Apr 12, 2020
Messages
740
Reaction score
516
Location
Western North Carolina
Rating - 0%
0   0   0
Special Update: Continuous Power for our 365G Reef Tank

I know my next post was suppose to be an update on my equipment installation. However, with all the sad and tragic stories in recent weeks of people loosing their reef tanks to power losses (severe weather across the U.S.), I wanted to share briefly how we are addressing this for our 365G Reef Tank. First off, our hearts go out to everyone that has tragically loss a tank to a power outage. Many years ago I loss several corals and fish during a summer storm and I'll never forget that awful feeling of helplessly watching fish and corals perish.

Back on post #52, we discussed the electrical design for our reef tank, including the installation of five separate circuits to ensure redundancy of all critical life support equipment (powerheads, return pumps and heaters). We live in the Blue Ridge Mountains of North Carolina and we can get severe weather (summer storms and hurricane season). On several occasions we have lost power for extended periods.

The heart of our continuous power solution is our Cummins RS50 LP/NG Single Phase Standby Generator which generates 50KW of continuous power. This generator is an absolute beast and required a large crane to install. Every week we switch over the entire home to the generator and fully test the system for 30 minutes. Recognizing that power outages seem to occur when you're not a home, we also have an alert system that will send us emails every time the generator goes on/off and we can remotely monitor the performance of the system.

Here are some pics:
IMG_0768.jpg

IMG_0771.jpg

IMG_8224.jpg
 
OP
OP
K

Karliefish

Well-Known Member
View Badges
Joined
Apr 12, 2020
Messages
740
Reaction score
516
Location
Western North Carolina
Rating - 0%
0   0   0
Equipment Installation

Back on post #81 we provided a simple floor plan drawing that showed how we will utilizes the available precious floor space for the reef tank, controller room and where we plan on installing the equipment.
We also included in that post a complete list of equipment that needs to be installed.

The first picture here shows the original wall that was selected for mounting all of the equipment that isn't going into sump.
IMG_0179.JPG


The next picture shows the equipment wall. We took the paneling from our original family room wall and reused the wood to build an equipment mounting wall. This paneling is attached to multiple 2x4's which are drilled into the cement wall - very secure and there will be no problem on equipment weight. You'll note that there are two wood equipment walls.

IMG_8248.jpg


The empty mounting wall on the left will eventually hold:

- 3 Apex Dosing Fluid Metering Systems
- 1 Trident Water Analyzer.

The mounting wall on the right will hold the following equipment:


- 1 BRS 7 Stage RO System
- 1 Aquatec RO Booster Pump
- 1 57 Watt Aqua Ultraviolet UV Sterilizer
- 1 BRS Carbon Reactor - Deluxe
- 1 BRS GFO Reactor - Deluxe
- 1 BRS Air Filter (ozone generator)

Right now we have completed the installation of the BRS 7 Stage RO system and Aquatec Booster Pump. This system was recently fully tested and is ready to make RO Water! BTW.....regarding the RO system, given that our home utilizes a well system, we had a whole-home 5 Micron filtration system installed (see next picture below). This is used to filter-out all of the large sediment before entering the 1 Micron filter in the BRS RO 7 Stage system.

IMG_8258.jpg


The last picture is a close-up that shows the proposed placement (with some creative photo editing) for the equipment that still needs to be installed. You'll note the electrical outlets near the two mounting walls - these will be relocated. Unfortunately, we had to get the electrician out to do the electrical install before we had completed the design of the equipment mounting walls. Obviously we don't want electrical outlets any where near equipment with water!

I'll send a final picture of the equipment mounting walls once everything is in placed - including the plumbing.

Mounting Walls with Equipment.png


Upcoming projects for the next two weeks:
1) Install computer room, including controller boards and mount all controllers.
2) Two 65 Gallon Water tanks should be arriving, so it's time to build the saltwater mixing station
3) Receive 325lbs of Marco Reef Rock - but this will wait for a whole separate post on the topic of rock
4) Finish installation of equipment mounting walls along with all required plumbing.

Our next post will be an update on the Controller Room.
 
Last edited:
OP
OP
K

Karliefish

Well-Known Member
View Badges
Joined
Apr 12, 2020
Messages
740
Reaction score
516
Location
Western North Carolina
Rating - 0%
0   0   0
Update on the Rock

There are a lot of decisions that have to be made when setting-up a new large scale reef tank. For my wife and I, the two that we have spent more time agonizing over have been (1) Lighting and (2) Dry vs Live Rock. We were so relieved when we took the decision to go with the combination of 4 Straton's and 3 Kessil A360X's for the lighting. Of course the real validation of that decision awaits putting corals into our tank and watching the growth/color we get from these LED lights.

The rock has been a much debated topic in our household. My wife and I would love to have the instant look and quick usability that you get from live rock (all of our previous tanks were live rock), but we don't want to deal with the unwanted hitchhikers and other PIA things that are lurking on live rock like Aiptasia. Having suffering through an Aiptasia outbreak on our last tank, we want to reduce the probability of getting that problem again. YES! YES! we understand that somewhere along the way we might pickup Aiptasia or other nasty hitchhikers. We recognize that risk every time we introduce a new coral into our tank - even after first using a quarantine tank. With all those pro's and con's debated, the number one reason we ended-up going with Dry Rock was the quality-of- time we could spend doing our aquascaping. We haven't rushed anything on this project and when you go with Live Rock you are dealing with a simple reality called time. You can't spend long hours or multiple days putting the rock on the floor trying different aquascaping designs when you work with Live Rock. I know my wife and I are going to want to try different designs and we'll probably spend a few days before we settle on our final "look". After looking at a variety of dry rock products we decided to go with Marco Dry Rock from BRS. They just had a great 10% off sale this past week and since we were ordering over 350 pounds of rock, this turned out to be a fairly sizable monetary savings.

We have mentally prepared ourselves for a long-haul process to get the rock properly established with sustainable bacteria and coralline and we're planning on a four month cycle. Not thrilled about looking at white rock for the first year - but we know it will look like Live Rock in 2022.

Here is a picture of the all the boxes of Marco rock we received today - seven 50lb boxes of rock! So much fun carrying those boxes down two flights of stairs! In a future posting, I'll detail the various type of Marco rock we selected.


IMG_8276.jpg


We plan on using the floor in front of our in-wall tank to layout the rock and do our aquascaping. To protect the floor we have purchased a piece of plywood and cut it down to the exact internal dimensions of our tank (including space all around the front, side and back glass - at least 6"). Here are a couple of pics.

IMG_8277.jpg

IMG_8278.jpg


So now we've got an equipment wall with plumbing to finish setting up, plus a saltwater mixing station to build and now aquascaping to complete. It's going to be a very busy next couple of weeks. It doesn't look like we are going to meet our original project goal of having everything done and cycling the tank by end of February - more likely mid-March now. We'll be back with aquascaping pictures once we get our final designed finished.
 
OP
OP
K

Karliefish

Well-Known Member
View Badges
Joined
Apr 12, 2020
Messages
740
Reaction score
516
Location
Western North Carolina
Rating - 0%
0   0   0
A Very Busy 5 Weeks

Our last posting was almost 5 weeks ago and during that time we have:
1) Completed the computer room and controller boards
2) Built the Closed-Loop plumbing system for the Reactors, Chiller and UV Sterilizer
3) Built the Salt Water Mixing Station
4) Finished the Aquascaping


We have been multi-tasking these four task, working through a few challenges along the way, but I’m happy to report that everything is just about done. I’ll provide some pics and a short summary on each of the activities over the new four post.
 
OP
OP
K

Karliefish

Well-Known Member
View Badges
Joined
Apr 12, 2020
Messages
740
Reaction score
516
Location
Western North Carolina
Rating - 0%
0   0   0
Salt Water Mixing Station Completed

Our Salt Water Mixing Station is now complete. Here are some details and lessons learned.

My main DT and Sump holds ~340G and my goal was to find water containers that could hold a 20% water change which works out to ~70G. Actually, I wanted 100G containers to have some extra headroom for larger water changes, but my fish utility room just wasn’t going to handle anything taller than 45” - width really wasn‘t a problem. First thing I discovered in attempting to buy water storage containers on-line is the incredibly high cost for shipping. Most places were charging shipping that was running 75-80% of the cost for the water tanks themselves. I looked at Tank Depot, NTO tank, Amazon, Plastic-Mart, and Tractor Supply. During my research I stumbled across this storage tank from Home Depot.


What I really liked about these containers was not only were they the perfect size, but the holes came plumbed with bulkheads on top and bottom and it has a really nice size secure screw-on lid. What I don’t is the tanK only comes in black which makes reading the gallon markers on the side of the tanks impossible.

The clincher in picking this storage tank was the shipping price: $50.00 for both storage tanks. Now I know picking them up at a local Home Depot was an option (that would save me $50.00), but it was going to be a hassle trying to figure out how to get them loaded into our car. Well sadly and frustratingly that turned out to be a really bad decision, as the Special Order Shipping Process with Home Depot was terrible. I was told that I would receive the storage containers on February 22, 2021 which was a reasonable timeframe from the time I placed the order ( two weeks earlier). However, I did not receive the storage tanks until Mid March which really messed-up our entire timeline for cycling the tank by mid-march. Just one last comment on Home Depot - their call center support is simply awful. I was promised on three different occasions that an ”expediter“ would call me back and never did. Also, I learned that Home Depot is using some unknown Mom & Pop shipping company. For example, the shipping company told me they would only delivered to our area once-a-week. So lesson-learned - no more special orders from The Home Depot!

Ok here are some lessons learned on building our saltwater mixing station:
1) I looked at dozens of mixing station pictures on the internet and watched several really helpful videos.
2) Similiar to plumbing main Display Tanks, use unions everywhere. Saved me when it came time to fix leaks.
3) Installed a piping system in the Saltwater tank that circulates the water and keeps salt from accumulating on the bottom of the tank - really nice setup.
4) Really think through your heating system and make sure you get one where you can run the temp probe and the heater all the way to the bottom of the tank. I had purchased a Finnex 500W heater for the saltwater container along with a FInnex Controller. Here is the specific controller.

https://www.marinedepot.com/digital-aquarium-temperature-controller-finnex-hc-0810m-deluxe

This turned out to be a bad purchase as the probe cord is very short and only drops-down approximately 40” but you really don’t have access to 40” unless you lay the controller literally on the lid of the storage container which is really a bad idea. So in my case the probe cord only drops down half-way in the tank which is really not helpful if you storage container is less than 50% full of saltwater. So I’m now in the process of ordering a Ranco Controller that I’ll I use with my Finnex Heater. What is super nice about the Ranco Controller is that you can custom order the length of your probe cord and the power cord that connects to the Finnex heater is really long (6 feet).
5) For my pump, I ended-up going with the Sicce Pump. Here is the specific pump:

https://www.bulkreefsupply.com/syncra-sdc-7-0-controllable-pump-800-1900-gph-sicce.html

I have had a love/hate relationship with this pump. First what I hate....the instructions are pretty poor and I had to rely on a YouTube video to set up the Wifi. Second, unlesss the pump is perfectly level on the floor the pump will leak. I had read online about others complaining of leaks. In my case I had to take the pump apart and re-install the rubber gasket to get the leaking to stop. Fortunately, I got awesome tech call center support which made the troubleshooting process bearable. These pumps are not cheap, at $350.00 you’d think that the Italians could create decent instructions and ensure that their rubber gaskets are properly secure/installed before shipping. Here is what I like about the SICCE pump.
- super quiet
- good power - both for circulation and pumping saltwater into the DT.
- Controller that comes with the Sicce is really cool to use and good looking (if there is such a thing for a pump controller)
- Wifi is stable and an absolute life saver when you are home alone and are trying to pump saltwater into your DT. I just get up on a ladder, put the hose in the DT and hit one button on my iPhone and the pump turns-on, same process for turning the pump-off. A really convenient feature that I absolutely love.
6) My biggest ah-ha lesson learn was to remember that when plumbing the mixing station when the tanks is empty versus full it changes the entire weight distribution/pressure on the whole plumbing system. I had to deal with a couple of annoying leaks where there was pressure on the plumbing when the tanks were filled with water.
7) Lastly, very rarely, unless you are just dang lucky will your pump line-up on the same level as the bottom bulkheads on the storage tanks. You end-up having to spend time raising and lowering the pump until it is perfectly aligned with the Bulkheads. As you will see in the picture below, I ended-up using a 2x6 and some 1/4” plywood to get everything perfectly leveled. This is where I probably spent over 25% of my total install time.

Here is the saltwater mixing station. The RO storage tank is on the left and the saltwater storage tank is on the right. It’s a pretty standard configuaration that allows me to use the various ball-values to configure the station to mix saltwater. It’s simple to transfer RO water into the Saltwater storage tank by turning-off the ball values that are used for mixing saltwater and opening-up the ball value on the RO storage tank. It takes just a few minutes to transfer 60G of RO water. Finally the 3/4” barb hose fitting in the middle of the picture is how I transfer water into the DT. It also is great for quickly filling-up a water container for really pure drinking water. I’ve also included a second picture that shows where the leak was occurring on the Sicce Pump before I took it apart and fixed.

F6DCB39B-B7BC-4B02-A137-FE993DC61DF8.jpeg


D1EFE83C-FD0D-4D7F-8A81-2549D82B3487.jpeg
 

Mjl714

Valuable Member
View Badges
Joined
Aug 4, 2014
Messages
1,106
Reaction score
1,844
Location
Earth
Rating - 0%
0   0   0
Salt Water Mixing Station Completed

Our Salt Water Mixing Station is now complete. Here are some details and lessons learned.

My main DT and Sump holds ~340G and my goal was to find water containers that could hold a 20% water change which works out to ~70G. Actually, I wanted 100G containers to have some extra headroom for larger water changes, but my fish utility room just wasn’t going to handle anything taller than 45” - width really wasn‘t a problem. First thing I discovered in attempting to buy water storage containers on-line is the incredibly high cost for shipping. Most places were charging shipping that was running 75-80% of the cost for the water tanks themselves. I looked at Tank Depot, NTO tank, Amazon, Plastic-Mart, and Tractor Supply. During my research I stumbled across this storage tank from Home Depot.


What I really liked about these containers was not only were they the perfect size, but the holes came plumbed with bulkheads on top and bottom and it has a really nice size secure screw-on lid. What I don’t is the tanK only comes in black which makes reading the gallon markers on the side of the tanks impossible.

The clincher in picking this storage tank was the shipping price: $50.00 for both storage tanks. Now I know picking them up at a local Home Depot was an option (that would save me $50.00), but it was going to be a hassle trying to figure out how to get them loaded into our car. Well sadly and frustratingly that turned out to be a really bad decision, as the Special Order Shipping Process with Home Depot was terrible. I was told that I would receive the storage containers on February 22, 2021 which was a reasonable timeframe from the time I placed the order ( two weeks earlier). However, I did not receive the storage tanks until Mid March which really messed-up our entire timeline for cycling the tank by mid-march. Just one last comment on Home Depot - their call center support is simply awful. I was promised on three different occasions that an ”expediter“ would call me back and never did. Also, I learned that Home Depot is using some unknown Mom & Pop shipping company. For example, the shipping company told me they would only delivered to our area once-a-week. So lesson-learned - no more special orders from The Home Depot!

Ok here are some lessons learned on building our saltwater mixing station:
1) I looked at dozens of mixing station pictures on the internet and watched several really helpful videos.
2) Similiar to plumbing main Display Tanks, use unions everywhere. Saved me when it came time to fix leaks.
3) Installed a piping system in the Saltwater tank that circulates the water and keeps salt from accumulating on the bottom of the tank - really nice setup.
4) Really think through your heating system and make sure you get one where you can run the temp probe and the heater all the way to the bottom of the tank. I had purchased a Finnex 500W heater for the saltwater container along with a FInnex Controller. Here is the specific controller.

https://www.marinedepot.com/digital-aquarium-temperature-controller-finnex-hc-0810m-deluxe

This turned out to be a bad purchase as the probe cord is very short and only drops-down approximately 40” but you really don’t have access to 40” unless you lay the controller literally on the lid of the storage container which is really a bad idea. So in my case the probe cord only drops down half-way in the tank which is really not helpful if you storage container is less than 50% full of saltwater. So I’m now in the process of ordering a Ranco Controller that I’ll I use with my Finnex Heater. What is super nice about the Ranco Controller is that you can custom order the length of your probe cord and the power cord that connects to the Finnex heater is really long (6 feet).
5) For my pump, I ended-up going with the Sicce Pump. Here is the specific pump:

https://www.bulkreefsupply.com/syncra-sdc-7-0-controllable-pump-800-1900-gph-sicce.html

I have had a love/hate relationship with this pump. First what I hate....the instructions are pretty poor and I had to rely on a YouTube video to set up the Wifi. Second, unlesss the pump is perfectly level on the floor the pump will leak. I had read online about others complaining of leaks. In my case I had to take the pump apart and re-install the rubber gasket to get the leaking to stop. Fortunately, I got awesome tech call center support which made the troubleshooting process bearable. These pumps are not cheap, at $350.00 you’d think that the Italians could create decent instructions and ensure that their rubber gaskets are properly secure/installed before shipping. Here is what I like about the SICCE pump.
- super quiet
- good power - both for circulation and pumping saltwater into the DT.
- Controller that comes with the Sicce is really cool to use and good looking (if there is such a thing for a pump controller)
- Wifi is stable and an absolute life saver when you are home alone and are trying to pump saltwater into your DT. I just get up on a ladder, put the hose in the DT and hit one button on my iPhone and the pump turns-on, same process for turning the pump-off. A really convenient feature that I absolutely love.
6) My biggest ah-ha lesson learn was to remember that when plumbing the mixing station when the tanks is empty versus full it changes the entire weight distribution/pressure on the whole plumbing system. I had to deal with a couple of annoying leaks where there was pressure on the plumbing when the tanks were filled with water.
7) Lastly, very rarely, unless you are just dang lucky will your pump line-up on the same level as the bottom bulkheads on the storage tanks. You end-up having to spend time raising and lowering the pump until it is perfectly aligned with the Bulkheads. As you will see in the picture below, I ended-up using a 2x6 and some 1/4” plywood to get everything perfectly leveled. This is where I probably spent over 25% of my total install time.

Here is the saltwater mixing station. The RO storage tank is on the left and the saltwater storage tank is on the right. It’s a pretty standard configuaration that allows me to use the various ball-values to configure the station to mix saltwater. It’s simple to transfer RO water into the Saltwater storage tank by turning-off the ball values that are used for mixing saltwater and opening-up the ball value on the RO storage tank. It takes just a few minutes to transfer 60G of RO water. Finally the 3/4” barb hose fitting in the middle of the picture is how I transfer water into the DT. It also is great for quickly filling-up a water container for really pure drinking water. I’ve also included a second picture that shows where the leak was occurring on the Sicce Pump before I took it apart and fixed.

F6DCB39B-B7BC-4B02-A137-FE993DC61DF8.jpeg


D1EFE83C-FD0D-4D7F-8A81-2549D82B3487.jpeg
Nice work, also like the two tankless water heaters. I’m enjoying your build, thanks for the thorough write ups.
 
OP
OP
K

Karliefish

Well-Known Member
View Badges
Joined
Apr 12, 2020
Messages
740
Reaction score
516
Location
Western North Carolina
Rating - 0%
0   0   0
Nice work, also like the two tankless water heaters. I’m enjoying your build, thanks for the thorough write ups.
Yes those are tankless water heaters. I swapped out the original floor water heaters when I started my new tank build as I need the floor space for my fish tank room. Thanks for comments - nice to hear.
 
OP
OP
K

Karliefish

Well-Known Member
View Badges
Joined
Apr 12, 2020
Messages
740
Reaction score
516
Location
Western North Carolina
Rating - 0%
0   0   0
Control Room Completed

Well building a Control Room to house all of your Reef Tank computer stuff and equipment controllers may not be as sexy as setting-up a DT, but it’s still quite important and can make your life easier over the long run if done right. This past weekend I finally completed our dedicated Control Room which in essence will be the brain for our new 365G DT.

Early-on as I started putting together our equipment list (pumps, lights, heaters, etc) and I realized I was going to end-up with a nightmare of cords and cables everywhere if I didn’t stop and think through how I wanted to install all of this equipment and keep things tidy and organized. I knew I wanted to purchase some sort of controller cabinet where I could mount the equipment and hide all the ugly wires and powercords/powerbricks. I thought about crafting my own control cabinets and quickly dismissed this idea as I was already spending way to much time setting up this tank. So I opted to go with two Deluxe Controller Boards (Cabinets) from Adaptive Reef. Even on sale, these Boards are on the expensive side for what you get, and in my opinon is one of the most over-priced products I have acquired to date. Quality is ok, but nothing stellar. You are basically buying a prefabricated board with cutouts, some cord plug covers and screws. I’m hoping some other company will enter this market space and create some much needed competition.

What I like about the Adaptive Reef Controller Boards:
1 ) Easy material to work with (drilling, etc)
2) Plenty of cutouts to thread cords & cables
3) Decent space inside to hide all the cords & cables
4) Finished product does have a nice “pop” when people look into the Control Room
5) The product does its job - hides your power cords and cables and provides ample surface space for mounting a fair amount of equipment, as you’ll see in our picture below.

What I don’t like about the Adaptive Reef Controller Boards:
1) They really are over priced for what you get. They charge you for add-on‘s which you really don’t have a choice but to buy once you committed yourself to use their controller boards. For example, if want to connect a shelf to the controller board, for lets say a Neptune Trident, get ready to shell-out another $60.00. Need a few more cord-cutouts plugs, that will cost you an additional $23.00.
2) There are two interior shelves (more like small ledges) for holding those big ugly power blocks. Mounting the power blocks is a bit tricky and you better have some LONG cables-ties around the house to hold them in place. Adaptive Reef doesn’t include anything to tie-down the power blocks.
3) Adaptive Reef includes a French Cleat that is suppose to make removing the controller board from the wall easy. Well once you have all of your equipment mounted on these boards and all the cords running through them to a second controller board - forget it. There is nothing easy about taking the boards off the wall and reconfiguring the layout. Trust me on this - I learned this the hard way when I wanted to make a small reconfiguration to my board layout. It took a better part of a day to do that task. These boards can quickly become quite heavy and difficult to work with - I mention this further in my lessons learned.
4) Some of the cord cut-out plugs are not very well machined. In some cases they were difficult to push into place (required a real hard press or a small hammer). In other cases, they were so loose they would just fall-out and not stay in place.

Lessons learned (some of these really apply to large tank setups):
1). Suggestion....If you are really into creating “the look” - a highly professional tidy looking Control Room with pop, then make sure to have your electrical wall power placed strategically next to your Controller Boards - check out my picture to understand further.
2). REALLY think-through all of the equipment you’ll be buying in-advance before laying out your controller boards. Yes, you can add to these controller boards as you add equipment to your DT. But I guarantee you’ll be reconfiguring the layout which can become a tedious and painful task.
3) If you are going to have multiple Controller Boards, then #2 becomes REALLY important. You will be running cords between the Controller Boards as all cords eventually have to get back to your display tank. Trying to take a Controller Board off-the-wall with cords running through a second controller board makes this a two-person job. Bottom line, changing the equipment layout on your Controller Boards can become a really challenging experience.
3) If you have a large DT (our’s is 8 feet long) then think-through in-advance if the control equipment you are planning on mounting comes with cables long enough to reach the far end of your tank. Here are two examples where this problem significantly delayed our Control Room project.

1st example: I bought two EcoTech Vortech MP60’s pump to be mounted at each end of the tank ((opposite each other). The plan was to mount the two Vortech controllers that operate the Vortech pumps onto the Adaptive Reef Mounting Boards next to each other. To help everyone visualize our main DT room layout, the Adaptive Reef Controller Boards are mounted on a wall next to the left end of the DT. So mounting the EcoTech Vortech controller onto the Adpative Reef Controller Board for the left-side powerhead was really simple - literally a 3-4’ cable run. Now the Vortech Powerhead at the other end of the tank - BIG PROBLEM! When I started to install the 2nd EcoTech Vortech pump, I realized that the standard Vortech cable (approximately 8 feet) would be way to short. I was going to require a 14 foot cable to reach all the way to the Adaptive Reef Controller Board. Unfortunately, as we all know running a cable never goes in a straight line. In my case, I needed to take the cable down 2 feet from where the pump was mounted on the DT glass, then across the underside of the tank 8 feet, then up 2 feet and then I needed to pass through the first Adaptive Reef Controller Board (add another 1 1./2 Feet) to finally reach the Vortech Controller. In total, I need a cable length of 14 feet. So my Control Room installation project came to a sudden halt as I needed to research Vortech extension cables. After some research, I found a small company that makes extension cables for Vortech Controllers. This delay set me back over a week on the control room installation.

2nd example: I took a recent decision to go with two Gyre Pumps from Maxspect (XF350s) to provide the flow for the upper portion of our 365G DT. Side note: I had been in a constant debate with myself for two months on what pumps I wanted to use on the upper portion of our tank. Additionally, I decided to forgo using the Maxspect Controller to manage the Gyre Pumps and instead purchased a Hyrdos WaveEngine controller (I will give a in-depth review of this product in a future post). Well the only open spot I had left on my Adaptive Reef Controller Boards was an open location on the the Controller Board furthest from the tank (of course!). Therefore, I was suddenly having to research extension cables for the Maxspect Gyre pumps. If I had known I was going to use a Hydros WaveEngine, I would have configured the layout on the boards differently to avoid the extension cable drama. In total, I had 4 different controllers that I had to acquire extension cables for and lost a total of three weeks sorting all of this out. So the take away from all of this is, plan ahead ALL your equipment for your control room and think about cable lengths for all your equipment and how the cables will need to be run to work with your Controller Boards.

So what is in our Control Room....the picture below shows the final installation. I’ve included a reference guide that explains everytning that is on our Controller Boards. I said earlier that the Control Room is now complete, well that isn’t entirely correct. As you’ll see in the second picture, We have a identified a place in the Control Room that will hold a large screen table (probably 16-18” long) that will be used exclusively to display our Apex DashBoard and Hydros Dashboard.

E92BEAE7-6ACE-443C-89B6-C92FADA47DEA.jpeg


1) Two dedicated circuits - we split all heaters and pumps, including Apex Energy Bars across both circuits. We had the circuits installed right next to the controller boards to keep a “clean” look. Plugged into these wall outlets are #6, #7 & #8
2) Ranco dual heater controller - One sides operates a Finnex 800W Titanium Heater. I still need to figure out what kind of wall fan I’m going to purchase & install on the wall for the ”cold” side of this controller. Any good suggestions?
3) Ranco single heater controller - operates a second Finnex 800W Titanium Heater that helps take the load off the primary heater plus creates resliency if the primary heater should ever fail.
4) BubbleKing SuperMarin 250 Protein Skimmer Controller
5) Apex Neptune Main Computer
6) Apex Neptune Energy Bar number one: plugged into this Energy Bar is #3, #4, #10 & #11
7) Apex Neptune Energy Bar number two: plugged into this Energy Bar is: #2, #9, #13 & #14
8) Hydros WaveEngine which is controlling, through a wireless connection, the Vortech pump controllers #11, #12 & #13. Additionally it is also controlling two Maxspect Gyre FX350 pumps. Finally, it will also control our two Abyzz 200 return pumps (#9 & #10) once I get the interface cable delivered this week.
9) Abyzz 200 controller - operates one of the two Abyzz return pumps. These pumps are the primary workhorses of the tank
10) Abyzz 200 controller - operates the second Abyzz return pump. I went with these two German pumps as part of the overall design to have redundancy and quality built into all key components.
11) Vortech MP40 controller - operates the Vortech pump placed on the back wall (lower middle) of the DT.
12) Vortech MP60 controller - operates the Vortech pump on the far right end of the tank (lower front). This is the controller that required the extension cable I discussed earlier.
13) Vortech MP60 controller - operates the Vortech pump on the left end of the tank (lower back)
14) Reef Octopus controller - operates a Reef Octopus Varios 8 pump used on a closed loop system (controlling the UV, carbon reactor and GFO Reactor). The closed-loop pump has been setup to handle a chiller, if required in the future.
15). LOL!! Yes I know there is no #15 on the picture. I realized in writing this post that I have completely forgotten that I have on one additional controller that will need to be installed somewhere on these two Controller Boards in the next several months - a Deltec Twin-Tech Calcium Reactor (CRT1500). I now need to go find the controller and pray it will fix somewhere.

The next picture shows the whole Control Unit Room wall and where we plan mounting a large touchscreen tablet (somewhere between 18-20”). I have been having a challenging time finding the right large display tablet that can be wall-mounted. As I mentioned earlier, this tablet will be a dedicated display for both the Apex Dashboard and the Hydros WaveEngine Dashboard. BTW...we are looking for suggestions on large touch-screen display tablets.

651265EF-4B5A-4B8B-8533-A1A94DFDCEB6.jpeg


Well that’s it....I need to head back into the Tank Utility room now and get this tank ready for saltwater. So close now to starting our 4-month cycle!

I hope some of you found this in-depth post on setting-up a control room helpful.
 

Daveobrien

Active Member
View Badges
Joined
Sep 9, 2011
Messages
172
Reaction score
266
Location
Portland, OR
Rating - 0%
0   0   0
The next picture shows the whole Control Unit Room wall and where we plan mounting a large touchscreen tablet (somewhere between 18-20”). I have been having a challenging time finding the right large display tablet that can be wall-mounted. As I mentioned earlier, this tablet will be a dedicated display for both the Apex Dashboard and the Hydros WaveEngine Dashboard. BTW...we are looking for suggestions on large touch-screen display tablets.

I too am researching a permeant display for my Apexfusion screen. Most setups show a tablet, but I have another idea. Large touchscreen monitor, to a dedicated PC.

A Dell 24" monitor, in landscape position is only $360. That's a much bigger display, than any cheap tablets. power with an old out of date laptop (free), or the cheapest Intel NUC computer you can get on the web ~$400-450.
- Dell 24 Touch Monitor - P2418HT
- Old laptop or Intel NUC (or Equiv) uber small PC

Not Free, but cheaper than an Ipad Pro (largest size). That's my current thoughts.
 
OP
OP
K

Karliefish

Well-Known Member
View Badges
Joined
Apr 12, 2020
Messages
740
Reaction score
516
Location
Western North Carolina
Rating - 0%
0   0   0
I too am researching a permeant display for my Apexfusion screen. Most setups show a tablet, but I have another idea. Large touchscreen monitor, to a dedicated PC.

A Dell 24" monitor, in landscape position is only $360. That's a much bigger display, than any cheap tablets. power with an old out of date laptop (free), or the cheapest Intel NUC computer you can get on the web ~$400-450.
- Dell 24 Touch Monitor - P2418HT
- Old laptop or Intel NUC (or Equiv) uber small PC

Not Free, but cheaper than an Ipad Pro (largest size). That's my current thoughts.
Thanks for the really quick suggestion. I have also been considering the PC route with a large touchscreen display (Such as Dell). My personal hang-up with this option is having to place the main computer on the floor and being so close to the sump not sure in my case that is probably not a smart way to go. I then thought about housing the computer “off the floor”, but the clean ‘look’ I’m going forward makes this not a desirable option either. I am starting to look at kiosk displays to get some other ideas. I’ll post you if I find something exciting.
 

Daveobrien

Active Member
View Badges
Joined
Sep 9, 2011
Messages
172
Reaction score
266
Location
Portland, OR
Rating - 0%
0   0   0
Thanks for the really quick suggestion. I have also been considering the PC route with a large touchscreen display (Such as Dell). My personal hang-up with this option is having to place the main computer on the floor and being so close to the sump not sure in my case that is probably not a smart way to go. I then thought about housing the computer “off the floor”, but the clean ‘look’ I’m going forward makes this not a desirable option either. I am starting to look at kiosk displays to get some other ideas. I’ll post you if I find something exciting.
That's why I quoted Intel NUC like compute solution. It's a ~6"x6" hocky puck PC. (HTPC, Ultra-small form factor)... Get the cheapest one you want, because all you're running is a web browser to display ApexFusion webpage.

This one is a little chunky, but ~$300. There are Non Intel-Nuc options out there too, slimmer, cheaper, literally, mount on the back of the monitor.

Add a USB wireless keyboard and mouse, and leave those someplace else when not in use.

Intel NUC NUC6CAYH Mini PC/HTPC - Intel J3455 Quad-Core, Intel HD Graphics 500 Dual Monitor Capable, WiFi (ac) + Bluetooth 4.2, Windows 10 Pro (Renewed) (8GB RAM + 120GB SSD)


1617288105163.png


Thinner, cheaper... (also less capable)
Beelink T4 Mini PC Windows 10 Quad Core Intel Atom x5-Z8500 Mini Desktop Computer DDR4 4GB RAM 64GB, 2.4G/5G WiFi, Gigabit Ethernet, USB 3.0, BT4.0, 4K HDIM&DP Dual Display Support Auto Power On


1617288456395.png
 

Mjl714

Valuable Member
View Badges
Joined
Aug 4, 2014
Messages
1,106
Reaction score
1,844
Location
Earth
Rating - 0%
0   0   0
That's why I quoted Intel NUC like compute solution. It's a ~6"x6" hocky puck PC. (HTPC, Ultra-small form factor)... Get the cheapest one you want, because all you're running is a web browser to display ApexFusion webpage.

This one is a little chunky, but ~$300. There are Non Intel-Nuc options out there too, slimmer, cheaper, literally, mount on the back of the monitor.

Add a USB wireless keyboard and mouse, and leave those someplace else when not in use.

Intel NUC NUC6CAYH Mini PC/HTPC - Intel J3455 Quad-Core, Intel HD Graphics 500 Dual Monitor Capable, WiFi (ac) + Bluetooth 4.2, Windows 10 Pro (Renewed) (8GB RAM + 120GB SSD)


1617288105163.png


Thinner, cheaper... (also less capable)
Beelink T4 Mini PC Windows 10 Quad Core Intel Atom x5-Z8500 Mini Desktop Computer DDR4 4GB RAM 64GB, 2.4G/5G WiFi, Gigabit Ethernet, USB 3.0, BT4.0, 4K HDIM&DP Dual Display Support Auto Power On


1617288456395.png

I really like this idea (small footprint) another might be to add a laptop holder (laptop is closed when stored) of sorts up above the electrical conduit (away from water) connected to a touch screen.
 

Creating a strong bulwark: Did you consider floor support for your reef tank?

  • I put a major focus on floor support.

    Votes: 54 40.0%
  • I put minimal focus on floor support.

    Votes: 28 20.7%
  • I put no focus on floor support.

    Votes: 48 35.6%
  • Other.

    Votes: 5 3.7%
Back
Top