First off, if you don't like narratives and lots of pictures then I don't think this post is going to be for you. If you stick in until the end I would love to hear your thoughts, your feedback, advice and criticisms.
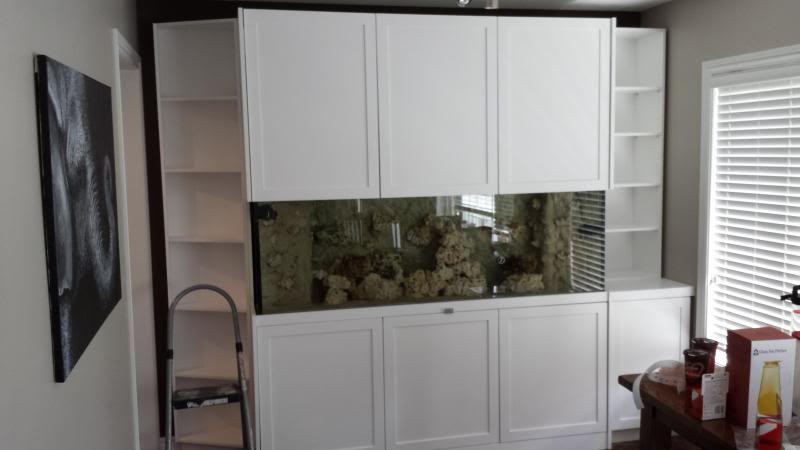
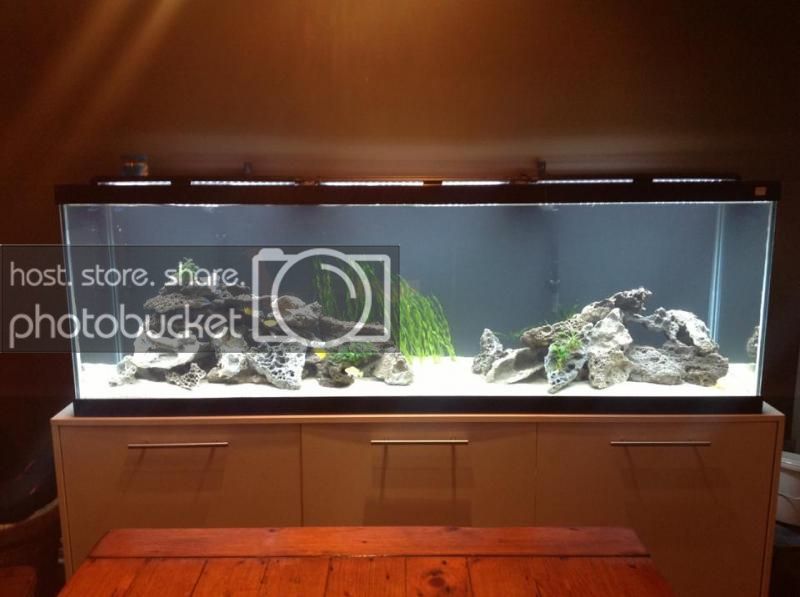
I tried to make this the best tank I've ever seen...but I'm relatively new to saltwater (only 1 year with a few small tanks) and if you think I could have done it better than I did, I sincerely want to know about it. This build took me nearly 9 months to complete. Partly because I don't move very fast, and partly because I nearly scrapped the whole project a great many times as I was going through it. I can't tell you how many times I wished I had just sold the tank and bought a 90G Starfire tank and been done with it in a few weeks. But I'm glad I stuck with it because when my vision was finally solidified a few weeks ago it was better than I could have imagined.
The story of this tank starts nearly 5 years ago. At the time I had a 60g short tank with cichlids in it. I went to buy some valisineria plants from a person in my local fish club and she had this amazing planted tank with discus in it.
My wife and I were enthralled with the tank, and the stand and the everything about it. We told her if she was ever going to sell it to let us know. Fate, as it turns out, favoured us. About 6 months later she got pregnant and decided
to downsize to an Iwagumi style rimless tank and called us to see if we were still interested in the tank. We promptly made a deal and went to get it. It was a Miracles tank with Starfire front glass that started life as a reef tank, but she
converted it to freshwater. I tried to mimic the style she had with driftwood and plants, but I never quite got the tank to take off. I was running 2 canister filters being fed through bulkheads in the bottom of the tank and the head pressure was just a bit too much, even for big filters. The tank worked okay for a few years, but it always had problems with algae, or dying fish...or something else.
I was never quite satisfied with it and when I took it down it looked like this:
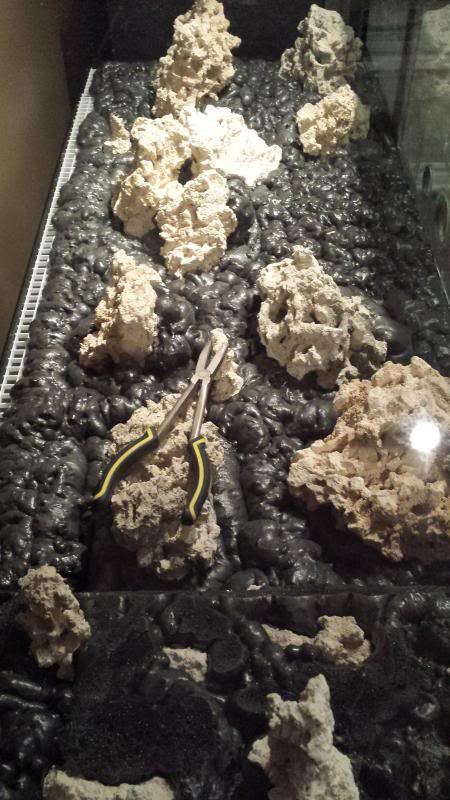
I decided at that point to convert it to a cichlid tank. I capped all the bulkheads, bought some aragonite and few hundred pounds of lace rock and got to building. Which in my world always takes forever because I work and have kids in
sports and don't like to rush. Going over the back with the filters made the tank work much better, and everything started off great. Then I realized how hard it is to get good quality haps and peacocks where I live and how truly evil
African Cichlids can be. I had a few fish take over the tank, and other fish breeding and couldn't find stock and I felt like I had done it all for nothing.
I was never quite satisfied with it and when I took it down it looked like this:
Around that time I had started an 8 gallon all-in-one CADLights tank as a mini reef. Everyone told me learning about reef keeping on a nano tank could be hard since things can go bad fast, but I was up for the challenge.
That little tank thrived and I fell in love.
Big time.
I started the little tank in May and by August I put all the fish and gear from the cichlid tank up for sale to get it empty and start building my dream reef.
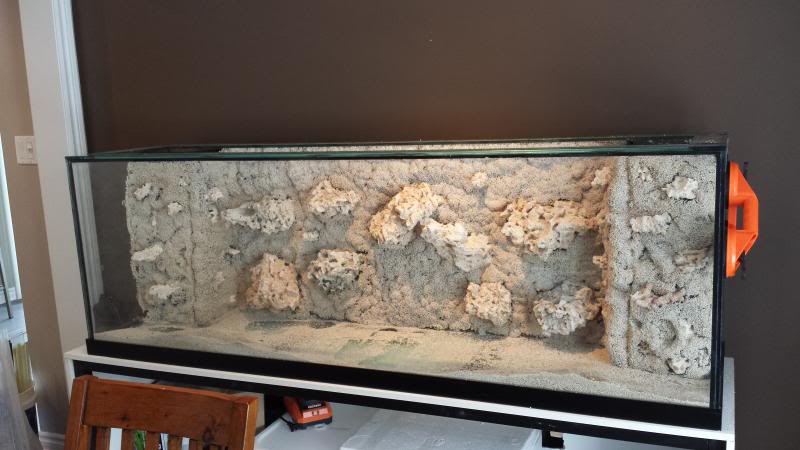
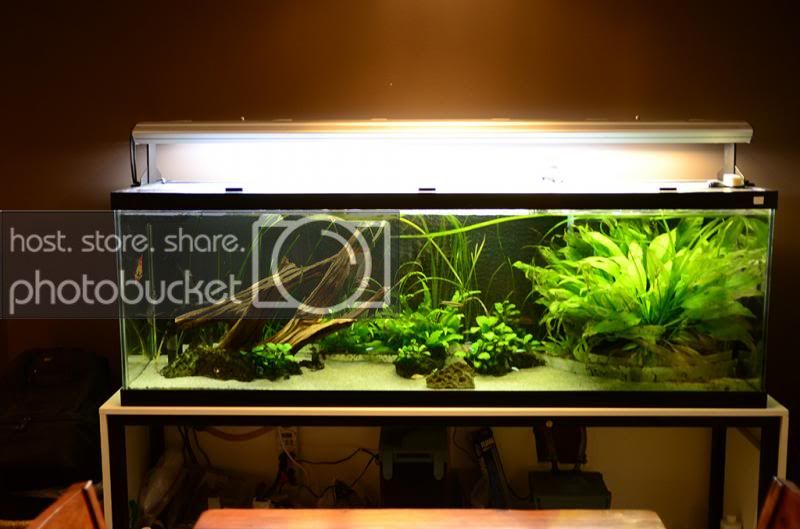
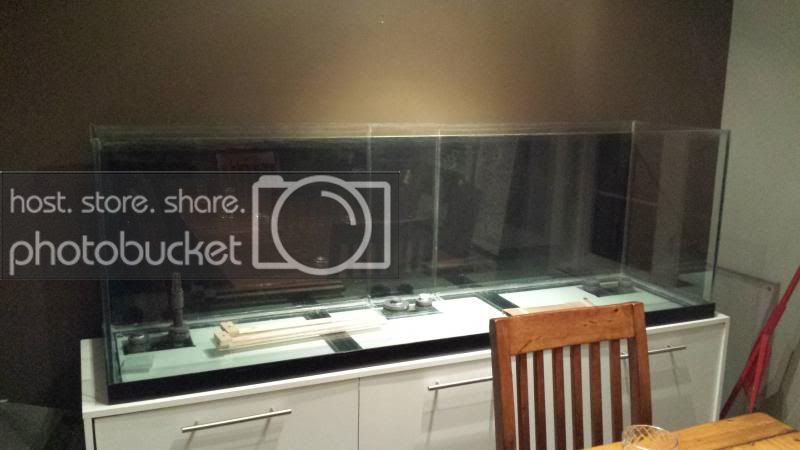
This is what it looked like the day I ripped it apart to rebuild.

The stand was a square steel one covered in melamine that I got with the tank and the lights were an 8 bulb T8 job that also came with the tank. I knew they were both going to go, so I sold the lights and used the stand a work bench
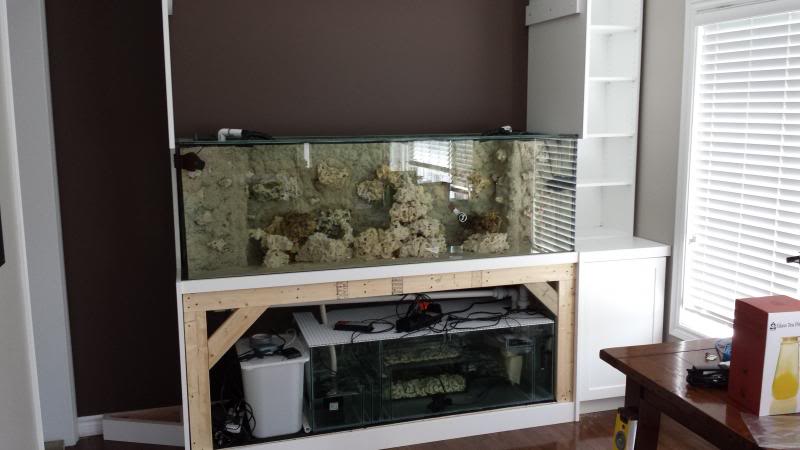
until I was ready to build the new stand out of 2x4's.
I started my whole build thinking about my lights. I had 2 top braces on the tank and it's 6 feet long so I knew I was going to either have to go with 3 LED's, or change the tank. I started looking at spread patterns of lights and coverage
areas and settled on either Radion Pro's or GHL Mitras. At the time the Mitra's were on sale and two of them would cost less than 3 of the Radions so I went with them.
Of course that meant I would have problems from my center braces if I didn't remove them so that was step one. I got a hack saw blade and carefully cut into the plastic, then removed the top brace. Let's just say I wouldn't want to do it again. It's not hard, just tedious and when you have starfire glass any little touch of the blade will scratch your glass.
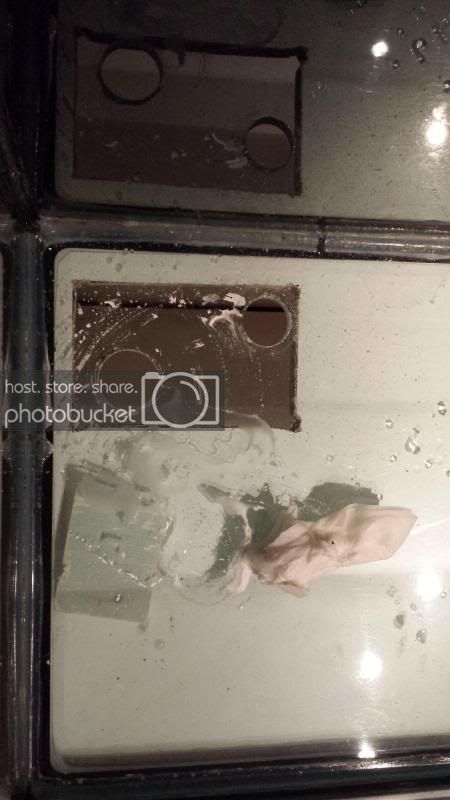
Once that was done I decided to re-seal the whole tank. The original silicone was clear and had a bit of algae behind it from careless scraping and it was in relatively crappy condition. I very carefully removed all the interior silicone
without going through the seams between the panels. Once that was done I taped up my lines and re-sealed with GE SCS1200 black. I've seen many, many new tanks with black silicone and I love it. It's so clean and you don't really lose
much space - you certainly don't gain anything using clear over black and you'll never see algae building up on it.
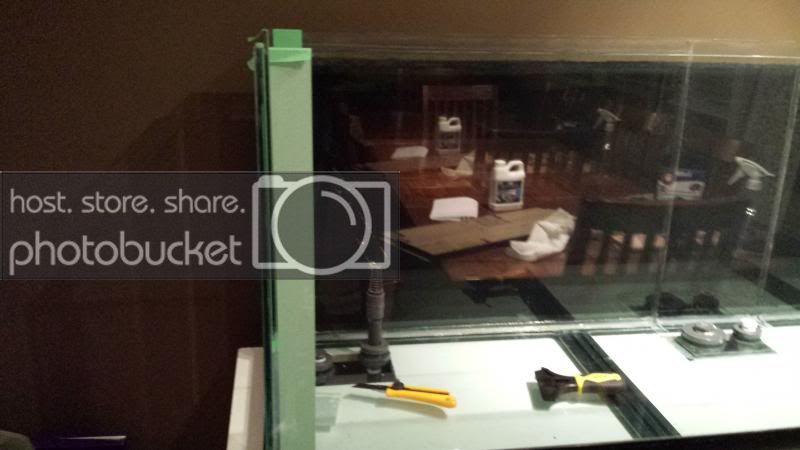
This tank had quite a few holes drilled into it. There were two 3/4" bulkheads in each corner, and one 3/4" plus a 1" in the center of the tank. I decided to go with rectangular corner overflow boxes, but really wanted 1" overflows on the tank. My return pump is a DC2640 so I had no concerns with 3/4" returns. But I wanted at least 1" overflows based on calculators online for the volume of water, overflow box size and flow rates I was hoping for. Problem is, the holes were drilled for schedule 80 bulkheads at 3/4". My buddy owns a fish shop and has a really good set of bits, so we built up some tape and proceeded to drill two of the holes bigger to accommodate the overflows. Worked like a charm, likely because the glass on the bottom of this tank is 1" thick.
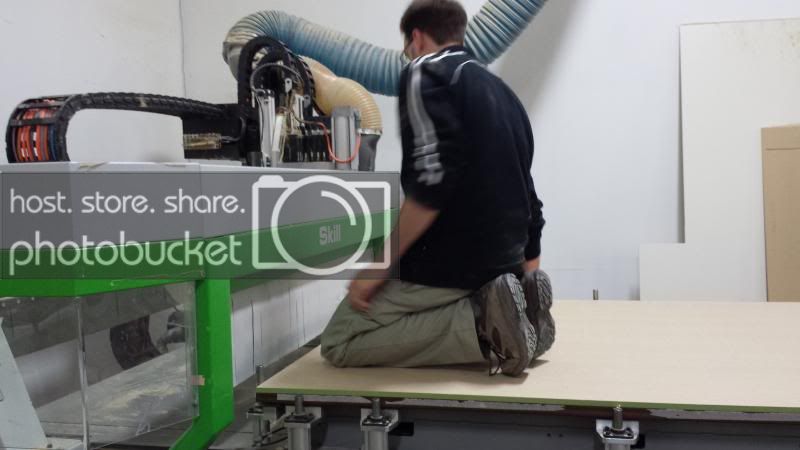
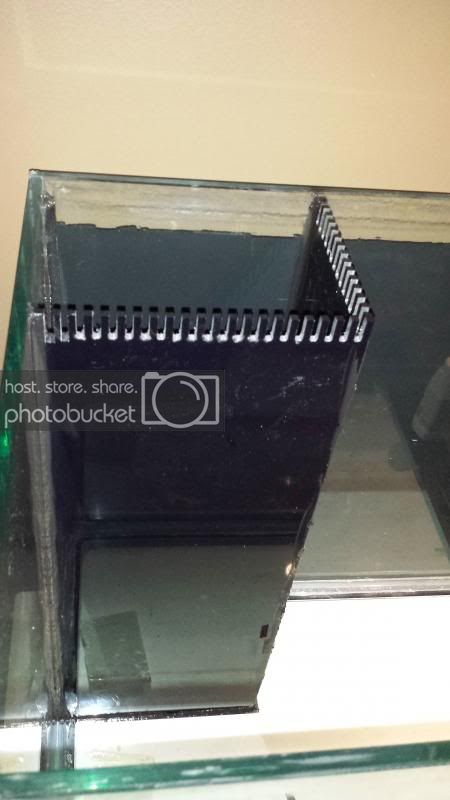
With that done I ordered my acrylic for my overflow boxes from a local supplier, cut to size. I then got a buddy with a CNC machine at his work to cut the gates in the top of the acrylic for me, which worked out relatively well, but if I
did it again, I would cut the panels short and then use those pre-made combs you can get to attach to the top because it was allot of work. He was trying to perfect the method for doing it, so I guess it was worth it.
I mocked them in, then put them in with GE SCS1200. I know that silicone doesn't really bond acrylic to glass that well, but be patient because it won't matter soon enough")
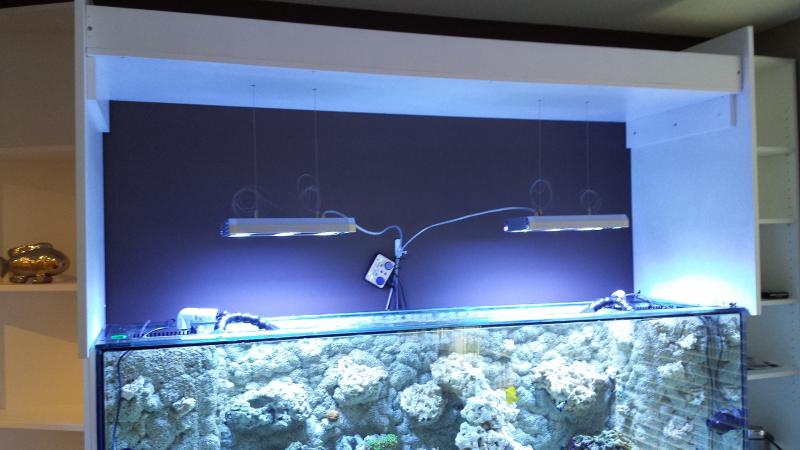
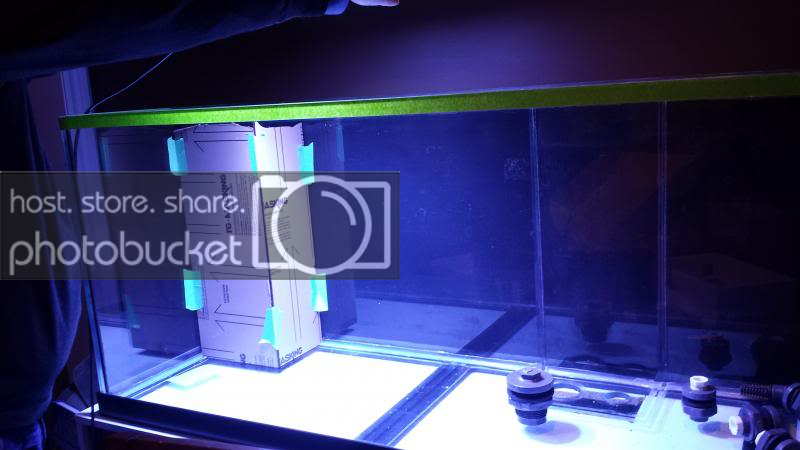
Oh yeah, before everything got sealed into place I did a light test to see how the coverage would be. Looking pretty good.
At this point I decided to pick up some stuff I was going to need for the build.
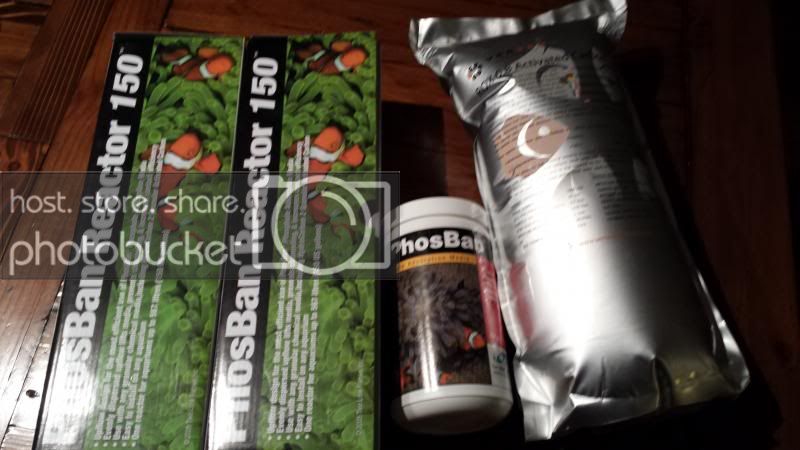
Reactors:
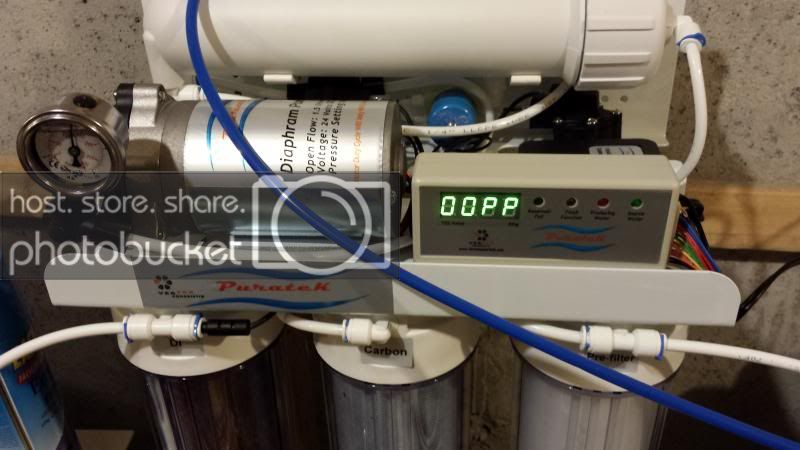
Vertex 100GPD RO/DI:
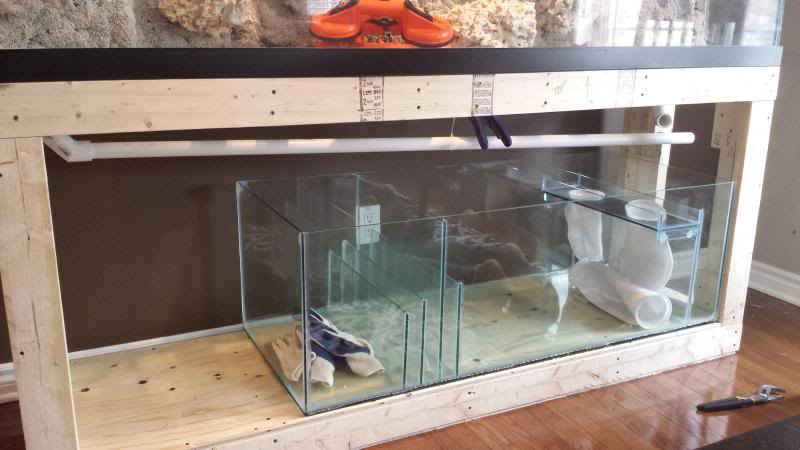
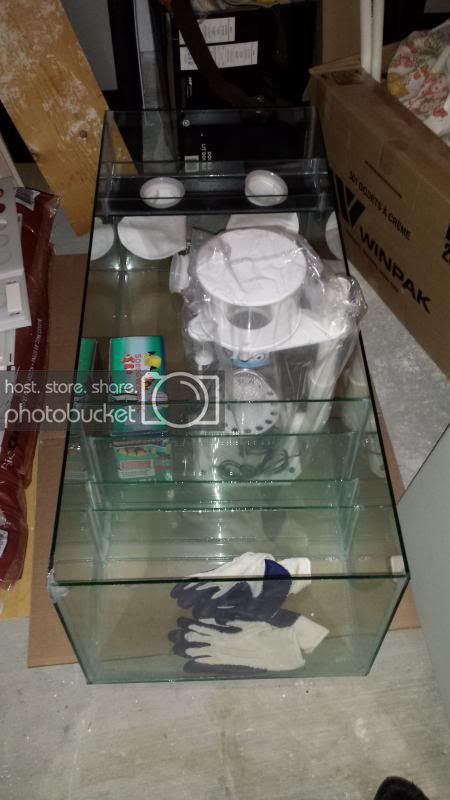
Sump, Speedwave DC Return pump and Skimmer:
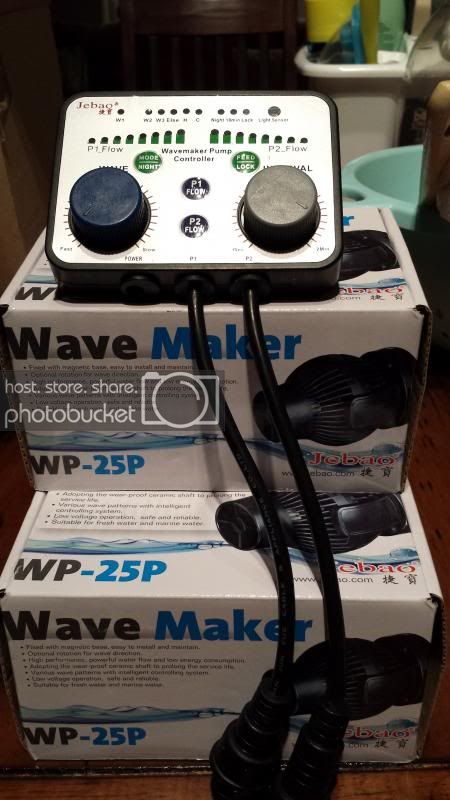
Jebao WP-25's:
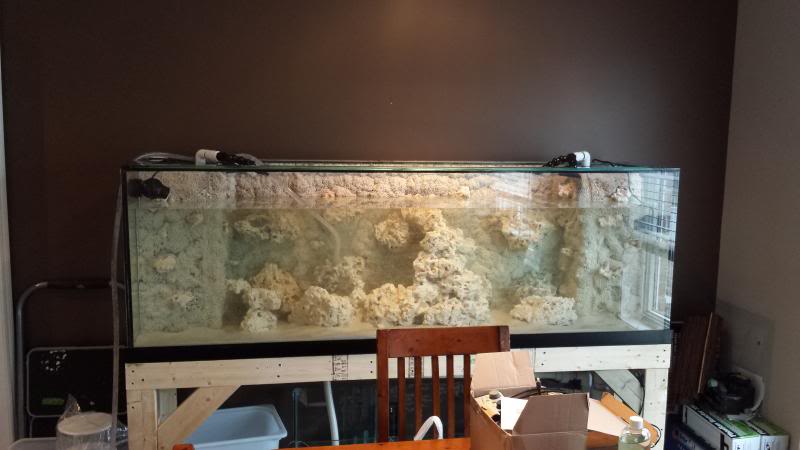
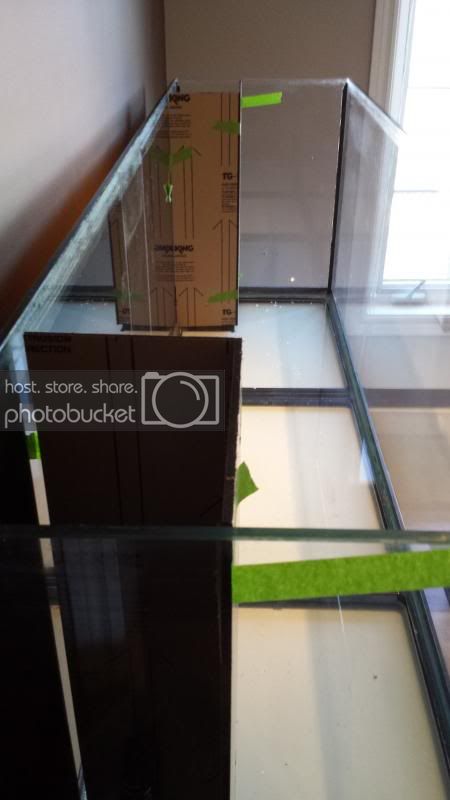
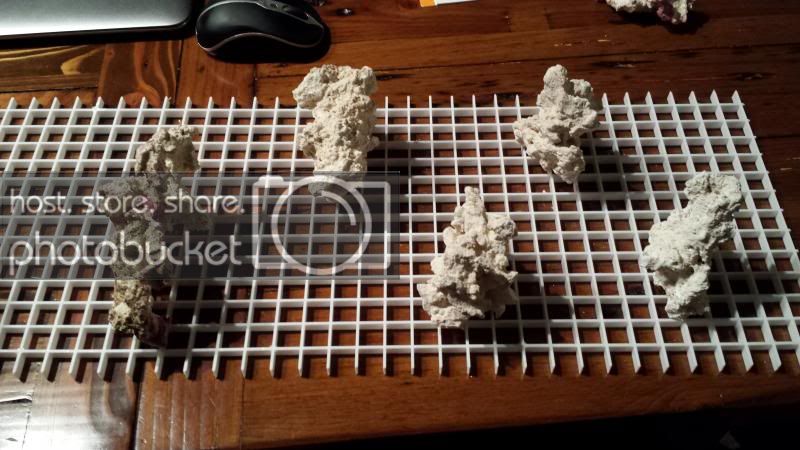
The time had come to start working on my background. I had decided, in the beginning, to cover my overflow boxes with a spray foam background. when I started looking at it though, I realized it would probably look good if I did the whole background with spray foam. So I mocked up the egg crate for the panels.
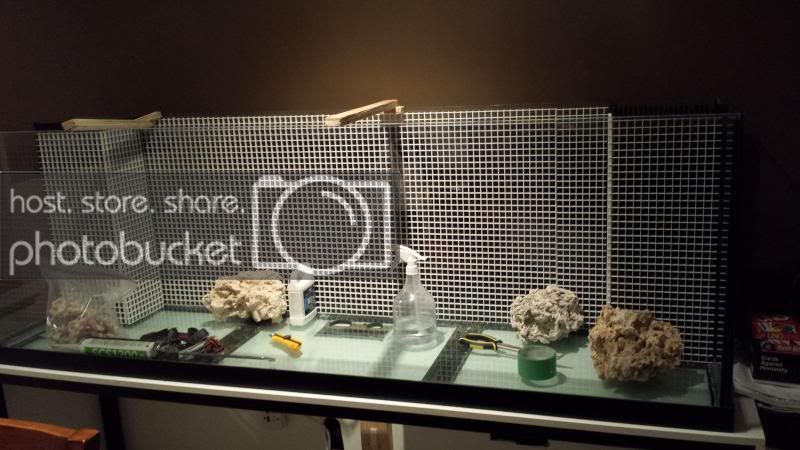
Then started to work on the overflow panels outside the tank.
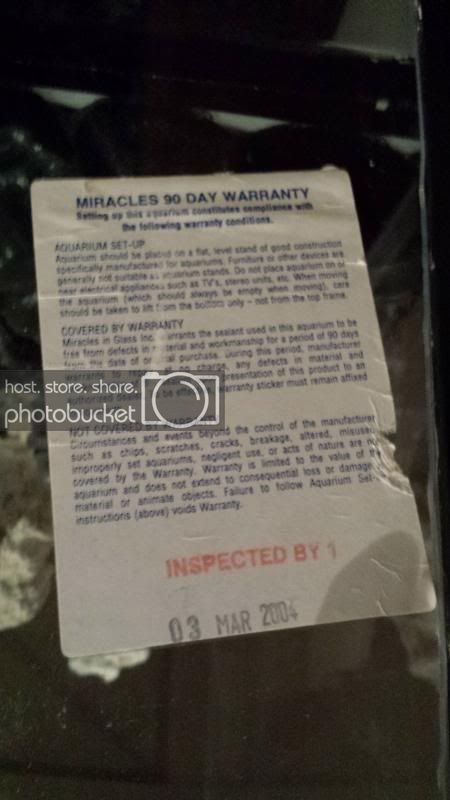
Then we flipped the tank over to work on the big panels inside the tank. And promptly found the inspection sticker from 2004. I doubt I would have ever seen this before as the tank was sitting on a stand covered in Melamine that you
couldn't really see through.
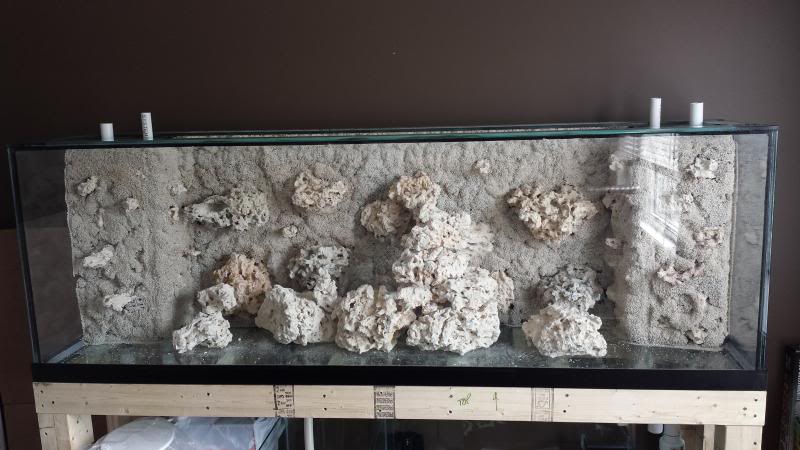
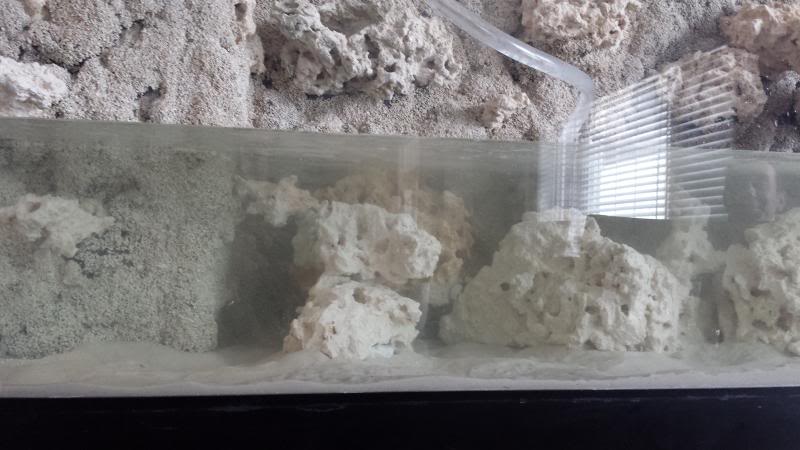
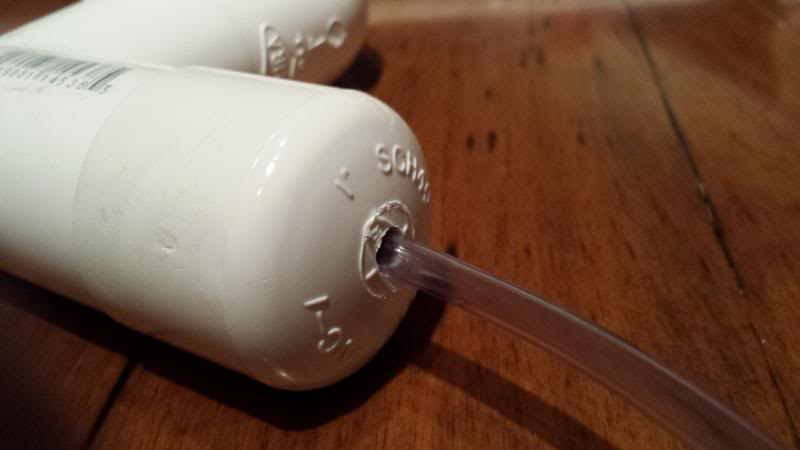
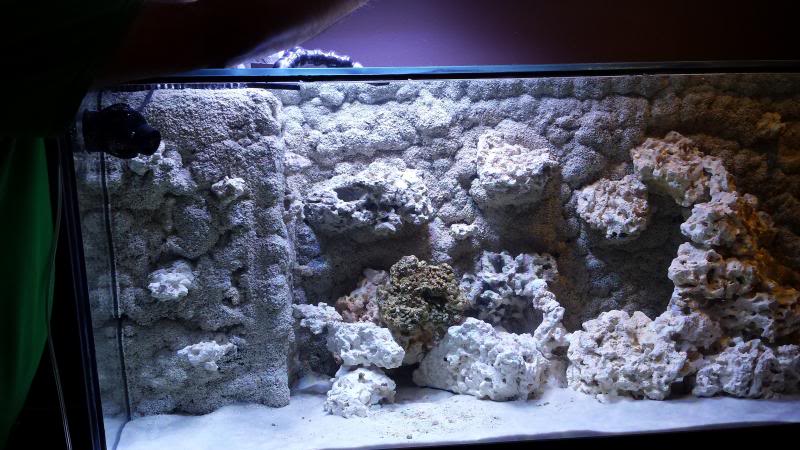
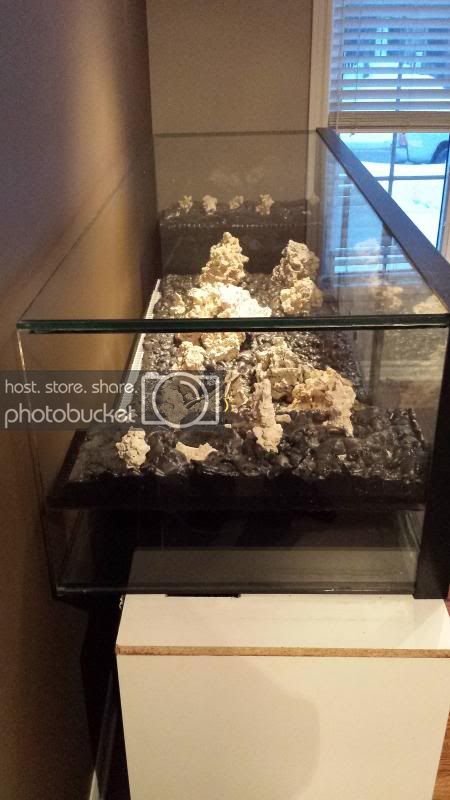
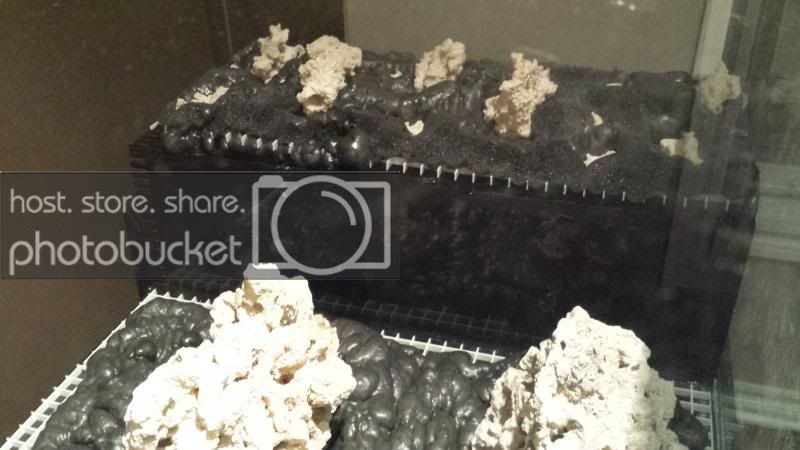
Then the work on the background started in earnest. I used the Great Plains black pond foam since it's UV resistant and comes in pretty big cans. I stopped counting after about 8 cans of it.
I tried to make this the best tank I've ever seen...but I'm relatively new to saltwater (only 1 year with a few small tanks) and if you think I could have done it better than I did, I sincerely want to know about it. This build took me nearly 9 months to complete. Partly because I don't move very fast, and partly because I nearly scrapped the whole project a great many times as I was going through it. I can't tell you how many times I wished I had just sold the tank and bought a 90G Starfire tank and been done with it in a few weeks. But I'm glad I stuck with it because when my vision was finally solidified a few weeks ago it was better than I could have imagined.
The story of this tank starts nearly 5 years ago. At the time I had a 60g short tank with cichlids in it. I went to buy some valisineria plants from a person in my local fish club and she had this amazing planted tank with discus in it.
My wife and I were enthralled with the tank, and the stand and the everything about it. We told her if she was ever going to sell it to let us know. Fate, as it turns out, favoured us. About 6 months later she got pregnant and decided
to downsize to an Iwagumi style rimless tank and called us to see if we were still interested in the tank. We promptly made a deal and went to get it. It was a Miracles tank with Starfire front glass that started life as a reef tank, but she
converted it to freshwater. I tried to mimic the style she had with driftwood and plants, but I never quite got the tank to take off. I was running 2 canister filters being fed through bulkheads in the bottom of the tank and the head pressure was just a bit too much, even for big filters. The tank worked okay for a few years, but it always had problems with algae, or dying fish...or something else.
I was never quite satisfied with it and when I took it down it looked like this:
I decided at that point to convert it to a cichlid tank. I capped all the bulkheads, bought some aragonite and few hundred pounds of lace rock and got to building. Which in my world always takes forever because I work and have kids in
sports and don't like to rush. Going over the back with the filters made the tank work much better, and everything started off great. Then I realized how hard it is to get good quality haps and peacocks where I live and how truly evil
African Cichlids can be. I had a few fish take over the tank, and other fish breeding and couldn't find stock and I felt like I had done it all for nothing.
I was never quite satisfied with it and when I took it down it looked like this:
Around that time I had started an 8 gallon all-in-one CADLights tank as a mini reef. Everyone told me learning about reef keeping on a nano tank could be hard since things can go bad fast, but I was up for the challenge.
That little tank thrived and I fell in love.
Big time.
I started the little tank in May and by August I put all the fish and gear from the cichlid tank up for sale to get it empty and start building my dream reef.
This is what it looked like the day I ripped it apart to rebuild.
The stand was a square steel one covered in melamine that I got with the tank and the lights were an 8 bulb T8 job that also came with the tank. I knew they were both going to go, so I sold the lights and used the stand a work bench
until I was ready to build the new stand out of 2x4's.
I started my whole build thinking about my lights. I had 2 top braces on the tank and it's 6 feet long so I knew I was going to either have to go with 3 LED's, or change the tank. I started looking at spread patterns of lights and coverage
areas and settled on either Radion Pro's or GHL Mitras. At the time the Mitra's were on sale and two of them would cost less than 3 of the Radions so I went with them.
Of course that meant I would have problems from my center braces if I didn't remove them so that was step one. I got a hack saw blade and carefully cut into the plastic, then removed the top brace. Let's just say I wouldn't want to do it again. It's not hard, just tedious and when you have starfire glass any little touch of the blade will scratch your glass.
Once that was done I decided to re-seal the whole tank. The original silicone was clear and had a bit of algae behind it from careless scraping and it was in relatively crappy condition. I very carefully removed all the interior silicone
without going through the seams between the panels. Once that was done I taped up my lines and re-sealed with GE SCS1200 black. I've seen many, many new tanks with black silicone and I love it. It's so clean and you don't really lose
much space - you certainly don't gain anything using clear over black and you'll never see algae building up on it.
This tank had quite a few holes drilled into it. There were two 3/4" bulkheads in each corner, and one 3/4" plus a 1" in the center of the tank. I decided to go with rectangular corner overflow boxes, but really wanted 1" overflows on the tank. My return pump is a DC2640 so I had no concerns with 3/4" returns. But I wanted at least 1" overflows based on calculators online for the volume of water, overflow box size and flow rates I was hoping for. Problem is, the holes were drilled for schedule 80 bulkheads at 3/4". My buddy owns a fish shop and has a really good set of bits, so we built up some tape and proceeded to drill two of the holes bigger to accommodate the overflows. Worked like a charm, likely because the glass on the bottom of this tank is 1" thick.
With that done I ordered my acrylic for my overflow boxes from a local supplier, cut to size. I then got a buddy with a CNC machine at his work to cut the gates in the top of the acrylic for me, which worked out relatively well, but if I
did it again, I would cut the panels short and then use those pre-made combs you can get to attach to the top because it was allot of work. He was trying to perfect the method for doing it, so I guess it was worth it.
I mocked them in, then put them in with GE SCS1200. I know that silicone doesn't really bond acrylic to glass that well, but be patient because it won't matter soon enough
Oh yeah, before everything got sealed into place I did a light test to see how the coverage would be. Looking pretty good.
At this point I decided to pick up some stuff I was going to need for the build.
Reactors:
Vertex 100GPD RO/DI:
Sump, Speedwave DC Return pump and Skimmer:
Jebao WP-25's:
The time had come to start working on my background. I had decided, in the beginning, to cover my overflow boxes with a spray foam background. when I started looking at it though, I realized it would probably look good if I did the whole background with spray foam. So I mocked up the egg crate for the panels.
Then started to work on the overflow panels outside the tank.
Then we flipped the tank over to work on the big panels inside the tank. And promptly found the inspection sticker from 2004. I doubt I would have ever seen this before as the tank was sitting on a stand covered in Melamine that you
couldn't really see through.
Then the work on the background started in earnest. I used the Great Plains black pond foam since it's UV resistant and comes in pretty big cans. I stopped counting after about 8 cans of it.