The big 45g cube build

gar732

Valuable Member
View Badges
Joined
Nov 28, 2009
Messages
2,354
Reaction score
364
Location
CT
Rating - 0%
0   0   0
Well now that the 150g is sold I need to upgrade the Solana with something I like a little better, enter the big 45g cube upgrade! This is a Marineland rimless 45g cube, 24x24x18. The equipment list is as follows though some of it is subject to change.

Vertex omega 150 (I may be going with something else)
Jebao dc3000 return
Bubble magnus 3 channel doser
Or
Geo 612 calcium reactor (I have both just need to figure out which way I want to go)
Tunze ato
Hydra 52 in cncreef oshun heat sink with 2 24w T5s
Vortech mp40
Jebao rw-8
Custom acrylic sump with integrated ato reservoir
Diy ghost style overflow
The stand will be built by me as usual

I think that's it but there may be something I've missed. The tank will be sps dominant with a few zoas, softies, and lps peppered in. I've been collecting pieces here and there but I've been in no rush to get this tank set up because of the impending move, which unfortunately is taking longer than I hoped to close. It's hopefully going to happen soon so I've got to get everything fished up and ready to go. I've still got to complete the overflow and drill the tank, finish up and stain the stand, and get it all plumbed up and ready to go. The idea is to basically move the contents of the solana into this tank. I'll try to get some pics up of what I've got going on so far.
 
OP
OP
gar732

gar732

Valuable Member
View Badges
Joined
Nov 28, 2009
Messages
2,354
Reaction score
364
Location
CT
Rating - 0%
0   0   0
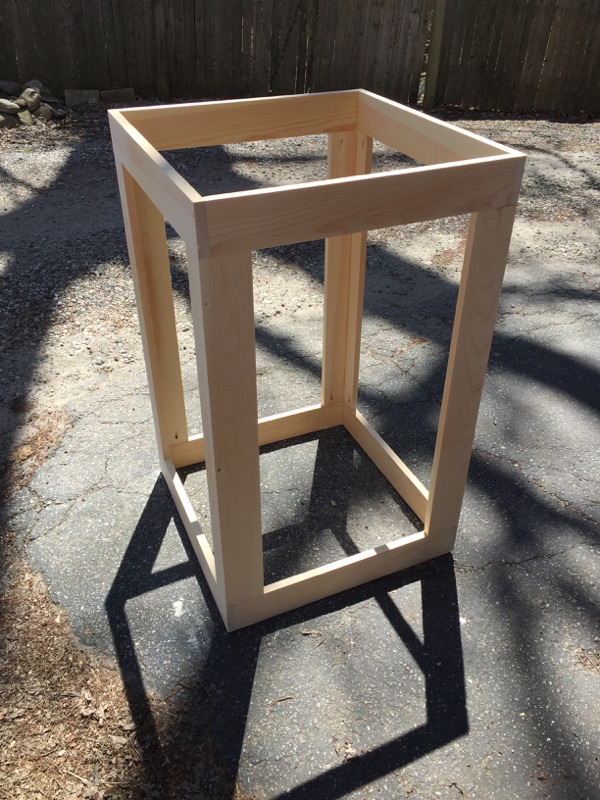
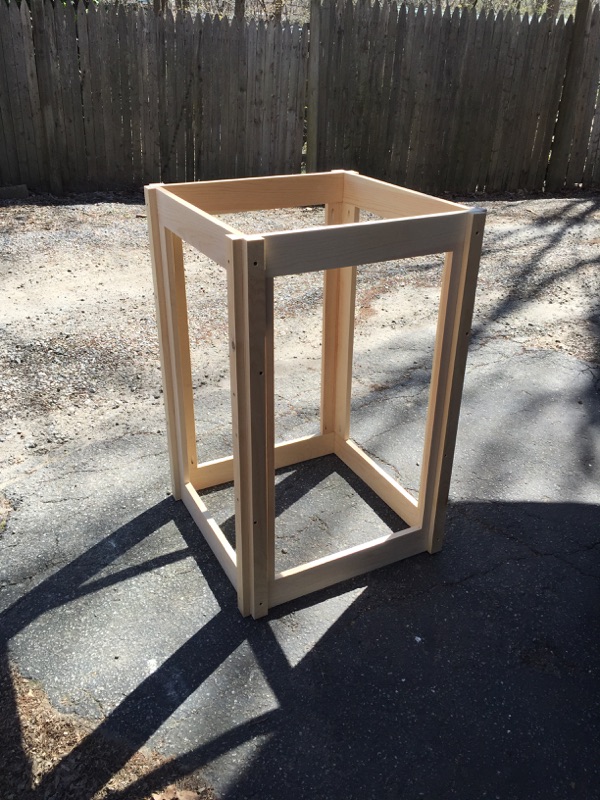
Here are a few pics of the progress I've made on the stand.


OP
OP
gar732

gar732

Valuable Member
View Badges
Joined
Nov 28, 2009
Messages
2,354
Reaction score
364
Location
CT
Rating - 0%
0   0   0
Thanks, the gyre did cross my mind and I may still end up going with it. I've been meaning to read up on it a bit but between being extremely busy at work and preparing for the move I just haven't had much spare time.
 

143MPCo

ASSIST PROTECT DEFEND
View Badges
Joined
May 14, 2012
Messages
6,696
Reaction score
8,294
Rating - 0%
0   0   0
Here are a few pics of the progress I've made on the stand.


Craftsmanship on the stand is topnotch... well done! I'm looking forward to seeing the rest of the build!
 
OP
OP
gar732

gar732

Valuable Member
View Badges
Joined
Nov 28, 2009
Messages
2,354
Reaction score
364
Location
CT
Rating - 0%
0   0   0
Thanks, still some more work to do but I ran out of time. I'm going to try to finish it up next weekend then it's on to the overflow. I was in no rush because I had plenty of time but it seems I may have put thing off a little too long now I'm trying to squeeze in work whenever I can, which doesn't seem like its very often lately.
 

143MPCo

ASSIST PROTECT DEFEND
View Badges
Joined
May 14, 2012
Messages
6,696
Reaction score
8,294
Rating - 0%
0   0   0
Updates pls?
 
OP
OP
gar732

gar732

Valuable Member
View Badges
Joined
Nov 28, 2009
Messages
2,354
Reaction score
364
Location
CT
Rating - 0%
0   0   0
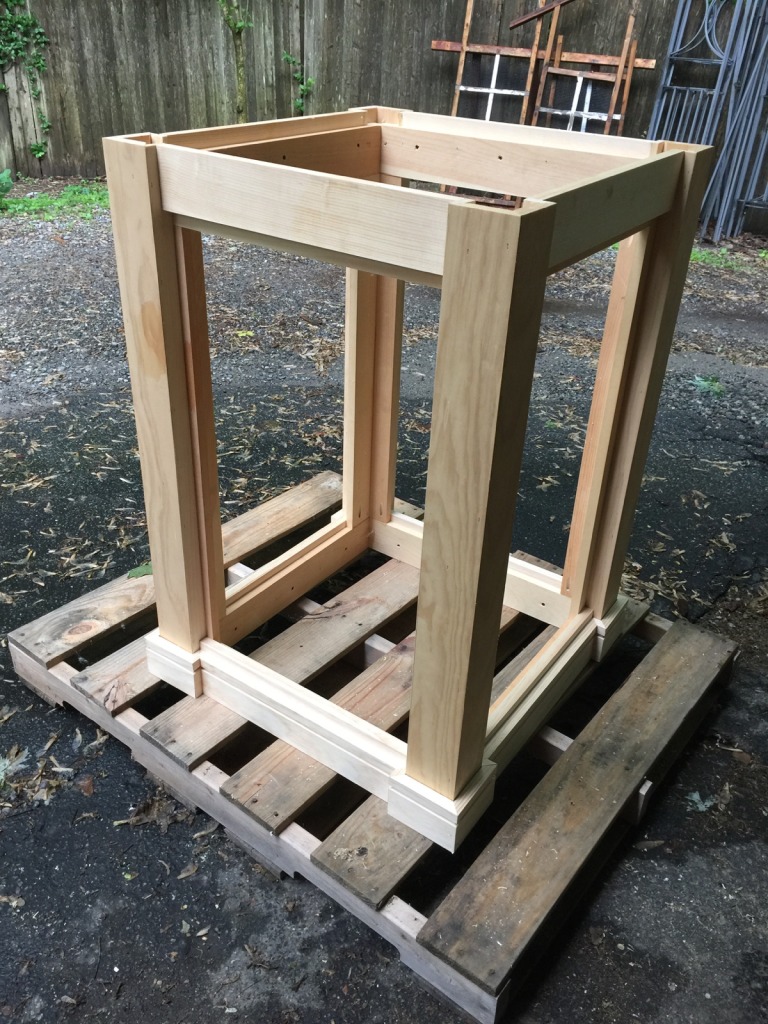
Small update, I didn't get as much done as I wanted this weekend. The rain really held things up since I'm working out side but at least I got some work done. It doesn't look like much but I had to make the trim on the bottom since I couldn't find any I wanted already milled. I wanted something simple and everything I came across was just too ornate, this is really the look I was after. And then all the miter cuts that go around the columns took some time too. I just have to finish the top, fill and sand, then I can stain and poly it. The stand is pretty tall, about 40", so I'll probably make a shelf up top to hold the electronics. Anyway, here is a new pic of the progress.
 
OP
OP
gar732

gar732

Valuable Member
View Badges
Joined
Nov 28, 2009
Messages
2,354
Reaction score
364
Location
CT
Rating - 0%
0   0   0
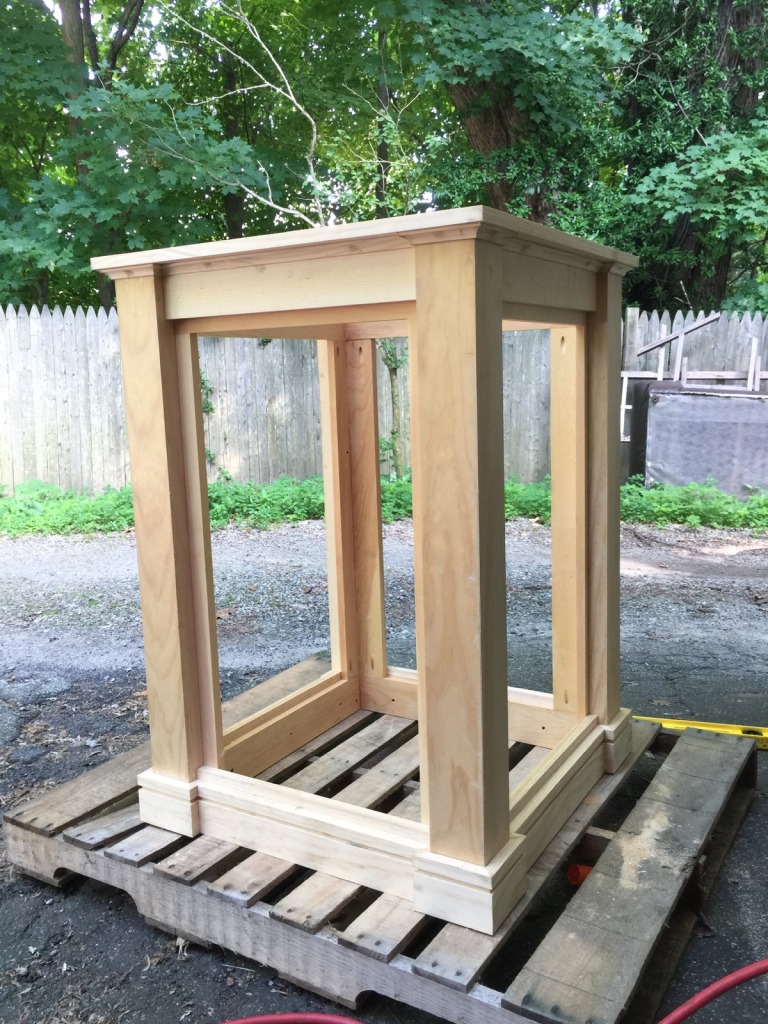
ll things are progressing though very slowly, just too much to do and not enough time unfortunately. I did however manage to steal some time and get some work done on the stand. I've got it pretty much complete except for the ply wood for the bottom and where the tank sits. All nail holes have been filled and the stand awaits final sanding. Besides doors it's basically done.

I also got the acrylic all cut up for the overflow. I just have to finish drilling all the holes for the bulkheads and glue the thing together. I was hoping to have it assembled tonight, but yeah that time issue again. I'm happy with the work I got done this weekend though. I'll be in the new house hopefully the beginning of next month and I'm trying to have the tank and stand completed so I can just move everything right into the tank at the new house. I'm going to try to get the stand stained next weekend and the tank drilled for the overflow. That might be wishful thinking but we'll see. Anyway here is a pic of the stand just before I started sanding.

 
OP
OP
gar732

gar732

Valuable Member
View Badges
Joined
Nov 28, 2009
Messages
2,354
Reaction score
364
Location
CT
Rating - 0%
0   0   0
Got some more work done on the tank. The overflow is done except for finish sanding on the lid edges and I got 2 out of 3 holes drilled in the tank. I just have to drill the hole for the return and it's good to go. Next I have to turn my attention back to the stand and button that up. Now what everyone is really interested in, here are some pics.


Here it is in the tank. The bulkheads aren't tight so that's why its sitting a bit crocked.

 
OP
OP
gar732

gar732

Valuable Member
View Badges
Joined
Nov 28, 2009
Messages
2,354
Reaction score
364
Location
CT
Rating - 0%
0   0   0
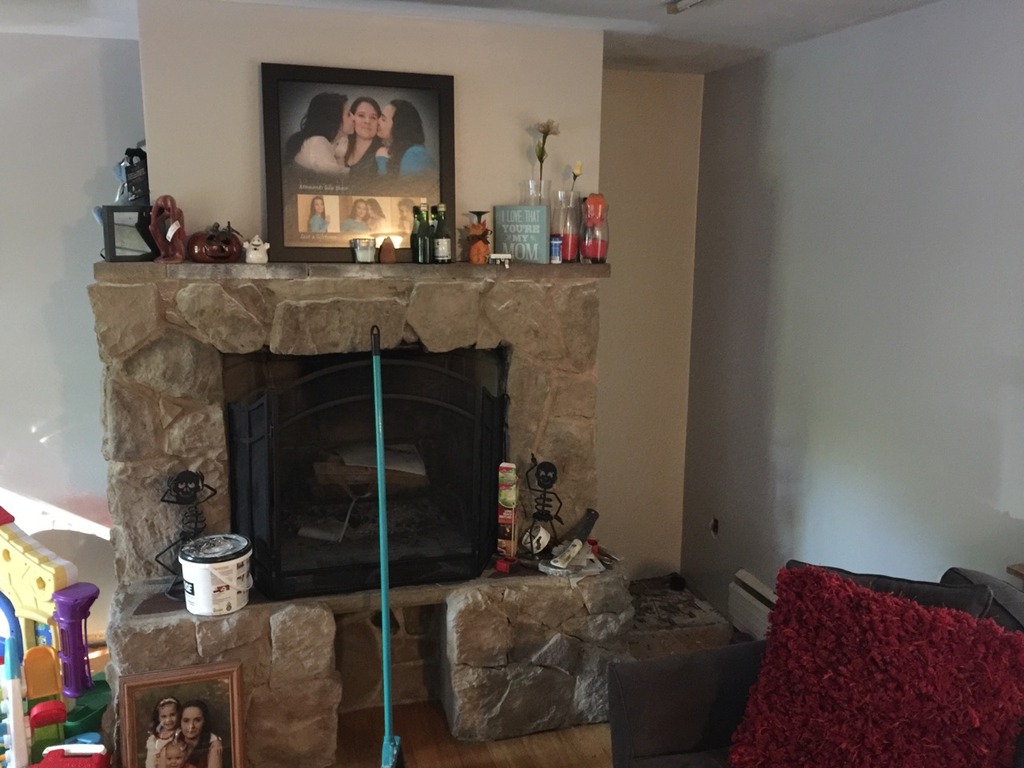
Well, this build didn't go as planned, lol. I do still have the 45g cube though and my schedule seems to have gotten a bit more manageable, at least for now anyway. I've sold off the sump and stand that I had built for this tank since I didn't really have a good place to put the tank other than beside the fireplace. I figured rather than try to work around that I'll just work with it instead. So the build is taking a new direction. The tank will now sit atop a built-in next to the fireplace (which coincidentally I haven't built yet)and I will be going with a basement sump (which I've never done before so I'll be looking for advice on this please). I'll be working on the built in this week so I should have some pics to post in the next few days.

In the meantime here are the plans for the sump. I originally purchased a deep blue 60g tank to use as a sump/frag tank but I just don't think it is deep enough to hold the water that would drain from all the plumbing if the power were to go out. I wanted an 80g but I couldn't find one that would fit my budget and I got a great deal on the 60g. But looking at it now I just don't think it will work. Now I'm thinking I'll just set up the 60g as a frag tank and I'll get a 70g stock tank that will fit under the stand for the 60g to use as a sump. I have a reeflo hammer head as a return pump but I'm worried that it might be overkill for a 45g tank. Though I figure I should be able to run reactors and such off of it as well but even still it might be too much. I'll have to take some pics of what I have to work with and how I plan to run the plumbing. If anyone has any suggestions, I'm all ears.
 
OP
OP
gar732

gar732

Valuable Member
View Badges
Joined
Nov 28, 2009
Messages
2,354
Reaction score
364
Location
CT
Rating - 0%
0   0   0
This hasn't progressed as planned but I did manage to get some work done, finally, lol. The basement is scheduled to get finished over the winter and I need to get the livingroom complete before I start so things should pick up pretty well for here on. Here are a few pics of what I got done.


OP
OP
gar732

gar732

Valuable Member
View Badges
Joined
Nov 28, 2009
Messages
2,354
Reaction score
364
Location
CT
Rating - 0%
0   0   0
I couldn't put a drawer in because of the lumber to support the tank but what I plan on is just a pull out work surface for when I'm working on the tank. The oak will also wrap around above the fireplace and I'll also make an oak mantle that will wrap around as well.

The basement sump is on hold until I the finish the basement but once it's done I will have a dedicated fish room that will house my broodstock system, my grow out system, my frag tank, and the sump for the 45 and frag tank. Until the the basement is ready I picked up a Eshopps nano cube sump and I'll use an Warner marine mf121 on this system for now also.
 
OP
OP
gar732

gar732

Valuable Member
View Badges
Joined
Nov 28, 2009
Messages
2,354
Reaction score
364
Location
CT
Rating - 0%
0   0   0
Thanks, I'm off the next few days so I will be getting back at it. I've got a new pump on its way that should fit in the return compartment in the sump. It feels good to finally be getting somewhere with it after this build changing direction so many times.
 
OP
OP
gar732

gar732

Valuable Member
View Badges
Joined
Nov 28, 2009
Messages
2,354
Reaction score
364
Location
CT
Rating - 0%
0   0   0
It seems this build is moving at a snails pace with life constantly getting in the way but I did finally get some time. Here's a pic of the progress.

image.jpeg


I just have to level the stand off and secure it to the wall and then I can start to mock up my plumbing so I could drill my holes in the top. The wavelike dc2500h came in and it's tiny, much smaller than I thought it was going to be. The sump and plumbing will only be temporary but I want to keep it clean since I'm sure it will take much longer than planned to get the basement and sump room ready.

My corals in the 34 solana are actually doing well which is motivating me to get the ball rolling finally. I have a elegance coral that is absolutely huge, it really has no business being in a tank that small but I don't want to get rid of it and I'm too afraid to frag it. You can see it in this pic, and it's not even completely inflated. The clowns in the pic are laying at the bottom of it so the nip it back when they have a nest.
image.jpeg
 
OP
OP
gar732

gar732

Valuable Member
View Badges
Joined
Nov 28, 2009
Messages
2,354
Reaction score
364
Location
CT
Rating - 0%
0   0   0
This can probably qualify for the most drawn out thread ever, lol. Life hasn’t seemed to slow down any and honestly I haven’t really worried much about getting back to this build, but as the weather is starting to cool and I haven’t been outside as much, I’ve been getting the itch to finish this up finally. I did have a goal to have water in it before fragtoberfest so I can go take advantage of the deals but I blew that deadline and slacked after that. Otherwise I was making some pretty good progress. Anyway here is where I’m at currently,
F0B3E82C-CBDF-4AE9-BE48-807F72BCAEEF.png


The woodwork is pretty much done, just need some final sanding then its on to stain but first I have to get my holes drilled for my plumbing which is what I’ll be doing tonight. I have an eshopps Nano cube sump that will sit underneath and I’ll get the plumbing started tonight as well though I have to pick up some unions and most likely more fittings.

I’m still unsure as to how it will be plumbed since I’m limited on space behind the tank. Everything fits with maybe a 1/4” to spare. I’d have to glue the union on after I feed the pipe through the hole which defeats the purpose of using the union. I’ve thought about using vinyl tubing but I really wanted to have clean plumbing. I guess we’ll see what happens when I actually start getting things going.
 
OP
OP
gar732

gar732

Valuable Member
View Badges
Joined
Nov 28, 2009
Messages
2,354
Reaction score
364
Location
CT
Rating - 0%
0   0   0
Well, I got some holes drilled and as it turns out I had all the right fittings in all the wrong sizes. It wasn’t a complete waste of time though, I did figure out how I want to lay the plumbing out and exactly what I need to get the job done. Well hopefully. I was thinking to use schedule 80 fittings as it will look better but on the down side it will have to be ordered online and if I’m missing something it will mean another order which will further slow down an incredibly slow build. I’m thinking I might just go with the schedule 40 though I do still have to order a few things that I can’t get locally. I do have some time though since I still have to stain and poly everything so I guess we’ll see how it goes.
 
OP
OP
gar732

gar732

Valuable Member
View Badges
Joined
Nov 28, 2009
Messages
2,354
Reaction score
364
Location
CT
Rating - 0%
0   0   0
I picked up the fittings to finish up my plumbing, I got extra stuff just to make sure I wasn’t forgetting anything but of course I did. The unions don’t fit though the holes I drilled in my stand so I’m not 100% sure how I’m going to get this done. I can’t drill the hole any bigger because I don’t have anymore room behind the tank. It’s going to be every tight back there. I tried to look up low profile unions but didn’t come across anything. The best idea I’ve thought of so far is to thread the drain pipe into the bulkhead from underneath I’m not sure I can get it tight enough that way, I guess we’ll find out.

Im thinking of giving the Triton method a shot with this tank. My biggest concern is that I don’t have a large enough fuge with my Nano cube sump. It does have a small fuge but not enough to get the job done. I’m thinking of adding another tank to use as the fuge but it would be fed from the manifold and not the drain so it would be less than ideal for Triton. I’ve thought about trying to tee off the drain but not sure that’s a good option either. I’ve thought about algae reactors as well but the pax bellum is way more than I’d like to spend. The skimz is more in line with my budget but has to be run in sump and I don’t have the space for that. The diy options I’m not convinced I won’t have issues with down the road due to heat issues with the leds, I haven’t come across any posts from anyone using them long term. The thought crossed my mind to try and diy a pax bellum style reactor but realistically don’t have time for more projects, I mean come on this build is taking long enough as it is.

Well, that’s it for now. I’m going to try to get some plumbing done tomorrow and I’ve still got to drill the hole for the return on the tank and in the stand. Maybe I’ll have some pics tomorrow.
 

Algae invading algae: Have you had unwanted algae in your good macroalgae?

  • I regularly have unwanted algae in my macroalgae.

    Votes: 7 38.9%
  • I occasionally have unwanted algae in my macroalgae.

    Votes: 3 16.7%
  • I rarely have unwanted algae in my macroalgae.

    Votes: 2 11.1%
  • I never have unwanted algae in my macroalgae.

    Votes: 2 11.1%
  • I don’t have macroalgae.

    Votes: 4 22.2%
  • Other.

    Votes: 0 0.0%
Back
Top