She got you downsizing tanks already? ;Hilarious
Navigation
Install the app
How to install the app on iOS
Follow along with the video below to see how to install our site as a web app on your home screen.
Note: This feature may not be available in some browsers.
More options
You are using an out of date browser. It may not display this or other websites correctly.
You should upgrade or use an alternative browser.
You should upgrade or use an alternative browser.
93 Cube for under a grand. It can be done... I think. UPDATED GRAND TOTAL! :)
- Build Thread
- Thread starter dantimdad
- Start date
- Tagged users None
She got you downsizing tanks already? ;Hilarious
HAHAHAHA!
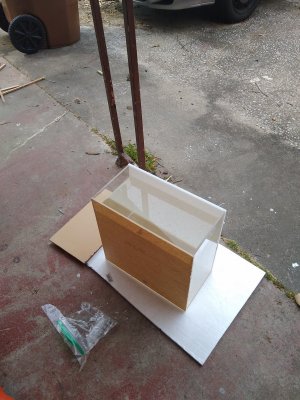
ATO resevoir. Thought I would try my hand at building one so she will be happy I got rid of the 5 gallon bucket!
The blocks are glued in the corners to hold up the lid. The handle is on the lid and the lid is cut down to fit inside the container and sit on the blocks.
I am leaving water in it until tomorrow evening and then I will flush trim, remove the paper, drill a hole in the lid for the hose and fill it back up for a couple days to make sure I didn't harm it during finishing.
So, it'll be in use by Saturday, hopefully.
I am leaving water in it until tomorrow evening and then I will flush trim, remove the paper, drill a hole in the lid for the hose and fill it back up for a couple days to make sure I didn't harm it during finishing.
So, it'll be in use by Saturday, hopefully.
Couldn't wait. I went ahead and finished it and filled it back up so it can leak test even more.
It's hard to tell from the pic, but, I am guessing, solvent got behind the paper in the upper left corner and clouded the acrylic a bit.
It's not bad for my first acrylic job of any real size.
This will start another addiction to another aspect of this hobby I am sure. I am already looking at my little CNC thinking "Time to go to work, little buddy!"
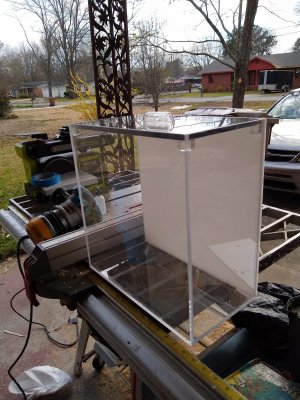
Please excuse the mess. I will get it cleaned up.
It's hard to tell from the pic, but, I am guessing, solvent got behind the paper in the upper left corner and clouded the acrylic a bit.
It's not bad for my first acrylic job of any real size.
This will start another addiction to another aspect of this hobby I am sure. I am already looking at my little CNC thinking "Time to go to work, little buddy!"

Please excuse the mess. I will get it cleaned up.
Really nice work! There really is nothing you cannot do.
Uhm... I can't birth a child but you wouldn't know that by my belly!
;Hilarious;Hilarious;Hilarious
;Hilarious;Hilarious;Hilarious
Uhm... I can't birth a child but you wouldn't know that by my belly!
;Hilarious;Hilarious;Hilarious
Extended tri-mester?
I noticed in the photo the nearest seam looks like bubbles towards the bottom. You can't see these in person. I am wondering if that was just a reflection.
The ATO reservoir looks great to me!
Good job on your first Acrylic project.
Good job on your first Acrylic project.
Gas baby.I'm in the 39th trimester with this one.

Thanks!The ATO reservoir looks great to me!
Good job on your first Acrylic project.
Thanks @NY_Caveman
Big thanks to @Lowell Lemon for the materials and expert advice on the ATO. You rock my friend!
@Katrina71 I didn't get any build photos because I flew solo on this one. I am gonna build some other stuff soon and will do better.
- Joined
- Mar 26, 2017
- Messages
- 37,343
- Reaction score
- 210,784
Hellz yeah!
Last edited:
crusso1993
7500 Club Member
View BadgesTampa Bay Reef Keepers
West Palm Beach Reefer
Hospitality Award
Ocala Reef Club Member
MAC of SW Florida
Looks really nice, my friend!
And why wouldn't you light it up?
Ask and ye shall receive:
Start with two slightly oversized pieces of 3/16 cast acrylic:
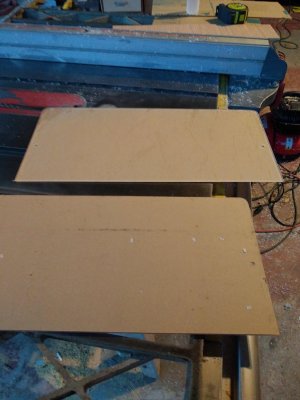
Then use the pins method to glue them into a piece of 3/8"
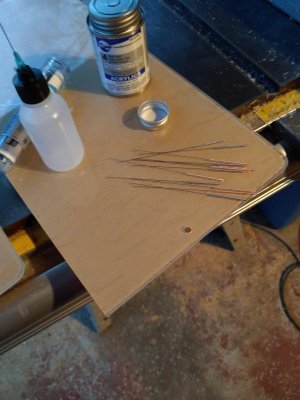
Then mark out your little router table to route a groove for the LED strip:
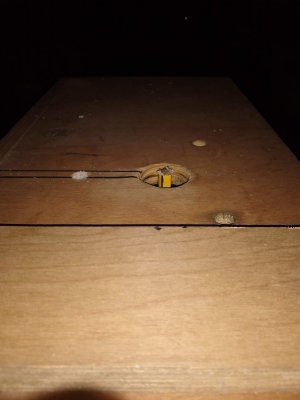
Route said groove:
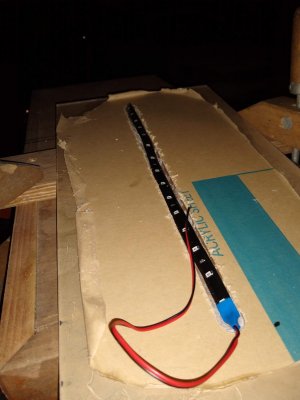
Light it up:
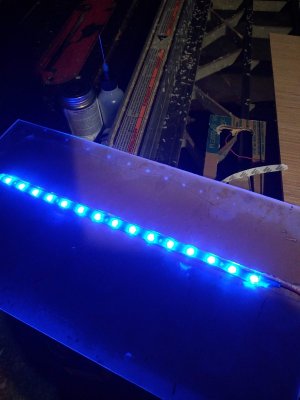
Now, It's not under the reservoir yet because it's still leak testing until tomorrow. This base will have it's edges sanded smooth to kind of glow a bit. The groove is 2mm thicker than the strip so the LEDs don't touch the bottom of the reservoir. They run very cool but I didn't want to take any chances.
I will set the reservoir on it tomorrow night and light it up so you can see.

Start with two slightly oversized pieces of 3/16 cast acrylic:

Then use the pins method to glue them into a piece of 3/8"

Then mark out your little router table to route a groove for the LED strip:

Route said groove:

Light it up:

Now, It's not under the reservoir yet because it's still leak testing until tomorrow. This base will have it's edges sanded smooth to kind of glow a bit. The groove is 2mm thicker than the strip so the LEDs don't touch the bottom of the reservoir. They run very cool but I didn't want to take any chances.
I will set the reservoir on it tomorrow night and light it up so you can see.
Hellz yeah!
Agreed!And why wouldn't you light it up?


