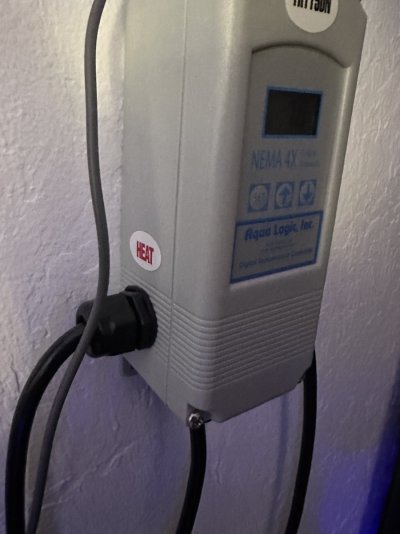
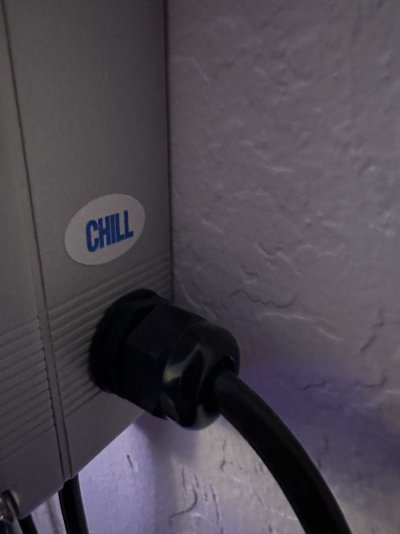
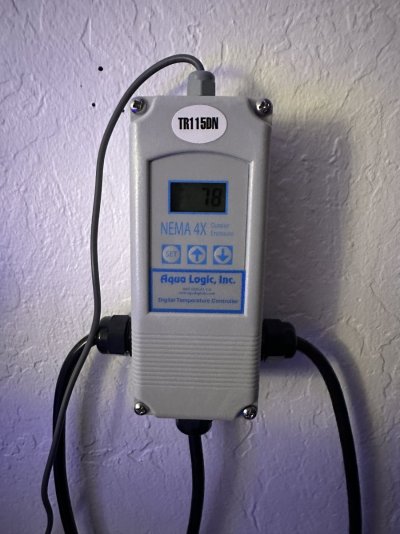
Aqualogic Heater / Cooler Controller - TR155DN

Alexander1312

Active Member
View Badges
Joined
Oct 10, 2022
Messages
152
Reaction score
110
Location
San Francisco Bay Area, California, United States
Rating - 0%
0   0   0
I have this heater/chiller controller, which was recommended to me as the most reliable option (vs. Inkbird or others).

I set up the heater turn-off point, which works well, but I could not figure out the chiller starting point.

My ideal temperature to turn off the heater is 79F, and the chiller should turn on when the temperature reaches 80F.

Does anyone have this controller and knows how to quickly set the chiller temperature (or had a link to a youtube video, which I could not find).
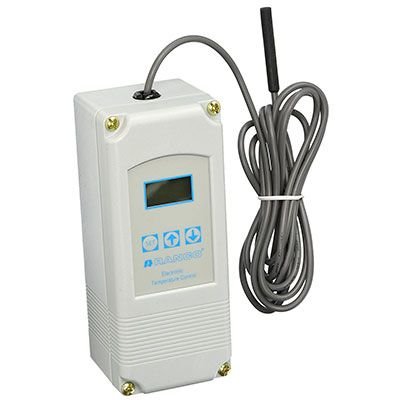
IMG_0878.jpeg
 

Attachments

  • 20230604200732.pdf
    1.1 MB · Views: 28

DCR

Well-Known Member
View Badges
Joined
Jan 3, 2018
Messages
834
Reaction score
699
Rating - 0%
0   0   0
Normally it just scrolls through the inputs on the PDF instructions as you hit set and you hit raise or lower to adjust and then hit set again to save and advance. Are you sure you bought the two stage model and not the single stage model?
 
OP
OP
Alexander1312

Alexander1312

Active Member
View Badges
Joined
Oct 10, 2022
Messages
152
Reaction score
110
Location
San Francisco Bay Area, California, United States
Rating - 0%
0   0   0
Normally it just scrolls through the inputs on the PDF instructions as you hit set and you hit raise or lower to adjust and then hit set again to save and advance. Are you sure you bought the two stage model and not the single stage model?

I have this model with a ‘heat’ and chill plug. It is probably simple, but we have tried a few times, and the setup is rather clunky.
 

Attachments

  • IMG_5813.jpeg
    IMG_5813.jpeg
    121 KB · Views: 28
  • IMG_5812.jpeg
    IMG_5812.jpeg
    86 KB · Views: 27
  • IMG_5811.jpeg
    IMG_5811.jpeg
    159.9 KB · Views: 28
OP
OP
Alexander1312

Alexander1312

Active Member
View Badges
Joined
Oct 10, 2022
Messages
152
Reaction score
110
Location
San Francisco Bay Area, California, United States
Rating - 0%
0   0   0
It is a rebranded Ranco. You should be able to find directions online for Ranco Dual Stage controller.
I wish. Unfortunately, this particular controller does not seem to have good availability for this type of content. If anyone could walkthrough the settings, that would be great.
 

DCR

Well-Known Member
View Badges
Joined
Jan 3, 2018
Messages
834
Reaction score
699
Rating - 0%
0   0   0
If you have two receptacles, then you have a two stage unit. I only use the single stage units so I may be off, but I believe it pretty much follows the instructions in the PDF you attached.

Start by pressing SET and it should show the units either C or F (hit the up key to get F assuming you want Degrees F). Then hit SET again and it will display the Stage 1 temperature setpoint. You can make this your heater setpoint. Use the up/down key to adjust. Hit SET again and it will display the deadband for turning the heater on and off. It will come on at your setpoint but will not turn-off until it is the deadband number of degrees above your setpoint. I use the default 1 degree. This prevents excessive cycling. You cannot go less than 1 F on these units. Then hit SET again to display the mode for Stage 1. You want to see H1 for the heater. Press the up arrow until you get H1. Hit Set again and it will take you to the Stage 2 setpoint which will be your chiller. Adjust this for when you want your Chiller to turn on. Then hit SET again for the deadband for turning the chiller on and off. The chiller will come on at the setpoint but will not turn-off until it is below the setpoint minus the deadband. You might make this larger (like 2 F) to avoid cycling your chiller a lot. Then press SET again and adjust up or down to get to C2 which is the chiller for Stage 2. Finally press SET again and it should display the actual temperature. You have to make sure you have the heater plugged into the Stage 1 receptacle and the chiller plugged into the Stage 2 receptacle.

This repeats a lot of what is in the instructions - don't mean to sound condescending. Just trying to help. Could be defective but the only time I have seen this happen is from power surges or lighting strikes when you get an error code (either E1 or E5 I think). If that happens the unit is toast. I use 7 of them on my various salt and freshwater tanks and never had an issue with them.
 
OP
OP
Alexander1312

Alexander1312

Active Member
View Badges
Joined
Oct 10, 2022
Messages
152
Reaction score
110
Location
San Francisco Bay Area, California, United States
Rating - 0%
0   0   0
If you have two receptacles, then you have a two stage unit. I only use the single stage units so I may be off, but I believe it pretty much follows the instructions in the PDF you attached.

Start by pressing SET and it should show the units either C or F (hit the up key to get F assuming you want Degrees F). Then hit SET again and it will display the Stage 1 temperature setpoint. You can make this your heater setpoint. Use the up/down key to adjust. Hit SET again and it will display the deadband for turning the heater on and off. It will come on at your setpoint but will not turn-off until it is the deadband number of degrees above your setpoint. I use the default 1 degree. This prevents excessive cycling. You cannot go less than 1 F on these units. Then hit SET again to display the mode for Stage 1. You want to see H1 for the heater. Press the up arrow until you get H1. Hit Set again and it will take you to the Stage 2 setpoint which will be your chiller. Adjust this for when you want your Chiller to turn on. Then hit SET again for the deadband for turning the chiller on and off. The chiller will come on at the setpoint but will not turn-off until it is below the setpoint minus the deadband. You might make this larger (like 2 F) to avoid cycling your chiller a lot. Then press SET again and adjust up or down to get to C2 which is the chiller for Stage 2. Finally press SET again and it should display the actual temperature. You have to make sure you have the heater plugged into the Stage 1 receptacle and the chiller plugged into the Stage 2 receptacle.

This repeats a lot of what is in the instructions - don't mean to sound condescending. Just trying to help. Could be defective but the only time I have seen this happen is from power surges or lighting strikes when you get an error code (either E1 or E5 I think). If that happens the unit is toast. I use 7 of them on my various salt and freshwater tanks and never had an issue with them.
Thanks so much for explaining this in great detail. There is an issue when I follow the steps outlined here and in the instructions. I will list the steps maybe someone can detect the issue, but they do not align with what is stated above and in the instructions, as per the device‘s menu:

1. Step 1 - Set C or F - I use F.
2. Step 2 - S1 Temperature - I set this to 79 (I want to not go below 78 or above 79).
3. Step 3 - DIF 1 - I set this to 1 (is this correct to start heating when below 78?)
4. Step 4 - H1 - No change; press set again.
5. Step 5 - d1 - I set this to 0 - is this the ‘deadband’ time of 0 sec to 20 sec? Or is this a temperature? This is not outlined in the instructions I have. Not clear what d1 means.
6. Step 6 - S2 - I set this to 80 (is this correct? I want the chiller to turn on when the temp is 80 or higher)
7. Step 7 - DIF2 - I set it to 1 (is this correct? The chiller would turn off at 79?)
8. Step 8 - C2 - No change; press set again.
9. Step 9 - d2 - I set this to 0 - see my questions under step 5. Or should this be set to a different value?
 

DCR

Well-Known Member
View Badges
Joined
Jan 3, 2018
Messages
834
Reaction score
699
Rating - 0%
0   0   0
Interesting. I do not recall seeing the d1 and d2 parameters on my units (out of town right now but I intend to check this when I get home). Maybe it is a newer feature on these controllers as mine are all older and Aqua Logic and some of the older Ranco manuals do not mention it. Looking up on the Ranco manual (attached), these are time delays in minutes that the controller will wait after the chiller has been turned off before it will be turned back on to prevent short cycling the chiller compressor. It apparently only applies to the cooling mode. The Ranco manual says the range is 1-20 minutes. I would try changing d2 to maybe 5 minutes. It might need to be something more than 0 for the cooling mode to work.

Otherwise, your programming looks correct to me according to the manual. Before now, I thought the heater would come on at the setpoint and turn off at setpoint plus DIFF, but according to the manual it turns off at the setpoint and comes on at the setpoint minus the DIFF1. You might need an extra degree of gap between the two setpoints because at 79 F theoretically both the heater and the chiller might be called to be on at the same time. Manual does not suggest this would be a problem, but you might try lowering the heater setpoint to 77 F.

I assume that the unit is wired correctly from the factory. I am not really an electrician, but I am pretty sure both stages should be wired to the Normally Open (NO) set of relay contacts within the unit.
 

Attachments

  • Ranco 2-Stage Temperature Controller Manual.pdf
    6.7 MB · Views: 20
OP
OP
Alexander1312

Alexander1312

Active Member
View Badges
Joined
Oct 10, 2022
Messages
152
Reaction score
110
Location
San Francisco Bay Area, California, United States
Rating - 0%
0   0   0
Interesting. I do not recall seeing the d1 and d2 parameters on my units (out of town right now but I intend to check this when I get home). Maybe it is a newer feature on these controllers as mine are all older and Aqua Logic and some of the older Ranco manuals do not mention it. Looking up on the Ranco manual (attached), these are time delays in minutes that the controller will wait after the chiller has been turned off before it will be turned back on to prevent short cycling the chiller compressor. It apparently only applies to the cooling mode. The Ranco manual says the range is 1-20 minutes. I would try changing d2 to maybe 5 minutes. It might need to be something more than 0 for the cooling mode to work.

Otherwise, your programming looks correct to me according to the manual. Before now, I thought the heater would come on at the setpoint and turn off at setpoint plus DIFF, but according to the manual it turns off at the setpoint and comes on at the setpoint minus the DIFF1. You might need an extra degree of gap between the two setpoints because at 79 F theoretically both the heater and the chiller might be called to be on at the same time. Manual does not suggest this would be a problem, but you might try lowering the heater setpoint to 77 F.

I assume that the unit is wired correctly from the factory. I am not really an electrician, but I am pretty sure both stages should be wired to tNormally Open (NO) set of relay cocntacts within the unit.

Thanks again so much confirming this. I tried this yesterday night and with S1 set at 79 with a Diff 1 set to 1, and it does fluctuate now between 78 and 79, as intended. Setting the heater to 77 would drop the temp to 76, correct, and then turn on until 77? Which might be too low for me.

Also, if I set the chiller to 80, it would turn off at 79, correct? This would mean there is no overlap between heater and chiller since the heater would only turn on at 78, with S1 temp of 79 and a Dif 1 set to 1? Or do I have this wrong?

Regarding d1 and d2, yes, it is 1 to 20 minutes (not seconds). And I did not understand the value of this setting in an reef tank scenario, so not sure why I needed to set a time for this, but will go with 5 minutes as recommended.
 

KStatefan

2500 Club Member
View Badges
Joined
Jun 24, 2015
Messages
4,159
Reaction score
4,034
Location
MHK
Rating - 0%
0   0   0
Also, if I set the chiller to 80, it would turn off at 79, correct? This would mean there is no overlap between heater and chiller since the heater would only turn on at 78, with S1 temp of 79 and a Dif 1 set to 1? Or do I have this wrong?

If you set the chiller to 80° F it will turn on at 81°F if the differential is set to 1° F

1686146302783.png
 

DCR

Well-Known Member
View Badges
Joined
Jan 3, 2018
Messages
834
Reaction score
699
Rating - 0%
0   0   0
KStatefan is correct on the chiller settings. It turns off at the setpoint and turns on at Setpoint plus Diff.

I am more hopeful that setting the d2 parameter to something more than zero will solve your problem.

I had one other thought. I have been assuming you are using an Aqua Logic chiller and not a unit like JBJ with its own temperature controller. Trying to use a chiller with its own temperature controller could cause problems if the chiller loses its programming everytime it is powered down by the Ranco controller
 
OP
OP
Alexander1312

Alexander1312

Active Member
View Badges
Joined
Oct 10, 2022
Messages
152
Reaction score
110
Location
San Francisco Bay Area, California, United States
Rating - 0%
0   0   0
Thank you very much to everyone who helped with this. I really appreciate this. I believe I fully understand the settings now, and it is very clear in hindsight, but I did not think that the provided instructions were great if read cold.

Therefore, for those who, like me, just wanted to use this controller to get a consistent temperature of around 78F in the tank, here are the settings steps with some additional explanation:

1. Select F. You could use C too, but the steps below are targeted to achieve 78F.

2. Set S1 to 78. This is the heating turn-off point, not the turn-on.

3. Set DIF 1 to 1. This means the heating will only turn on when the temperature is 1F below the S1 temperature. In this example, the heating turn-on will be 77F (78-1). If you set this value to 2, the heating will only start at 76F (78-2). With the setting at 1, the temperature will fluctuate between 77 and 78 F. Testing this in the past few days with the APEX temp probe, the average temp will go below 77.5. If this is too low for you, you can increase the S2 to 79 (and change S2 accordingly to 80). This will then get you an average temperature of around 78.5F (from what I have measured).

4. Select H1. This means that the S1 temperature triggers the heating mechanism (subtracting the DIF value from the S1 value as outlined above).

5. Set d1 to 0. This setting only applies to cooling and is therefore not needed here (but potentially below for the chiller settings).

6. Set S2 to 79F. This is the cooling turnoff point, not the turn-on point. This will not cause an issue as the cooling will stop at 79F, and the heating will only turn on at 77F, which will be a sufficient buffer, in my opinion.

7. Set DIF 2 to 1. This means the cooling will turn on at 80F (79F+1).

8. Select C2. This means the S2 value will be a cooling trigger (adding the DIF value to the temperature).

9. Set d2 to 5. This means there is a cooling delay of 5 minutes (up to 20 minutes possible) to avoid a constant on and off of the chiller (not sure if this is relevant for a reef tank, though, but I might be very wrong). I use the small Tunze Eco Chic fan as the chiller, which works great for the 26-gallon tank to bring down the temperature, and I would not have this concern, but I keep the 5 in my settings.

I have tried the above for the past few days, and it works very well (heating and chiller), and I highly recommend this. Below is the summary of my equipment:

- BRS Titanium Heater (100W)
- Tunze Eco Chic Fan
- Aqualogic (former Ranco) Dual stage controller (TR115DN)

The above is installed in the RedSea Max Nano Peninsula.
 

Keeping it clean: Have you used a filter roller?

  • I currently use a filter roller.

    Votes: 46 29.1%
  • I don’t currently use a filter roller, but I have in the past.

    Votes: 6 3.8%
  • I have never used a filter roller, but I plan to in the future.

    Votes: 44 27.8%
  • I have never used a filter roller and have no plans to in the future.

    Votes: 54 34.2%
  • Other.

    Votes: 8 5.1%
Back
Top