okay here we go..... i hate to be rushed but i will do the best i can do with the little time i have right now..."only work good under pressure" lol....anywho.....
okay so i got a kit just like a bunch of others....
first off i would like to say "great idea" i love the way avast pushes diy in the hobby and you all know by now im all about it!!!!!:tongue:
so the kit came very well packaged and the parts were machined to perfection i must say which is a big plus....
for me i just opened opened the box and stuck it together without directions or pics lol...."built a few skimmers in my days"...
i must say thou even with no knolodge on the subject it wouldn't be to tough since the parts are pretty much machined where you can only do it one way......
so i had intentions of taking a million pics and making this a thread where you could see step by step instructions but avast topped me by a long shot with the diy video.......so i really didn't feel the need to do so.....if you guys need them or want to see some more just lmk....
this was the dry fit rite out of the box....
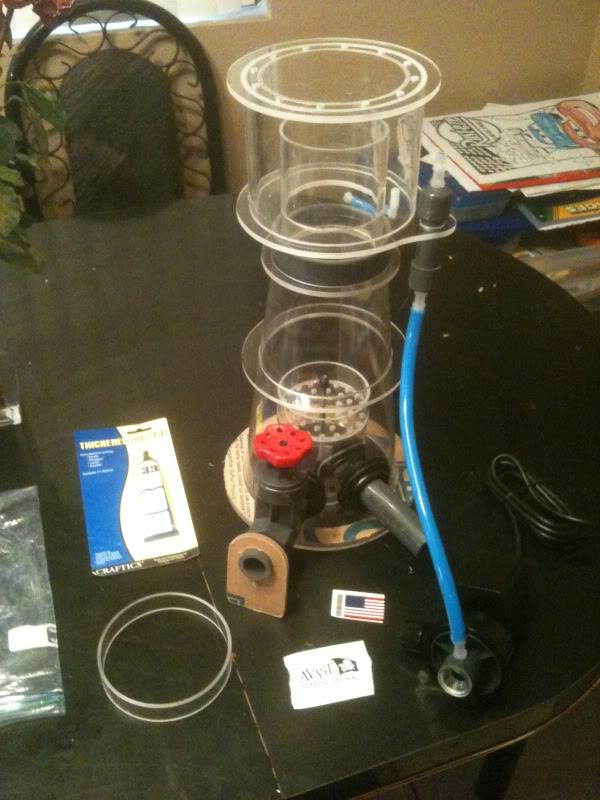
i must say this is very user friendly.... i was gonna use solvent's like weldon #4 but i wanted to go into this build just like you or the next guy would.... so i used everything that came with the kit and didnt cheat on anything just to see the difficulty which i would say is about 4 on a scale to 10.......
i started by assembling the cup and neck flange just as they show in the video then came the cone body and base... i must say this to you guys "LESS IS MORE WHEN IT COMES TO GLUING THIS UP" you dont need to fill the grooves with the glue that was supplied to get a good strong bond so save your self the head ache and mess by using a very little bead in the grooves..."use supplied tip"
i built the whole thing in about a hour but it shouldn't take the average joe more than 2 like avast mentions....
my first intial thoughts where, this is a great kit and very cost effective... a big plus for you and me.... i did find that the bottom of the cup is a very tight fit like shown in the video it's kind of a pain to push down "for the kits out there already i would recommend sanding the inside of it a little bit where it's a snug fit and not so tight because the joint is so tight it will cause crazing "fine hairline cracks" it's not gonna break or anything it's just a eye soar....for future kits maybe open the diameter up a couple thousandth's... the other pieces fit like a glove no problems with them at all......
another thing to maybe think about would be just tapping the center hole on the base plate to thread the rod into for the bubble plate, so it don't stick out the bottom of the skimmer with a nut on it.... not a big deal...."just looking for ways to simplify it" a thought anyways....one less thing to get lost when cleaning it.....
then came attaching the pump with the supplied uniseals.... i have used them in the past and will in the future... i would have liked to see unions to make connections but i know why avast picked uniseals over them..."don't blame them at all"
reasons
#1 more machining....
#2 the builder is gonna need some tools and a little skill to make it work properly...
#3 is.....if your clutz like myself sometimes and bang the pump there is a good chance that the cone body will crack......
so uniseals were definatly the way to go here..... i personally have never seen or used the kind supplied with the kit i normally use uniseals they have a logo on them that says uniseal there alot more stout and would allow you to use one hand for adjusting the flow vs. 2 because the uniseals supplied are made to flex..... "something to think about anyway" some might like the supplied one for the reason above....
so running the skimmer.......
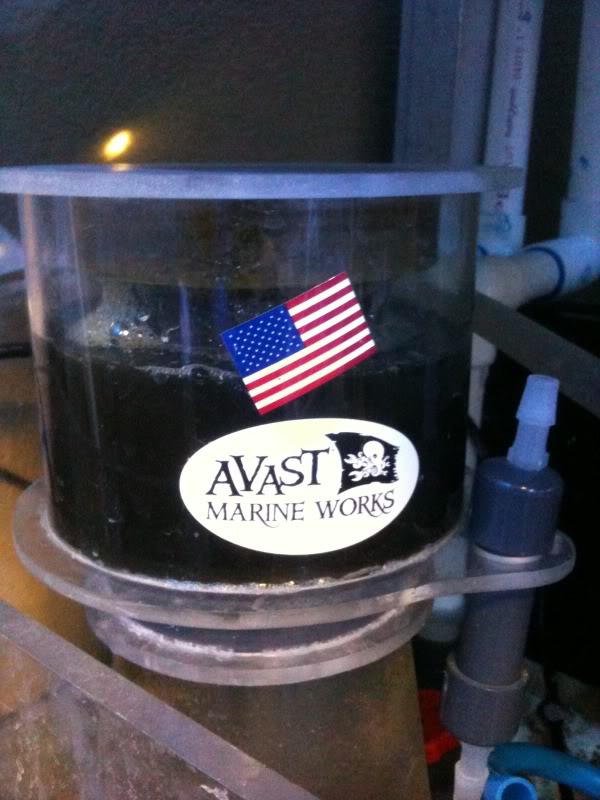
i have been running it for about a week now.... all i can say is wow!!!!! it performs alot better than i had expected since the sicce pump wasn't really pushed no where near it's limit..."pretty much bone stock" but i would have to say a perfect match for the body..."PERFORMS VERY WELL".....no start up issues and very quiet amazingly.....lol
so here is where i ran into the next problem.....
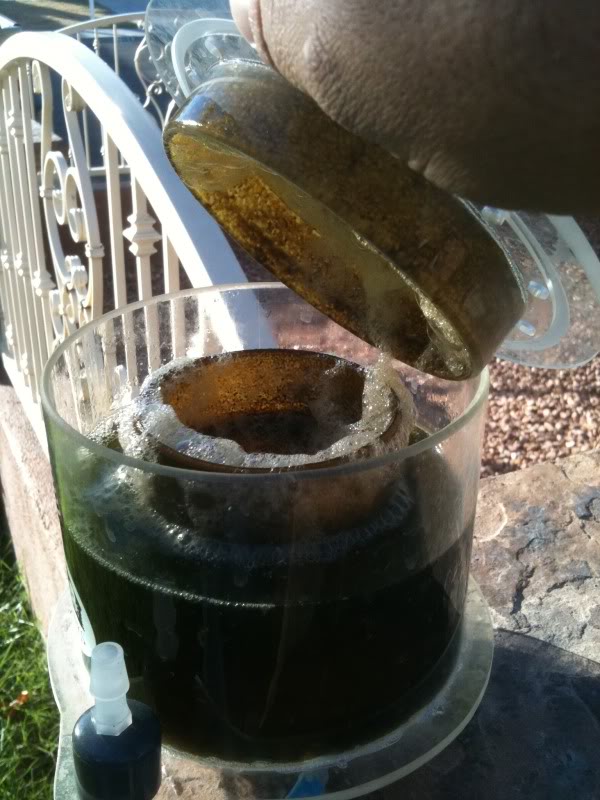
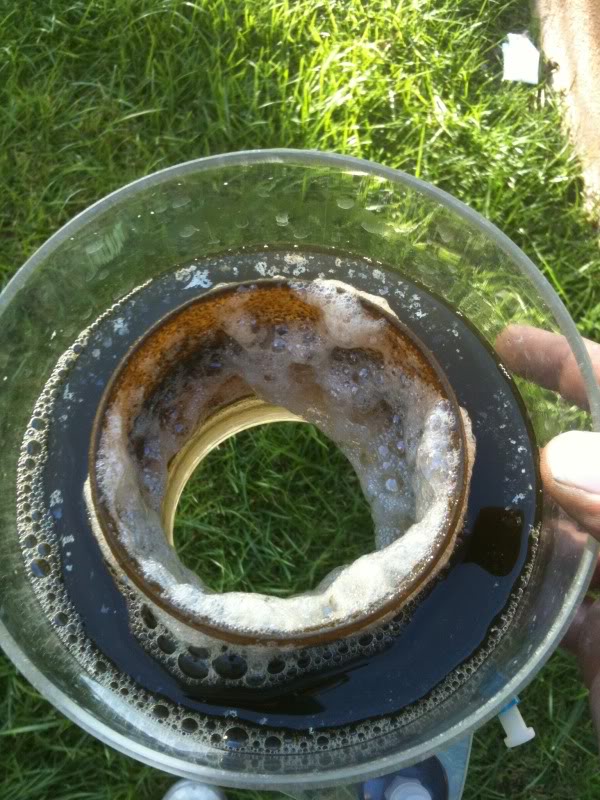
the lid won't stay on the cup, the foam blasts it's off lol..."not like that's a bad thing":wink:
fix would be maybe a 3/8" thick acrylic, the weight would keep it on." this would raise the cost to the consumers thou"......
.. "side note.... im gonna drill the holes for the vents a little bigger and see if that helps" [i will update this}...
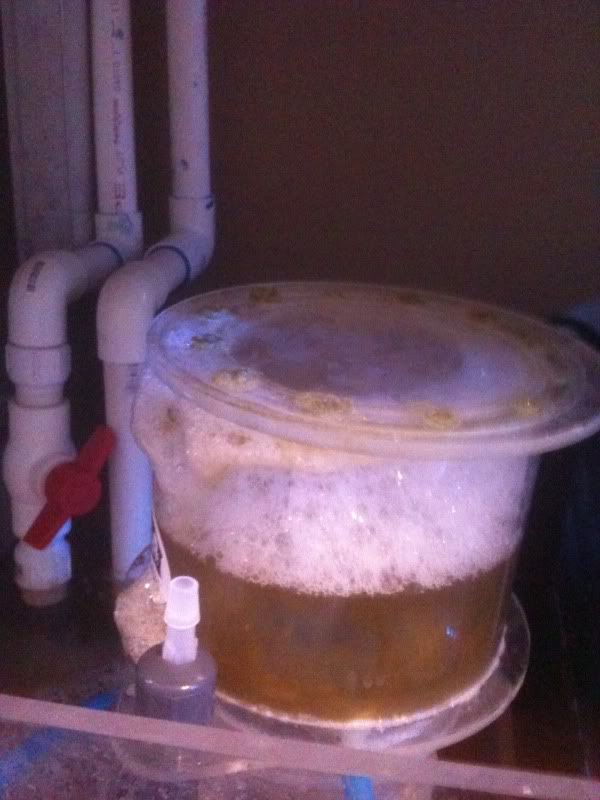
then came my next problem that would be a easy fix......
removing the cup...
it pulls rite off but it gets kind of annoying that you have to remove the airline everytime..."the fix would be adding the silincer holder to the bottom of the neck flange"
this would allow the silencer to be attached to the body and never have to be handled for emptying the cup etc......
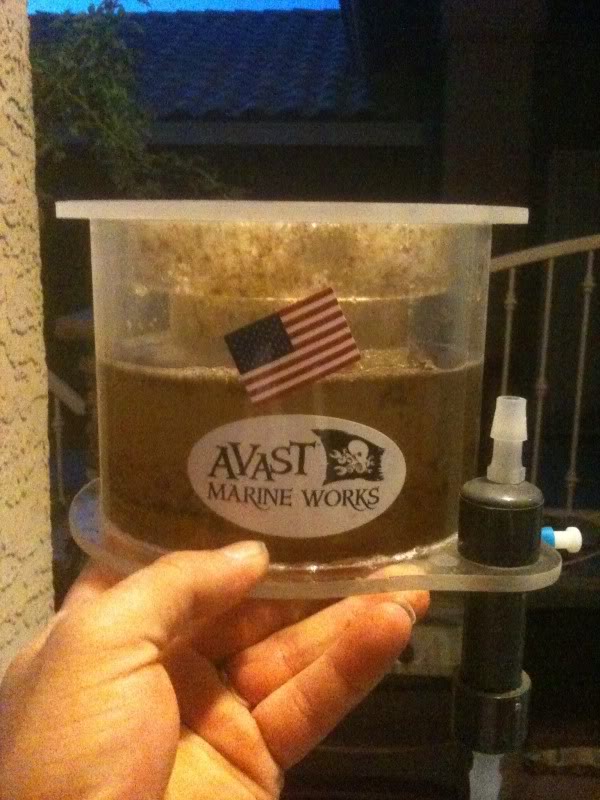
i must say i can fill the cup in a day and a half!!!!! that's kicking butt!!!!!!
so all in all thats my intial thoughts........ I WILL DEFINATLY KEEP THIS THREAD ALIVE AND LET EVERYONE KNOW AS TIME PROGRESSES "STILL KINDA BREAKING IN".......:xd:
pro's......
#1 COST!!!!!!!
#2 LEARNING EXP.....
#3 EASE OF ASSEMBLING AND FUN!!!!!!!
#4 IT'S A PERFORMER
#5 MY HATS OFF TO YOU GUYS FOR A AMAZINGLY COOL KIT AND GETTING MORE PEOPLE INVOLVED DEEPER INTO THE HOBBY LIKE MYSELF......:tongue:
CONS.....
NOT MUCH BUT THOSE COUPLE LITTLE THINGS I MENTIONED BUT I GAVE SOME EASY FIXES FOR THEM SO IM SURE AVAST WILL LOOK INTO THEM......
REMOVING THE AIRLINE TO EMPTY THE CUP..... "NOT A BIG DEAL, BUT A EASY FIX" SO I MENTIONED IT
AND THAT WOULD BE ABOUT IT.........
i know other people are gonna have different things to say etc.... but just when you think well why this or that!!!!! remember the price tag!!!!!! you cant touch a skimmer for this price that performs this well anywhere....ya sure they could use this or that but it's gonna drive the price way up.... for a sicce powered skimmer in this dollar range where amongst the top few here imho.........
so that would be my un-biased most honest opinion i can give.....
great job fellas.....
anyone looking to learn about acrylic or diy projects this should be up there on you list...
feel free to ask questions or share your exp. here......:nerd:
okay so i got a kit just like a bunch of others....
first off i would like to say "great idea" i love the way avast pushes diy in the hobby and you all know by now im all about it!!!!!:tongue:
so the kit came very well packaged and the parts were machined to perfection i must say which is a big plus....
for me i just opened opened the box and stuck it together without directions or pics lol...."built a few skimmers in my days"...
i must say thou even with no knolodge on the subject it wouldn't be to tough since the parts are pretty much machined where you can only do it one way......
so i had intentions of taking a million pics and making this a thread where you could see step by step instructions but avast topped me by a long shot with the diy video.......so i really didn't feel the need to do so.....if you guys need them or want to see some more just lmk....
this was the dry fit rite out of the box....

i must say this is very user friendly.... i was gonna use solvent's like weldon #4 but i wanted to go into this build just like you or the next guy would.... so i used everything that came with the kit and didnt cheat on anything just to see the difficulty which i would say is about 4 on a scale to 10.......
i started by assembling the cup and neck flange just as they show in the video then came the cone body and base... i must say this to you guys "LESS IS MORE WHEN IT COMES TO GLUING THIS UP" you dont need to fill the grooves with the glue that was supplied to get a good strong bond so save your self the head ache and mess by using a very little bead in the grooves..."use supplied tip"
i built the whole thing in about a hour but it shouldn't take the average joe more than 2 like avast mentions....
my first intial thoughts where, this is a great kit and very cost effective... a big plus for you and me.... i did find that the bottom of the cup is a very tight fit like shown in the video it's kind of a pain to push down "for the kits out there already i would recommend sanding the inside of it a little bit where it's a snug fit and not so tight because the joint is so tight it will cause crazing "fine hairline cracks" it's not gonna break or anything it's just a eye soar....for future kits maybe open the diameter up a couple thousandth's... the other pieces fit like a glove no problems with them at all......
another thing to maybe think about would be just tapping the center hole on the base plate to thread the rod into for the bubble plate, so it don't stick out the bottom of the skimmer with a nut on it.... not a big deal...."just looking for ways to simplify it" a thought anyways....one less thing to get lost when cleaning it.....
then came attaching the pump with the supplied uniseals.... i have used them in the past and will in the future... i would have liked to see unions to make connections but i know why avast picked uniseals over them..."don't blame them at all"
reasons
#1 more machining....
#2 the builder is gonna need some tools and a little skill to make it work properly...
#3 is.....if your clutz like myself sometimes and bang the pump there is a good chance that the cone body will crack......
so uniseals were definatly the way to go here..... i personally have never seen or used the kind supplied with the kit i normally use uniseals they have a logo on them that says uniseal there alot more stout and would allow you to use one hand for adjusting the flow vs. 2 because the uniseals supplied are made to flex..... "something to think about anyway" some might like the supplied one for the reason above....
so running the skimmer.......
i have been running it for about a week now.... all i can say is wow!!!!! it performs alot better than i had expected since the sicce pump wasn't really pushed no where near it's limit..."pretty much bone stock" but i would have to say a perfect match for the body..."PERFORMS VERY WELL".....no start up issues and very quiet amazingly.....lol
so here is where i ran into the next problem.....
the lid won't stay on the cup, the foam blasts it's off lol..."not like that's a bad thing":wink:
fix would be maybe a 3/8" thick acrylic, the weight would keep it on." this would raise the cost to the consumers thou"......
.. "side note.... im gonna drill the holes for the vents a little bigger and see if that helps" [i will update this}...

then came my next problem that would be a easy fix......
removing the cup...
it pulls rite off but it gets kind of annoying that you have to remove the airline everytime..."the fix would be adding the silincer holder to the bottom of the neck flange"
this would allow the silencer to be attached to the body and never have to be handled for emptying the cup etc......

i must say i can fill the cup in a day and a half!!!!! that's kicking butt!!!!!!
so all in all thats my intial thoughts........ I WILL DEFINATLY KEEP THIS THREAD ALIVE AND LET EVERYONE KNOW AS TIME PROGRESSES "STILL KINDA BREAKING IN".......:xd:
pro's......
#1 COST!!!!!!!
#2 LEARNING EXP.....
#3 EASE OF ASSEMBLING AND FUN!!!!!!!
#4 IT'S A PERFORMER
#5 MY HATS OFF TO YOU GUYS FOR A AMAZINGLY COOL KIT AND GETTING MORE PEOPLE INVOLVED DEEPER INTO THE HOBBY LIKE MYSELF......:tongue:
CONS.....
NOT MUCH BUT THOSE COUPLE LITTLE THINGS I MENTIONED BUT I GAVE SOME EASY FIXES FOR THEM SO IM SURE AVAST WILL LOOK INTO THEM......
REMOVING THE AIRLINE TO EMPTY THE CUP..... "NOT A BIG DEAL, BUT A EASY FIX" SO I MENTIONED IT
AND THAT WOULD BE ABOUT IT.........
i know other people are gonna have different things to say etc.... but just when you think well why this or that!!!!! remember the price tag!!!!!! you cant touch a skimmer for this price that performs this well anywhere....ya sure they could use this or that but it's gonna drive the price way up.... for a sicce powered skimmer in this dollar range where amongst the top few here imho.........
so that would be my un-biased most honest opinion i can give.....
great job fellas.....
anyone looking to learn about acrylic or diy projects this should be up there on you list...
feel free to ask questions or share your exp. here......:nerd:


