Back In the Saddle - Reefer 450 Softie/LPS Build

OP
OP
theKoolAidMan

theKoolAidMan

Active Member
View Badges
Joined
Aug 1, 2018
Messages
266
Reaction score
430
Rating - 0%
0   0   0
For RO/DI in the basement, I have a brute trash can that has a double float from http://autotopoff.com/Standard/index.html
Then I installed two solenoids on the input line for the RO(also from http://autotopoff.com/Solenoids/index.html), which are plugged into the float switch outlet. When the trash can is full, the float switches kill power to the electric solenoids which shuts off the RO. I use two solenoids for redundancy in case one of the solenoid fails open.

You will inevitably forget about the RO and not turn it off in time, so the float switches will save you. From there you can just manually turn it off with a valve, during times you don't need to make water. In my case, I added a third fail safe. The solenoids are plugged into the float switch outlet, and the float switch plug is plugged into a simple lamp timer to only allow it to run for 2 hours a day. That way, if the float switches get stuck, the RO/DI can only run for 2 hours a day. The idea there being that if the float switches get stuck, I would only find a few gallons on the floor versus a ton of water. I'm down in the basement at least once a day, so I would catch it. But I'm not down there all the time, so it may be a few hours before I would know something is wrong. Two hours a day keeps the trash can full. If I need to make more water, I can always switch the light timer from auto to on and let it run all day.

That's a good idea and something I'll look into doing for ongoing maintenance. Another reason I wish we could all just use tap water without issues lol. At the moment I have a big batch to make this weekend for the initial fill and I'll be around the whole time and set times to remind myself. TBH I'll be impatient and excited so there is no way I will forget, however for water changes and top off and keeping a fresh supply ready, you know, the more mundane stuff once the tank is humming, I can totally see myself forgetting and coming home to a nice little flood there.
 
OP
OP
theKoolAidMan

theKoolAidMan

Active Member
View Badges
Joined
Aug 1, 2018
Messages
266
Reaction score
430
Rating - 0%
0   0   0
Day 3 - An Inauspicious Start: Trying to Make Water

-The Method-

Today was to be all about starting to make water and slowly filling the tank. I would unbox and hook up the RODI Value until from BRS and begin making water in a 32gallon Brute garbage bin. As that filled up I'd siphon the water into 5 gallon buckets and lug them up from the basement and dump them into the tank.

-The Madness-

Things got off to a disappointing start yesterday as I got a shipment from BRS of my heater, a 300 watt Finnex HPG, Reff Octopus Classic 150 INT skimmer, and the BRS 4 stage value RODI unit. I only had time to open the heater and was greeted by a box full of black sand that dumped all over my living room carpet. Likely during shipment, the glass heater shattered filling the product box and shipping box with the black sand from inside the unit. The BRS packing job did leave a lot to be desired. They put it in a box that was too small so they wedged it in diagonally with no sort of packing material to cushion it. Come on guys, really? I immediately contacted BRS and they told me to chuck out the broken until and they would ship out a new one, which, unfortunately, would not arrive until Tuesday of next week. I was planning on getting a 2nd heater from my LFS anyway as a backup, so I figured I could just use that to heat the initial water fill up until the new Finnex arrived next week.

MbLnkjUUCIksDaKryZ90N2PbRV0AjiyHniQn51XkKBFegay7IYnEM6OGxgUGA2iQffz19GpbGADzxBIhr1Gic9IRaNsUPdV495tr10Jqrh1GUgb1-sl1ZhNds32rN-cK6SwTOLI5p1OTO7X4xgE-_8ygyDdXeDM3kHlv6UHT9dlc9n96-AXA5Yzx87cCoDOmGz2S90zQuPfNrhtNiIbp8iQQSdWOwLoH1CEqNfcOK5QDY3NuJaWGkkl7SU-PLM0_qdoK9vaiLlfeTNCrmw1DzH_sKBK73r71-cUQ67AH6ydz7OCQ8JjdLvJgiB1o-WzVl7vI565HY5HExI2LYGFjSa1OnKIDbAsRyBJfrzLlhvfkqgJ6w553OhL96EVidg4OFbv5wqAguy380qOPaljcCqNpKHFC91aQcQm4TyLvxLrg59j2FQKFU4GyRqH7BbJXJ7Crn3KPDp380w3K8ByGljRVAQ_Jpm-W9s2rVC1eCqyJnF3SSOSSqs2iPVqOce4qPWRUA-GgznBKZVy5wakzsv70SUTrRsf7I-nvugMSArd6jIscOS9N7hXDCncYqYLNstgTsX0wpAEdPYG7mPPzAmdJlPTseuD9bWb1RwQ8=w1302-h1736-no

^^Note to BRS and UPS. The black sand goes IN the heater, not in the box and all over my carpet. ^^

Today I decided to work from home and when I had a chance, hook up the RODI unti from BRS to my basement laundry sink and begin making RODI water and filling the tank over the next couple of days. It's a 100GPD until and I would only make water when I'm home as I don't have any sort of auto shut off set up at the moment, so I knew the process would take me until Monday. Thus, I was eager to get moving!

9g4hg9bqzchJiqioNOe3HUOmr4zyTmRd2mfksJg4KPj_Y-kWxUJMpRVUG-HwSGjqfnUwwmDYQuyRcesGPWoFeiO4h_Tjff3weiBRGmn0CHGLbCFuDexqe5JDOTmzM9MTLHweOnDlQFPO1nR5OMr3rloViqQDvIhWaOoQYp6GLrlKisp-Y9J623cmzrXjyRMAvddzLdGZeV6xKspRmGpDannr_CXf1f_0zs3XrRGEGDUGTeBSWHjnr_QedlYM1utPU5-94TOyRWI-3bWpr_0gYGwlJuK5pC2P9EsD0Cq7tRMtYDuT7yWzaDEQuIUzcO0oPyHb8DjQ5lv57q7Iyp0_XXrPrRK4T7H1cX8YGdEDPhgwGQ8Yb9ErloRhPtPMh1qOAmJDiln4JnhXv7DV6SbfvB3xFOy9m68LMnj9H2GKi43EQTZUb4qFsBCXq83cn8BBxc-hjddz3DFH9MypBuhYYc-4Ut28qxuoMHHSf6ipJYBqYEHQShA_FT2lhyG10yOjSneN6l4JORTS55rbNZlgnASeZuRCkAJ0Zms8iWtjzjRMnk5_7e3VahGFFMLvS31XG1QCRYuehp2r1aAUAKV7fUP0MW1puZDoXEWbOYpj=w2316-h1736-no


The BRS RODI unit itself seemed solid and I appreciate the multiple faucet connections included. The switch to be able to use the faucet for faucet things or divert the flow to the RODI was a nice touch. The first issue was that my laundry sink as one of those hose faucets and is designed with the aerator flush with the face of the head until. This meant that after removing the aerator, the adapters BRS included would be too short to actually hook up to the sink. The adapter, once installed, wouldn't even extent past the end of the faucet head, so there was no way to screw the diverter on. A quick trip to Home Depot and a $7 adapter that was longer than what BRS included solved that issue.

fpuogFpIW3u7PpNd9dlTeWQkSdGHnL8hHIxjCE2GFmtaA71Ex-SZdV_PHWLb6GBTj7MJr-VPkxo1052Z1lESPHcV04_abeTo_U18P_rxnBcmEBBrcKfaOXtaogiGryOD8zL2KmT9E4eir9nA6v7FBD1UWNtoGnU7_krtQ2vmrdIT02PFOQcS0fPXkZL4co9j_2LzNmip4ErTjMmIpYIacgUjBOQdhrsWg8PoQvPgUXcRLlVhOXkmpepF5K1j3PrttucoFt5_otgmAzJO4IhagJ3CNWsmHcI_sFiDfmtk7og3h3Q4f1xSwF6lQWUjOnl45C5EBWtWF5zfEBFsTMuSTD_piFGQVsO7MHfvqmRlgHbpsjBFsaNqy711e3dP-kY5yTd_FRVeA_64W5KvsrBigZ5G3m6S-u0oVQQBBg51VNsxg1cjySUhNITPkHp4H3tUZi1TBE4LJ9Np-7cBI61pzEmJq-4lgsRwHB9NfWzPDA3nM9GgJorzoW3tLUE5M9gHIXqF7ZvFHNX1gkD54GRt7HvS4r1tybZYv94HUGGhbxWzA8hOxZPO0W7Qw4Dr4A_PGmedp3HAX8dk7VUgah-urkoC8srcrHObb-C5gM8R=w1302-h1736-no

^^So Deep...TOO Deep. The BRS adapter was too short to fit into this massive hole. ^^

bQXirt2tnyBOO-wo3WIP5u6pz_oYsyziLVI-ZPJOzUCt6wTQ1EryendvfXt3g9BSX_-hOjr0oOZLx7fgntEILPBDAFcpcSq2LFsbNLDVHZemCtNBfz8NVt4sJcsZUEGKr5AvzdpAHF_fJ7kM2zPq71XjfqfURsf5P-aioZ-PBz06CBqUXd9tlbWrvWTXKTbLy2wXVT2DLPSYQCrijWCwam0Zkx8zyy0SsqnLnj8mYJyE6aZPJ-zM1yvZgyFwNxQkvqdIU58kfompy4zaw2dBD-MoACFFKdYt0FZ5fmVFl-axCnkuM6SRS2sHHBOx3lmeuvrLpL5r63PJf-ZnG5fYA8sO8Opq63gVO_NBhVDKC_--KE3xKEwG_bIGu4SAlXD96CNsZEhe5dNBzFf6B_jEQyMLZtzSNG2dGKn-_gE0ruf1GqhD3sKfWsxPcEPYpW8cv38eB2UFPBZQQtvx_Kkm07O37LF-UeZYV60ZQ-HSporxZWrtD6xxn_2y7FOvUh2qEEUL7H2ukTOKm5ru3LOTqzizYa9ZZE7RaC1k4TlqhaPprPALneDdMJx8S70cLJQf13LwHcZgSASRBRkACFFVWHy4bll0E_T5U9h5Am_C=w1302-h1736-no

^^After a run to Home Depot for a $7 adapter that was much longer that the one BRS provided^^

Hooking everything up then was easy and within a minute or two was ready to begin pumping some crystal clear beautiful RODI water. Turn on the faucet, turn the diverter to the RODI unit and....water gushing out all over the basement floor. Was there a leak? Did I do something wrong?

NOPE, there was a pretty major error in BRS's home made RODI assembly process. There was absolutely no connection between the two RO stage canisters of the unit. So as water filled up the first canister, instead of passing through a little connection into the second canister, water would just shoot directly out of a hole on the side of it!

mnPtEHS5n5QS5TOPLHy_PK6Lvh6IaFc1pX-0na1XB9ZSPRAgd6XmeMg6P0H5MEl4cg66pWemiR9luh02HLeCuEK7tlStoEAsVFWCZvRL2RLIxcP7_0lU8G_CVIhR-T1A7HERqc0r3tBdkmlNvZWSRpdbTel0DE9u8axnAGuNANPurCHYuyeu2_q5VgS363L4KpQ1IPFP8putf_AcXUNoP0jjoF4En87KClEJGkoO0AAt-q8FcCGSoQOn4rjUy5qpv2ETrvr6yVLAkjR5ZuuOntB6OenS54G2tJQ-hnl_nHLoggmvJZ0Ne6-gTiP0ibl7ol3QO3SQO3O9nkKUn6vLzTTvSXv6H6I-e7lFWsJ0-gq1_Ei0upKFSDzg-3rk1fU0aSFuz6kFkQkuP4FJPZwl6Z5NfJkQ8fco4OKaiSIRG0kEKoxqxJ9Gf_vc1sMh-A-onzWjgOvWpzxTJFb0I8zmMrAqYk8lILI17AYWT07onjigxISMkeHxwxa-RdhrbZuscXH1unX7q0pvj3PzuyWz_LOw5ZJSmSWCXiOVJpQE3mxz7ycB6yGBBy--5r0=s1638-w1230-h1638-no

^^Yea...pretty sure there should be a connection between canister there...not daylight^^

A chat with BRS revealed that yes, OOPS, they didn't assemble it right, and must not have any sort of Quality Control process because they shipped it out to me with no connector between the stages. We settled on them overnighting me the missing connector with instructions on how to fix it.

Unfortunately this means no RODI until tomorrow. A slight delay, but also some less than ideal feelings about BRS.

-Thoughts and Prayers-

Listen, I understand that things happen, and even the best companies out there have hiccups. While the broken heater was disappointing, that was much more UPS screwing up than anything BRS did. While the way the heater was packed really wasn't all that great for something made of glass, and BRS could have done better by putting it in a shipping box that fit properly and then using appropriate packing materials, this is far more on UPS than on them. The claimed they couldn't overnight me a replacement and could only do 3 day shipping. I don't really buy that as if I wanted to pay for overnight I'm sure they would have accommodated that just fine. It's not that they couldn't overnight it, it's that they didn't really want to pay the money to do so. But, whatever. No biggie, and no hard feelings there.

With the RODI, however, I'm not so forgiving. It needs to be stated that this isn't a third party product that they just act as the middle man on. They manufacture this themselves in house. They are the ultimate controllers of quality on it and ultimately the ONLY party responsible. Now, of course, mistakes happen. We've all made little errors at work. However for this to happen not only did the assembler make a mistake, but then whomever is responsible for quality control also screwed up. Is there even anyone checking these things before they go out?

I will say that during this process customer service was very helpful and attentive and are making an effort to make things right, but at the same time, maybe not going quite as far as they could. If something like this happened with an Amazon product, they wouldn't ship me a replacement part with instructions, they would overnight me a full on new until so I don't have to fix their mistake myself. I'd also likely have a nice little store credit for the problem. I know this because they have done this exact thing before when a mistake was made on their part. None of this was offered by BRS, which was disappointing. I do realize they are a small business operating in a very niche hobby, so they're not going to be keen on spending the money to overnight things or offer store credit, but this was 100% a BRS mistake. While It's good to see them standing behind their product, it would be better to see them make a real effort to keep me as a customer. I'm newly back into the hobby. I have no loyalty to them, and these products were all my first orders. I could easily take my business to one of the many other online and local retailers, especially after two of the first three products I ordered for them arrived broken or unusable. That's a horrific success rate. It would have been nice to see them recognize this and really try to make up for their failing with something beyond dropping an envelope with a part and instructions on how to fix their mistake in the mail. Perhaps years of Amazon Prime has taught me to expect too much? I'd be ok without any sort of discount or credit, but at least overnight me a new unit so I don't have to do the job of your assemblers and quality control people. I did not pay you for a DIY RODI kit.

What do you think? Am I being too hard on them? Am I being unfair? In the grand scheme of things this isn't really a big deal and they are technically doing something to try and get me a functional until. But is it ok to expect more than a shrug and a part in the mail? Let me know your thoughts and how you would react.


Last edited:

NY_Caveman

likes words, fish and arbitrary statistics
View Badges
Joined
Sep 8, 2017
Messages
17,009
Reaction score
108,396
Location
New York
Rating - 0%
0   0   0
That is very disappointing. One issue, you could live with that, but I agree two issues in one order seems to warrant a “we will do everything we can” response.

That said I have ordered from BRS several times and have had zero issues. In fact, I have the same 4 Stage Value RO/DI unit and it worked great out of the box (and luckily fit my laundry room sink).

In the end, the only thing really lost is time. It is unfortunate you cannot stick to your original plan for the water, but I would bet by a week from now all will be made right. It is still very frustrating. Best of luck.
 
OP
OP
theKoolAidMan

theKoolAidMan

Active Member
View Badges
Joined
Aug 1, 2018
Messages
266
Reaction score
430
Rating - 0%
0   0   0
That is very disappointing. One issue, you could live with that, but I agree two issues in one order seems to warrant a “we will do everything we can” response.

That said I have ordered from BRS several times and have had zero issues. In fact, I have the same 4 Stage Value RO/DI unit and it worked great out of the box (and luckily fit my laundry room sink).

In the end, the only thing really lost is time. It is unfortunate you cannot stick to your original plan for the water, but I would bet by a week from now all will be made right. It is still very frustrating. Best of luck.

Agreed. It's more of an annoyance than anything else. I'll have it up and running tomorrow so it's no great loss, just the hassle of fixing their mistake. I think it's more than most of us have come to expect more of a "make right' response from most of the retail stores we buy from thanks to places like Amazon, that when a company does really only the minimum they need do, which is still enough, we're disappointed. I mean if my Reefer 450 were missing a part I'd have to get in touch with them and they'd take a week or two to get me a replacement with little more than an "oops, our bad", so BRS is certainly doing enough, it's just within their power to really make you want to come back and keep shopping there even after their problems, and they aren't taking that opportunity.

I work in higher ed sales and the thing about that market is that it is finite. There are 4,000 colleges and universities in the US to sell to. If you burn bridges or leave a bad taste in their mouth, you're permanently out a customer in a small market that is getting smaller. Reefing is kind of the same way. There are not a lot of reefers out there to support many reef shops like BRS. You would think they would realize that and really make efforts to ensure that even when there are the inevitable problems, the customer is left still wanting to continue to buy from them because there just isn't a huge market out there otherwise.
 

happyschneiders

New Member
View Badges
Joined
Oct 15, 2015
Messages
14
Reaction score
9
Rating - 0%
0   0   0
I'm sorry to hear about your rough start. I had a similar issue with my rodi when I started. The European tubing did not seem compatible with the product I ordered. As I had a tight project plan I started with tap water. Long story short, stupid idea. Several water changes later I still struggled with many issues. Luckily, with the new build everything went well so far.

Good luck with your next steps. It starts to get exciting [emoji41]
 
OP
OP
theKoolAidMan

theKoolAidMan

Active Member
View Badges
Joined
Aug 1, 2018
Messages
266
Reaction score
430
Rating - 0%
0   0   0
-Newsfash- Let there be water!

Quick update on the build. The replacement connector from BRS arrived this morning along with some teflon tape. I took the unit apart to add the missing connector to find that this darn thing had one more trick up its sleeve. As you can see in the photos below, the connector was never actually missing. Instead, it had been completely sheared off, leaving half of it encased inside. After a few moment of panic and dread, I got a pair of scissors and wedged one of the blades in as far as I could so that it gouged into the plastic of the sheared connector and then turned it like a screw driver. Luckily the plastic is first enough to hold onto the scissor blade while still being soft enough to allow the scissors to gain purchase and I was able to extract the broken connector.

A few minutes later the new connector was installed and I'm currently doing a 1 hour initial flush to the unit and will still filling the tank today!

kMkofi4Asu7JNbacrpQHJvOZ3dmfA3lGsjp-Wfw70KmmBvIDWHW0lZmmkFg857NqXwVDCK7ac99eb5BXt-GVzNM8B8ibO2tqstXFDsISmpt9gyYBtqcAu00ARxqNh7i-24ygcSQAYHEfoGXUnCxLE5fjeRshqZwHLTr06hsZslSnHeFk9BkclReqk60vH4kRZ2wAR7U-b9aSuwVrCiy2kbi-FRgtJVJTwrw2QzOLQrBmNWen9V1mk9I91KWHaupeyu8WeYYThqg7K6jxKyFTNdSGAeWlWlT-7js14Zecsy8oOCniykviJXqrJoDyLhxHADcJdiUnHqy-MJuyhI6jbDo629ei6CEk0Xx9Z1vhiVfG0Uu7PCOy6jkwUKxGPZM7CZeiCyYADYCuww_2FIwAtGleX6BYRORm1occ74NmMrt8oHqFy8WsIKoOCi7GHIdTd6BIv_J_PeXqgbkQwfRP-zpLWL8-1MFapD3qoC-p9oVgHY4qB0XKT-dP45shP-W9AEfWxVbdjsVi9j_dhCeSiWx3obrQfPOKQqWAB89RaVXvJB5m-PDOo3J-TEG-bFB6iK4xwJvqJh-Lh6sEjWWw9N8OBINJYrTtSso5kSKz=w1296-h1728-no
 

mmw64

Valuable Member
View Badges
Joined
Feb 5, 2016
Messages
1,308
Reaction score
1,293
Location
Modesto CA
Rating - 0%
0   0   0
Hi folks. I'm about to begin the journey of my 3rd ever reef tank and my first in about 10 years! Back when I was in college at the University at Buffalo I was a bit of a fish nut and had a couple of freshwater tanks and 30g and 10g reef tanks.

I7B1UXZC721Qj9Hq34XZgYriyHE6fcg2ruyJaL9I4M6ze7Ke1o66BTjp37HBMxjLl_bfRzot_j5_IIED26F7PC1-jZREWm4o21CgWN__eP9qoh3wo6t9_J_h27EOH-mQKOF5YeWCNwmnAO04m-3_AAI5_H9CQIp7DQa1oMug26-I0isOnziEcukMDFJSubbmNdUlhZTjqe_HDmOTc70aE8tIliCE9HaXaeqIgREfvgGkrkj3M9lIRMeeJlK_XcyZeQTIQFz27bRvSpU7FnbVK3vXhq0sEURMnCkoB7IK5l-RA6mDfF8g9Y1jFm7Eqas4Rpnk_aETnVYPoX_ajoA1H9Ei-pFHaFGXDR_qNVSy5Jat4AZ9KlTlTCrykczm4gHmQUlE1y8LRXJSIxZXkmVQuk7u5qAZLWWZvMlkFVLx0YcIINMm4TgcSq3CAbuJ5o1HlAvIvAYOjN748ytyI2tRCzGm7u1Cxdy6JqWMj32V9L8rP6PpTBqHsqHobUAffNuKm_gytiTE0KRxNRNnHd_TAeU_r4Dmf1v4nehAPAyMPwteyC6IkuPvSOchCsXZUNIKeqqofQoFhG32r_eQRhC0dCCdHcntXAH4XFhwbZg=w612-h800-no

^^Clown from my old 30g^^

In 2009 I graduated and moved to South Korea to teach English. I had majored in Linguistics which is one of those degrees that you get for the love of the subject matter and not the career prospects. During my two years in Korea I couldn't have a tank due to space constraints but was able to feed my reef obsession through diving. I would often fly to the Philippines on long weekends to dive and ended up with my Advanced Open Water and Nitrox certs by the time I was done. I had the privilege of diving some amazing places during those two years. Moalboal, Borneo, Cebu, Boracay, and the Great Barrier Reef.

My next career move took me to Warsaw, Poland, where the diving obviously wasn't so great and financial constraints made reefing a pipe dream. I did, however, meet my wife there and 3 years later, in 2015, we moved back to my hometown of Buffalo to settle down and pretend to be responsible adults.

Flash forward to 2018 and we're happy DINKs (Dual Income No Kids) with an extremely reasonable mortgage. It seems like it's finally time to get back into the hobby and get the tank I've always wanted.

With my amazing wife's encouragement we began searching for the right size. Off the bat we both knew we wanted a reef. While I've happily kept freshwater fish in the past, that just wasn't as appealing as a big, gorgeous reef. The only freshie tank I considered was a Great Lakes biotope with a couple wild caught Bluegills as I am an avid angler (the whole fish thing I guess!).

dZq6XfwasBCjzGgfi1RicmDWfZF8XFG7C_jt7jveb9GSkrammRaSc-_vLkZXvO2gKbb6TiAMK_4H-F8xJG-gOi9R6jb4eSkul1o5PywJVPpAbrjKsKCYTYw4VQer3ziUZsi40pvNLlUjdJjQOIG0jwtp8r0jCqx-4CMD28FKaAr3WIKhHCoZpwQGoSxvteCMN2En5Xg7AAyjkcUmtFbeqD--6BsDOJQUNpiFY43GHbh7Yv3PkErtVqW6p9HvDXc9g0SoN30Pvl78s4j2mvh2yEe1HKFAOoOW3juMDZdl4s3RjMeMs0cUhGyMux2K-L8ebkzjgJo0xmpuuVIAnOylA-A4FgaEGnaoe70wob_6PkTQJIgOe-AjE-lglmlCzWFR4-xU2_kKWvQvdMfps-U4O9hYz-aCyPAEYm4iCQf2TKpOijm__4R7uvx2hsq_zfQ4OmNkRtReFzTxUK_jWVUmYib8lp1xNYWeq1xxsGyU0ad_uion4Osdu47fgNGoH55i1XKBGI2NTFncZkgRN3AFEcY3kGBwQ7_P1ujOvSV-21uYYsAvSlDs5RXCVV8UxanzYLZSehvy9VcIqxzdFUEFjq-qj2cSMw9f15u_Kbhd=w2316-h1736-no

^^This is how you afford expensive stuff like reefing. Keep the house small and mortgage LOW LOW LOW^^

We knew we could afford what we wanted, within reason, so the real limitation was going to be time we had for maintenance and the space available in the house. In order to keep our mortage reasonable and have disposable income for things like travel, kayaks, aqauriums...just fun stuff essentially, we decided on a small suburban ranch. With no near term plans for kids we didn't really need the space and figured we would get more use out of the extra money each month rather than an extra guest bedroom or two that wouldn't be used. As a result, however, we did have limited space for a tank. The best spot was the living room for a couple of reasons. First off, we want to see the tank and share it with others. Nothing against folks with tanks in a "tank room" or the basement, but our main goal was to make the tank and reef a part of the house's decor and a focal point for both us and for visitors. Second, it was the only room left in the house that could be reconfigured to have an open wall for a tank.

This led to the question of size. the open wall we cleared was about 6.5 feet long. We thought about a 125g but didn't want something the whole length of the wall as I felt that could make maintenance tough as it would be difficult to reach around the back of the tank. After looking at some standard black plastic rimmed 4 foot tanks at Petsmart, we also weren't in love with the aesthetic and also felt that 4 feet might be a bit small for the wall. We wanted a WOW tank and again, had a goal of an aquarium where the design was as much a draw as the cool stuff inside of it. On the recommendation of the fantastic folks at A Reef Creation here in Buffalo, we took a look at the Red Sea Reefer series. This seemed like a match made in heaven as the tanks and stands were absolutely gorgeous with a sleek, rimless, modern look that just oozes class and refinement. I also loved that the 450 would be 5 feet long bridging the gap between the too short 4 foot and too long 6 foot tanks. While I do have experience in reefing and am not a true n00b, I also was not thrilled with having to do my own plumbing, drill a tank, etc. The fact that the Reefer came with a fairly well designed sump, ato system, and even 3 Hydra Twenty Six lights pretty much made it a no-brainier for us.

When it comes to stocking we wanted a balance between beauty and manageability. While we weren't necessarily looking for a ULM setup, we also did not want to spent hours each weekend doing maintenance. So, planning out livestock that would keep things like dosing, reactors, and water changes to a minimum would be a plus. This led us to a softie/lps tank. It also helped that we both preferred the look and movement that these corals provide to the tank. At the same time, we wanted to choose a setup that could easily be ramped up to handle a true mixture of SPS and LPS corals after a year or so if desired.

In the end, the equipment we settled on is as follows:

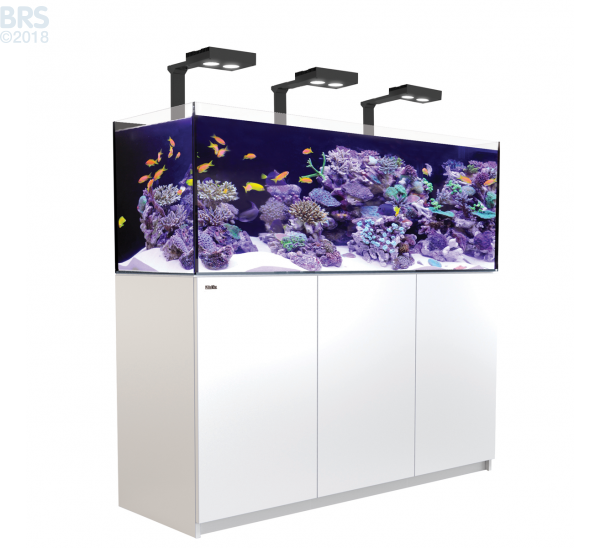
Tank and Stand: Reefer 450 Deluxe
210408-reefer-deluxe-450-white-red-sea_1.png

Lighting: 3X Hydra Twenty Six LED
AI_HYDRA_26_HD_FRONT_AND_BACK__70011.1455919202.500.750.jpg

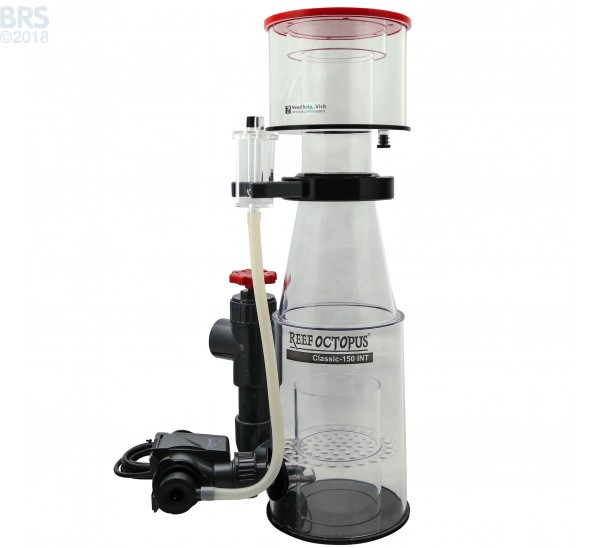
Skimmer: Reef Octopus Classic 150 INT
204062_clsc-150intclassic6inchskimmer-a_1_3.jpg

ATO: Included with Reefer
Flow: Ice Cap 3K Gyre
210763-gyre-icecap-3k-title.jpg


We especially liked that the Gyre was DC and could be turned down and programmed for a light pulse for the softies and LPS and if we end up adding SPS down the road can be cranked up if needed.

Stay tuned as we get everything set up over the coming days/weeks and take you all along for the ride. I plan on giving you thoughts/reviews on the equipment as well as updates on livestock choices, etc. I think this will be a unique build in one specific way. I'm neither a grizzled vet starting another tank, nor a total n00b on my first adventure. I've been out of the hobby for 10 years, so I've forgotten a lot, but still remember a ton and am looking forward to catching up on 10 years of changes in the hobby! There will also be lots of picture, I promise! Comment with your questions, commonts, tips, complaints, etc!
following
 

NY_Caveman

likes words, fish and arbitrary statistics
View Badges
Joined
Sep 8, 2017
Messages
17,009
Reaction score
108,396
Location
New York
Rating - 0%
0   0   0
I got a pair of scissors and wedged one of the blades in as far as I could so that it gouged into the plastic of the sheared connector and then turned it like a screw driver. Luckily the plastic is first enough to hold onto the scissor blade while still being soft enough to allow the scissors to gain purchase and I was able to extract the broken connector.

Nice! Smart with the scissors. Glad you had something work out with it.
 

Rory

Community Member
View Badges
Joined
Jan 17, 2017
Messages
56
Reaction score
25
Rating - 0%
0   0   0
Totally following! I am also in your neck of the woods over here in Depew/Lancaster NY... I always try to buy locally where I can (ARC or Buffalo Coral Reef). Any complications that I ran into could be correct then the same day so I never had to wait on replacements to be shipped. I do get some stuff off of Amazon and a few oddball parts from Dr. Fosters & Smith but for the most part, the guys around here want to help you get up and running.
 
OP
OP
theKoolAidMan

theKoolAidMan

Active Member
View Badges
Joined
Aug 1, 2018
Messages
266
Reaction score
430
Rating - 0%
0   0   0
Totally following! I am also in your neck of the woods over here in Depew/Lancaster NY... I always try to buy locally where I can (ARC or Buffalo Coral Reef). Any complications that I ran into could be correct then the same day so I never had to wait on replacements to be shipped. I do get some stuff off of Amazon and a few oddball parts from Dr. Fosters & Smith but for the most part, the guys around here want to help you get up and running.

Absolutely. I did get a bunch of my main equipment online but chatting with Randy at ARC he pointed out that he can get be pretty much anything going forward if I want.
 
OP
OP
theKoolAidMan

theKoolAidMan

Active Member
View Badges
Joined
Aug 1, 2018
Messages
266
Reaction score
430
Rating - 0%
0   0   0
Day 4, 5, &6- Getting this Show on the Road...er...Sand

-CNDK6UI8CPfRuTq3MC9tzM8urYfI2ZPsVs3oF8pPmdOFEj6xtNdagz5BRDO4rSM2pkCbLUZGhyZxmR61yUJvbbkJAv_3utzO9TrDChZRwS0j73-TP34NXxQaNeWFL6iVIMJb6a_J8LJKH8sDHuoQ0Cmvun7hPcrhMgQS-aa7ejOIDNt_mgzOq1NmijH8lSNaQ0ZUnCDDbH68Lex0pS_plXE1rxr3QSaNXfnAxz3fvVPY7TNevyV2jmuV68-zRPbOXXivudEYd_O1uxnxfOZlWKVquS4EriNQZFOtQ6WvSZUrkLFY7Jkj-tvjYl5KJt8qFFTrdhVTLJQRP_Q9odIFKiff8QxmaG3I4F59QW84wzv5Gx_JTdecF9dw7-UPJCDYd8e1XIQuxH6G7VcktSPnBr69I_EwbB9rUL4JI197OleRV_0cPvQfO8Yx862S9Xk13AwxzXpozYYVthyrBaV4K2n0LHGWetnrOjCH-ZDjZHBJl14k4Qcc-acEBYEA0APlbiXThUjX4anEVvs2K32xvHrIZ7ygh2SgEMJZZp3tRUVBNgLxce7-6tG6YxIm3QrAzA7ipMLCZxV4Jwv4ikxEdyQTnMwWV6JeUNRWKhc=w2304-h1728-no


-The Method-

I cleared my weekend schedule with the goal of having the tank fully operational by Monday night (with the exception of livestock of course).
Goals were:


*Hook up sump and plumbing
*Finish filling with RODI
*Mix salt in tank and bring up to temperature
*Purchase Live Rock and aquascape
*Add Live Sand and allow to clear

-The Madness-

...Filling...
One thing I had forgotten from my earlier builds a decade ago was how nothing ever seems to work the way you expect it to in this hobby, at least not at the start. The tinkering to get things working just right are nearly endless until you find the sweet spot. It makes sense given how complex these systems can be and all the specialized technology involved.

The first step now that the RODI until BRS sent was repaired and working was to fill the tank and sump. I decided to go with the steps of RODI water in the tank, followed by mixing the salt, then adding rock, the sand. I know a lot of folks like to aquascape before adding water, which admittedly would be easier from a rock movement and placement perspective, however I knew I wanted to use some "real reef rock" which had been made live with a few months in the ocean in florida and then cured at my LFS, so I would need to minimize time out of water to limit dieoff of the bacteria that makes this stuff cost $8/lb.

The first step would be to get the sump and plumbing set up to handle the water. This was easy and uneventful (for the most part, keep reading). Red Sea mostly hit it out of the park with the plumbing being sized and not requiring any cuts or glue. Just push the pipes together or screw them in and you're ready to go. The sump is perfectly sized for the large compartment in the cabinet and is flush with the edge front to back while leaving just about 1 and 1/2 inches on the left and right. It really maximizes space in the sump and I have more than enough room for my skimmer plus whatever else I'd like to throw in there in the future. Note to other hobbyists: I have some some older or smaller models of the reefer come with a green vinyl tube to connection your return pump to the return piping. The Reefer 450 DOES NOT. You will need to head to Lowes or Home Depot and pick up some 3/4 inch tubing. I oped for the reinforced because it looked nicer and was stiffer and less prone to kinks than the non-reinforced.

Originally I had planned to make my water in the basement in a 32g Brute and schlep it upstairs to the tank. I pretty quickly realized this was a waste of energy as I could just hook up the RODI to the sink in the kitchen and make it all one room away from the tank! Still I figured I would have to carry 5 gallon buckets one at a time and dump them into the tank over time. Again, another obvious revelation occurred. Just get some additional tubing for a few bucks from Home Depot and a connector and run the RODI output directly into the tank. Brilliant! Yes, I know this was obvious but it wasn't to me until about 30 gallons in.

I left the RODI on anytime we were home including Friday into Saturday night as I knew we were in no danger of overflowing given the volume the RODI can put out and how much the tank still needed. By Sunday we were up to the overflow and ready for the water to start going over and filling the sump. This is where my comment about the Red Sea plumbing being MOSTLY easy and uneventful comes in. The main downflow pipe to the sump was leaking at the bulkhead on the underside of the tank. This was a pretty steady trickle that was getting the inside walls of the cabinet a bit wet and obviously a problem. So I siphed out the overflow and unscrewed the pipe. MISTAKE. The siphon left probably half a gallon of water in the overflow which call came rushing out into the sump compartment when I unscrewed the pipe! I noticed it very quickly and used my hands as a diverter to get MOST of it into the sump, but it did leave the cabinet walls and foam pretty soaked. I removed the sump and mopped it up and vowed not to be so foolish again. After inspection of the o-ring on the pipe to bulkhead connection, I reseated it and filled the overflow box again. It was still leaking but only at the rate of about a drop every 10-15 seconds. Not major, but also not something to ignore. Thankfully BRS's screw up on the RODI unit left me with a mostly unused roll of teflon tape which I used to wrap the threads on the downpipe to bulkhead connection. After re-seating we were leak free!

This leads me to recommend for a quick and easy extra level of protection that if you buy one of the reefer tanks, wrap the threads of the pipe to bulkhead connection with some teflon tape to save potential hassles after filling!

SZYqwMANm8DEFQEdW68Rp_4TyjnroQzFGVe9FWdXZi289dbKGk5ROCLOxRha7gZyMoKiDnekn-aPmyFF3RxY9PBliWU-vIfSlXdC10J2nvyBVPzI173Bx6mKyd_LN5GgkvXvsRNfE0zNxvzb2cIE5u9gZkXvdWFo6-AWRyVhK170Czi-BarTOyqGKyxqCA_W2hq3hesbCXOG6WarqgIhnOvrWJV78bX_w5auhago2mnk8v42IbmsuCgHh11NBKjSl3nX1_S0JS5shVCV5lH8OsFBeAZTADni7JJb_AWWdjS8BGrRx0cIzXlv6qMIQgc8KnqKuy1dJujNZ86pVURAOgOwTyWfilTfYDhbcM5sNyC-tOQgOoUlgHCKrG1eG5JuQpObY2Oo0vkiJu8kGCGmmwB_kEE69G1SyN5CrRBjAEHvb47S4dkCHvMUEeHyzH59PCtSoeOTS_DCltDMqmDA0ZC1_zJorMK4rrAo-iucwCOdIu4jiQXI21LhQreOmhK2s6tAARfGvAS5q-W67rv3DjUhVikA3d-iPNHxFky4xDyJOcdsjghdHFtRjhuTwDCfBEOFxQ2mWW_yhyGMUMzSGacW5OOIkR3qwcXpTlgm=w2304-h1728-no


...Lighting...
When it came to lighting, we had the choice with the reefer series to get the Deluxe or Standard models. Deluxe cam with 3 Hydra Twenty Sixes, the standard left you to your own lighting choices. With the pricing from our LFS, the Deluxe was $750 more. Each Hydra on its own is $350, and the arms are about another $75 - $100 each. So getting three lights and arms for $750 was a no brainer, Setup was fairly easy both mechanically and with software. As I showed in a previous post, the deluxe tanks now come with plugs build into the back wall of the tank for attaching these specific lights and arms, meaning there are no clamps around the rim! They literally screw into the back of the tank for a super clean and slick look. Installation consisted of adding an included attachment bracket to the lights, mouting the arms to the tank with the included plastic plug screws, and then pinning and screwing the light to the hinge on the arm. Easy peasy. The software wasn't quite as easy. The problem with the Hydras is that while each light as it's own Wifi radio, they are complete and utter crap. Our Wifi router broadcast from a room no more than 30 feet away with only 2 drywall walls between it and the tank and all other wifi devices we own get full bars while in the living room. The two lights closest to the router were able to connect to wifi fine, however the third light, which is only a foot further from the router than the middle light, would constantly drop connection and go unresponsive. Connecting to the lights directly with their own internal wifi from my phone worked fine, but who wants to have to change their wifi connection each time you want to mess with the lights? A $20 plug in range extender from Tp Link fixed the issue, however the illustrate how horrible the wifi in the lights is. They are currently about 10 feet away from the range extender with directly line of sight, and only show 2 of 3 bars for connection quality. That's horrific. Come on AI, you folks have got to do better than this!

SHyzf3AfoVuUuWmwAdGwxNQgDjlGOzKVB4tVngFFa_VrNoX6Xe9a8pPYfd3yaRbv6Oc6JxFyhsdtsDUZYHDAXdLUGrXfr6vE4ssmd9cDjb5l_OMfUralV6Ln5iWTfLi6blkGMHvRAmn65Eki-3Fj3WOt5IwSemaGoW1eUocyTlEiCVUJ6jNdOgfT_IXx3k4HW2nrQnK9gnue5D5Vy7yVqNOLkL7iV2mZrcG7PXYmkzWDLsgElQSuUEMW7o8P5vtCtstv-jqj9UKtWA3vBk--gtNOnGMpYTKF0KAvaYAxVAYM3r8M3NRG2fZURwESr-CausJk3hcxzN70VZ_3Pazp9WG6ZnDYuP_c8t_8U5vDu-3CDnJy3wkf25HDZPudkIXFNnBA1wzqhda9Kta3wr6oGMGWEBG0GzB0ofw9VS3wRhsHwDsUnB5nQ_hzqhXiDf6BPVnAsWYSVxGNe_RdBGruaQ9vFajAi1ARDDxBz7SWDEaH7dbIneVYao4ki0GbDcJZMf0Fy6yYraP1G1XR7J6vAD11Ag-0pzc3CGx1jxonUCChW5GQZNQbh0LKwREcrbNpvD3yeGGTIxsgDMAp87vNTV2Vk9Lon2CXDmhU-89E=w2304-h1728-no


...Pumping...
Once full I turned the return pump on to get the overflow dialed in. This is a great example of stuff that should just work, not working, and needing some tinkering. Remember in previous posts how I said that I ordered 3 things from BRS and 2 were broken? Actually, I ordered 4. The Quietone Pro 400 return pump was an "A" grade open box from their site. And after plugging it in, the motor whirred but it did not pump any water. Oh, BRS. Luckily it started right up after disassembling and re-seating the impeller.

...Flowing...
Now that we had the sump working and water being moved it was time to test out the main flow method of the tank, the Ice Cap 3K Gyre. I knew I wanted a gyre because they're DC and easy to control the output, I like the flow pattern, and I could use only one, positioning it on the side of the tank closest to the wall to make it less noticeable. The Ice Cap brand "licenses" the gyre technology and design from Maxspect and as shown in a previous post, they look nearly identical, even using extremely similar controllers. This makes sense and is what I put "licenses" in quotes. Both Ice Cap and Maxspect are CoralVue brands, so it's all the same company anyway. Might as well give it a try for 1/2 the price as the Maxspect Gyre!

First thoughts in the tank were bad. Really bad. It was loud. Not "I like me tank to be utterly silent" loud. But, I can hear this dentist drill over the TV in the same room loud. Turning it off and back on would make it quiter, but still fairly loud. However this would only last a minute or two before it turned into a buzz saw. Something seemed wrong, so I fully disassembled it and used the replacement bushing that Ice Cap provided. This made no difference. Some suggestions online were that Ice Cap recommends a few days to full weeks break-in period for the ceramic shaft and the bushings to polish each other via friction and quiet down. So I ran it at 100% alternating all Sunday night. This made no difference.

Next is a great example of the fantastic customer service of Amazon. I reached out to them due to what really seemed to be a faulty Ice Cap. I checked with my LFS who uses one in their tank, and other than a light hum, it's silent. Not a dentist drill. I explained to Amazon that the pump was defective but did move water. I needed a replacement but couldn't ship this one back until I had a new one in hand as I was going to add live rock Monday night and would to have some flow. They volunteered to place and order for a new one, allowing me to ship the faulty one back after I had the new one in hand, AND they upgraded to shipping to overnight at no charge.


Fast forward to today (Tuesday). I left the Ice Cap off overnight as I needed to let the cloudiness from the sand settle. Turned it on this morning and it's silent! What happened? It was loud when I last had it on. It sat for 12 hours and is now silent. No idea why. Craziness.

In any event, with the Ice Cap in place it was time to get mixing. I got the water up to the temp recommended by Instant Ocean and got to work. We went with Instant Ocean mostly due to its reasonable cost and having past experience with it. Perhaps if we add SPS at some point in the future we will change, but I've always been happy with the balance of quality and affordability of Instant Ocean. At 1/2 a cup per Gallon we would need 58 cups for the entire system. Over a couple of hours salt was added slowly directly in front of the Ice Cap running at 100% to mix. I would use a stick to mixe as well after adding to ensure nothing was settling on the bottom. Once at a specific gravity of 1.025 tests for kh, and ph were run. pH came in at a perfect 8.2 while kH was a bit high but within range at 12kH. Reading online Reef Crystals can be a bit inconsistent with some folks reporting up to 11 or 12 with others as low as 8. In any event, I was within acceptable ranges so we're all good.

...Rocking...
Monday night meant a trip to the LFS for some rock, and time for aquscaping! First off, we decided that we wanted the rock in under the sand to limit potential rock falls or shifts if we opt for a burrowing fish or invert in the future. After looking at options for rock placement on the glass from "just put it on the glass" to "put eggcrate under it", we actually decided just to go to Target and pick up some Farberware, thin cutting boards. They're non-porous and BPA-free and at only about 0.2 inches thick, would provide a solid base to distribute the rock weight and avoid points on the glass, while also remaining low profile to be easily hidden by the sand. Advisory that these things do float, but a few pounds of rock were more than enough to keep them down and not moving. Egg crate, while popular, is pretty thick and would require a deeper sand bed to cover and keep covered. It also can restrict sand movement too much as it settled into the little squares. Digging fish and inverts may also not love it.

For rock, the decision was made a while back to go with Real Reef Rock brand live rock. This rock is a lot like reef saver, but painted with some fake coraline and then seeded down in the florida so that it arrives to you or your LFS live. A Reef Creation here in Buffalo sells this as their only LR choice as it is far more responsible and ec0friendly than traditional boat or air rock harvested from living reefs. It also looks good, and is easily stackable. They keep theirs cured and fully live and cultured in a tank connected to a big coral rubble tank in their shop, so it's well established. We started with about 45lbs but I went back for another 15, so we're at about 60 total. The 1 LB per gallon rule seems crazy to me as the system is 116 gallons and the display is 92. There would be no sand or water if we had that much rock!

For the aquascape we wanted something that looked natural, but also interested. It can be difficult to avoid the pile o' rocks look, or what Randy at ARC refers to as "the snowman", where folks will put the biggest rocks on the bottom and the smallest on top. We tried to keep smaller rocks on the bottom and stock the larger on top at this could create interested overhangs, caves and crevasses.

From an overall theme perspective, after viewing hundreds of photos and many aquascaping videos, we decided we wanted 2 or 3 islands and a more minimalist look. We wanted the rocks to cap out at about half the height of the tank to allow for swimming space and corals on top. This isn't a cube, but a 5 foot by 19 inch tank, so we wanted to build OUT, rather than up. We also knew that we wanted ample sand space for critters, frags, and any future additions.

Z3PUKDFmhPuUBul_7q81II5WIpU5prYDG1Yu2vIbzR_3Ynsy9QMlWjqiBMXZJmD63JHItHCaH9L89_NsZhflYM_QNc5i3L_hDmdm8sQd_zRFWIF8Rp0RP8zRf75CIVKTSznQ8kaytOI-Y_c9ezZkvdSe7jr_cak7T9zpT91bi-h9EDahhrsZwZcNrvN3VyrkFyBKVxJuKH09vhNTdrFjEnBhoItUvzvy3AVv8ud-Tq6GNPvyWnm01w_LFN_BZWrmsNpL_1ib4cnG8e2XGh5Pbl1AAIiy0p_-mmnkF3CIMRJGn1PeT0jbTaIALboJXd0cdTGsVbXUPs6kfl9EaAtfG6leM3k4ejDr6TM5SW8AUu2XcvrpdKKE-2WQyE21niWUi2Df6D_AnehDm3iYbTB5_H2K4fAvcrH7jE8n6lJ_aABUOPcJXpsfTKWvga3-UCp3XPMn_o20jIP4aSfMwkqjErWfRePBIEIXMXudBpMOZBBC2bRozvlwXBXLy1Z8zvTOnY9KeFL-jXVlxEHJDhnvzbQTIlDFCI3grZ2DW7cArlbon2iX_8QmQ-QMSoUcUYNyJlSlg4bZ7Whi0b0gy2GhGpWXrzP6nO0C88IxqDry=w2304-h1728-no


...Sanding...
With the rocks scaped the way we liked, it was time for the sand. I had warned my wife that this may turn the tank to milk that lasts a few days. I'm happy to report that our experience with CaribSea Agaralive was fantastic!

The sand should look natural and soft, with grain sizes small enough for sand sifter for digging wrasse to be safe, but also large enough to not be blown around by the gyre. On the recommendation of many reefers, we went with the CaribSea Agaralive Special Grade Reef Sand. At 1-2mm per grain, this was the right balance of being fine enough to look nice and goby safe, while also hefty enough to stay put in current.

To place the sand, I removed a bit of water from the sump to account for displacement, and lowered the bag into the tank. A box cutter was then used to cut a slit the length of the bag and it was slowly dumped and spread across the tank. Calculations showed that before the LR 3x 20 LB bags would be enough to cover the tank 1.5 inches. With the LR we should have an average of a 2 inch-ish bed.

Of course the water turned super milky, but thanks to the filter socks in the Reefer sump and the packets of water clarifier RedSea provides in the bag, within an hour ot two you could already see the rocks and start to make out the overflow box. The finished photo below was from this morning at 8AM, about 12 hours since adding the sand. Pretty good!!

-On the Dockett-

With the Live Sand, populated Live Rock with minimal die-off, some live sand from a friend's tank, and a bottle of Bio-Spira, I'm anticipating an extremely quick cycle. I've begun testing the parameters and and adding 1.5ppm Ammonia daily. Once I see that the number get down to zero overnight I'll add a limited clean up crew at the BRS recommended 1 snail and 1 hermit per 10 gallons, and will then add more once the bio-load from the fish increased. The first fish will also be added about this time, an oscellaris clown.
 
OP
OP
theKoolAidMan

theKoolAidMan

Active Member
View Badges
Joined
Aug 1, 2018
Messages
266
Reaction score
430
Rating - 0%
0   0   0
Days 7 & 8 - All Under Control

-The Method-

*Add Reefkeeper Lite controller and configure
*Organize wires in cabinet
*Begin dosing ammonia to get cycle moving
*Start testing

-The Madness-

With the water crystal clear Tuesday morning, it was time to begin adding some ammonia to get the cycle moving. I added 2ppm of ammonia to the tank on Tuesday evening and then tested Wednesday morning. From 1ppm the ammonia level had dropped to 0.50 and Nitrites had risen to 0.25. There were 0 nitrates. This was encouraging as it meant that a combination of the live rock, live sand, and bio-spira I added did indeed work! Within 12 hours of adding ammonia directly, the bacteria colonies were at work breaking it down, however not necessarily fully to the point of 0 readings. Tuesday evening I dosed again and Wednesday morning my levels were still holding steady at about 0.50 Ammonia and 0.25 nitrite with 0 nitrate. Same dose on Wednesday night and this morning we have some movement! Ammonia had begun to drop to 0.25 and nitrite was up to 0.50 with the first nitrates showing up at a level of about 5.0ppm. It would seem we are indeed making very rapid progress on the cycle. I wouldn't be surprised if tomorrow saw ammonia zero out with nitrites a day or so behind them. Now, given that there was no control tank, I cannot say if it was more the bio-spira, the live rock, or the live sand, or a combination of the three that was having the biggest impact, but it seems pretty clear to me thus far that they absolutely can seriously shorten your cycle.

I'll also add that during this I was also losely monitoring free ammonia, the actually harmful stuff using a Seachem monitor, which is basically a little plastic card that suctions on inside your sump with a circle of free ammonia detecting paint. It has 4 levels, safe at 0ppm, alert at 0.05ppm, alarm at 0.2ppm and toxic at 0.5ppm. It's not meant to replace more exact testing, but it's like a low tech seneye in that it will at a glance let you know if you're in danger due to free ammonia. On Tuesday and wenesday it was reading a color that was less than the 0.05ppm alert, and today, Thursday, it is just a hair above the safe level, so we're absolutely trending the right way.

In addition to the testing and dosing, my controller also arrived, which meant it was time to tackle wiring. I went with a used Reefkeeper Lite I got off of eBay for about $80. It came with the controller display, PC4 power strip, and temp probe. Super basic, but it was actually cheaper than buying a new temperature controller, and it has the potential to do a lot more. I'd love to add salinity, ORP, Alk, etc units and probes, however I'm hesitant to invest further in what is essentially dead tech with Digital Aquatics going under recently. I'm thinking that I'll use the RKL for temp control until later in the year and hope for a black friday sale at BRS or Marine Depot on the redesigned Nepture Apex or even newer Apex EL.

As for wiring, I really want to avoid screwing anything into the cabinet itself, and have instead opted for using 3M command strips for hanging pictures. If you haven't used these before, they're like velcro but made of plastic. They stick to the back of whatever you're mounting as well as the wall or cabinet. They're super strong, easy to detatch what's being hung, and also easy to remove when you want them gone without the need for an adhesive remover or fresh paint. Also because I want to maximize storage space in the cabinet and avoid drilling, I did not go with a clean looking false wall or board like many people will. While this can look amazing, I feared it would severely diminish the storage space and I wasn't sure how to best do it without screws. Instead I picked up some adhesive backed cable clips from Home Depot. I've seen BRS recommend them and they do work great. They stick to the walls of the cabinet with 3M tape and cinch down to hold cables firmly, but can be released with the push of the latch. I used these to both run cables where I needed them as well as to hold loops of excess cable. The photo below may look busy, but most of the cables you see is excess that has been neatly looped and then held to the wall with the cable clips. The power strips and controllers can easily be removed but just pulling them away from the backing and re-attached with a firm push.

I'm interested to see examples of your wiring organization, especially if you have a Reefer. Please share in a reply!

oiArCJmr_MmAHG7ijzAabErFwYgd1PFCCL_yeCbPNZCEhKpoMHT3bnlFu8Ycb16eGlrCrR0E6GJQYKx0BxylqfOQYIuhRUHqvCgirW8mXLlbvkcbfvS5tqIiAaU73F2TRa1T9kn5SS4GHlWZoEQyS1WSgb6LTM_ipCa4hQMJyvp47cXUER4MKihsOzphQzCp9KvacgkPDYyW-TgjM4NrNpg66FeDkrGYZqqPt4meX_vnBAcDXEm0Yfb4z--gdKOv-x1JY5Hx9Ieeh_4N682izRWa8U3PtK5oM0nj1vGh5jzhJ5yFofNkmti9c6ZZPEhdGzORbRcmtM_jcWuE1AJvET0oLmu7eeEuyl0L6Bb1Pyd3pfbOCV3oR4evGxb0s_gnu2N6E3lBb6APZJw65GLEgwyl0O8iOx2fsuH90xEoMjx7qQUksr1GnJI5--toMD1XHKaFW67EEh0ghs4lvBy9eDkTACi6rWQ6GaYWjMI6OEi9gnlI5rLsEJalzuBIitgtEoLbYZ_dUt1V6_tCT3aJmBETpcJ5QlCUGgFK0MH2dvmNtYVr9A-3Pdw-mdaNoy2LTeiseIkBL_TMQYbyJW94YjQblve9j6asVXoMvKQ4=w1296-h1728-no

CTPv8XnL25rUPStS1VqU6GPUpUcbqSxQqL8YVc44cK_rR1VHZcjj1DRScrgUQQpFk00UYK-1z3ZU9A6A5m4PkA7oCkm4AhQ96NIxtOxgLGK-Zqd4bm0FQ688kdFSmWK1wLqiNYEm_MsHb0CY2fQ35OjRJnLIh9qxXeAmmUJSdrFuBpUhytJRLsgnzkwG6N5HXD5qw3KJ9w4l5SNc8FMjV6mz5POTRc5aNlIOtZAijUm0JSFdzPFCAfnBcEmkkk8W-KtWSSkC6wzrYb8a4d0pXgvfEtJIs-dVcX0BOYIs2rxV_IV2Udpwf7KDj6vfjFDLIqS0x7kwZw5RDBmV_AqVdAAvpr5cq7lGQM9A36NO8DDS42yZr_Y_Fz9-5RxBOTlsdwvdiA_mTrO0uoSeHWZ1nwJpkoRaGg3Yqtfbm3zeixyzmlECRzRy0CC92R-UqX4oGUXPL3MpKTZR1u_n3Ie1ght39XkROoIgyLcVP05Tq0CnkugWoRsMHgV1wmjDi0IZpNuSH4K-wCaI72F4mjmVGZjAILvWmfJeg4mm7BRHShSmtC__odGjeOQtmbZZtqjFytzIPys_MwynX12XUNY3TBDvzesmUhM5PpsHbsS4=w1296-h1728-no


-On the Dockett-

I'm leaning toward picking up some carbon to keep the water clear and scent free. My debate is whether or not to just get some to put in a filter sock or bag in the sump, or if I should just go ahead and get a reactor. If I went that route I would probably pick up the double GFO and Carbon reactor from BRS, though it is currently out of stock. Do you run carbon or GFO? What are your thoughts.

I'll also continue to monitor ammonia and nitrite levels and once we're at a solid 0 on both our first pair of clownfish and a very small cleanup crew will be added.
 

Rory

Community Member
View Badges
Joined
Jan 17, 2017
Messages
56
Reaction score
25
Rating - 0%
0   0   0
As for wiring, I really want to avoid screwing anything into the cabinet itself, and have instead opted for using 3M command strips for hanging pictures. If you haven't used these before, they're like velcro but made of plastic. They stick to the back of whatever you're mounting as well as the wall or cabinet. They're super strong, easy to detatch what's being hung, and also easy to remove when you want them gone without the need for an adhesive remover or fresh paint. Also because I want to maximize storage space in the cabinet and avoid drilling, I did not go with a clean looking false wall or board like many people will. While this can look amazing, I feared it would severely diminish the storage space and I wasn't sure how to best do it without screws. Instead I picked up some adhesive backed cable clips from Home Depot. I've seen BRS recommend them and they do work great. They stick to the walls of the cabinet with 3M tape and cinch down to hold cables firmly, but can be released with the push of the latch. I used these to both run cables where I needed them as well as to hold loops of excess cable. The photo below may look busy, but most of the cables you see is excess that has been neatly looped and then held to the wall with the cable clips. The power strips and controllers can easily be removed but just pulling them away from the backing and re-attached with a firm push.

I'm interested to see examples of your wiring organization, especially if you have a Reefer. Please share in a reply!


For my wiring, I opted to build a matching stand that sits next to my stand... this allows me to maximize my space under the tank for my sump. Also, I don't have to worry about salt creep or accidental water getting splashed on the electronics.
 
OP
OP
theKoolAidMan

theKoolAidMan

Active Member
View Badges
Joined
Aug 1, 2018
Messages
266
Reaction score
430
Rating - 0%
0   0   0
For my wiring, I opted to build a matching stand that sits next to my stand... this allows me to maximize my space under the tank for my sump. Also, I don't have to worry about salt creep or accidental water getting splashed on the electronics.

That's pretty cool, though I suck at building stuff like that. I think I saw on this forum that someone else did that for their ATO. They build an enclosed end table that's next to the tank that just looks like normal furniture, but actually as an ATO reservoir inside.
 

NY_Caveman

likes words, fish and arbitrary statistics
View Badges
Joined
Sep 8, 2017
Messages
17,009
Reaction score
108,396
Location
New York
Rating - 0%
0   0   0
I'm interested to see examples of your wiring organization, especially if you have a Reefer. Please share in a reply!

I used the same 3M strips for mine as well and they work great.
FEA15DD8-27A0-4624-9567-0704AE518588.jpeg

00A55AFC-185C-403D-8B53-FCEBA8EEDE41.jpeg
 
OP
OP
theKoolAidMan

theKoolAidMan

Active Member
View Badges
Joined
Aug 1, 2018
Messages
266
Reaction score
430
Rating - 0%
0   0   0
Today's tests are 0.25 Total Ammonia. Less than 0.050 Free Ammonia (seems very close to 0). Nitrites continue to climb and are up from 0.5ppm yesterday to 1.0 ppm today. Nitrates at are up to 10ppm. pH holding steady at 8.0. So things are moving along as expected. The bacteria load is enough to break down 2ppm ammonia to 0.25 overnight and keep the toxic free ammonia to pretty much undetectable levels, however its not strong enough to completely dispose of all of the ammonia yet. Nitrites are climbing, suggesting that the bacteria that convert it into Nitrate are struggling to keep up, but are still working hard as Nitrate is climbing. Hoping to see Nitrite level out and begin to fall soon.

Also, forgot to mention that I have my first inhabitant (accidentally). Somehow didn't notice until last night that a Turbo Snail came in on my live rock. I have to say I'm extremely impressed with the Real Reef Rock brand rock and my LFS, A Reef Creation. The rock they sold me is seemingly devoid of any hitchhikers other than the turbo, which they themselves put into their live rock tank. I've been watching and am used to using rock that fulls of weird stuff. I'm slightly disappointed because the hitchhiker lottery can be really fun, however it's nice to not worry about things like aptasia, gorilla crabs, mantis shrimp, are horrid worms starting out.
 
Last edited:

BestMomEver

2500 Club Member
View Badges
Joined
May 8, 2018
Messages
2,998
Reaction score
5,820
Location
Lower Alabama
Rating - 0%
0   0   0
Hi folks. I'm about to begin the journey of my 3rd ever reef tank and my first in about 10 years! Back when I was in college at the University at Buffalo I was a bit of a fish nut and had a couple of freshwater tanks and 30g and 10g reef tanks.

I7B1UXZC721Qj9Hq34XZgYriyHE6fcg2ruyJaL9I4M6ze7Ke1o66BTjp37HBMxjLl_bfRzot_j5_IIED26F7PC1-jZREWm4o21CgWN__eP9qoh3wo6t9_J_h27EOH-mQKOF5YeWCNwmnAO04m-3_AAI5_H9CQIp7DQa1oMug26-I0isOnziEcukMDFJSubbmNdUlhZTjqe_HDmOTc70aE8tIliCE9HaXaeqIgREfvgGkrkj3M9lIRMeeJlK_XcyZeQTIQFz27bRvSpU7FnbVK3vXhq0sEURMnCkoB7IK5l-RA6mDfF8g9Y1jFm7Eqas4Rpnk_aETnVYPoX_ajoA1H9Ei-pFHaFGXDR_qNVSy5Jat4AZ9KlTlTCrykczm4gHmQUlE1y8LRXJSIxZXkmVQuk7u5qAZLWWZvMlkFVLx0YcIINMm4TgcSq3CAbuJ5o1HlAvIvAYOjN748ytyI2tRCzGm7u1Cxdy6JqWMj32V9L8rP6PpTBqHsqHobUAffNuKm_gytiTE0KRxNRNnHd_TAeU_r4Dmf1v4nehAPAyMPwteyC6IkuPvSOchCsXZUNIKeqqofQoFhG32r_eQRhC0dCCdHcntXAH4XFhwbZg=w612-h800-no

^^Clown from my old 30g^^

In 2009 I graduated and moved to South Korea to teach English. I had majored in Linguistics which is one of those degrees that you get for the love of the subject matter and not the career prospects. During my two years in Korea I couldn't have a tank due to space constraints but was able to feed my reef obsession through diving. I would often fly to the Philippines on long weekends to dive and ended up with my Advanced Open Water and Nitrox certs by the time I was done. I had the privilege of diving some amazing places during those two years. Moalboal, Borneo, Cebu, Boracay, and the Great Barrier Reef.

My next career move took me to Warsaw, Poland, where the diving obviously wasn't so great and financial constraints made reefing a pipe dream. I did, however, meet my wife there and 3 years later, in 2015, we moved back to my hometown of Buffalo to settle down and pretend to be responsible adults.

Flash forward to 2018 and we're happy DINKs (Dual Income No Kids) with an extremely reasonable mortgage. It seems like it's finally time to get back into the hobby and get the tank I've always wanted.

With my amazing wife's encouragement we began searching for the right size. Off the bat we both knew we wanted a reef. While I've happily kept freshwater fish in the past, that just wasn't as appealing as a big, gorgeous reef. The only freshie tank I considered was a Great Lakes biotope with a couple wild caught Bluegills as I am an avid angler (the whole fish thing I guess!).

dZq6XfwasBCjzGgfi1RicmDWfZF8XFG7C_jt7jveb9GSkrammRaSc-_vLkZXvO2gKbb6TiAMK_4H-F8xJG-gOi9R6jb4eSkul1o5PywJVPpAbrjKsKCYTYw4VQer3ziUZsi40pvNLlUjdJjQOIG0jwtp8r0jCqx-4CMD28FKaAr3WIKhHCoZpwQGoSxvteCMN2En5Xg7AAyjkcUmtFbeqD--6BsDOJQUNpiFY43GHbh7Yv3PkErtVqW6p9HvDXc9g0SoN30Pvl78s4j2mvh2yEe1HKFAOoOW3juMDZdl4s3RjMeMs0cUhGyMux2K-L8ebkzjgJo0xmpuuVIAnOylA-A4FgaEGnaoe70wob_6PkTQJIgOe-AjE-lglmlCzWFR4-xU2_kKWvQvdMfps-U4O9hYz-aCyPAEYm4iCQf2TKpOijm__4R7uvx2hsq_zfQ4OmNkRtReFzTxUK_jWVUmYib8lp1xNYWeq1xxsGyU0ad_uion4Osdu47fgNGoH55i1XKBGI2NTFncZkgRN3AFEcY3kGBwQ7_P1ujOvSV-21uYYsAvSlDs5RXCVV8UxanzYLZSehvy9VcIqxzdFUEFjq-qj2cSMw9f15u_Kbhd=w2316-h1736-no

^^This is how you afford expensive stuff like reefing. Keep the house small and mortgage LOW LOW LOW^^

We knew we could afford what we wanted, within reason, so the real limitation was going to be time we had for maintenance and the space available in the house. In order to keep our mortage reasonable and have disposable income for things like travel, kayaks, aqauriums...just fun stuff essentially, we decided on a small suburban ranch. With no near term plans for kids we didn't really need the space and figured we would get more use out of the extra money each month rather than an extra guest bedroom or two that wouldn't be used. As a result, however, we did have limited space for a tank. The best spot was the living room for a couple of reasons. First off, we want to see the tank and share it with others. Nothing against folks with tanks in a "tank room" or the basement, but our main goal was to make the tank and reef a part of the house's decor and a focal point for both us and for visitors. Second, it was the only room left in the house that could be reconfigured to have an open wall for a tank.

This led to the question of size. the open wall we cleared was about 6.5 feet long. We thought about a 125g but didn't want something the whole length of the wall as I felt that could make maintenance tough as it would be difficult to reach around the back of the tank. After looking at some standard black plastic rimmed 4 foot tanks at Petsmart, we also weren't in love with the aesthetic and also felt that 4 feet might be a bit small for the wall. We wanted a WOW tank and again, had a goal of an aquarium where the design was as much a draw as the cool stuff inside of it. On the recommendation of the fantastic folks at A Reef Creation here in Buffalo, we took a look at the Red Sea Reefer series. This seemed like a match made in heaven as the tanks and stands were absolutely gorgeous with a sleek, rimless, modern look that just oozes class and refinement. I also loved that the 450 would be 5 feet long bridging the gap between the too short 4 foot and too long 6 foot tanks. While I do have experience in reefing and am not a true n00b, I also was not thrilled with having to do my own plumbing, drill a tank, etc. The fact that the Reefer came with a fairly well designed sump, ato system, and even 3 Hydra Twenty Six lights pretty much made it a no-brainier for us.

When it comes to stocking we wanted a balance between beauty and manageability. While we weren't necessarily looking for a ULM setup, we also did not want to spent hours each weekend doing maintenance. So, planning out livestock that would keep things like dosing, reactors, and water changes to a minimum would be a plus. This led us to a softie/lps tank. It also helped that we both preferred the look and movement that these corals provide to the tank. At the same time, we wanted to choose a setup that could easily be ramped up to handle a true mixture of SPS and LPS corals after a year or so if desired.

In the end, the equipment we settled on is as follows:

Tank and Stand: Reefer 450 Deluxe
210408-reefer-deluxe-450-white-red-sea_1.png

Lighting: 3X Hydra Twenty Six LED
AI_HYDRA_26_HD_FRONT_AND_BACK__70011.1455919202.500.750.jpg

Skimmer: Reef Octopus Classic 150 INT
204062_clsc-150intclassic6inchskimmer-a_1_3.jpg

ATO: Included with Reefer
Flow: Ice Cap 3K Gyre
210763-gyre-icecap-3k-title.jpg


We especially liked that the Gyre was DC and could be turned down and programmed for a light pulse for the softies and LPS and if we end up adding SPS down the road can be cranked up if needed.

Stay tuned as we get everything set up over the coming days/weeks and take you all along for the ride. I plan on giving you thoughts/reviews on the equipment as well as updates on livestock choices, etc. I think this will be a unique build in one specific way. I'm neither a grizzled vet starting another tank, nor a total n00b on my first adventure. I've been out of the hobby for 10 years, so I've forgotten a lot, but still remember a ton and am looking forward to catching up on 10 years of changes in the hobby! There will also be lots of picture, I promise! Comment with your questions, commonts, tips, complaints, etc!
Ha! I love your comment about linguistics! My daughter just graduated with dual degrees in Foreign Language and Literature and International Studies with a concentration in French and linguistics! And you’re right...no big career options there. But she managed to find a job as a customs broker working with Airbus (French owned plane manufacturer). She didn’t want to teach but she’s considered going overseas to teach English.

Anyway... we’re thrilled to have you. FWIW, I love your house. It’s adorable!
 

Rory

Community Member
View Badges
Joined
Jan 17, 2017
Messages
56
Reaction score
25
Rating - 0%
0   0   0
Today's tests are 0.25 Total Ammonia. Less than 0.050 Free Ammonia (seems very close to 0). Nitrites continue to climb and are up from 0.5ppm yesterday to 1.0 ppm today. Nitrates at are up to 10ppm. pH holding steady at 8.0. So things are moving along as expected. The bacteria load is enough to break down 2ppm ammonia to 0.25 overnight and keep the toxic free ammonia to pretty much undetectable levels, however its not strong enough to completely dispose of all of the ammonia yet. Nitrites are climbing, suggesting that the bacteria that convert it into Nitrate are struggling to keep up, but are still working hard as Nitrate is climbing. Hoping to see Nitrite level out and begin to fall soon.

Also, forgot to mention that I have my first inhabitant (accidentally). Somehow didn't notice until last night that a Turbo Snail came in on my live rock. I have to say I'm extremely impressed with the Real Reef Rock brand rock and my LFS, A Reef Creation. The rock they sold me is seemingly devoid of any hitchhikers other than the turbo, which they themselves put into their live rock tank. I've been watching and am used to using rock that fulls of weird stuff. I'm slightly disappointed because the hitchhiker lottery can be really fun, however it's nice to not worry about things like aptasia, gorilla crabs, mantis shrimp, are horrid worms starting out.
Good or bad, I love all the cool stuff you can find on regular Live Rock... keeps things interesting!
 
OP
OP
theKoolAidMan

theKoolAidMan

Active Member
View Badges
Joined
Aug 1, 2018
Messages
266
Reaction score
430
Rating - 0%
0   0   0
Day 10 - Something's Fishy

-The Method-

*Continue to test ammonia and nitrite. Once both are 0 for two days in a row, add first fish!

-The Madness-

I knew we were getting close to the cycle stabilizing as ammonia had fallen to 0 recently and only nitrites were hanging on, but as of Friday evening had dropped to only 0.5ppm. Both Saturday and Sunday had stable readings of 0 ammonia and 0 nitrite with nitrate at either 10 or 20ppm. It's difficult to tell as the shades on the API card are so close at that range.

Let me start by saying that the combination of clean, cured, but bacteria populated live rock, plus live sand, plus Bio-Spira as absolutely the way to go and I will likely go this route for any future tanks. Using the Real Reef Rock brand Live Rock from a trusted source at my LFS meant that there were no nasty hitchikers at all (only got a Turbo Snail which was put into the LR tank by the LFS), yet I was able to start the tank as if it was already far more mature than it was. I'm not sure the live sand and bio-spira were truly necessary with such great rock, however the sand was essentially the same price from my source as dry sand and the Bio-Spira was only $20. At worst it gave me peace of mind, and at best it actually helped, which is well worth the cost to me. Additionally, while we didn't "cycle" with fish, we absolutely could have given how low the levels stayed. Total ammonia never got higher than 0.5ppm and that was only for a day, before dropping down to 0.25ppm for a couple of days. Additionally, the harmful free ammonia topped out at less than 0.025ppm, the lowest level "alet" on the Seachem ammonia alert monitor, and again, that was only for on day before dropping to basically undetectable levels. Nitrite topped out at 1ppm for a few days, which is simply not a harmful level to marine life. A study actually showed that clownfish can tolerate nitrite levels in the hundreds of ppm. It's deadly to freshwater fish, but just not harmful at the low levels you get during even a traditional cycle in a home aquarium. Straight up, we COULD HAVE thrown a couple clowns in the tank and they would have done just fine as the combination of bacteria sources kept levels so low during the highly expedited cycle. I'm glad we didn't however, as it allowed us to focus more on dialing in the lighting schedule we like, and being able to deal with the normal mid/late cycle diatom bloom without having new fish in the tank to stress.

At this point though, it was time for our first inhabitants. This is my third tank, and first in 10 years. Each of the last two started with an oscellaris clownfish, and I planned on this one being no different. The obvious place to go was A Reef Creation, the LFS that we went to for the tank and live rock as all of the oscellaris and percula clowns they sell are bred in house. The owner, Randy gave my wife and I a tour of their breeding operation, which consisted of about 10 or 15 mated pairs pumping out fry. We even got to see some week old fry in one tank and some month old ones that just recently got their colors. It was actually a bit difficult to find what we really wanted, however, which was a normal old 3 stripe oscallaris or percula, as most of the fish they breed end up producing "designer" babies. If you're in Western New York and want a cool looking designer clown, this is hands down the best place to go, but if you want an old school version, the selection was a bit slimmer. Eventually we did find two perculas that fit the bill. One was a bog standard percula and the other was pretty close, with the only "non-standard" coloration being the back stripe near the tail did not go fully around the fish and instead rounded out and ended on the side. It looks pretty cool! The one with the rounded our back stripe is named Nori, and the normal one is Rory.

ic_bawQQo9LFGciPpomc5b0TreHlv8Lvk8pdXzLGfHYTS4q22431a8A9bhtIZP7NkMVBStCLXfpURfASczZkgGbuRS3rfTiggSKkIgc68Xgp05CnmnA3EnPLjBhryX8LDpmMmsDOPPk2dxQCT_warjWRpJAqqo6nE8POG2ccsE0uGRIZk3jocQhN9M9R2Fc4VQMdjr4R8dFoBTfhZcr5GgNrmU3YsgkpHXSKmOPZZHdnXbQML3e-eujv9BcsCgXITcnSF5IfWKGuuWnSTvdWBs2D3OgykO4_ud1BoCzXGDGMwmK3Lnpoztk-7bRz5ZB_dc3Tsp1Kl9wbwEueXNsf800FxGldVtLztOfo1x2Z4q5qvcH8V91pz3RrYi3qrhJAG7HP8-BrK61uSDwywoUWYVPqGNbIGFcOWgTRQiXHSo597dA4PFEheQrY0zWEworLgn7EA7qkUlFHRsL3NmhqyaK1Pvg4mcbZNxPMGeqv45NsZHeXP2t7IT5EBvfWzzZ_AWQIZOBz9pAJbAIxK7qtHBK-tK8_YWZCVzsUFerU32EWskJwZBOxMXHfWuwcnuViz9Uta5Q9cSRzCZkJHgeDX9r5vNFPs87XKOzdn1bq=w2304-h1728-no


In addition to the clowns we picked up a basic clean up crew to start. We went low quantity compared to most as we knew there just wasn't going to be much to eat for awhile. We picked up 5 astrea snails, 2 nassarius, 2 babalonia, 5 scarlet hermits, 2 red mithrax crabs, and a sand sifting conch. We figured that the astreas and the turbo we already had would take care of the glass and rocks, the hermits would help with rocks and sand, the nassarius and babalonia with leftover food, and the conch with the sand in general. We got the mithrax crabs simply because I like them, and they were a good pre-emptive strike against bubble algae down the road.

As of this morning ammonia and nitrite both measure 0, so the tank certainly seems thus far to have been fully cycled to handle the new bioload.

-On the Docket-

I'll continue to monitor ammonia and nitrite levels and provided they remain stable, will pick up a few frags to get started with. We're also working on building a fish wishlist that will help guide our stocking going forward. Once we have the list build we'll figure out a preferred order with the leeway for impulse buys along the way. We'll then start to stock further as we see some of those fish become available at one of our two or 3 preferred local LFSs taking aggression and order of stocking into account.

As of now we're looking at stocking the following over time:

1 Blenny (Starry, Lawnmower, or Tail Spot)
1-2 Reef Safe Wrasses (McCoskers, Carpenter's, some sort of Fairy, etc.)
1-2 Anthias (really like the Square or Fathhead. Wife likes the Borbonius
1 Purple, Exquisite, or Helfrichi Firefish
1 "reef safe-ish" Dwarf Angel. Either Coral Beauty or Flame
1 Kole Tang
+
Maybe an additional Yellow or Purple Tang added at the same time as the Kole.
Perhaps a small 3 or 5 fish group of blue-green Chromis or even better, blue reef chromis.
 

Making aqua concoctions: Have you ever tried the Reef Moonshiner Method?

  • I currently use the moonshiner method.

    Votes: 48 20.8%
  • I don’t currently use the moonshiner method, but I have in the past.

    Votes: 4 1.7%
  • I have not used the moonshiner method.

    Votes: 167 72.3%
  • Other.

    Votes: 12 5.2%
Back
Top