This project is for something I have been curious about trying for awhile. I ran across a vendor in Germany that uses an aeration tube to strip any excess CO2 from the effluent coming from one of their calcium reactors. Their reactor design operates in saturation mode, like my ACR CalRx does. This style of reactor uses the saturation point of CO2 to control how much CO2 is added to the CalRx water column. Other popular designs like Dastaco and Deltec also operate in saturation mode. This method removes the variable of setting the CO2 rate correctly. Bubble count / tuning / pH control, etc. all becomes irrelevant once you take the approach of adding CO2 until no more will dissolve.
The expectation is that the effluent of saturation CalRx's will contain excess CO2 within the effluent. This project is to alleviate this possibility.
I decided to add an aeration tube to my ACR along with a air separator / settlement tube for removing the air that is used to strip the CO2 from the effluent. This is the basic design that the German CalRx vendor uses.
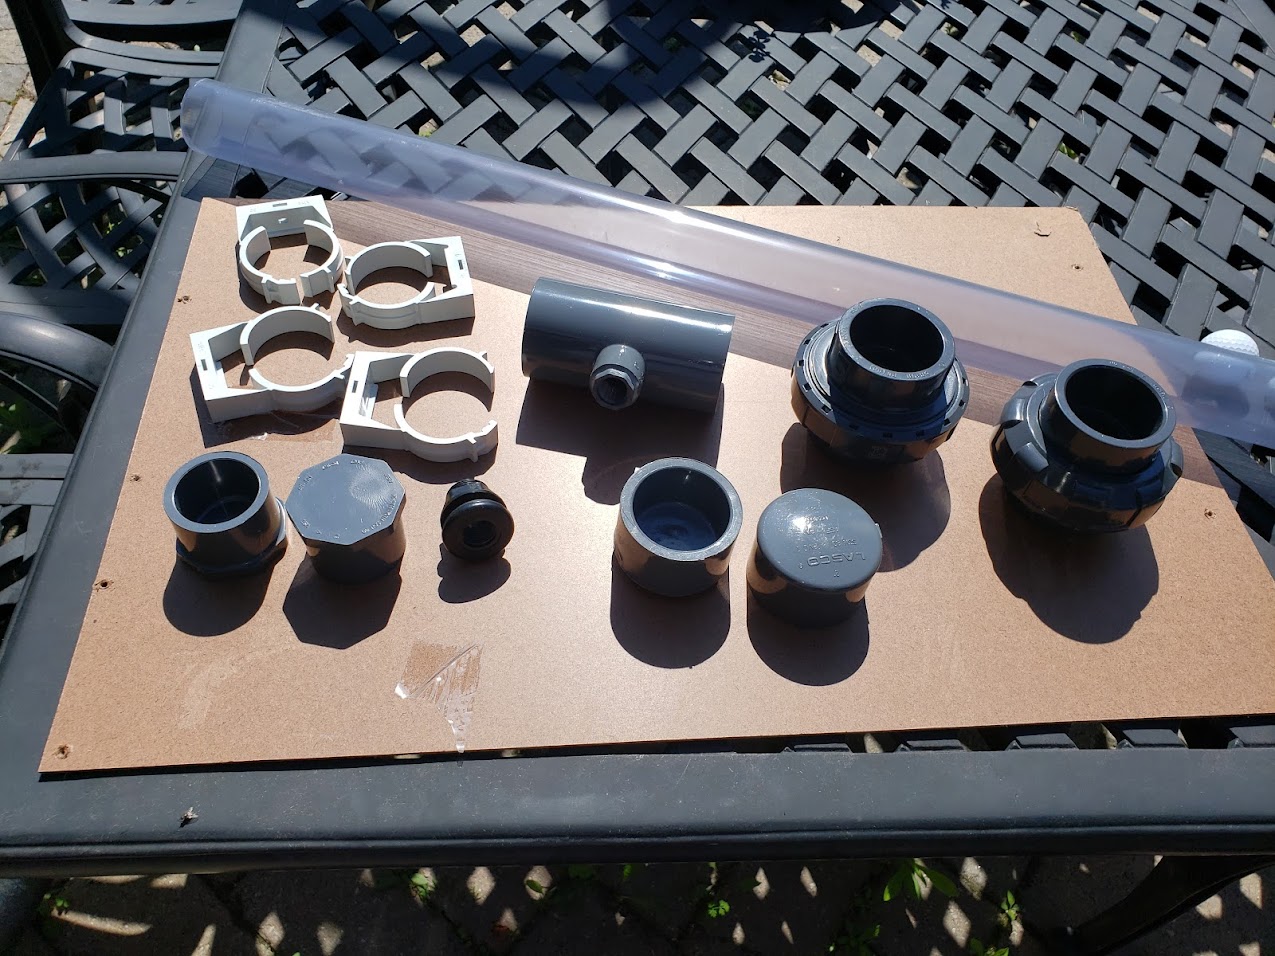
I ordered in the needed parts to build both parts from 2" PVC. I went with schedule 80 grey to match my ACR CalRx. There is no pressure involved, so schedule 40 is fine, and opaque tubing would be OK as well, but being this is a project, I went with clear PVC so I could see what is taking place inside.
Here are the parts I ordered.
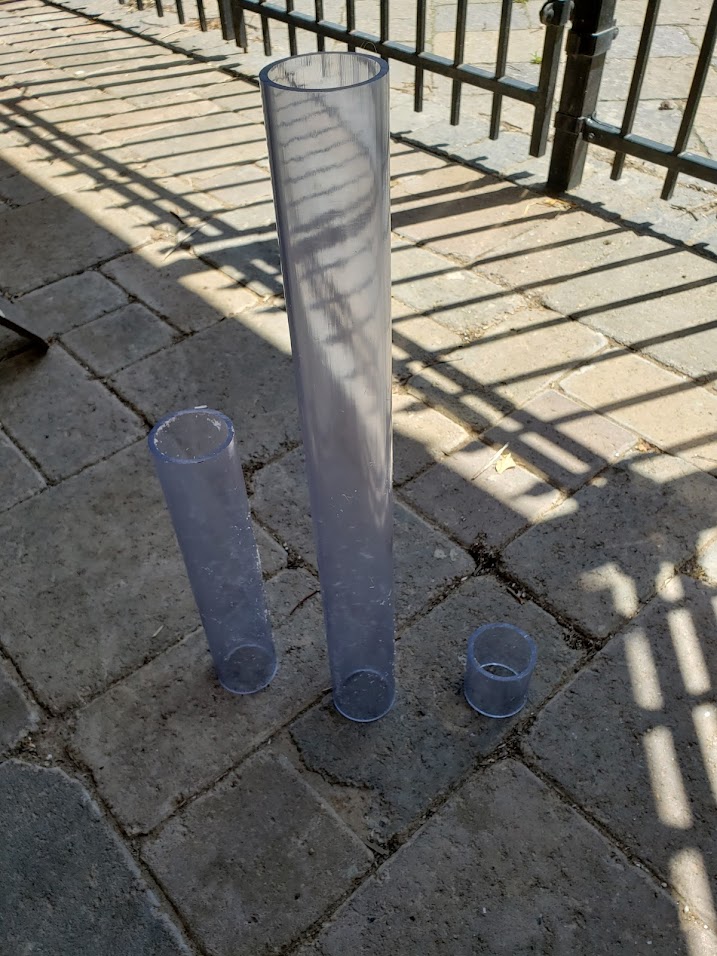
The plan was to use the clear PVC length for a 12" air separator / settlement tube and the remainder of the 36" tube to for the aeration tube.
I often hurry the actual build, which can lead to mistakes, but I managed to catch and avoid making any fatal mistakes during the gluing process.
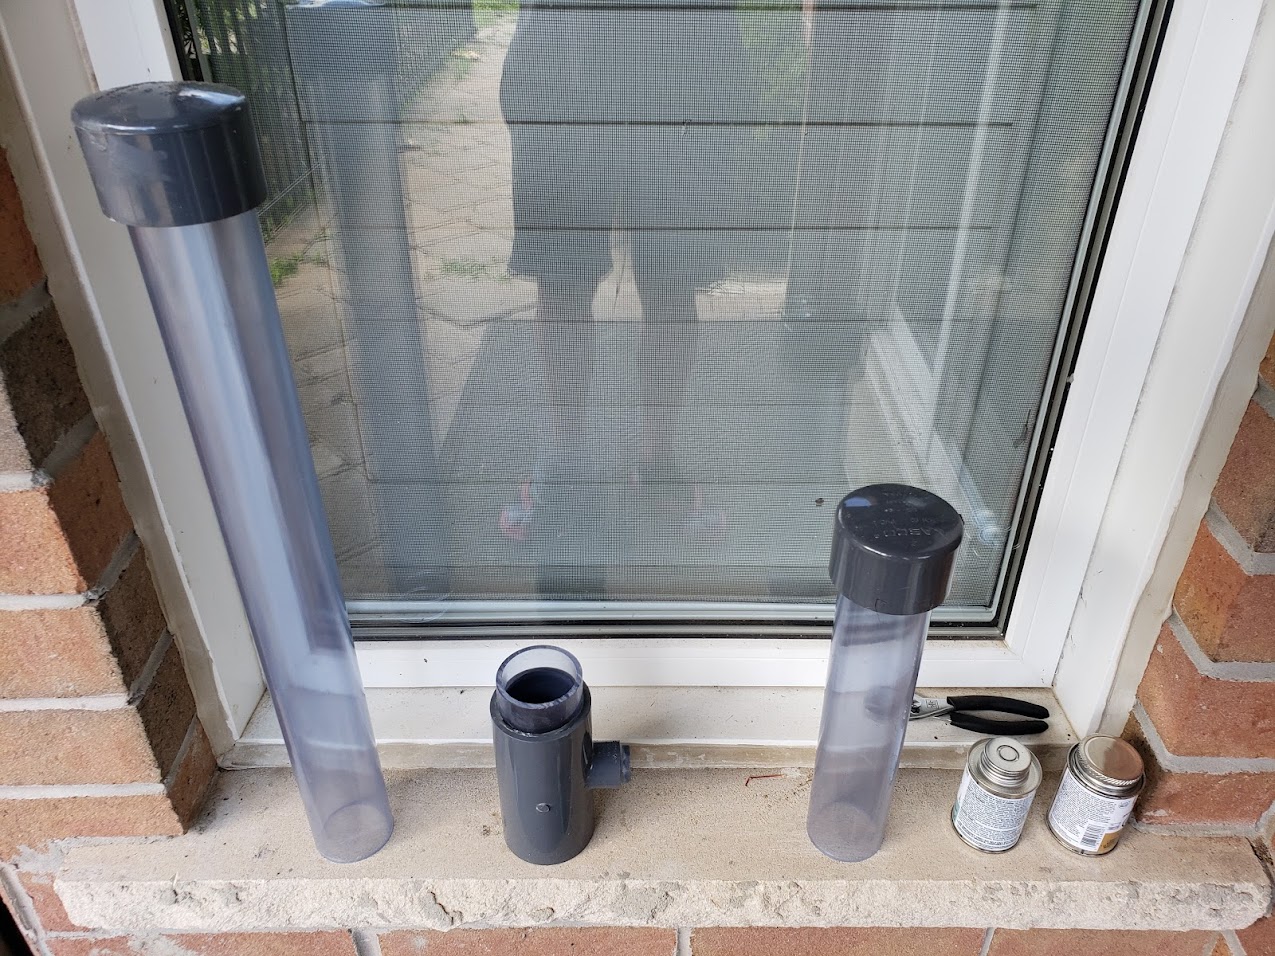
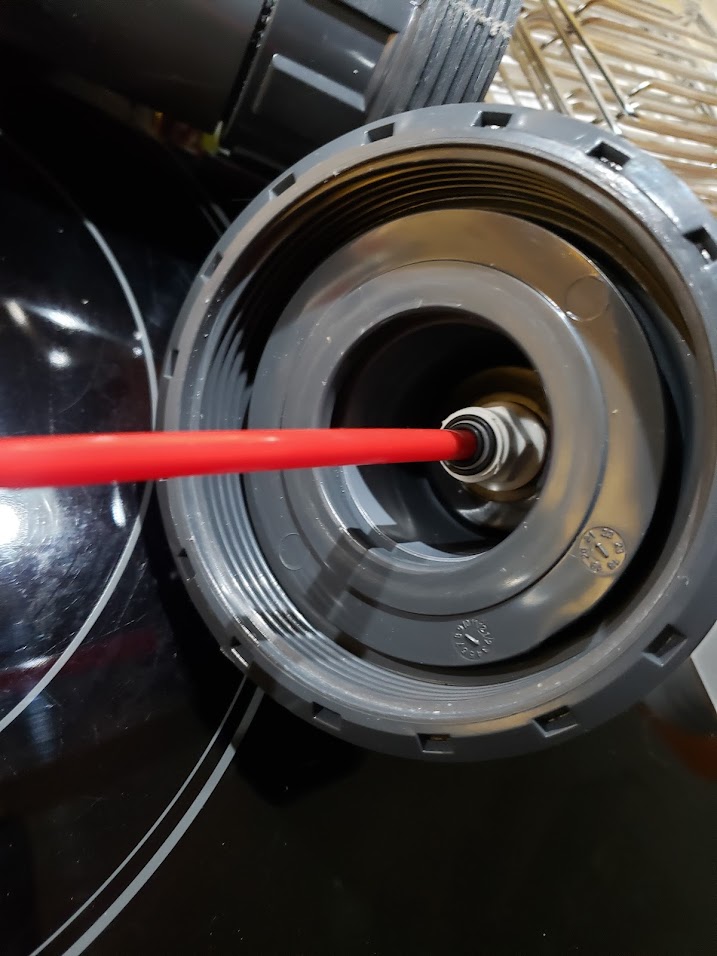
The completed units are shown here. Concerning mistakes, I did not tap the 1/4" holes deep enough resulting in the push fittings not screwing in to full depth. After noticing the issue I went to re-tap the affected holes and in my haste, did not notice that I had cross threaded the tap in the air vent hole. After realizing it was cross threaded, backing it out, and screwing it in again cross threaded, but in a different orientation, I started to get concerned. I looked at the hole and the tap was chewing through all the material in the multiple insertion and removals of the tap, miss threaded 3 times. I thought for sure I had wrecked the part. I carefully made 1 more attempt at threading the hole with the tap held vertical and plumb to the hole. I tried screwing in a fitting and could just engage the threads at the deepest part of the hole. This would likely not seal the fitting properly, so I added an o-ring to the fitting. This seems to seal it fine with the o-ring. Even if it leaks, it will only be air higher in CO2 than the surrounding air (hopefully).
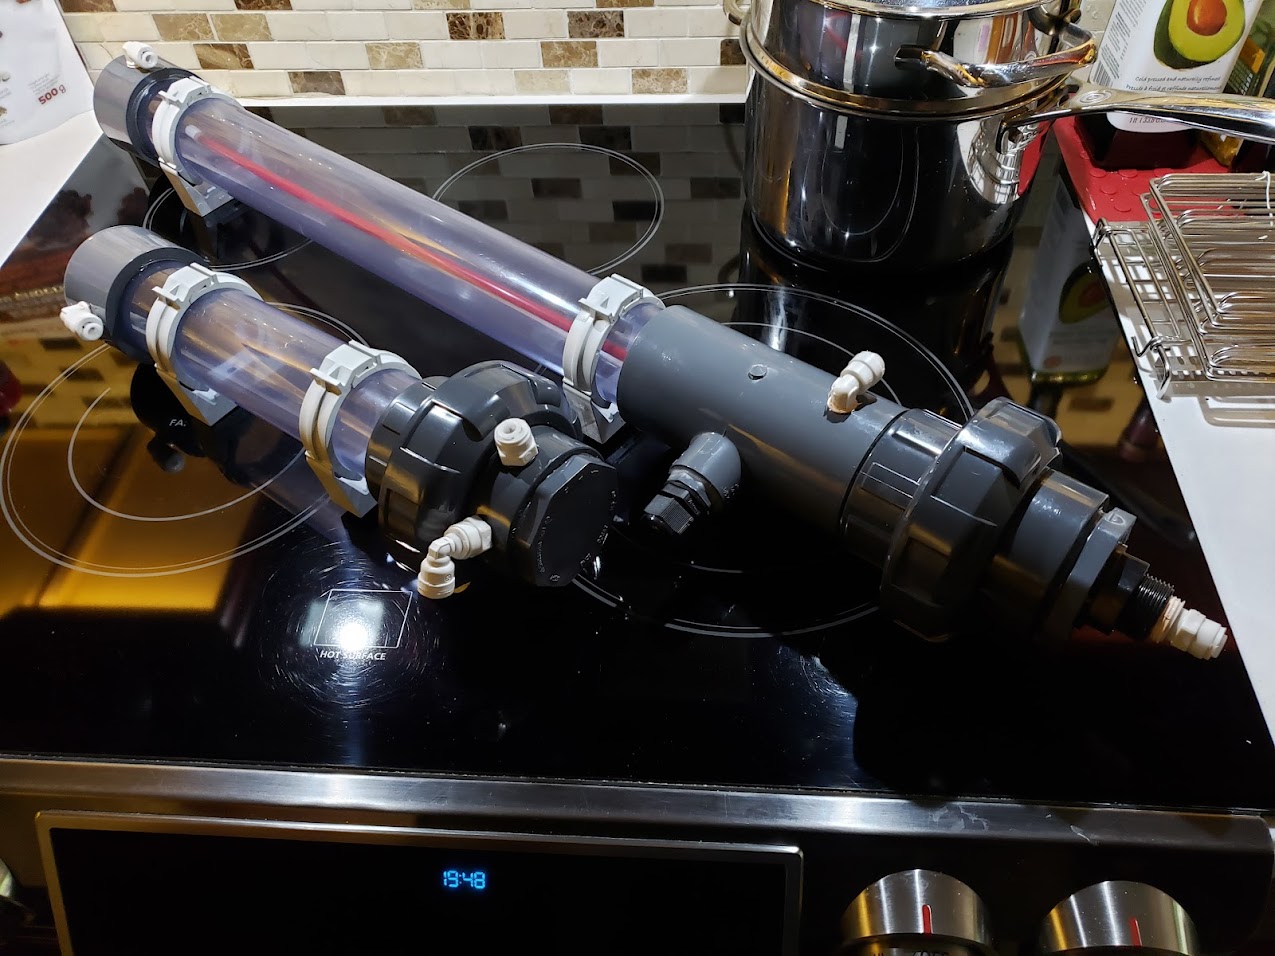
Because I wanted a push fitting inside the aeration tube, I added a couple of o-rings to try to prevent saltwater from reaching the metal in the push fitting connector. This fitting is in the airspace above the water level in the aeration tube, so we are mainly trying to prevent splatter from contacting the metal gripping ring.
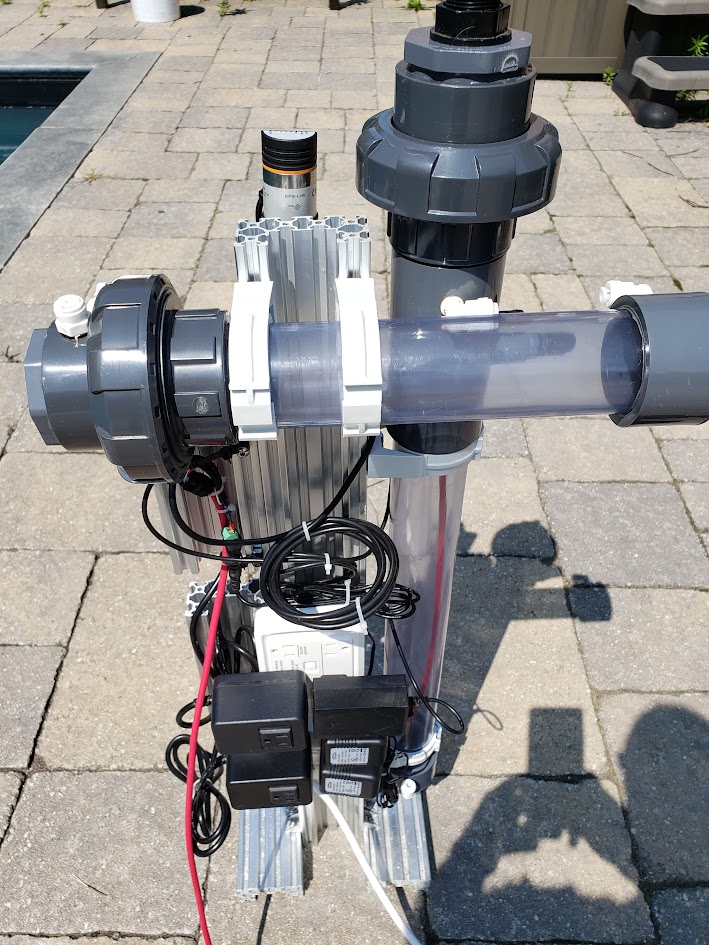
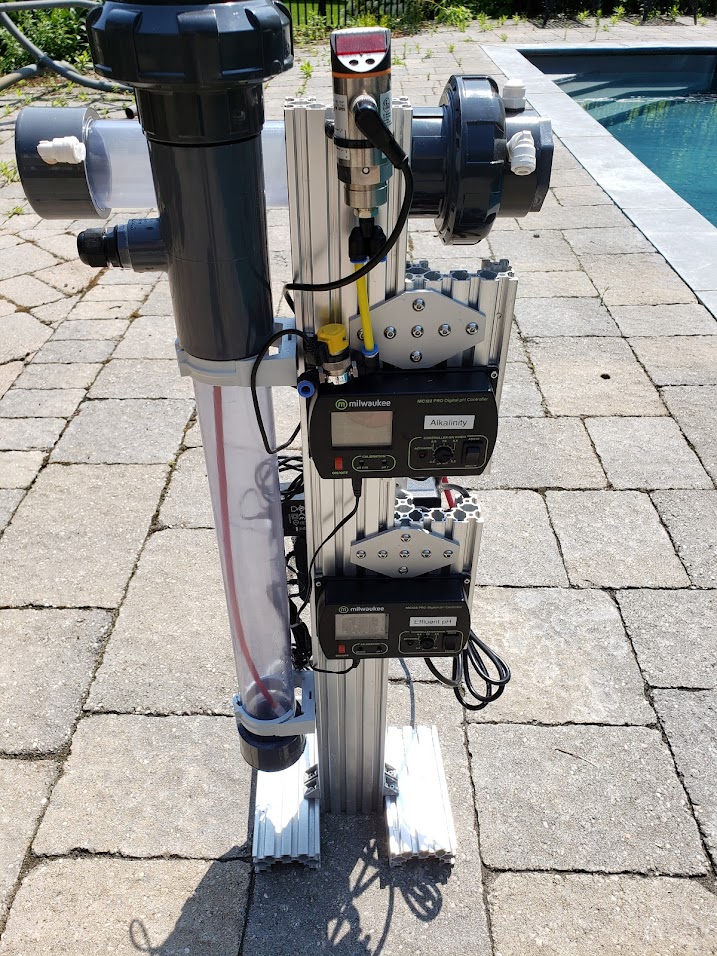
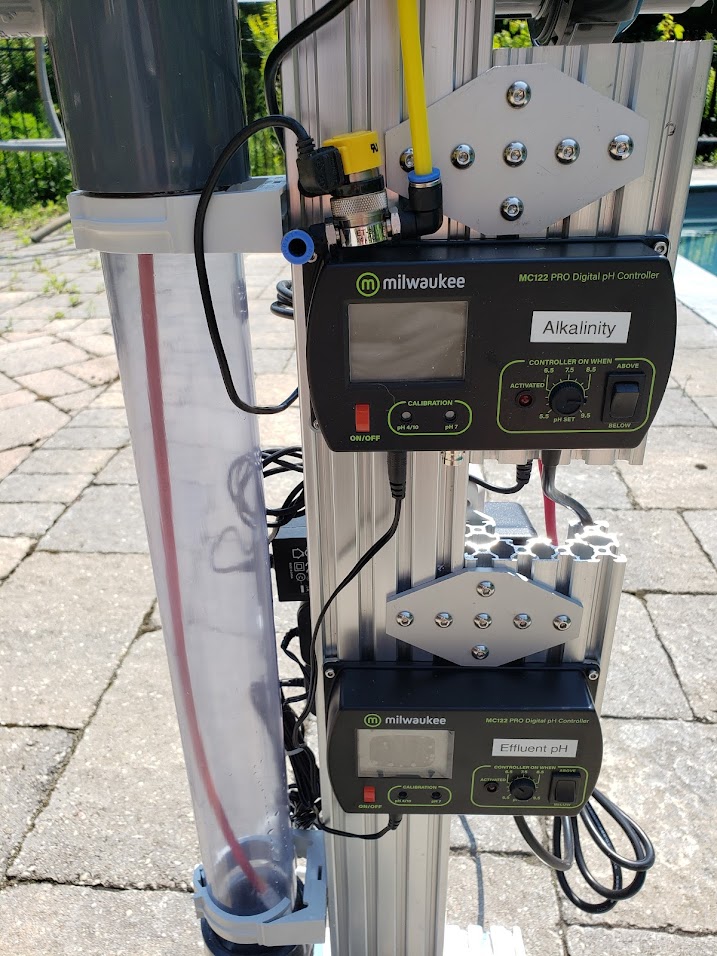
This is the completed build attached to a stand I made to hold the equipment I replaced my factory controller on my ACR CalRx. The top pH controller is used to control the akalinity by disabling the reactor when my Alkatronic indicates the alkalinity level has risen above the setting on the pH controller. The bottom pH controller is for setting the pH of the effluent leaving the air separator / settlement tube (horizontal tube in photo).
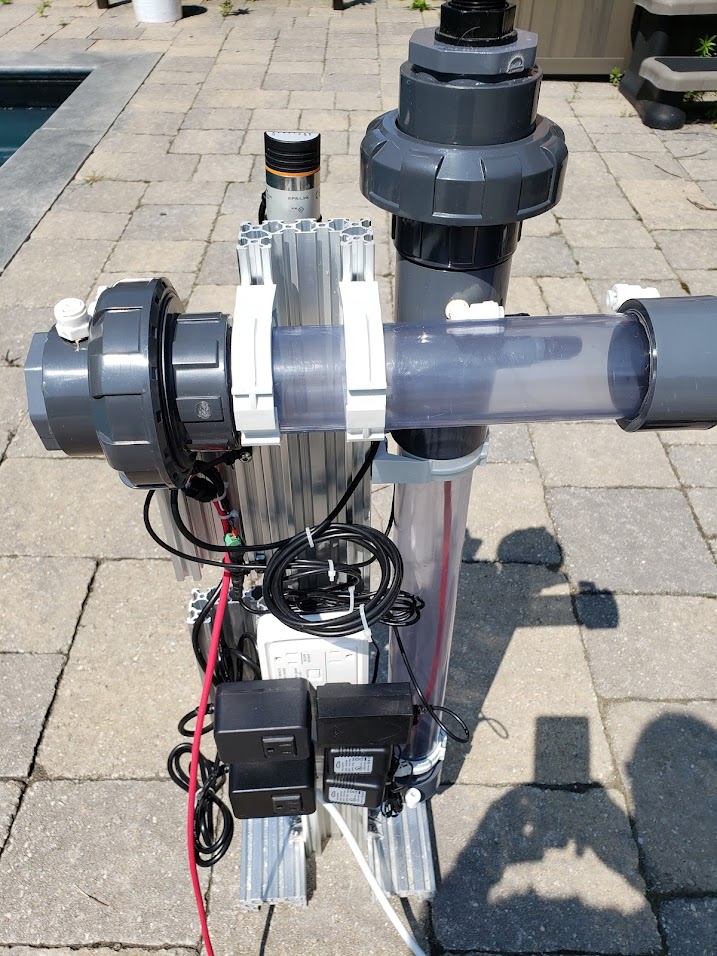
A picture of the backside of the stand holding all the adapters and power relays. While putting it into operation and carefully checking for leaks, I noticed that if any leaks were to occur, the power bar mounting puts them directly under a potential source of leaks. Not the best idea, so I will look to improve this in the future.
A close up of the 2 pH controllers on the stand. The Clippard valve in the photo is for controlling the CO2 to my ACR CalRx. That valve along with a Masterflex replaces the factory controller that came with the reactor.
I have brought the unit online. I have a tiny leak in the pH probe holder. I used one of the 1/2" NPT fittings from electrical suppliers. I used the flat o-ring that came with the fitting, but it seems to have a slow leak, so I will need to shut it down and tape the threads to seal it.
The initial results are interesting. The pH of the effluent I filled the aeration tube with was 6.1 pH. I set the controller to 7.3, or where I thought 7.3 would be on the scale, and enabled the unit. The air pump turned on and ran for less than 60 seconds and then turned off as the pH had reached 7.4. I was a bit surprised at how fast the pH was raised. I was expecting a slower process, but the fine bubbles from the air pump did it in seconds instead of minutes or tens of minutes.
This is now in use on my tank, but the tank is a small frag tank I am using to test equipment for a larger upcoming build. So the effluent rate is so slow (0.8 ml/min), that the air remains disabled for long stretches of time. I have only managed to catch it activating once for a few seconds and then shutting down. I would expect that in a higher demand situation, it would toggle on a more regular basis.
To track any effect this is having, I have been tracking the concentration of CO2 within the tank for the past several days. I use the Marine CO2 Level Calculator from Hamza's Reef to do this. I just put the unit online less than 24 hours ago, so I am still collecting up the initial data.
I might have to remove some of the other elements that I have in place to deal with the CO2 within the effluent to give the aeration tower more dissolved to CO2 work with. My ACR currently feeds a Geo 618 with no CO2 hookup. The Geo helps to use up any excess CO2 within the effluent. The Geo is currently running with 6.16 pH, just based on the effluent coming from the ACR. I also have an 8" Geo kalkwasser reactor running to again use up excess CO2 within the tank. Both of these units may be competing with the functionality of the aeration tower and I may need to remove them to give the aeration tower something to solve, lol.
My tank runs between 8.0 and 8.2 pH on a daily basis now. I am hoping to pump up these 2 ranges by 0.1 pH on a daily basis. Let's see what happens.
Dennis
The expectation is that the effluent of saturation CalRx's will contain excess CO2 within the effluent. This project is to alleviate this possibility.
I decided to add an aeration tube to my ACR along with a air separator / settlement tube for removing the air that is used to strip the CO2 from the effluent. This is the basic design that the German CalRx vendor uses.
I ordered in the needed parts to build both parts from 2" PVC. I went with schedule 80 grey to match my ACR CalRx. There is no pressure involved, so schedule 40 is fine, and opaque tubing would be OK as well, but being this is a project, I went with clear PVC so I could see what is taking place inside.
Here are the parts I ordered.
The plan was to use the clear PVC length for a 12" air separator / settlement tube and the remainder of the 36" tube to for the aeration tube.
I often hurry the actual build, which can lead to mistakes, but I managed to catch and avoid making any fatal mistakes during the gluing process.
The completed units are shown here. Concerning mistakes, I did not tap the 1/4" holes deep enough resulting in the push fittings not screwing in to full depth. After noticing the issue I went to re-tap the affected holes and in my haste, did not notice that I had cross threaded the tap in the air vent hole. After realizing it was cross threaded, backing it out, and screwing it in again cross threaded, but in a different orientation, I started to get concerned. I looked at the hole and the tap was chewing through all the material in the multiple insertion and removals of the tap, miss threaded 3 times. I thought for sure I had wrecked the part. I carefully made 1 more attempt at threading the hole with the tap held vertical and plumb to the hole. I tried screwing in a fitting and could just engage the threads at the deepest part of the hole. This would likely not seal the fitting properly, so I added an o-ring to the fitting. This seems to seal it fine with the o-ring. Even if it leaks, it will only be air higher in CO2 than the surrounding air (hopefully).
Because I wanted a push fitting inside the aeration tube, I added a couple of o-rings to try to prevent saltwater from reaching the metal in the push fitting connector. This fitting is in the airspace above the water level in the aeration tube, so we are mainly trying to prevent splatter from contacting the metal gripping ring.
This is the completed build attached to a stand I made to hold the equipment I replaced my factory controller on my ACR CalRx. The top pH controller is used to control the akalinity by disabling the reactor when my Alkatronic indicates the alkalinity level has risen above the setting on the pH controller. The bottom pH controller is for setting the pH of the effluent leaving the air separator / settlement tube (horizontal tube in photo).
A picture of the backside of the stand holding all the adapters and power relays. While putting it into operation and carefully checking for leaks, I noticed that if any leaks were to occur, the power bar mounting puts them directly under a potential source of leaks. Not the best idea, so I will look to improve this in the future.
A close up of the 2 pH controllers on the stand. The Clippard valve in the photo is for controlling the CO2 to my ACR CalRx. That valve along with a Masterflex replaces the factory controller that came with the reactor.
I have brought the unit online. I have a tiny leak in the pH probe holder. I used one of the 1/2" NPT fittings from electrical suppliers. I used the flat o-ring that came with the fitting, but it seems to have a slow leak, so I will need to shut it down and tape the threads to seal it.
The initial results are interesting. The pH of the effluent I filled the aeration tube with was 6.1 pH. I set the controller to 7.3, or where I thought 7.3 would be on the scale, and enabled the unit. The air pump turned on and ran for less than 60 seconds and then turned off as the pH had reached 7.4. I was a bit surprised at how fast the pH was raised. I was expecting a slower process, but the fine bubbles from the air pump did it in seconds instead of minutes or tens of minutes.
This is now in use on my tank, but the tank is a small frag tank I am using to test equipment for a larger upcoming build. So the effluent rate is so slow (0.8 ml/min), that the air remains disabled for long stretches of time. I have only managed to catch it activating once for a few seconds and then shutting down. I would expect that in a higher demand situation, it would toggle on a more regular basis.
To track any effect this is having, I have been tracking the concentration of CO2 within the tank for the past several days. I use the Marine CO2 Level Calculator from Hamza's Reef to do this. I just put the unit online less than 24 hours ago, so I am still collecting up the initial data.
I might have to remove some of the other elements that I have in place to deal with the CO2 within the effluent to give the aeration tower more dissolved to CO2 work with. My ACR currently feeds a Geo 618 with no CO2 hookup. The Geo helps to use up any excess CO2 within the effluent. The Geo is currently running with 6.16 pH, just based on the effluent coming from the ACR. I also have an 8" Geo kalkwasser reactor running to again use up excess CO2 within the tank. Both of these units may be competing with the functionality of the aeration tower and I may need to remove them to give the aeration tower something to solve, lol.
My tank runs between 8.0 and 8.2 pH on a daily basis now. I am hoping to pump up these 2 ranges by 0.1 pH on a daily basis. Let's see what happens.
Dennis
Last edited: