Chill Solutions CSXC-1 Unboxing and Installation

reefiniteasy

Check me out on IG!
View Badges
Joined
Jun 6, 2018
Messages
2,347
Reaction score
5,335
Location
Orlando, FL
Rating - 0%
0   0   0
I purchased the Chill Solutions CSXC-1 hydroponic chiller for my 16 gallon BioCube. Even after taking the top off the cube, high weekend temperatures in my classroom were causing a small spike in temp. I want my aquarium to consistently be at 77 degrees. There are a few videos on YouTube and some mentions on a couple of forums but it wasn't enough information for me. This thread will be my attempt at documenting the unboxing, installation, and review of how it is working.

The following is the description on Chill Solutions' Website:

"Powerheads, pumps, UV sterilizers and high-intensity lighting all add undesirable heat into the aquarium. The CSXC-1 chiller is perfect for nano tanks, hydroponics setups, and aquariums up to 30 gallons (or more, depending on heat input). The same thermoelectric technology used in this device is used by NASA to generate electricity and maintain equipment temperature in space!"

I ordered the chiller and wall mount bracket directly from Chill Solutions and the installation kit from Live Aquaria. The installation kit was on clearance, so I only paid about $24 instead of $40 from Chill Solutions. The Chiller, wall mount and shipping came to about $250. They do offer free shipping, but I don't like electronic/delicate equipment sitting in transit longer than necessary so I paid $13 for usps 3 day priority.

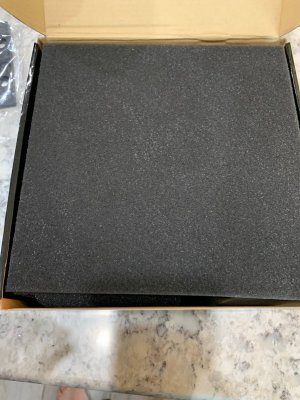
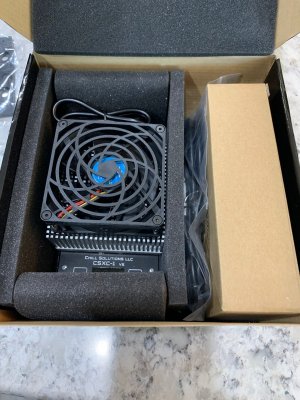
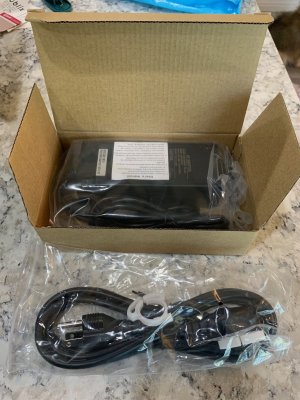
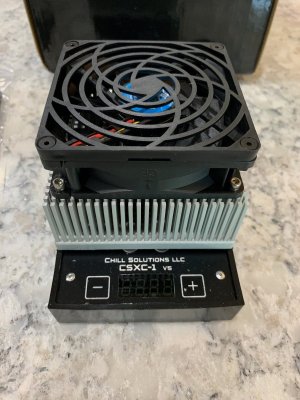
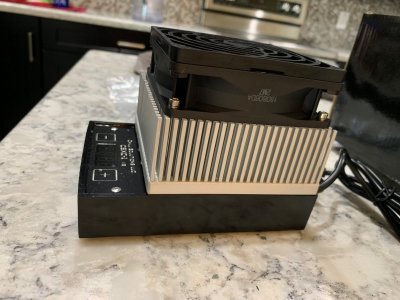
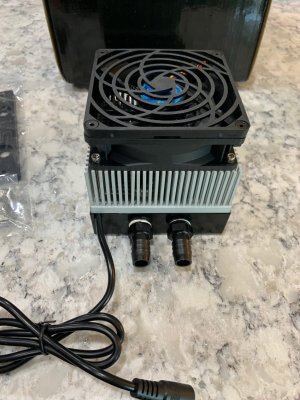
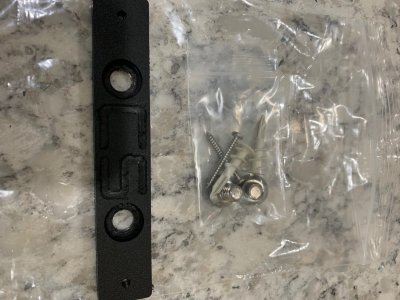
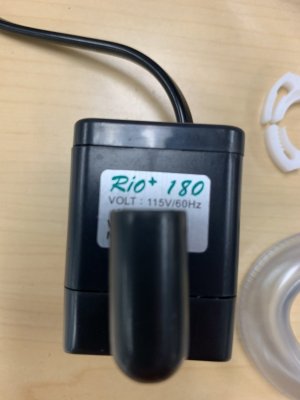
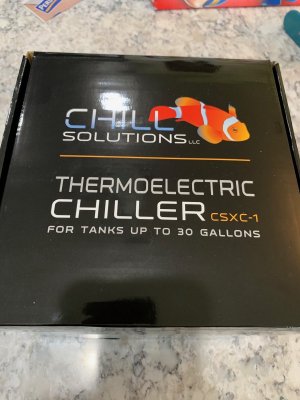
The chiller was packaged in a cube shaped shipping box with packing peanuts both above and below the chiller's box. This left no room for shifting of equipment. The wall mount was buried within the packing peanuts. Here are pictures of the chiller and its packaging.
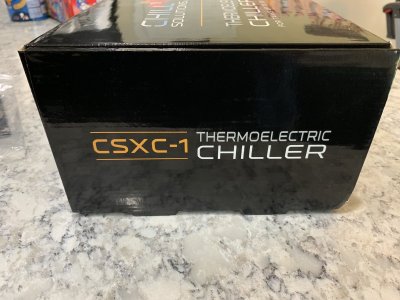
IMG_1877.jpg IMG_1879.jpg IMG_1880.jpg IMG_1882.jpg IMG_1884.jpg IMG_1885.jpg IMG_1886.jpg IMG_1887.jpg IMG_1876.jpg

The installation kit is sitting on my desk in my classroom. I will post pictures of that on Monday. I will also document the installation this week and post that as well.

To be continued...
 

Blue Spot Octopus

2500 Club Member
View Badges
Joined
Dec 30, 2016
Messages
3,321
Reaction score
1,397
Rating - 0%
0   0   0
Looking good , was Live Aquaria out of the chiller? Will take some pictures of how you mount it to the tank?
 
OP
OP
reefiniteasy

reefiniteasy

Check me out on IG!
View Badges
Joined
Jun 6, 2018
Messages
2,347
Reaction score
5,335
Location
Orlando, FL
Rating - 0%
0   0   0
Looking good , was Live Aquaria out of the chiller? Will take some pictures of how you mount it to the tank?

Live Aquaria has the chiller on clearance for something like $170. However, the picture shows the latest version, the chiller has a digital display. The description on their website makes no mention of the digital display so I emailed them for clarification. Customer service wrote back that it is an older model, with a dial to set the temperature. Which would explain why it is on clearance. So they are using the picture of the new version to sell the older version on clearance.

I’ll take plenty of pictures during installation. Probably get to that on Tuesday. Have to do a water change and make extra water as the chiller will increase the total volume of the aquarium.
 
OP
OP
reefiniteasy

reefiniteasy

Check me out on IG!
View Badges
Joined
Jun 6, 2018
Messages
2,347
Reaction score
5,335
Location
Orlando, FL
Rating - 0%
0   0   0
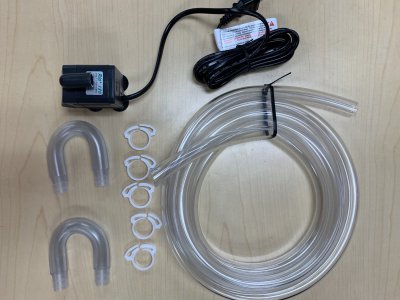
Alright, so here is a picture of the installation kit.
AA0656B9-176F-4F62-9159-067FB9DFC900.jpeg
76A092C6-05F9-4CC1-B8CA-F46FBC2A972E.jpeg

I dry fitted the u-bend barb fittings and they fit the rim of the BioCube perfectly. I completed a water change today to drop the nitrates in my tank and I also made an extra gallon of saltwater as the chiller will increase the total volume of water in the tank. Tomorrow I will hopefully have a chance to install the micro-chiller. Details and pictures to come.
 
OP
OP
reefiniteasy

reefiniteasy

Check me out on IG!
View Badges
Joined
Jun 6, 2018
Messages
2,347
Reaction score
5,335
Location
Orlando, FL
Rating - 0%
0   0   0
Zero reason to run a reef tank at 77, you can go to 85 with conditioning.

I’m sorry, but you missed the point. Everything I’ve read on these forums say that a reef tank can survive at what seems to be any temperature, 72 to mid 80s. However, temperature change needs to be slow and not quick as to cause issues.

When the AC is on my classroom it is 76 and that’s where the tank sits. However I have seen quick spikes as high as 84. I’m sorry, but from what I have read, having my tank on a Friday at 77 and then Saturday it’s at 84 and Monday it’s back to 77 could be too much of a change for such a small habitat. Not to mention my room can hit well into the 90s over the summer with no AC.

Anyway, can’t I run my tank at whatever temperature I want? I am not around my tank at night, from 5pm to 8am and on weekends. Wouldn’t you do anything to stabilize your tank as to prevent an issue when you’re not there?

So I have plenty of reasons to want my tank at 77. Also, I could say the same about running your tank at 85. Why condition your tank to do that. With available technology there is no reason to run that high. Do you post on everyone’s threads when they mention temp that they can keep their tank at 85 and they have no reason to do what they are doing? Or was I just the lucky recipient of a comment that’s got nothing to do with my unboxing, installation, and review of this device.
 
Last edited:

FlyPenFly

Well-Known Member
View Badges
Joined
Feb 25, 2013
Messages
743
Reaction score
338
Location
San Diego, CA
Rating - 0%
0   0   0
Get an inkbird temp controller and don’t take things so personally.

And yes real reefs go to 85 and even higher! Maintaining at 77 makes no sense but up to you I guess. You can comfortably run a reef tank 80-82 and be more energy efficient during the summer. If you condition your coral to temperature swings they also become hardier.
 

JoshH

Tank Status: Wet...ish, growing things....
View Badges
Joined
Dec 3, 2016
Messages
9,994
Reaction score
35,393
Location
Humble
Rating - 0%
0   0   0
I’m sorry, but you missed the point. Everything I’ve read on these forums say that a reef tank can survive at what seems to be any temperature, 72 to mid 80s. However, temperature change needs to be slow and not quick as to cause issues.

When the AC is on my classroom it is 76 and that’s where the tank sits. However I have seen quick spikes as high as 84. I’m sorry, but from what I have read, having my tank on a Friday at 77 and then Saturday it’s at 84 and Monday it’s back to 77 could be too much of a change for such a small habitat. Not to mention my room can hit well into the 90s over the summer with no AC.

Anyway, can’t I run my tank at whatever temperature I want? I am not around my tank at night, from 5pm to 8am and on weekends. Wouldn’t you do anything to stabilize your tank as to prevent an issue when you’re not there?

So I have plenty of reasons to want my tank at 77. Also, I could say the same about running your tank at 85. Why condition your tank to do that. With available technology there is no reason to run that high. Do you post on everyone’s threads when they mention temp that they can keep their tank at 85 and they have no reason to do what they are doing? Or was I just the lucky recipient of a comment that’s got nothing to do with my unboxing, installation, and review of this device.

Really would like to thank you for the review and keep it up. It doesn't matter what temp you want to keep your tank at especially with the huge temperature swings in your classroom. Stability is key and it sounds like even if you wanted to keep it at 82 you would still need the chiller to do it. An ink bird isn't going to cool your tank you'd still need a chiller to do that. So please try and ignore the comments that are only going to derail your thread. I personally would love to see a very detailed review of this as I might need one for a build I'm doing at some point where the temperature staying below 75 is really important. Theres a handy ignore tool to use that I use for people who I deem... let me say unpleasant to have to put up with.

Anyway back to the review!!!
 
OP
OP
reefiniteasy

reefiniteasy

Check me out on IG!
View Badges
Joined
Jun 6, 2018
Messages
2,347
Reaction score
5,335
Location
Orlando, FL
Rating - 0%
0   0   0
So today I installed the chiller. I took plenty of photos and I will do my best to provide explanations and my early impressions.

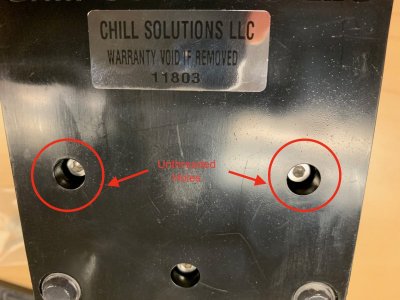
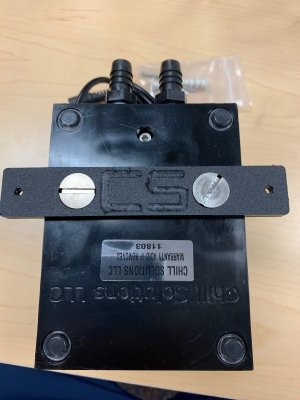
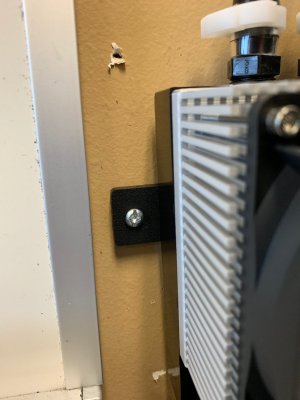
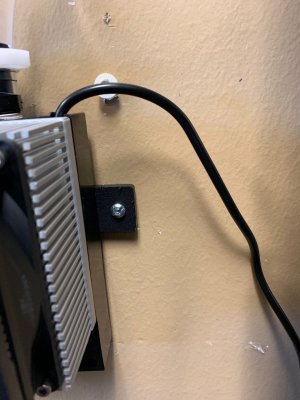
First order of business was to attach the wall mount plate/bar thing. There are two large recessed holes for two large stainless screws. Easy enough. First problem, the two holes on the back of the chiller are not threaded. Contacted the company via their online chat (which was super easy). They explained that the holes will self thread. So first problem was indeed not a problem. Installation back on track.
IMG_1918.jpg IMG_1920.jpg
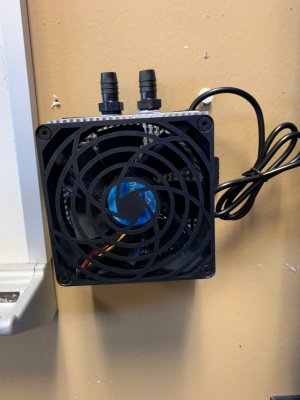
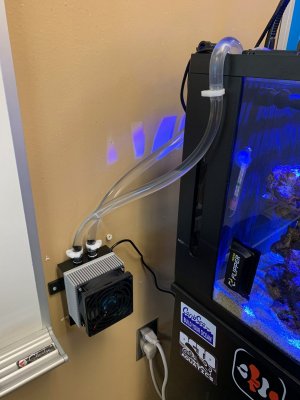
Next I held the unit up to the wall and marked the holes on the wall for the drywall anchors. I first attempted to use the anchors that came with the wall mount kit but they would not thread into the drywall. The walls in our school are not the same as the walls in your standard house. Luckily I brought my drill to school and some extra heavy duty anchors I had in the garage. The chiller mounted to the wall easily.
IMG_1922.jpg IMG_1937.jpg IMG_1938.jpg

The only thing I do not like about the wall mount is that it is a thin piece that causes the chiller to sit about 3-4mm off the wall. The mount is about 1-2mm wider than the feet on the back of the chiller. Now when you press the buttons to set the temp the device has some give to it. I don't believe it is enough flex to put stress on the anchors, but I wish it mounted flush to the wall.

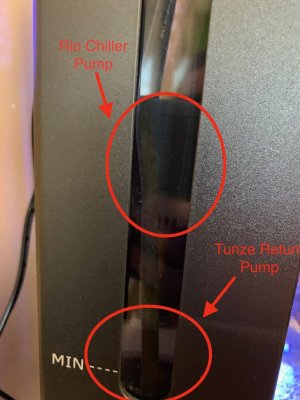
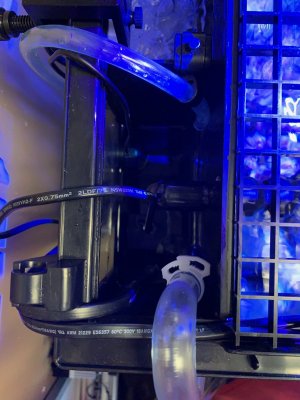
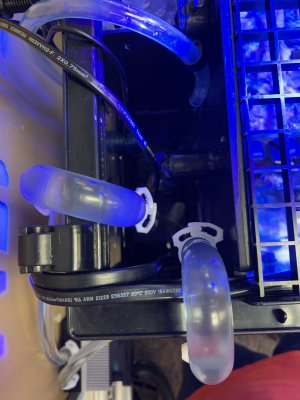
Next step is to cut tubing and install u-bend fittings. I started with attaching a small section of tubing (very pliable, and easily adjusted with hot water) to the rio pump, I did not use one of the snap-grip clamps for this as it did not fit around the vinyl tubing against the body of the pump. However, the vinyl tubing was nice and snug. I then attached the u-bend fitting and secured the tubing with a clamp. I then suctioned the pump to the rear glass in the left most (return) chamber of the BioCube and turned the u-bend fitting so it would go over the side of the tank. I then pushed it down until it sat on the rim of the tank.
IMG_1925.jpg IMG_1927.jpg

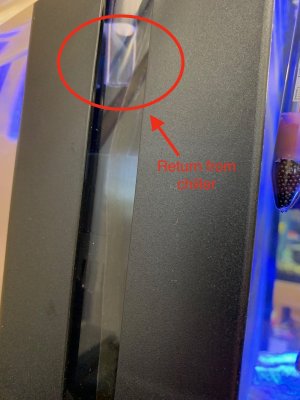
I then worked on the return u-bend and the tubing that would attach on the inside of the aquarium. I cut a length of tube that would reach just below the water level so as to not disturb the surface and the sensors on the XPAqua Duetto.
IMG_1931.jpg IMG_1932.jpg

Next I set up the lines going to the chiller. This was easy. No real issues here, just some small trimming after dry fitting the tubes. The vinyl is very flexible and I did not want any kinks in the tubing.
IMG_1930.jpg

There is no specific in and out on the chiller. Now that it was all plumbed I started up the Rio pump and let it run for about an hour to make sure there were no leaks at any point. I had to add some salt water to compensate for the added volume on the system. Once the tank was back at the proper level I turned my ATO back on.

Next step was to turn on the actual chiller. The way this device works is that water is constantly pumped through the unit while the temperature sensor in the chiller monitors the water temp. When it senses that the water is above the set temp, the chiller kicks on. When the water reaches the set temperature the chiller goes in to standby mode. The cycle continues to keep the tank at the set temp. When I plugged in the system the device read 77.2 and went right in to cooling mode. The display the jumped to 77.4 where it stayed. I attempted to set my desired temperature but had trouble using the buttons. The directions said to press the plus or minus button to set the desired temp but when I pressed the buttons, nothing happened. When I put constant pressure on the minus button the LED flashed orange, the fan stopped, and I was able to set my desired temperature. I didn't have to do much as it was already set to 77 degrees. I kept constant pressure on minus button and the desired temp adjusts in increments of .5 degrees. You just take your finger off when the display reads your desired temp. I then reset it at 77 degrees.

I started the installation process at 11:00. I finished at about 11:45. I let the pump run from 11:45 to 12:45 at which time I plugged in the chiller. At 3:40 the chiller displayed 77.2 degrees and at 4:32 the chiller displayed 77.1 degrees. My 16 gallon BioCube only has about 12-13 gallons of water. I was concerned that the chiller was not functioning properly as it took almost 4 hours to drop the tank .3 degrees. I contacted customer support again, and they said to allow 24 hours for the water temperature to stabilize before assessing performance. I am comfortable with doing this.

I am excited to check the system in the morning when I return to my classroom and I cannot wait to see how it responds to the weekend temps in my classroom. I also need to find a better thermometer to measure my water temp. My "classic" glass aquarium thermometer was reading 78 degrees, the chiller was reading 77.1 degrees and my infrared thermometer that i use for my turtle habitat was reading 76.2 through 76.9 degrees.

As of right now, my Neo-Therm heater is set at 76 degrees and the CSXC-1 is set to 77 degrees. I will continue to post updates going forward.
 
Last edited:

Adamantium

Valuable Member
View Badges
Joined
Sep 10, 2018
Messages
1,533
Reaction score
1,039
Rating - 0%
0   0   0
So today I installed the chiller. I took plenty of photos and I will do my best to provide explanations and my early impressions.

First order of business was to attach the wall mount plate/bar thing. There are two large recessed holes for two large stainless screws. Easy enough. First problem, the two holes on the back of the chiller are not threaded. Contacted the company via their online chat (which was super easy). They explained that the holes will self thread. So first problem was indeed not a problem. Installation back on track.
IMG_1918.jpg IMG_1920.jpg
Next I held the unit up to the wall and marked the holes on the wall for the drywall anchors. I first attempted to use the anchors that came with the wall mount kit but they would not thread into the drywall. The walls in our school are not the same as the walls in your standard house. Luckily I brought my drill to school and some extra heavy duty anchors I had in the garage. The chiller mounted to the wall easily.
IMG_1922.jpg IMG_1937.jpg IMG_1938.jpg

The only thing I do not like about the wall mount is that it is a thin piece that causes the chiller to sit about 3-4mm off the wall. The mount is about 1-2mm wider than the feet on the back of the chiller. Now when you press the buttons to set the temp the device has some give to it. I don't believe it is enough flex to put stress on the anchors, but I wish it mounted flush to the wall.

Next step is to cut tubing and install u-bend fittings. I started with attaching a small section of tubing (very pliable, and easily adjusted with hot water) to the rio pump, I did not use one of the snap-grip clamps for this as it did not fit around the vinyl tubing against the body of the pump. However, the vinyl tubing was nice and snug. I then attached the u-bend fitting and secured the tubing with a clamp. I then suctioned the pump to the rear glass in the left most (return) chamber of the BioCube and turned the u-bend fitting so it would go over the side of the tank. I then pushed it down until it sat on the rim of the tank.
IMG_1925.jpg IMG_1927.jpg

I then worked on the return u-bend and the tubing that would attach on the inside of the aquarium. I cut a length of tube that would reach just below the water level so as to not disturb the surface and the sensors on the XPAqua Duetto.
IMG_1931.jpg IMG_1932.jpg

Next I set up the lines going to the chiller. This was easy. No real issues here, just some small trimming after dry fitting the tubes. The vinyl is very flexible and I did not want any kinks in the tubing.
IMG_1930.jpg

There is no specific in and out on the chiller. Now that it was all plumbed I started up the Rio pump and let it run for about an hour to make sure there were no leaks at any point. I had to add some salt water to compensate for the added volume on the system. Once the tank was back at the proper level I turned my ATO back on.

Next step was to turn on the actual chiller. The way this device works is that water is constantly pumped through the unit while the temperature sensor in the chiller monitors the water temp. When it senses that the water is above the set temp, the chiller kicks on. When the water reaches the set temperature the chiller goes in to standby mode. The cycle continues to keep the tank at the set temp. When I plugged in the system the device read 77.2 and went right in to cooling mode. The display the jumped to 77.4 where it stayed. I attempted to set my desired temperature but had trouble using the buttons. The directions said to press the plus or minus button to set the desired temp but when I pressed the buttons, nothing happened. When I put constant pressure on the minus button the LED flashed orange, the fan stopped, and I was able to set my desired temperature. I didn't have to do much as it was already set to 77 degrees. I kept constant pressure on minus button and the desired temp adjusts in increments of .5 degrees. You just take your finger off when the display reads your desired temp. I then reset it at 77 degrees.

I started the installation process at 11:00. I finished at about 11:45. I let the pump run from 11:45 to 12:45 at which time I plugged in the chiller. At 3:40 the chiller displayed 77.2 degrees and at 4:32 the chiller displayed 77.1 degrees. My 16 gallon BioCube only has about 12-13 gallons of water. I was concerned that the chiller was not functioning properly as it took almost 4 hours to drop the tank .3 degrees. I contacted customer support again, and they said to allow 24 hours for the water temperature to stabilize before assessing performance. I am comfortable with doing this.

I am excited to check the system in the morning when I return to my classroom and I cannot wait to see how it responds to the weekend temps in my classroom. I also need to find a better thermometer to measure my water temp. My "classic" glass aquarium thermometer was reading 78 degrees, the chiller was reading 77.1 degrees and my infrared thermometer that i use for my turtle habitat was reading 76.2 through 76.9 degrees.

As of right now, my Neo-Therm heater is set at 76 degrees and the CSXC-1 is set to 77 degrees. I will continue to post updates going forward.
Hey there! How’s it working out for you? Great posts!
 

Adamantium

Valuable Member
View Badges
Joined
Sep 10, 2018
Messages
1,533
Reaction score
1,039
Rating - 0%
0   0   0
I picked one up from Craigslist, and the darn thing just isn't cooling my tank. It started at 80 (thanks to a fan) and just climbed and climbed to almost 84 when I put this on, and turned off the fan. It might as well have been adding heat with the pump. I can't figure out what I'm doing wrong. It's especially weird because I tried it in ~1 gallon of water, and it worked great, so I know it works. Any thoughts?

It's in an open area, so it's not like the heat output is hitting the tank.
 

bigcheese

Active Member
View Badges
Joined
Jan 31, 2019
Messages
161
Reaction score
314
Location
Saratoga Springs
Rating - 0%
0   0   0
Alex,
Nice review so far. I see a couple of things you might want to take a look at to increase efficiency.

I was concerned that the chiller was not functioning properly as it took almost 4 hours to drop the tank .3 degrees.
Fron your pics, it looks like inlet and outlet are in the same chamber, along with the return. Is the heater in there too?
My thought is that you may be recirculating a large portion of the chilled water back into the inlet, providing little benefit to the tank. If possible, you might want to relocate one of those.
If your heater is in there too, you probably should move the outlet directly into the tank next to the tunze's outflow. Chilled water flowing onto the NeoTherm would cause it to turn on, effectively negating the chiller's effects.

As of right now, my Neo-Therm heater is set at 76 degrees and the CSXC-1 is set to 77 degrees.

I'd consider at least a 2° difference, if not 3°, between the heater and chiller. The heater does not provide a constant 76.0° stream, it will fluctuate because, well, thermodynamics. Likewise, the chiller is providing water colder than its setpoint. Setpoints that close together and the two systems may fight each other.*
Even though we say stability is key, during the course of a day, tropical ocean temps at 6' depth will change 3-4°. Water in tidal pools change even more... sometimes 25, 35 degrees. 2° diff during a day is no sweat.

*- you could get around this with one of the new dual-stage Inkbirds or Ranco controllers with some more "smarts" and its probe serving as a 'single source of truth'.
 

ThatFishGuy

Active Member
View Badges
Joined
Jan 10, 2018
Messages
122
Reaction score
202
Rating - 0%
0   0   0
I had one of these on my 39 gallon reef tank and it worked pretty good for the first 6ish months then kinda stopped working so I took it off. just make sure to regularly clean the metal heat sink and the fan to prevent loss in performance. The fan tends to get a bunch of dust on it and the heat sink gets a whole lot of hair and salt dust in it (in my experience at least). other than that its a pretty good little unit for the price :).
 

Adamantium

Valuable Member
View Badges
Joined
Sep 10, 2018
Messages
1,533
Reaction score
1,039
Rating - 0%
0   0   0
I had one of these on my 39 gallon reef tank and it worked pretty good for the first 6ish months then kinda stopped working so I took it off. just make sure to regularly clean the metal heat sink and the fan to prevent loss in performance. The fan tends to get a bunch of dust on it and the heat sink gets a whole lot of hair and salt dust in it (in my experience at least). other than that its a pretty good little unit for the price :).
Were you never able to get it working again? Mine doesn't seem to be doing a darn thing. It's pumping plenty of heat out the fan, but not cooling my tank, at all. I'm at a loss. It's weird, though, because it cooled a small bucket of water well. Maybe the pumps in my tank just push out heat faster than it can cool?
 

ThatFishGuy

Active Member
View Badges
Joined
Jan 10, 2018
Messages
122
Reaction score
202
Rating - 0%
0   0   0
Were you never able to get it working again? Mine doesn't seem to be doing a darn thing. It's pumping plenty of heat out the fan, but not cooling my tank, at all. I'm at a loss. It's weird, though, because it cooled a small bucket of water well. Maybe the pumps in my tank just push out heat faster than it can cool?
After it stopped working, no I was not able to get it to work again sadly. I debated on taking out of the plumbing entirely (I had it hard plumbed into my filtration). I had it fill up a specimen container with a thermometer and monitored that for a few hours and the temp never changed so I just took it out. luckily the tank sits at a steady 77-78 degrees without it now.
 
OP
OP
reefiniteasy

reefiniteasy

Check me out on IG!
View Badges
Joined
Jun 6, 2018
Messages
2,347
Reaction score
5,335
Location
Orlando, FL
Rating - 0%
0   0   0
Hey there! How’s it working out for you? Great posts!

It is working great so far. My heater is set at 76 and the chiller is set at 78. When the AC is on the room the tank sits at 77.2 degrees. When the AC is off and the classroom is between 85-90 degrees the chiller runs nonstop and the tank doesn't go over 78.5 degrees.

I picked one up from Craigslist, and the darn thing just isn't cooling my tank. It started at 80 (thanks to a fan) and just climbed and climbed to almost 84 when I put this on, and turned off the fan. It might as well have been adding heat with the pump. I can't figure out what I'm doing wrong. It's especially weird because I tried it in ~1 gallon of water, and it worked great, so I know it works. Any thoughts?

It's in an open area, so it's not like the heat output is hitting the tank.

At the beginning I didn't think the chiller was doing anything. The tank was at 82-84 degrees and not moving. It took 36-48 hours for the tank to stabilize and everything has been perfect since. How long did you have it running on the tank before you gave up? Over what period of time did the temp rise back up to 84 degrees, I'm wondering if it ran longer if it would then begin to drop again like it did on my tank. What pump are you using with it? Maybe water flow through the chiller is too fast? I'm not sure.
 
OP
OP
reefiniteasy

reefiniteasy

Check me out on IG!
View Badges
Joined
Jun 6, 2018
Messages
2,347
Reaction score
5,335
Location
Orlando, FL
Rating - 0%
0   0   0
I had one of these on my 39 gallon reef tank and it worked pretty good for the first 6ish months then kinda stopped working so I took it off. just make sure to regularly clean the metal heat sink and the fan to prevent loss in performance. The fan tends to get a bunch of dust on it and the heat sink gets a whole lot of hair and salt dust in it (in my experience at least). other than that its a pretty good little unit for the price :).

Yeah, I hope mine lasts longer. This was the only economical way (besides a fan) to chill the BioCube in my hot classroom. I wish there was a chiller that I can run all my tanks through simultaneously. At least my freshwater fish can handle a large spike.
 
Back
Top