CreamCity's 120 Eurobraced Tank + High end Coral and Lots of DIY

OP
OP
CreamCityCorals

CreamCityCorals

Well-Known Member
View Badges
Joined
Jan 1, 2019
Messages
520
Reaction score
266
Rating - 100%
4   0   0
I’m curious about the sump. Won’t the salt eat away at the plywood? I have seen all sorts of mold issues also from plywood being in a warm dark area. It is one of the prettiest set up’s I have seen you definitely payed attention in wood working class.
Thank you for your comments! Appreciate that! The plywood is sealed using pond shield and then finished with silicone on the seams. If you are patient and apply multiple coats the sump will turn out looking almost like acrylic. It works nicely.
 
OP
OP
CreamCityCorals

CreamCityCorals

Well-Known Member
View Badges
Joined
Jan 1, 2019
Messages
520
Reaction score
266
Rating - 100%
4   0   0
coming from a boating world- was just wondering why not use foam core board like coosa?
Good question! The problem with using some of these various materials is it is often hard to seal the corners without a true weld. So acrylic can be welded at the seams however, silicone won't stick. FCB I am a bit unsure of, I don't have much experience with that. Durability is the other issue. If a rock falls or else, the surface needs to be able to handle that. Hope this helps?
 
OP
OP
CreamCityCorals

CreamCityCorals

Well-Known Member
View Badges
Joined
Jan 1, 2019
Messages
520
Reaction score
266
Rating - 100%
4   0   0
Alright y'all!

Apologize, things have been hectic around here. Since the last post I have...

Finished the stand
Coated the Sump
Changed my mind a couple times :rolleyes:

I’m gonna break this up into a few posts

In terms of the stand....

I added a half circle trim around the top which seemed to finish out the look nicely. I used Appliance Epoxy on the stand which is a pretty hard finish that has been durable for me in the past....using 3 coats.

317C8C19-222C-4C45-832A-A4D07AF59C4A.jpeg

87228929-212C-43A6-8BDA-FAF08CBDDF08.jpeg


After 1st coat

75545B7A-7E64-4274-99CA-E426790C3BD4.jpeg

C2005A93-DEA3-4D44-93FA-F3D148DBB2B1.jpeg
 
OP
OP
CreamCityCorals

CreamCityCorals

Well-Known Member
View Badges
Joined
Jan 1, 2019
Messages
520
Reaction score
266
Rating - 100%
4   0   0
THE SUMP

So a huge part of making the plywood work is sanding…I spent a legithours sanding this thing….no joke. Crazy amount of time…

1-2 hrs initial sanding
Fill all holes
.5-1 hr sanding all of this
Coat
1 hr re-sand

before sanding

0917F1B3-CFE6-4F31-B8DA-73D34618E078.jpeg

FCD3B88C-6539-49F7-AF32-D55DDCB5C801.jpeg

4527BCC5-B38C-46B9-92E5-CC3E259472E1.jpeg


Once sanded the initial coat of pond shield went on. Looks splotchy, but the first coat of pond shield soaks into the wood. Very important to put an extra thick layer on the seams to ensure that seals properly


88D4AC52-8BC8-417E-8B13-1D8B742C20F7.jpeg


9426D46C-F997-4CA5-9F38-67D9A5AA539B.jpeg

Sanding after coat #1

724FE1D1-A6D5-45FE-9120-3A4B0D91AE6E.jpeg

34E6A97B-2ED4-45ED-9F55-9EB4C1BD5959.jpeg

This is post coat #2….I actually want to coat this one more time and it will be perfect. Excuse the old basement lights as it makes the sump look yellow. It’s actually pure white haha
 
OP
OP
CreamCityCorals

CreamCityCorals

Well-Known Member
View Badges
Joined
Jan 1, 2019
Messages
520
Reaction score
266
Rating - 100%
4   0   0
Now……for the part where I changed my mind….

Initially the idea was to downsize and keep everything more consolidated, however, with coral demand, and my ever increasing passion for learning more about these animals, I have decided to reuse my old sump in the basement. The sump is quite a bit bigger and will give me more room for equipment. Honestly will simplify my life quite a bit in the long run.

Additionally this move will allow me to re set up my trough when I need the space. Corals have been growing and with a bigger collection I am finding I may need the extra room…

Sooo I have decided to modify my old sump. The sump is a plywood build and measures 6ft by 30”…. It will be the same as this current one I am building. Filter socks, skimmer, large lagoon, and return pump.

I WILL finish the original sump and track the progress so everyone can see how it is done. The timeline may be a little bit further away however as I want to get this system rocking.

The large sump is plywood and so is my trough, which was my first ever plywood tank. It measures 8 ft by 3.5 ft and 18” deep.
Again coated in pond shield and siliconed edges. Both were up for a year and a half with no issues.

here are a few pics

60F87141-156E-400B-BD06-E82C457C9650.jpeg

54915616-DAB5-4C57-82A9-043A5969C4BA.jpeg

This was when it was set up, just sump and trough.

7848C06C-9AE6-43BB-9E05-B2A41620EEB1.jpeg


As I said, the trough will be probably be a ways down the road, however it’s a nice option to be able to have.

So right now my main focus is getting this new system up and running. I am slightly modifying the sump to have a large lagoon where I can house my mushrooms, nems, soft stuff and clams. Once the sump is finished all I have to do is plumb.

the upstairs 120 will turn into a lps tank housing my torches, and maybe a few choice sps. The trough will be 100% sps grow out.

Again, I will continue to finish the original sump as I know many of you were looking forward to seeing that. I may end up using it for a Qt tank. We shall see. Or maybe she will end up a relic for the DIY forum

Time will tell, but first let’s get this thing rocking
 

revhtree

Owner Administrator
View Badges
Joined
May 8, 2006
Messages
47,814
Reaction score
87,538
Rating - 100%
1   0   0
Looking good!
 
OP
OP
CreamCityCorals

CreamCityCorals

Well-Known Member
View Badges
Joined
Jan 1, 2019
Messages
520
Reaction score
266
Rating - 100%
4   0   0
Quick update for y'all....

Time has been limited but got a couple of things done that makes me feel like I made progress :)

During the original build of the upstairs tank I had put a box in the wall where I ran the initial 2" plumbing. I needed to use 1" for this build, so its not the cleanest thing in the world, but it will work!

DDCDD6E7-0471-447F-8E79-1B4C3238B320.jpeg


8794A32B-25D9-4BCD-8BE9-6CFE5DD786F2.jpeg


Tank is centered, and the self leveling mat installed!

84B70B08-5D53-4AEC-AE29-644D88405816.jpeg

93093966-DDBA-491B-98DE-8672A5046EFC.jpeg


Won’t be getting much done the next two weeks, however after shouldn’t take me long to plumb and fill!
 
OP
OP
CreamCityCorals

CreamCityCorals

Well-Known Member
View Badges
Joined
Jan 1, 2019
Messages
520
Reaction score
266
Rating - 100%
4   0   0
Looking good! I have always been intrigued with plywood builds. Does the glass in the sump adhere to the wood strong enough?

corey
It does! Silicone works excellent. Unfortunately its gonna be awhile before I finish that sump. I have waaaay too much to do to get this new system rocking and rolling.
 
OP
OP
CreamCityCorals

CreamCityCorals

Well-Known Member
View Badges
Joined
Jan 1, 2019
Messages
520
Reaction score
266
Rating - 100%
4   0   0
Quick update.

Plumbing for the main tank and sump is DONE. However, having said that....there is still a good amount of plumbing to do. But I can get the heart of the system running. Was hoping to have water in the tank this week but unfortunately have to leave town and don't want a brand new system up and running without me there.

ANYWAYS....

Here is the sump.... You can see the 3 1" pipes coming down from the upstairs display. The return pump is 1-1/4" and will feed the tank upstairs, the trough, and my newly plotted filtration stand.

sump is 6ft by 30” wide. Has 4 filter sock holes I made out of pvc. The main area will be a “sunlight lagoon” style. Will house mangroves, mushroom collection, clams, and some decorative macro algae’s.

D01909D5-DCC9-4B59-9071-616C88FB241D.jpeg

04A4F55F-2FD6-487E-A226-769E9598586D.jpeg


My thought here is for the mangroves to sit in a glass tank placed in the cove right after the filter socks. I want to contain roots as much as possible…..we will see how that goes. Lol open to ideas tho.


08E8FF1B-A23B-4643-A047-65EE76B9BFE0.jpeg


I also worked the plumbing under the tank. Have a little bit of work to do yet….have to put in outlets and paint the plumbing white, as the tan Hugh looks terrible. Pics of that to come.

As a result of my utilization of the main sump….I needed a area for my filtration…which is minimal.

I will be using a skimmer, algae scrubber, and calcium reactor. Soooo my thought is to create a pvc tray that is 4x2. I would install a drain on the tray back to the sump in case of emergency overflows or leaking. The skimmer will sit inside a cube tank that will only have the required about of water. I can easily adjust this and also gives me breathing room for upgrading the skimmer when the trough is online. The bonus of this set up for me is having another place to draw water from with the alkatronic. I can’t mount above the sump as that puts the unit outside the recommended range to pull water from….so kinda a win win here. More room in the sump for lagoon, easy height level for me to work at, and the details are all in one concise area.

just a preview to give y’all an idea
4C3949C5-8346-4229-B723-D3C3767BB675.jpeg


More to come, unfortunately slowly but surely. Lots of travel is slowing down progress, but my goal is to be up and running by the end of March which shouldn’t be an issue.
 
OP
OP
CreamCityCorals

CreamCityCorals

Well-Known Member
View Badges
Joined
Jan 1, 2019
Messages
520
Reaction score
266
Rating - 100%
4   0   0
Now something completely unrelated LOL

What free time I do have I spend cooking..just starting to dabble and it’s a nice release for me!


Couple dishes from this week


56FB1EB2-6E33-48DC-A8DA-F0A81100940D.jpeg
B2B5A9C0-F630-445A-97CE-28462D8A26CB.jpeg
 

biecacka

Valuable Member
View Badges
Joined
Jan 1, 2012
Messages
2,305
Reaction score
2,116
Location
columbus ohio
Rating - 0%
0   0   0
Love it!!!
can I play?
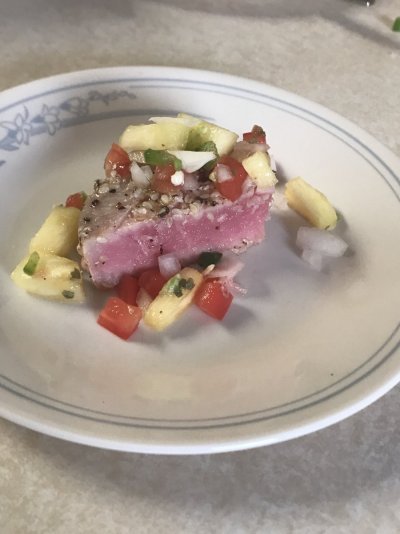
Seared yellow tuna, pineapple/mango salsa….
I love to cook.

corey
 

Attachments

  • 8B14334D-E789-4DDB-B756-F2F5BE1B318A.jpeg
    8B14334D-E789-4DDB-B756-F2F5BE1B318A.jpeg
    131 KB · Views: 28

Reefing threads: Do you wear gear from reef brands?

  • I wear reef gear everywhere.

    Votes: 20 13.7%
  • I wear reef gear primarily at fish events and my LFS.

    Votes: 10 6.8%
  • I wear reef gear primarily for water changes and tank maintenance.

    Votes: 1 0.7%
  • I wear reef gear primarily to relax where I live.

    Votes: 22 15.1%
  • I don’t wear gear from reef brands.

    Votes: 83 56.8%
  • Other.

    Votes: 10 6.8%
Back
Top