Reef Tank Time Machine - 120 Gallon Edition

jdthome

Community Member
View Badges
Joined
Nov 5, 2022
Messages
55
Reaction score
73
Location
usa
Rating - 0%
0   0   0
I hope that members find this build Interesting and useful. I think it will be unusual. To get to the build, I will need to do a little background information first. I started with tanks in the early 90's with the basic fresh water tanks as a teenager. Moved onto cichlid tanks for a good bit of time. Mid 2000's I believe, I received a used system from a friend to try saltwater. It was a 75 gallon tank and nothing else. Because hobby money was always tight, it was a combo of homebuilt and used pieces upgraded with more used pieces for about 6 years. Around 2010 or so, the plans for a tank upgrade began. The same guy I received the 75 gallon from, upgraded again and passed a 120 gallon onto me. We pulled a few things I wanted to keep from the 75 and set up a 32 gallon All-in-one that I bought used. This is because we needed the spot to place the new tank and a little money to start buying parts.

Over the next 2 years, I bought new items for this tank but it was a "one piece at a time" shopping spree. Each month I would buy another part for the build. I built the stand during this time and started stacking equipment. I made it to plumbing and water testing when life decided to take a detour. I moved on, taking the 32 gallon and the 120 gallon with me. The 32 stayed running for a couple more years and then it too was shut down. Both of these tanks stayed with me. The entire time a voice kept telling me "Next year we will get the tank running"

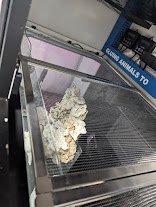
It took longer than expected, but the pieces for this tank to run are falling into place. I have been out of the hobby for so long, it may be best to fire up this old equipment and test to see if this is really the hobby I want to get back into. This tank for the most part believes Today is 2012. We are going to get it running and hopefully upgrade along the way. Because my build was going to take so long, I didn't post until I had enough to show most of the build.

Hopefully you find this interesting and useful. I apologize in advance if my ADHD makes this a wild ride..... Hey did you see that squirrel?
 

CasperOe

In it to win it!
View Badges
Joined
Feb 14, 2022
Messages
3,261
Reaction score
5,714
Location
Glasgow, United Kingdom
Rating - 0%
0   0   0
Will be interesting to follow- and hey! No issues with the ADHD- in my experience it's a handy "feature" to have for many things! :beaming-face-with-smiling-eyes: Best of luck- and thank you for bringing us along!
 
OP
OP
jdthome

jdthome

Community Member
View Badges
Joined
Nov 5, 2022
Messages
55
Reaction score
73
Location
usa
Rating - 0%
0   0   0
Here's what I have planned so far:

Tank

Used 120 tank of unknown manufacture. 1/2" glass euro braced top and bottom with central overflow. Sadly it was drilled for closed loop in a previous life.

Stand

A used steel frame from a 240gallon powder coated white. With homebuilt hood and magnetic removable sides.

Sump

40 gallon breeder with basic DIY glass baffles

Rock/Sand

Marco rock base with a mix of old Fiji, Tonga branch and Tampa Bay Saltwater rock

Filtration

Very old Avast Marine Skimmer with Swabbie. If I remember correct, I think it was from the first batch.

Gravity Refugium


Pumps/Flow

Return: Crappy Jeboa DC pump

Powerheads: 2x Jerepet 3400GPH wavemakers (cheap Let's try this)

2x MP10 were originally purchased but are too small and don't stick to 1/2" very well (saving for possible frag tank down the road)


Lighting

3x RapidLED Onyx

4x Aliexpress blue/uv strips

Controller

Neptune Classic Jr Apex
- 2x VDM
- WXM
- Energy Bar x2
- PM1
- PM2
- ALD

Topoff/Dosing

ATO w/25 gallon poly tank

Temperature Control

BRS Titanium heaters x2 (300W &500W)

Inkbird thermostats

BlueLine Thermostat

RODI/Mixing Station

2 44gallon brute trash can mixing cans

1 44 gallon brute waste water cart

1 50 gallon Poly tank for RO/DI storage
 
OP
OP
jdthome

jdthome

Community Member
View Badges
Joined
Nov 5, 2022
Messages
55
Reaction score
73
Location
usa
Rating - 0%
0   0   0
My Fiancée and I bought a house just before COVID. The plans for getting the tank going was back on. I take the "Nothing good happens quickly in saltwater" mantra very seriously. Maybe too seriously.

The tank was going to need a place to reside in our home. My fiancée has never been down the saltwater road before. So some requirements were needed to make this a success.

1. In location both viewable and isolatable if needed.
2. Easy access to water
3. Easy access to drainage
4. Available space to expand.


My sons and I have other hobbies too. Console gaming, computer gaming, Lego collecting and now aquariums again. We need a man cave. While this part may not seem like the beginning of the tank build. It truly is in my opinion

I picked a corner of the unfinished basement and built a wall.
IMG_3429.JPG


Added a few more shelves from IKEA because they are useful and cheaper/easier than drywall.

IMG_3426.JPG


Needed a place for the electronics the playroom needed

IMG_3110 - Copy.JPEG


Don't forget a spot for the fish tank that surely is next????????

IMG_3112.JPEG


No tank just yet but the Gaming and Lego building can begin

IMG_3469.JPEG
 
OP
OP
jdthome

jdthome

Community Member
View Badges
Joined
Nov 5, 2022
Messages
55
Reaction score
73
Location
usa
Rating - 0%
0   0   0
Honest, This is a tank build. The next thing that I will need for this tank is access to water and a drain to get rid of water. I hauled buckets last time I ran a tank and I hated it. With this tank in the basement, hauling buckets would be next level crappy. The good thing for where the tank will go, the water main enters the house about 12 feet away. I tell my partner that I plan to build a sink and install the water filter for the tank outside the room of entertainment. She thought that was a great idea after I explained it to her. Two weeks later she was shocked to see what "a sink and filter" truly was in my brain.

This is the corner that I picked to start the work.
PXL_20230910_001702427.jpg


I have 2 of the Poly storage tanks that initial plan was to use as a mixing station. My planning is greatly reliant on putting things in place and making decisions about its effectiveness. I pondered it for a couple days and decided that I would use 1 for water storage and then still use brute trash cans to mix water. The major factor for me was that these tall tanks would be terrible to try to clean and with salt mix the cause for cleaning, I feel the Brutes will be easier to clean.

This was the initial footprint for the sink/filter station.

377109816_1275634809759100_2044529075078567347_n.jpg


Because the sewer line was between 4 and 5 feet above the floor, special plumbing was required to add a sink. This is my only real option. I still worry about what the saltwater will do to this pump. The thought is run water at the same time to try to dilute it some. The other decision made is to have only cold water and to add a small electric tankless water heater down the road.

377950689_844588977143007_8875517389689047757_n.jpg


Added the RO/DI to the wall. Some how over the years I bought 2 pressure gauges so I installed both one pre filters and one post RO. The stainless piece of scrap I saved looks really nice and overs the hole I punched in the wall accidently.

379941035_690027776342961_6710170566788943272_n.jpg


I then rescued another set of conveyor legs from scrap and another section of table top. They were wider so I did not extend the wall section to keep the fronts in line. Will give me a space for my 2 Brutes.

379342044_213287018422588_5409469870154403072_n (1).jpg


Next scrap rescue was a trade show display that will be the future frag station. Honest the tank is still coming. This is how I get derailed and these projects take so long.


PXL_20231012_021155831 (1).jpg


Added the 2 Brutes that are linked to the RO/DI and the poly tank with shutoffs so I can fill all 3 from the RODI. Also added a pair of quarantine tanks to get ready for water in the 120 gallon. I also added a fridge for fish food storage.

PXL_20231011_022710774.jpg
 
OP
OP
jdthome

jdthome

Community Member
View Badges
Joined
Nov 5, 2022
Messages
55
Reaction score
73
Location
usa
Rating - 0%
0   0   0
Unfortunately the building of the cabinet happened 12 plus years ago and I can't seem to find pictures of it. The stand was bought from craigslist. It was a listing for a 220 gallon or so cracked tank. it was listed for weeks. I reached out and asked if he'd sell the steel stand only. I was able to get this welded 1.5 inch square tube stand that somebody had powder coated for $50. It was amazing. I then began building a skin with the fancy Kreg kit I was gifted. On the base stand, the front, sides and back are all build independently and have recessed rare earth magnets. While the added doors allow day to day simple access, the idea was to pull the entire front off for anything involved. I will need to keep and eye on the magnets. This may be design flaw #1 on this system if they really rust. There are other questionable decisions but we will get to them in further posts. Remember that this is a time machine build and hoods were still widespread. I like the look and am going to roll with it. I think it looks nice like this. Here is a photo of the tank a couple days ago to see the look of the tank. It reveals a few spoilers, but please ignore those.

PXL_20240204_042219473.jpg
380519881_816469756882508_475397585492632823_n.jpg
PXL_20240204_042111758.jpg
 

kevgib67

7500 Club Member
View Badges
Joined
Apr 16, 2022
Messages
9,375
Reaction score
43,717
Location
Canfield, Ohio
Rating - 0%
0   0   0
Unfortunately the building of the cabinet happened 12 plus years ago and I can't seem to find pictures of it. The stand was bought from craigslist. It was a listing for a 220 gallon or so cracked tank. it was listed for weeks. I reached out and asked if he'd sell the steel stand only. I was able to get this welded 1.5 inch square tube stand that somebody had powder coated for $50. It was amazing. I then began building a skin with the fancy Kreg kit I was gifted. On the base stand, the front, sides and back are all build independently and have recessed rare earth magnets. While the added doors allow day to day simple access, the idea was to pull the entire front off for anything involved. I will need to keep and eye on the magnets. This may be design flaw #1 on this system if they really rust. There are other questionable decisions but we will get to them in further posts. Remember that this is a time machine build and hoods were still widespread. I like the look and am going to roll with it. I think it looks nice like this. Here is a photo of the tank a couple days ago to see the look of the tank. It reveals a few spoilers, but please ignore those.

PXL_20240204_042219473.jpg
380519881_816469756882508_475397585492632823_n.jpg
PXL_20240204_042111758.jpg
Wow, that looks amazing, well done!
 
OP
OP
jdthome

jdthome

Community Member
View Badges
Joined
Nov 5, 2022
Messages
55
Reaction score
73
Location
usa
Rating - 0%
0   0   0
The next part was my sump area design. The plan is to house a ATO storage tank, sump and a gravity flow refugium. I built a very simple sump design. The first section is narrow settling area with a 2 inch pass under baffle. I do not intend on running filter socks full time. I have hang on filter sock holders I plan to use when stirring up the tank during maintenance. Plan on putting the heaters in this section. The section has a 10 inch high final baffle. The thought was to lift the protein skimmer up on a platform to hit the correct water depth and still have an area below for some tonga branch as additional filtration. It would also allow this chamber to be used as a refugium if I change my mind.

PXL_20240101_221608955.jpg


I'm not sure if this is going to cause bubble issues as there is no trap. In power out water testing, the sump was able to handle all water backflow. The ATO reservoir is a 25 gallon that will have a RO/DI line back to the service area on the other side of the wall to the left. Plans are to just run the RO/DI on the weekend as service is happening. I did add a float to the tank if I decide to let the system auto fill when needed.
 
OP
OP
jdthome

jdthome

Community Member
View Badges
Joined
Nov 5, 2022
Messages
55
Reaction score
73
Location
usa
Rating - 0%
0   0   0
For the plumbing, this tank has a Herbie style overflow.
PXL_20240101_221850542.jpg


The returns on this tank are below the water line. I did drill water breaks in these supplys but for added security, I did add a check valve. I do have a Apex FMM module and I am debating adding a flow sensor between the check valve and the 2 gate valves.
PXL_20240101_221853297.jpg


My original thoughts were to supply the display Fuge by redirecting some of the return flow. Even though the plumbing is installed for that scenario, I think that use will be abandoned.
PXL_20240101_221843727.jpg


The skimmer sits too low in the sump and will definitely need to lift it. Don't mind the kink in the soft line return. It has since been shortened.

PXL_20240105_035829222.jpg
 
OP
OP
jdthome

jdthome

Community Member
View Badges
Joined
Nov 5, 2022
Messages
55
Reaction score
73
Location
usa
Rating - 0%
0   0   0
The tank condition is likely going to be controversial. This was a tank with a built in closed loop, squid flow diverter and 4 outputs. I decided to only use the top 2 outputs for my returns. The large inbound hole and the 2 returns needed to be closed. I contemplated my options. Glass patches over the holes would have been cheaper. It may have been safer too. I am not convinced. I added bulkheads with new rubber seals. I then used plugs on both sides of the bulkhead with tape and pipe dope.
PXL_20240101_221618608.jpg

PXL_20240101_221615865.jpg


The overflow is the next decision that needs to be addressed. It was clear and I was not sure how to deal with it. I decided to weld-on thin sheets of black acrylic to cover the box. It seems to work. I did have a hard time dealing with the thin solvent and unfortunately marked the acrylic. Looks like a crack or a hair. Its annoying but I still plan to use it. This overflow does not have a weir comb. Debating adding one.

PXL_20240101_221622375.jpg


Playing with the idea of adding a weir by directly welding it to the cover. I have 2 for the sides that would be permanent and one that would be removable on the front. If anybody is watching this build, what are your thoughts?

PXL_20240213_233736684.jpg

PXL_20240213_233733070.jpg
 
OP
OP
jdthome

jdthome

Community Member
View Badges
Joined
Nov 5, 2022
Messages
55
Reaction score
73
Location
usa
Rating - 0%
0   0   0
The Controls for the tank will be the Neptune Apex Classic. When the original planning for this tank began 12-15 years ago, I began assembling the parts and storing them. A new module was bought every couple of months over a year and a half. They would then be added to a tote, often never opened until this was revisited recently. This is where the time machine part of this comes in. Rather than buying new, I'm just going to utilize what I have.

During the planning of this tank, I want to have access to the back of the tank for any emergencies or cable routing. Due to the location of the tank, a very narrow area was going to be hidden by panels hanging from the ceiling. This give me the opportunity to us one to mount the controllers to and its interesting to see it.

The panels are extruded aluminum and acrylic sheet to mount on. I really like the look of it.

PXL_20231013_014159645.jpg


Added a bit of wire management duct to the side to make it look nice.

PXL_20231029_230047699.jpg


Then hung in place

PXL_20240101_221555331 (1).jpg


A second panel was built to provide access to the space. I used white acrylic sheet on this side to add stickers to as I get them .

PXL_20231029_230120380.jpg


Unfortunately I did not plan for this when putting up the ceiling and misjudged where the joists fall to attach the hanger to.
 
OP
OP
jdthome

jdthome

Community Member
View Badges
Joined
Nov 5, 2022
Messages
55
Reaction score
73
Location
usa
Rating - 0%
0   0   0
There has been a few aquascape spoilers in past posts. I have collected a large collection of rock to use in this tank or any future tank. A large pile of very large tonga branch. Some rock that originally came from Tampa Bay Saltwater in me previous 75 gallon and 32 gallon from years ago. Some of that Pukani rock and a ton of Marco rock from 10 years ago. I think that original Marco rock had a ton of sand embedded in it that I had great difficulties in removing. I send a lot of energy trying to pressure wash this rock and then soaking it in bleach water several times. I did not the results I wanted.
379863356_357052443326631_2332289659946084561_n.jpg

PXL_20230922_173208202.jpg


PXL_20230928_150234098.jpg

PXL_20230928_150236147.jpg


I read many many aquascaping posts and decided I wanted 2 islands and then a central low structure for a Zoa garden. I've been saving a very weathered conch shell for this plan. I set up a folding table the same size as the tank and added cardboard to try to stick to the rules of 3 I have read about.

PXL_20231011_023110742.jpg


PXL_20240202_023602223.jpg


This is the General layout that I decided I wanted to go with. As I started to glue some of it together, I quickly discovered I would never get it in the tank. Every minimal creation with marco rock that I did, I was not happy with. I really like this. Ultimately as I tore this apart and glued it into smaller sub assemblies, the final in tank version is a bit different than the above photo. I still like it.


PXL_20240204_020022181.jpg
 
OP
OP
jdthome

jdthome

Community Member
View Badges
Joined
Nov 5, 2022
Messages
55
Reaction score
73
Location
usa
Rating - 0%
0   0   0
I decided to CaribSea Dry Special grade sand. I estimated how much I needed wrong. I bought 3 40lbs bags but ended up only using 2. I should have bought the live sand for the sole reason of not needing to was it. This was a chore to do. It was burning up too much RO/DI to try to rinse it. I ended up putting 1/3 of a bag in a 5 gallon buck and churning it with tap water (45TDS) and then I did a ro/di soak with chlorine neutralizer and then a RO/DI final rinse.
PXL_20240219_231051256.jpg
PXL_20240219_231113459.jpg
PXL_20240219_231125743.jpg
 
OP
OP
jdthome

jdthome

Community Member
View Badges
Joined
Nov 5, 2022
Messages
55
Reaction score
73
Location
usa
Rating - 0%
0   0   0
I love the look of the open top tanks. I don't have the body or confidence to go to the beach dressed like that. I'm still old school and like being able to hide gear in a hood. I assembled a group of lights. I have 5 of the RapidLED Onyx lights. They never came out of the box until now. Upon opening the boxes, I found that the rubberized coating has changed and was a sticky mess. Used alcohol to strip the coating.

PXL_20240120_143519953.jpg


Used some Aluminium angle to build a frame to hang the lights. I also added second hand aliexpress light bars that are blue/uv. Hope to supplement the RapidLEDs with more blue.

PXL_20240127_222437996.MP.jpg


Used stainless eye hooks and carabiners to hang it from the top of the canopy.

PXL_20240128_183800382.jpg


Routing wire was daunting but I thought I had a plan. We will see how it holds up long term with usage.

PXL_20240122_020619342.jpg


Install finished.

PXL_20240204_020115664.jpg


Not completely happy with the way I am dealing with the power bricks for the lighting. I drilled a ton of holes in the bottom of the basket. Its my hope that water never gets in there but wanted added insurance if it does. Interested to see if anybody has suggestions for another option here. I really like how the wire duct looks and hides much of the extra wires.

PXL_20240204_020112987 (1).jpg
 
OP
OP
jdthome

jdthome

Community Member
View Badges
Joined
Nov 5, 2022
Messages
55
Reaction score
73
Location
usa
Rating - 0%
0   0   0
I new I needed a cover. The debate on whether to go solid or screen still wages war in my brain. I made the decision to go with the screen. I also did not want to deal with a single large cover with the canopy. I decided on 3 panels and 2 with feeding potholes.

PXL_20240209_040542878.jpg

PXL_20240209_040546942.jpg


This seems like an easier simple access to the tank. Will if be effective? Guess we shall see.

PXL_20240209_012018990.jpg
 

Attachments

  • PXL_20240209_040549194.jpg
    PXL_20240209_040549194.jpg
    14.3 KB · Views: 9
OP
OP
jdthome

jdthome

Community Member
View Badges
Joined
Nov 5, 2022
Messages
55
Reaction score
73
Location
usa
Rating - 0%
0   0   0
Another design fault that I didn't realize was an issue until we reached the final phases of brining this system on line. The next tasks were to lay water sensors on the floor in the very narrow service space I worked in to the back side of the tank. I'm not a small man or in my opinion a really large man. 6 foot and 260 lbs of Dad bod. While the canopy was off, I could get back there. It was not fun but it was doable. When the canopy was on, I could not get back there. So I needed to enlist my 15 year old son for help. I'm also trying to get him interested in this hobby at the same time.

PXL_20240224_200352562.jpg

PXL_20240224_200356698.jpg

PXL_20240224_202013604.jpg


He said he was going to be the troll that lives behind the tank. I did in addition to the water sensors, had him add a security camera so I could take a look back there, a shop light that can be turned on if anybody else needs to go back there again in the future and a make shift step to help getting out. Its an empty salt bucket but its unseen and better than nothing.

430086983_453120144143269_1767355548555851478_n.jpg
 

Gumbies R Us

Another Fish in the Sea
View Badges
Joined
Nov 10, 2022
Messages
9,951
Reaction score
19,192
Location
North Georgia
Rating - 0%
0   0   0
I new I needed a cover. The debate on whether to go solid or screen still wages war in my brain. I made the decision to go with the screen. I also did not want to deal with a single large cover with the canopy. I decided on 3 panels and 2 with feeding potholes.

PXL_20240209_040542878.jpg

PXL_20240209_040546942.jpg


This seems like an easier simple access to the tank. Will if be effective? Guess we shall see.

PXL_20240209_012018990.jpg
That lid design is really nice! I love how it is easy to move like that
 

Reefing threads: Do you wear gear from reef brands?

  • I wear reef gear everywhere.

    Votes: 20 13.7%
  • I wear reef gear primarily at fish events and my LFS.

    Votes: 10 6.8%
  • I wear reef gear primarily for water changes and tank maintenance.

    Votes: 1 0.7%
  • I wear reef gear primarily to relax where I live.

    Votes: 22 15.1%
  • I don’t wear gear from reef brands.

    Votes: 83 56.8%
  • Other.

    Votes: 10 6.8%
Back
Top