CuzzA's 40 Breeder Display & 40 Breeder Sump | True All In One | Mixed Reef Tank Build | Heavy Automation

2mk

Community Member
View Badges
Joined
Apr 27, 2019
Messages
68
Reaction score
23
Rating - 0%
0   0   0
Alright, I got my rocks cooked in muriatic acid, bleached, dried and welded together over the weekend, wrapped up the shadow box and it's all in the tank. Looks good.

I'm putting sand in now. My light should be here tomorrow and I'll fill 'er up with water.

I have just a few other things to do. I need to install the light, the auto feeder, the nem light and fabricate a hinged acrylic lid for the ATO and water changer reservoir. Then it'll be time to wait. I'll be running heavy carbon and GFO for a couple weeks to yank out any contaminates and phosphate. Then we'll see if it can support life.

Here's a video of the aquascape. Check out and subscribe to my YouTube channel for more to come and cool diving videos.


20190920_133106.jpg


20190920_145517.jpg


20190923_165303.jpg


20190923_164917.jpg

Man! Your build's craftsmanship is amazing! Much better looking and well though out than anything that you have to spend a fortune on to buy. I can't believe you can make 40gallons Aqueons look that good.

Questions:
1. Is your sump no removable from the stand?
2. How or what do you use to make and power/control the background lighthing? ( I skimming thru the thread and might have missed it)
 

nickkohrn

Corals for President 2020
View Badges
Joined
Jul 18, 2018
Messages
1,903
Reaction score
5,121
Location
Lima, OH
Rating - 0%
0   0   0
Man! Your build's craftsmanship is amazing! Much better looking and well though out than anything that you have to spend a fortune on to buy. I can't believe you can make 40gallons Aqueons look that good.

Questions:
1. Is your sump no removable from the stand?
2. How or what do you use to make and power/control the background lighthing? ( I skimming thru the thread and might have missed it)
Regarding the background, here ya go: Post #13

I had to search for the answer because it looked really neat!
 

WiscoFishNut

Valuable Member
View Badges
Joined
Jun 10, 2019
Messages
1,575
Reaction score
6,752
Location
WI
Rating - 0%
0   0   0
So I moved the stand into the house a couple days ago. It looks good and fits the location perfectly. I don't know what I was thinking when I was going to put an 8 ft. tank there. :rolleyes:

I did have to do some electrical work. The previous 90 gallon was on a standard 15 amp circuit shared with the rest of the room, with a GFCI outlet. When I was doing the 330 gallon build I installed two separate 20 amp circuits with more robust GFCI breakers. Well, this tank obviously isn't 8 ft. and so I needed to move the twin 20 amps over to keep my wires behind the stand, which required drilling through two studs inside the wall. Easier said than done, but nevertheless I got it done and now my aquarium's life support will be separated over two circuits. Two 20 amp circuits are overkill for this size tank, but if it's worth doing, it's worth over doing.

69005110_10218080165169963_8412198185182691328_o.jpg


69154417_10218080165449970_7810891760036478976_o.jpg


I finished painting the canopy. That should come in the house tomorrow and I'll be able to provide better pictures for the final look of the furniture for the build.

I got the 16 gallon water change reservoir divider in a couple days ago and leak tested today. It's holding just fine. 3/16" glass and 100% silicone. I also installed the 3.5 gallon ATO divider this evening and tomorrow I'll put in the single return baffle setting the filtration section at 10 inches high. I've found through experience that with some forethought on a build and good equipment selection, bubble traps aren't necessary and usually just waste space, especially if they are so narrow making the flow so fast no bubble could escape anyway.

You will note I filled the reservoir a gallon at a time and labelled each volume; thus making salt mixing calculations much easier. I am also labeling just about everything in order to more easily explain the system to a tank sitter should something happen while I am away. These reservoirs will have lids, float valves on the RODI feed, solenoids controlled by the Apex and dual float switches to facilitate in automatic reservoir refilling.

I will set the Auto Aqua water changer to replace half a gallon per day giving me a 30 day supply of fresh saltwater. This equals 10% per week. It should significantly help maintain stability while replacing elements. I like the fact the AutoAqua also handles the ATO duties as well. I could have utilized the Apex for all of this, but that would have increased the investment compared to using the AutoAqua stand alone unit. I will have float switches in the filtration section to shut down the AutoAqua should it add or remove too much water. I had a MaxiJet 1200 laying around and since it has an air feed and hanging bracket, that seemed like the most logical mixing pump to use. I also had an Eheim Jager 50 watt heater in the aquarium bin that will serve to heat the water in the winter should I have to do a larger water change. I won't be concerned about the half gallon per day.

20190829_124230.jpg


Finally, wrapping up the sump build will allow me to really get rolling on the equipment setup so I should have some quality updates here in the near future. I am thankful that I have not completed this build yet considering we have Hurricane Dorian on our doorstep this weekend. My last tank had a DIY battery backup system which was far more robust than these little back ups the aquarium manufactures make for their powerheads or a UPS. For posterity here's a diagram of that and a link to the thread on the setup. Stay tuned for more updates. I will likely do a video walk though of the entire build when I am done.


BATTERYBACKUP_zpsa8e919f7.jpg

Thanks for sharing the info about the battery backup method, definitely gonna give that a look.
 
OP
OP
CuzzA

CuzzA

Well-Known Member
View Badges
Joined
Jul 23, 2014
Messages
617
Reaction score
705
Rating - 0%
0   0   0
Man! Your build's craftsmanship is amazing! Much better looking and well though out than anything that you have to spend a fortune on to buy. I can't believe you can make 40gallons Aqueons look that good.

Questions:
1. Is your sump no removable from the stand?
2. How or what do you use to make and power/control the background lighthing? ( I skimming thru the thread and might have missed it)
Thank you. Yeah, I was kicking around the idea of a custom built tank or building a tank myself as my original plan was to go rimless, but being that this tank is in my living room I didn't want the light spill from a rimless setup blinding me while I sit on the couch, not to mention a responsible reefer has to have a screen on a rimless tank and that basically defeats the look. So, for $50 for the tank, it made my decision all that much easier.

The sump is removable from the back. So should I ever have to remove the sump I'll have to drain off enough water to slide the tank off the wall. That was a compromise for having a sump Identical to the display. I could have built a removable skin for the stand, but I think it would have added a lot of bulk to the stand and make getting dimensions all that more challenging.

For the background I purposely left about 1.5 inches behind the tank to add a skinny shadowbox. I made it from sky blue foam board from JoAnn Fabrics. I cut the dimensions to fit, siliconed the pieces together and then installed wifi programmable rgb led strip lights on the top and bottom. They are set to come on through the Alexa app routines. Though I should note I don't have an Alexa wiretap mic in my house, just the app on my phone. From there I shot some window and door foam on to wax paper to create a reef looking structure. I trimmed it up with a razor and then painted it grey, black and purple. I'll have to take another picture as I added a little more to the center piece to give it more height as the acrylic paint ended up creating some reaction and shrunk the foam by a few inches. In the picture before it appeared to me that my corals would quickly cover it up if I didn't make it taller. To attach the faux reef foam I just hot glued it to the board. I think it came out really well, especially with the added piece.
 
OP
OP
CuzzA

CuzzA

Well-Known Member
View Badges
Joined
Jul 23, 2014
Messages
617
Reaction score
705
Rating - 0%
0   0   0
Thanks for sharing the info about the battery backup method, definitely gonna give that a look.
My pleasure. I believe we have a responsibility to ensure these animals survive and with the tech we have today, there's no reason to not have a backup. I will add for posterity that Tunze makes a simple switch for their pumps that could be used in place of the transfer switch and inverter, though you would be limited to just Tunze pumps and not any other potential life support equipment like fans and heaters. Of course the battery backup is not a substitute for a generator in a long term power outage, like a hurricane for example. But the beauty is I don't need to be present for my powerheads to remain on all day until I can rectify the situation. If you have any questions, just let me know.

I'll try and give a better update tomorrow. I'm beat, was out diving all day spearfishing and collected some sand to seed the bagged sand I put in the tank yesterday.
 
OP
OP
CuzzA

CuzzA

Well-Known Member
View Badges
Joined
Jul 23, 2014
Messages
617
Reaction score
705
Rating - 0%
0   0   0
Okay. Not a huge build update as I'm patiently making batches of water, 15 gallons at a time. Which is okay as it allows me to work out any kinks in the auto water changer system. Display is about half full as I type this.

Nevertheless, posts without pics suck, right? So here's a shot of the inside of the shadow box. I saved it in black and white as the blue light was killing the image, but at least you get the idea.

20190926_215644.jpg


I also took another pic of the tank with the main light on which includes the raised shadowbox faux reef structure as I described earlier. I think it looks much better being taller and won't get blocked by coral growth. And yes, we have a great white and an orca to hold off the kids.

20190924_221916.jpg


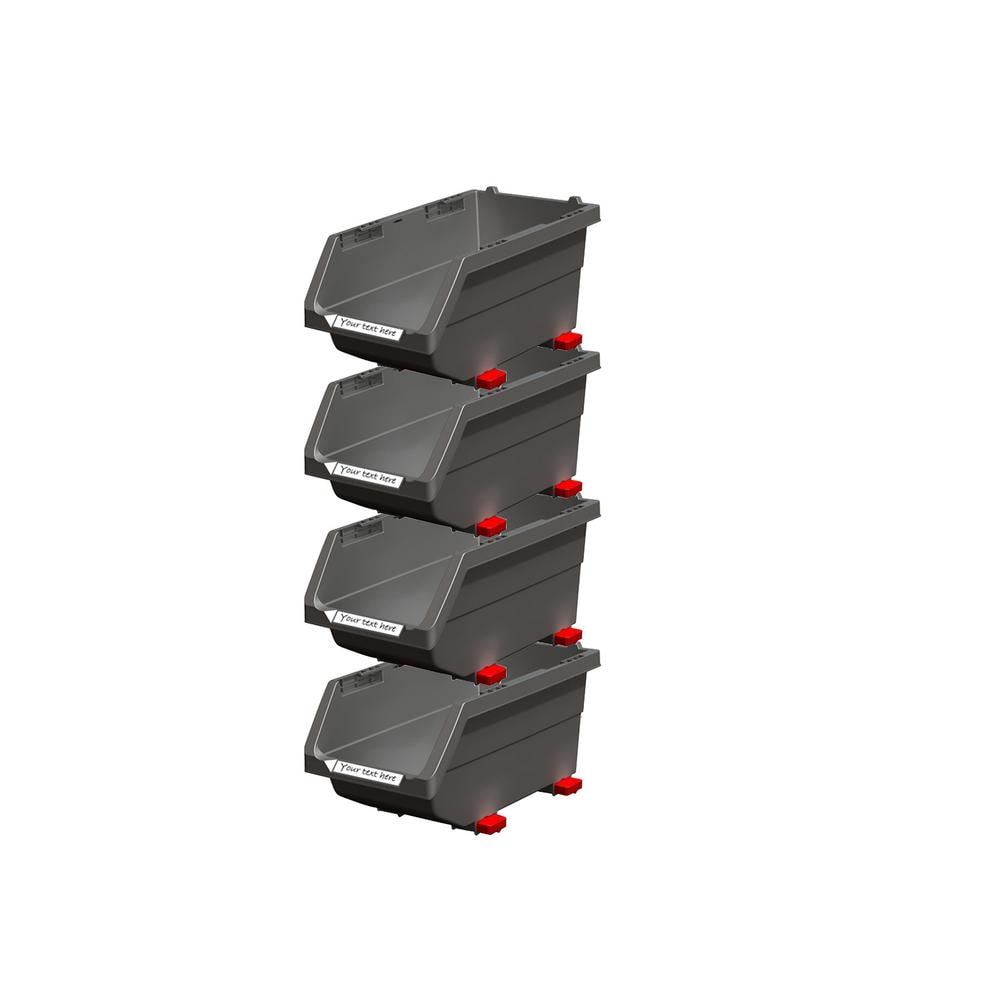
Here's a shot of the back of the canopy. I used $5 bins from Home Depot and cut them to spec for fan vent light-spill preventers. Works great! I also like the fact the Zetlight Qmaven 2 has all of the electronics off the fixture and incorporated into the power supply and controller. There's no heat coming off the lights.

20190925_210219.jpg


husky-tool-storage-bins-17197117-64_1000.jpg


And finally, here's a shot of inside the canopy. To mount the light I used simple wall shelf brackets. Space is tight in the canopy and I wanted to be able to easily slide the light back to have ample room to work. To protect the light I cut 1/4" pex pipe lengthwise and pushed it on to the bracket frame. The brackets are powder coated steel which wouldn't be my first choice, but given their $2 price tag, if they begin to rust in a few years it's an easy swap.

You'll also note I installed the Neptune auto feeder in the center over the return. Neptune really needs to do something about how loud that thing is. Fortunately it's not so bad in a canopy, but I would not be happy if I had a rimless tank. I do think it's really cool you can tell Alexa to feed your fish, though I won't have that luxury since I'm not letting Bezos wiretap my house.

On the right of the tank, I added a Kessil A80 dense matrix led light. This, coupled with the anemone rock I made is my attempt at trying to keep the ******* in one place and not wander around the tank stinging everything. We'll see if it works. I researched this technique and could not find anyone else who has tried it. The light will come on before the main light and turn off after. When I introduce the nem I'll probably leave the main light off to ensure it stays put, then add a pair of clowns using a pipe so hopefully they will immediately take up residence in the nem. I saw this technique work on a video by Melev's reef.

That's all I got. Now I'm going to go try and get an ID on this wrasse I saw diving yesterday. First time seeing this species in the Gulf.

20190926_144040.jpg


1569519821830243052917.jpg


1569519810823-835164446.jpg


Almost forgot. While diving I found a brand new jewfish rig on a wreck. I needed a handle to set the canopy lid down when I open it. Seemed like a good fit. Let's hope none of my fish decide to jump and impale themselves on it. Though I did dull the hook.

20190926_144102.jpg
 
OP
OP
CuzzA

CuzzA

Well-Known Member
View Badges
Joined
Jul 23, 2014
Messages
617
Reaction score
705
Rating - 0%
0   0   0
Yesterday's project and the final item to complete the build phase. I fabricated an acrylic lid for the fresh and salt water reservoirs... I need to make friends with someone who has a CNC machine. Table saws and jack off saws are a lot of work.

I might add one more lid on top of the big lid to put a hopper on top for easily adding salt. That's what that tiny piece in the center is for. We'll see. So far all I've found are pancake batter hoppers, but they aren't large enough.

1569848611248.png
 
OP
OP
CuzzA

CuzzA

Well-Known Member
View Badges
Joined
Jul 23, 2014
Messages
617
Reaction score
705
Rating - 0%
0   0   0
I got the lid welded up and installed. This should help keep evaporation down. With the three 140mm case fans going, even at 25%, I have no issues with heat and co2. The system has been at a constant 8.15 pH and temp pegged at 78°. Salt is right at 35 ppt. ORP is a little low at 260, but I haven't researched that and I haven't calibrated that probe.

The tank is humming along quite well. I'm tweaking things here and there, but as with any complex system, the nerves are high when you first turn everything on. So far, so good. No leaks, all systems are operating as designed. I haven't programmed the auto water changer yet because I don't plan on changing the water for a couple weeks. The skimmer is still breaking in and hasn't created a head yet. I'm sure it has more to do with the fact there's no nutrients yet.

I put a small bottle of bacteria in the tank. Also when I went diving for sand, to my surprise I had a few hitch hikers. A green stripe hermit crab, a Florida Cerith, a colinista snail, some pods and a half dollar size piece of rock covered in coraline algae. The snail and crab confirm my system can support life as they're cruising around. I'm ghost feeding the tank and dropping pieces of algae wafers in to keep them fed. It wasn't my intention to add them yet, but I wasn't going to just throw them away either. I'm patiently waiting for my diatom bloom so I can officially add my clean up crew.

I have to say, I absolutely love the light effects I'm able to create with this shadowbox and the two tank lights. I will have to record a time lapse to show it off. It adds an entire new dimension to the display and the beauty is at night with moonlights and the box off, I can still capture the black background effect.

Anyway, that is my thoughts for now. One error I can note is the orientation of the UV light. I don't know how I failed to consider this, but with ports down I'm certain I have trapped air. Though I don't think there would have been a better way to install it given the space constraints. I will figure something out though. Perhaps if I never stop flow to it the air will eventually be purged and maybe I'll add dual check valves. Not ideal, but better than nothing

One other thing to add that can be seen in these pics are those two GoPro boxes. I was looking for a way to create a junction box for the float switches. Those boxes came with my old GoPro cameras and have been sitting in the "maybe I can use this one day" bin. Float switches are one of those things that at some point the seal will harden and allow water in and trash the switch. I wanted to be able to easily service them so they are connected with Molex connectors and I went ahead and sealed the connectors with nail polish. I also added some nail polish to the switches themselves to ensure a bit more longevity. CAT5 Cable worked great to handle all of the high and low switches. It made the wire run a breeze.

20190930_210134.jpg
20190930_210118.jpg
 
Last edited:

2mk

Community Member
View Badges
Joined
Apr 27, 2019
Messages
68
Reaction score
23
Rating - 0%
0   0   0
Thank you. Yeah, I was kicking around the idea of a custom built tank or building a tank myself as my original plan was to go rimless, but being that this tank is in my living room I didn't want the light spill from a rimless setup blinding me while I sit on the couch, not to mention a responsible reefer has to have a screen on a rimless tank and that basically defeats the look. So, for $50 for the tank, it made my decision all that much easier.

The sump is removable from the back. So should I ever have to remove the sump I'll have to drain off enough water to slide the tank off the wall. That was a compromise for having a sump Identical to the display. I could have built a removable skin for the stand, but I think it would have added a lot of bulk to the stand and make getting dimensions all that more challenging.

For the background I purposely left about 1.5 inches behind the tank to add a skinny shadowbox. I made it from sky blue foam board from JoAnn Fabrics. I cut the dimensions to fit, siliconed the pieces together and then installed wifi programmable rgb led strip lights on the top and bottom. They are set to come on through the Alexa app routines. Though I should note I don't have an Alexa wiretap mic in my house, just the app on my phone. From there I shot some window and door foam on to wax paper to create a reef looking structure. I trimmed it up with a razor and then painted it grey, black and purple. I'll have to take another picture as I added a little more to the center piece to give it more height as the acrylic paint ended up creating some reaction and shrunk the foam by a few inches. In the picture before it appeared to me that my corals would quickly cover it up if I didn't make it taller. To attach the faux reef foam I just hot glued it to the board. I think it came out really well, especially with the added piece.

Thanks for the details. Is it possible to share some pics ( from all angles) of your background not attached to your tank if you have not posted them yet? I am interested in the specs of it actually. I am really interested in doing this for my 55g aqueon's back as well. (Right now I see my wall and cables after resetting up the tanks and properly mounting / hiding my gears).
 
Last edited:
OP
OP
CuzzA

CuzzA

Well-Known Member
View Badges
Joined
Jul 23, 2014
Messages
617
Reaction score
705
Rating - 0%
0   0   0
Thanks for the details. Is it possible to share some pics ( from all angles) of your background not attached to your tank if you have not posted them yet? I am interested in the specs of it actually. I am really interested in doing this for my 55g aqueon's back as well. (Right now I see my wall and cables after resetting up the tanks and properly mounting / hiding my gears).
I don't have any other pics. All you need is some sky blue foam board and acrylic paint from JoAnn Fabrics. A can of expanding window foam, clear silicone, frosted window tint, and a razor from a box store. Make your box from the foam board. Silicone it together. Shoot some foam on wax paper into the shapes you want. Let it dry completely, shape and size with the razor. Paint them and hot glue to the board. Pick up some wifi controllable led strips lights and put one on one controller at the top and one on another controller at the bottom. Program however you like through Alexa routines.
 
OP
OP
CuzzA

CuzzA

Well-Known Member
View Badges
Joined
Jul 23, 2014
Messages
617
Reaction score
705
Rating - 0%
0   0   0
A quick update on the water change reservoir lid. I was able to find a batter dispenser large enough to hold the minimum 5.5 lbs. of salt I need to make water. And in an effort to keep the sump tidy this will go a long way. I used a whole saw and drilled the lid, and well, I think the rest is self explanatory. The dispenser came from Bezos. Around $15.

20191003_162335.jpg


20191003_162343.jpg


20191003_162418.jpg
 

2mk

Community Member
View Badges
Joined
Apr 27, 2019
Messages
68
Reaction score
23
Rating - 0%
0   0   0
I don't have any other pics. All you need is some sky blue foam board and acrylic paint from JoAnn Fabrics. A can of expanding window foam, clear silicone, frosted window tint, and a razor from a box store. Make your box from the foam board. Silicone it together. Shoot some foam on wax paper into the shapes you want. Let it dry completely, shape and size with the razor. Paint them and hot glue to the board. Pick up some wifi controllable led strips lights and put one on one controller at the top and one on another controller at the bottom. Program however you like through Alexa routines.


Thanks
 

2mk

Community Member
View Badges
Joined
Apr 27, 2019
Messages
68
Reaction score
23
Rating - 0%
0   0   0
A quick update on the water change reservoir lid. I was able to find a batter dispenser large enough to hold the minimum 5.5 lbs. of salt I need to make water. And in an effort to keep the sump tidy this will go a long way. I used a whole saw and drilled the lid, and well, I think the rest is self explanatory. The dispenser came from Bezos. Around $15.

20191003_162335.jpg


20191003_162343.jpg


20191003_162418.jpg

You make you salt water at the sump reservoir? Is the batter dispenser going to be part of your sump lid?
 
OP
OP
CuzzA

CuzzA

Well-Known Member
View Badges
Joined
Jul 23, 2014
Messages
617
Reaction score
705
Rating - 0%
0   0   0
You make you salt water at the sump reservoir? Is the batter dispenser going to be part of your sump lid?

Yes, I have an AutoAqua water changer and part of the goal with this build was for everything tank related to be contained within the stand so you'll note in previous pictures I partitioned the 40 breeder sump to include the ATO and WC reservoirs. On my old system I used a closet that was on the other side of the wall for my ATO and water change reservoir, but that is now being occupied and rather than try to figure out storage organization, I decided to integrate, hence the title, "True All In One."

The batter dispenser just sits on top, it was an easy solution to keep salt and water from splashing all over when pouring in new salt mix. When it's time to make water I weigh out 5.5 pounds of salt for 15+ gallons in the dispenser, set it over the hole in the lid, pull the trigger and the salt drops in.
 
Last edited:
OP
OP
CuzzA

CuzzA

Well-Known Member
View Badges
Joined
Jul 23, 2014
Messages
617
Reaction score
705
Rating - 0%
0   0   0
Also, I can report today the skimmer is starting to produce a little head and we have our first signs of diatoms. Not bad for only being filled less than two weeks. Considering the two hitch hiker inverts are still alive I'd say we're ready to start adding fish.

I am also re-orientating the UV sterilizer to be horizontal. I pulled out my old 18 watt Turbo Twist UV from the fish box which is a better design as it has mounting clips that make for easy bulbs swaps and so that solves the oversight I had. I thought better of trying to make the new one work with check valves and such. Long term that would be a pain in the butt.
 

2mk

Community Member
View Badges
Joined
Apr 27, 2019
Messages
68
Reaction score
23
Rating - 0%
0   0   0
Yes, I have an AutoAuqa water changer and part of the goal with this build was for everything tank related to be contained within the stand so you'll note in previous pictures I partitioned the 40 breeder sump to include the ATO and WC reservoirs. On my old system I used a closet that was on the other side of the wall for my ATO and water change reservoir, but that is now being occupied and rather than try to figure out storage organization, I decided to integrate, hence the title, "True All In One."

The batter dispenser just sits on top, it was an easy solution to keep salt and water from splashing all over when pouring in new salt mix. When it's time to make water I weigh out 5.5 pounds of salt for 15+ gallons in the dispenser, set it over the hole in the lid, pull the trigger and the salt drops in.

Do you have a pump to stir/mix the salt in the reservoir? I think I see you have a auto top off flow on that reservoir. How would the RODI water come into play? Is it auto refill, or you just control the adding of water manually after the salt input?
 
OP
OP
CuzzA

CuzzA

Well-Known Member
View Badges
Joined
Jul 23, 2014
Messages
617
Reaction score
705
Rating - 0%
0   0   0
Do you have a pump to stir/mix the salt in the reservoir? I think I see you have a auto top off flow on that reservoir. How would the RODI water come into play? Is it auto refill, or you just control the adding of water manually after the salt input?
Yes. Here's some pics and an explanation of how my system works.

Both reservoirs are automatically filled utilizing a float valve, a 24v DC normally closed solenoid plugged into the Apex DC outlets and two float switches plugged into the Avast breakout box and on a custom bracket I made from acrylic and old powerhead magnets. Both the ATO and WC reservoirs have identical equipment with the exception of the WC reservoir has a Eheim heater, a conductivity probe, temp probe and a Maxijet 1200.

The ATO automatically refills when the low level switch closes and turns off when the high level switch closes.

The WC reservoir automatically fills as well, however I will get a text message/notification when the low level switch closes. This of course informs me I need to make water that day. Then I add my salt to the full reservoir and turn on a virtual outlet that turns the Maxijet powerhead on for four hours and then turns it off automatically. The nice thing about the Maxijet, despite it's noise level, is it has the air venturi to blow off the co2 in the water. I don't open it up a whole lot, just enough to inject some air into the water. I suppose the loud noise is not all that bad though because if it were stuck on I would eventually notice it.

So far the system is working flawlessly. The AutoAqua ATO/AWC has worked great so far. Of course setting up an ATO and AWC can be accomplished through the Apex, but given the price point of the AA it's hard to beat.

Here's some pics...

Solenoids mounted to the stand. Home Depot sells these nifty pipe mounts for Pex pipe and they fit perfect for the solenoids.

15705874509393157944895196024151.jpg


Kill switches. I had to wire the solenoids up anyway and had these wires with switches, sitting in the electrical bin, so why not? :)
15705874995383904586352679062065.jpg


MaxiJet 1200 with air inlet. The wire run channels worked great to hold the air intake in place.
15705875258304489915298003695529.jpg


Heater, probes, float valve and AA pump can be seen here.
15705875619074532804364398168032.jpg


This pic is the best I can do with the float switches. Pretty simple. A piece of acrylic with two smaller pieces welded to it.
15705876094835111539612776016322.jpg
 
Last edited:
OP
OP
CuzzA

CuzzA

Well-Known Member
View Badges
Joined
Jul 23, 2014
Messages
617
Reaction score
705
Rating - 0%
0   0   0
So, I got the UV Steriler squared away and dialed in. Not as clean of an install as the old one, but we're after function, not form.

20191008_233742.jpg


The diatom bloom persists, but I don't think it will be all that drastic as I've been running GFO since I turned the system on. The hitch hiker crab and snail are still doing their thing.

I added a fish on Sunday. A nice healthy Pueple Firefish that's been doing well at the LFS for two weeks. He has taken well to his final home and was immediately eating. I am undecided on what fish to add next as most of my choices require the tank to be more mature. Perhaps a pair of captive bred Bangaii Cardinals.

I ordered some reef soup from Aquaculture Nursery Farms https://www.aquaculturenurseryfarms.com/live-plankton/copepods/blends/reef-soup-6-types/ here in Florida. It should be here tomorrow and so that should be a good start to my pod population. I don't have a refugium, just another thing to maintain, but I do have those two pod hotels I made under the skimmer and under the filter roller. Hopefully I'll get a good breeding population going in there. I am also developing a pretty nifty automatic Artemia in tank hatch and feeder. I have thought about this challenge for years and finally think I have found the perfect solution. Stay tuned, parts are in route.

Finally, I measured my water for the first time tonight. I never bothered with ammonia or nitrite, experience has taught me those two test kits end up being a waste of money. Slow and steady is all that is required. One two inch fish in 50+ gallons of water will not produce any measurable ammonia. Not to mention the live sand and small bottle of bacteria were added which would easily consume any waste from one fish.

Anyway, back to my results. They look pretty spot on. I was actually quite surprised and happy with the po4 level considering this was Pukani rock (which was sadly ripped from live reefs, years before I knew any better) and sat growing all sorts of organics on the side of the house. The acid bath and bleach really does go a long way to prepare the rock for use.

Alkalinity is okay, could be higher, but I only used regular Instant Ocean Sea Salt to fill the tank. Bezos had a sale and so I got two bags for one. I will probably be switching to Tropic Marin Pro-Reef going forward.

It also dawned on me that I have not shared a good picture of the display so perhaps tomorrow I'll update the thread with one.

20191008_221548.jpg
 
Last edited:

2mk

Community Member
View Badges
Joined
Apr 27, 2019
Messages
68
Reaction score
23
Rating - 0%
0   0   0
Yes. Here's some pics and an explanation of how my system works.

Both reservoirs are automatically filled utilizing a float valve, a 24v DC normally closed solenoid plugged into the Apex DC outlets and two float switches plugged into the Avast breakout box and on a custom bracket I made from acrylic and old powerhead magnets. Both the ATO and WC reservoirs have identical equipment with the exception of the WC reservoir has a Eheim heater, a conductivity probe, temp probe and a Maxijet 1200.

The ATO automatically refills when the low level switch closes and turns off when the high level switch closes.

The WC reservoir automatically fills as well, however I will get a text message/notification when the low level switch closes. This of course informs me I need to make water that day. Then I add my salt to the full reservoir and turn on a virtual outlet that turns the Maxijet powerhead on for four hours and then turns it off automatically. The nice thing about the Maxijet, despite it's noise level, is it has the air venturi to blow off the co2 in the water. I don't open it up a whole lot, just enough to inject some air into the water. I suppose the loud noise is not all that bad though because if it were stuck on I would eventually notice it.

So far the system is working flawlessly. The AutoAqua ATO/AWC has worked great so far. Of course setting up an ATO and AWC can be accomplished through the Apex, but given the price point of the AA it's hard to beat.

Here's some pics...

Solenoids mounted to the stand. Home Depot sells these nifty pipe mounts for Pex pipe and they fit perfect for the solenoids.

15705874509393157944895196024151.jpg


Kill switches. I had to wire the solenoids up anyway and had these wires with switches, sitting in the electrical bin, so why not? :)
15705874995383904586352679062065.jpg


MaxiJet 1200 with air inlet. The wire run channels worked great to hold the air intake in place.
15705875258304489915298003695529.jpg


Heater, probes, float valve and AA pump can be seen here.
15705875619074532804364398168032.jpg


This pic is the best I can do with the float switches. Pretty simple. A piece of acrylic with two smaller pieces welded to it.
15705876094835111539612776016322.jpg

I assume that you got the WC programmed to go off when Apex notify you of on water mixing. Is the AA WC programmed to come on only after mixing?

Curious why you have temp probe & heater mounted in the WC reservoir?
I assume you Salinity probe is for reading mixed water salinity level.
 

When to mix up fish meal: When was the last time you tried a different brand of food for your reef?

  • I regularly change the food that I feed to the tank.

    Votes: 23 28.8%
  • I occasionally change the food that I feed to the tank.

    Votes: 30 37.5%
  • I rarely change the food that I feed to the tank.

    Votes: 21 26.3%
  • I never change the food that I feed to the tank.

    Votes: 5 6.3%
  • Other.

    Votes: 1 1.3%
Back
Top