Looks really good! It's hard to work with plywood!And proof I'm not totally inept at woodworking, care of the Soss 101 Hinge Router Template:


Navigation
Install the app
How to install the app on iOS
Follow along with the video below to see how to install our site as a web app on your home screen.
Note: This feature may not be available in some browsers.
More options
You are using an out of date browser. It may not display this or other websites correctly.
You should upgrade or use an alternative browser.
You should upgrade or use an alternative browser.
Dinosaur to Phoenix, a new 22G Long mini build
- Nano Build
- Thread starter theatrus
- Start date
- Tagged users None


OP
OP

Looks really good! It's hard to work with plywood!
Not pictured is me forgetting to drill pilots for the hinge screws and cracking the plywood.
")
The routing process is fine, but I’m not impressed with the fill on this plywood - lots of inner layer little voids. Maybe I’ll try heading to a real lumber store and see what I can source - this was the Home Depot 3/4” Birch.
Good plywood is hard to find, voids are common. ApplePly is good stuff: minimal voids, more/thinner layers, more care taken in production.Not pictured is me forgetting to drill pilots for the hinge screws and cracking the plywood.
The routing process is fine, but I’m not impressed with the fill on this plywood - lots of inner layer little voids. Maybe I’ll try heading to a real lumber store and see what I can source - this was the Home Depot 3/4” Birch.

Happy to hear it - the last chamber teeth do need to go, but I do run smooth weirs on my 90g sump with no major bubble issues.
Attaching few of concept, have a look at the last chamber. Since realestate was less.
OP
OP
Attaching few of concept, have a look at the last chamber. Since realestate was less.


Nice concept! The adjustable skimmer section baffle is interesting.
Whats the use case of the basket on the return - media?
Media and bubble trap sponge, I’m guessing.Nice concept! The adjustable skimmer section baffle is interesting.
Whats the use case of the basket on the return - media?


OP
OP
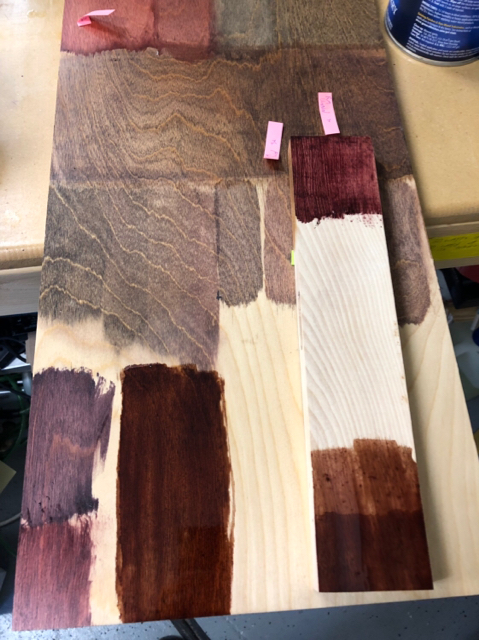
Wood! I edge glued two 1x8 birch boards to serve as the base for the aquarium on top of the 8020 frame. I'll need to make another two saw cuts to get it back to 12"x36".

After some light planing and sanding on the top surface. I still need to plane out the bottom surface. This is mostly using an orbital sander and powered hand planer (so not ideal since its not very wide)

I'm also testing stains. The bulk of the stain here is the "Red Mahogany" color. I'm also testing sealing and not sealing the wood to avoid splotchiness with the stain. The other colors are red chestnut and jacobean (both only one coat).

After some light planing and sanding on the top surface. I still need to plane out the bottom surface. This is mostly using an orbital sander and powered hand planer (so not ideal since its not very wide)
I'm also testing stains. The bulk of the stain here is the "Red Mahogany" color. I'm also testing sealing and not sealing the wood to avoid splotchiness with the stain. The other colors are red chestnut and jacobean (both only one coat).
Last edited:

Great build! I'll be following along if you don't mind.
OP
OP

Cut on the table saw and another pass of 120 grit.

Fit looks good (you can tell the tank has basically never left the box lol)! If I could, I'd add back like 0.2mm in width, since the tank vs the glass isn't quite square, but this is pretty much in tolerances and wood will breath a little anyway.


Following!

Mostly waiting on delivery of 8020 before finishing the rest of the woodwork. Soon!
Glad to see a current mr Aqua 22 build, thought I was the only one these days [emoji849]
OP
OP
Glad to see a current mr Aqua 22 build, thought I was the only one these days [emoji849]
No idea why - its a very nice size!


Pitter patter then!
OP
OP
Stain R&D continues. Currently narrowing in on:
General Finishes Gel Georgian Cherry
Minwax PolyShades Bombay Mahoganny
The latter isn’t a real stain but a combo polyurethane so its layering is a lot more like paint. Doesn’t stain as much as adds a translucent coat. I may combine the two (stain then poly).
Last edited:
Similar threads
- Replies
- 2
- Views
- 104
- Replies
- 8
- Views
- 201


