- Joined
- Jun 24, 2019
- Messages
- 4,879
- Reaction score
- 4,832

Follow along with the video below to see how to install our site as a web app on your home screen.
Note: This feature may not be available in some browsers.


Thanks!That thing is perfect!


Thanks. I'll be gluing and the bottom will be skinned as well. The bottom being skinned will allow the sump to sit about 3 inches lower and I can seal the bottom to catch any spills.Personally if skinning it I wouldn't even bother with the screw boards if you're using pocket screws, especially if you're gluing.


I've been asked the following question through PM, and thought it was beneficial posting the question/reply here because others could potentially have the same issue:
"Using your build as template, on my stand I have small <1/16” spaces between purple and red boards, is that issue? I kind of see space on your actual image as well."
The purple boards transfer the weight to the lower frame....so yes, it must be in contact with the top frame. If not, the screws/fastners are now supporting the weight of the tank.....and you don't want that. All is not lost...it can be fixed.....two potential fixes.
FIX 1: Pick up a pack of wood shims. Now take two of these and from either sides of the purple board, where it should be contacting the red board, tap them in equally using a hammer, thin end in first. You're now good to go! Here's an example of what I'm talking about, with a big gap between purple and red so you can see the shims. Using a utility knife, cut off the excess shim by first scoring and then snapping it off.

FIX 2: Remove the screws from the green board into the upper frame (hopefully they are screws and it's not glued) and now with weight on the upper frame, re-screw the green board to the red board. I'd use new locations for the screws so that they don't "follow" the old holes.
Now, the way I actually assemble these stands is that I screw the green boards to the lower frame and then, with good contact of the purple boards in contact with the lower frame, the purples are screwed to the greens. With the upper frame assembled, that is now placed over the upright legs, and with weight on the upper frame, the greens are screwed to the upper frame.
Hope this helps.

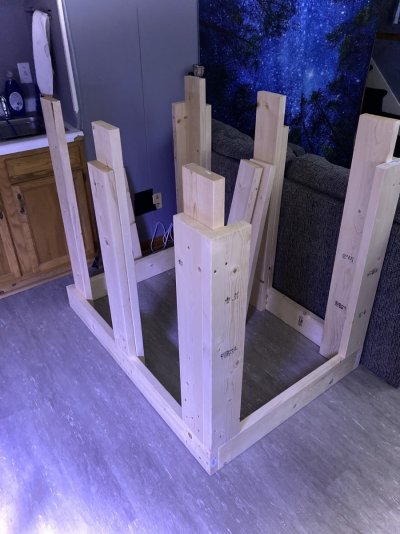
@RocketEngineer is being way too modest (or he doesn't wish to divulge his age), because years ago he came up with a DIY design that has since been used by thousands of DIY'ers.....me included. Here is his original design using dimensional lumber....no center brace needed:

And here is my five foot stand (before skinning with plywood):

So please, with confidence, believe @RocketEngineer .....he knows what he's talking about!
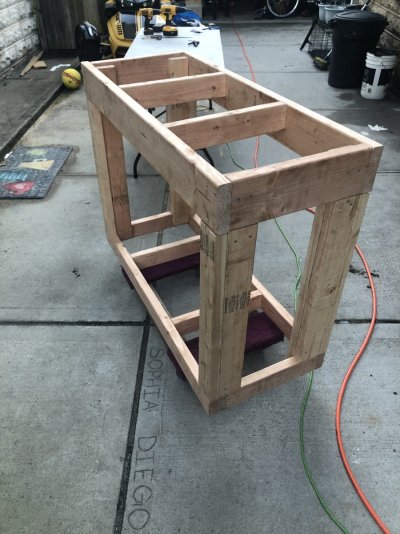
How long is that stand? Looks like you could do with just one in the top and one in the bottom. Just a little extra support for the plywood layer that'll go on top. Could even use 2x4 instead of 2x6 - give yourself a little more headroom inside.Do you need the horizontal braces that you have two on bottom and one on top?
How long is that stand? Looks like you could do with just one in the top and one in the bottom. Just a little extra support for the plywood layer that'll go on top. Could even use 2x4 instead of 2x6 - give yourself a little more headroom inside.
Sitting on the floor might be fine - but what is the floor? Inevitably salt creep and some salt water will find it's way out of the sump. Keeping it contained in the stand is how most people approach the issue. Of course if it's just a concrete garage floor then it may not be worth worrying about.No plywood is going on the sides, only on the top, I was planning on setting the sump on the floor, with the cross braces it will have to sit on top of them.
Compromise and split the 2x4s into 2x2 for the crossbraces? That way you aren't setting the sump directly on the floor and you aren't losing as much interior height, or lay the 2x4s flat.No plywood is going on the sides, only on the top, I was planning on setting the sump on the floor, with the cross braces it will have to sit on top of them.

Not worried about salt creep on floor.Sitting on the floor might be fine - but what is the floor? Inevitably salt creep and some salt water will find it's way out of the sump. Keeping it contained in the stand is how most people approach the issue. Of course if it's just a concrete garage floor then it may not be worth worrying about.
I’m not worried about losing height. I just did not want to need to use plywood as the floor. If I use braces I will need a plywood layer for sump and ato reservoir to sit on.Compromise and split the 2x4s into 2x2 for the crossbraces? That way you aren't setting the sump directly on the floor and you aren't losing as much interior height, or lay the 2x4s flat.