electrical idiot builds a controller - a reef pi build

OP
OP
Mikeneedsahobby

Mikeneedsahobby

Well-Known Member
View Badges
Joined
Sep 16, 2018
Messages
516
Reaction score
922
Rating - 0%
0   0   0
Wife was still making my hobby money so off to paragraph 2...

Okay paragraph two was super easy! All you have to do is press copy code on Ranjib's guide and paste it into terminal on the PI. Using VNC it's all on the same computer. Now I am updated and using an internet time to keep the pi on time.

NEXT UP: I have to get into a config file. That sounds scary.
 

theatrus

Valuable Member
View Badges
Joined
Mar 26, 2016
Messages
1,957
Reaction score
3,355
Location
Sacramento, CA area
Rating - 0%
0   0   0
Wife was still making my hobby money so off to paragraph 2...

Okay paragraph two was super easy! All you have to do is press copy code on Ranjib's guide and paste it into terminal on the PI. Using VNC it's all on the same computer. Now I am updated and using an internet time to keep the pi on time.

NEXT UP: I have to get into a config file. That sounds scary.

Learn to love text files, they make the world go around :)
 
OP
OP
Mikeneedsahobby

Mikeneedsahobby

Well-Known Member
View Badges
Joined
Sep 16, 2018
Messages
516
Reaction score
922
Rating - 0%
0   0   0
so in the next set of steps on page 1 of Ranjib's guide I get to make changes to the raspbian settings to be able to use reef-pi. Up to now everything I have done is just standard Raspberry pi stuff

1) change the config.txt file to add a pwm overlay thing. From osmosis of reading about reef-pi I think PWM is related to varying intensity of things by quickly turning something on and off. This would be for lights or dc pumps I think. I have no clue what the overlay code line does specifically but I'll follow directions and do it.
.... So I learned that I can't edit the file like I would on a PC. I opened the file manager on pi and right clicked and found a text editor. I added the line but was not allowed to save. The trolls said no as it is a system file. I couldn't change the permissions settings so I googled it. Google says to use a text editor in a terminal window. The command is "sudo nano /boot/config.txt". It worked and reminded of using PINE to send my first emails while I was in college. (also reminded me of a few dates I got from those emails. My wife commented about the weird smile on my face...)

2) next it says to enable 1-wire (temp probe connector) in the configuration settings. I did this by accident during install (I turned everything on).
Re-name the pi. I guess this probably isn't required. I called mine Trolls.
Disable spi - yes sir it is disabled

and I am ready to install Reef-PI!!!! Woot Woot!
 

Erica-Renee

Valuable Member
View Badges
Joined
Oct 4, 2017
Messages
1,596
Reaction score
3,290
Location
lost
Rating - 0%
0   0   0
so in the next set of steps on page 1 of Ranjib's guide I get to make changes to the raspbian settings to be able to use reef-pi. Up to now everything I have done is just standard Raspberry pi stuff

1) change the config.txt file to add a pwm overlay thing. From osmosis of reading about reef-pi I think PWM is related to varying intensity of things by quickly turning something on and off. This would be for lights or dc pumps I think. I have no clue what the overlay code line does specifically but I'll follow directions and do it.
.... So I learned that I can't edit the file like I would on a PC. I opened the file manager on pi and right clicked and found a text editor. I added the line but was not allowed to save. The trolls said no as it is a system file. I couldn't change the permissions settings so I googled it. Google says to use a text editor in a terminal window. The command is "sudo nano /boot/config.txt". It worked and reminded of using PINE to send my first emails while I was in college. (also reminded me of a few dates I got from those emails. My wife commented about the weird smile on my face...)

2) next it says to enable 1-wire (temp probe connector) in the configuration settings. I did this by accident during install (I turned everything on).
Re-name the pi. I guess this probably isn't required. I called mine Trolls.
Disable spi - yes sir it is disabled

and I am ready to install Reef-PI!!!! Woot Woot!
Since you are running pi-3 with Gui (graphical user interface) You can go into the raspberry pi setup and turn most of those things on and off. as well as set time and wifi.. pi-zero i would say install CLI (Command line Interface only) It just does not have the power .


You can also download and install reef-pi from withing the Dashboard. Just browse to the file and click on it. It will extract and install. It will ask you for root password ..
 
OP
OP
Mikeneedsahobby

Mikeneedsahobby

Well-Known Member
View Badges
Joined
Sep 16, 2018
Messages
516
Reaction score
922
Rating - 0%
0   0   0
Since you are running pi-3 with Gui (graphical user interface) You can go into the raspberry pi setup and turn most of those things on and off. as well as set time and wifi.. pi-zero i would say install CLI (Command line Interface only) It just does not have the power .


You can also download and install reef-pi from withing the Dashboard. Just browse to the file and click on it. It will extract and install. It will ask you for root password ..

Uh oh. I am running pi zero. So far it seems fine running the GUI but I am not trying to do anything yet. Should I change now? Is there an easy way to shut it off? Or should I start over with a new version of raspberry pi?

Maybe it okay to just boot without the GUI?
 
Last edited:

Erica-Renee

Valuable Member
View Badges
Joined
Oct 4, 2017
Messages
1,596
Reaction score
3,290
Location
lost
Rating - 0%
0   0   0
Uh oh. I am running pi zero. So far it seems fine running the GUI but I am not trying to do anything yet. Should I change now? Is there an easy way to shut it off? Or should I start over with a new version of raspberry pi?
you can in raspberry pi settings inside the gui change start up to cli... Next time you start the pi it will not load the gui but reef-pi will still run.. From there to start gui just type startx ....

from the gui to exit to cli just click shutdown . then exit to cli

I Have ran gui on pi zero as well.. its just slow and not really needed .
 
OP
OP
Mikeneedsahobby

Mikeneedsahobby

Well-Known Member
View Badges
Joined
Sep 16, 2018
Messages
516
Reaction score
922
Rating - 0%
0   0   0
I’m a little worried about being able to connect to vnc without the GUI. I don’t want to mess with my wife’s computer again if it doesn’t connect and I need to get a keyboard and mouse hooked up. So for now I am going to stay in the GUI. But now I am noticing the 100% cpu usage line at the top of GUI.

I don’t really know how to install reef pi from the dashboard. Instead in the reef pi I used chromium to go to www.github.com/reef-pi/reef-pi/releases. I clicked on the *.deb file for the latest version (2.1) and for pi0. It downloaded. I opened the file and it said it installed.

Ranjib’s guide gives terminal line code to install it but I thought I would take advantage of the GUI.
From here I got lost. If I had followed the guide then reef pi should be running and should need to enter a username and password.

I don’t see anything like that and i’m already logged into the raspberry pi.
I opened a terminal window and typed reef-pi. I got a bunch of words on my screen that didn’t make sense to me but seemed to say it wasn’t working.

Next I tried logging out of raspbian and logging in as user reef-pi. Nope


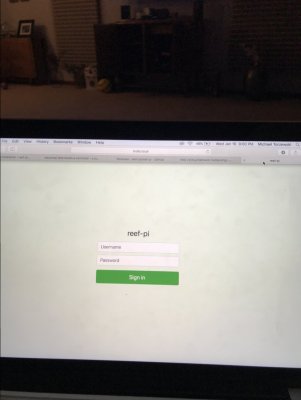
So I read the guide closer and saw that it said put hostname.local in my browser. I typed trolls.local in safari and there it is! It’s almost like Ranjib meant for me to follow his instructions. image.jpg

"At this point, reef-pi is running and responding, nice work!"
Thanks!

NEXT: I need to hook the raspberry pi to something so that I can make something do something.
 
Last edited:

Ranjib

7500 Club Member
View Badges
Joined
Apr 16, 2016
Messages
9,843
Reaction score
17,058
Location
Pleasant Hill, Concord
Rating - 0%
0   0   0
I’m a little worried about being able to connect to vnc without the GUI. I don’t want to mess with my wife’s computer again if it doesn’t connect and I need to get a keyboard and mouse hooked up. So for now I am going to stay in the GUI. But now I am noticing the 100% cpu usage line at the top of GUI.

I don’t really know how to install reef pi from the dashboard. Instead in the reef pi I used chromium to go to www.github.com/reef-pi/reef-pi/releases. I clicked on the *.deb file for the latest version (2.1) and for pi0. It downloaded. I opened the file and it said it installed.

Ranjib’s guide gives terminal line code to install it but I thought I would take advantage of the GUI.
From here I got lost. If I had followed the guide then reef pi should be running and should need to enter a username and password.

I don’t see anything like that and i’m already logged into the raspberry pi.
I opened a terminal window and typed reef-pi. I got a bunch of words on my screen that didn’t make sense to me but seemed to say it wasn’t working.

Next I tried logging out of raspbian and logging in as user reef-pi. Nope


So I read the guide closer and saw that it said put hostname.local in my browser. I typed trolls.local in safari and there it is! It’s almost like Ranjib meant for me to follow his instructions. image.jpg

"At this point, reef-pi is running and responding, nice work!"
Thanks!

NEXT: I need to hook the raspberry pi to something so that I can make something do something.
when you installed it from your GUI (and pi told you its already installed)., reef-pi was already running from that point... now you have access to the UI, play with it. You can enable dev_mode and play with all featurs without connecting any device/circuit etc. Its meant for development (where all the drives are mocked out), but you can use that feature to explore the ui.
 

Ranjib

7500 Club Member
View Badges
Joined
Apr 16, 2016
Messages
9,843
Reaction score
17,058
Location
Pleasant Hill, Concord
Rating - 0%
0   0   0
@Ranjib I am so glad to see this wonderful project is living on. I feel ashamed for bailing out and buying an apex! :(

Aaron
There’s nothing to be ashamed of.
I am so happy to see you active :) . Yes , we are still having fun with more diy builds .
 

Erica-Renee

Valuable Member
View Badges
Joined
Oct 4, 2017
Messages
1,596
Reaction score
3,290
Location
lost
Rating - 0%
0   0   0
@Ranjib I am so glad to see this wonderful project is living on. I feel ashamed for bailing out and buying an apex! :(

Aaron
Wanna borrow a hammer ???

Hi there.. Not everyone has the time or patience to devote to this project on top of already complicated and time consuming Hobby..
 
OP
OP
Mikeneedsahobby

Mikeneedsahobby

Well-Known Member
View Badges
Joined
Sep 16, 2018
Messages
516
Reaction score
922
Rating - 0%
0   0   0
IMG_4282.JPG
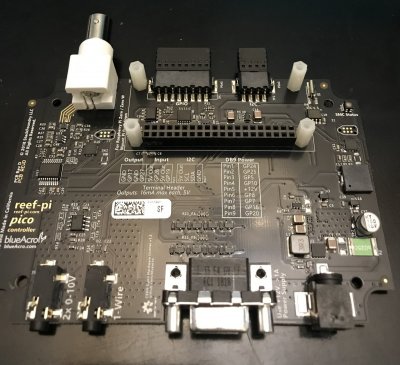
This beautiful piece of artwork is a rev D base board "Pico" controller made by theatrus! It houses trolls that are trained to move inputs to the PI and take outputs from the PI and send it where it needs to go. Most of the functions of Reef-pi are contained on this one board. I didn't have to do any soldering and saved a ton of time and headaches.

Ranjib has a guide on how to make a troll house one piece at a time. Diamond1 and others have done it and it works, but I took a pass. (plus the cost of the baseboard from theatrus was amazingly reasonable!)

I thought about the top hat from Wykat. He provides detailed instructions that make the build seem easy, but it still requires a lot of solder joints. For an idiot I think I made the right choice.
 
OP
OP
Mikeneedsahobby

Mikeneedsahobby

Well-Known Member
View Badges
Joined
Sep 16, 2018
Messages
516
Reaction score
922
Rating - 0%
0   0   0
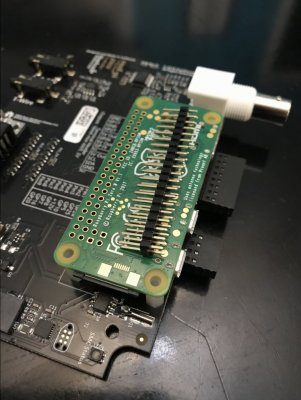
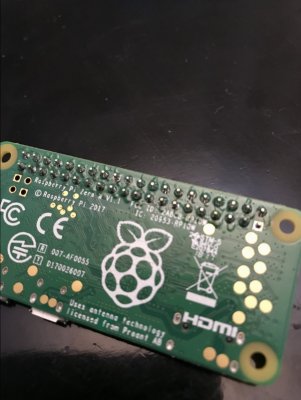
The pi mounts to the base board in the direction shown on the picture (rev D face down). However a stack of pins need to be soldered to the PI because it doesn't come with the pins. The pins I need to solder are laying on the PI.
IMG_9956.JPG

I have never soldered electronics before. I watched my Grandpa solder 35 years ago. My son has soldered as part of a high school engineering class. AND I have done a ton of copper pipe soldering! How hard could this be. Time to watch some youtube videos. wish me luck....

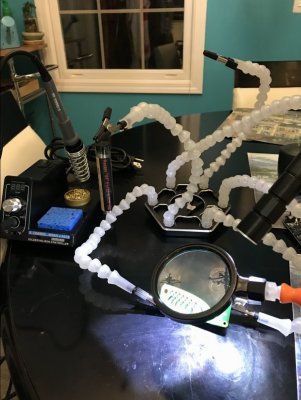
Here are my weapons of choice.
IMG_6222.JPG
 
OP
OP
Mikeneedsahobby

Mikeneedsahobby

Well-Known Member
View Badges
Joined
Sep 16, 2018
Messages
516
Reaction score
922
Rating - 0%
0   0   0
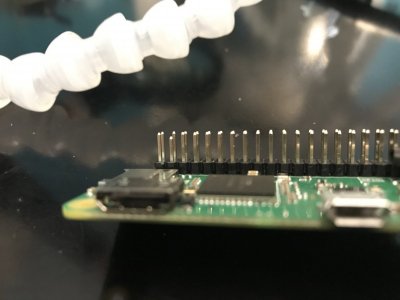
and soldered
IMG_1123.JPG

It was easier than I expected. But I don't know how to figure how much solder to add. I went back to a few and added more as it looked a little skimpy. I also found one pin that had slid or something and doesn't sit as high as the others. I tried heating and pushing it in but that didn't work. Hopefully it is long enough.
IMG_2916.JPG
 
OP
OP
Mikeneedsahobby

Mikeneedsahobby

Well-Known Member
View Badges
Joined
Sep 16, 2018
Messages
516
Reaction score
922
Rating - 0%
0   0   0
well now that I am a soldering expert! Might as well press forward. I would like to get the temperature sensor working next. I went back to Ranjib's adafruit guide and opened Guide 3 - Temperature controller. I have a temp probe (he calls it for DS18B20, I guess he likes star wars droids), but the wires are not connected to the plug. Ranjib shows the red wire going to the top, the yellow to the bottom and a black to middle. My probe has red, yellow, and blue. I'm going to go with blue = black and try it. Time to solder....


EDIT:
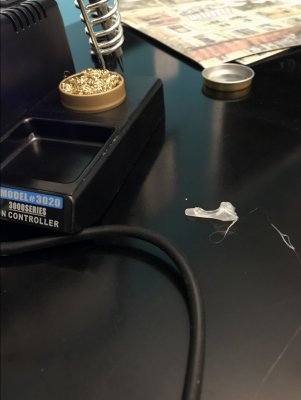
Pro tip: If your soldering iron has a plastic tip protector on it. Take this off before you turn the iron on to prevent fire alarms going off.
IMG_1101.JPG
 
Last edited:
OP
OP
Mikeneedsahobby

Mikeneedsahobby

Well-Known Member
View Badges
Joined
Sep 16, 2018
Messages
516
Reaction score
922
Rating - 0%
0   0   0
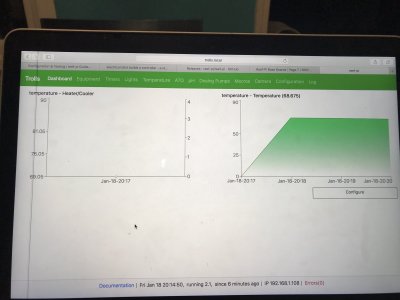
soldering the temp probe was harder than the raspberry pi but it's done and it works!!!

I followed the rest of Ranjib's guide and the temperature is being tracked on the dashboard.
IMG_6286.JPG

Next Up: Get plugs attached to the pi so the temperature probe can turn something on and off.
 

Creating a strong bulwark: Did you consider floor support for your reef tank?

  • I put a major focus on floor support.

    Votes: 53 39.8%
  • I put minimal focus on floor support.

    Votes: 28 21.1%
  • I put no focus on floor support.

    Votes: 48 36.1%
  • Other.

    Votes: 4 3.0%
Back
Top