Elos 130-ish + a chopped up 160 for a frag tank and display

w2inc

Active Member
View Badges
Joined
Aug 30, 2017
Messages
411
Reaction score
368
Location
San Diego
Rating - 0%
0   0   0
My husband loves watching what I do with the hobby and didn't have to be talked into letting me fill the breakfast nook and part of the back patio with tanks. Friends have been sending me hook ups whenever they hear about free stuff. Uhaul was getting plenty of business from me for about 3 months, ha ha.

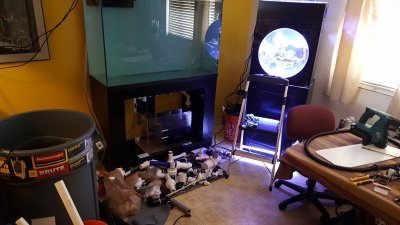
170 reef the guy wanted hauled out of the house he just bought. Elos 135 ish that had a broken overflow. When I was looking for a stand for it a friend connected me to a guy that was closing out his tanks. Giving away a 120, 160, a stand that would fit, and a bunch of rock. I tried to pay him something but he wouldn't take any money he was just glad to have someone excited to take it. Awesome guy!

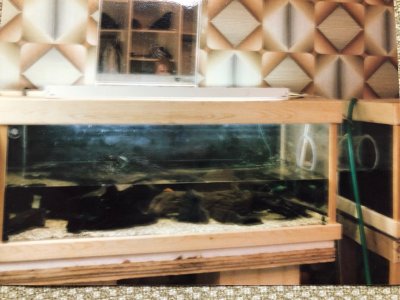
I had a 110 tall that I kept seahorses in for about a year and I got to where I couldn't stand it. 30" tall and my arms are about 22". Seemed like everything I did to it involved me shirtless and literally up to my ear in the water. I tore it down, cut the tank apart and decided to cut up the glass down to 20" and make a rimless 90. I am telling this story because it was my turning point where I swore I will never have another tank over 24" in my life unless I have someone else taking care of it for me. image.png
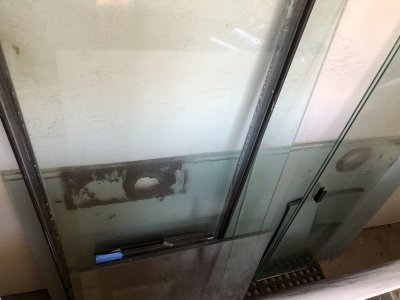
I sold a bunch of stuff and kept the Elos, a stand that pretty much fit it and a bunch of 1/2 inch glass. One of the euro brace supports pulled out of the 160 when I was moving it. It came out clean. Like no silicone residue on it clean and it made me not trust the tank. I didn't have anyone around to help me get it out of the u-haul anyway so I just cut it up and took it out a piece at a time from the truck. IMG_2552.jpeg
I don't really have room but I decided to find a way to make everything fit. I might have to shut down the 120 plant tank.
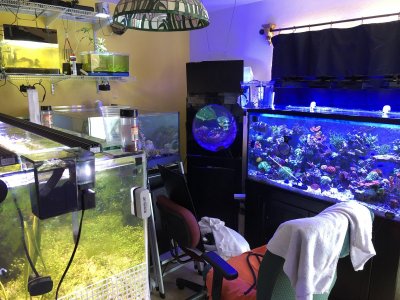
IMG_2575.jpeg
Goals:
1) Have a massive sump that I could use as a frag tank
2) See if I could set up a display tank that didn't look like a mad science experiment
3) Transition my existing 120 reef into a system that doesn't have any bubble algae and leave that part of reef tank ownership in my distant past
4) Have a large enough reverse daylight tank to actually stabilize my pH
Finally 5) Fuel efficiency! My power bills are ridiculous I can count on $600 and summer is coming up. We have to pay penalty fees for overuse once we hit $450 so any place under that would be swell.
We will add solar power soon but I really need to get that under control.

Eventually I will put the two reefs on a common sump or we will actually start the remodel of our house and I will put in a proper fish and filter room and an 8 or 10 foot long island main display that I will try to just look at.

I have been cutting glass and building tanks since high school.
IMG_2571.jpeg IMG_2570.jpeg
I am a lot better at it now, but I still undershoot some times. Like the euro bracing on my 120 reef.
IMG_2557.jpeg IMG_2558.jpeg

I wasn't sure if I was going to do the build thread so I am a little short on photos in the beginning.

I had not cut much 1/2 inch glass and since I had a stack of it now I decided to give it a shot. The first try was on some craigslist scrap and it didn't come out at all. I got about two usable pieces. Cutting scratched glass is pretty hard because the break wants to take the easiest path and doesn't know that it should follow the score you just made and not the one from a few years ago when it was a coffee table.

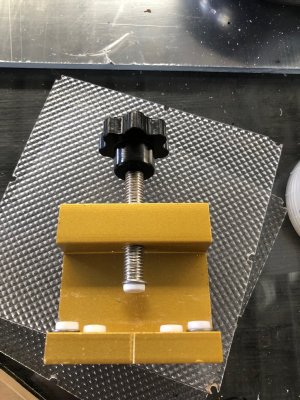
Cutting tank glass was way easier, but I still had some big surprises and had to recut a few pieces. I got this tool from amazon and it changed the whole experience.
IMG_2553.jpeg
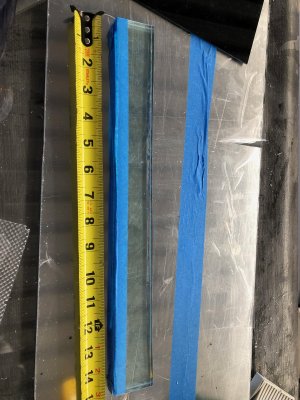
I was able to do a couple of what I thought were impossible cuts when I was practicing.
IMG_2554.jpeg
I think the older glass that has had time to sag cuts a little differently. Some of the cuts wouldn't break straight even with the new tool. It took a while before I was ready to actually slam the glass down to start the run. In the end I got my best results when I laid a pencil on the table at the beginning of the run and had a 1/2 triangular strip of plexiglas laying underneath the score section and I would lift one side while holding the other to the table and slam it down.

I finally got enough good cuts to build the massive sump I wanted as well as an extra one to replace my undersized one in my current reef.
IMG_1880.jpeg IMG_2538.jpeg
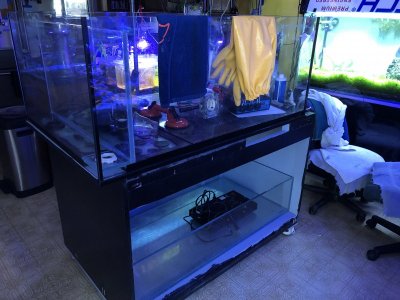
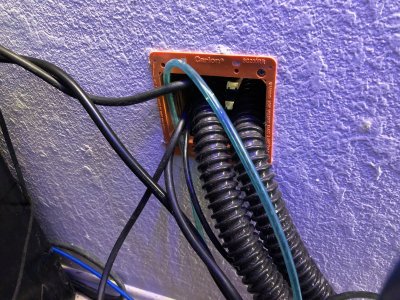
Leak tested for a week and good to go. I had a seahorse setup with a couple experiment tanks on that wire rack above and it was on wheels. REALLY handy to be able to move it. I constantly wish I had put my 120 plant tank in front of the window and the reef against the wall. I would move it but some of my SPS dont handle being out of water for more than a couple minutes and I cut a hole in the wall to run pipe so I cold keep my pump and chiller outside.
IMG_2579.jpeg IMG_2580.jpeg
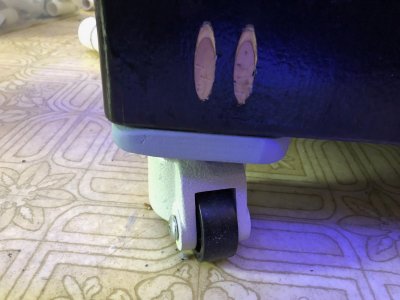
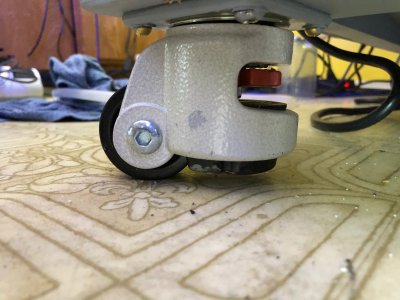
I decided to put this set up on wheels in case I needed to move it as well as elevate it so that if I had a spill or a leak I cold get under it and clean. My other reef sits on the floor and the finish is not all that waterproof. I have had a leak and a spill behind that setup. It has to be nasty under there.

I found these casters that are rated at 1200 pounds each. They have a leveling foot built in.
IMG_2578.jpeg
I bolted them to a board, bolstered the stand with a stud on the underside of either end and Crag Jig, glue and screwed the wheeled boards on to the stand.
IMG_2581.jpeg IMG_2582.jpeg
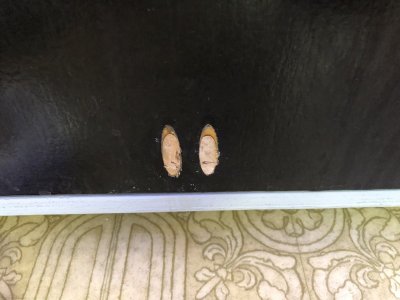
The floor of the stand had some water damage when I got it, so I scrubbed it down and cut a sheet of 3/4 exterior ply and glued it over the floor. So it is 1.5" thick now.

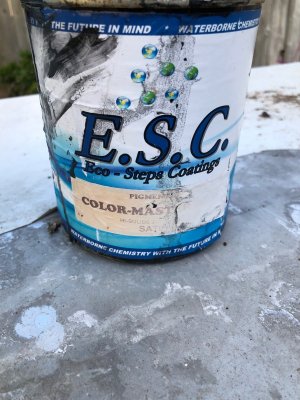
The paint I use on my stands is kind of spendy for me. It is from Colorama and is nothing but awesome. Waterbase, easy clean up. Totally waterproof when it is dry. I had a spill in one of the stands I built that was painted with this stuff and it held everything in place overnight and didn't even discolor. Totally worth the money!
IMG_2583.jpeg
The Elos had a crack in the overflow. I was just going to patch it and move forward but I couldn't really figure out how it worked by looking at it. It seemed like it was missing a part or that the failsafe for not flooding the tank was not as safe as I wanted. After looking around online for images I found another elos build on this site with some photos of the model I had and decided that I wanted to do it a little differently. Plus the flow line into the tank was 1/2 inch. It all just seemed kind of weak to me. The base of the tank is made out of two layers of glass and it is laid up in a way that there is a square hole in the corner that they put the overflow in. Sorry I dont have a photo. It looked like it was going to be really hard to cut the overflow out of there but it came out really easily. The white bulkhead fitting is sitting on the area where the patch is.
IMG_1880.jpeg

I had a bunch of half inch glass left over and I have always thought a wall to wall overflow would be cool. It exposes more water surface to air, and acts like a turbulent stopper for outgoing water. I thought it might make it easier to look down into the tank when the pumps were on. The wall also acts like a giant baffle and gives sediment a chance to fall out before going into my sump. I dont use filter socks because I think they stop a plankton population from developing. In my current reef the final baffle of the sump, just before the pump intake is where the sediment collects. It is hard to clean out since I cant syphon from it. I am hoping this one works out and will be an easy cleaning job. Here is another view of the new overflow.
IMG_1879.jpeg


I would have used black silicone, but I had clear in my tool box and still thought I was going to be able to get water in it within the next 10 days at the time. Back in November of 18... I switched for the later add ons.

It had a black plexiglass floor that had to partially ripped up to get the old overflow out of there. I am not sure if I am going to have any sand or gravel in this one and I think reflected light from the bottom is helpful, so I didn't want to leave it black. The overflow wall looked way less cool in reality than it did in my mind and so I decided to cover it and the floor in white plexiglass. I am really happy with that choice.
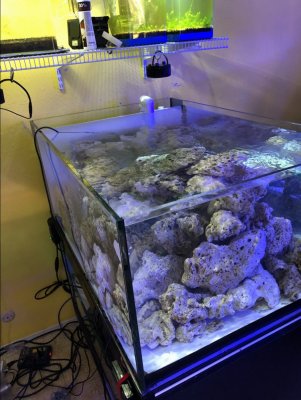
57628946584__4D656F1F-AE0A-45D1-B280-DF27144C7AC9.jpg
While I was waiting for my (black) silicone to dry I thought it would be a good idea to paint the rest of the non essential viewing areas. So I did the grey at the end. It kind of defeated the whole seeing detritus build up and easy cleaning idea and I realized that when I added water. It will come off one day, but it is a low priority right now.
 
OP
OP
w2inc

w2inc

Active Member
View Badges
Joined
Aug 30, 2017
Messages
411
Reaction score
368
Location
San Diego
Rating - 0%
0   0   0
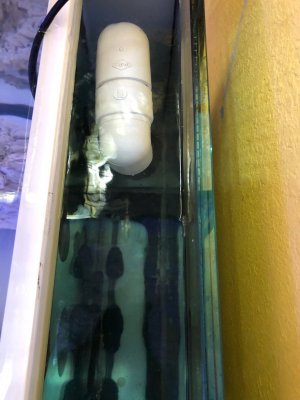
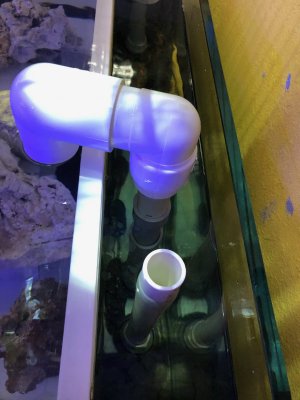
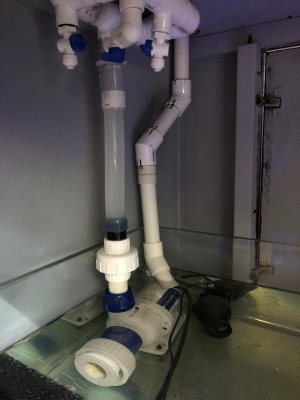
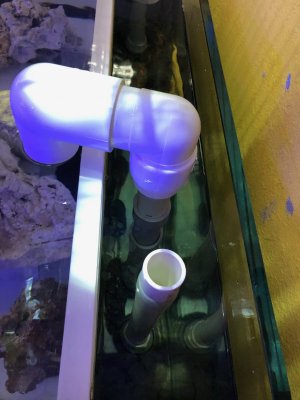
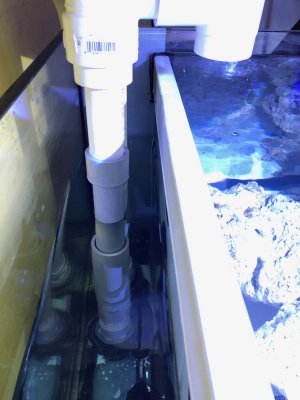
I was planning to do a syphon feed to get the water to the sump and did something like the bean animal. I think it is one pipe less than that design but I have it going on the other reef and it suits my needs. The actual drain pipe is 1 inch, but it couldn't handle the pump flow with the 1" elbows on top, so I put an adapter to make them 1.5" and that fixed it. I am not planning to run the pump at much more that 30% because top to bottom flow is not all that efficient but I wanted the option in case I change plans like I often do.
IMG_2588.jpeg
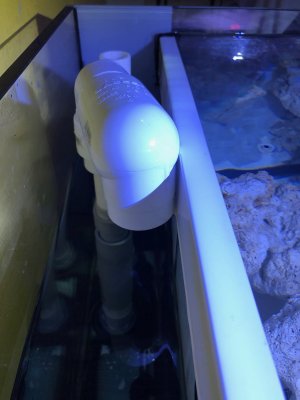
The return flow is also 1" up to the turn. I gauged up here in order to add less head pressure to the line. It moves more water than the 2 90 degree sweeps I was testing it out with and looks good to me.
IMG_2587.jpeg
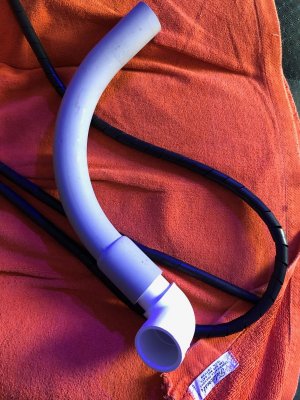
This is a 90 degree sweep if you aren't familiar with them. They help reduce head pressure quite a bit when you need to go around a corner with hard pipe and they are $1.10 at dixieline.
IMG_2590.jpeg IMG_2499.jpeg
I was thinking of building rock work around it, but the 1.5" elbow the is on it now seems to move the same amount of water in and looks way better from the inside.
IMG_2589.jpeg
My smallest reef has a flow accelerator on the return line. Eductor, is another name for it. It spreads out the flow and adds to it. I think it is a great idea. Bonus water movement for the same price. This one chokes back my flow a little before it hits the flow chamber. I guess the idea is to build some back pressure, but you can do that with the pump speed, so it seems like things could be improved on.
IMG_2550.jpeg
I did some reading and spent a day experimenting with things and feel like a pipe blowing water into another 3x its size does a really nice job adding extra flow. Expanding the entrance makes seems to make water flow smoother and add a little more room. Expanding the out flow diffuses the flow a little more on the way out. My Dad was a nuclear physicist but I have a degree in visual arts. I am not going to pretend to know physics, before he passed away we would talk about stuff like this. I think the expanded out flow also creates a void that needs to be filled and adds another element of pull to get more water through the pipe.

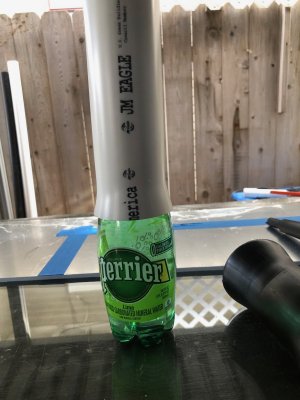
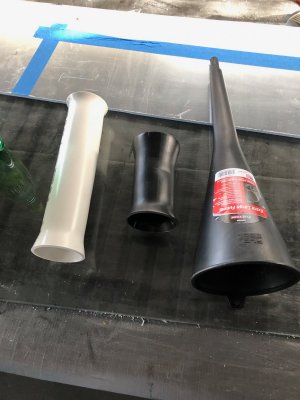
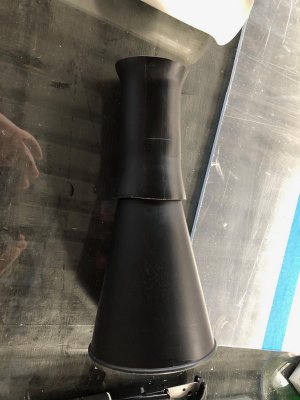
With all that said. Just a one inch pipe blowing into a 2 inch pipe works. you can watch sediment and micro bubbles get sucked into the pipe from three inches away. So the original return flow was going to be 1 inch an blow into a home made 2 inch eductor/injector. I put a pvc pipe in the oven at 300 for a few minutes and pressed it onto a funnel and a water bottle to form flanges. Then cut and glued the funnel to it.
IMG_2504.jpeg IMG_2505.jpeg IMG_2506.jpeg
I went to test it out and realized that I didn't have enough pressure moving through my 1" pipe with the pump running at 30% to really do anything. So that thing will go in the "thought it was a good idea" stack of things.

I am still working out the return flow. I could stop with the 1.5" I have on there now but I wanted a little more. I like to have a syphon break just below the water level rather than using a check valve. Or possibly as well as a check valve if I can avoid adding any head pressure to the line.

My issue is that I would like to be able to hit the feed button and keep the return line full of water. That way when I turn it on there would not be any little bubbles that blow out and splash up on my lights. Just one more thing to clean you know? It keeps me from shutting off the pumps on my current system when I feed.

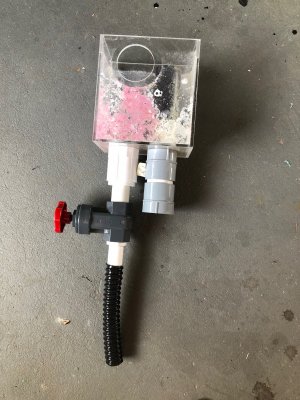
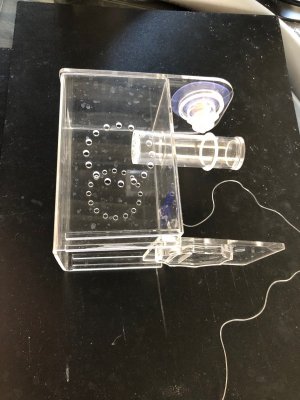
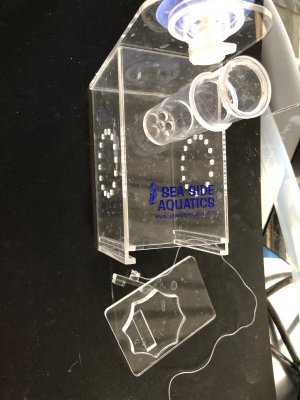
My most recent idea is to build a plexiglass box the return pump pours into that has a bubble trap built in. From there the box will overflow into the tank by way of a short flume that sits at exactly water level. or just below water level. I haven't worked it all out in my head yet but will probably try and prototype one on Monday. I would be happy to take some feedback if anyone has ideas.

The return pump is a Vectra L1. I pretty much hate it. I think about selling it but I would feel guilty dumping it off on someone who didn't know better.
IMG_2532.jpeg
I bought it for the return pump on my 110 seahorse tank mentioned earlier. It has all these cool features that you can't use when you have it set up as a return pump. On the seahorse tank it never put up anywhere near the amount of water it was rated for. I had it plumbed externally and I think that saved me from the plastic melting issue that other people have complained about on the BRS review website.

It is going to be in the water now so we will see what happens. I am just going to say it gives me some anxiety. I just feel obligated to do something with it since it cost so much.

When I had it set up as an external pump I thought it was loud. Louder than my fridge. I was going to build a case to muffle it but never got around to it. I posted a review twice on the site that I got it from but they never did publish it. Fittings had to be glued to try it out so by the time I realized it was not awesome there were no return option.

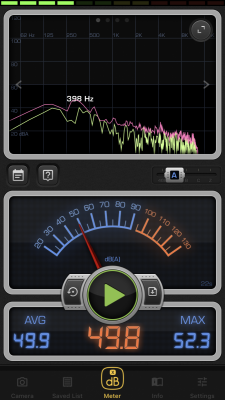
Now that it is submerged it is a lot quieter. It is still one of the two loudest things in my fish room, but iPhone app says I is only 50 db.
IMG_2531.png
I think that the problem is that most of the sound is at the Hz range that my hearing works best in.

I connected it with a foot of silicone tube. It keeps the sound from traveling to the PVC and makes the connection really easy so a pump change is less than 5 minutes.

It is putting out great flow right not, but it has been running for a week and has shut off on me once for no reason. The up side is that I calibrated it and I can check in and see the power usage at my EcoSmart account. I also like the flow control.
 
OP
OP
w2inc

w2inc

Active Member
View Badges
Joined
Aug 30, 2017
Messages
411
Reaction score
368
Location
San Diego
Rating - 0%
0   0   0
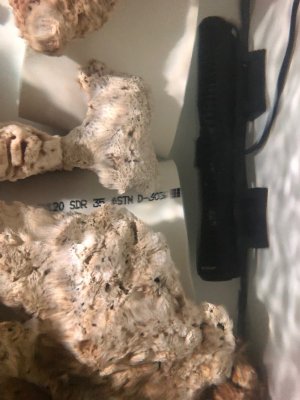
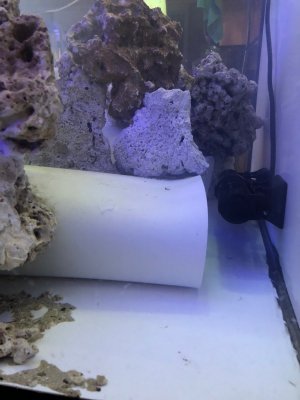
Part of the stuff I got with the free tanks was a Gyre pump. I tried it out and was instantly in love with it. The thing moves water! I wish I could plug it into my Ecotech MP-40 controller and have the best of both worlds. The only negative is that it is a little more hard hitting than I like. I would have to put it off to the side in the tank so things get indirect flow.

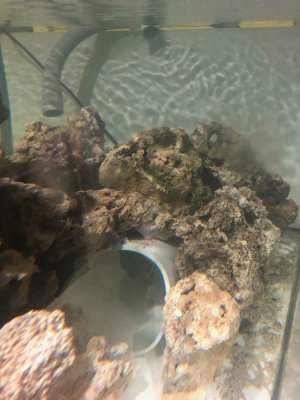
Messing around with some pipe scraps I grabbed from my brothers home remodel I was checking to see if I could soften the water flow and possibly pick up some volume with the eductor idea I was playing with for the return pump. At the end of that day it looked like blowing the pump straight into a 6" pipe did take things nicely in the direction I was hoping. I dont have flow meters or anything, but it looks like it is pulling in water from way farther than is was without the pipe and looking at the tank it is easy to see all kinds of movement.
IMG_2500.jpeg
I heated up the pipe and squished the end that the Gyre flows into so that it matched the shape better. This also decreased the total area inside the pipe at the intake and left it the same at the output, so it echos the design strategies that are being used on similar devices.

It worked without the narrow intake, and I have no way to check and see if it works better with the narrow intake, but the idea looked good after I spent an afternoon reading about it. I wish I had shot photos before I put them in, but I was kind of caught up in my creative builder world that day and didn't think to do it. Here are some photos of it after I superglued it down and started to hide it with rocks.
IMG_2595.jpeg IMG_2596.jpeg IMG_2592.jpeg
The Gyre is have is a few years old. It is the third loudest thing in my fish room. I hear from others on the forum that the newer ones are a lot quieter. If anyone has feedback on that or if they have another favorite circulation pump, I would love to hear about it. I plan leave the pump accessible so I can get to it for service. Or to put something else in there.

I have an mp-10 in my other reef that is nicely hidden, but I have to frag corals to get to it and it tends to make me put off cleaning.
 

Idaho Mojo

Active Member
View Badges
Joined
Feb 14, 2018
Messages
263
Reaction score
334
Location
Fairfield
Rating - 0%
0   0   0
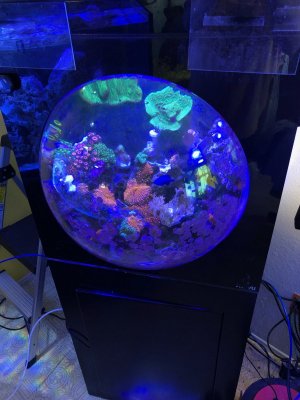
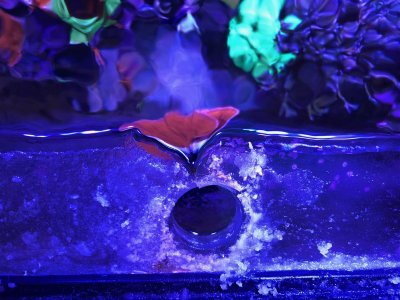
Dude, I LOVE that round porthole tank you have in the first picture.

Following along because this all looks interesting and I never have the guts to chop up tanks. I'm diggin it!
 
OP
OP
w2inc

w2inc

Active Member
View Badges
Joined
Aug 30, 2017
Messages
411
Reaction score
368
Location
San Diego
Rating - 0%
0   0   0
Wow you’re adventurous with all that glass!
Well, probably a little too much at times but I have been doing most of my life. It was the only way I could afford bigger tanks when I was a kid.

I had a lot of help. I was probably 16 when I built my first tank. I went in to the glass store and ask them what kind of silicone I needed for fish tanks and if they ever had 1/4 inch scrap glass. He was really excited that I was so in to it so he took me in the back in to the shop gave me a tour. He showed me how to finish off the edges of my glass and gave me cutting tips. Later on he came and spoke in one of my high school classes. Did a really cool demo. He had a piece of laminated glass, told us how it had a plastic center with glass top and bottom. From there he scored both sides, poured alcohol on it, lit it on fire to heat it up and snapped it in half. My friends all thought it was the coolest thing.

It is crazy when I look back at it! I cant believe my parents let me spill so much water in our basement. My mom was always really supportive. She kept tanks long after I left the house. She bred Corey Cats and would sell them back to the LFS I worked at in high school. It was fun to get updates from her about my boss and coworkers when I called home to visit.
 
OP
OP
w2inc

w2inc

Active Member
View Badges
Joined
Aug 30, 2017
Messages
411
Reaction score
368
Location
San Diego
Rating - 0%
0   0   0
Dude, I LOVE that round porthole tank you have in the first picture.

Following along because this all looks interesting and I never have the guts to chop up tanks. I'm diggin it!
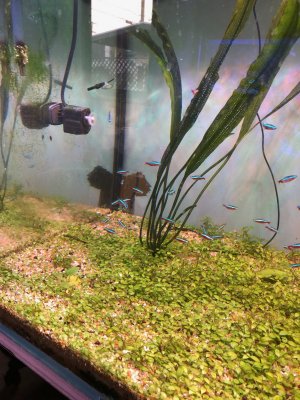
It is one of those bubble front tanks that magnifies things underwater. I built a sump that is the same size as it and it sits behind Plenty of room for a refugium and skimmer.

I had to shut down my tanks for a little while when I moved to California. That one was the first one I set up. It made a great frag tank because it makes everything look way bigger than it really is. The only down side is that the bubble front is acrylic and when you get Coraline algae growing on it there is no easy way to clean it off.
 
OP
OP
w2inc

w2inc

Active Member
View Badges
Joined
Aug 30, 2017
Messages
411
Reaction score
368
Location
San Diego
Rating - 0%
0   0   0
I was planning to get on a design for a modified return flow that would let me hit the feed button on the return pump and not have a bunch of bubbles flow into my display before the water starts to run. They pop and get salt spray on my lights. Over time it is an issue. I thought about using a check valve just to keep the line primed and still go with the return line that just barely breaks the surface.
IMG_2587.jpeg
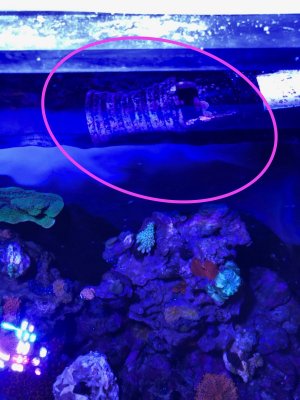
When I was looking through spare parts I found a 1" expansion joint with a threaded attachment. They come from the electrical section at Lowes. They are about $20 which is kind of steep. It is just two pipes nested in each other with rubber gaskets to seal them and still let them slide. The let you really easily twist, and slide the joint to be almost a foot longer. It has been really handy for trying out different fittings. I am going to leave it on the tank.
IMG_2612.jpeg IMG_2614.jpeg

I don't have a feed button on my other tank and so I don't use it. When I turn off the return pump on that system I constantly forget to turn it back on. After all the effort I put into plumbing for a feed button, I have to wonder if I will actually use it. It will be a fun day of messing around.

The other reef is giving me a little trouble for the first time in two years. I made a few changes and had some tissue loss. I am seeing some tip burn and other things that I can't explain so I decided to get the Elos rock work done and start moving frags over as soon as possible. I just need to get the rocks stacked the way I want to see them and commit.

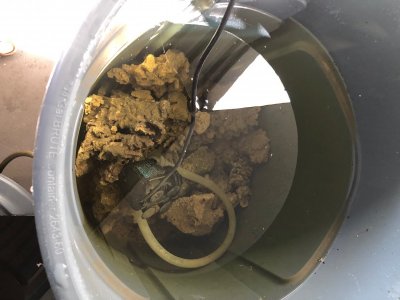
I have been aging them in this trash can full of seawater with a circulation pump on my carport since late November.
IMG_2543.jpeg
They still have some gunk on them, but I think my clean up crew will welcome the food.
 
OP
OP
w2inc

w2inc

Active Member
View Badges
Joined
Aug 30, 2017
Messages
411
Reaction score
368
Location
San Diego
Rating - 0%
0   0   0
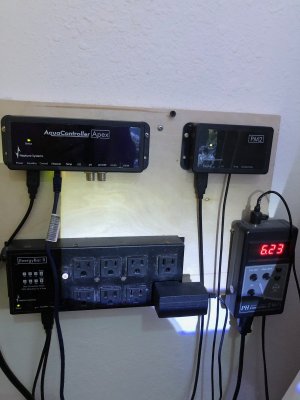
Apex...

I got this Apex controller three years ago with a used tank I bought. I got it all nicely mounted and have been planning to use it to send me notices if bad things happen.
IMG_2606.jpeg
It sat on the wall for 3 years so far. I almost sold it 3 different times, but I was not even sure if it worked. Each time I would look it up to see what I could do with it I would land on some page where people are writing code. I just kept thinking I am not that into it. (ph controller is a separate unit)

In the mean time I had bought a Seneye to use as a light meter. It gives me temp, pH, and a couple other warnings. It has a module that lets it send a text to me that cost close to $300. You can get a crappy laptop new for $100 less. We had an old laptop laying around the house. We plugged in the Seneye and all was well. I generally know what is going on with my system so Temp and pH have been enough for me.

The Monday, @ChronicReefH2o came by to check out my tank. He was telling me that he loved his Apex and all it could do. He spent 2 hours doing update and helping me figure things out. He took it home and finished the updates and brought it back to me yesterday ready to go! Big thanks!

I still have to attach the wifi to it, but that is much more in my scope of skills. The interface was simple. Has some nice automated controls and best of all at this moment is that it allows me to track my power use!! I am so excited to find out where all my power is getting sucked into and find a way to control it. I haven't had a power bill under $400 since we set up.
 
OP
OP
w2inc

w2inc

Active Member
View Badges
Joined
Aug 30, 2017
Messages
411
Reaction score
368
Location
San Diego
Rating - 0%
0   0   0
After a trip to my local screen print supply store for a 1lb. bottle of superglue I though the rock work would be a couple hours. I already had most of the rocks in the tank some of it already glued where I wanted it and a general plan.
57662464980__B47C5019-502B-477B-BE39-6C7C5A43D292.jpg
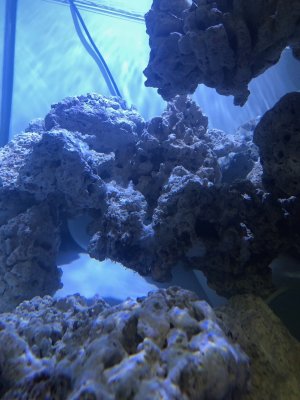
4 hours later I remembered that I have a degree in visual arts and that there was no fast way through this. I want to maximize flow everywhere so I am making an effort to have large holes wherever possible. I also like to have the caves for fish to duck through.
IMG_2629.jpeg

This called for a lot of gluing smaller rocks together to make big ones. I like where things are going, but still have a couple hours left.
IMG_2628.jpeg

I am still dealing with some tissue loss in my 120 reef and trying to figure out what to do with the mass of frags I have left over from catching one of my crabs. I tapped out the LFS and they are pretty stocked up with my stuff, but they did say they wanted my Cardinal fry now that they are weaned. My store credit had dipped below $1,000 and it was making me feel a little insecure ;). (Ok, half of it was a gift card from my husband.) For now, I am off to sell some babies!
IMG_2632.jpeg
 
OP
OP
w2inc

w2inc

Active Member
View Badges
Joined
Aug 30, 2017
Messages
411
Reaction score
368
Location
San Diego
Rating - 0%
0   0   0
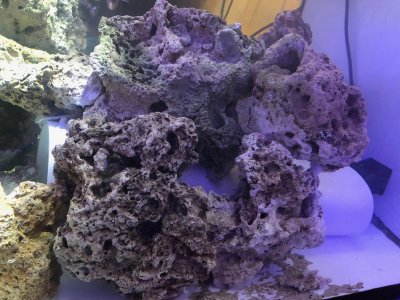
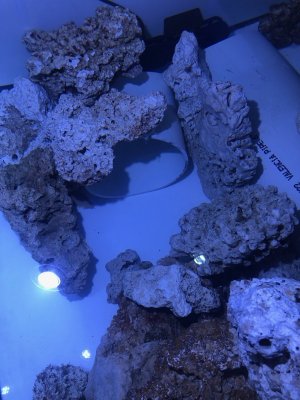
It took another 3 hours to get the rock stacked. It is hard to hide the pipes without making it look like you are trying to hide pipes. It is hard for me to remember that the rock work is just a frame to mount corals onto. A lot of times I end up building what I think is a masterpiece just to end up pulling pieces out so that I can fit coral in there.

Not many rocks sit directly on the bottom of the tank and flow is looking nice to me. There are a couple hot spots still, but nothing that would stop coral from growing. Everything sits about 6 to 10 inches off the floor. The majority of my livestock will be SPS and light loving things so this should maximize my wattage to light output. Possibly let me mount the lights a little higher and get better blend out of my Radions.
IMG_2639.jpeg
IMG_2640.jpeg
IMG_2637.jpeg
IMG_2638.jpeg

I am going to try and get going on the lights today.
 
OP
OP
w2inc

w2inc

Active Member
View Badges
Joined
Aug 30, 2017
Messages
411
Reaction score
368
Location
San Diego
Rating - 0%
0   0   0
The current 120 reef started out as an octopus tank. It seemed like a good way to age my rocks and substrate.

We found this guy in a tide pool and decided to save him from a life of hiding from predators. This is him in a 1 1/5 inch pipe.
20161120_203348.jpg

He moved from there to a 55 all in one Red Sea. We decorated it with rocks we found at the beach. It seemed like he would feel more at home.
20161223_195327.jpeg


He outgrew that space in just a couple months. Summer was coming on and we had a chiller running on his tank. It makes no sense to heat the room just to cool the tank so I decided to put the chiller outside and that is where the hole in the wall came from in the first page of this build.

I had bought a used 120 that supplied the rock for our 20 gallon nano bubble tank and the 110 seahorse tank. It also came with things like a skimmer, Apex system, sump, pumps, lights, pretty much everything. It was crusted over with Coraline algae on all the walls and had been sitting dry for almost a year by the time I decided to set it up. It was star fire glass and I wan kind of excited to see what it was going to look like when it was full.

I filled it up with water and poured some acid in it until the pH was down to 3. After a couple days I was able to just wipe the stuff off of the walls. I drained it, sprayed it out and refilled it.
20170610_162318.jpg

It is hard to see from the photo, but the water is not cloudy. The algae had etched itself into the glass and it was not something that could be fixed. I was kind of frustrated, so I cut the front panel off, ordered a replacement panel and bought a new tank tank all in the same day.

That tank is a freshwater planted now. It doesn't always look great but this was its glory day.
IMG_2985.jpg
IMG_1342.jpeg

The new tank came with glass tops and that was perfect for keeping the octopus. I got an old 1/2" glass table top for free from craigslist and cut some strips from it to make eurobracing for the new tank. Seahorse tank had a center brace and it was just too much to work around.
IMG_2653.jpeg
From there I drilled it, made some custom overflows, took the stand from the old 120, pulled half of the live rock from the seahorse tank and the rest from original octopus tank. Put a hole in the wall, plumbed the chiller and return pump to go out there under an old desk my bother donated to my project. At the time I had no plans of taking down the seahorse tank but I wish I had at least measured and matched the placement of the holes for the overflows.

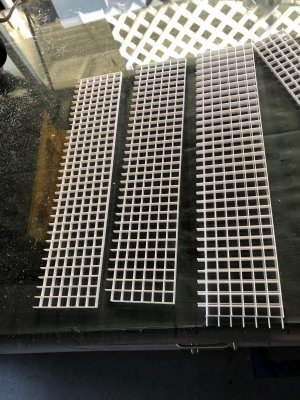
Now I have this system I built with laser cut magnetically attached strainers and an animal bean overflow that attaches to the back side. I haven't found a way to repurpose it and am still too attached to it to throw it away.
IMG_2654.jpeg
IMG_2655.jpeg

Well, that is some of the history of where all the parts for the new build are coming from. I am excited to start moving frags from the 120 reef and doing my best to hold back and be sure things area ready.
 
OP
OP
w2inc

w2inc

Active Member
View Badges
Joined
Aug 30, 2017
Messages
411
Reaction score
368
Location
San Diego
Rating - 0%
0   0   0
Well, it has 3 lights on it. Two kessil 360x and one Radion xr-15 g4 pro. There is a second Radion that I am planning to put on it but it is currently on this tank. IMG_2694.jpeg
The tank has a bubble front that magnifies everything in it, so it is a great frag tank. The biggest trouble with it is that if neglected and allowed to grow coralline algae on the inside of the dome, cleaning it is just not easy. Right now it is super encrusted and I just dont want to scrape it off.

I have been planning to break it down for months. Something in the fish room needs to go and this one has some kind of corynactis anemone living on the rocks that has spread to the sump in the back. The tank is often neglected, amazingly stable, and since I built the stand, buffed out the dome and built a custom sump that is attached to the back of the tank, I am emotionally attached to it.

Current build looks like this today.
IMG_2693.jpeg

I liked the color of the Kessil lights until I put the Radion next to them. Now they look a little bit green to me and I havent hooked up the controller to try and adjust out of it. They have a hot spot right under them that is above 700, so I moved a little rock and the recessed area under the light gets closer to 30o PAR now.
I messed with the Radion and tried to get it to match the Kessil, but finally gave in and just set it to match my current reef. The hot spot under it is not nearly as dramatic as the kessil and it seems to drive the light a little deeper. Radions worked great on my 120 reef, and pretty well on a planted freshwater tank. I just have issues with the diffusers. I dont like the scattered color I get without them, and I struggle with the 20% light loss with them on.

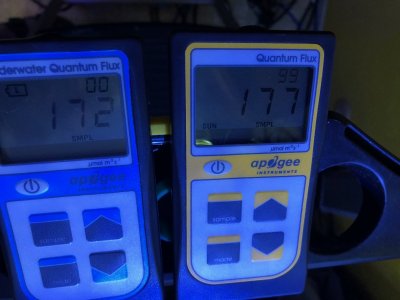
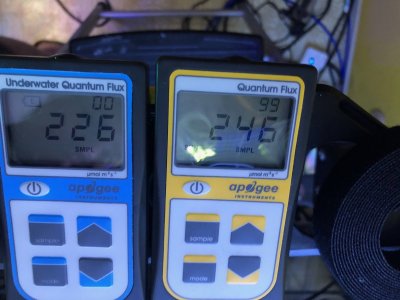
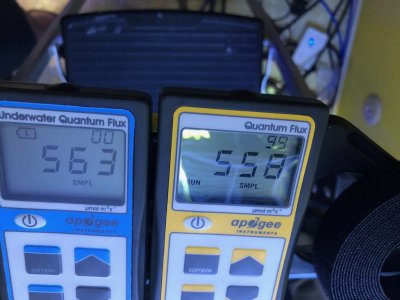
@ChronicReefH2o has one of the newer PAR meters and he let me borrow it to see how it compared to mine and see if my lights, rock height, and levels were going to be what I wanted before I moved on. I guess the new ones check for things that the old ones dont, but I was relieved to see the readings so similar to each other. I am feeling like mine is good enough for what I do.
IMG_2670.jpeg
IMG_2674.jpeg IMG_2677.jpeg


Now that the one is on the tank and I can see how bulky that mounting arm is going to be, I am thinking of using my pet store credit to get another two kessils, I think they are just going to look better presentation wise, but I havent really settled on a light mounting strategy yet. Today I have enough light for the system so that is not a real concern. I am trying to decide if I want to seed it with coralline algae, or coral, or turn off the lights and finish some of the plumbing.
IMG_2697.jpeg


Today my fingers are sanded a little thin from handling rocks so I am not terribly motivated to get my hands wet and handle things.


Bought a Copper band butterfly for the 120 reef two days ago. My Red Sea sail fin went on a mission to murder it. These fish traps are awesome! 15 minutes and he is now in a bag and we are headed to the LFS to add to trade him in.
IMG_2698.jpeg IMG_2699.jpeg
 
OP
OP
w2inc

w2inc

Active Member
View Badges
Joined
Aug 30, 2017
Messages
411
Reaction score
368
Location
San Diego
Rating - 0%
0   0   0
Not that much going on. Tested the water. PO4 is .25 and NO3 is 50. I want to get some Chaeto in the sump and bring the levels down before I seed the tank with coralline or move corals into it. My other two systems have bubble algae and something like Derbesia in the sump. I wanted to get clean cheato from some place, but everyone is out. I am thinking I will set up a QT with some cheato and Ulva and dose it with fluconazole for a couple weeks before I move it in. It will give me time to build a black 60 gallon cube that I can use to as my reverse daylight tank.

I seeded my tanks from ocean rocks and water when it started. I have tons of different pods and plankton in the other two reefs and I am planning out a way to get them seeded in the new tank without bringing in the things I dont want. Some times I think it might not be possible. A good pod stock seems to be a key to a stable tank. I am doing my best to just avoid shaking a rock in the tank. There are several things I would love to leave behind.
 
OP
OP
w2inc

w2inc

Active Member
View Badges
Joined
Aug 30, 2017
Messages
411
Reaction score
368
Location
San Diego
Rating - 0%
0   0   0
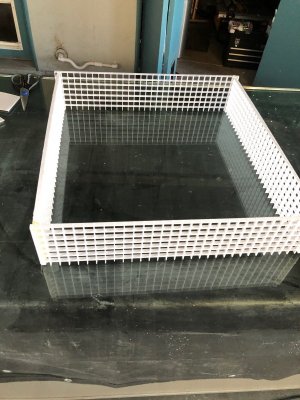
Built a Cheato cage and got it in the sump. I dont think I have all that much room for Frags.
IMG_2772.jpeg IMG_2782.jpeg IMG_2783.jpeg
IMG_2795.jpeg

I will figure it out when the nutrients come down.

IMG_2781.jpeg
 
OP
OP
w2inc

w2inc

Active Member
View Badges
Joined
Aug 30, 2017
Messages
411
Reaction score
368
Location
San Diego
Rating - 0%
0   0   0
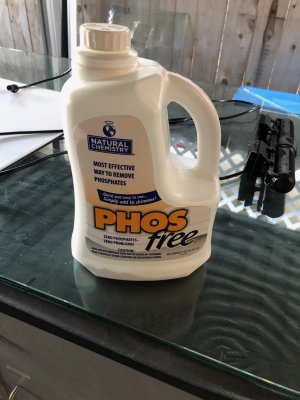
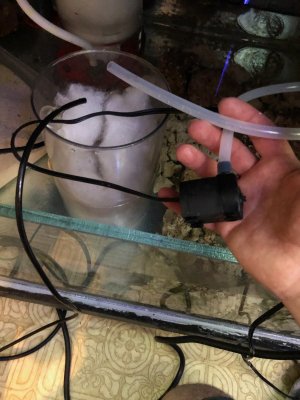
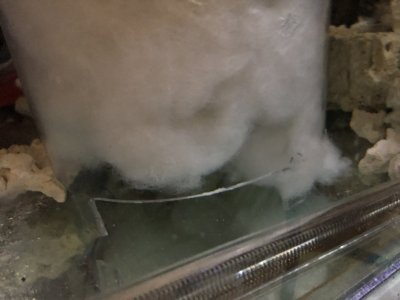
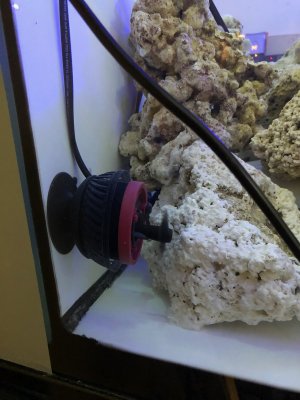
I have been dosing Lanthanum Chloride to the tank to drop Phosphates. I had to do it to my 120 so I figured I would share the love. I didn't want it settling down all over the place so I dripped it into a wad of filter cotton next to my skimmer. I put a small power head on it and let the dripper drop things into the power head stream and into the cotton.
IMG_2787.jpeg IMG_2792.jpeg
IMG_2798.jpeg

IMG_2793.jpeg
9 to 12 ml a day. Phosphate is at .15 ppm. NO3 is at 40 ppm. I like the ratio. I will get the light on the Chaeto cage tomorrow.
IMG_2796.jpeg
 
Last edited:
OP
OP
w2inc

w2inc

Active Member
View Badges
Joined
Aug 30, 2017
Messages
411
Reaction score
368
Location
San Diego
Rating - 0%
0   0   0
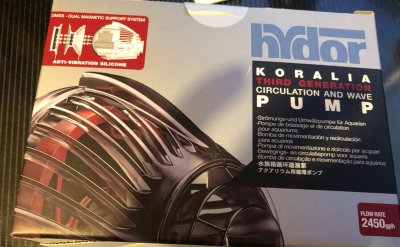
I think the Gyre is dead to me. I was comparing watts to flow an the new Koralia pretty much blows everyone out of the water. 9 watt pump. 2460 gph, 773 gallons per watt. $100. Pull off the grill and the thing really goes off.
IMG_2789.jpeg
IMG_2788.jpeg
I read some bad reviews about them and was going to go with another pump but a guy at the LFS that I trust said he had them running for a year and loved them.

Not DC. I love that. No brick sized converters to try to find a place for. I have at least 10 of them on my 120. Still trying to find a way to hide them.

Fish figure it out and stay away from the prop.
IMG_2790.jpeg

If I dont pull the guards I trim them out. So much more flow.
IMG_2794.jpeg

My MP-40 have giant gaps in the guards. They do suck in an occasional fish. Only killed one.
So far I love the pumps. Suction cup mount Sealed clear magnets so I can see if they leak. I will post again if I have a down turn on them, but for not I am really excited about them.

IMG_2788.jpeg
 
OP
OP
w2inc

w2inc

Active Member
View Badges
Joined
Aug 30, 2017
Messages
411
Reaction score
368
Location
San Diego
Rating - 0%
0   0   0
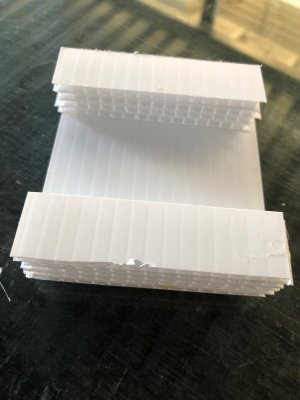
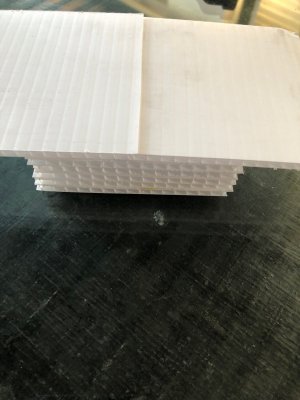
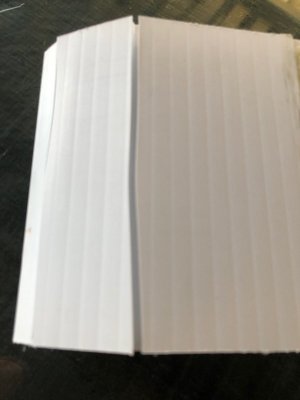
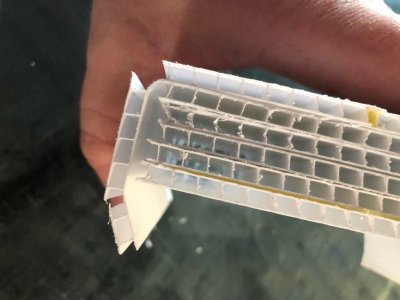
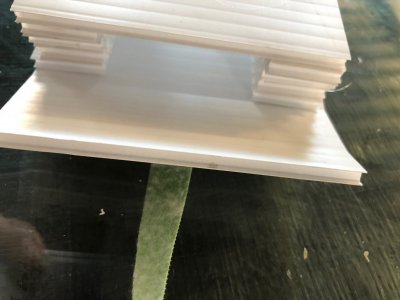
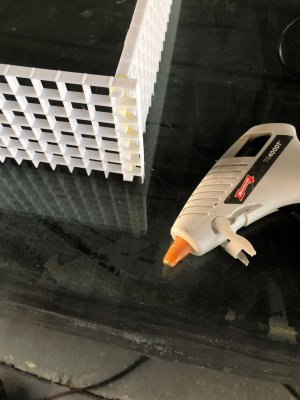
Corrugated pvc sign material from Home Depot $5. Hot glue and a piece of velcro and we have a pod hotel. Modified to hold some bait.
IMG_2775.jpeg IMG_2776.jpeg IMG_2777.jpeg IMG_2778.jpeg IMG_2779.jpeg

If you haven't tried roofing blades with a boxcutter knife, you really should. They are so handy for controlled cuts on vinyl kinds of things.
IMG_2784.jpeg

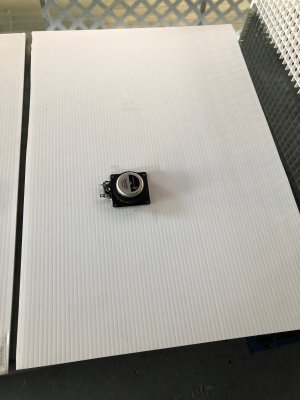
With the left over material I added these exciters and made some panel speakers. They sound amazing and put out a nearly flat frequency if you epoxy them to the surface. I use the 3/5th rule to place them. They sound best about a foot from a wall.
IMG_2786.jpeg
IMG_2785.jpeg
 

Reefing threads: Do you wear gear from reef brands?

  • I wear reef gear everywhere.

    Votes: 16 16.5%
  • I wear reef gear primarily at fish events and my LFS.

    Votes: 5 5.2%
  • I wear reef gear primarily for water changes and tank maintenance.

    Votes: 0 0.0%
  • I wear reef gear primarily to relax where I live.

    Votes: 17 17.5%
  • I don’t wear gear from reef brands.

    Votes: 51 52.6%
  • Other.

    Votes: 8 8.2%
Back
Top