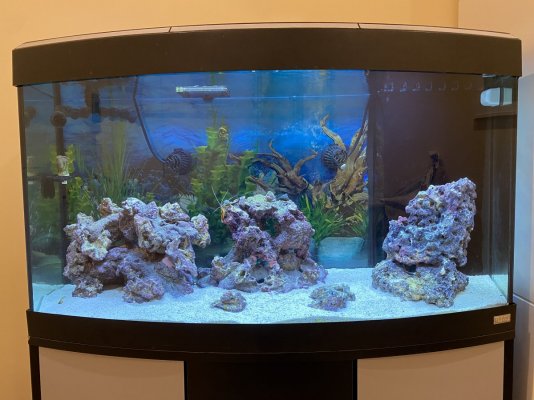
Fluval Vicenza 47G Sump converted

PapaReefer

Community Member
View Badges
Joined
Feb 10, 2020
Messages
72
Reaction score
37
Rating - 0%
0   0   0
As of continuation from my meet & greet post https://www.reef2reef.com/threads/new-reefer-from-canada.689180/.

So, somehow I found myself managing saltwater tank now... This is our first marine tank, here is what we have so far:
  • Bowfront 47G tank - Fluval Vicenza
  • Fluval 205 Canister filter
  • Current USA Orbit Marine LED light
  • Heater
  • Current USA eFlux Wave pump
  • CaribSea Live Dry Rock
  • CaribSea Sand
Tank itself I think is meant to be used for freshwater, but we'll try to make it work for saltwater.

IMG_0426.jpg

IMG_0427.jpg
 
OP
OP
P

PapaReefer

Community Member
View Badges
Joined
Feb 10, 2020
Messages
72
Reaction score
37
Rating - 0%
0   0   0
Catching up on the updates for our reef journey...


After tank finished cycling we added our first fish - Clarkii Clown.

He lived happily for 3 weeks and then one day went down with Brooklynella. I was not able to save him :( We were so heartbroken...

Now we are in the fishless mode for 6 weeks to allow for Brook to die-off ....
 
OP
OP
P

PapaReefer

Community Member
View Badges
Joined
Feb 10, 2020
Messages
72
Reaction score
37
Rating - 0%
0   0   0
Since we lost our first and only fish we decided to quarantine all new fish. I picked up a 10 gallon TOP FIN tank from Pets Mart and today we set it up. Starter kit came with everything: HOB Filter, Heater, Thermometer.

IMG_0767.jpg
IMG_0772.jpg


The only thing that puzzles us is that filter doesn't come with the Bio media of any sort and there is nowhere to out them in the filter so we are not quite sure how thats going to work.

We have prepared the following medicine for quarantine:
  • PrasiPro
  • Reef Rally Pro
Now we just need to figure out what to do with bio media and cycle the tank...
 
OP
OP
P

PapaReefer

Community Member
View Badges
Joined
Feb 10, 2020
Messages
72
Reaction score
37
Rating - 0%
0   0   0
We love our tank but one thing ids missing - sump.
So during Christmas holidays I decided to add sump to it.
All inhabitants got moved temporarily to the QT, DT was drained and cleaned and is ready for surgery.
 
OP
OP
P

PapaReefer

Community Member
View Badges
Joined
Feb 10, 2020
Messages
72
Reaction score
37
Rating - 0%
0   0   0
1st order of business - what size sump can we fit?
Vicenza's cabinet has divider in the middle which needs to go in order to accommodate as large sump as possible.
Without center divider I can fit 30" sump in it...

Cabinet from the back (notice that divider is removed and back panel is removed as well)
IMG_2802.jpg

I picked up used 30G tank from somebody on Facebook.
It is 30" x 12" x 18"
IMG_2803.jpg


12" depth means it that backpanel needs to be removed in order for it to fit:
IMG_2804.jpg

So I will have to add some braces to support weight of the DT....
 
OP
OP
P

PapaReefer

Community Member
View Badges
Joined
Feb 10, 2020
Messages
72
Reaction score
37
Rating - 0%
0   0   0
Vicenza is drilled at the bottom (2 holes) which will allow me to run Herbie overflow with 3/4" pipes.

Quick visit to local LFS brought some plumbing goodies :
IMG_2805.jpg


Now I can remove old drain from the tank (which is some non-standard size) and install 3/4" bulkheads.
After removing old bulkheads I quickly realized that not only pipes are non standard, but hole in the glass is bit too small for 3/4" bulkhead - I guess because it was drilled in metric. it is literally 1mm host in diameter to fit standard 3/4" bulkhead.

So Dremel with glass grinding bit comes to help. Very carefully, with lots of water, enlarging holes in the glass...
IMG_2800.jpg


10 minutes later - perfect fit:
IMG_2806.jpg
 
OP
OP
P

PapaReefer

Community Member
View Badges
Joined
Feb 10, 2020
Messages
72
Reaction score
37
Rating - 0%
0   0   0
Today I manufactured weir overflow box from 6mm black acrylic following same method as in this video:

It was glued into the DT and drain pipes got installed too:
IMG_2851.jpg

IMG_2852.jpg
 
OP
OP
P

PapaReefer

Community Member
View Badges
Joined
Feb 10, 2020
Messages
72
Reaction score
37
Rating - 0%
0   0   0
The build is complete! Sump is installed and plumbing is done. Still need to tidy up wires a bit, but we can start filling with water now...
IMG_2862.jpg
 

stu1982

New Member
View Badges
Joined
Feb 7, 2021
Messages
1
Reaction score
0
Location
Epsom
Rating - 0%
0   0   0
Hi Papa reefer, great build so far. Do you know what the size of the holes through the tank actually were? I'm thinking of doing the same thing but need to work out what boys I need.
 
OP
OP
P

PapaReefer

Community Member
View Badges
Joined
Feb 10, 2020
Messages
72
Reaction score
37
Rating - 0%
0   0   0
Hi Papa reefer, great build so far. Do you know what the size of the holes through the tank actually were? I'm thinking of doing the same thing but need to work out what boys I need.
Hi

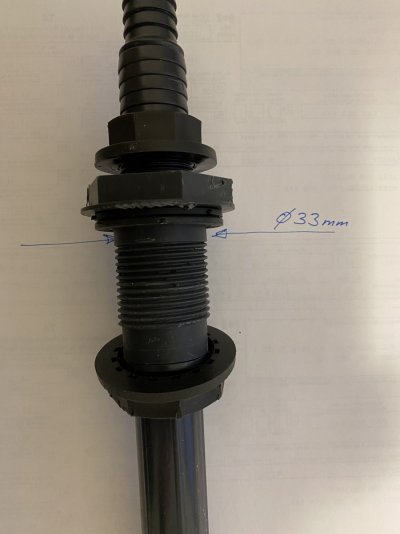
I am afraid that in the excitement of new build I forgot to measure the actual size of the hole but I still have original bulkhead which was installed and its size is 33mm

IMG_3269.jpg
 
OP
OP
P

PapaReefer

Community Member
View Badges
Joined
Feb 10, 2020
Messages
72
Reaction score
37
Rating - 0%
0   0   0
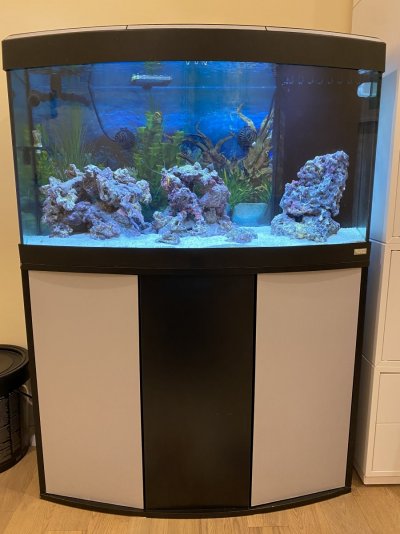
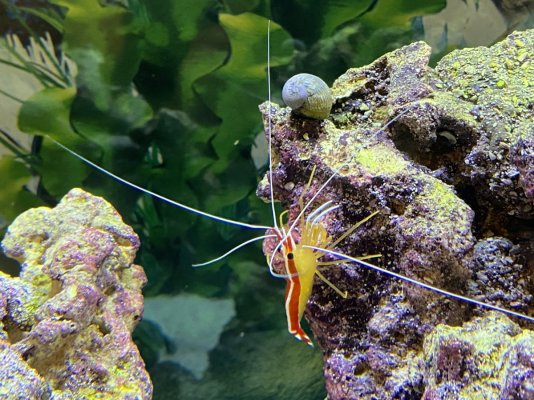
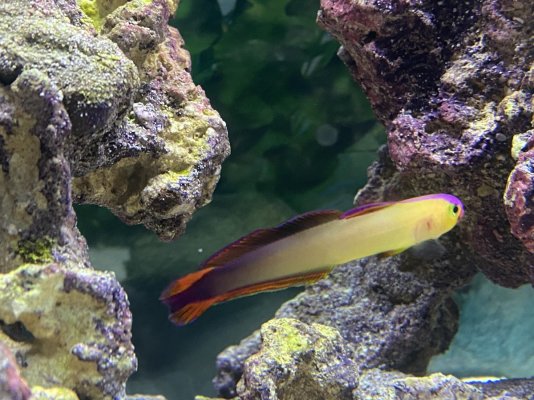
A few shots what tank looks like for now.
Current inhabitants:
  • Bi-Color Blenny
  • Exquisite Firefish
  • Cleaner Shirmp
  • Strawberry Conch
  • Mexican Turbo snail
  • Nassarius Snail
  • few smaller snails
IMG_3109.jpg
IMG_3111.jpg IMG_3172.jpg IMG_3110.jpg

I am running Orbit Marine LED lights at the moment. Good thing about these lights is their low profile which allowed them to hide under existing tank cover (slightly modified). But light is not strong enough for corals so new lights are already here and soon will be installed.
 

Creating a strong bulwark: Did you consider floor support for your reef tank?

  • I put a major focus on floor support.

    Votes: 45 41.3%
  • I put minimal focus on floor support.

    Votes: 23 21.1%
  • I put no focus on floor support.

    Votes: 38 34.9%
  • Other.

    Votes: 3 2.8%
Back
Top