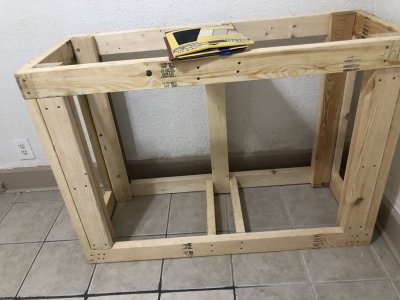
Help!!! Split wood on Diy 75 gallon stand (pics)

R2D2-15

New Member
View Badges
Joined
Aug 23, 2019
Messages
23
Reaction score
22
Rating - 0%
0   0   0
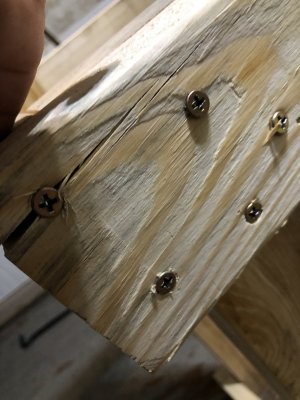
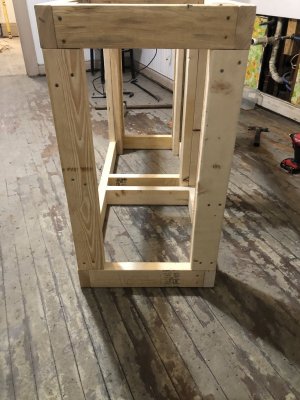
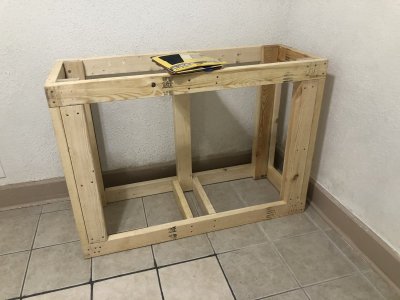
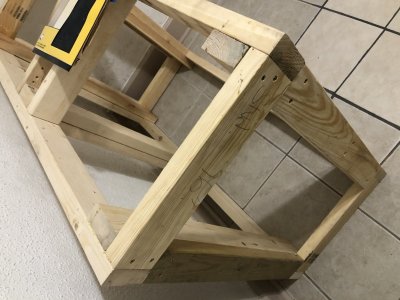
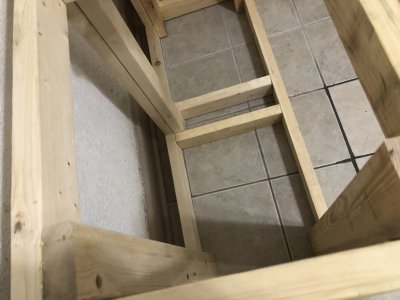
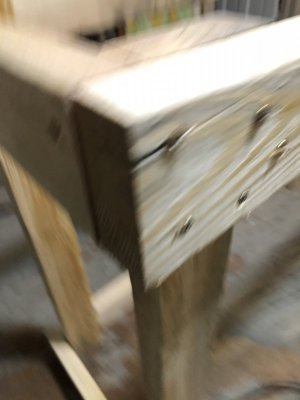
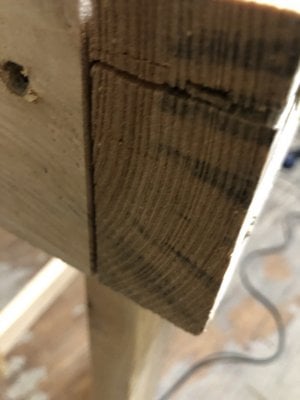
So I was building this stand for a 75g I have in mind when I realized I actually split the wood one of the 4 mains rails that support the tank length wise (49inch rail). I’m hoping this isn’t too bad of a split and I can just continue with the build? Or should I go out and buy more wood? I can either decide to use this as the base that sits on the floor, or the base the supports the tank directly....
EB1ADCC9-4BEA-40F6-871F-ED937C93DB11.jpeg A1E5F5F1-C4C8-45FF-ACFA-0E9B582941DC.jpeg D8B9A123-FA91-4A1B-8CE5-E7FA4F8F7B82.jpeg
 

Reef man 89

Valuable Member
View Badges
Joined
Oct 8, 2016
Messages
1,902
Reaction score
1,343
Rating - 0%
0   0   0
Me personally I would just cut a new piece. You don’t want that piece of wood to fail with 75 gallons of water to hit the floor. Then kick yourself in the rear end because you didn’t fix it in the first place.
 

redfishbluefish

Stay Positive, Stay Productive
View Badges
Joined
Mar 22, 2012
Messages
11,713
Reaction score
25,770
Location
Sayreville, NJ
Rating - 0%
0   0   0
I wouldn't be too overly concerned if......you add the actual support pieces below this piece and top the stand with 3/4 plywood to help flatten it out. In addition, I'd consider pre-drilling any additional screw/nails you're going to add.

The support pieces I'm talking about are here (purple) in RocketEngineers design.

Stand.jpg
 

JoshH

Tank Status: Wet...ish, growing things....
View Badges
Joined
Dec 3, 2016
Messages
9,994
Reaction score
35,394
Location
Humble
Rating - 0%
0   0   0
I wouldn't be too overly concerned if......you add the actual support pieces below this piece and top the stand with 3/4 plywood to help flatten it out. In addition, I'd consider pre-drilling any additional screw/nails you're going to add.

The support pieces I'm talking about are here (purple) in RocketEngineers design.

Stand.jpg

+1 on this
 

SpringFever

Community Member
View Badges
Joined
Dec 24, 2019
Messages
26
Reaction score
17
Rating - 0%
0   0   0
Former cabinet maker here.

I would most certainly replace that piece. Especially if you keep it screwed to the outside of your upright support. In its current configuration, the only thing holding the tank up is the sheer strength of the screws.

The frame diagram posted above is textbook. I highly encourage you to think about revising your design to more closely match it.
 
OP
OP
R

R2D2-15

New Member
View Badges
Joined
Aug 23, 2019
Messages
23
Reaction score
22
Rating - 0%
0   0   0
Former cabinet maker here.

would most certainly replace that piece. Especially if you keep it screwed to the outside of your upright support. In its current configuration, the only thing holding the tank up is the sheer strength of the screws.

The frame diagram posted above is textbook. I highly encourage you to think about revising your design to more closely match it.
That’s the same design I’m using
 
OP
OP
R

R2D2-15

New Member
View Badges
Joined
Aug 23, 2019
Messages
23
Reaction score
22
Rating - 0%
0   0   0
I wouldn't be too overly concerned if......you add the actual support pieces below this piece and top the stand with 3/4 plywood to help flatten it out. In addition, I'd consider pre-drilling any additional screw/nails you're going to add.

The support pieces I'm talking about are here (purple) in RocketEngineers design.

Stand.jpg
ok, so should I use this as the top (red) or bottom (orange)?
 

Mastiffsrule

Where ever you go, there you are, so be nice 2 you
View Badges
Joined
Feb 10, 2019
Messages
8,440
Reaction score
33,571
Location
Charlotte
Rating - 0%
0   0   0
Hi, I’m stopping by with my wisdom, so don’t expect much. ;Happy

It’s split, take the whole “will it hold” thing out. What would take at this stage to pull a few nails, grab and cut a new board when u get a chance and be done. I agree as well with it being fine, but if it’s worth doing than do it right. Gosh, do I sound corny.

Anyway, pull the board, put a new one in and keep us updated on that sweet build:D
 

jsker

Reefing is all about the adventure
View Badges
Joined
Apr 11, 2015
Messages
24,974
Reaction score
79,745
Location
Saint Louis
Rating - 0%
0   0   0
Former cabinet maker here.

I would most certainly replace that piece. Especially if you keep it screwed to the outside of your upright support. In its current configuration, the only thing holding the tank up is the sheer strength of the screws.

The frame diagram posted above is textbook. I highly encourage you to think about revising your design to more closely match it.
Winning answer in my book :)
 

RocketEngineer

Well-Known Member
View Badges
Joined
Sep 3, 2019
Messages
983
Reaction score
1,072
Rating - 0%
0   0   0
Its so nice to see that design kicking around :).

OP: I'm curious what screws you used. Given that they have a Phillips recess, I doubt they are exterior grade screws and are more likely long sheet rock screws. If that's the case, I would suggest a reset and rebuild. The exterior screws I prefer have a couple notable features including a self-tapping tip, a self-countersinking head, and a torx bit (star drive) recess for better engagement and control while driving them in.

Good luck and I hope you post the final results.
 

Ashish Patel

2500 Club Member
View Badges
Joined
Feb 9, 2017
Messages
3,275
Reaction score
2,597
Location
Marlboro NJ
Rating - 0%
0   0   0
Not sure why you would want to keep the tank in this state given you spend all this time with this DIY. Last month I moved so had to make a stand out of 2x4 for a fiberglass vat I bought to hold all my corals and I did not feel good about the slit ends I ultimately made. Since its temporary and time was not on my side I reluctantly kept it but long term its no brainer.. Do the right thing! lol
 
OP
OP
R

R2D2-15

New Member
View Badges
Joined
Aug 23, 2019
Messages
23
Reaction score
22
Rating - 0%
0   0   0
Its so nice to see that design kicking around :).

OP: I'm curious what screws you used. Given that they have a Phillips recess, I doubt they are exterior grade screws and are more likely long sheet rock screws. If that's the case, I would suggest a reset and rebuild. The exterior screws I prefer have a couple notable features including a self-tapping tip, a self-countersinking head, and a torx bit (star drive) recess for better engagement and control while driving them in.

Good luck and I hope you post the final results.
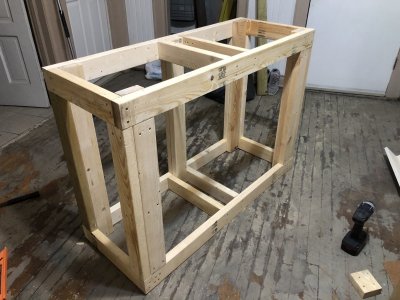
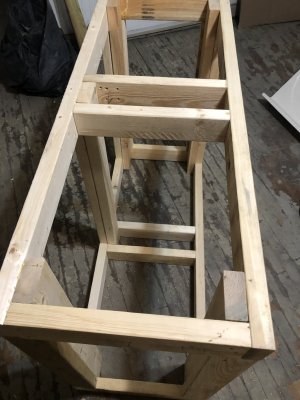
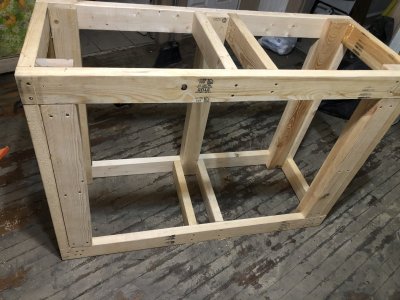
I went ahead and bought two more 2x4 and replaced two rails that weren’t even. Used the left over wood for side support and middle bracing. Added a back bracing for the back and I’m leaving the front open for a sump. Just need to buy some oak sheet wood and stain to make it look pretty. Don’t mind the background, I decided to build the stand in one of the floors I’m renovating. Oh and they’re deck screws.

ABEAA831-5891-40DF-9054-851C9C7FD03A.jpeg 3D90847C-6DA8-4AD1-911A-FCEA12EEE7CA.jpeg 84A610F5-94A5-456B-9C00-04C7F4A75A3F.jpeg BDA28FC1-0DC7-44F1-80CB-183E1365AA44.jpeg 65538B31-9C39-4B6A-A13B-D24E7B21F832.jpeg BD7076EE-B74F-467B-A839-B0AC9CD6CF39.jpeg E4AEA574-C3B7-4C66-AF40-9BEF13326DBA.jpeg 5F2AC9D3-7E22-48F8-ABD1-A6A2254094D5.jpeg
 
Last edited:

Crabs McJones

I'm so shi-nay
View Badges
Joined
Jul 24, 2017
Messages
27,463
Reaction score
138,761
Location
Wisconsin
Rating - 0%
0   0   0
I went ahead and bought two more 2x4 and replaced two rails that weren’t even. Used the left over wood for side support and middle bracing. Added a back bracing for the back and I’m leaving the front open for a sump. Just need to buy some oak sheet wood and stain to make it look pretty. Don’t mind the background, I decided to build the stand in one of the floors I’m renovating. Oh and their deck screws.

ABEAA831-5891-40DF-9054-851C9C7FD03A.jpeg 3D90847C-6DA8-4AD1-911A-FCEA12EEE7CA.jpeg 84A610F5-94A5-456B-9C00-04C7F4A75A3F.jpeg BDA28FC1-0DC7-44F1-80CB-183E1365AA44.jpeg 65538B31-9C39-4B6A-A13B-D24E7B21F832.jpeg BD7076EE-B74F-467B-A839-B0AC9CD6CF39.jpeg E4AEA574-C3B7-4C66-AF40-9BEF13326DBA.jpeg 5F2AC9D3-7E22-48F8-ABD1-A6A2254094D5.jpeg
giphy (1).gif


I based my stand for my 75 off the same design, and it's solid :)
 

SpringFever

Community Member
View Badges
Joined
Dec 24, 2019
Messages
26
Reaction score
17
Rating - 0%
0   0   0
Bravo. This design will be much easier to skin, also.

One other thing to consider is a leveling system. I imbedded adjustable leveling legs into the base of my stand. I might be able to snap a picture in the next day or two as I'm in the process of setting my tank back up.
 

Bigtrout

Valuable Member
View Badges
Joined
Dec 16, 2018
Messages
1,189
Reaction score
2,826
Rating - 0%
0   0   0
giphy (1).gif


I based my stand for my 75 off the same design, and it's solid :)
My 75 stand is the same design with the exception of more framing wood in the bottom so that when I add my 40 breeder sump, all 4 sides will be sitting on a 3/4 piece of plywood and the tank edges sitting directly over framing. If you plan on a sump its easy to add that stuff now
 

Managing real reef risks: Do you pay attention to the dangers in your tank?

  • I pay a lot of attention to reef risks.

    Votes: 152 43.6%
  • I pay a bit of attention to reef risks.

    Votes: 123 35.2%
  • I pay minimal attention to reef risks.

    Votes: 53 15.2%
  • I pay no attention to reef risks.

    Votes: 16 4.6%
  • Other.

    Votes: 5 1.4%
Back
Top