IM Lagoon 25 EXT Build

OP
OP
DWill

DWill

Active Member
View Badges
Joined
Jan 11, 2020
Messages
444
Reaction score
375
Rating - 0%
0   0   0
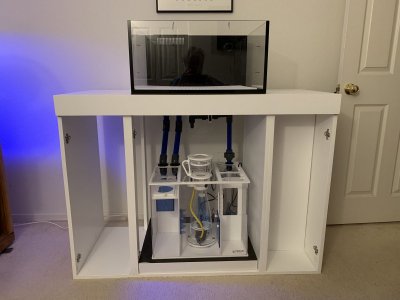
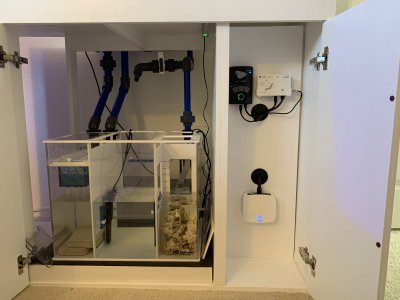
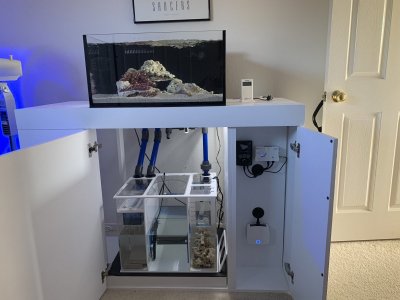
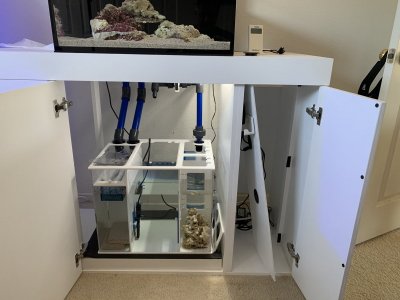
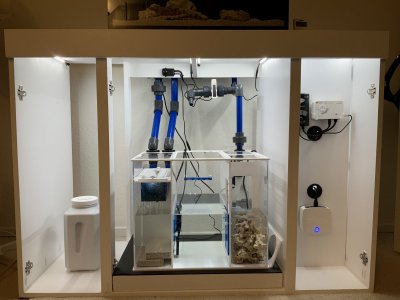
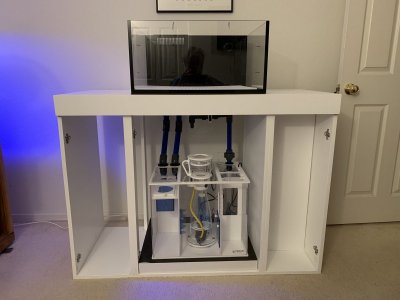
All plumbed and ready for water.

Tomorrow I’ll mount I mount pump control and maybe the MP10 driver. Can’t do too much with the controllers until A: the 10 gallon comes down so I can grab the temp controller from it and B: I decide which controller I’m buying; GHL Apex.

I’ll likely just run the return pump and a heater to cycle the tank. So I’ll probably just mount return pump controller, MP10 driver and leave a space at top for the Bayite Temp controller on the Nuvo 10.

So tomorrow the doors go on and I’ll start making water, though I may go buy some of the water for the cycle.
4E0E90B5-195D-421C-9F74-AC3016CA34B3.jpeg
 
OP
OP
DWill

DWill

Active Member
View Badges
Joined
Jan 11, 2020
Messages
444
Reaction score
375
Rating - 0%
0   0   0
Paint dried on the sump “spacer” and got everything plumbed yesterday.

But… before I pump the tank and sump on the cabinet it was level. After I plumbed it and slid it back into place yesterday it no longer level front to back. It’s close but not level.
Should I level it before I fill it ( easier); or level it when it’s filled or partially filled?

926E5D76-4E43-46FD-9A37-EB48115004D2.jpeg
 
OP
OP
DWill

DWill

Active Member
View Badges
Joined
Jan 11, 2020
Messages
444
Reaction score
375
Rating - 0%
0   0   0
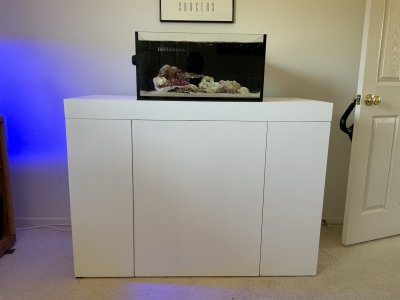
Finally ! The cycle has begun, day one!

Mixed HW Marinemix salt into 33 gallons of RODI in the system Wednesday added the scape yesterday. Let it clear up overnight.

This morning I added a bottle of Dr. Tim’s One And Only and dosed Ammonium Chloride to start the cycle. I took the skimmer out of the sump while the tank cycles. I’ll put it back on and start it up when I start to move things over from the 10 gallon reef.

After letting the tank run since Wednesday there’s a couple things I want/need to change. First the return pump. I finally found a IM mid-size Mighty Jet. I love the smaller Mighty Jet in my IM Nuvo 10. It’s dead quiet. So though I’d use its big brother in the set up.

Well, it’s great pump but it rattles and the flow varies. After talking with IM yesterday it turns out this pump isn’t really up to this application. Even though the specs say it’s good for up to 8’ of head pressure… not so much. So the search for a better return pump begins. I have a Jaebao but it makes a annoying whine. I’ll likely end up biting the bullet and spending the money on a Ecotech pump. Even though my MP10 Quiet Drive isn’t exactly quiet if it’s anywhere above 10%. But I’m told it will quiet down as it breaks in.

I also need to find (or borrow) a used ATO. My plan was to top off manually during the cycle then install the Tunze ATO when I take down the 10 gallon. But… this tank evaporates water pretty quickly and I’m already tired of manual top offs.

I’m also going to add just a little more sand today.

I need to make a decision on a controller. I’m really torn between Apex and GHL. I think GHL is higher quality hardware and more stable and less expensive and easier to add “modules” to. That seems To come at the expense of a steeper learning curve and maybe software thats not quite as user friendly and robust. Apex on the other hand seems to be lower build quality, you need a “module” for pretty much anything outside what’s included in the box or to add anything non-Apex and those are expensive. But the software is good and the learning curve is less steep and there’s a larger installed base here in the US, although that gap seems to be closing some.

if you have any input on either controller please feel free to comment.

Heres a few pics of the progress on the build.

BD7E9C07-B5D9-4569-8068-F9F6B0CB1E74.jpeg C1B0AD9B-BF06-4B8F-9071-C999353E9D0B.jpeg 2ABA3A6E-E49C-46AA-8804-7AE1B08EB354.jpeg
 

zoablasto

Community Member
View Badges
Joined
May 27, 2020
Messages
45
Reaction score
27
Rating - 0%
0   0   0
i'm pretty sure after a couple of months your tank will look really sick! Good luck!
 
OP
OP
DWill

DWill

Active Member
View Badges
Joined
Jan 11, 2020
Messages
444
Reaction score
375
Rating - 0%
0   0   0
The new tank is almost cycled. Ammonia is just over 1.0 ppm and Nitrite is starting to show up. I’d guess another week maybe less and it should be cycled. After the Nitrite is gone I’ll wait for Nitrate to build then do a water and put a couple fish in before tearing down and moving things from the 10 gallon over.

Today I did little work on the new reef.

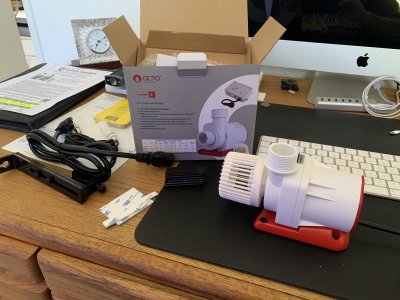
I replaced the mid-size Mighty Jet with a new Varios S2. The Mighty Jet is a great little pump. The smaller one in my 10 gallon is dead quiet. That’s what lead me to get the bigger one for this tank. It turned out pumping from the sump is asking just a little too much of the larger Mighty Jet. It was getting the job down but it was humming and that was making me crazy.

I had some points saved up at BRS so I picked up the Reef Octopus Varios. It’s a little overkill for this size tank, but, it is dead silent. I can’t run it above 2 on the controller or the RFG causes sand drifts in the tank. It doesn’t pick the sand up around, in fact you really. can’t see the sand blowing around. Over the course of a couple hours you start seeing smaller rocks are covered and little drifts of sand in places

So far I’m really glad I spent the money on this pump. It’s just dead quiet. Also whatever controller I end up with it will plug right in to

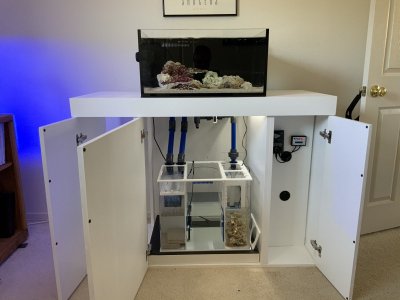
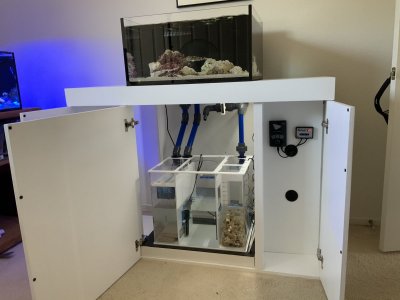
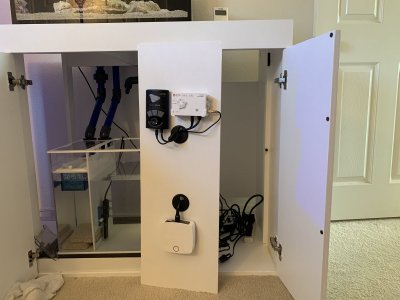
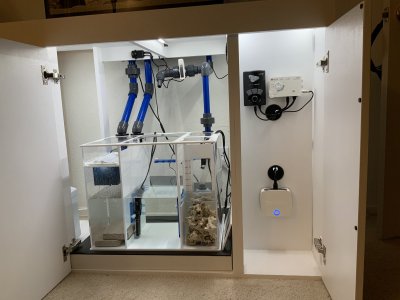
I also did some clean up work on the temporary board in the controller cabinet.

It’s temporary because when I finally decide between Apex and GHL and get it here the board will change. I made a couple of them when the stand/cabinet was built so that I could make changes when I need to.

Today I switched out the pump controller for the new Varios pump. I also mounted the Reef Link, getting it off my desk.

I’d used Velcro strips to hold the board in place originally but that was a not good solution. Today I replace the Velcro with water proof magnets, even though they are on the dry side of the stand. That seems to a better solution. I want The board to be easily and quickly removable and now with the magnets it is.

I need to move the Bayite Temp controller over when I take it off the 10 gallon. That’s what the space in the middle of the board above the Reef Link is for. But, as I mentioned this will all be different when I settle on a controller.

In the mean time I think it is looking and it’s serving it’s purpose.

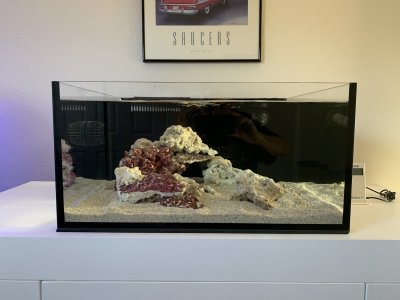
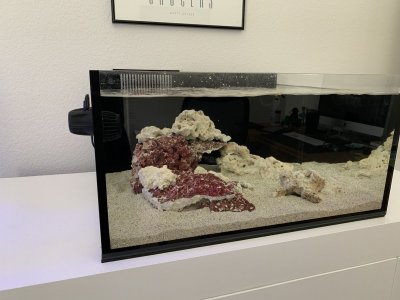
Last, I changed up the scape just a little. I wanted to add a little height in middle section but try to keep the slope up and back down as it makes the turn. So I got out a chisel, hammer and a saw a modified a spare Marco dry rock I had left over and then I epoxied the end pieces on to make the slope down to the right.

My plan is to put a few pieces of SPS on that rock when I have the water parameters stable. l Will be using the Prime 16HD that is on my 10 gallon for lighting hence adding height where I did to move the SPS closer to the light. Though I am considering selling the 16HD and replacing it with a Radion G5 XR15 Pro.

I may have gone a little to high with the scape though, what do you guys think?

It’s easy to modify if I did; that rock on top isn’t glued down. A little work with a chisel and hammer and I can lessen the height some.

Anyway, that’s it for now. I going to enjoy the silence of the Reef Octopus pump then go prep the Mighty Jet for sale.

Next project is installing some LED lights in the cabinet over the sump and in the top off reservoir/reactor area to the right of the sump. Those lights will be controlled by a motion sensor, at least that’s the plan. The controller cabinet lights will be on a door switch.

I also need to Get the skimmer in and start the process of breaking it in and adjusting it. I think I’ll wait until I put fish in the tank for that though or at least until the cycle is done. When would you suggest I start the skimmer?

1660C3E0-CCCC-4F5C-BA4E-48CA42C4B285.jpeg 704161D6-8368-427E-927C-D504F1670B38.jpeg FC6F5FC6-9311-439A-B576-F70FA04C15F8.jpeg 2D0A4F22-6AEE-4DB8-A6CA-156179CAB185.jpeg 872C5C5C-7B00-45F9-AB29-F6C60FD301E9.jpeg 4CE46452-4E92-44A3-BCBC-48AE7912169B.jpeg 9996F3BE-EDB0-4669-8981-53FE6C604964.jpeg 71977105-7406-4C72-9DA5-91829D6FB711.jpeg
 
OP
OP
DWill

DWill

Active Member
View Badges
Joined
Jan 11, 2020
Messages
444
Reaction score
375
Rating - 0%
0   0   0
Let there be light…

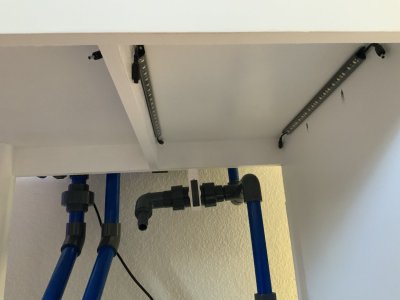
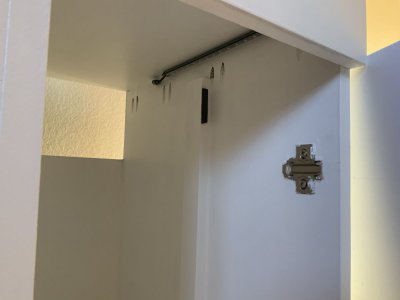
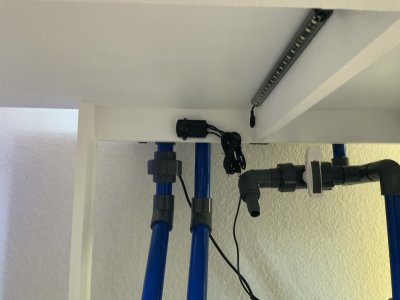
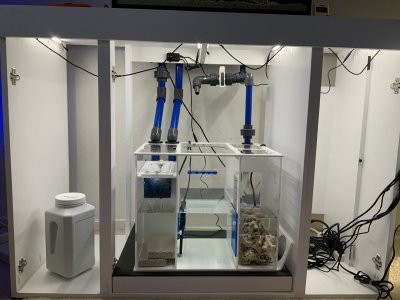
Tonights project putting LED lights inside the cabinet.

My goal was to have plenty of light for working in the sump/ATO reservoir area and enough light to be able to see and read switches, buttons, dials etc. in the controller cabinet. I’m not too interested in having color LED’s in the cabinet, I just wanted bright light and wanted something a little better quality than the typical China made rolls of LED’s.

i also want separate circuits, one for the sump/ATO reservoir area and one for the controller cabinet. That controller cabinet is separated by a ”wall”. The other requirement is I want the lights to come when I open the door(S) and go off when the door(s) is closed. I don’t want to have to turn them on and off with a switch and I wanted the lights when any single door was opened.

After asking for some advice on how best to accomplish this in another forum here on R2R and on #AskBRSTV group on Facebook group the consensus was that using motion sensors would be better than door switches. So I set off on Google to search out what I needed and of course ended on Amazon to reading through info on lots of products.

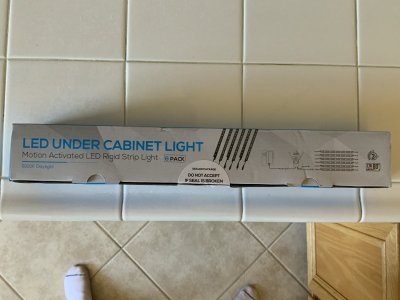
After a few hours of searching and reading I decided on these lights.

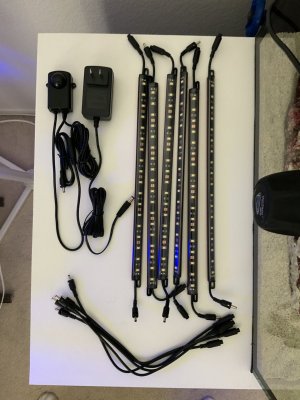
TORCHSTAR LED Safe Lighting Kit, (6) 12 Inch Linkable Light Bars + Motion Sensor + UL Power Adapter, Under Cabinet, Gun Safe, Locker, Closet, Under Counter, Shelf, Showcase Lighting, 5000K Daylight


The company is located in LA so I was able to call them and order a additional motion switch and power supply so that I can set up two independent sets of lights.

I ordered the lights late Monday night and they were delivered before noon today (Tuesday) you gotta love Amazon. I called the company in LA today at about 1PM and ordered the power supply and switch. Those will be here tomorrow, okay Today (Wednesday) as I’m writing this.

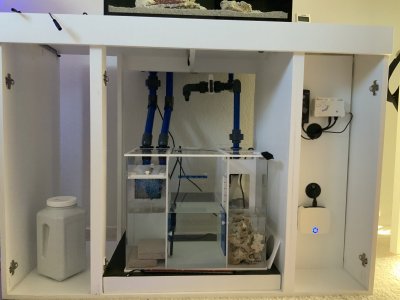
Tonight I installed the lights in the stand/cabinet. They are pretty much plug and play so it only took a little more than a hour. Tomorrow when the other parts get here I’ll separate the lights in the controller cabinet and put them on their own power supply and switch. Then I’ll finish up cable management so wires aren’t hanging down in the back behind the sump.

The thing to be aware of with these lights is that are not water proof. They are water resistant though. I’ve mounted them using the double sided tape that came pre-installed and I used small stainless wood screws in the slots built into the lights for that purpose. They won’t come down and the water resistance rating is high enough that humidity and any minor splashing won’t hurt the lights or wires.

A really nice feature of the lights is the cases are made with 45° angles allowing the lights to be mounted flush into the corners. Both sides of the angles have pre-installed 8lb Scotch double sided tape. The tape holds the lights in place on both the side and the top of the cabinet. The small screws screw into the side wall.

When any of the doors are opened the lights come on instantly. They will stay on as long as the motion switch senses motion. When you close the door(s) the lights go off after 2-4 minutes. As you can see from the pictures there’s plenty of bright white light. I chose 5000k color temp, they also come in 3000k (I Think) that would be a little more yellow light.

The tank has been running for two weeks. It’s just about cycled already. I dida fishless cycle using Ammonium Chloride and Dr. Tim’s One and Only. I suspect it will be another week to 10 days before I can move over from the 10 gallon reef.

I still need to put the skimmer in and get it broken in and adjusted. I also need to put the two new heaters in but I can’t do that until I can take 10 gallon reef down. I need the Bayite temp controller that’s on that reef.

So there’s still a list of things that need to done.

A quick question. When would it best to start the skimmer up and start the break in process; should I start it as soon as the cycle is complete or should I wait until I put livestock in the tank ?

Heres a few pictures of today’s project. As always comments, constructive criticism and suggestions are welcome.

49D31219-150F-41FE-8B09-7F4FA31B0752.jpeg 13D576B9-A803-419A-B03C-E080F43C062C.jpeg 07D33FD5-D0AC-4FB0-B52C-F1A64821CE8E.jpeg D55BA8D2-EACD-406B-9A94-6D73C6307E9D.jpeg 2AF9B226-23FA-4805-9BCB-8898C8DA38B9.jpeg 5E13324C-6331-479A-8DAC-CC834EE25B54.jpeg 25F7E3ED-4414-4174-926F-C2E88264507F.jpeg C317669B-2B28-42B5-ACDF-844A24F4274E.jpeg F18AFA76-AFB4-4404-9691-06B838EA8FAE.jpeg 7BFF4BC6-CF74-48DA-A40E-8BC4CDF1E92A.jpeg
 

Clr

Active Member
View Badges
Joined
Nov 29, 2015
Messages
158
Reaction score
10
Rating - 0%
0   0   0
Awesome build thread !
I just bought the same tank, how do you like the sump ? Run silent ?
 
OP
OP
DWill

DWill

Active Member
View Badges
Joined
Jan 11, 2020
Messages
444
Reaction score
375
Rating - 0%
0   0   0
Awesome build thread !
I just bought the same tank, how do you like the sump ? Run silent ?
Yes. With the reef Octo Varios 2 it is dead silent. The only thing I hear is a very slight trickle of water dripping from the filter gloss. I’ll be switching to filter socks in the next few days that trickle sound should be gone then as well.


Hopefully when I start up the skimmer it’s also quiet. It should be, it’s got a Sicce pump. But of I hear it at all I’ll be switching to Reef Octo DC skimmer.
 

Clr

Active Member
View Badges
Joined
Nov 29, 2015
Messages
158
Reaction score
10
Rating - 0%
0   0   0
They have the plastic filter cups you can put floss in and that would make maintenance easy and potentially prevent that dripping noise ?
 
OP
OP
DWill

DWill

Active Member
View Badges
Joined
Jan 11, 2020
Messages
444
Reaction score
375
Rating - 0%
0   0   0
They have the plastic filter cups you can put floss in and that would make maintenance easy and potentially prevent that dripping noise ?
Thank you for the info. I already have 10 filter socks. I use filter socks in my current 10 gallon.

i don’t mind changing them out every few days. But, I do plan to get two cups to use when I’m gone and my son is watching the tank. It’ll be a lot easier and a lot less messy for him to just swap out flow a couple times a week.
 
OP
OP
DWill

DWill

Active Member
View Badges
Joined
Jan 11, 2020
Messages
444
Reaction score
375
Rating - 0%
0   0   0
Question.

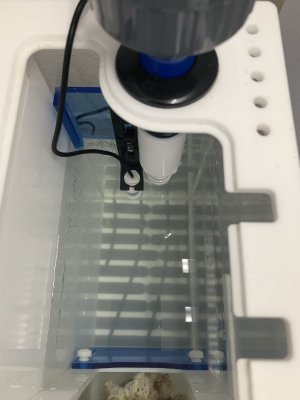
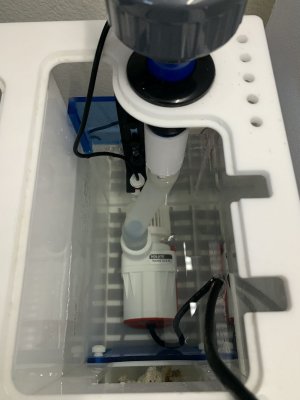
This is my first tank with a flow pump. I’d like to put it on the back wall so the pump blends in to the back of the tank and the motor is out of sight on the back side of the tank.

But, I don’t know if that’s a good idea for flow in the tank. Would it be better to leave it where it is as far as flow? Would it be okay on the back bouncing flow off the front glass?

I plan to keep mostly LPS with a few SPS up on that night rock.

Also I will tie the motor wire down correctly when the pump is in its permanent place. I just put the pump where it is for a little flow while the tank cycles until I determine where best to put it.

I need to do that soon though, the tank
Is nearly cycled.

43FE0EB8-5DFE-4501-9EA1-467092279C2C.jpeg
 

Mastiffsrule

Where ever you go, there you are, so be nice 2 you
View Badges
Joined
Feb 10, 2019
Messages
8,440
Reaction score
33,571
Location
Charlotte
Rating - 0%
0   0   0
Evening

Really nice build. Rock work came out great. The wavemaker can be put anywhere. It would be best on a side wall for flow across the tank. Stand came out great, looks like it may even hold a 180. :D
 
OP
OP
DWill

DWill

Active Member
View Badges
Joined
Jan 11, 2020
Messages
444
Reaction score
375
Rating - 0%
0   0   0
Evening

Really nice build. Rock work came out great. The wavemaker can be put anywhere. It would be best on a side wall for flow across the tank. Stand came out great, looks like it may even hold a 180. :D
Thanks for feedback... I made the stand a little larger than necessary for the tank. I wanted everything underneath and inside with room to work and a controller cabinet as part of the stand. And, you never know about upgrades... :)
 

Daniel@R2R

Living the Reef Life
View Badges
Joined
Nov 18, 2012
Messages
37,551
Reaction score
64,102
Location
Fontana, California
Rating - 100%
1   0   0
great work all around!!
 
OP
OP
DWill

DWill

Active Member
View Badges
Joined
Jan 11, 2020
Messages
444
Reaction score
375
Rating - 0%
0   0   0
I could use some advice please.

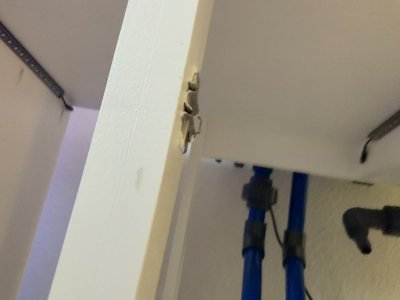
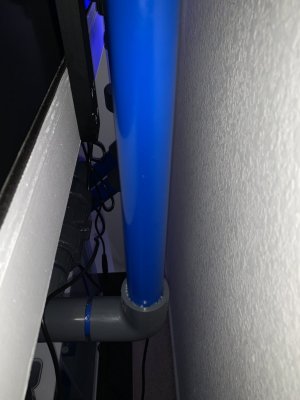
Salt creep… I cleaned this elbow off before I took the took the pic, wasn’t thinking, shouldn’t have gone that.

Anyway, as you can see there is salt creep around the joint. The joint statement a completely dry, no water and no sign of any water above or below.

So, how’s the salt get there. Could it just seeping very slowly and evaporating? I’ve watched it for two days and haven’t seen any water or even a sign of water.

The segment of pipe is easily removable. There’s unions above and below that fitting. I can use a hypodermic needle and put PVC into the joint, let that dry and put a little more around the joint.

But do I need to do that? In general does salt creep mean a leak?

I’m kinda at a loss here. That’s the return line so it under pressure.

Any advice is appreciated.

Thank you.

3D9B9641-8776-4941-9A26-8CB38BE9A0E7.jpeg
 

Clr

Active Member
View Badges
Joined
Nov 29, 2015
Messages
158
Reaction score
10
Rating - 0%
0   0   0
I could use some advice please.

Salt creep… I cleaned this elbow off before I took the took the pic, wasn’t thinking, shouldn’t have gone that.

Anyway, as you can see there is salt creep around the joint. The joint statement a completely dry, no water and no sign of any water above or below.

So, how’s the salt get there. Could it just seeping very slowly and evaporating? I’ve watched it for two days and haven’t seen any water or even a sign of water.

The segment of pipe is easily removable. There’s unions above and below that fitting. I can use a hypodermic needle and put PVC into the joint, let that dry and put a little more around the joint.

But do I need to do that? In general does salt creep mean a leak?

I’m kinda at a loss here. That’s the return line so it under pressure.

Any advice is appreciated.

Thank you.

3D9B9641-8776-4941-9A26-8CB38BE9A0E7.jpeg


I wouldn’t worry about it , if it’s not leaking then it should be fine. Whatever small gap there was the salt creep sealed it.
 

When to mix up fish meal: When was the last time you tried a different brand of food for your reef?

  • I regularly change the food that I feed to the tank.

    Votes: 24 26.4%
  • I occasionally change the food that I feed to the tank.

    Votes: 33 36.3%
  • I rarely change the food that I feed to the tank.

    Votes: 27 29.7%
  • I never change the food that I feed to the tank.

    Votes: 6 6.6%
  • Other.

    Votes: 1 1.1%
Back
Top