I have had the “Saltwater Addiction” for the last 9 year and I have never done a formal build thread so I figured it was about time (I did have a thread over on that other forum until I was removed by the admin…) My addiction started with a 24 gallon AIO tank, I told myself that a small all in one tank would be all I needed. Boy was I wrong! I bought a Red Sea Max not four months later. Now I had two saltwater tanks within a few months. The 24 gallon was a mixed reef of softies and LPS and the RSM was a fish only tank. I soon found out that the 24 wasn’t going to cut my coral addiction so I sold the 24 to a close friend that always wanted to try saltwater, sold the fish that wouldn’t work in a reef and made the RSM a reef tank.
This fed my addiction for a few years with my HUGE upgrade stuck in my head once I purchased a new house…. Fast forward a couple years, I purchased a new home with the perfect location for a 400-500 gallon peninsula tank. The wife was on board with the plans until we spent all our money on the house remodel (Something I said I would never do again after my last house but we couldn’t pass up on this house). The plan was to remove a closet that was a divider between the living room and the dining room but finances were not going to allow it.
Included in the plan for the big tank was to have a main display on the main floor with a fish room in the basement. Since the big tank wasn’t going to happen for a while (Still about 8 years out currently since we have decided to do it after the youngest is out of the house) we decided to go with a 75 gallon tank in the living room but it still allowed me to have the tank on the main floor and a basement fish room.
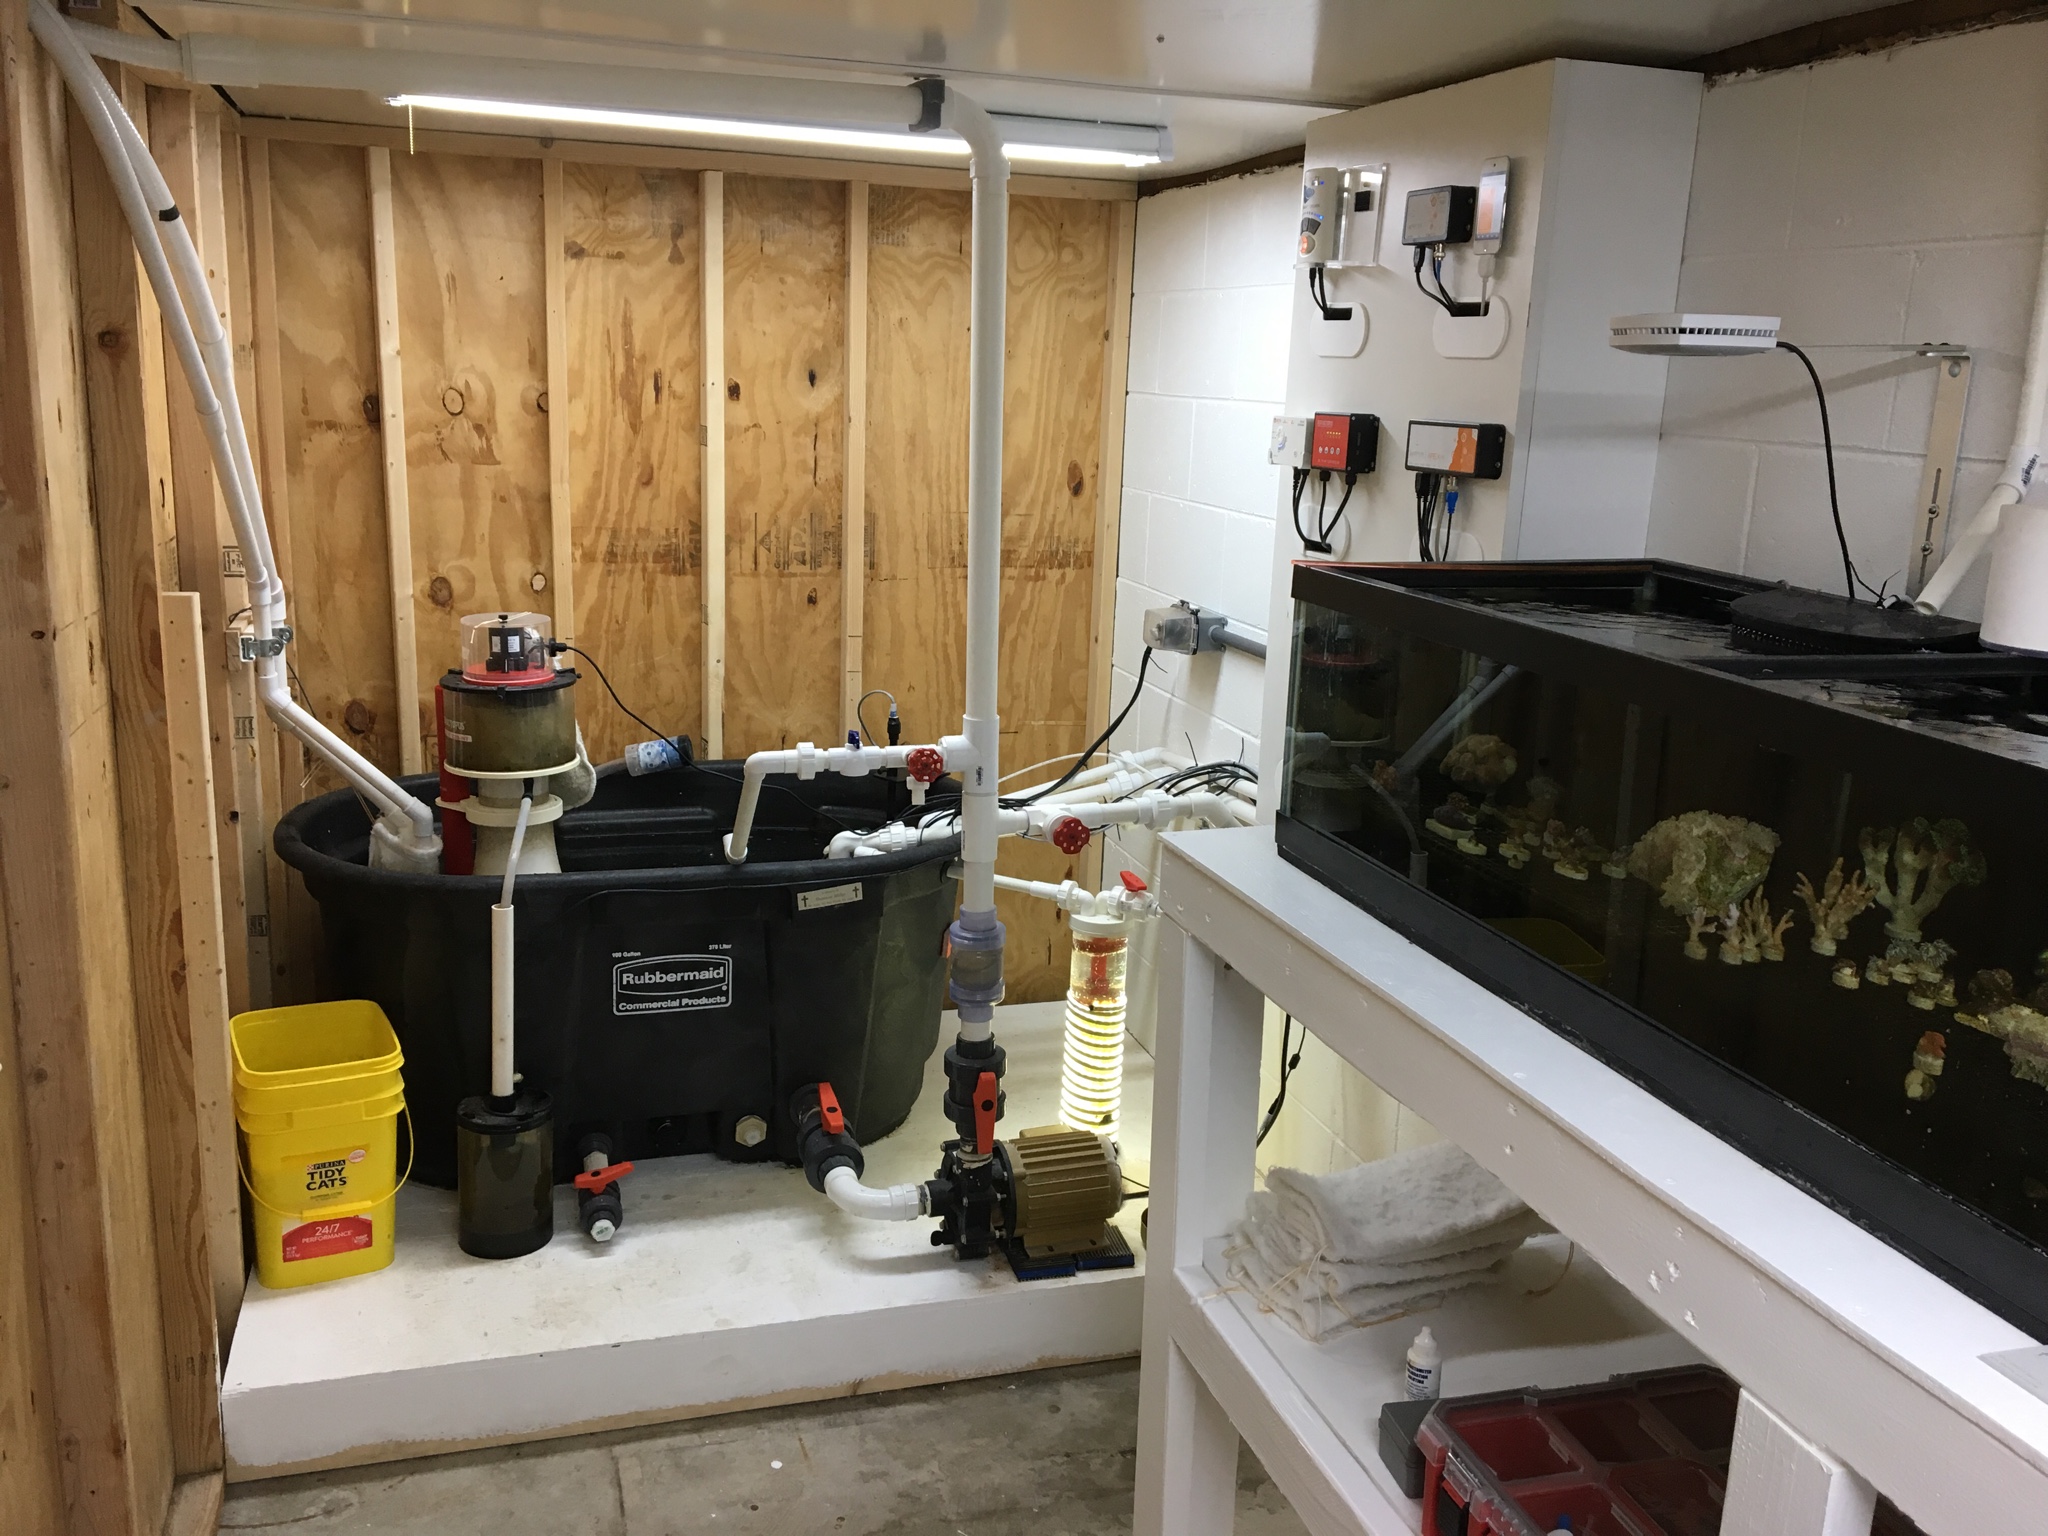
I bought a 75 gallon reef ready tank and made a stand out of 2x6’s, bought a 100 gallon Rubbermaid tank for a sump and started to plumb the system.
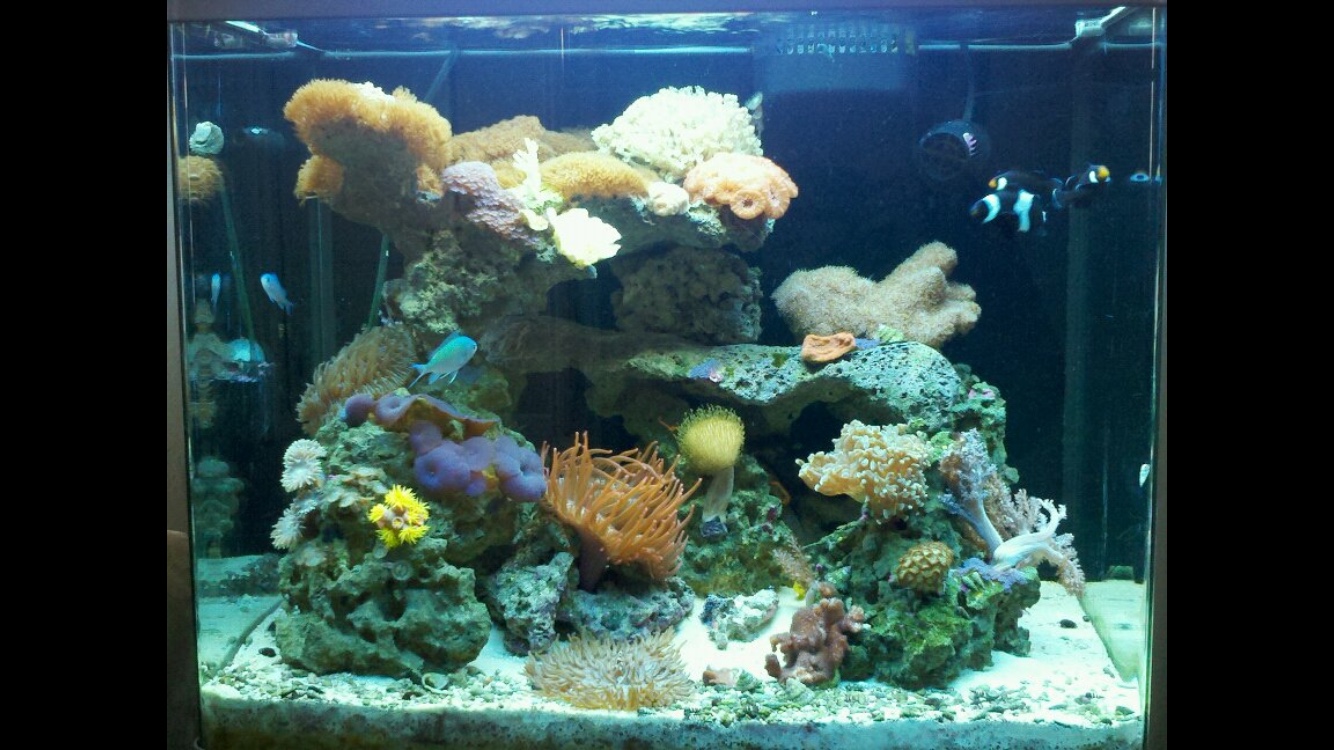
I was completely happy with the outcome, until stuff in my basement started to rust and have saltwater spray all over it. I soon found out that the sump area needed to be in a room to contain the spray and humidity. I built some walls and purchased a cheap door for the room for the time being. The tank did great over the next few years and was full with corals, about a 50/50 mix of sps and lps and some z/p’s mixed in until I had a long work trip and was gone for 80 days. My tank ended up crashing during my work trip and all my sps died and about 50% of the LPS.
I was sick when I got home and saw the final damage. I removed a five gallon bucket of sps skeletons and about a half of one of LPS. My wife is great at feeding the tank and so forth when I am gone but she is so busy that I don’t lean on her to take care of most of the “Behind the scene” items (She did however rebuild a pump for me once at midnight while I talked her through it on facetime because I was gone for work so she is competent of doing such when in a crunch)
After the crash I lost a lot of interest and kind of put the tank in “Auto” mode, which was basically me neglecting it. I didn’t have any delicate corals left and I was at wits end. I neglected it to the point that I had a red bubble algae infest that took over the tank and I had no choice but to start over. So last fall I completely tore down my system, I removed all my coral and sold 90% of them since I wanted to start over fresh but there were a couple that have been with me since the early beginning that I still enjoy.
I bought a bunch of pukani rock from a friend that had recently tore his 400+ gallon tank down.
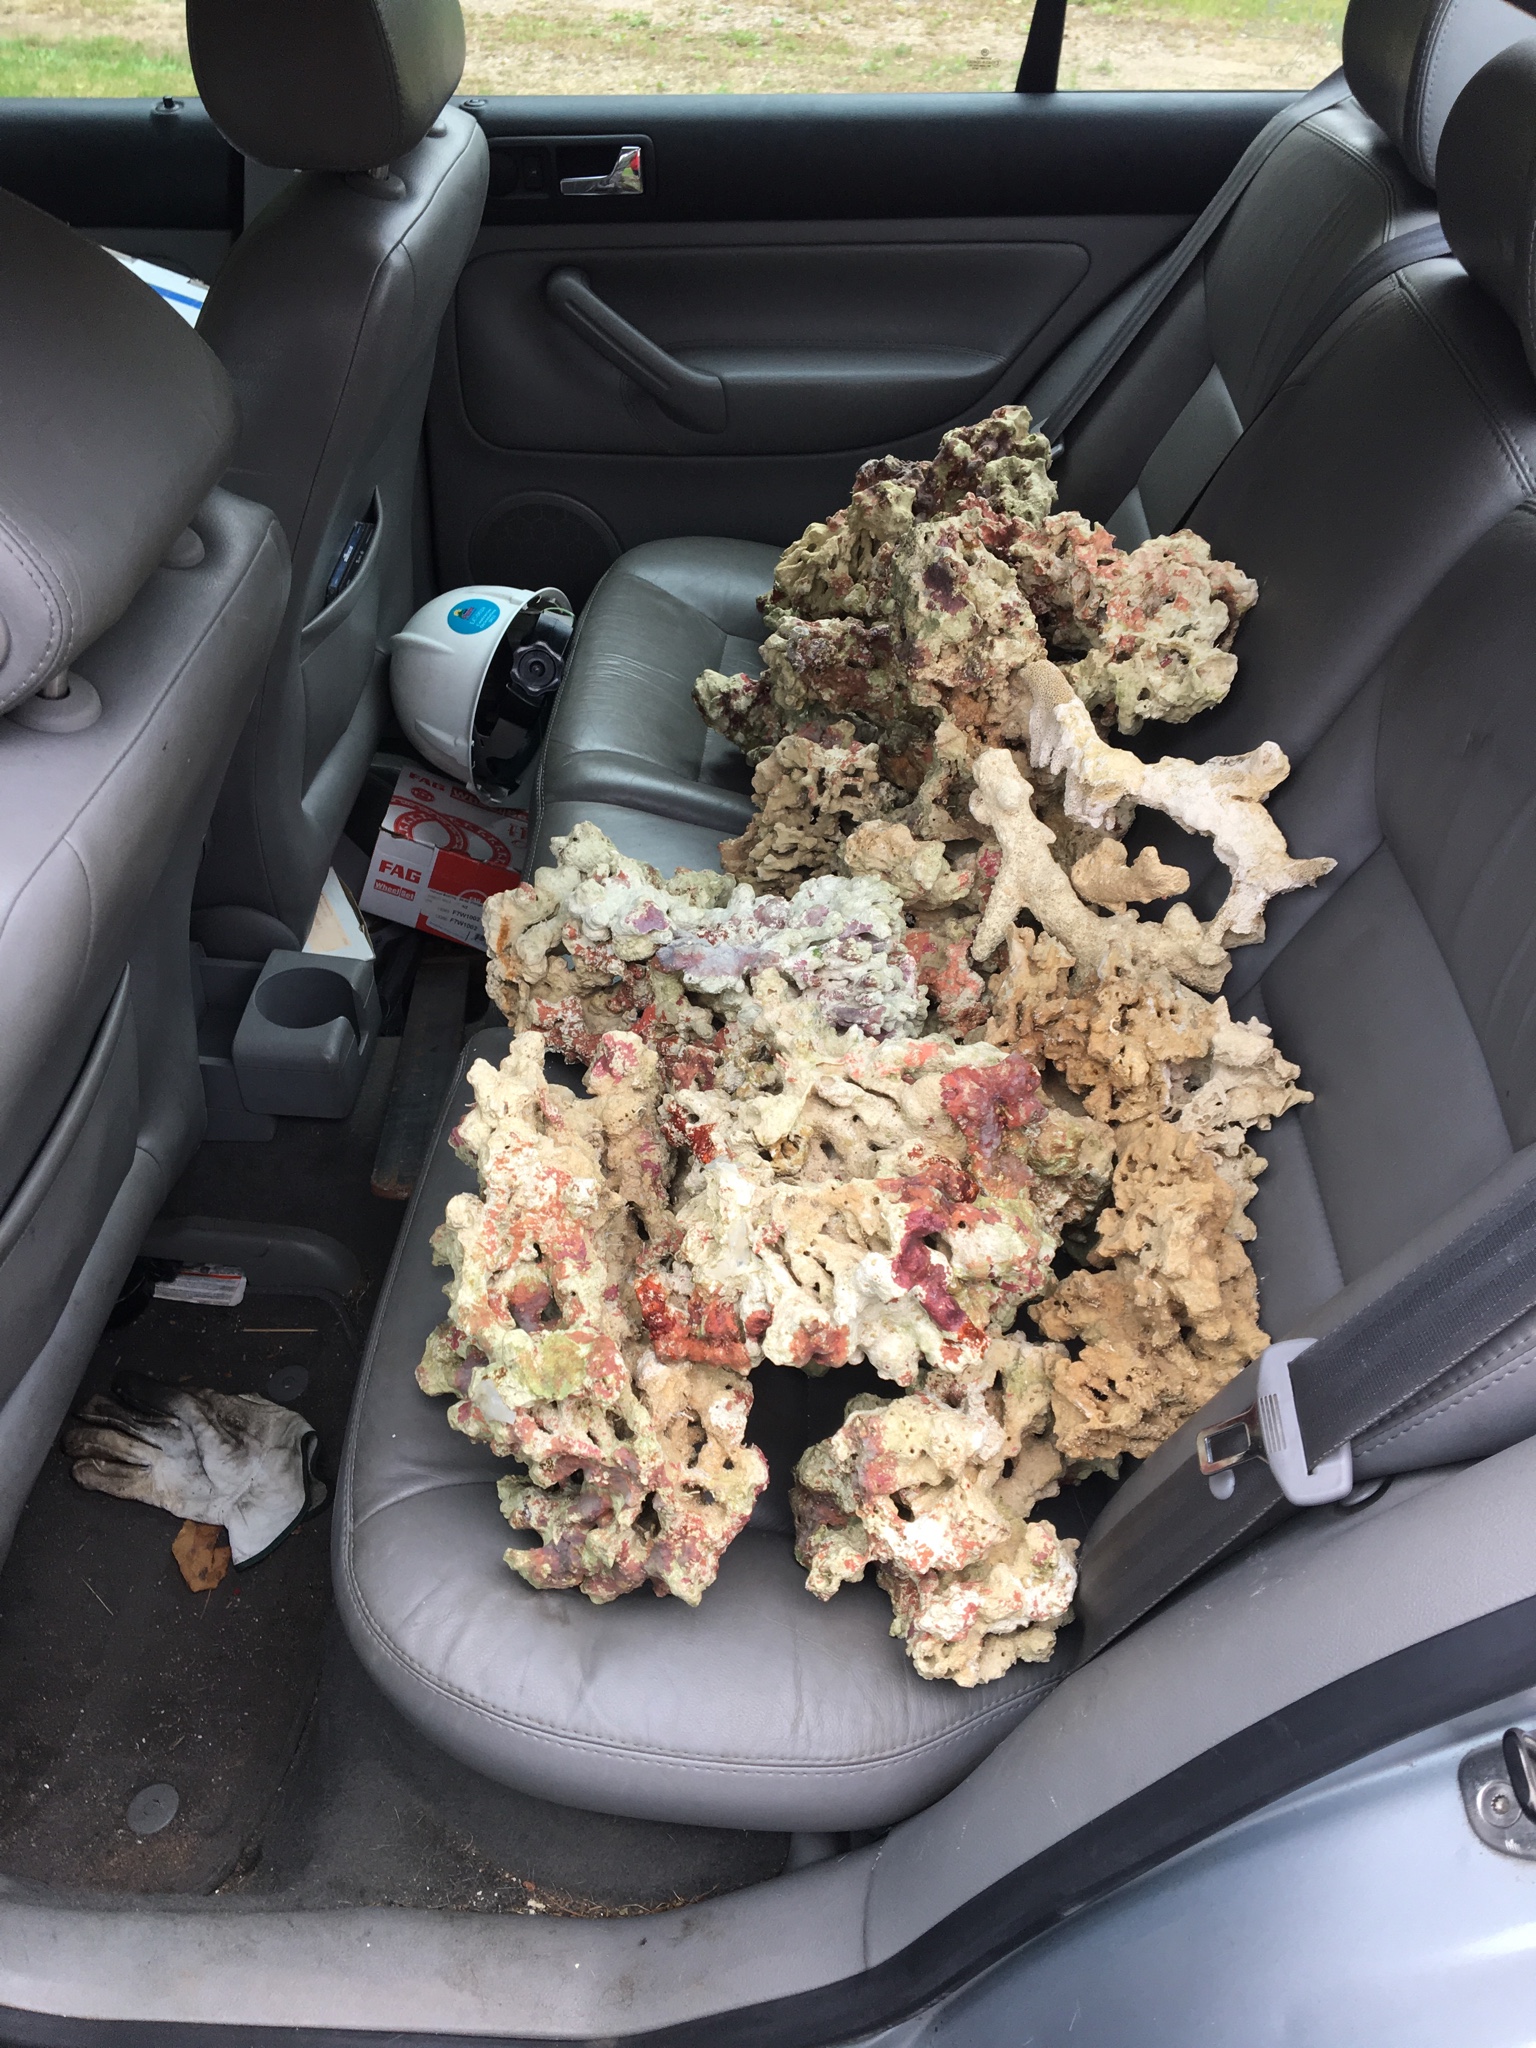
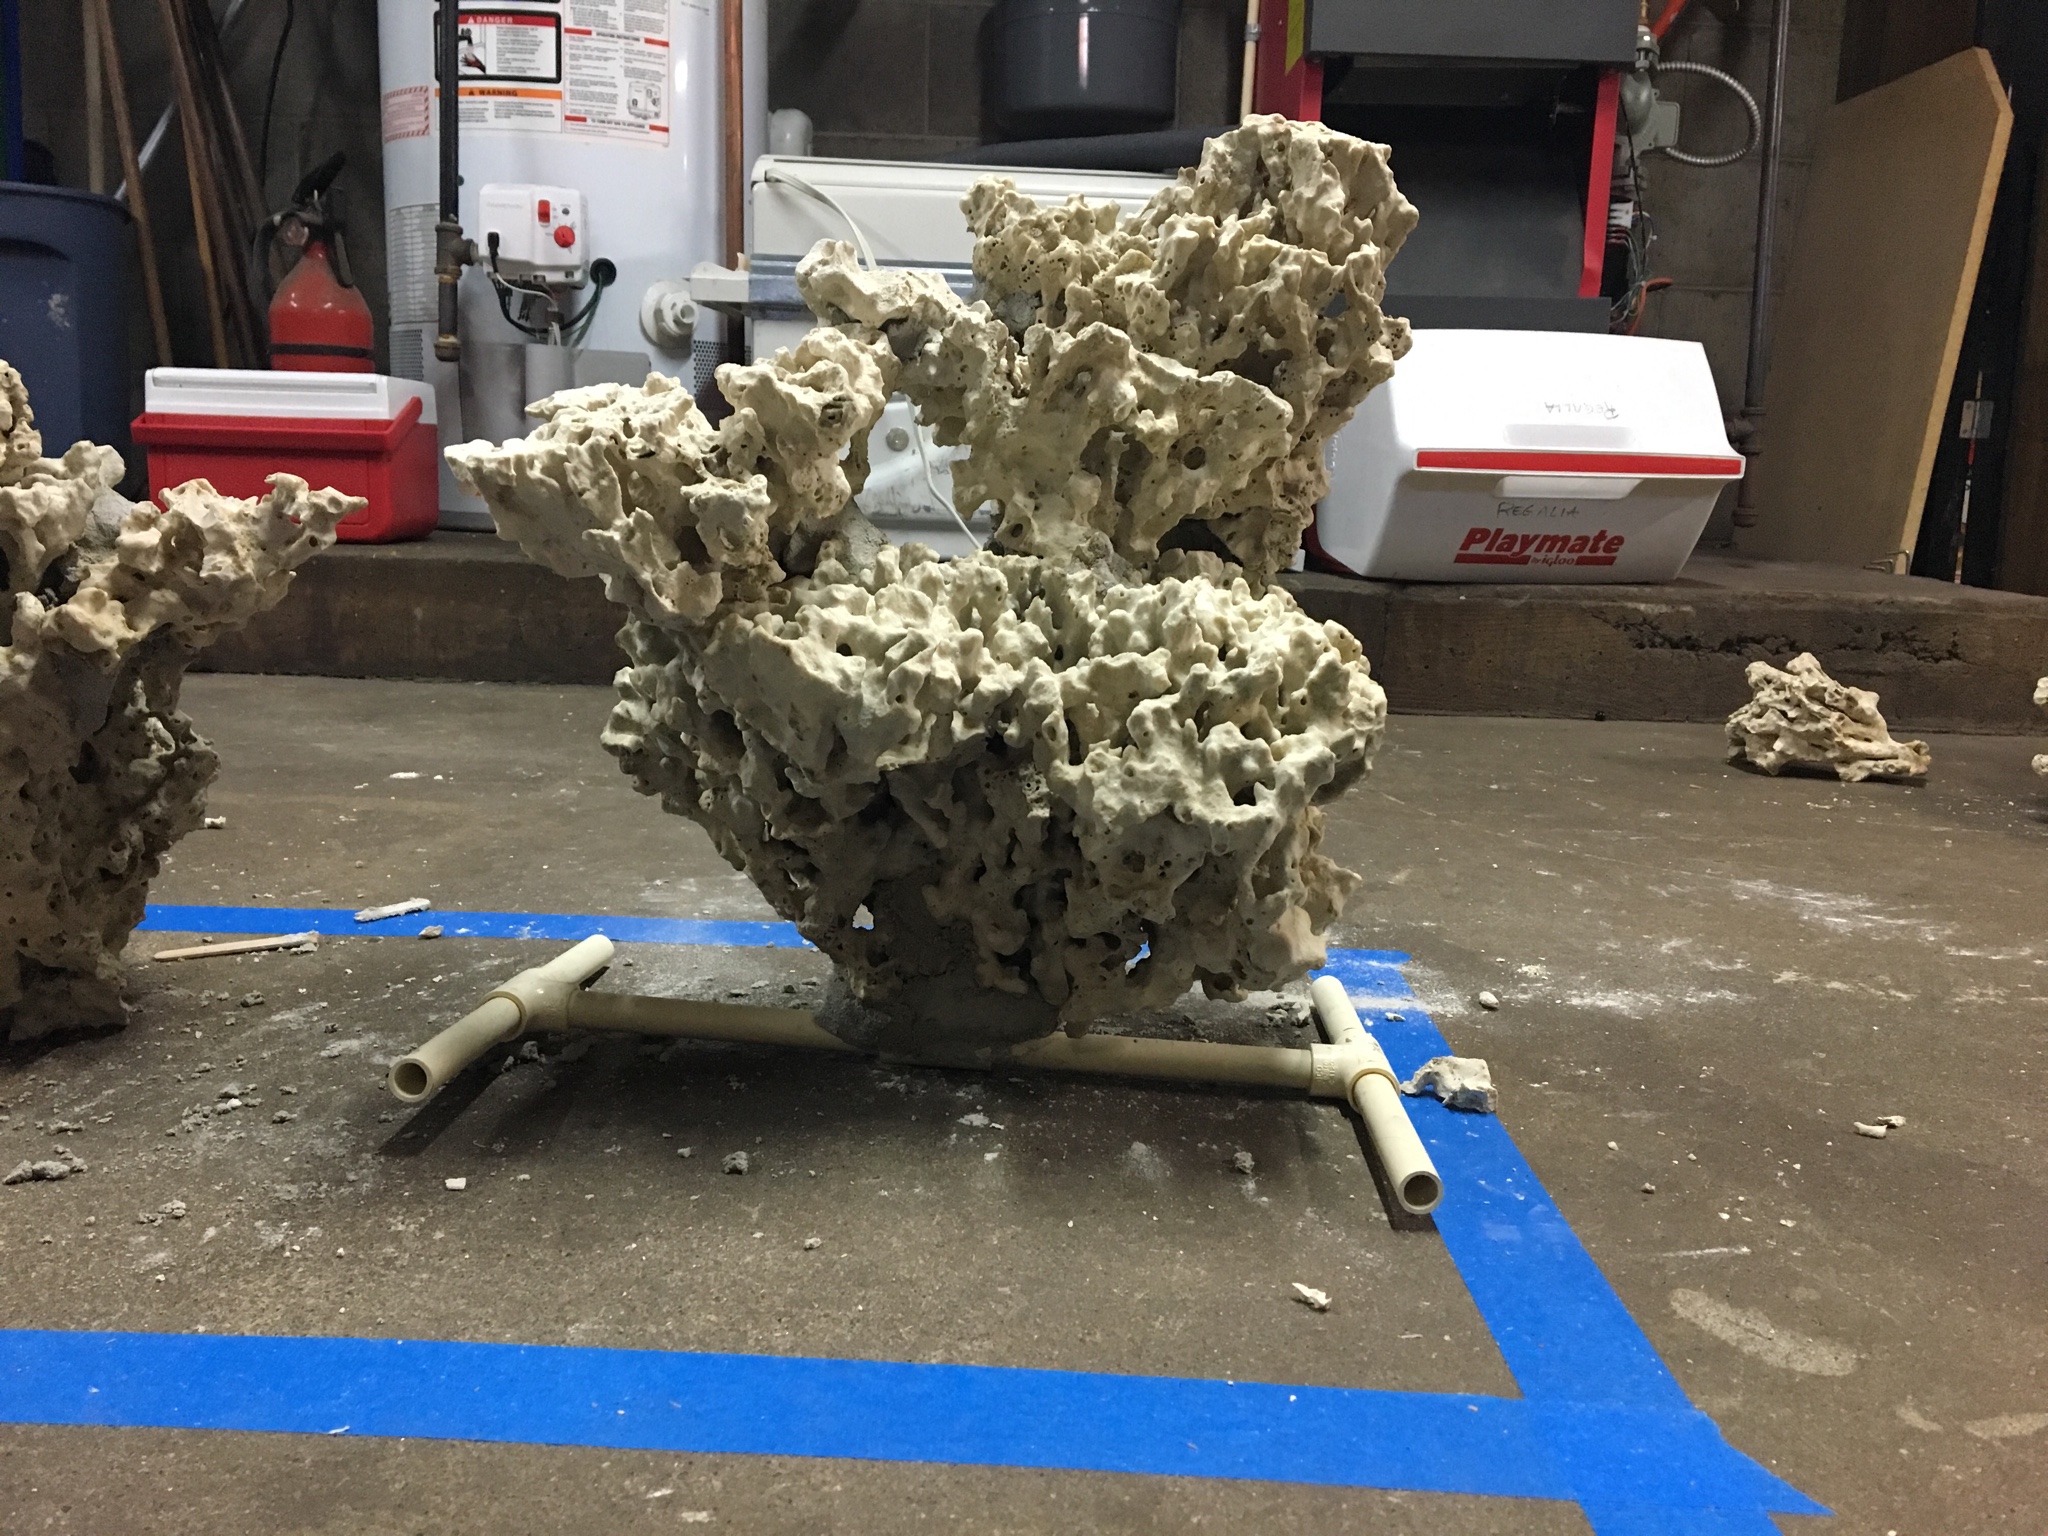
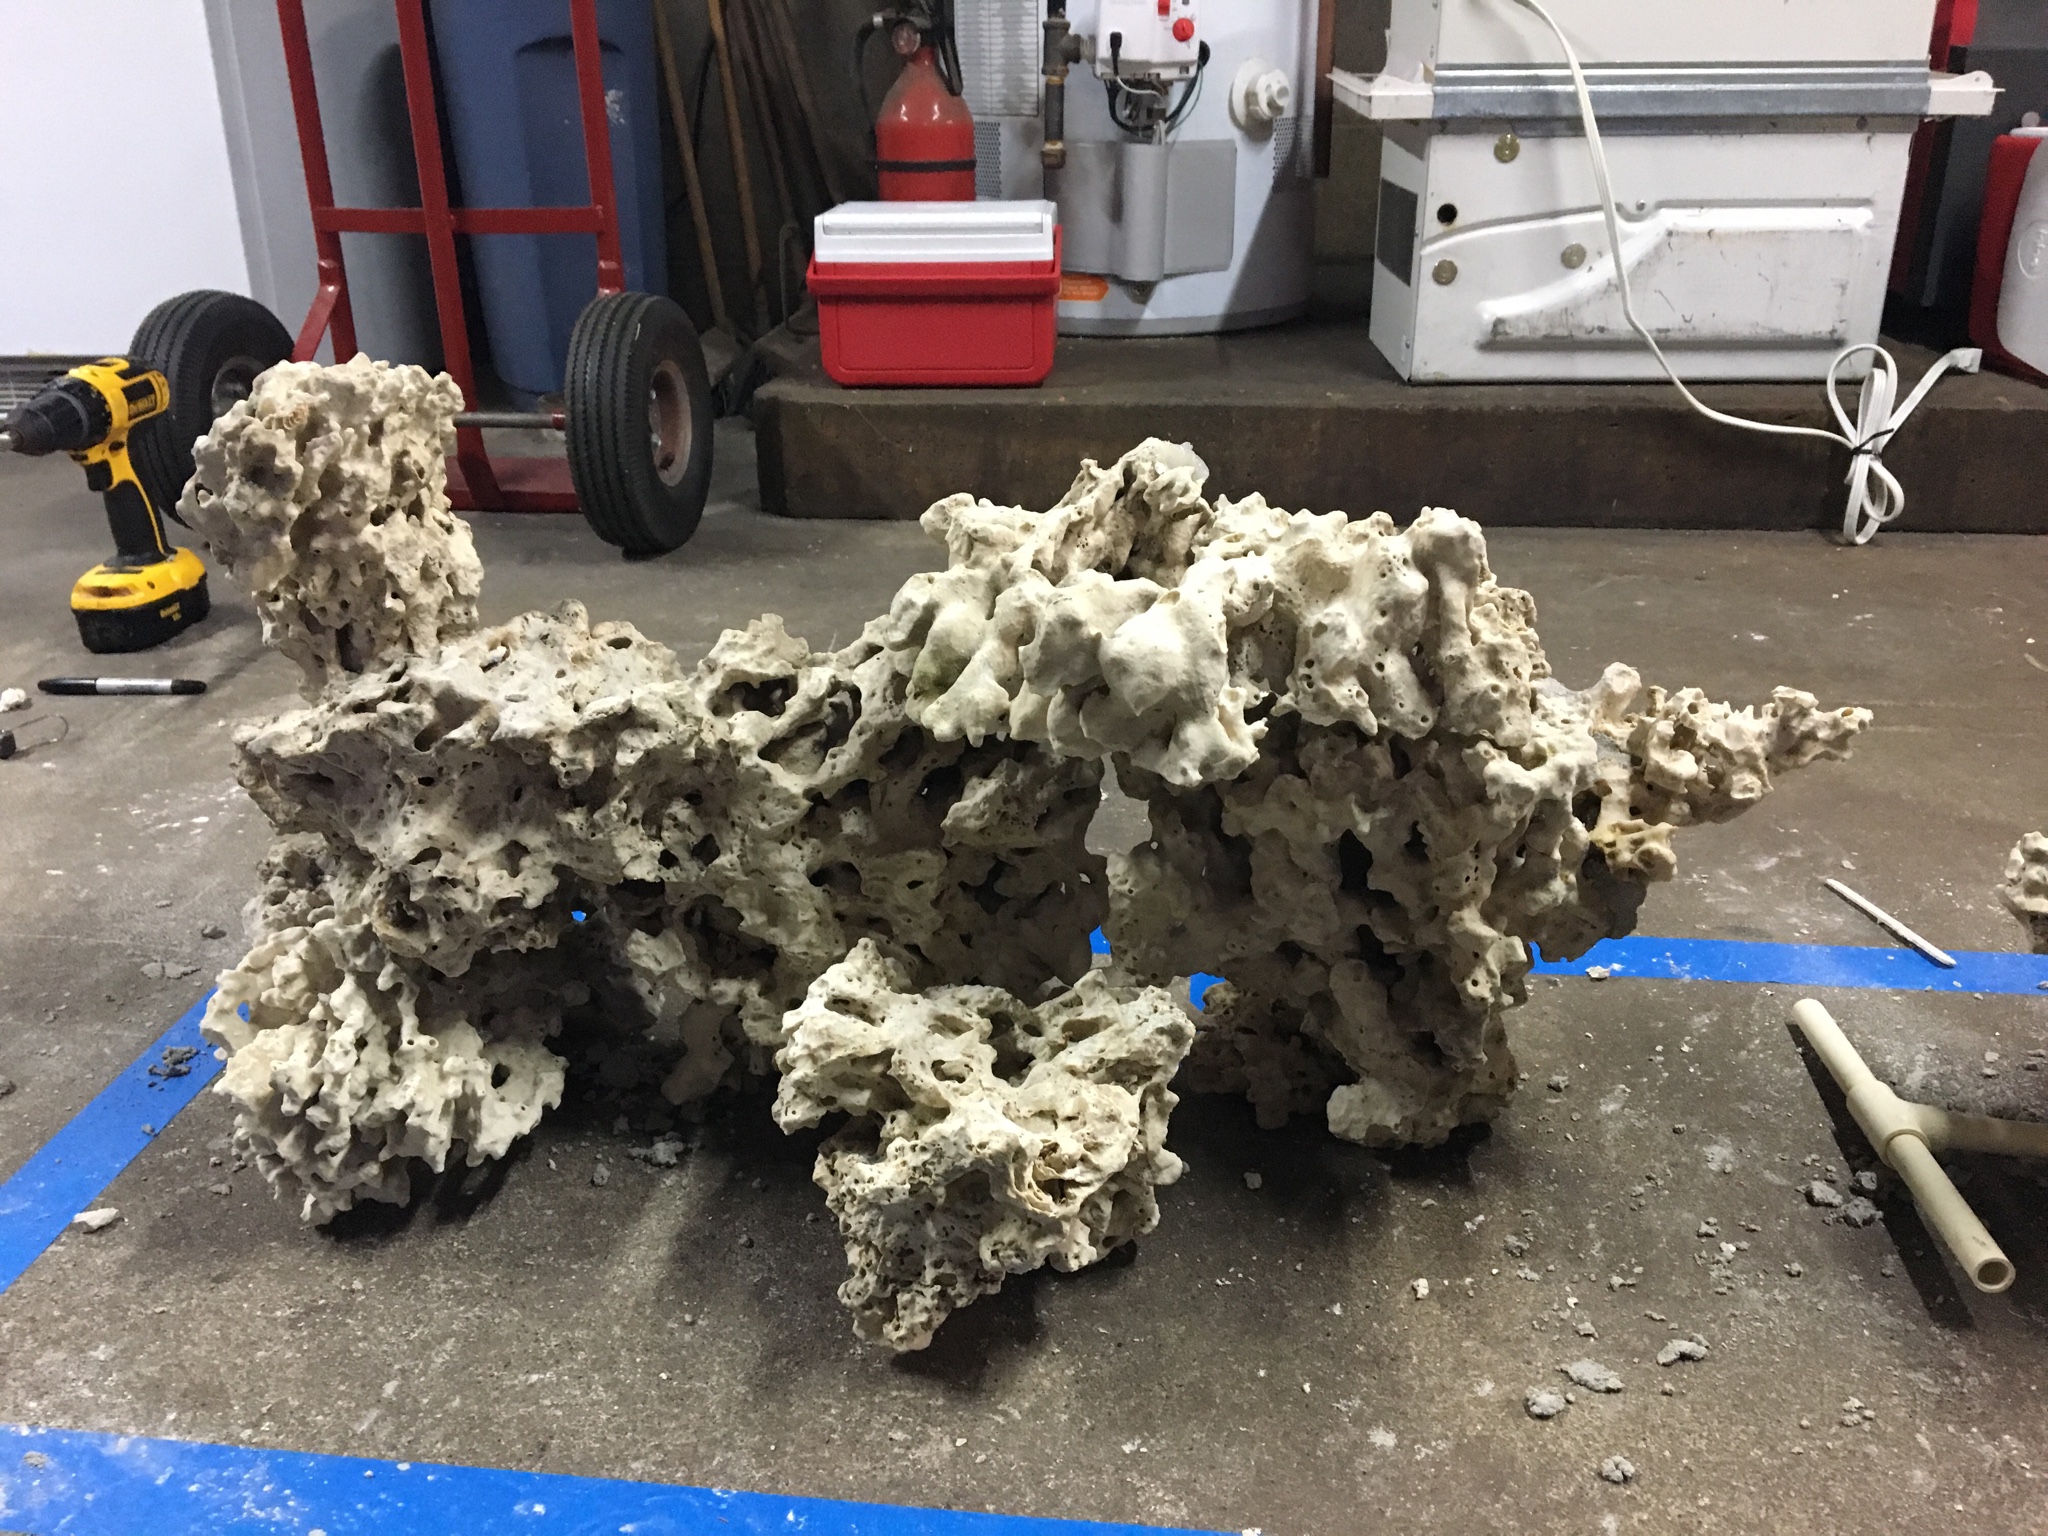
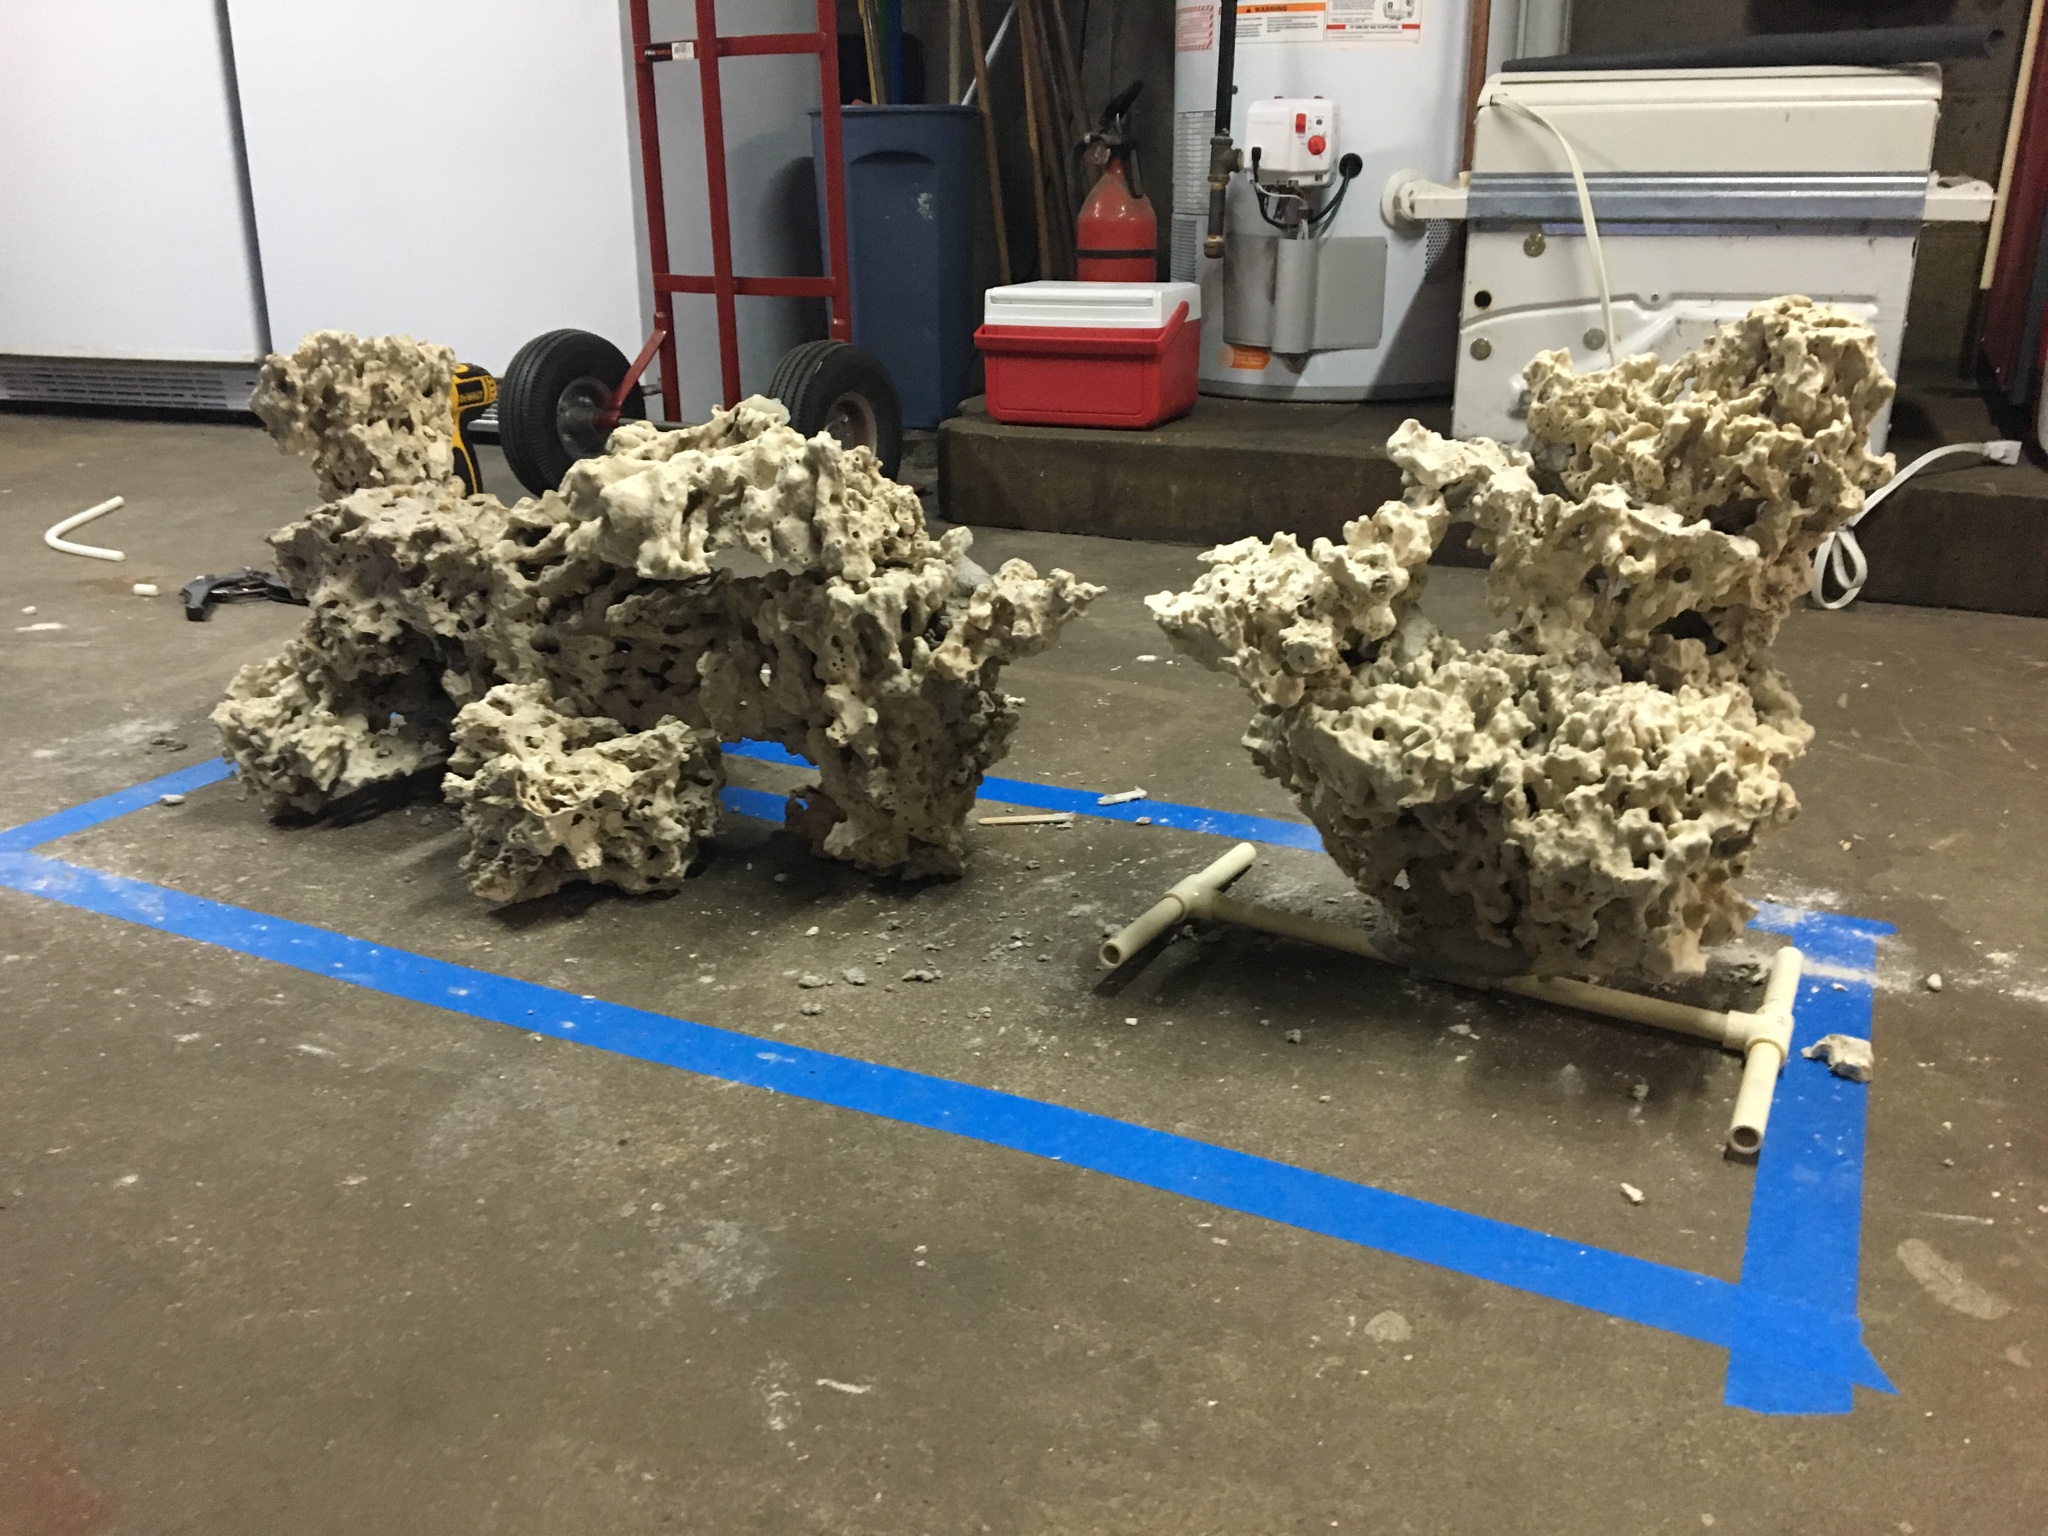
I did two complete acid washes of the rock even though I know he didn’t have any pests in his tank but I wanted to start the tank with as clean of rock as possible. My wife and I then created a rockscape on my basement floor using some tape on the floor as a guideline of the tank size and overflow location. We used Marco Rocks E-Marco 400 and acrylic rods to hold the scape together.
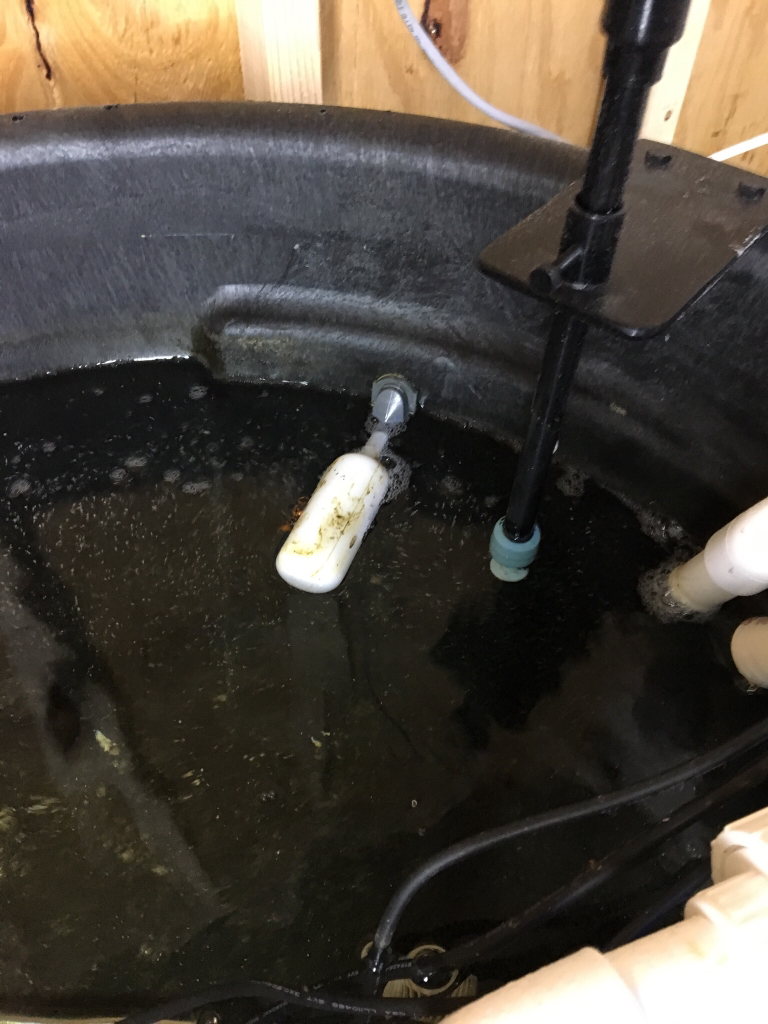
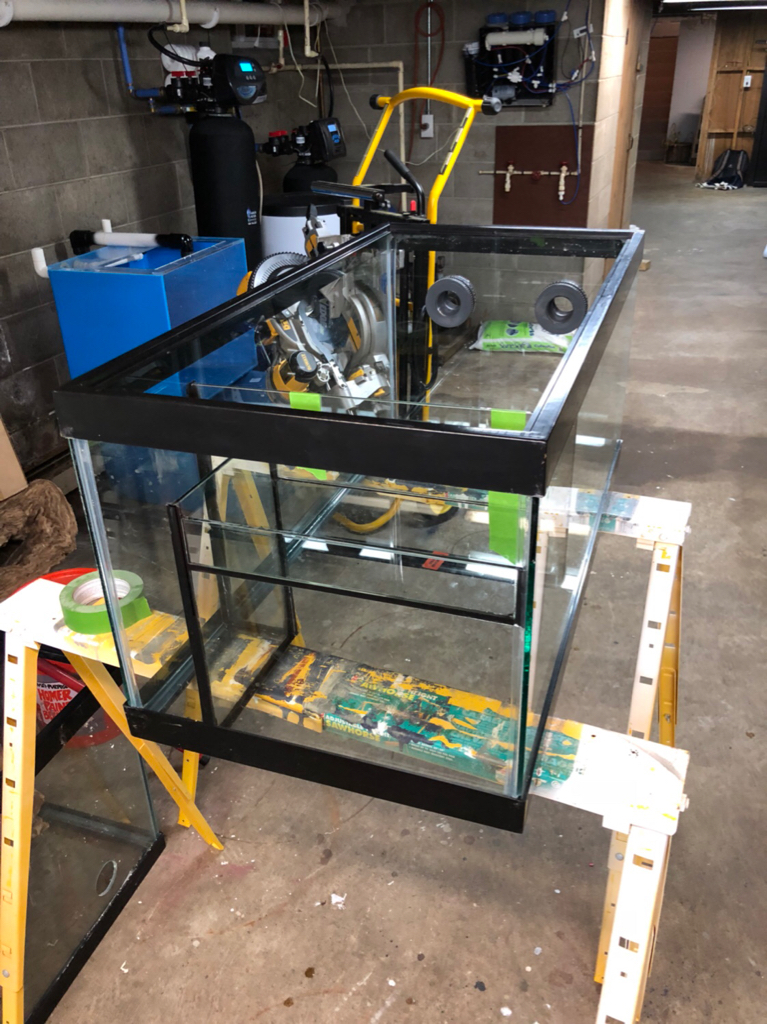
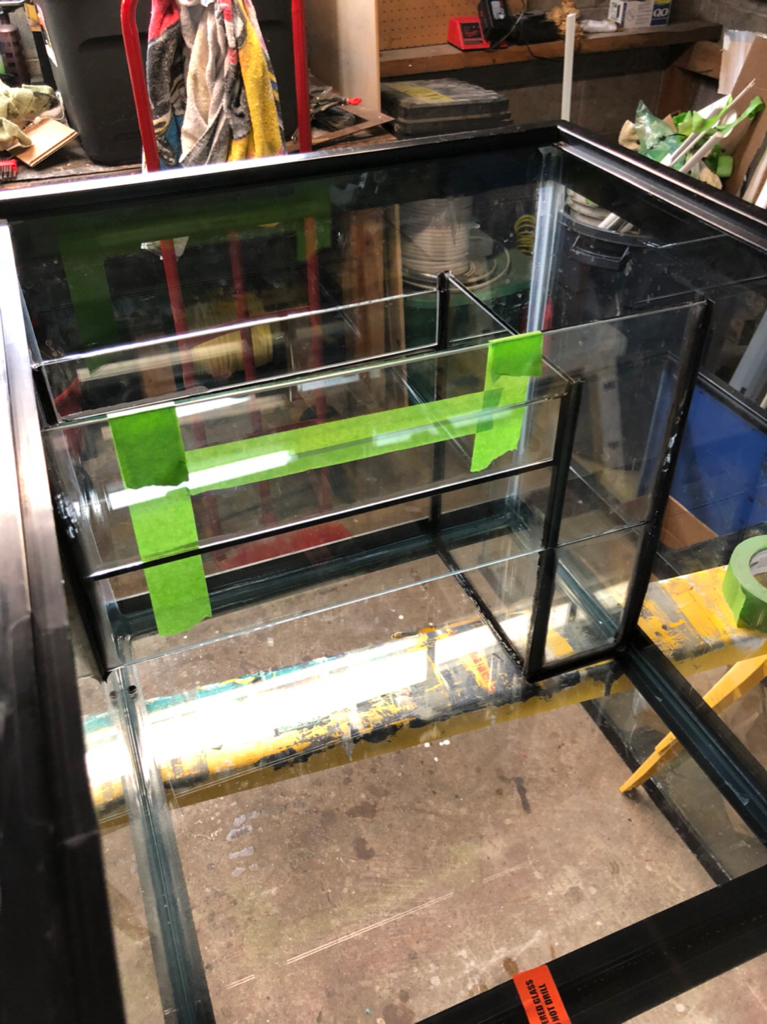
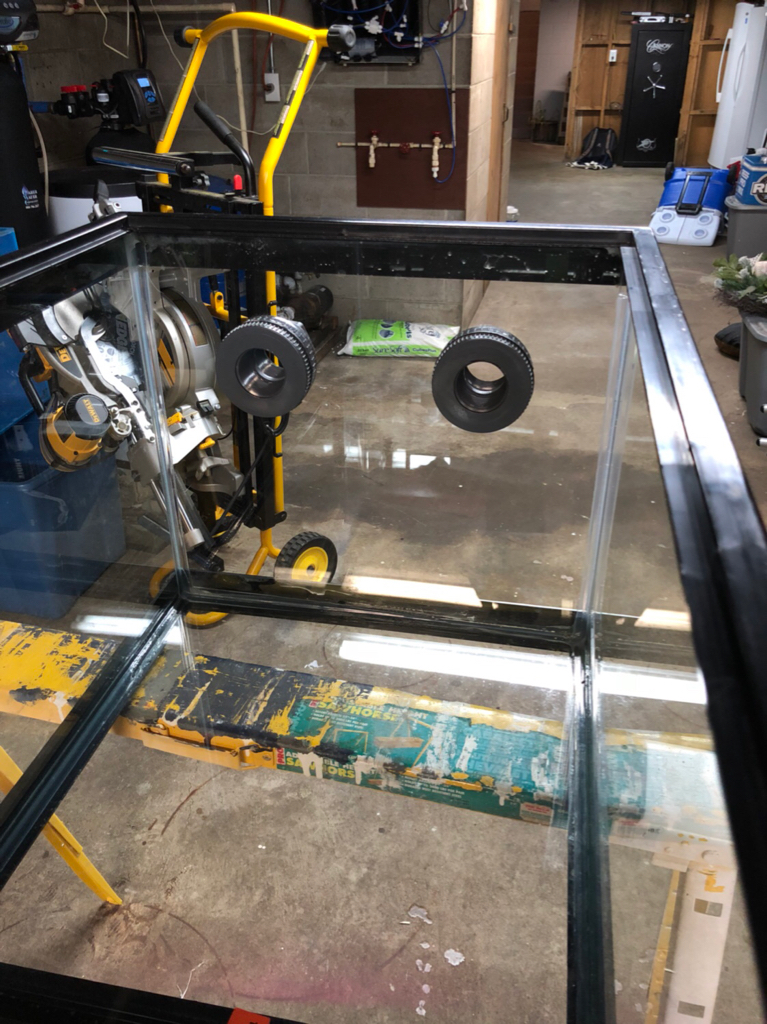
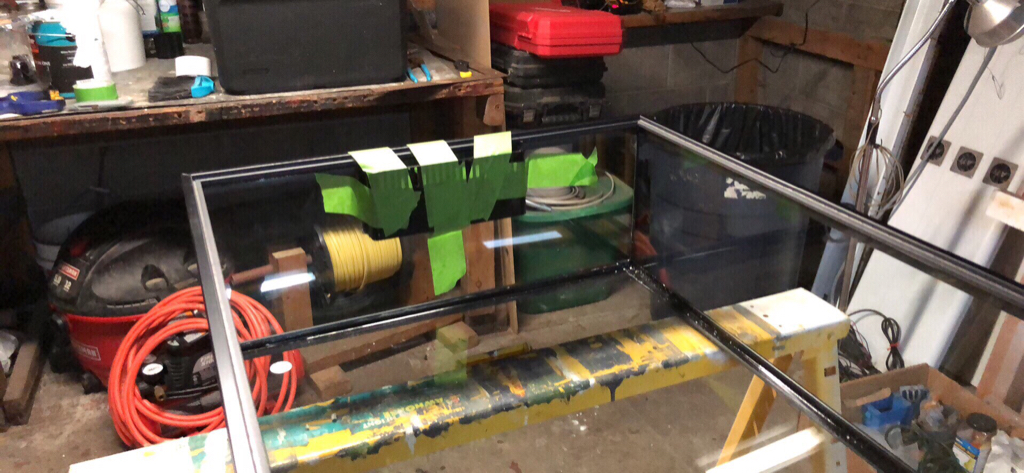
I then put the rocks into a large Rubbermaid tote and let them cook for about three months; I added bacteria multiple times during this time to help get the biological filtration established. While the rocks were cooking I designed the layout for the “new” fishroom. Once I had the final layout decided on we planned a weekend that we didn’t have anything going on (Almost impossible when your son plays competitive soccer all over the state and the surrounding states). When that weekend came I removed the corals from the tank that I didn’t sell already. Removed all the rock and caught all the fish. All the livestock went into their temporary homes for the next two days. I removed all the water and sand from the tank and then moved it outside. I gave the tank an acid bath and let it soak for a few hours. I then scrubbed it and made sure it looked like a new tank. The sump was removed as well and acid washed to make sure it was clear of any bad stuff.
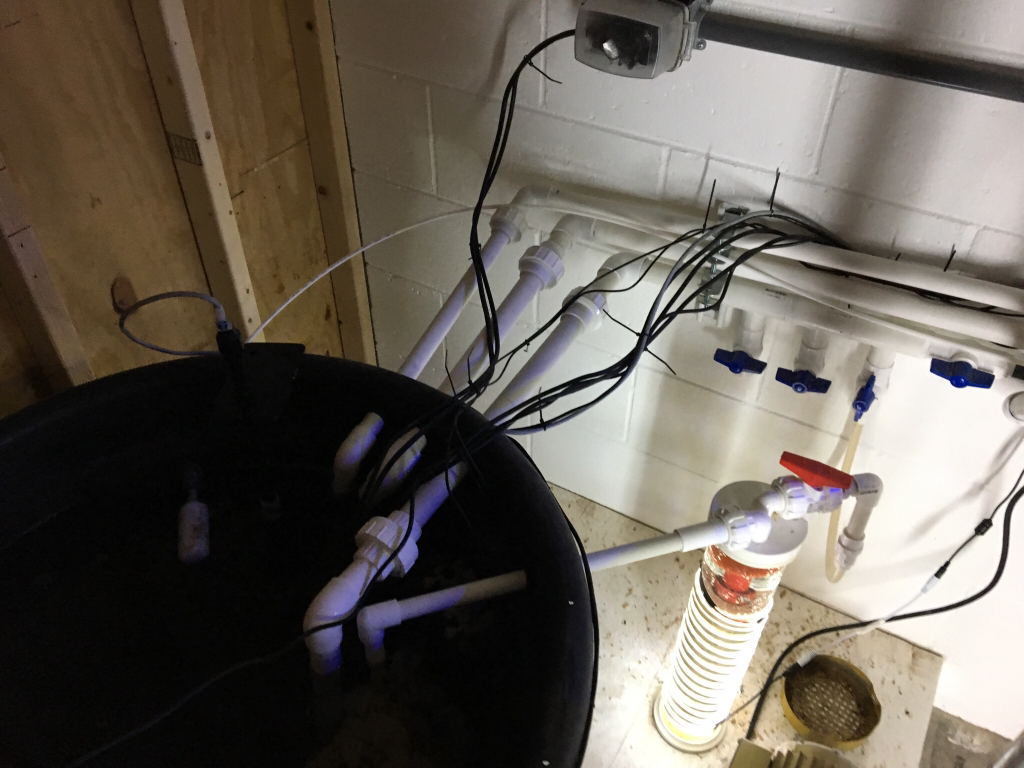
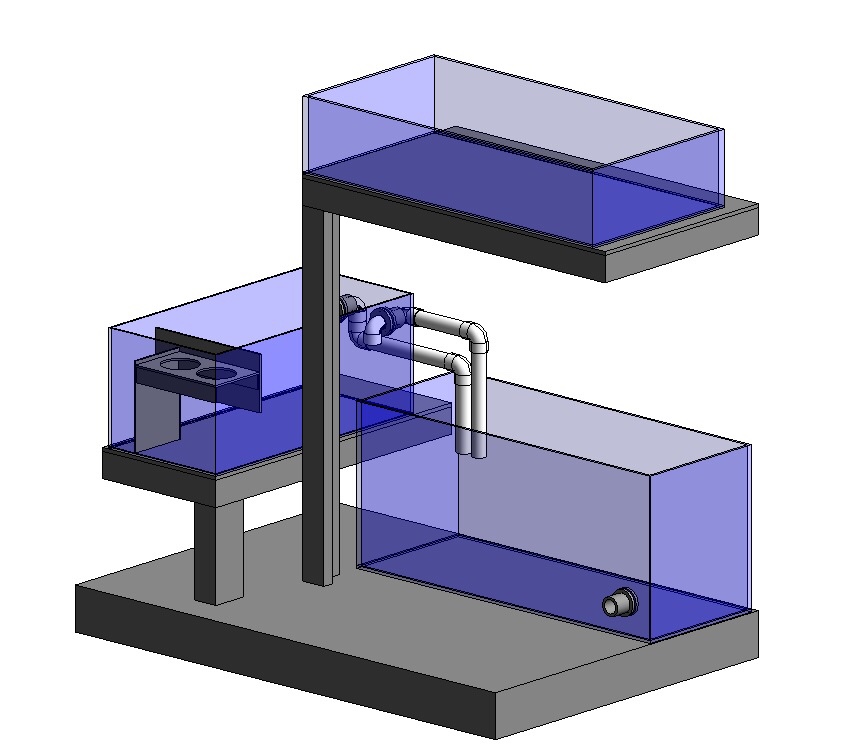
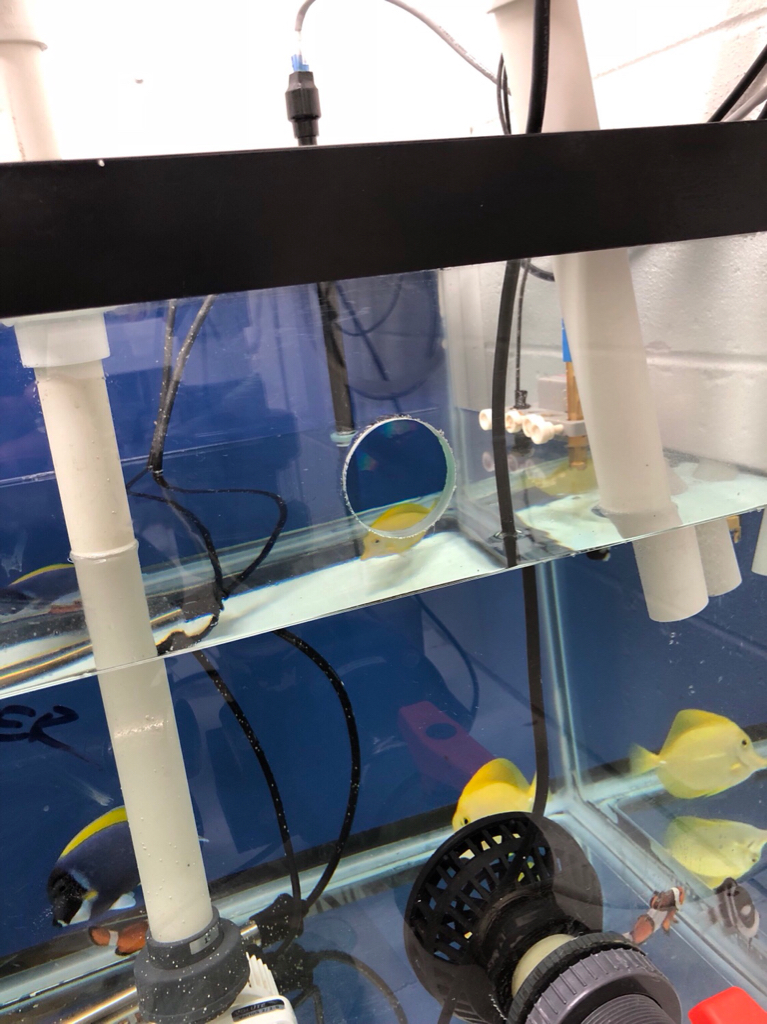
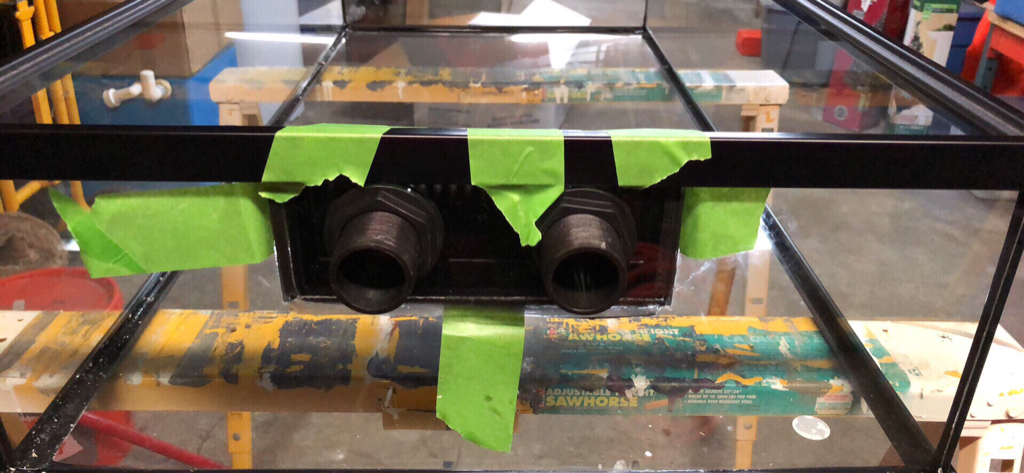
Once the tank and sump were acid washed I moved them back into the house and started to plumb them together with all new piping. I decided to take my standard reef ready tank and make both holes in the overflow be drains. Basically changing the overflow to a Herbie style overflow and the return piping would be over the back of the tank. This would make the overflow silent since the tank sits in the living room next to the TV.
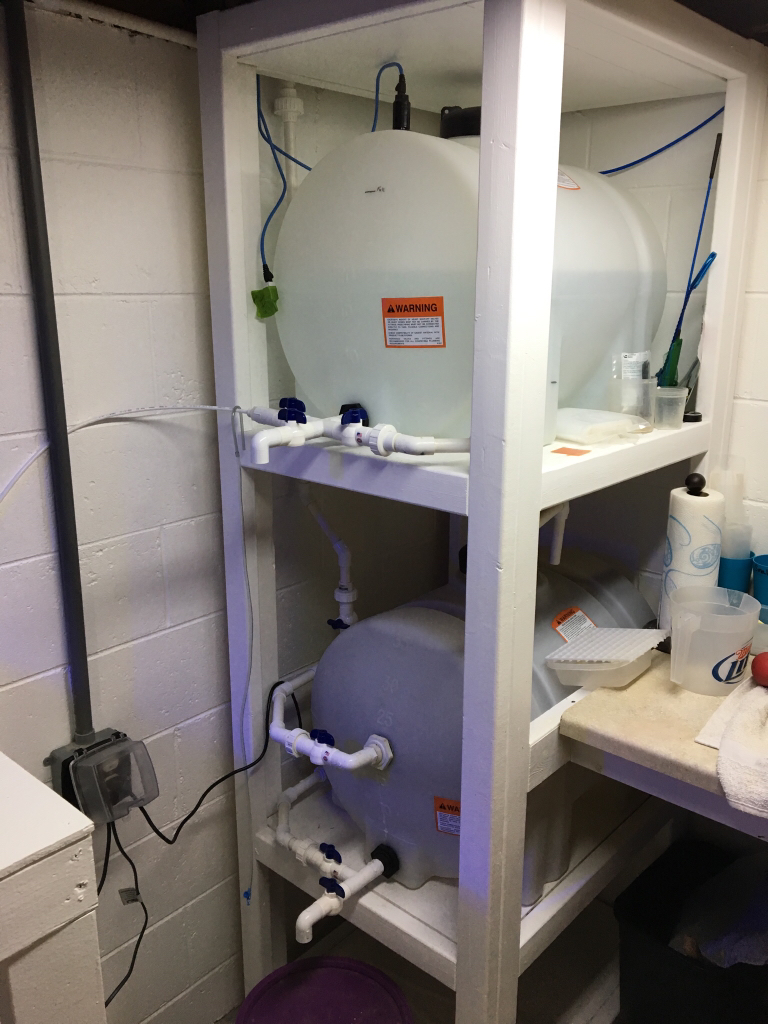
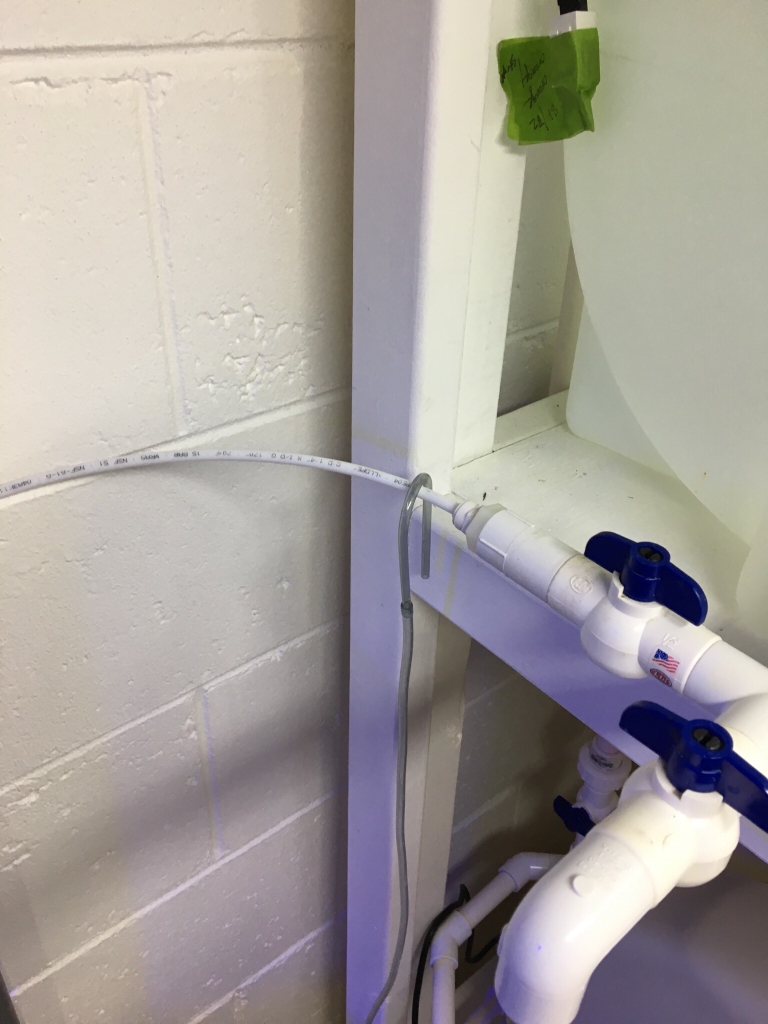
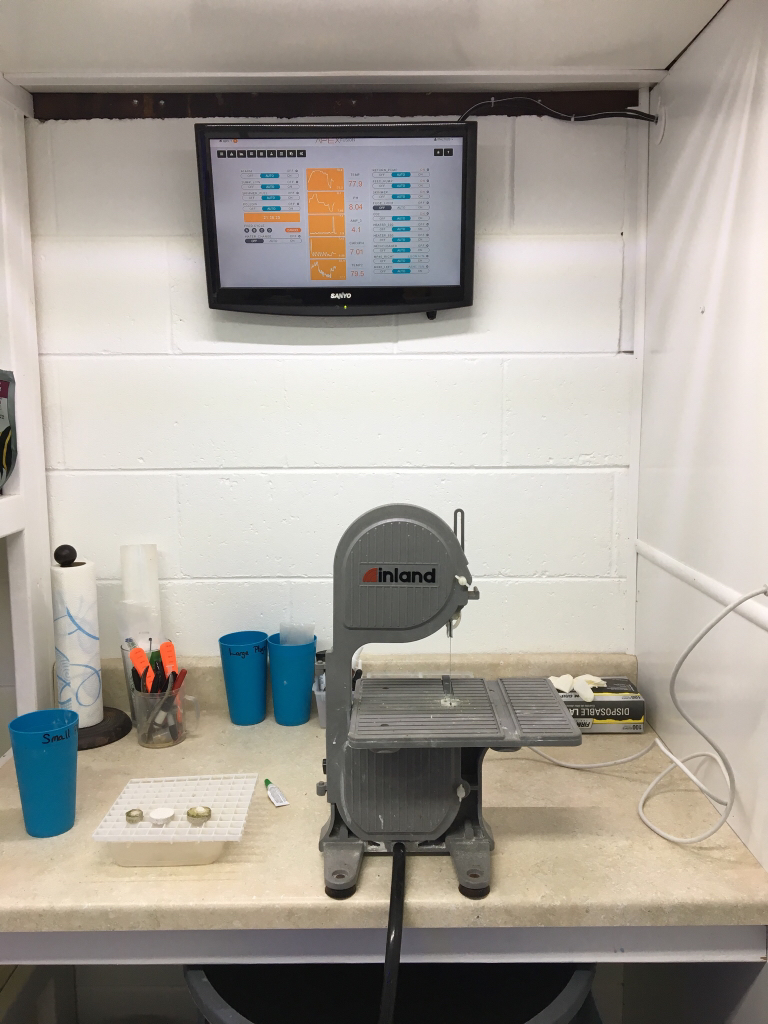
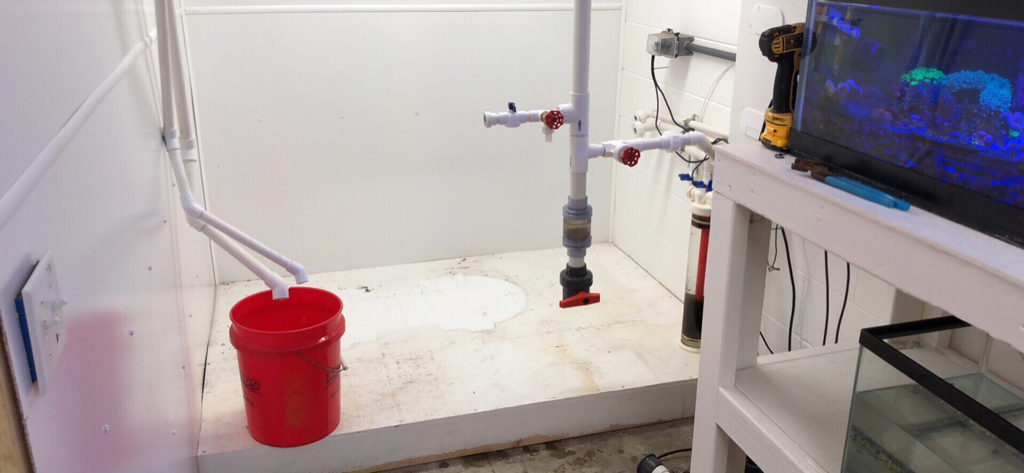
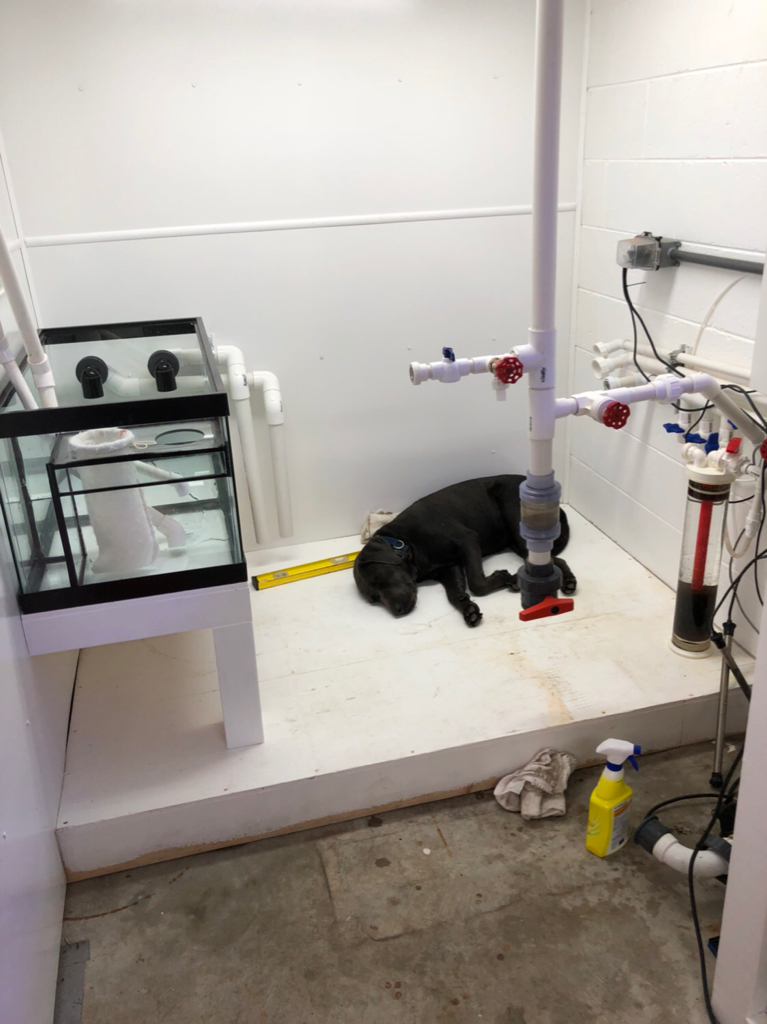
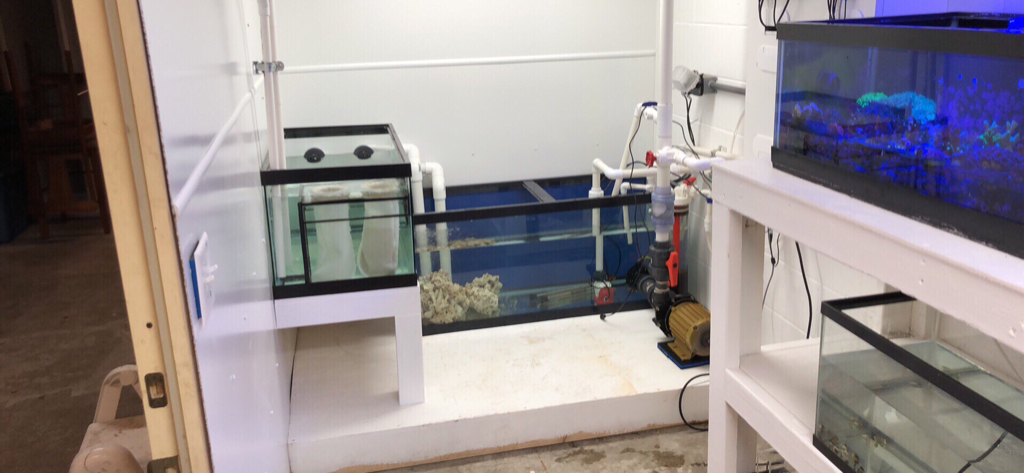
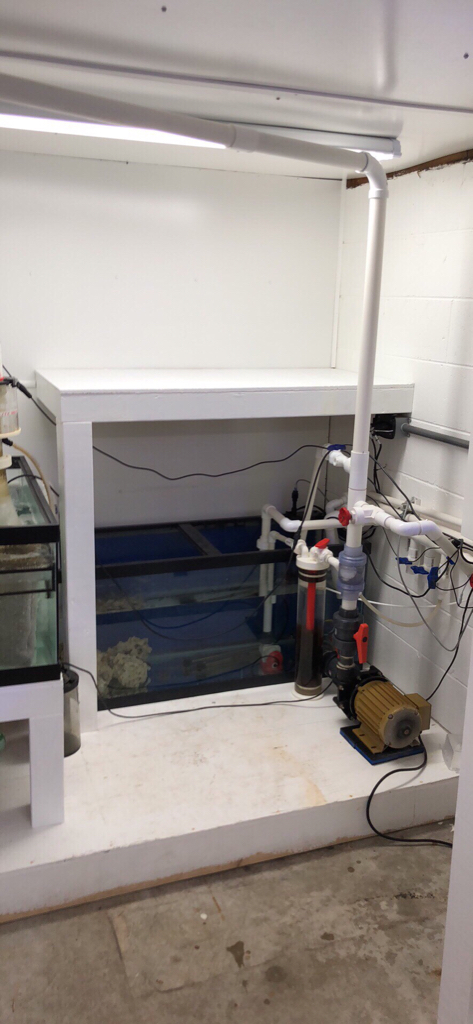
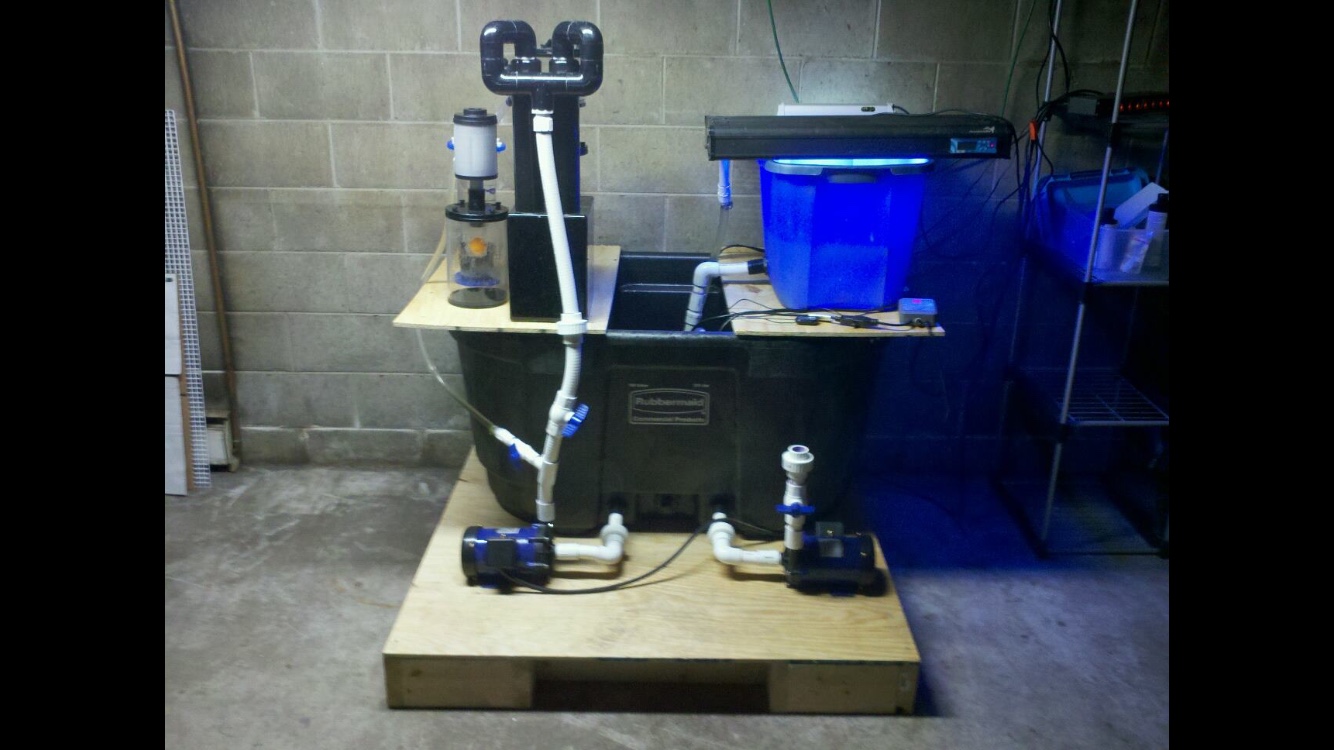
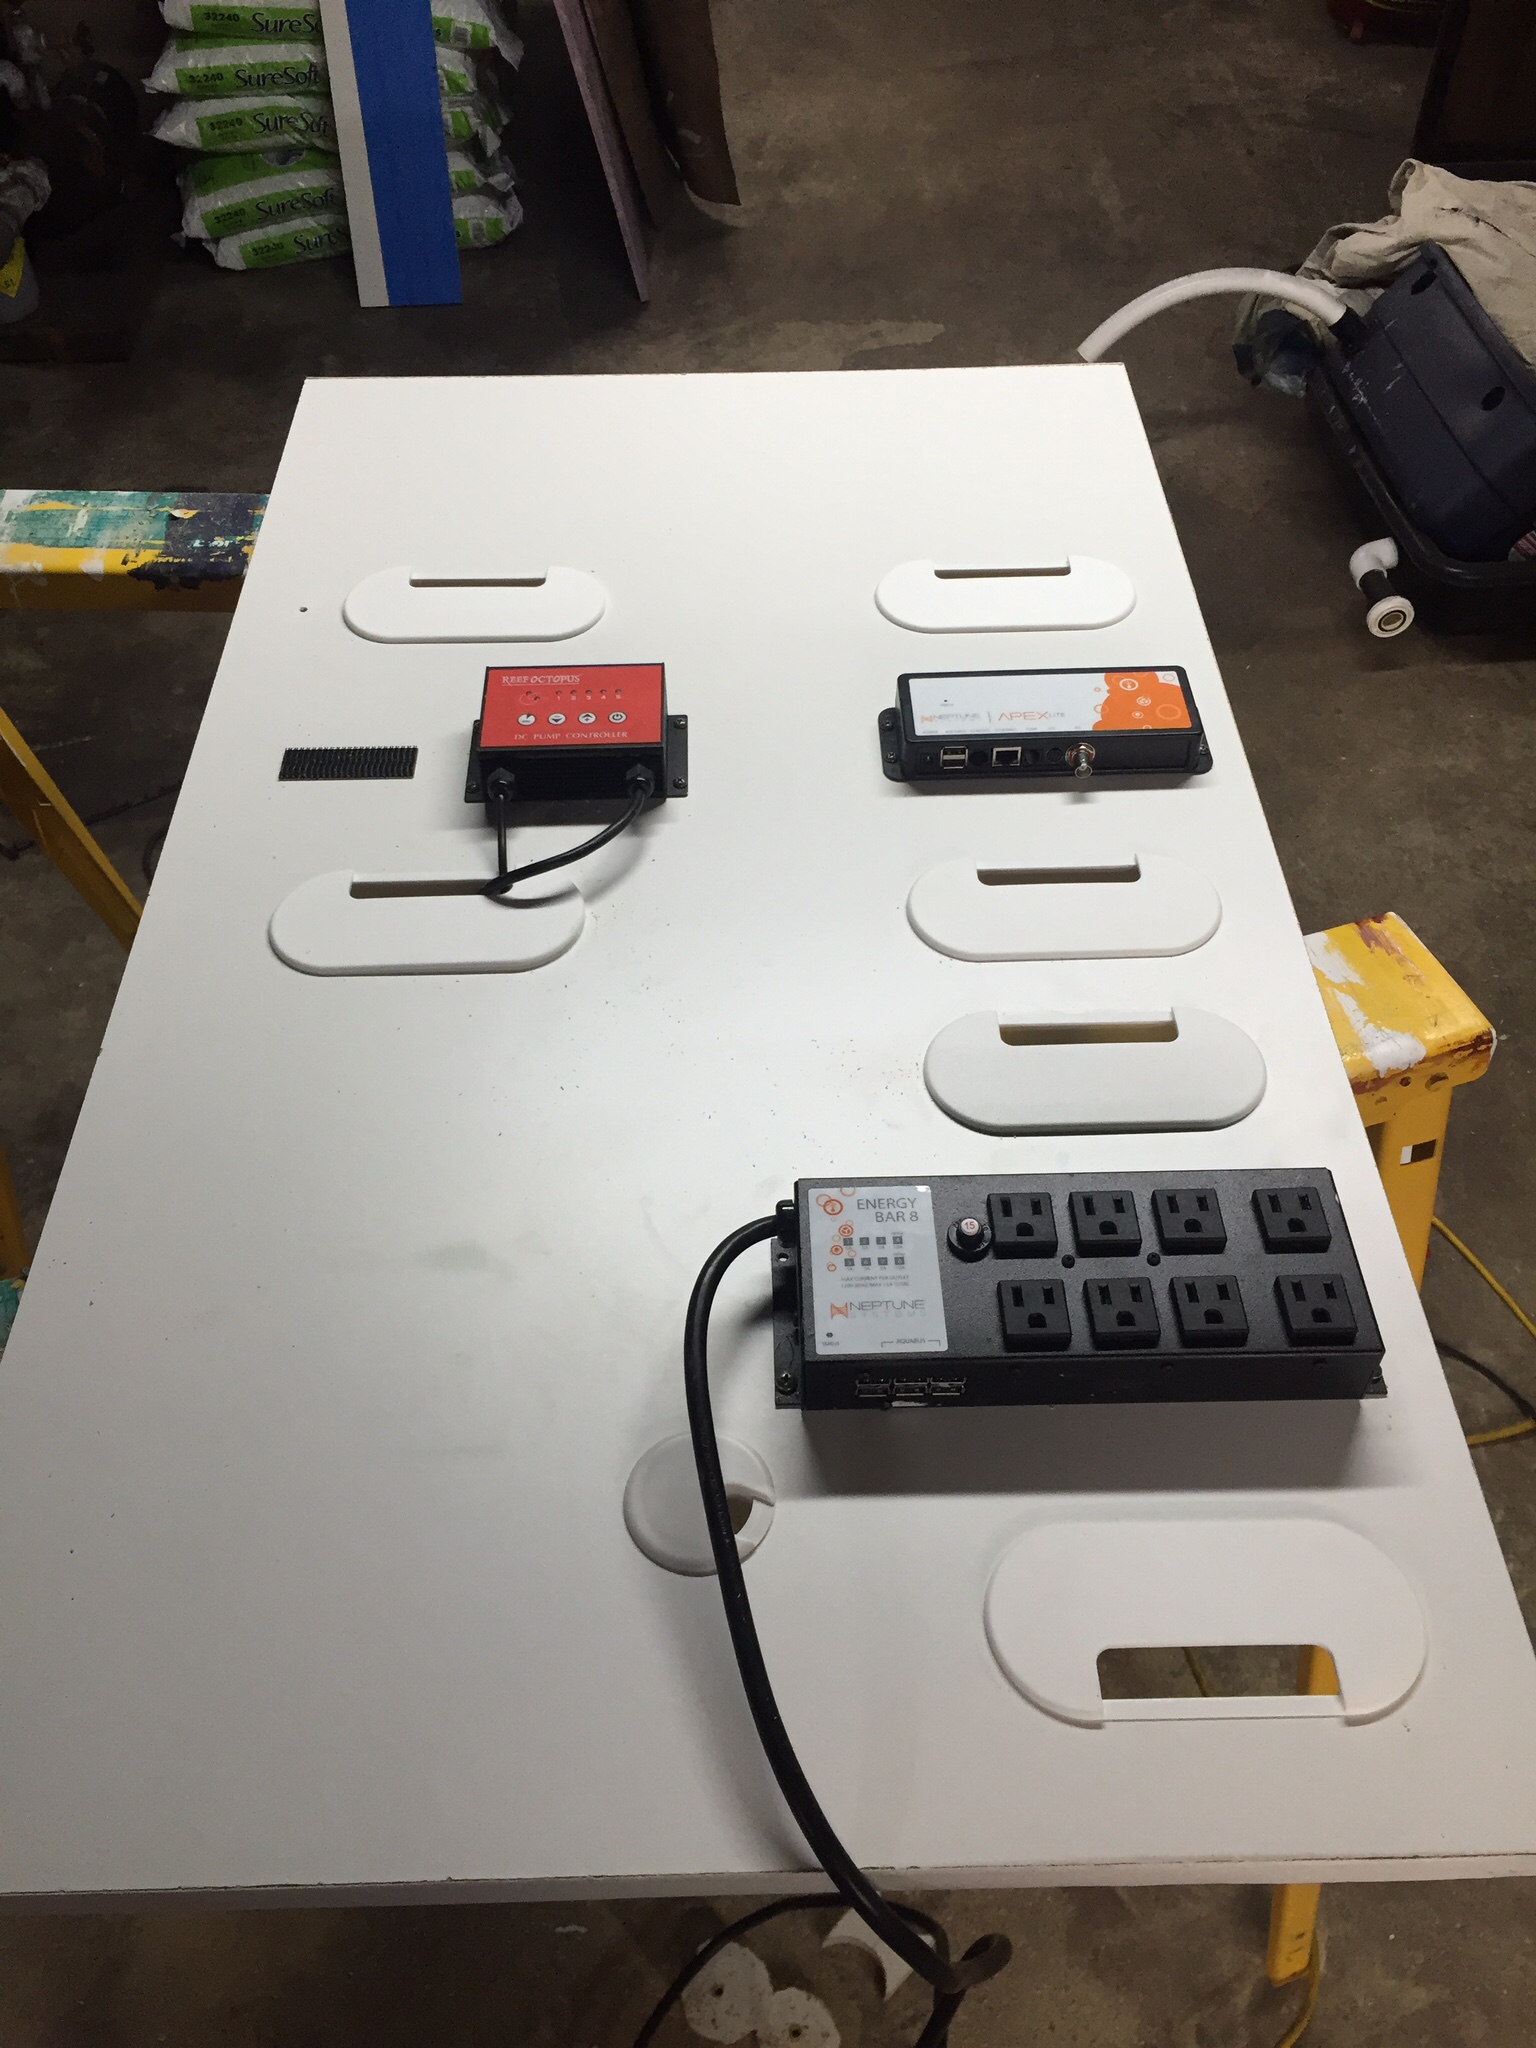
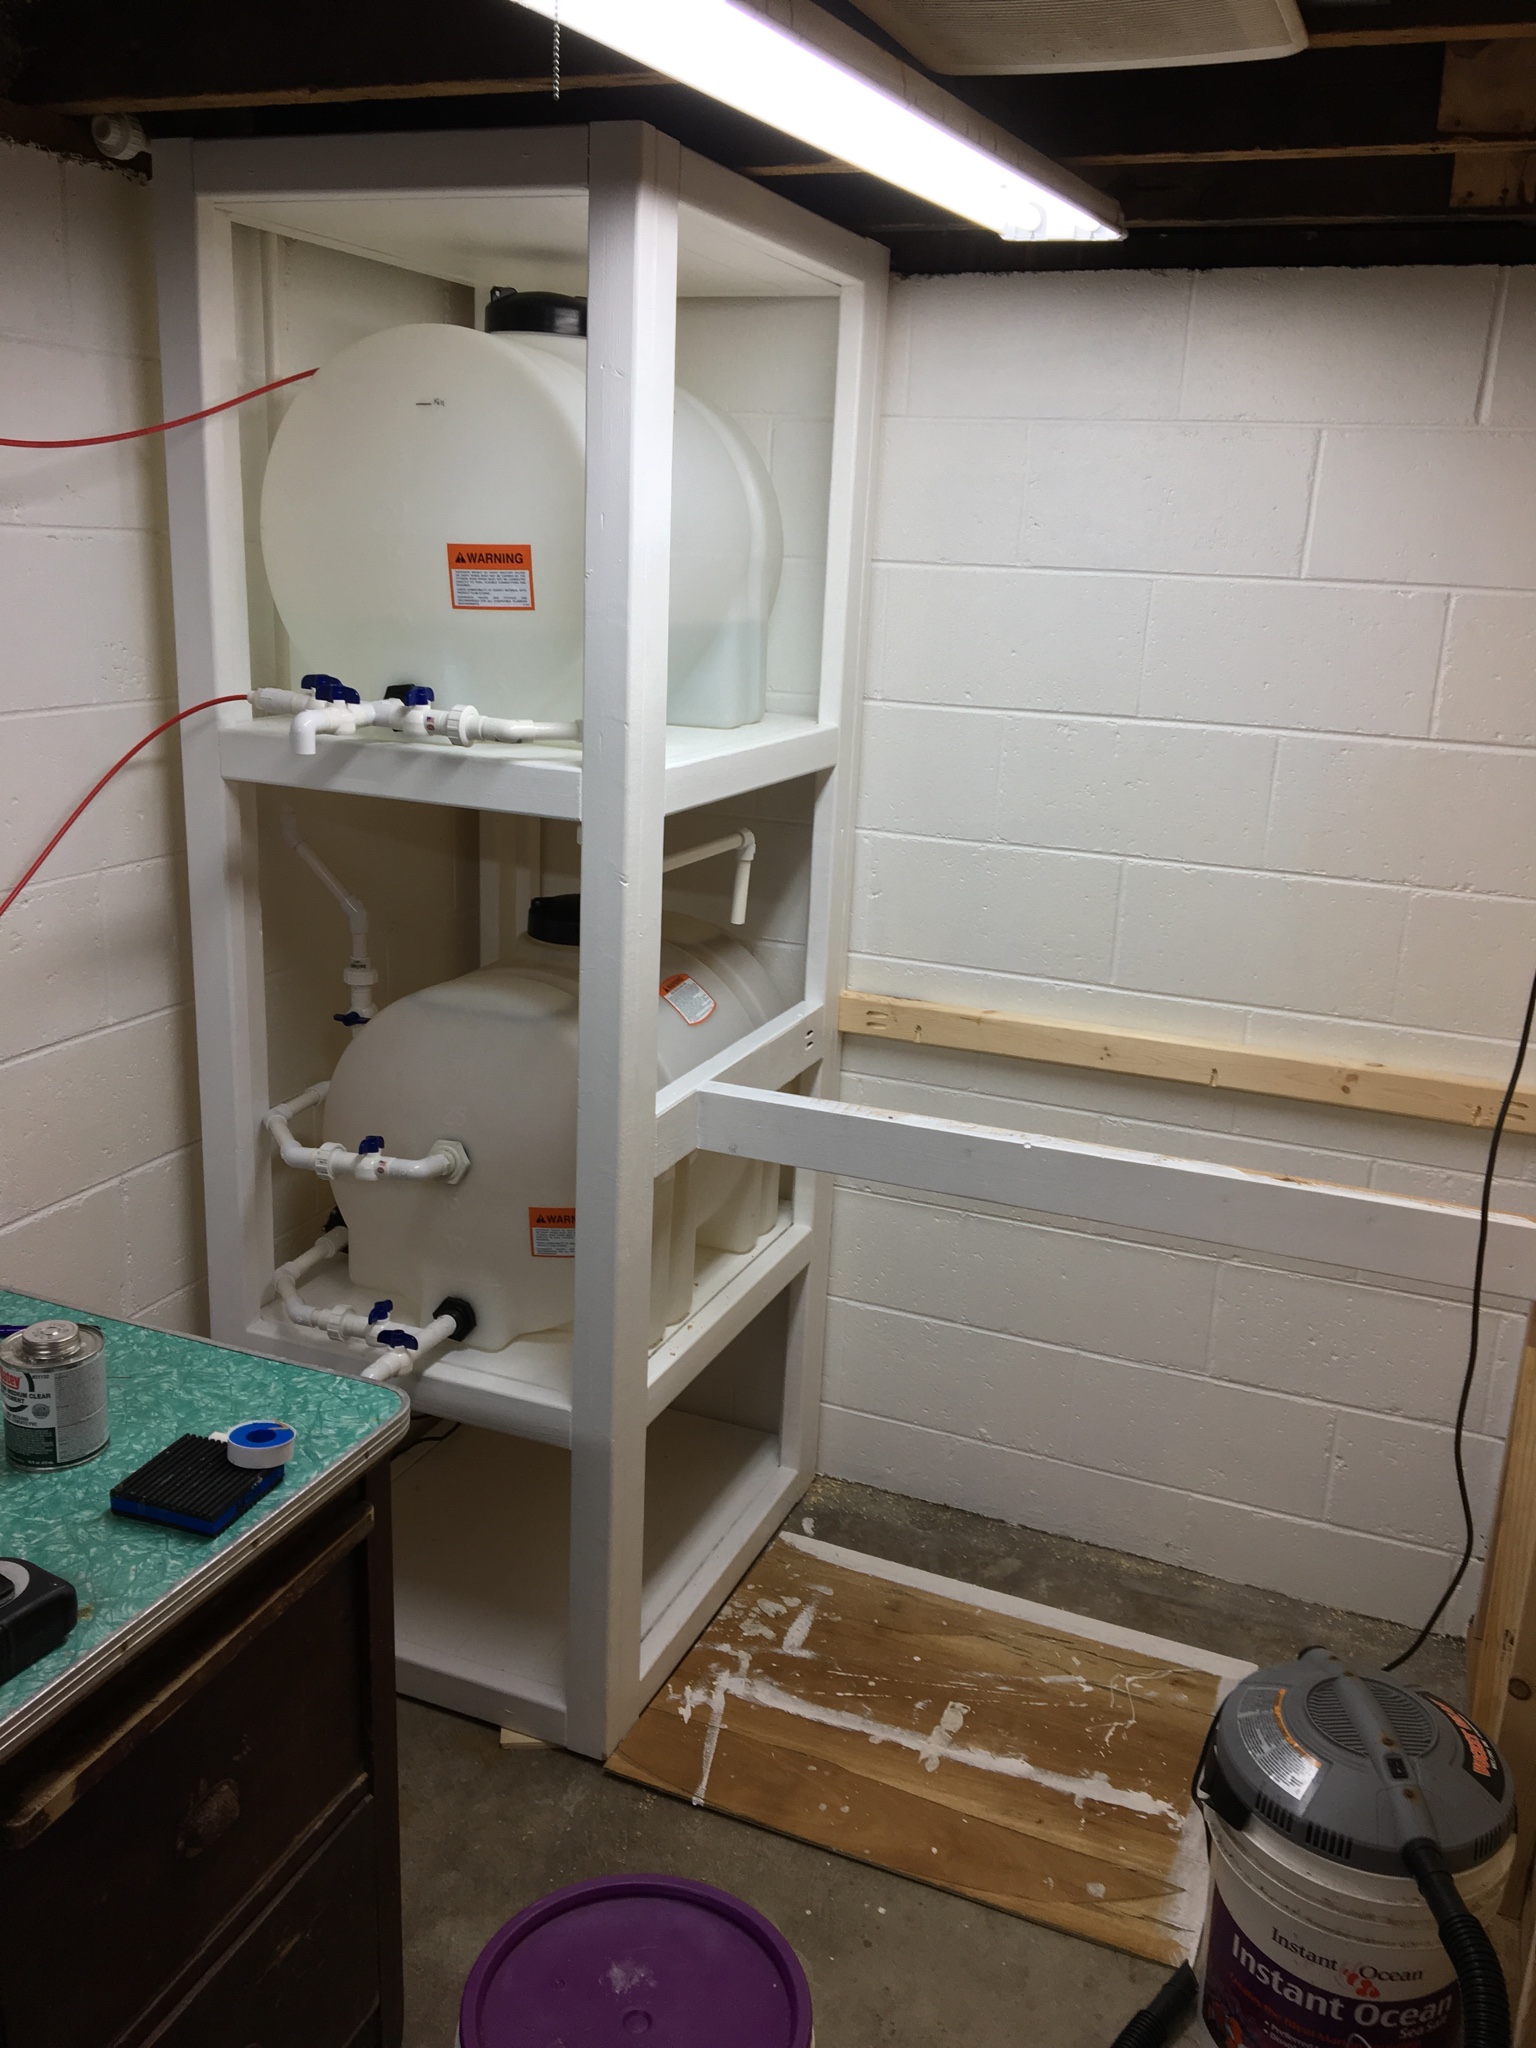
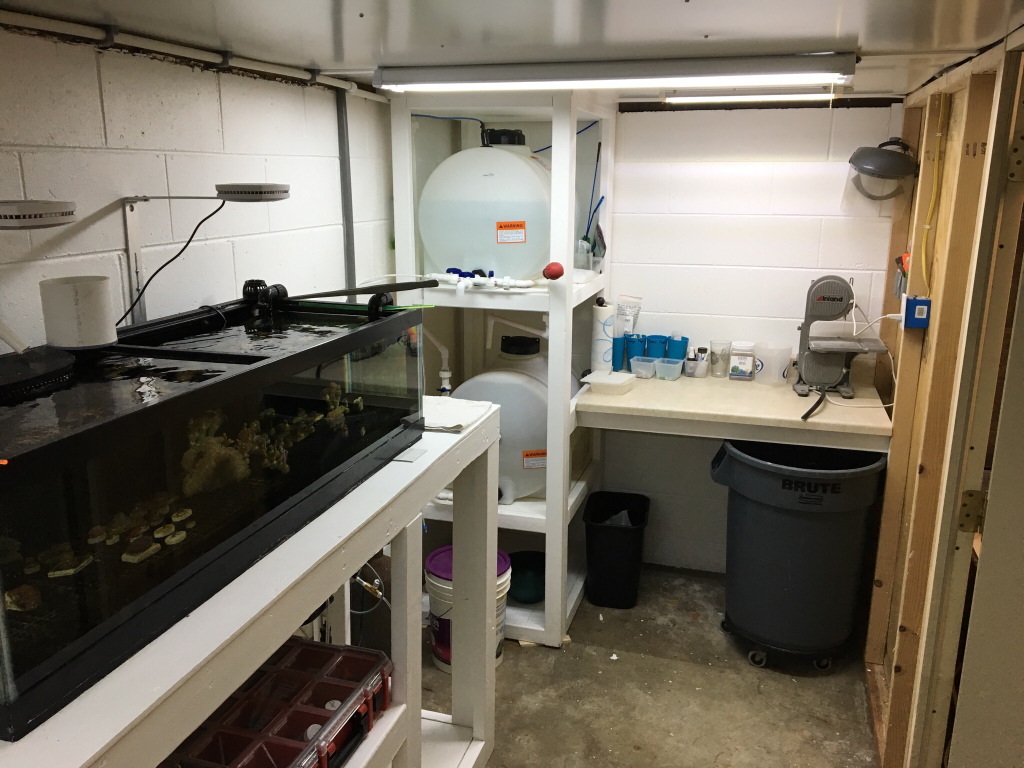
During the remodel of the fish room I relocated my frag system, the sump was moved and my RO top off tank and salt water mixing tanks were relocated. All of which received new stands so they had a clean install. I upgraded the “Frag Station” with a new countertop and painted the block walls white since I plan to install FRP on the stud walls.
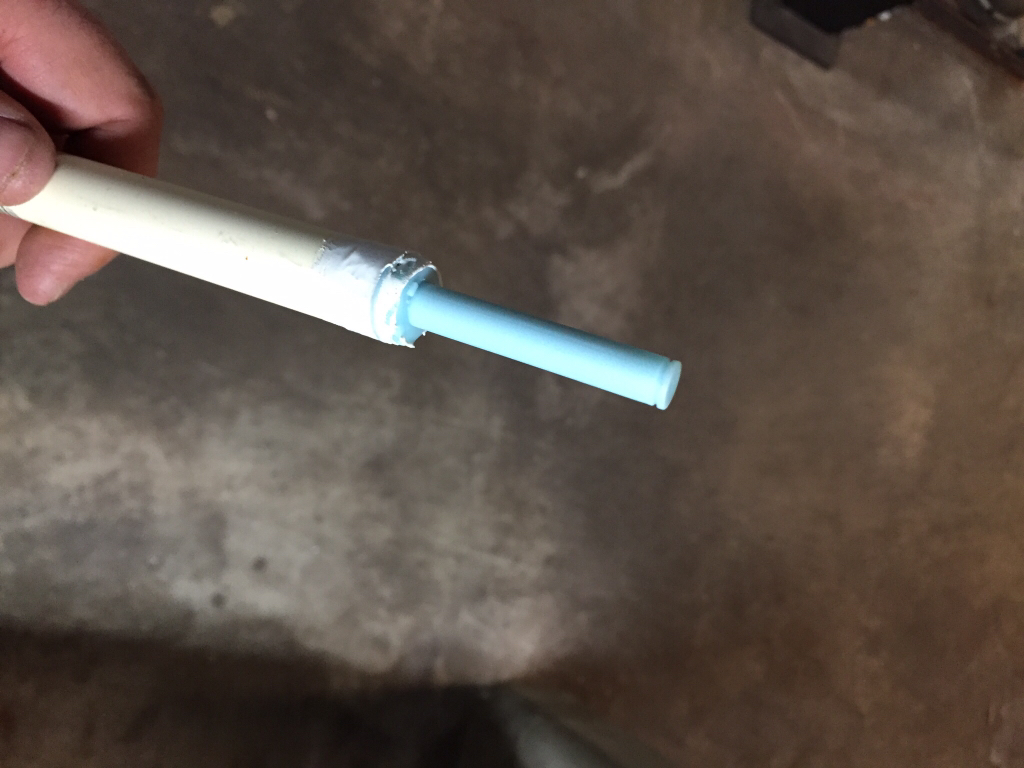
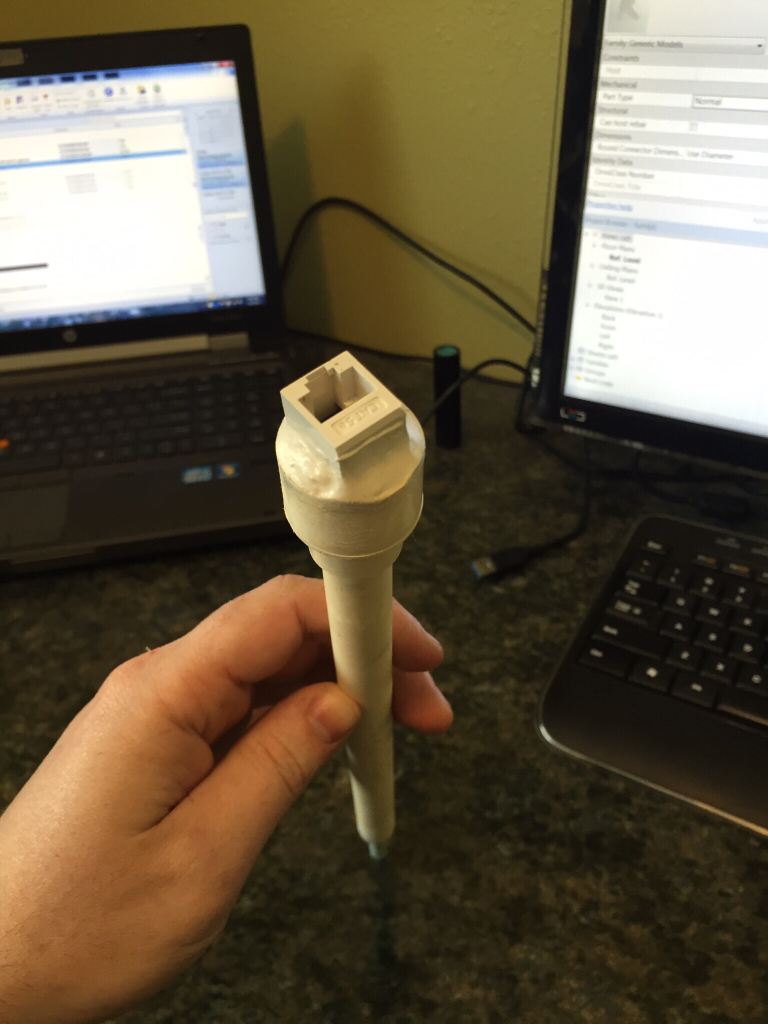
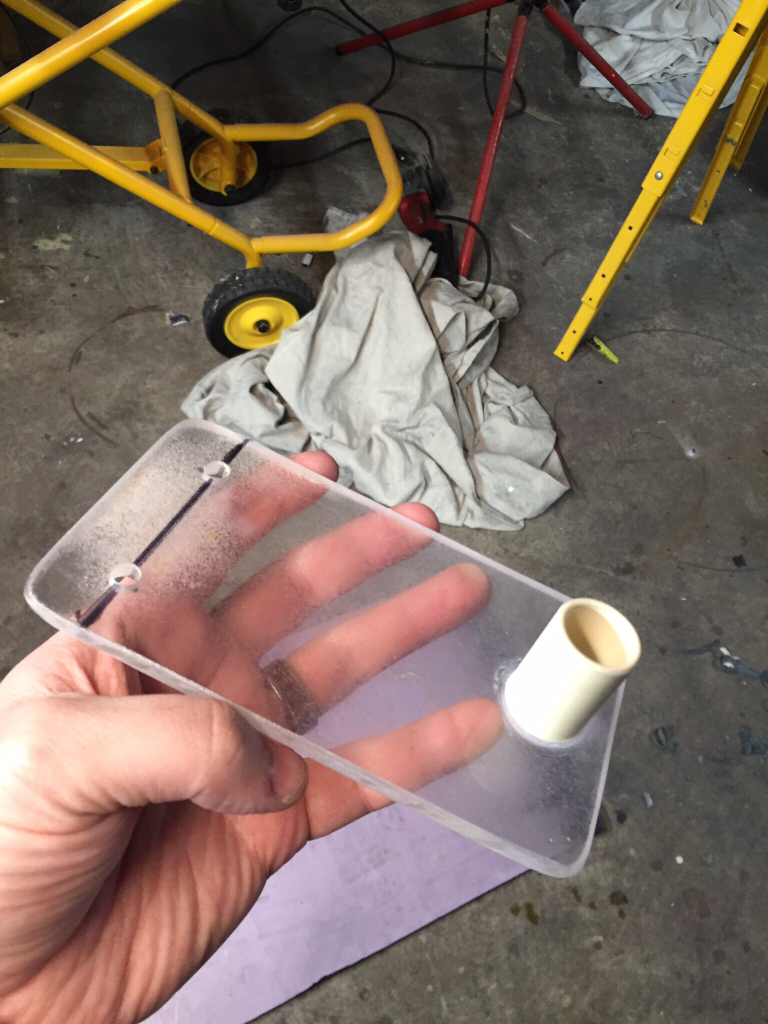
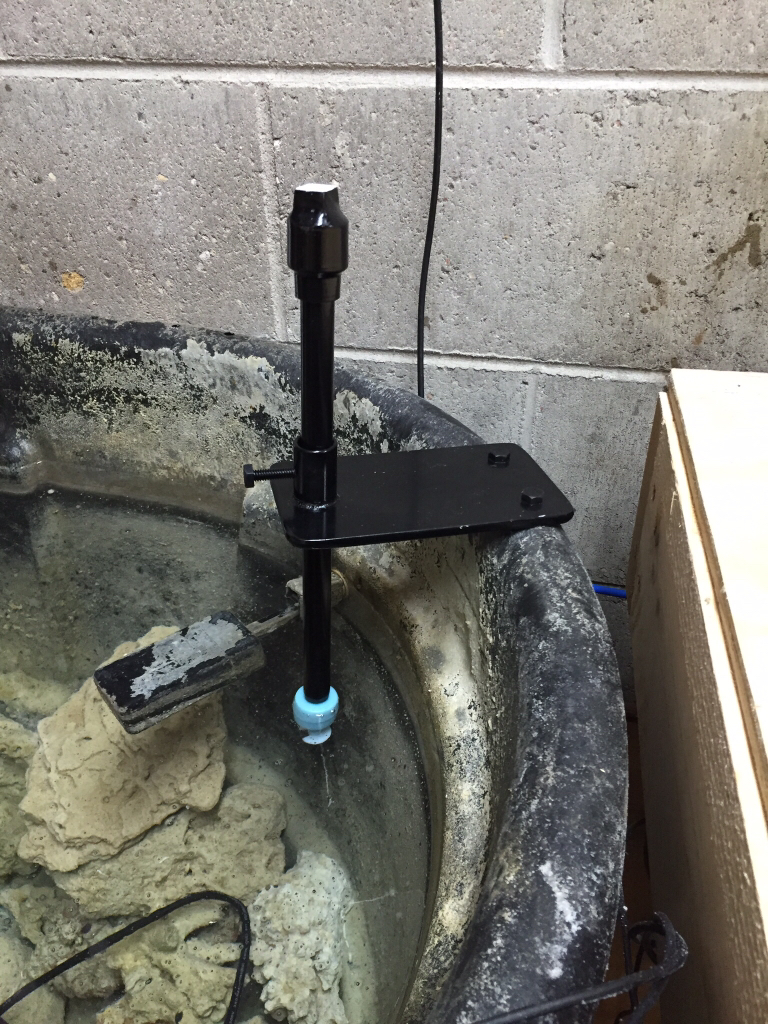
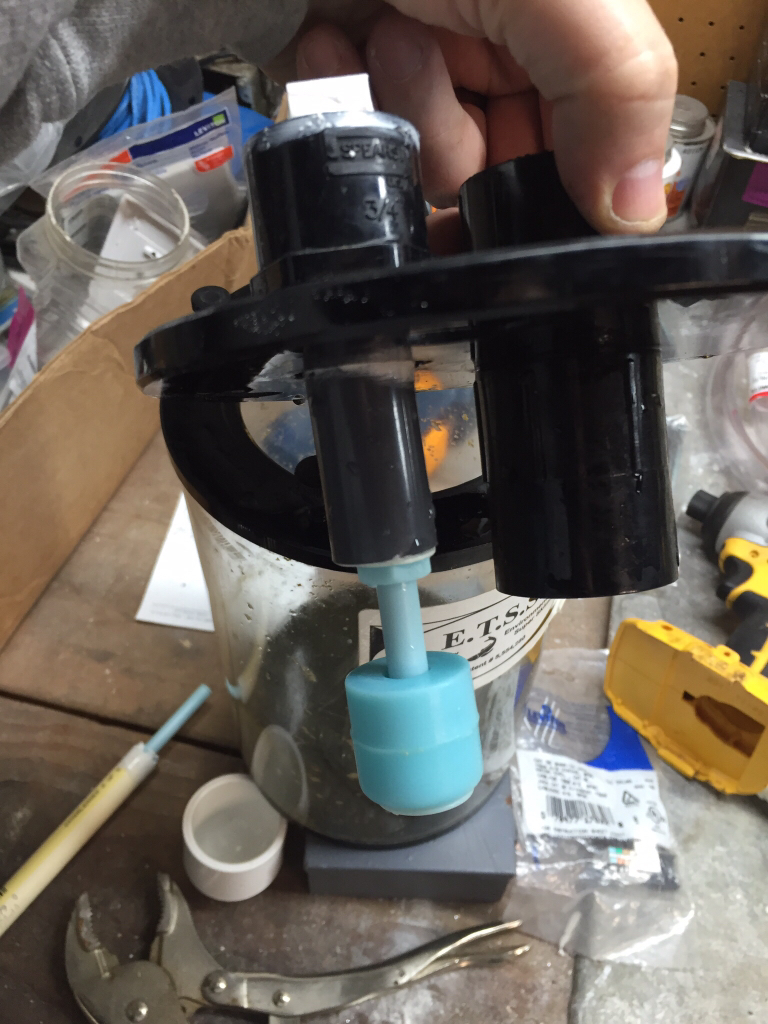
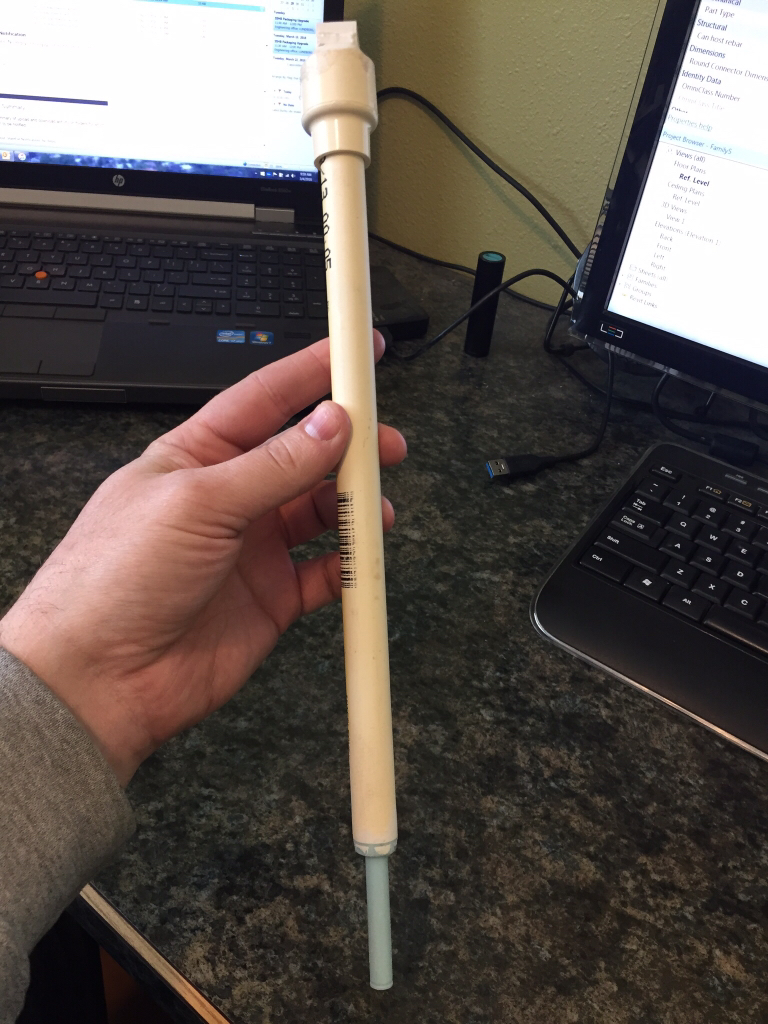
Here are some pictures during the process.

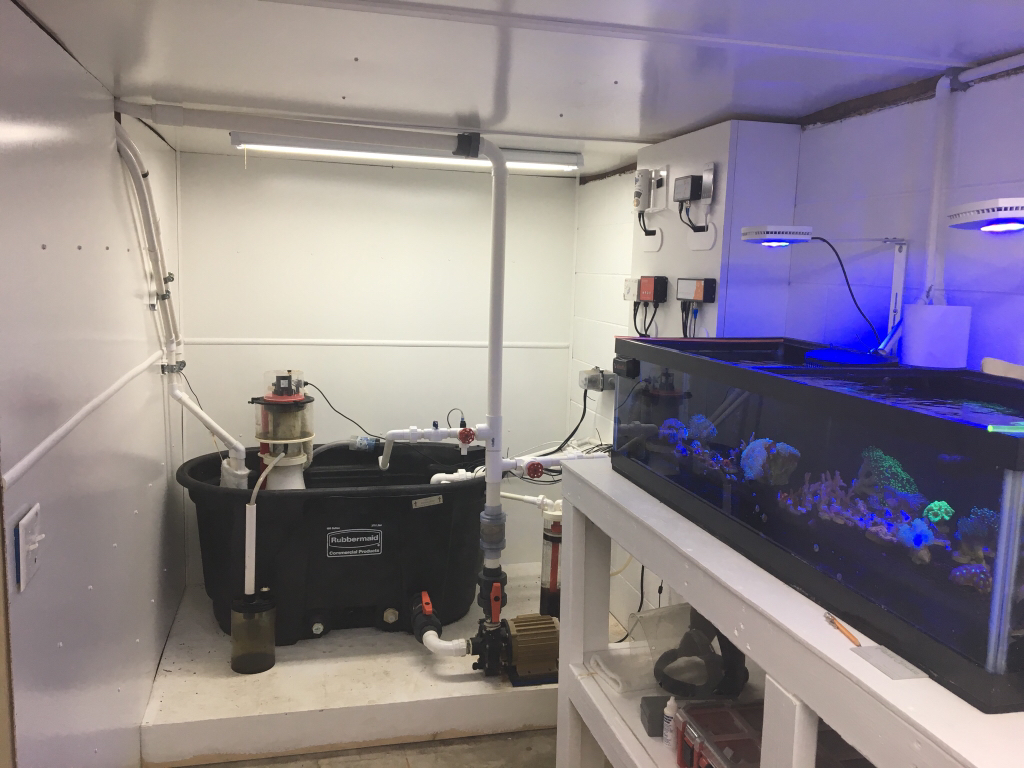
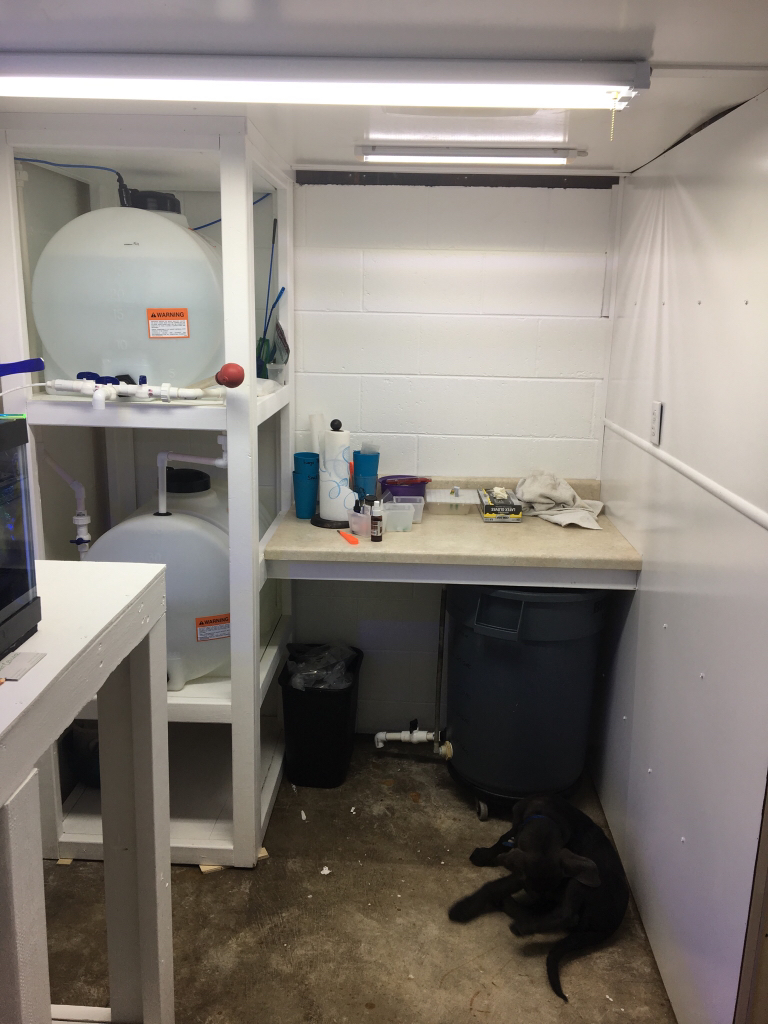
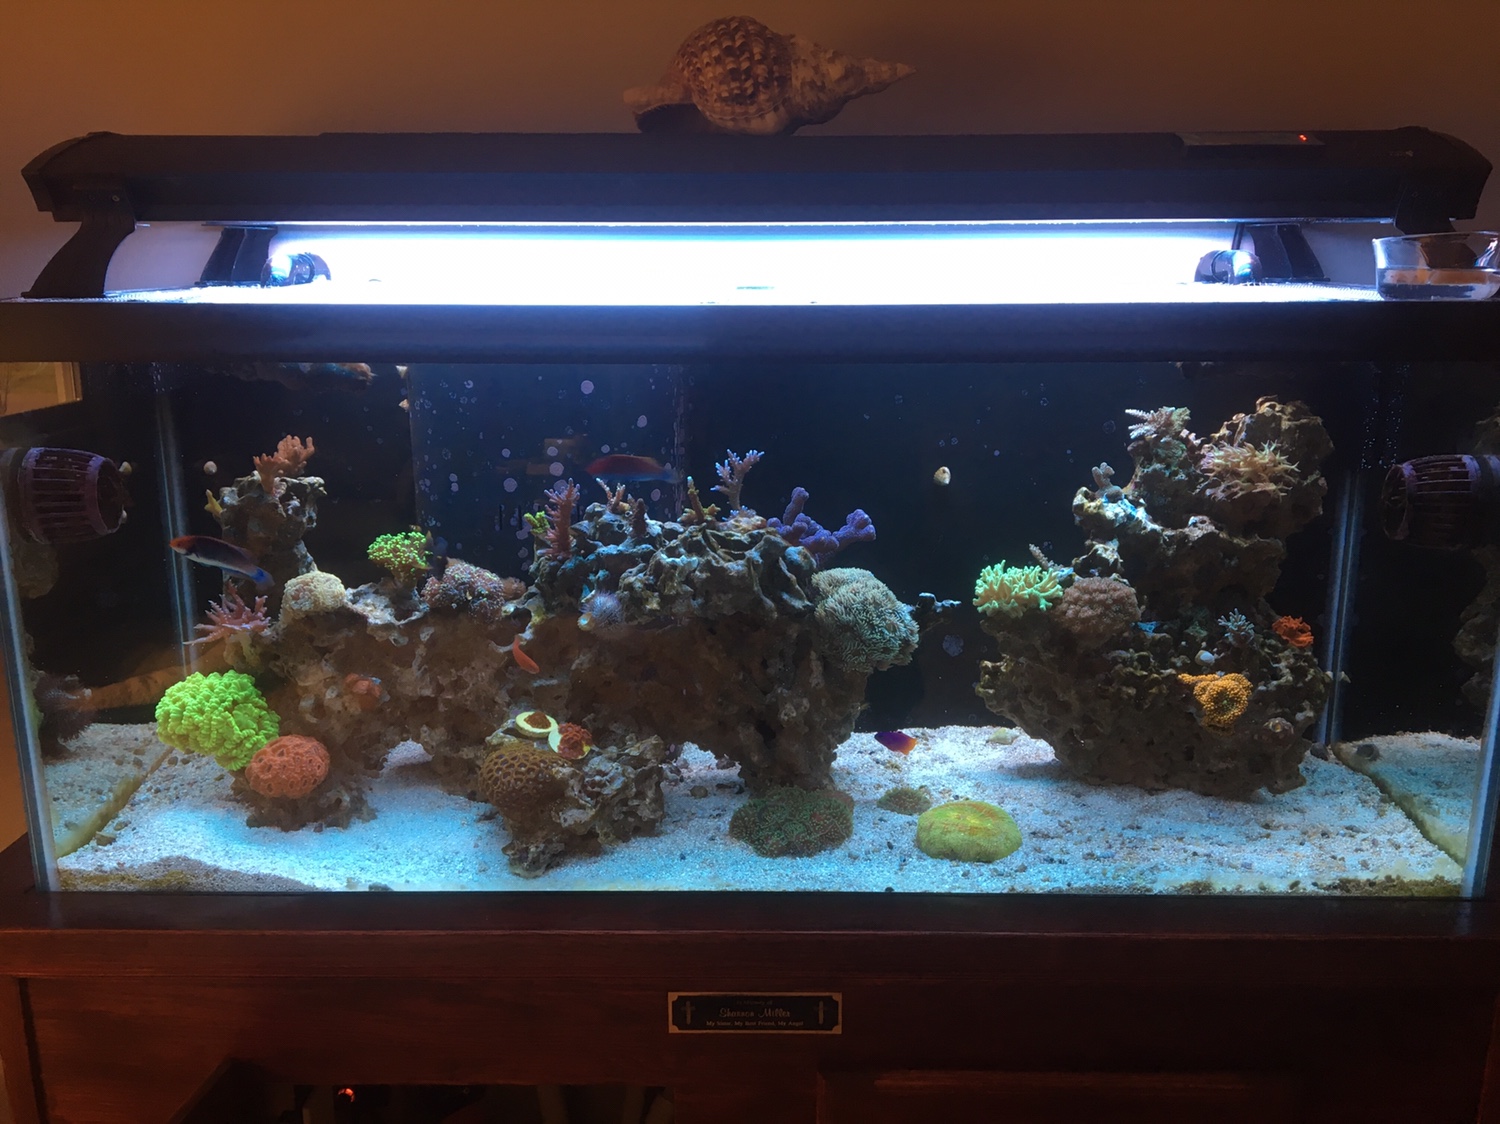
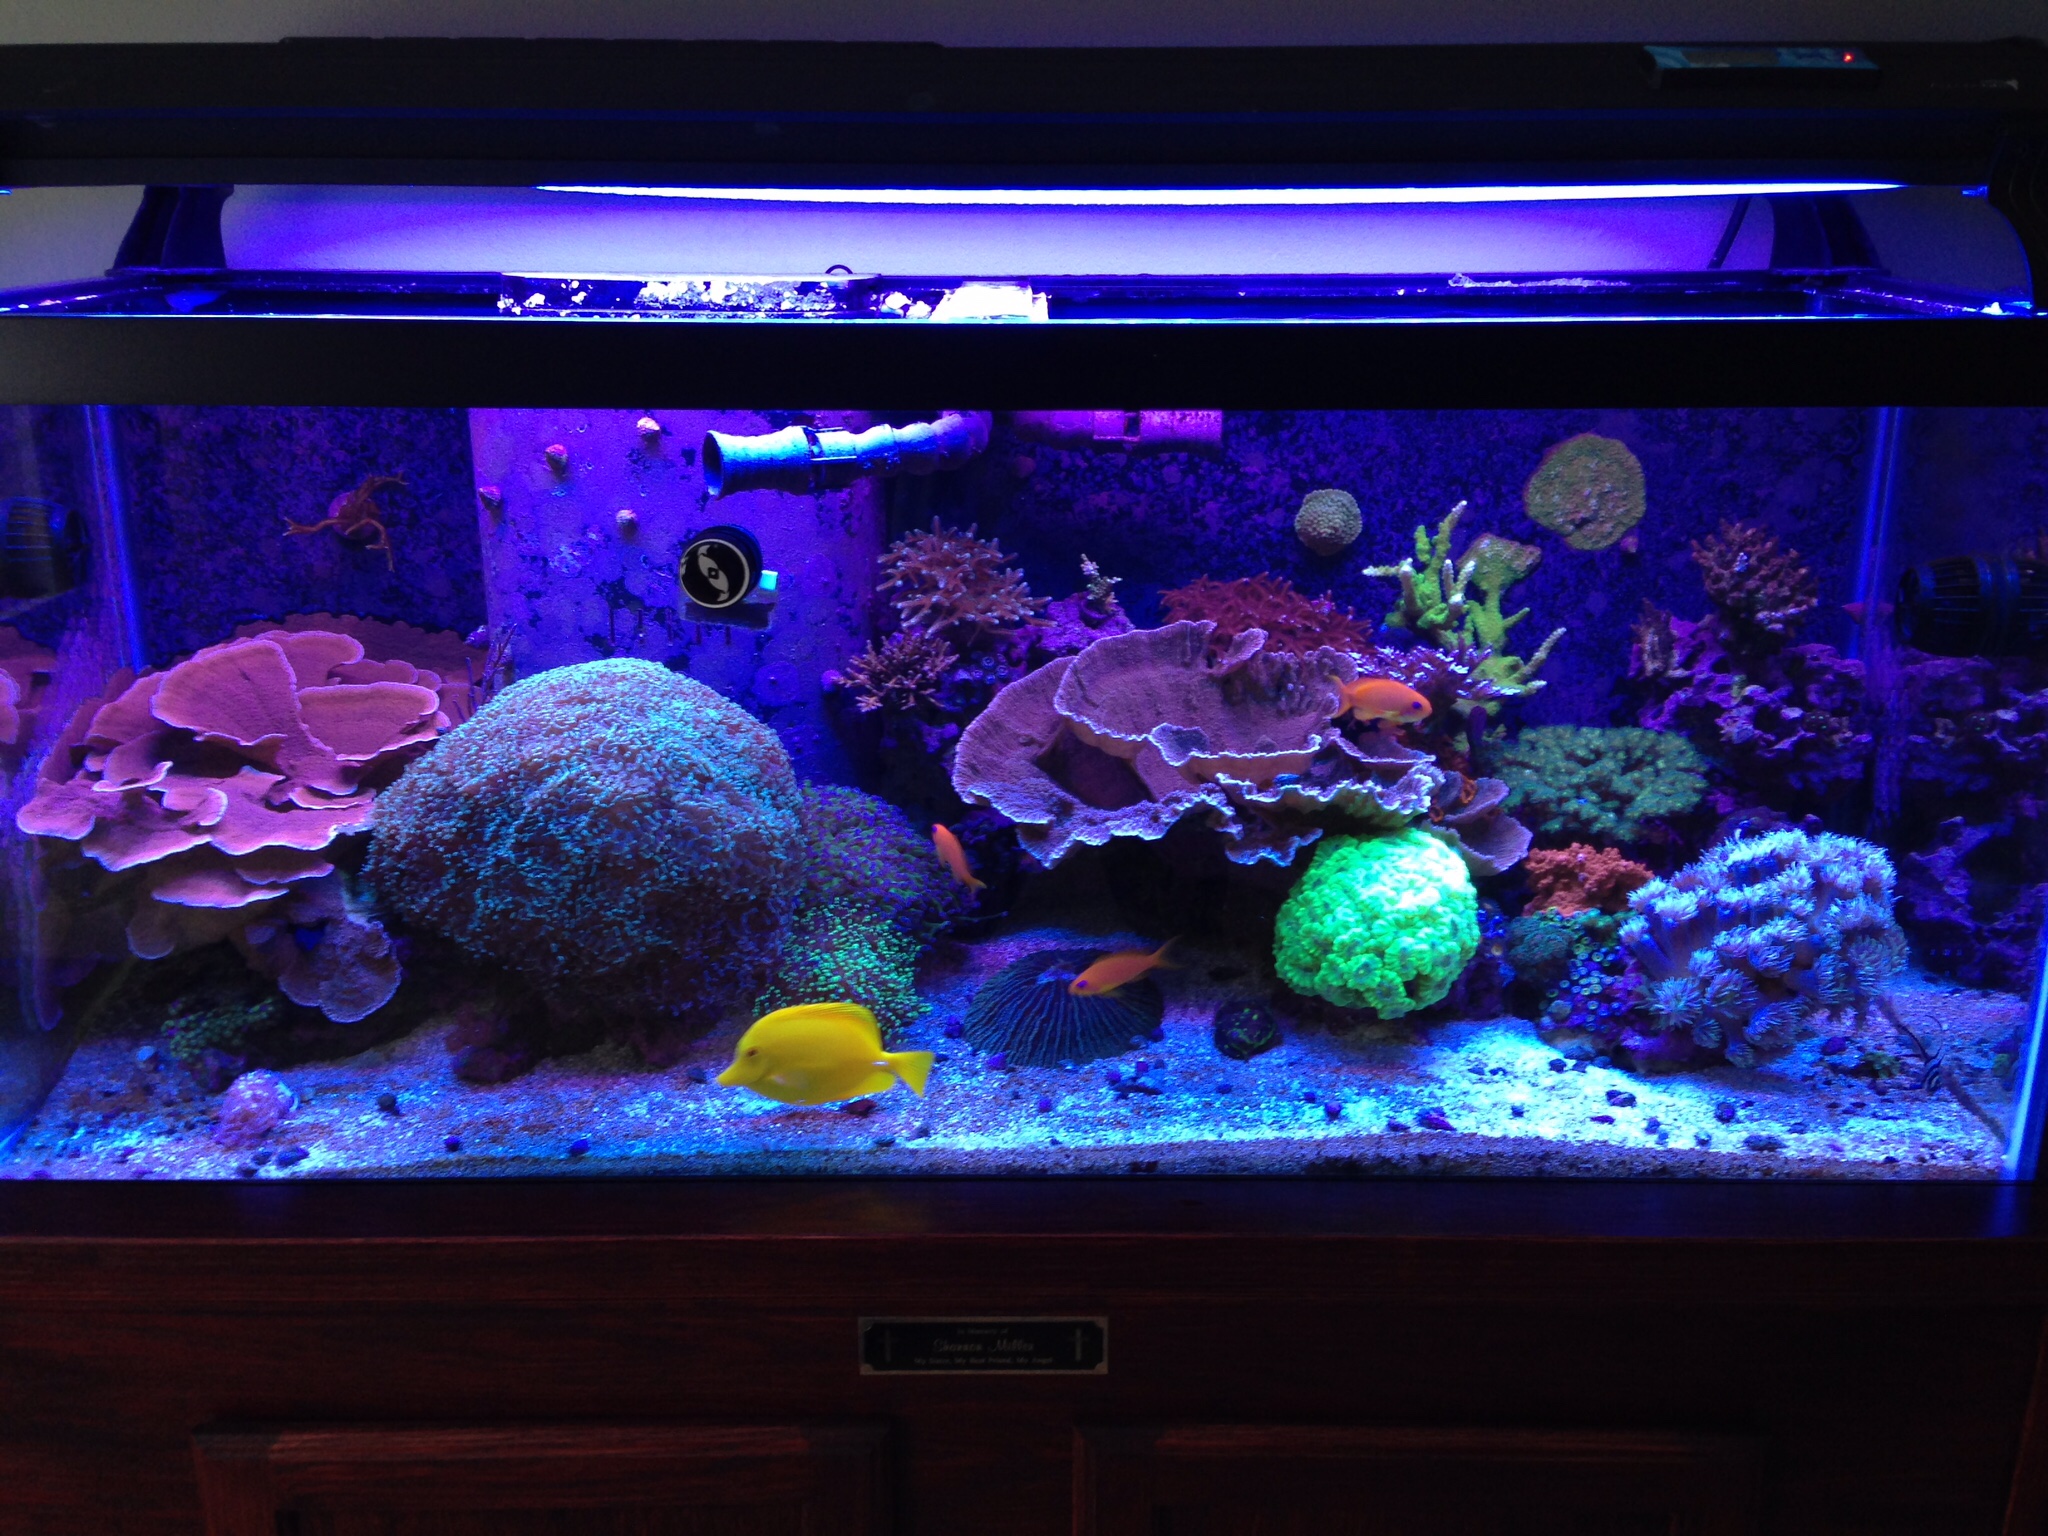
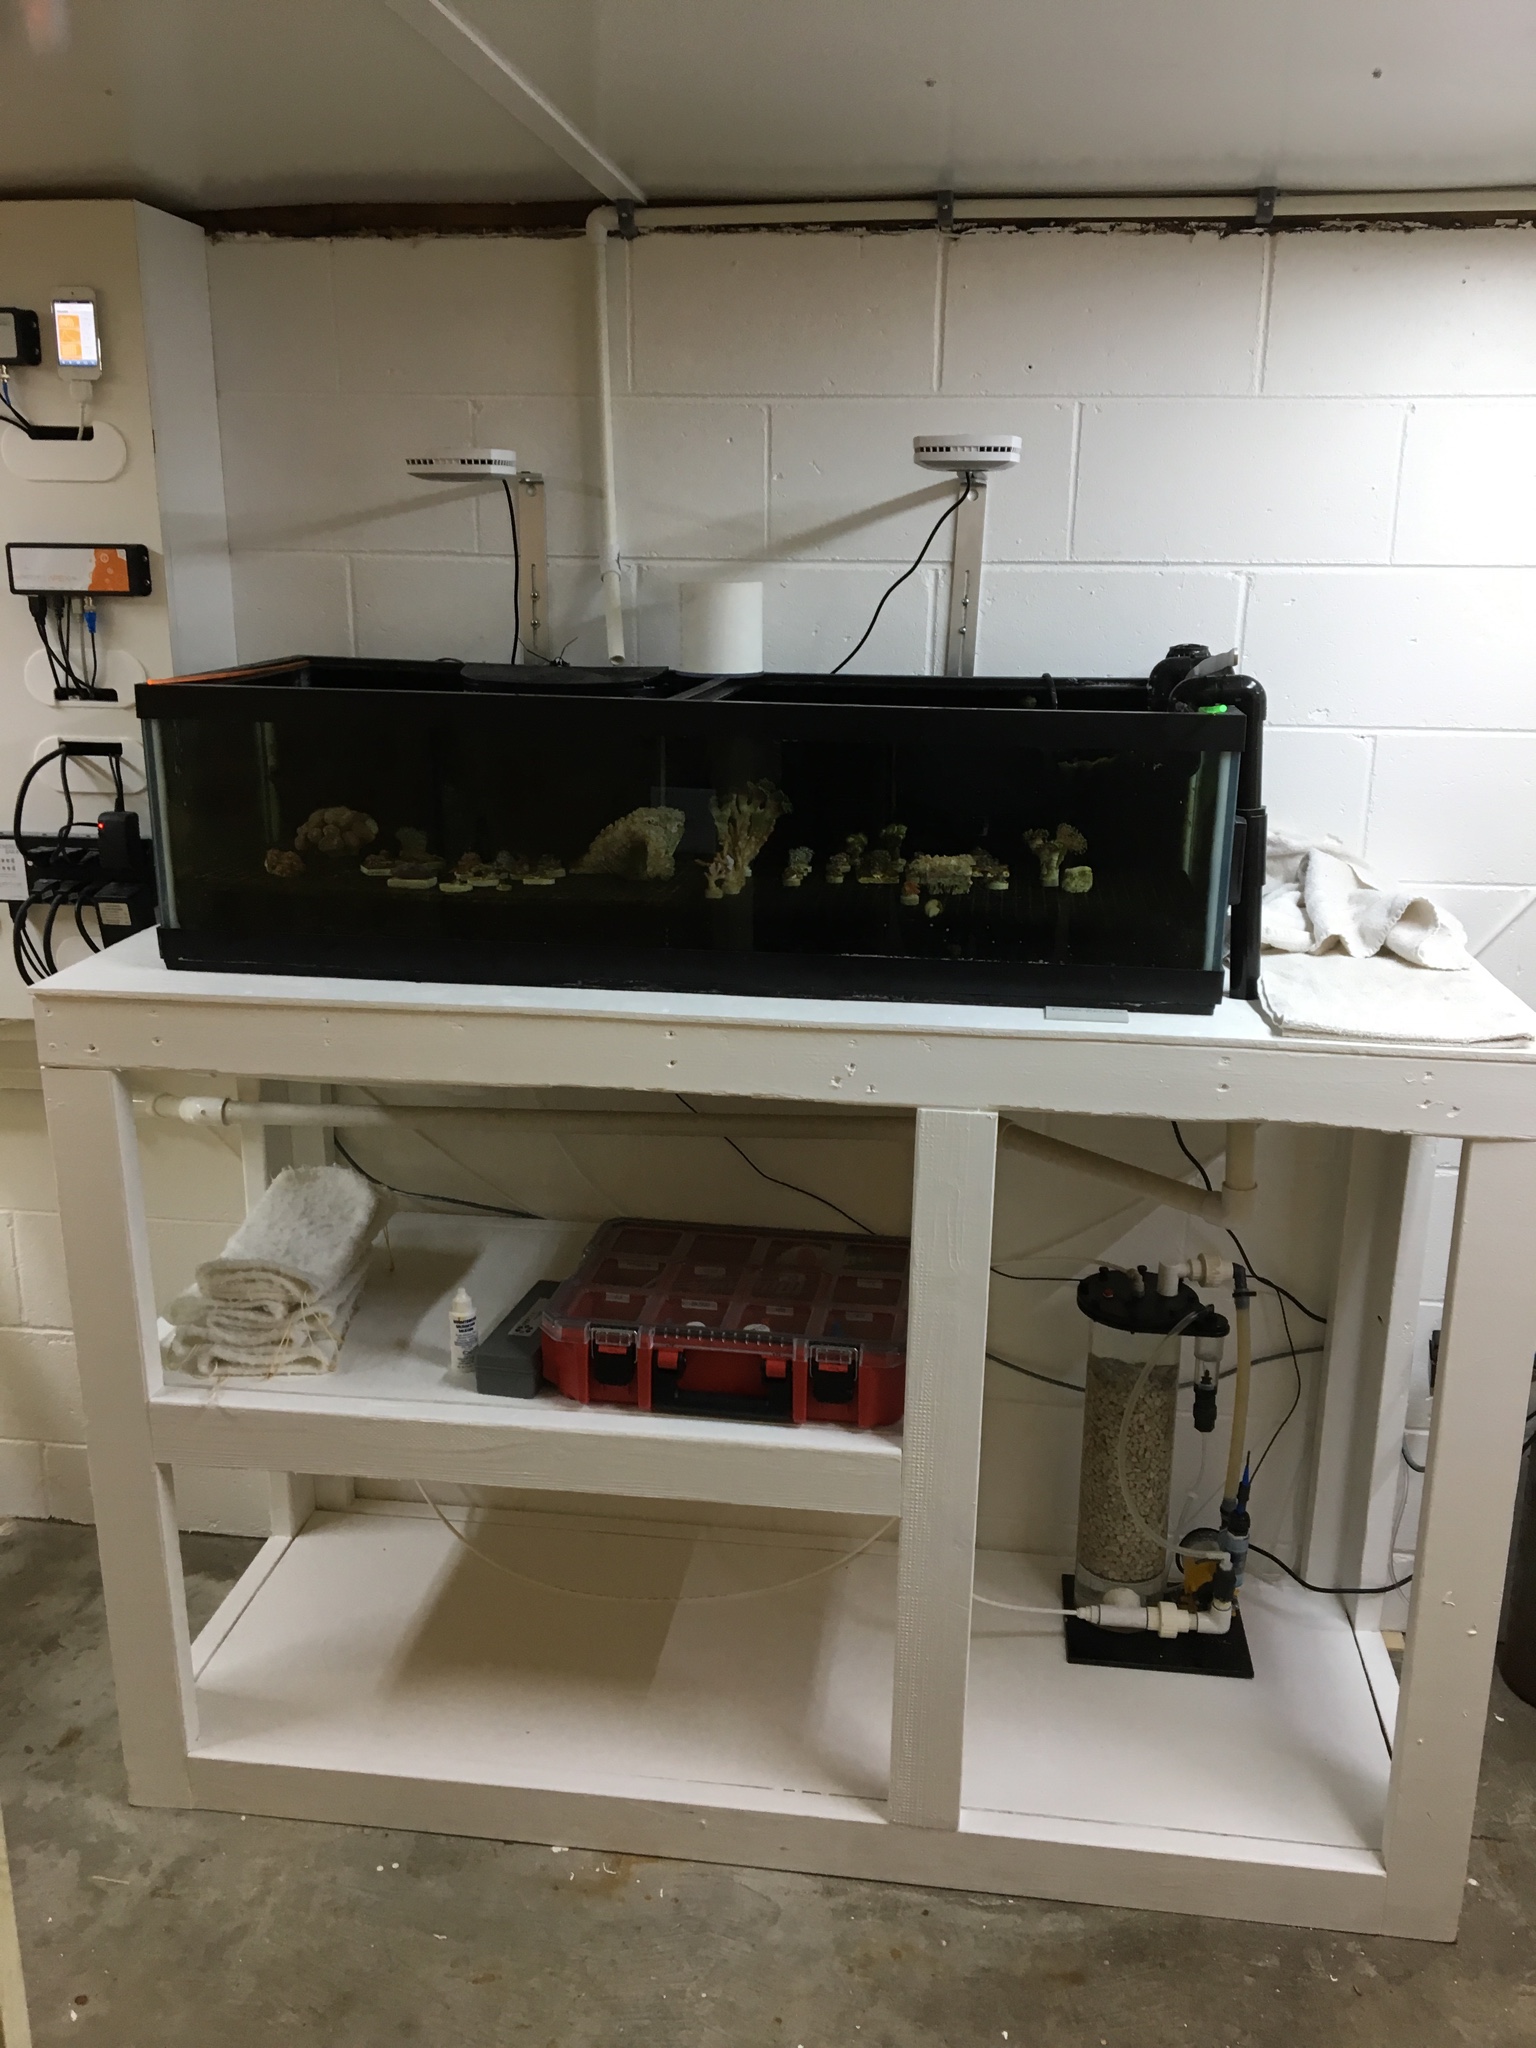
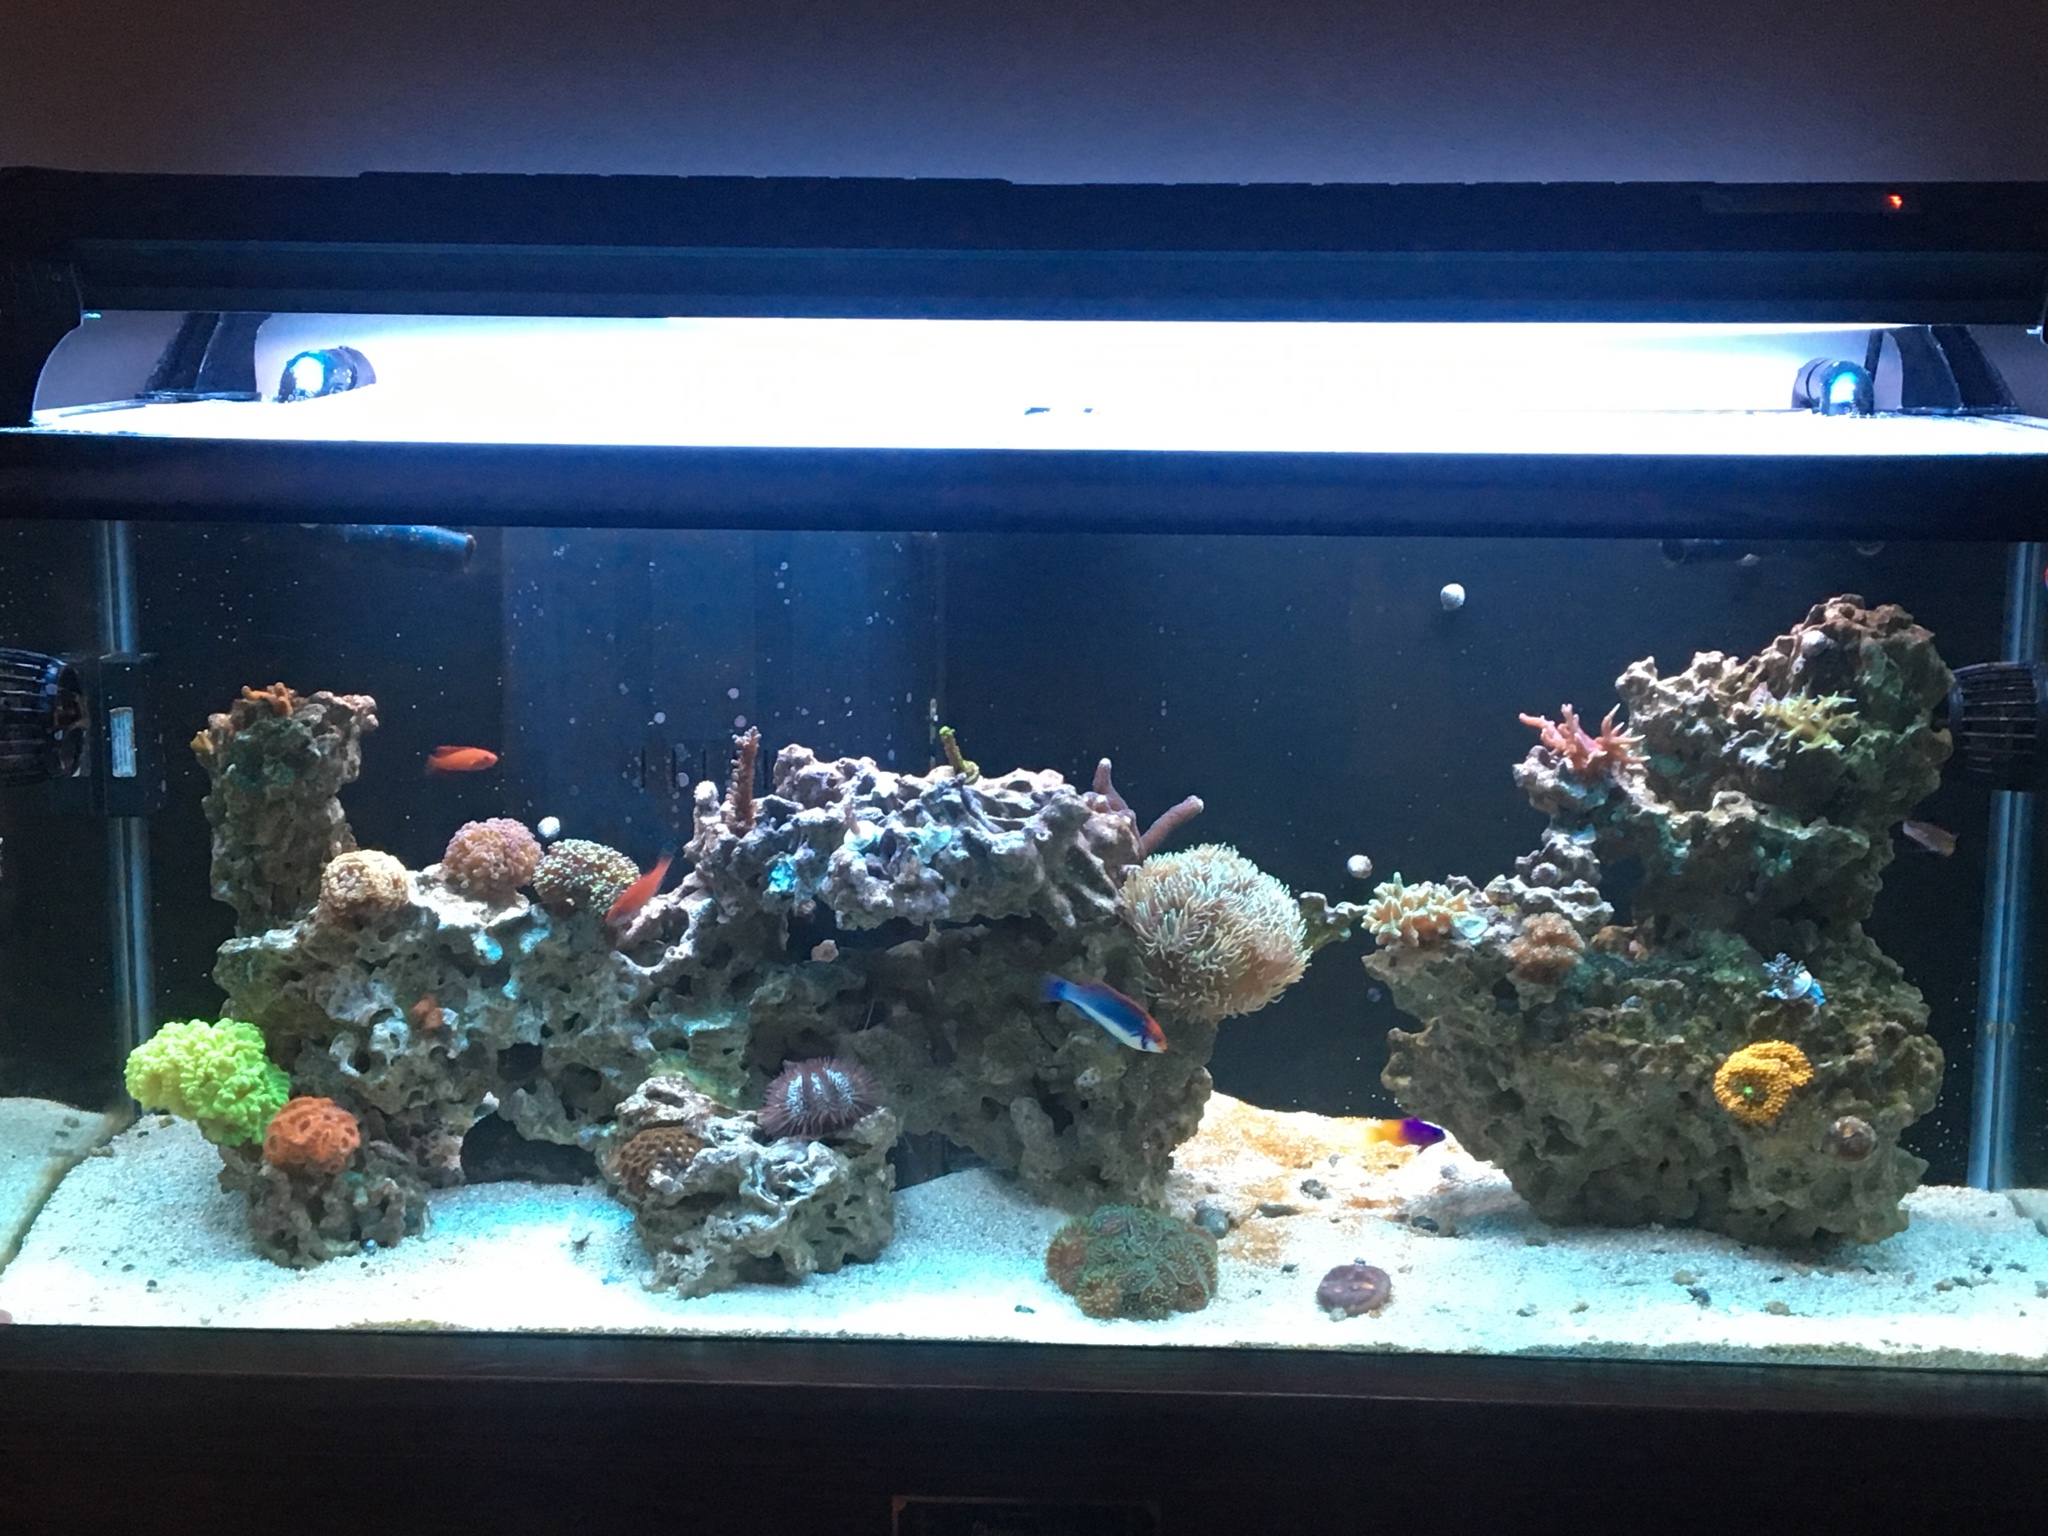
Fast forward to today, my tank is doing well and my redesigned fish room layout is working great. Here are some recent pictures of my system. I still don’t have the FRP installed on the side walls but I have installed the ceiling of the fish room.
If you have any questions regarding the build please let me know. I plan to add some additional information regarding my fail safes and my system maintenance in future posts.
This fed my addiction for a few years with my HUGE upgrade stuck in my head once I purchased a new house…. Fast forward a couple years, I purchased a new home with the perfect location for a 400-500 gallon peninsula tank. The wife was on board with the plans until we spent all our money on the house remodel (Something I said I would never do again after my last house but we couldn’t pass up on this house). The plan was to remove a closet that was a divider between the living room and the dining room but finances were not going to allow it.
Included in the plan for the big tank was to have a main display on the main floor with a fish room in the basement. Since the big tank wasn’t going to happen for a while (Still about 8 years out currently since we have decided to do it after the youngest is out of the house) we decided to go with a 75 gallon tank in the living room but it still allowed me to have the tank on the main floor and a basement fish room.
I bought a 75 gallon reef ready tank and made a stand out of 2x6’s, bought a 100 gallon Rubbermaid tank for a sump and started to plumb the system.
I was completely happy with the outcome, until stuff in my basement started to rust and have saltwater spray all over it. I soon found out that the sump area needed to be in a room to contain the spray and humidity. I built some walls and purchased a cheap door for the room for the time being. The tank did great over the next few years and was full with corals, about a 50/50 mix of sps and lps and some z/p’s mixed in until I had a long work trip and was gone for 80 days. My tank ended up crashing during my work trip and all my sps died and about 50% of the LPS.
I was sick when I got home and saw the final damage. I removed a five gallon bucket of sps skeletons and about a half of one of LPS. My wife is great at feeding the tank and so forth when I am gone but she is so busy that I don’t lean on her to take care of most of the “Behind the scene” items (She did however rebuild a pump for me once at midnight while I talked her through it on facetime because I was gone for work so she is competent of doing such when in a crunch)
After the crash I lost a lot of interest and kind of put the tank in “Auto” mode, which was basically me neglecting it. I didn’t have any delicate corals left and I was at wits end. I neglected it to the point that I had a red bubble algae infest that took over the tank and I had no choice but to start over. So last fall I completely tore down my system, I removed all my coral and sold 90% of them since I wanted to start over fresh but there were a couple that have been with me since the early beginning that I still enjoy.
I bought a bunch of pukani rock from a friend that had recently tore his 400+ gallon tank down.
I did two complete acid washes of the rock even though I know he didn’t have any pests in his tank but I wanted to start the tank with as clean of rock as possible. My wife and I then created a rockscape on my basement floor using some tape on the floor as a guideline of the tank size and overflow location. We used Marco Rocks E-Marco 400 and acrylic rods to hold the scape together.
I then put the rocks into a large Rubbermaid tote and let them cook for about three months; I added bacteria multiple times during this time to help get the biological filtration established. While the rocks were cooking I designed the layout for the “new” fishroom. Once I had the final layout decided on we planned a weekend that we didn’t have anything going on (Almost impossible when your son plays competitive soccer all over the state and the surrounding states). When that weekend came I removed the corals from the tank that I didn’t sell already. Removed all the rock and caught all the fish. All the livestock went into their temporary homes for the next two days. I removed all the water and sand from the tank and then moved it outside. I gave the tank an acid bath and let it soak for a few hours. I then scrubbed it and made sure it looked like a new tank. The sump was removed as well and acid washed to make sure it was clear of any bad stuff.
Once the tank and sump were acid washed I moved them back into the house and started to plumb them together with all new piping. I decided to take my standard reef ready tank and make both holes in the overflow be drains. Basically changing the overflow to a Herbie style overflow and the return piping would be over the back of the tank. This would make the overflow silent since the tank sits in the living room next to the TV.
During the remodel of the fish room I relocated my frag system, the sump was moved and my RO top off tank and salt water mixing tanks were relocated. All of which received new stands so they had a clean install. I upgraded the “Frag Station” with a new countertop and painted the block walls white since I plan to install FRP on the stud walls.
Here are some pictures during the process.
Fast forward to today, my tank is doing well and my redesigned fish room layout is working great. Here are some recent pictures of my system. I still don’t have the FRP installed on the side walls but I have installed the ceiling of the fish room.
If you have any questions regarding the build please let me know. I plan to add some additional information regarding my fail safes and my system maintenance in future posts.
Last edited: