My Fluval Evo V 5 Gallon Build

justdeb1107

Active Member
View Badges
Joined
Feb 25, 2024
Messages
156
Reaction score
157
Location
Birmingham
Rating - 0%
0   0   0
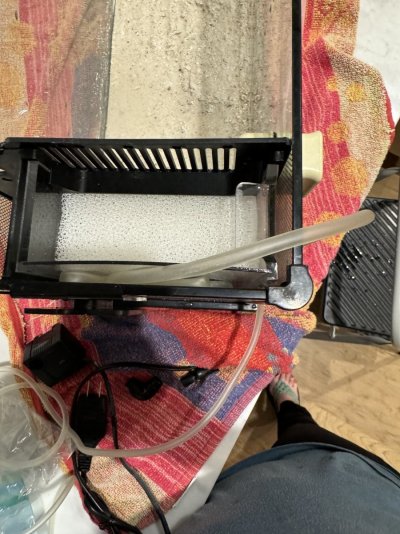
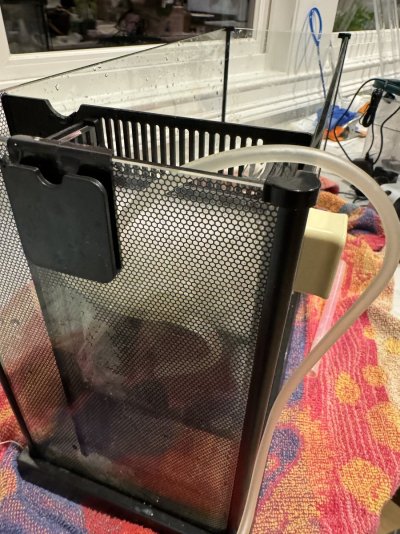
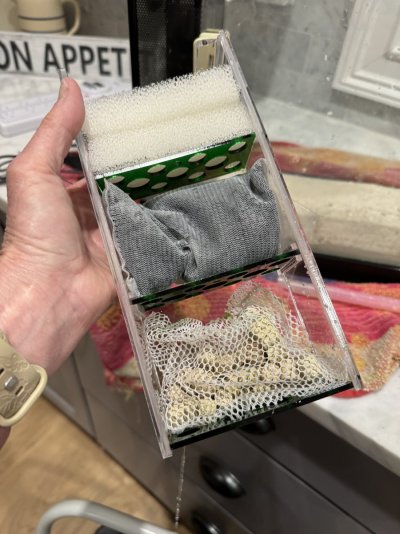
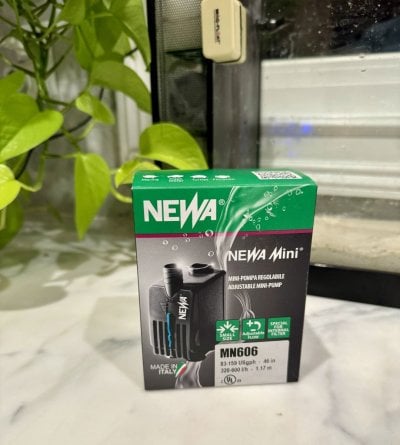
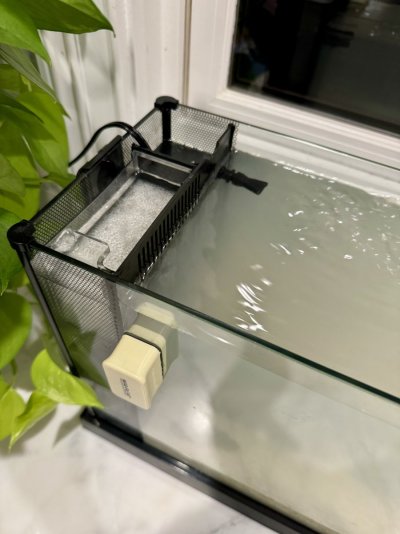
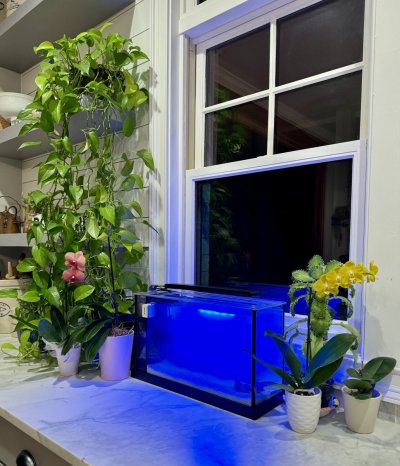
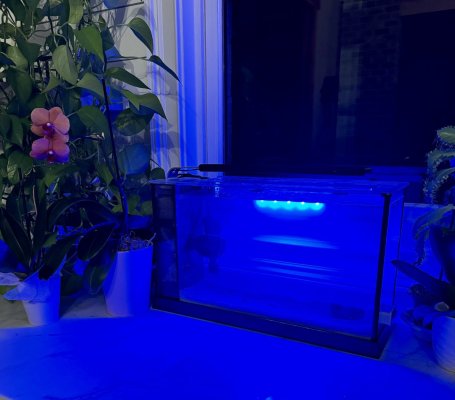
I originally bought this tank used on FB Marketplace. It was supposed to be new in box, but it was missing pieces and had clearly used tubing. Additionally, all the electrical elements were wired for European plugs. I'd planned on it being a QT tank but, well, there was something appealing about it. It's rimless, for one, and if you can resist mini items you're a stronger human than I am. At first, I used the stock equipment (with plug adapters because - European - remember?). But everything out of the box is garbage. The return pump was so weak you could barely tell anything was coming out (even putting your finger on the return jet to check for flow), and their sponge "media" thingie is a joke. Hence, my $40 FB Marketplace "deal" was going to cost me some real dough. haha For a few weeks it actually *did* QT a zoa frag I noticed had aiptasia on it, which didn't end well for either the frag or the aiptasia, but I'm super happy I never put it in my MD.

IMG_2717.jpeg
 
OP
OP
justdeb1107

justdeb1107

Active Member
View Badges
Joined
Feb 25, 2024
Messages
156
Reaction score
157
Location
Birmingham
Rating - 0%
0   0   0
Here's what's going into the build so far:
  1. The Evo V 5 gallon tank itself
  2. An InTank media rack with a double layer of Fluval bio foam on top, carbon in the middle, and Matrix bio something or another little pieces in the bottom (last time I was in the hobby, bio balls were a thing). Things to note: the InTank media rack is expensive but I LOVE it. Also, it doesn't fit well up against the side of the chamber that the water comes in on, but I wedged some air line tubing on the off side and it works like a champ now.
  3. A Newa Mini MN 606 159 gph pump purchased from Salty Critters in Ohio. I had to pry the front face plate off to fit it in chamber 1, but what a difference a real pump makes to this setup! I also bought a Sicce Nano pump from Amazon, but it didn't look like it would fit and I'm returning it. Maybe there's some way it fits, but idk and the Newa was both easy and powerful. Quiet, too.
  4. A rather clunky looking Fluval power head (though, honestly, with the Newa pump's flow, it's probably overkill).
  5. A preset small heater, which doesn't seem to fit anywhere but in the MD. I don't mind, actually. Can't be uglier than the power head.
  6. A Mag Tool ATO-Lite I found for $46 on Amazon that works like a champ.
  7. A small LED light strip to add extra blue light to the tank. I don't remember the brand, but I suction cupped it to the outside back, shining it into the tank, because it kept submerging every time I messed with anything inside the tank.
  8. Right now I still have the stock light on it, but ordered a 60 watt Smatfarm LED light off Amazon because I want to put SPS coral in this thing eventually. It seemed reasonably priced for this build, with a controller built in with sunset, sunrise, etc. We shall see...
 
Last edited:
OP
OP
justdeb1107

justdeb1107

Active Member
View Badges
Joined
Feb 25, 2024
Messages
156
Reaction score
157
Location
Birmingham
Rating - 0%
0   0   0
Moving the "QT" tank from my bar to the kitchen counter. I decided since I have nothing to put in it yet to replace all the water but keep the sand bed. Will check for ammonia spikes.

IMG_4213.jpeg
 
OP
OP
justdeb1107

justdeb1107

Active Member
View Badges
Joined
Feb 25, 2024
Messages
156
Reaction score
157
Location
Birmingham
Rating - 0%
0   0   0
I had to do a bit of work with my fingernail dremel to shave the little water plug that goes in chamber 2 to make sure the water only flows in from the top. I also super glued it in place because it kept popping out. I *LOVE* this media rack so much more than the crappy sponge thingie they provide. I am also ordering one for my BioCube 32. It keeps the media bags from falling off the sides and getting stuck when you pull out the rack. I also see a lot of crud in the top section already, so the new and improved pump and intake are doing a great job. I did have to shove a bit of airline tubing down the back side to push the rack up against where the water flows in. Before that, the rack was loose and the water would simply pour in the gap on the tank side, bypassing the media. No biggie, and a simple fix.
 

Attachments

  • IMG_4217.jpeg
    IMG_4217.jpeg
    248 KB · Views: 48
  • IMG_4216.jpeg
    IMG_4216.jpeg
    275.1 KB · Views: 43
  • IMG_4215.jpeg
    IMG_4215.jpeg
    198.5 KB · Views: 46
  • IMG_4214.jpeg
    IMG_4214.jpeg
    154.3 KB · Views: 51
OP
OP
justdeb1107

justdeb1107

Active Member
View Badges
Joined
Feb 25, 2024
Messages
156
Reaction score
157
Location
Birmingham
Rating - 0%
0   0   0
This Newa Mini pump (MN 606) from Salty Critters in Ohio is fabulous! Very quiet, and - once again - SOOOOO much better than the piece of crap Fluval included. That one moved almost no water.
 

Attachments

  • IMG_4219.jpeg
    IMG_4219.jpeg
    153.1 KB · Views: 49
  • IMG_4220.jpeg
    IMG_4220.jpeg
    124.6 KB · Views: 48
OP
OP
justdeb1107

justdeb1107

Active Member
View Badges
Joined
Feb 25, 2024
Messages
156
Reaction score
157
Location
Birmingham
Rating - 0%
0   0   0
Pic shows the blue light bar. I think it's a little Marineland, but I can't find the model on Amazon. Probably grabbed it at my LFS. I believe it came in a little housing, as it's supposed to be hidden behind the tank rim, but there isn't one on this tank so I bought suction cups that fit it and threw away the housing. I'm pretty sure once the upgraded light arrives it will be obsolete, but c'est la vie.

This is also my ATO setup. I put the sensor behind the return pump valve (in MD) and put the water tube in chamber 1. This particular unit has a one-way siphon so it can't keep running and flood the tank. I'm using a plastic container with a sealing lid for my RO/DI water. It holds a gallon, but this tank evaporates pretty quickly, so I have to keep an eye on it. I can't imagine doing a very small tank without an ATO. This one was inexpensive, and will be worth it to keep salinity swings from happening. Amazing how many cords and different devices it takes to run a baby tank like this!

IMG_4223.jpeg IMG_4224.jpeg IMG_4225.jpeg IMG_4226.jpeg
 
Last edited:
OP
OP
justdeb1107

justdeb1107

Active Member
View Badges
Joined
Feb 25, 2024
Messages
156
Reaction score
157
Location
Birmingham
Rating - 0%
0   0   0
By the time you have an extra powerhead, heater, ATO lines, and the main pump power cords all sticking up on the back left of the tank, the stock top no longer fits. I decided to modify it with my Dremel. First, I drilled pilot holes so the plastic wouldn't crack, but I needn't have worried. My Dremel went through it like a hot knife through butter. That was good, because my first cut wasn't big enough and I had to cut more out. Of course, it was midnight by then and I was second guessing my life choices by that point. haha
 

Attachments

  • IMG_4227.jpeg
    IMG_4227.jpeg
    148.2 KB · Views: 41
  • IMG_4228.jpeg
    IMG_4228.jpeg
    148.4 KB · Views: 93
  • IMG_4229.jpeg
    IMG_4229.jpeg
    109.2 KB · Views: 44
  • IMG_4231.jpeg
    IMG_4231.jpeg
    236 KB · Views: 49
  • IMG_4233.jpeg
    IMG_4233.jpeg
    140.9 KB · Views: 46
OP
OP
justdeb1107

justdeb1107

Active Member
View Badges
Joined
Feb 25, 2024
Messages
156
Reaction score
157
Location
Birmingham
Rating - 0%
0   0   0
Woke up way too early the next (well, later, anyway) morning and saw that during sunrise I got direct sunlight in the tank. This was expected. Since I want to grow more than GHA in the tank, I'll have to put something behind it before going to bed at night. No biggie. For now, I chunked the back of an older BioCube tank stand behind it. I think it looks nice among my house plants. Now to figure out an aquascape. Been looking on the internet to see what others have done. It's challenging in this very narrow tank. At the moment there is only a single piece of rubble from when it was my QT tank. Stay tuned...

IMG_4235.jpeg IMG_4238.jpeg IMG_4237.jpeg IMG_4241.jpeg
 
OP
OP
justdeb1107

justdeb1107

Active Member
View Badges
Joined
Feb 25, 2024
Messages
156
Reaction score
157
Location
Birmingham
Rating - 0%
0   0   0
For the last 2 months this tank has been on the back burner. I acquired a used 210 system from Marketplace and it's taken all my time and energy. This tank has been used as QT for coral frags. But I had to get serious with it because I impulse bought a bunch of zoas and have a zoa snarfing Queen angel in the big tank. So...here goes nothing!
IMG_6338.jpeg
IMG_6334.jpeg
IMG_6331.jpeg
IMG_6332.jpeg
 
OP
OP
justdeb1107

justdeb1107

Active Member
View Badges
Joined
Feb 25, 2024
Messages
156
Reaction score
157
Location
Birmingham
Rating - 0%
0   0   0
One thing I did learn was that the guy who said putting it where it would receive direct sunlight without something behind it was the "worst place ever" was right. While used as a QT, it grew copious green algae. So it's in a protected spot now. Do I think it looks as cool? Maybe not.

Anyway, here we are less than 24 hours in. The rock is all cured live rock taken out of the 210 and sitting in a heated tank with flow.
 

Attachments

  • IMG_6347.jpeg
    IMG_6347.jpeg
    226.1 KB · Views: 29
OP
OP
justdeb1107

justdeb1107

Active Member
View Badges
Joined
Feb 25, 2024
Messages
156
Reaction score
157
Location
Birmingham
Rating - 0%
0   0   0
For sand I used about 5 lbs CaribSea "special grade" live sand. I actually hate the fiji pink because it's so dusty. Not only does it cloud a bunch when newly added, it clouds up when I do water changes. Sadly, that's usually all that's out there at the stores and online in any kind of quantity, so it's in my other two tanks. (And, yes, I rinse my sand before putting it in. The fiji pink takes SOOOO many rinses, and still clouds up. Bleh.) This sand clarified right up almost immediately.

In addition to the cured, true live rock, I added Dr. Tim's One and Only. Removed the carbon from the media basket. It doesn't specifically say to, but if you're supposed to turn off UV and skimmer for 48 hours, figured carbon might also "scrub" the water too much to let the bacteria establish. Added a .5 ml of Prime, too, just to be safe.

Stock light is crap, IMO, so I put a 60 watt, 3 channel SmatFarm on the tank. Funny how the "cheap" $40 marketplace tank expenses start adding up. One thing I've learned with salt tanks, though, is you're better off spending the money up front, than having crap equipment. Plus, at $98, this has 3 channels and all the sunrise/sunset/moonlight/timer functionality of the heavy hitters (which, IMO, is a good compromise between stock lighting and an AI or Kessil level light - zoas aren't SPS). It also has a nice, customizable light spectrum that puts 650 (!!!) PAR on the sand of this nano when using the regular "LPS" setting. Obv, that's way too much, so I've dialed it down to where it's a PAR of 150 on the sand (for the tank's previous QT inhabitant). That's still a lot for a zoa garden in this close quarters, so I'll need to tweak it some. I also took the blue light bar out. Don't need it. Same for the ugly powerhead. Can add that back if more flow is needed, but I don't think it will be after upgrading the return pump.

Lastly, I had a buddy coming to the house from the LFS, so I asked him to bring me one of their $20 captive bred clowns. Last time I was in the store, their base price clowns were adorable, tiny babies. Wasn't quite expecting this big a fish, and wouldn't have gotten this boy for a 5 gallon. Oops. Welp, he's here now.

I'll be making a custom screen top as time permits. As of now, the regular top is on it to help a little with evaporation (and to keep "Nemo" from counter surfing).

So...here goes nothing. The typical "just set this up" boring pics of a bare tank with a few plain rocks and a clownfish. lol
IMG_6349.jpeg
IMG_6351.jpeg
IMG_6295.jpeg


IMG_6348.jpeg
 
Last edited:
OP
OP
justdeb1107

justdeb1107

Active Member
View Badges
Joined
Feb 25, 2024
Messages
156
Reaction score
157
Location
Birmingham
Rating - 0%
0   0   0
Phone App PAR Meter

I didn't want to spend $350-500 for a PAR meter, and renting one costs between $100-200 now, yet I was venturing into SPS and needed to know where my PAR stood.

Someone recommended an app called Photone. For $7 I paid what they charged for full-spectrum PAR readings. I then bought a diver's phone case for $20 on Amazon. (Only issue with the one I bought is it floats, so I have to hold it down with one of my grabber sticks.) For less than $30 I had a PAR meter! Reviews even indicate it's pretty accurate. You do have to tape a small strip of white copy paper over your front camera as a diffuser, but that took five minutes.

Now for the readings. I recently installed 3 140 watt Smatfarm G6s on my big tank, and their 60 watt on my 5 gallon nano. No idea what the PAR was, so I chose their default LPS numbers. Lo and behold, I had 600 PAR halfway up the tank and 350 on the sand! I was frying errrrrrything. My little nano had 650 PAR on the bottom. I have a torch in there. Lucky it's still alive after a couple days of that. ☀️

Anyway, I hope this cost-effective PAR meter idea helps someone out. It definitely helped me.

IMG_5143.jpeg
IMG_6288.jpeg
 
OP
OP
justdeb1107

justdeb1107

Active Member
View Badges
Joined
Feb 25, 2024
Messages
156
Reaction score
157
Location
Birmingham
Rating - 0%
0   0   0
Still waiting patiently for my tank to cycle. Clown has been happy and eating. Had aiptasia on one of the sump rocks in the tank. Couldn’t break the piece off that had it, so I threw the whole rock away. #bettersafethansorry
 
Last edited:
OP
OP
justdeb1107

justdeb1107

Active Member
View Badges
Joined
Feb 25, 2024
Messages
156
Reaction score
157
Location
Birmingham
Rating - 0%
0   0   0
Cycle complete! Pretty happy about this. Today is day 20. I did a 50% water change, then tested again.

PH: 8
SG: 1.026
Temp: 78.8
Phos: .17
Nitrate: 0
Ammonia: 0
Nitrite: 0

I dosed 1.9 ml of NeoNitrate because I am scared of a cyano bloom, which is giving me fits with my 210 system. Currently running 48 hours on ChemiClean as a last ditch effort - so frustrating.

Made a screened top for it, though the clown in the tank doesn't seem to want to jump out anytime soon.

Because of the phosphates (before the water change my PO4 was .34), I had some algae developing. After the water change I flipped the affected rocks over to starve the algae. (That worked wonders on my 32 gallon BioCube. And, yes, I have 3 tanks going. Don't judge.) When I did, little bug critters went scurrying around like crazy. I'm assuming the little creepers are copepods. I have a 'fuge in my 210 that I put pods in a couple of months ago. This tank's rocks came from my sump, and I am super happy for the biodiversity in this tiny tank.

After that, I threw a few foolproof softies in the tank (Pandoras and some green-lashed zoas, as well as a few forest fire rhodactus mushrooms). They are the canaries in the coal mine, so to speak. Pretty happy with this adorable little tank.

Gratuitous pic of my adorable gem tang photo bombing the pic while I tried to take photos of some new frags. No, it's not in the 5 gallon! haha IMG_7240.jpeg IMG_7249.jpeg IMG_7244.jpeg IMG_7230.jpeg
 

DO YOU USE A PAR METER WHEN PLACING NEW CORAL IN YOUR TANK?

  • Yes! I think it's important for the longterm health/growth of my coral.

    Votes: 5 7.1%
  • Yes, but I don't find that it is necessary all the time.

    Votes: 16 22.9%
  • Not currently, but I would like to.

    Votes: 31 44.3%
  • No. I don't measure PAR and my corals are still healthy/growing.

    Votes: 14 20.0%
  • Other (please explain).

    Votes: 4 5.7%
Back
Top