New Basement Sump for 19 year old Reef

MickeyCT

Active Member
View Badges
Joined
Oct 9, 2016
Messages
362
Reaction score
231
Location
Cheshire, CT
Rating - 0%
0   0   0
I didn’t make any kind of build thread when I first set up this tank in 2004, which I have regretted several times over the years when I try to recall something I did and can’t, or worse, remember it wrong! I decided a few months ago to move the sump and various support items from under the tank to the basement to give my knees and back a break. (It’s tough to get old!); so this thread is about the tank update/renovation relating to that move.

Current tank:
Current Tank-1.jpg
Current Tank-2.jpg
Current Tank-3.jpg
Current Tank-4.jpg
Current Tank-5.jpg


Background and Description: Tank is a custom 225 gallon that’s 72” x 30” x 24” tall. It sits in the corner of my family room between the fireplace and the front wall of the house. Overflow is in the back right corner and there’s a “dry box” next it on the right side that is essentially a closed loop for the chiller. The whole overflow is one of my regrets that I would do very differently now if I had it to do over. Tank is lit by three metal halide PFO fixtures, original, 250 watt DE with Ice Cap HQI ballasts, also original. I’ve resisted temptation to change them out but one of these days a ballast will fail and I’ll have to.

Sump is a LifeReef LF1-300 with the VS3-30 skimmer currently powered by a Sicce Syncra ADV 10. Since the sump is below the tank and tank is in the family room where we spend most of our time I was concerned about noise so the main system pumps are actually in the basement. Water flows from the tank to the sump, then from the sump through the floor to a counter in the basement right below the tank. Return is a Iwaki MD40RXT, original. I also had a closed loop running through the overflow to the basement then back to the top of the tank and split to multiple outlets via an Oceans Motion and powered by a Reeflo Barracuda, but that was dismantled years ago.

Sump is under tank (never looked this clean again):
2004-Old Plumbing-4.jpg


Oceans Motion piping for closed loop:

2004-Old Plumbing-3.jpg


Counter in basement showing original chiller, return pump and closed loop pump:
2004-Old Plumbing-1.jpg


2004-Old Plumbing-2.jpg
 
OP
OP
MickeyCT

MickeyCT

Active Member
View Badges
Joined
Oct 9, 2016
Messages
362
Reaction score
231
Location
Cheshire, CT
Rating - 0%
0   0   0
Fast forward 19 years: Canopy is severely deteriorating from all the heat and humidity and inadequate sealing. Been working with a custom carpenter for a new canopy which will hopefully be delivered in the next couple of weeks if I’m lucky or months if I’m not.

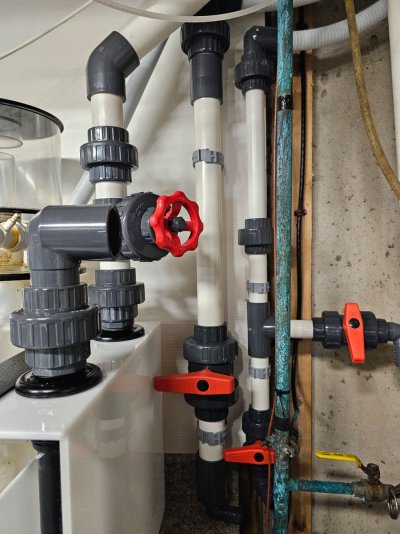
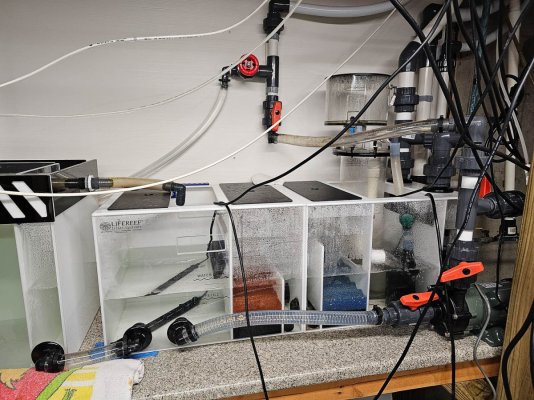
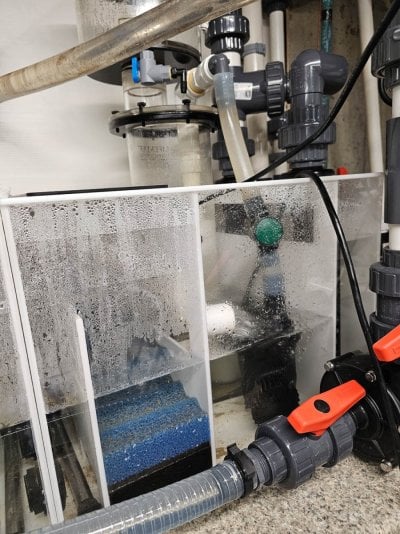
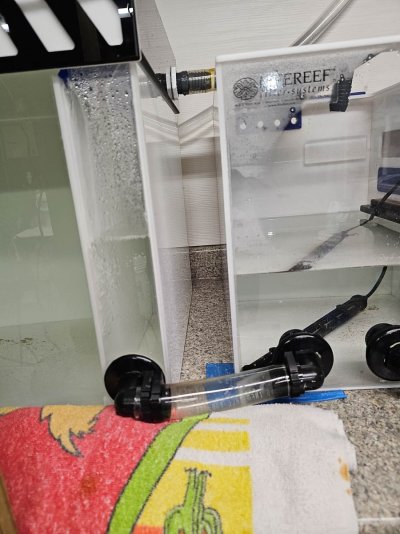
Tired of crawling under the tank so I decided to buy a new sump to make the switch to the basement easier. Worked with Jeff at LifeReef and settled on a custom sump built in two pieces and adding a refugium. New sump is 40” x 16” x 16” and refugium is 24” x 16” x 18”. Size was limited by what could be shipped via UPS.

While waiting for new sump, I attached some pressure treated 2x4’s to the basement wall and then added ½” PVC sheet. It’s not a finished basement so not as nice as the typical fish rooms I see on R2R but looks a lot better than it did before.

New sump and counter area:

Basement Counter-2.jpg

Basement Counter-1.jpg


Excuse the nightmare of wires and tubing. The ballasts for my metal halides are in the basement as are several Neptune DOS, 20 gal ATO, Kalk in 44 gal Brute cans and leak detectors. Hopefully with this renovation I can clean up all this mess. Can't move it yet until the new sump is hooked up.

Chiller is in the basement and needs to be disconnected and plumbing redone as it’s moving. Unfortunately only the ball valve under the tank on the chiller return line would close. The drain line to the chiller from the tank is stuck open and I can’t budge it. The bulkheads in the “dry” box are through the bottom of the tank and then through the side of the box to mid and lower tank. I tried putting a plug from the tank side and that slowed the water flow down to a trickle. Still working on a resolution. I’ll be changing out those bulkheads for new ones.

I needed to get the return pump off the counter in order to fit the new sump so I added a temporary pump under the stand. Part of that process required cutting the return line before it goes through the floor. Luckily that ball valve was a higher quality and was able to close. The bad news is the pipe was very brittle and shattered when I cut it. Good news is I was able to cap it. New temporary return pump is now connected under the stand.

The drain line to the new sump is going to use one of the lines previously used as the return on the defunct closed loop. I made an assumption that I did not permanently attach the pipes in the overflow. I still don’t know for sure but I could not budge that pipe. I need to remove it as it is presently higher than the water level in the tank. I need it significantly lower than the water level to run a full siphon. Planning on a Herbie drain. Would prefer Bean Animal but I don't have a second emergency drain. Pipe is 1 ½” and has two 45 degree elbows making a jog in it within the overflow. Below the elbows is a union (I was trying to think ahead in case I ever needed to remove it – guess that didn’t work too well). After 19 years in operation you can image how much gunk has accumulated on that pipe. The union is stuck tight and it’s very tight quarters so tough even reaching it. I have to essentially lay across the top of the tank and squish underneath the canopy then I can barely reach it.
 
OP
OP
MickeyCT

MickeyCT

Active Member
View Badges
Joined
Oct 9, 2016
Messages
362
Reaction score
231
Location
Cheshire, CT
Rating - 0%
0   0   0
Finally got that pipe cut in the overflow. Long story short, I took a small hacksaw and cut the pipe between the 45’s. It was tough going and took quite a while. My arms are bruised from elbow to wrist and all scratched up, but the pipe is cut and union unscrewed. I just hope now the pipe is short enough to create the siphon.

Also replaced the ball valves under the tank for the chiller drain and return lines. Unfortunately I used thin walled PVC on the return line and it shattered when I cut it. Not sure why I did that but lesson learned. I’ll never use it again. There may be more surprises in store as I don’t remember if all my 1” PVC is thin walled or not.

Started laying out the new lines for the chiller. I want to run them close to the wall so I can easily support them and since space is tight they need to be to the far right of the sump so they need to go in now before the sump is in place. They also they need to fit between the sump and a copper water pipe that can’t move. Chiller will be on a wheeled platform beneath the counter connected using vinyl tubing to the hard plumbing that will go through the floor back to the bulkheads under the tank. I’m planning on flex pvc from the hard plumbing at the wall through the basement ceiling to the bulkheads under the tank. Ball valves at the end of the hard plumbing before the vinyl tubing so I can close off the flow from the drain and any backflow from the return if I need to disconnect the chiller.
 
OP
OP
MickeyCT

MickeyCT

Active Member
View Badges
Joined
Oct 9, 2016
Messages
362
Reaction score
231
Location
Cheshire, CT
Rating - 0%
0   0   0
New ball valves under the tank for the chiller drain and return, then flex PVC through the floor to the basement to join with hard PVC. Everything all laid out and measured. Need to cut 3-4" off the hard PVC in the basement to allow unions and elbows to meet the flex PVC.

Crap!!!! The 1 1/2" hard PVC shattered when I tried to cut it. Ended up using a heat gun to warm it up, cut it past the cracks caused by the shattering, joined in another short piece and all looks okay. I'm hoping there are no invisible cracks, or any weakening.

The 1" flex PVC seems a tiny bit smaller than the 1" hard PVC. It went into the fitting so easy it made me nervous. After a few minutes I tested the connection and was able to pull the fitting right off. Grrr!#!*! Now what? I added more PVC cement and I'm just hoping it holds. I'll test it again tomorrow.
 

Stang67

KEEP CALM AND REEF ON
View Badges
Joined
Mar 26, 2019
Messages
9,158
Reaction score
40,913
Location
CLE
Rating - 0%
0   0   0
You are going to love having all that room for the sump and other stuff. Good luck.
20231203_195204.jpg
 
OP
OP
MickeyCT

MickeyCT

Active Member
View Badges
Joined
Oct 9, 2016
Messages
362
Reaction score
231
Location
Cheshire, CT
Rating - 0%
0   0   0
I'm hoping I'll love it. It'll be great not to have to get down on my hands and knees to futz around under the stand. But then again, now I have to do stairs and my age is showing in my knees and ankles!

You sure filled up your space. :)
 
OP
OP
MickeyCT

MickeyCT

Active Member
View Badges
Joined
Oct 9, 2016
Messages
362
Reaction score
231
Location
Cheshire, CT
Rating - 0%
0   0   0
In between times I started working on redoing my mixing station. It consists of two 44 gallon Brute trash cans with bulkheads in the bottom sitting on a wheeled platform. One was for waste water during water change and one for fresh salt water. I had a tee off the chiller drain line with some vinyl tubing that was used to drain about 40 gallons from the tank, then I pumped an equal amount of new saltwater back to the tank through separate piping. Worked perfectly for years and made sure I pulled out the same amount of old water as new water going in. Plus I didn’t need to be upstairs at the tank watching anything.

While fixing up the basement in preparation for the new sump I discovered that parts of the platform were deteriorating and some of the wheels were frozen as a result of rusting because of several floods in the basement due to sump pump failure. Platform was mostly 2x4’s but also contained some particle board and it was the particle board that was deteriorating. I dismantled everything and rebuilt the platform and added new wheels and a flat base of leftover ½” PVC sheet to give the Brute cans a flat base. I added plugs to the bulkheads in the bottom of the tank and will add new bulkheads to the sidewalls and all new plumbing.

Plan is to plumb both cans together and use for mixing saltwater as I want to implement automatic water changes and 40 gallons won’t last very long. I would love to buy new and larger water storage containers but they are so expensive and I already have these. Hopefully plumbing two together with a pump in the middle will allow 80 gallons or so to mix.
 
OP
OP
MickeyCT

MickeyCT

Active Member
View Badges
Joined
Oct 9, 2016
Messages
362
Reaction score
231
Location
Cheshire, CT
Rating - 0%
0   0   0
Finished connecting the new plumbing to the tank except for the return line which I can’t connect until I disconnect the temporary pump and that will be the last thing. Sump is in place, as is the new refugium.

I’ll be really glad when I can get all the wires out of the way. Right now they need to stay as they consist of the power cords and ballast connections for my metal halides plus various sensors and dosing tubes. Once the new sump has water and the return pump is connected I can move most of them to the back wall and rearrange others.

Plumbing.jpg
 

Stang67

KEEP CALM AND REEF ON
View Badges
Joined
Mar 26, 2019
Messages
9,158
Reaction score
40,913
Location
CLE
Rating - 0%
0   0   0
Following along.
 
OP
OP
MickeyCT

MickeyCT

Active Member
View Badges
Joined
Oct 9, 2016
Messages
362
Reaction score
231
Location
Cheshire, CT
Rating - 0%
0   0   0
Return line is plumbed from the sump with PVC supported on the back wall. Just need to attach under the tank but that will be the last thing as I need to disconnect the temporary pump. Debating whether I should leave the existing Hayward ball valve right below the tank, or replace with a new Cepex valve. One reason to do the replace is that the 1" piping was the thin walled PVC back in 2004 and it has repeatedly shattered on me during this project. There's only a few inches of it left in this return line between the connection with the flex pvc coming up from the basement and the ball valve below the tank.

Tank has been deteriorating somewhat over the last few months so decided to do a water change even though project not done. Attached a hose to the end of the drain line for the chiller to pull 40 gallons of water direct from the tank. It was an opportunity to check that there were no leaks in those glued joints. Worked great, only a few drips from unions that were not quite tight enough. Good thing as it's very tight getting to those pipes with the sump and return pump in place.

Getting the new water back up to the tank was a challenge. I left the piping I've always used to get water to the sump but I had to use a MagDrive 12 pump. In the past I used an external pump that had no problem but there's no way to connect an external yet. It did work but was very slow and stopped pumping once there was something less than 10 gallons left so had to use buckets for the rest of the water. When done there was water on the floor but not too bad. When draining the tank I wasn't holding the tubing in the 44 gal can so as the water level rose the tubing popped out of the can. Grrrr. I'll be so happy when all the pieces of this project come together and I can do a water change without have to move hoses around. I'd much rather just open and close valves.
 
Last edited:
OP
OP
MickeyCT

MickeyCT

Active Member
View Badges
Joined
Oct 9, 2016
Messages
362
Reaction score
231
Location
Cheshire, CT
Rating - 0%
0   0   0
Second to last piece glued in today. Ready to put water in the new sump and hook up the pump and make the switch. Gotta say I'm pretty nervous about it.

Last thing remaining is the emergency drain, but since it's being repurposed from the drainline to the existing sump I can't hook that up until after the sump is disconnected. Should be safe from clogs by algae, snails, or fish....for a few days at least.

After that I need to move and rearrange all my Apex gear. Not looking forward to that!
 

ScottD

Active Member
View Badges
Joined
Aug 16, 2022
Messages
242
Reaction score
174
Location
CT
Rating - 0%
0   0   0
Howdy neighbor, I’m next door to you in Bethany. Looks like you’ve got quite the plumbing project going on. Good luck with the switch over.
 
OP
OP
MickeyCT

MickeyCT

Active Member
View Badges
Joined
Oct 9, 2016
Messages
362
Reaction score
231
Location
Cheshire, CT
Rating - 0%
0   0   0
Hey neighbor. I've been thinking of doing this for a long time. It's actually much bigger than I realized it would be. Several bumps along the way but in the home stretch now.
 
OP
OP
MickeyCT

MickeyCT

Active Member
View Badges
Joined
Oct 9, 2016
Messages
362
Reaction score
231
Location
Cheshire, CT
Rating - 0%
0   0   0
Lots happened this week and with getting ready for lots of company over the holidays haven't had much time to update this.

New sump is wet!!! Good news is none of my glued connections leaked. Woohoo! had a couple unions that needed tightening, and one ball valve coming off the return pump was leaking like crazy and I couldn't tighten it enough. Turns out it was missing a gasket that I hadn't noticed when I put it in. Luckily I had a spare and swapped it out and that took care of it.

The hose barbs from the sump were initially leaking just a bit. Solved the one going to the pump but the one from the refugium back to the tank is still dripping. I'll need to tackle that soon, already tried once and it's a pain now that there's water in it as I can't get my arm down to the bottom.

Spent a couple of days trying to balance the flow. My return pump is much too strong. When I bought it I had planned on using it to feed the refugium and also media reactors for carbon and/or GFO when needed and still have 1200 gph or so going back to the tank. In the end I decided to feed the reactors with a separate pump so it's only feeding the refugium. In order to balance the flow I ended up needed to throttle back the pump quite a bit. Unfortunately it's a pain to control because I used a ball valve after the pump as I anticipated running it full open.

I don't believe my drain line is running a full siphon and that's probably why I can't run it full open. Long story I won't go into but because of decisions made way back in 2004 when I set up the tank, my new drain line starts from a pipe with the opening too high in the overflow. I would have sworn I didn't glue that in but I can't budge it. I'll have to work on it more after Christmas as I don't want to risk things now that it is balanced, if a bit noisy. Emergency drain not hooked up yet and that will have to wait a few days. Maybe I'll swap the drain lines around.
Or maybe I'll let both drain lines run and see if I can open the pump then. But that means no emergency drain. Tank has run for 19 years with only one drain line so maybe that will work. I'll put screens on the openings and tank is covered, plus drain is 1.5" so less likely to plug for any reason. Hmm. I'll have to think about that.

Apex modules haven't been moved yet. Probes went into the tank temporarily but I'll need to move them today as the wires are hanging outside and looks ugly.

I can't see into my overflow as it is at the back right corner of the tank, and tank is in a corner. Very bad planning on my part but nothing I can do about it now. Anyway, while messing around with the drain lines I learned that there was sludge several inches deep at the bottom. I pulled up my small wet/dry vac and had to actually sit it in a basin on top of the tank in order to reach the overflow and sucked out as much of that crap as I could. Unfortunately it also stirred it all up so some went down the drain line and is now sitting in my new bright shiny clean sump, but I did get most of it out. Took 4 or 5 trips cycles to do it as the wet/dry is small. I can always siphon it out of the sump later.

One last update, it's become pretty obvious that the bulkhead in the bottom of one of my Brute trash cans that I use for mixing new salt water is leaking. I had tried everything I could think of to seal that up good before I added new water to it but obviously that failed. I may just have to buy a new one. I have white cans now as that makes it really easy to see how the water looks but can't find those anymore for a reasonable price. The shipping is just outrageously expensive. I may just need to switch to gray. But I hate having things not match.

New Sump is Wet-3.jpg New Sump is Wet-2.jpg New Sump is Wet-1.jpg
 

Stang67

KEEP CALM AND REEF ON
View Badges
Joined
Mar 26, 2019
Messages
9,158
Reaction score
40,913
Location
CLE
Rating - 0%
0   0   0
Very nice great job. Enjoy the holidays!
 
OP
OP
MickeyCT

MickeyCT

Active Member
View Badges
Joined
Oct 9, 2016
Messages
362
Reaction score
231
Location
Cheshire, CT
Rating - 0%
0   0   0
Now that the holidays are over and I've recovered from all that company plus a virus of some sort, time for an update. Not a whole lot has changed though....

Couple days after Christmas around 10:00 at night my EB832 started going haywire and clicking all the outlets rapidly on and off. I understand this is a pretty common failure and related to the power supply. Guess I've been lucky since I've had it since 2017 and it controlled the major things in my tank and I've had no problems. Contacted Neptune and it's so old they won't even try to repair but offered me a discount on what they say is a new one without retail packaging. In addition, I sent my broken one off to FixReef for repair so I'll have a spare. Luckily I have another one and was able to transfer some things there and some things went direct to a noncontrolled outlet for now.

Disconnected the original drain from the tank and emptied the old sump. Moved it downstairs to be cleaned and soaked it for a day or so in citric acid. It was pretty bad after 20 years. Can't do much more with it until Spring when I can take it outside for a good cleaning. I'll try to sell it..... Lifereef LF1-300. So if interested let me know.

Spent some time trying to straighten about 6 ft of 1.5" flex pvc then installed it as the emergency drain. At least I got it hooked up to the bulkhead under the tank. Tomorrow I'll try hooking it up to the new sump.

Also attached my Adaptive Reef controller board to the wall. Now I just need to attached my Apex modules.
 
OP
OP
MickeyCT

MickeyCT

Active Member
View Badges
Joined
Oct 9, 2016
Messages
362
Reaction score
231
Location
Cheshire, CT
Rating - 0%
0   0   0
(also posted as a separate thread)

Saga of a neglected tank......

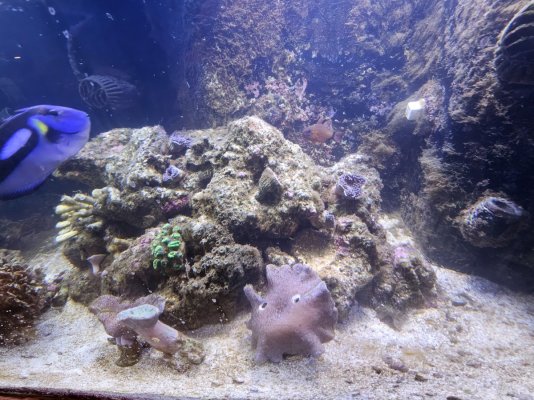
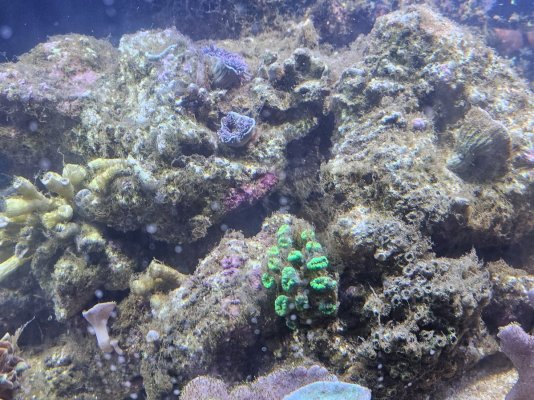
I've been battling some cyano and dinos in my display tank for quite a long time and I'm sorry to say I really neglected things while I was working on getting my basement sump up and running (described in My Thank Thread). Not to make excuses but a number of other things have also gotten in the way:
- I was away for 6 weeks in Florida escaping the cold in New England
- Hubby needed some surgery on his face to remove a melanoma
- my Apex brain failed and needed to be replaced as Neptune said it was no longer supported (A2 bought in 2017) and they wouldn't check it out or repair it.

Anyway, tank really took a major turn for the worse, started slowly then really took a dive over the last three months. When I got back from FL the rock work was entirely covered with red cyano. Lost a number of corals, including euphylia with many, many heads. Duncan coral with too many heads to count has been pulled in for 4 almost 5 months.

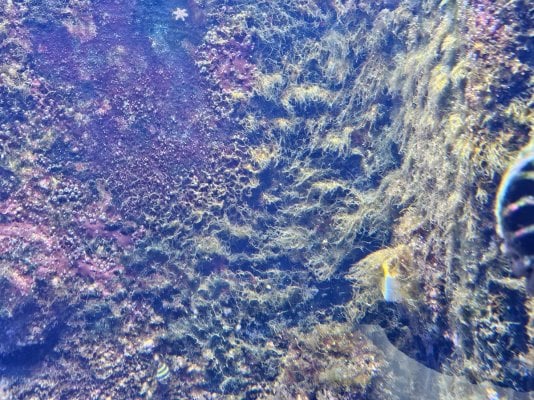
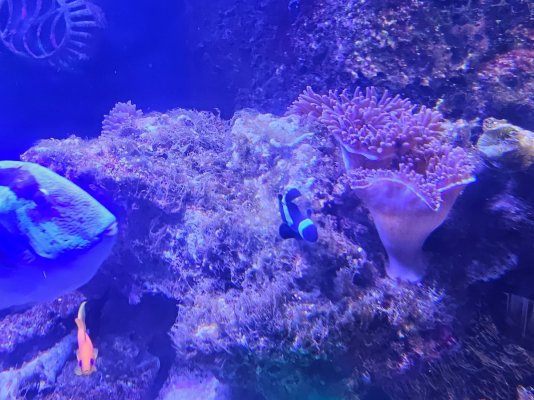
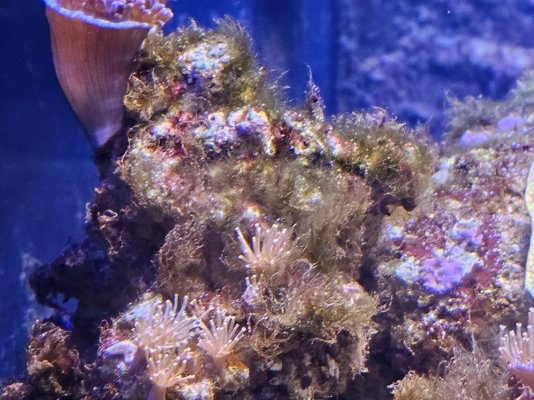
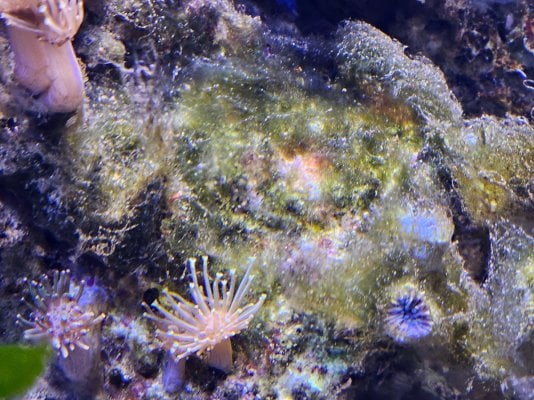
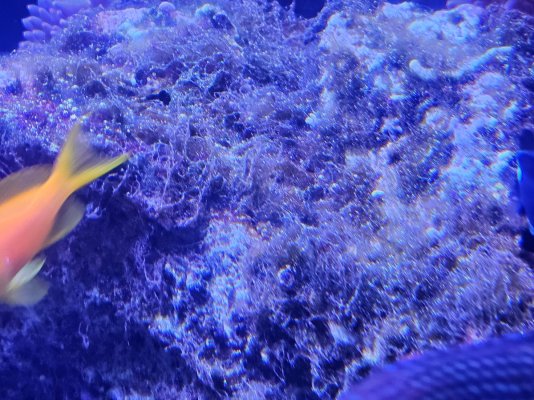
I've been vacuuming out the cyano every few days for weeks. I identified under the microscope cyano on the left side of the tank and interestingly enough, spirolina on the right side. Only a little dinos but enough to scare me since I've battled those before. Seemed to be a mix of LCA, procentrum and Ostreopsis. Finally at end of March I used Chemiclean out of despiration. I figured things couldn't any worse. Spirulina mostly gone but still had red cyano that needed vacuuming every few days. I also have been dosing silica for the last two years or so after my last battle with dinos. Tank is now covered in what I think is hair algae. When it first started a few weeks ago I thought it was an overgrowth of diatoms so I cut back some on the silica.

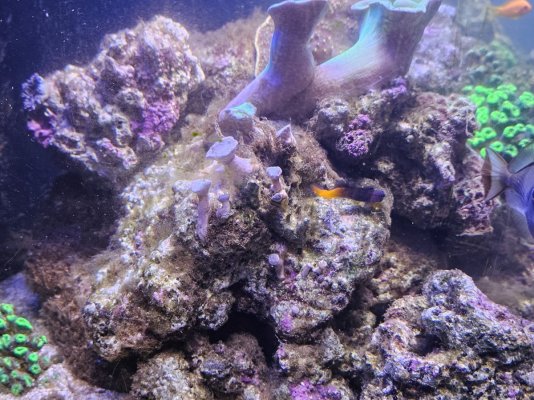
Today I spent about 4 hours scrubbing the rocks and the overlow walls where I could and trying to vacuum out as much as possible. Walls are still bad and need a better scrubbing but reef structure looks a bit better. I also took out the corals which were dead and covered in the stuff.

Tank parameters:

72" x 30" wide x 24" high set up initially in September 2005. I've always had high nitrates and high phosphate (like over 1.50 high) but I've been bringing those down slowly over the last 6 weeks or so by slow dosing LaCl. I'm sure my rockwork has a ton of phosphate built up.

Nitrates: 19.8
Phosphate: 1.36
Silica: .15 (only dose M,W,F)
Alk: 10.95
Calcium: 384 (too low)
Mg: 14.73
Temp: 80.8 (raised from 78 a few weeks ago)
pH: 8.21
Salinity: 35.2

I'm ordering a new CUC today and debating how many Mexican turbos to add as I want this hair algae gone but I don't want them starving to death afterwards.

Pictures: Before
20240414_141754.jpg 20240414_141718.jpg 20240414_141625.jpg 20240414_141618.jpg

After cleaning:
20240414_174440.jpg 20240414_174430.jpg 20240414_174414.jpg

20240414_141710.jpg 20240414_141637.jpg

Still a lot more scrubbing to do, but it will have to wait until tomorrow. I'll also be updating my progress on the basement project.
 

ygbsmww

New Member
View Badges
Joined
Jan 23, 2024
Messages
21
Reaction score
2
Location
STL
Rating - 0%
0   0   0
Now that the holidays are over and I've recovered from all that company plus a virus of some sort, time for an update. Not a whole lot has changed though....

Couple days after Christmas around 10:00 at night my EB832 started going haywire and clicking all the outlets rapidly on and off. I understand this is a pretty common failure and related to the power supply. Guess I've been lucky since I've had it since 2017 and it controlled the major things in my tank and I've had no problems. Contacted Neptune and it's so old they won't even try to repair but offered me a discount on what they say is a new one without retail packaging. In addition, I sent my broken one off to FixReef for repair so I'll have a spare. Luckily I have another one and was able to transfer some things there and some things went direct to a noncontrolled outlet for now.

Disconnected the original drain from the tank and emptied the old sump. Moved it downstairs to be cleaned and soaked it for a day or so in citric acid. It was pretty bad after 20 years. Can't do much more with it until Spring when I can take it outside for a good cleaning. I'll try to sell it..... Lifereef LF1-300. So if interested let me know.

Spent some time trying to straighten about 6 ft of 1.5" flex pvc then installed it as the emergency drain. At least I got it hooked up to the bulkhead under the tank. Tomorrow I'll try hooking it up to the new sump.

Also attached my Adaptive Reef controller board to the wall. Now I just need to attached my Apex modules.
Heat gun to straighten the flex PVC? That task is on my short term agenda....
 

Reefing threads: Do you wear gear from reef brands?

  • I wear reef gear everywhere.

    Votes: 20 13.4%
  • I wear reef gear primarily at fish events and my LFS.

    Votes: 10 6.7%
  • I wear reef gear primarily for water changes and tank maintenance.

    Votes: 1 0.7%
  • I wear reef gear primarily to relax where I live.

    Votes: 23 15.4%
  • I don’t wear gear from reef brands.

    Votes: 84 56.4%
  • Other.

    Votes: 11 7.4%

New Posts

Back
Top